
Avent SCF276 - Bottle sterilizer PHILIPS - Free user manual and instructions
Find the device manual for free Avent SCF276 PHILIPS in PDF.

| Product type | Steam bottle sterilizer |
| Brand | Philips |
| Model | Avent SCF276 |
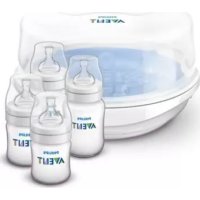
| Capacity | Up to 6 bottles (125 ml, 260 ml or 330 ml) |
| Sterilization modes | Mode 1: 6-minute cycle + sterile hold 6 hours; Mode 2: repeated cycle for sterile hold up to 24 hours |
| Display | Digital screen with countdown and light indicators |
| Required water volume | 90 ml (mode 1), 200 ml (mode 2) |
| Included accessories | 2 upper baskets (identical to lower basket), bottle holders, central rod, measuring cup, tongs, power cord |
| Power supply | Mains (wall outlet) |
| Material | Food-grade plastic (BPA-free) |
| Cleaning and maintenance | Descale every 4 weeks with white vinegar; do not use abrasive or bleach products |
| Safety | Automatic shut-off, do not open during operation, hot steam, do not immerse |
| Warranty | 12 months |
| Dimensions (L x W x H) | Approximately 30 x 30 x 35 cm |
| Weight | Approximately 1.5 kg |
Frequently Asked Questions - Avent SCF276 PHILIPS
User questions about Avent SCF276 PHILIPS
0 question about this device. Answer the ones you know or ask your own.
Ask a new question about this device
Download the instructions for your Bottle sterilizer in PDF format for free! Find your manual Avent SCF276 - PHILIPS and take your electronic device back in hand. On this page are published all the documents necessary for the use of your device. Avent SCF276 by PHILIPS.
USER MANUAL Avent SCF276 PHILIPS
Troubleshooting Guide
| Standard will not work | Check that the power chain is normalized to the workshop and played into the technical unit. |
| Executive/Executive-as-a-gate from kitchen to bed | Parts in correctly operated Rents (instructions or pages 5-6) |
| Starting guide to test the long | The steel bar is worked with only a front line - right, so will be longer to close. |
| Fishing to end are well for bed and keep | In addition, water has been placed in the kitchen. Longed at the water used, running water. Less clean (I have one box to be fully open) and will be up to 100 gm of water for a store lot (4800 gm of water can be with 1000 gm of water). |
| Fishing top and wide tank and keep | For completion amount, of water has been placed in the kitchen. Dipping the power use, in home water, above one sheet top box to be fully open with 90 gm of water for use with 100 gm of water can be with 100 gm of water. |
www.philips.com/AVENT
2017.4.16: 100% of the company's North American Corporation (North America). The top line of its hand lists all logos, brands and products within a trade mark or map standard in markets of the respective holders and are better recognized to 3.8x.
natural_image
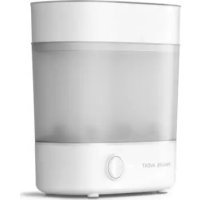
White Philips AVELT baby washing machine with multiple pacifiers (no visible text or symbols on body)us iQ24 Electronic Steam Sterilizer
Thank you for choosing Philips AVENT
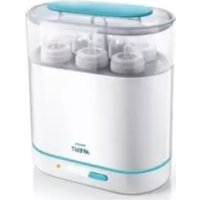
The Philips AVENT iQ24 Electronic Steam Sterilizer is one of a new generation of intelligent products from Philips AVENT. Based on the hospital principle, the iQ24 Sterilizer uses the intensive heat of steam to eliminate harmful bacteria.
There are two different modes for greater convenience:
Mode 1 (Optional six hour mode) runs a single 6 minute sterilizing cycle, then keeps the contents sterile for 6 hours, providing the lid is not removed.
Mode 2 keeps contents sterile for up to 24 hours by continuously repeating the cycle, so you can have clean, sterile bottles day and night.
As well as bottles and breastfeeding accessories, you can sterilize any other boilable items (please refer to the manufacturer's instructions regarding sterilization).
Please take a few minutes to read through the ENTIRE INSTRUCTION LEAFLET before using your iQ24 Sterilizer for the first time. PLEASE SAVE THESE INSTRUCTIONS. Also available at www.philips.com/AVENT
Contents (see diagram A)
| a) Lid | f) Sterilizer body |
| b) 2x Upper basket | g) Measuring Cup |
| c) Bottle rack | h) Tongs |
| d) Lower basket(same as b) | i) Power Cordand plug |
| e) Central stem |
Note: Upper and lower baskets are identical
Key to product label

FOLLOW OPERATING INSTRUCTIONS
IMPORTANT SAFEGUARDS
When using electrical appliances, basic safety precautions should always be followed including the following:
- Read all instructions.
- To protect against electrical shock do not immerse cord, plugs or appliance in water or other liquid.
- Close supervision is necessary when any appliance is used by or near children.
- Always switch off and unplug from outlet when not in use and before cleaning. Allow to cool before putting on or taking off parts.
- Always disconnect the cord from the back of the sterilizer before pouring away water and/or rinsing.
- Do not operate any appliance with a damaged cord or plug or after the appliance malfunctions or has been damaged in any manner.
- The use of accessory attachments not recommended by the appliance manufacturer may cause injuries.
- Do not use outdoors.
- Do not let cord hang over edge or table or counter, or touch hot surfaces.
- Do not place on or near a hot gas or electric burner, or in a heated oven.
-
Extreme caution must be used when moving an appliance containing hot oil or other hot liquids.
-
Always attach plug to appliance first, then plug cord into the wall outlet. To disconnect, turn any control to "off", then remove plug from wall outlet.
- Do not use appliance for other than intended use.
- WHEN IN USE, THE STERILIZER CONTAINS BOILING WATER AND STEAM ESCAPES FROM THE VENT IN THE LID.
- Ensure the sterilizer is placed on a firm level surface when in use.
- Never open the unit when in use.
- Always keep out of reach of children.
- Never place items on top of the sterilizer.
- To stop the sterilizer during the cycle, unplug at the electrical outlet or press the on/off button.
- Take care when opening as steam can burn.
- Do not use chemical sterilizing solutions/tablets or bleach in your steam sterilizer or on products to be sterilized.
- Do not use abrasive, anti-bacterial materials or scourers to clean the sterilizer.
- Do not use softened water in the sterilizer.
- A short power cord has been provided to prevent the risk of it becoming entangled or being tripped over.
- Extension cords may be used if care is exercised in their use.
- If an extension cord is used, its electrical rating must be as great
as the rating of the appliance and not draped over the edge of the table top where it could be pulled by children or tripped over. The extension cord should be a grounded type 3 wire cord.
- The power cord supplied must not be used on any other appliance and no other power cord should be used with the iQ24 Sterilizer.
-
Failure to follow de-scaling instructions may cause irreparable damage.
-
There are no serviceable parts inside the iQ24 Sterilizer. Do not attempt to open, service or repair the iQ24 Sterilizer yourself.
-
Do not touch hot surfaces. Use handles or knobs.
SAVE THESE INSTRUCTIONS
Instructions for use
Please refer to the diagrams in the back of the leaflet.
Before using your sterilizer for the first time (see diagram B)
Remove all items from inside the sterilizer body.
- Measure exactly 90 ml of distilled water and pour in.
- Assemble the blue components (baskets, stem and bottle rack) and place into the sterilizer. Put the lid on.
- Connect the power cord into the back of the sterilizer and plug into the electrical outlet.
- The unit will display a flashing '0' to indicate you need to select a mode. One short press of the control button will display a flashing '1'. Hold the control button in for 2 seconds then release, and a rotating '0' is displayed. Mode 1 is now in progress.
- After the water has reached 100^ C, it will turn to steam. When the sterilizing cycle is almost complete a numerical countdown will be displayed (see 'Electronic Display Guide').
- At the end of the cycle the unit will beep 5 times. Three bars will flash and then remain displayed.
- Let the sterilizer cool down for 3 minutes. Unplug from electrical outlet and remove power cord from the back of the sterilizer.
- Remove the blue components and empty any remaining water from the unit. Wipe dry. The sterilizer is now ready for use.
Sterilizing in Mode 1 - 6 hour sterile period
Sterilizing in Mode 2 - 24 hour sterile period (see diagram C)
To sterilize up to six 4 oz / 125 ml, 9 oz / 260 ml or 11 oz / 330 ml AVENT Bottles
Before each use, wash items to be sterilized in mild soapy water, and rinse.
- Measure and pour in exactly 90 ml of water if selecting Mode 1 OR 200 ml of water if selecting Mode 2.
- Slide the lower basket onto the central stem. Thread 2 screw rings onto the central stem. Slide the bottle rack down the central stem, with the neck facing down, until it rests on the top screw ring.
- Place the nipples through the center of the holes in the bottle rack onto the lower basket. Thread 4 screw rings onto the central stem.
- Place inverted bottles in the bottle rack and
push the upper basket onto the central stem until it rests on the catch. Place dome caps and tongs into the upper basket.
- The upper basket is not required when sterilizing 11 oz / 330 ml bottles.
- Place the assembled unit into the sterilizer body and put the lid on. Put the power cord into the back of the sterilizer body and plug into the electrical outlet. A flashing '0' will appear, indicating that you need to select a mode.
- To select Mode 1, press the control button once and the mode number will be displayed. To run this mode, hold the control button in for 2 seconds, then release. A rotating '0' will be displayed. Mode 1 is now in progress.
To select Mode 2, press the control button twice and the mode number will be displayed. To run this mode, hold the control button in for 2 seconds, then release. Three ascending and descending bars will be displayed. Mode 2 is now in progress. - Do not remove the lid until the 6 minute sterilizing cycle has ended. This is indicated by 5 beeps and 3 bars being displayed. It is recommended to let the sterilizer cool down for 3 minutes after the sterilizing cycle has been completed. Items will remain sterile for up to 6 hours provided the lid is not removed. After 2 hours, the display will show 2 bars and, after a further 2 hours, one bar. To indicate the end of Mode 1 or 2, the unit will sound a long beep followed by a flashing '0'. At this point items should be used immediately or re-sterilized. (Please refer to 'To remove sterilized items after a cycle'.) Unplug from electrical outlet and remove power cord from the back of the sterilizer. Pour away any remaining water, rinse out the inside of the sterilizer body and wipe dry.
^1 The end of a cycle is 6 hours after commencement of Mode 1 and 24 hours after commencement of Mode 2. The unit can be completely stopped at any time during a cycle, by pressing and holding in the control button for 2 seconds. The unit will beep and a flashing '0' will be displayed, indicating the unit has returned to selection mode.
To load the Philips AVENT ISIS Manual Breast Pump (see diagram D)
Before each use, wash items to be sterilized in mild soapy water, and rinse. - Disassemble your ISIS Breast Pump and click
US
the pump body/bodies into the slot/s in the upper basket. Arrange other breast pump components as shown.
- Place remaining components of the pump in the lower basket.
- Up to six 4 oz / 125 ml or 9 oz / 260 ml bottles (not including screw rings, nipples or dome caps) can be sterilized with the pump.
- Follow sterilizing instructions.
To load the AVENT Tempo Natural Feeding Nurser
Before each use, wash items to be sterilized in mild, soapy water, and rinse.
- Open the inner locking ring of the screw ring and place the screw ring in the basket with the locking tab facing downwards. Ensure that the parts of the screw ring that are in contact with the nipple are facing upwards.
- Place the nipple and the dome cap in the basket as you would when sterilizing a bottle assembly.
- Follow sterilizing instructions.
To remove sterilized items during or after a cycle (see diagram E)
- Let the sterilizer cool down for 3 minutes after sterilizing cycle has been completed.
- Press the control button to reset (Mode 1) or pause (Mode 2) the unit.
- Wash your hands thoroughly before removing the sterilized items.
- Remove the lid.
- If necessary, shake excess water from items before assembling.
- The tongs can be used to remove small items and to pull the sterile nipples through the screw rings of the bottles.
- Removed items must be used/assembled immediately or re-sterilized. Expressed milk can be stored in a sterile breast milk container in the refrigerator for up to 48 hours (not in the door), in the freezer for up to 3 months, or in a zero-degree freezer for up to 6 months. Infant formula should be made up fresh for each feed.
- In Mode 1, the sterilizer must be left to cool for at least 10 minutes between each use.
- In Mode 2 – items can be removed/replaced and then the cycle restarted. To restart, press the control button. The unit will immediately enter a new sterilization phase and continue the 24 hour cycle from where it was interrupted. If unplugged the countdown cycle will stop.
Dishwasher Basket (see diagram F)
-
Two baskets can be clipped together to hold small items such as nipples, breast pump parts etc. for washing in the top rack of your dishwasher prior to sterilization.
-
To clip together, align the baskets so that the indicators are opposite each other and snap the baskets together. To open, pull apart with fingers.
Warning: Your Philips AVENT items may discolor over time if they are washed in the dishwasher with dirty items covered with remnants of strong sauces, such as tomato sauce.
Care of your sterilizer
Using distilled water in your iQ24 Sterilizer can reduce limescale build up. You should de-scale your sterilizer every four weeks, or as often as needed in hard water areas, to ensure it continues to work 100% effectively.
Pour 100 ml vinegar mixed with 200 ml cold water into the sterilizer. Allow to stand in the unit until any limescale has dissolved. Drain and rinse the inside of the sterilizer thoroughly. Wipe dry.
Limited Guarantee
Philips AVENT guarantees that the iQ24 Sterilizer be free from manufacturers defects for 12 months from the date of purchase. In the event of a defect, Philips AVENT will repair or replace such parts free of charge with proof of purchase. The iQ24 Sterilizer must be used according to the instructions. The claim must not be a result of a accident, misuse, dirt, neglect or normal wear and tear. For questions about this product or our guarantee please call Customer Service at 1.800.54.AVENT.
Philips AVENT is here to help
For our complete catalog of mother and baby care products and breastfeeding information Call TOLL-FREE 1.800.54.AVENT
MANUFACTURED FOR: PHILIPS DOMESTIC APPLIANCES AND PERSONAL CARE COMPANY, A DIVISION OF PHILIPS ELECTRONICS NORTH AMERICA CORPORATION. 1600 SUMMER STREET, 5 FL. STAMFORD, CT 06905-9991.
www.philips.com/AVENT
Electronic Display Guide
| Sterilizer plugged in and ready for mode selection | |
 Ready for Mode 1 selection Ready for Mode 1 selection | [IMAGE] Ready for Mode 2 selection |
 Mode 1 sterilization in progress – indicated by a beep and rotating '0' Mode 1 sterilization in progress – indicated by a beep and rotating '0' | [IMAGE] Mode 2 sterilization in progress – indicated by a beep and three ascending and descending bars |
 Numerical countdown indicates sterilization almost complete* Numerical countdown indicates sterilization almost complete* | |
 Sterilization complete – indicated by 5 beeps and three flashing bars– items will remain sterile for up to 6 hours provided the lid is not opened Sterilization complete – indicated by 5 beeps and three flashing bars– items will remain sterile for up to 6 hours provided the lid is not opened | |
| [6X7T]Up to 6 hours sterile time remaining | [IMAGE] Up to 4 hours sterile time remaining [IMAGE] Up to 2 hours sterile time remaining |
| [87CH]Mode 1 cycle (6 hours) – indicated by a long beep and a flashing '0' Completion Mode 2 cycle (24 hours) | |
 Water level too high. See 'Troubleshooting' on back cover Water level too high. See 'Troubleshooting' on back cover | |
| [2023]Water level too low. See 'Troubleshooting' on back cover | |
* Mode 1 only
Gracias por elegir
Philips AVENT
www.philips.com/AVENT

- Thank you for choosing Philips AVENT
- IMPORTANT SAFEGUARDS
- SAVE THESE INSTRUCTIONS
- Instructions for use
- Before using your sterilizer for the first time (see diagram B)
- US
- Dishwasher Basket (see diagram F)
- Care of your sterilizer
- Limited Guarantee
- Philips AVENT is here to help
- Gracias por elegir
- Philips AVENT
Brand : PHILIPS
Model : Avent SCF276
Category : Bottle sterilizer