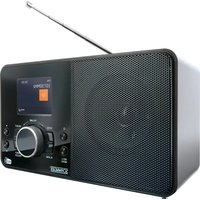
DAB400 - Alarm system Schwaiger - Free user manual and instructions
Find the device manual for free DAB400 Schwaiger in PDF.


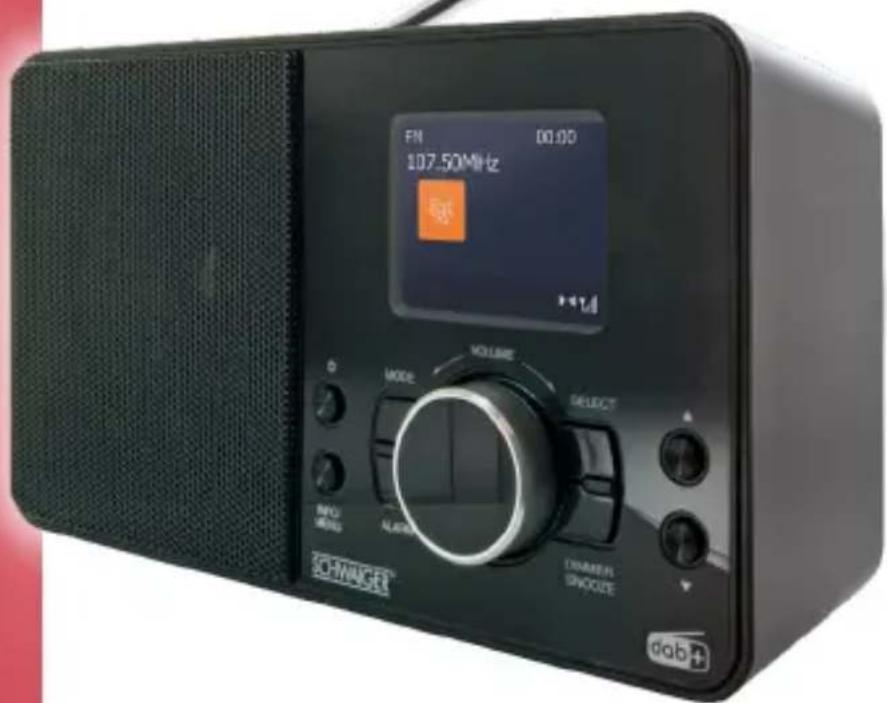
| Product type | Radio alarm clock with DAB+ and FM |
| Brand | Schwaiger |
| Model | DAB400 |
| Dimensions (L x W x H) | 210 x 80 x 120 mm |
| Net weight | 0.5 kg |
| Mains power supply | Adapter 5.9 V / 1 A (included) |
| Battery power | 4 x AA 1.5 V (not included) |
| Speaker power | 1 x 2 W RMS |
| DAB radio frequency | 174 - 240 MHz (Band III) |
| FM radio frequency | 87.5 - 108 MHz |
| Number of presets | 30 DAB + 30 FM |
| Display | Backlit LCD (4 levels) |
| Alarm function | Dual alarm with radio or buzzer + snooze |
| Sleep timer | Yes, adjustable from 15 to 90 min |
| Headphone jack | 3.5 mm jack |
| Safety | Surge protection, automatic shutdown in case of overheating |
| Maintenance and cleaning | Disconnect before cleaning; dry soft cloth; avoid abrasive products |
| Spare parts and repairability | No user-serviceable parts; consult a professional |
| General information | Compliant with RED directive 2014/53/EU; declaration of conformity online |
Frequently Asked Questions - DAB400 Schwaiger
User questions about DAB400 Schwaiger
0 question about this device. Answer the ones you know or ask your own.
Ask a new question about this device
Download the instructions for your Alarm system in PDF format for free! Find your manual DAB400 - Schwaiger and take your electronic device back in hand. On this page are published all the documents necessary for the use of your device. DAB400 by Schwaiger.
USER MANUAL DAB400 Schwaiger
DIGITALRADIO
DAB+

DAB 400
SCHWAIGER®
BEDIENUNGSANLEITUNG UND SICHERHEITSHINWEISE
DAB+ RADIO
GB OPERATING AND SAFETY INSTRUCTIONS
DAB+ RADIO
MODE D'EMPLOI ET CONSIGNES DE SÉCURITÉ
RADIO DAB+
ISTRUZIONI PER L'USO E AVVERTENZE DI SICUREZZA
RADIO DAB+
E MANUAL DE INSTRUCCIONES E INDICACIONES DE SEGURIDAD
RADIO DAB+
NL BEDIENINGSHANDLEIDING EN VEILIGHEIDSINSTRUCTIES
DAB+ RADIO
S BRUKSANVISNING OCH SÄKERHETSINFORMATION
DAB+ RADIO




natural_image
Simple line drawing of a rectangular device with a central screen and control buttons (no text or symbols)
natural_image
Simple line drawing of a cable and resistor connected to a terminal plug (no text or symbols)
natural_image
Blank white rectangular book with no visible text or symbols on the coverHauptgerät
Netzteil
Bedienungsanleitung
STROMQUELLE
- Read all the instructions carefully before using the unit and keep them for future reference.
- Check that the voltage marked on the rating label matches your mains voltage.
- The unit must be placed on a flat stable surface and should not be subjected to vibrations.
- Do not place the unit on sloped or unstable surfaces as the unit may fall off or tip over.
- The mains socket must be located near the unit and should be easily accessible.
- Avoid extreme degrees of temperature, either hot or cold. Place the unit well away from heat sources such as radiators or gas/electric fires. Avoid exposure to direct sunlight and other sources of heat.
- Never place any type of candle or naked flame on the top of or near the unit.
- To reduce the risk of fire, electric shock or product damage, do not expose this unit to rain, moisture, dripping or splashing. No objects filled with liquids, such as vases, should be placed on the unit.
- If you spill any liquid into the unit, it can cause serious damage. Switch it off at the mains immediately. Withdraw the mains plug and consult your dealer.
- To prevent the risk of electric shock or fire hazard due to overheating, ensure that curtains and other materials do not obstruct the ventilation vents.
- Do not install or place this unit in a bookcase, built-in cabinet or in another confined space. Ensure that a minimum of 10cm should be kept around the apparatus for ventilation.
Safety
- Always disconnect the unit from the mains supply before connecting/ disconnecting other devices or moving the unit.
- Unplug the unit from the mains socket during a lightning storm.
- This unit will become warm when used for a long period of time. This is normal and does not indicate a problem with the unit.

The lightning flash with arrowhead symbol, within an equilateral triangle, is intended to alert the user to the presence of uninsulated "dangerous voltage" within the unit's enclosure that may be of sufficient magnitude to constitute a risk of electric shock.
The exclamation point within an equilateral triangle is intended to alert the user to the presence of important operating and maintenance (servicing) instructions in the manual accompanying the unit.
Mains Adapter
- Make sure the unit is not resting on top of the mains adapter cable, as the weight of the unit may damage the cable and create a safety hazard.
- If the mains adapter is damaged it must be replaced by the manufacturer, its service agent, or similarly qualified persons in order to avoid a hazard.
Interference
- Do not place the unit on or near appliances which may cause electromagnetic interference. If you do, it may adversely affect the operating performance of the unit, and cause a distorted sound.
Supervision
• Children should be supervised to ensure that they do not play with the unit.
- Never let anyone especially children push anything into the holes, slots or any other openings in the case - this could result in a fatal electric shock.
Service/Maintenance
- To reduce the risk of electric shock, do not remove screws. The unit does not contain any user serviceable parts. Please leave all maintenance work to qualified personnel.
- Do not open any fixed covers as this may expose dangerous voltages.
- Ensure to unplug the unit from the mains socket before cleaning.
- Do not use any type of abrasive pad or abrasive cleaning solutions as these may damage the unit's surface.
- Do not use liquids to clean the unit.
PRODUCT OVERVIEW
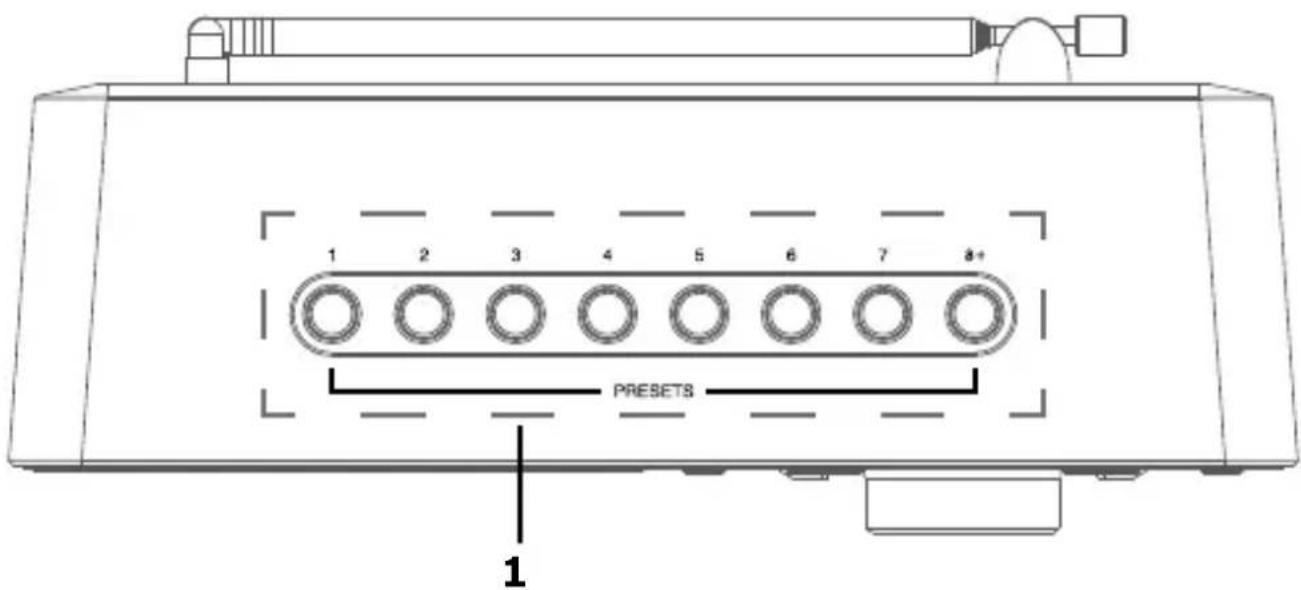
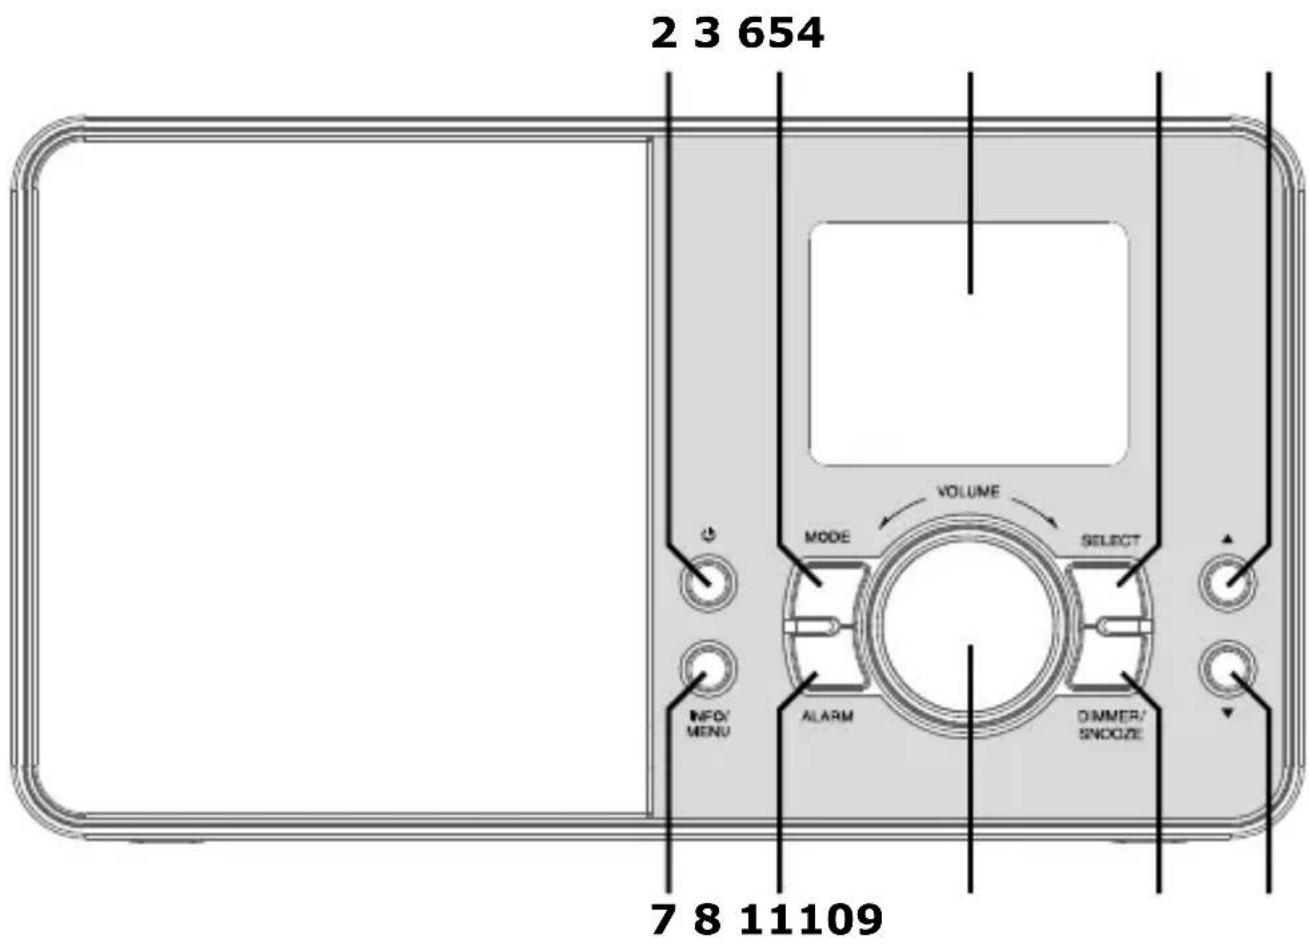
2 3 654
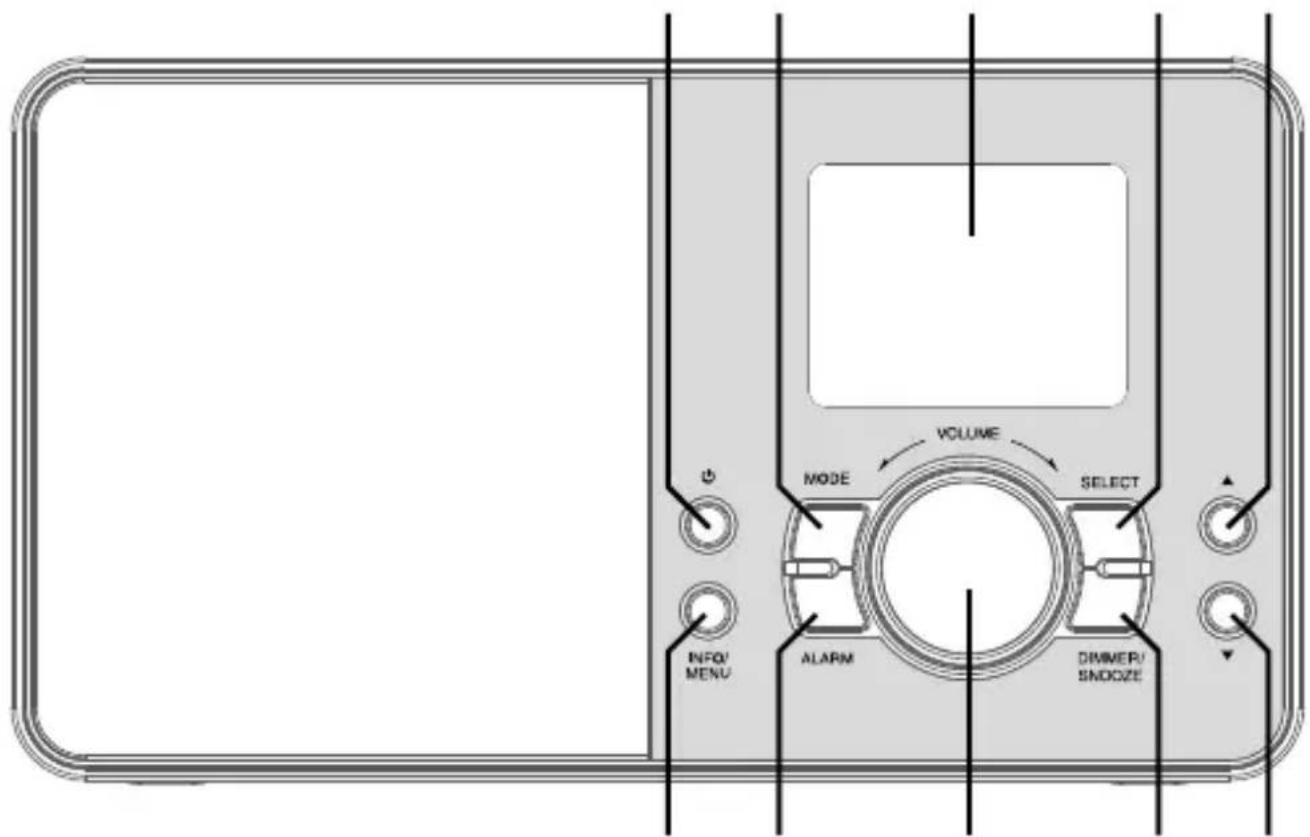
7 8 11109
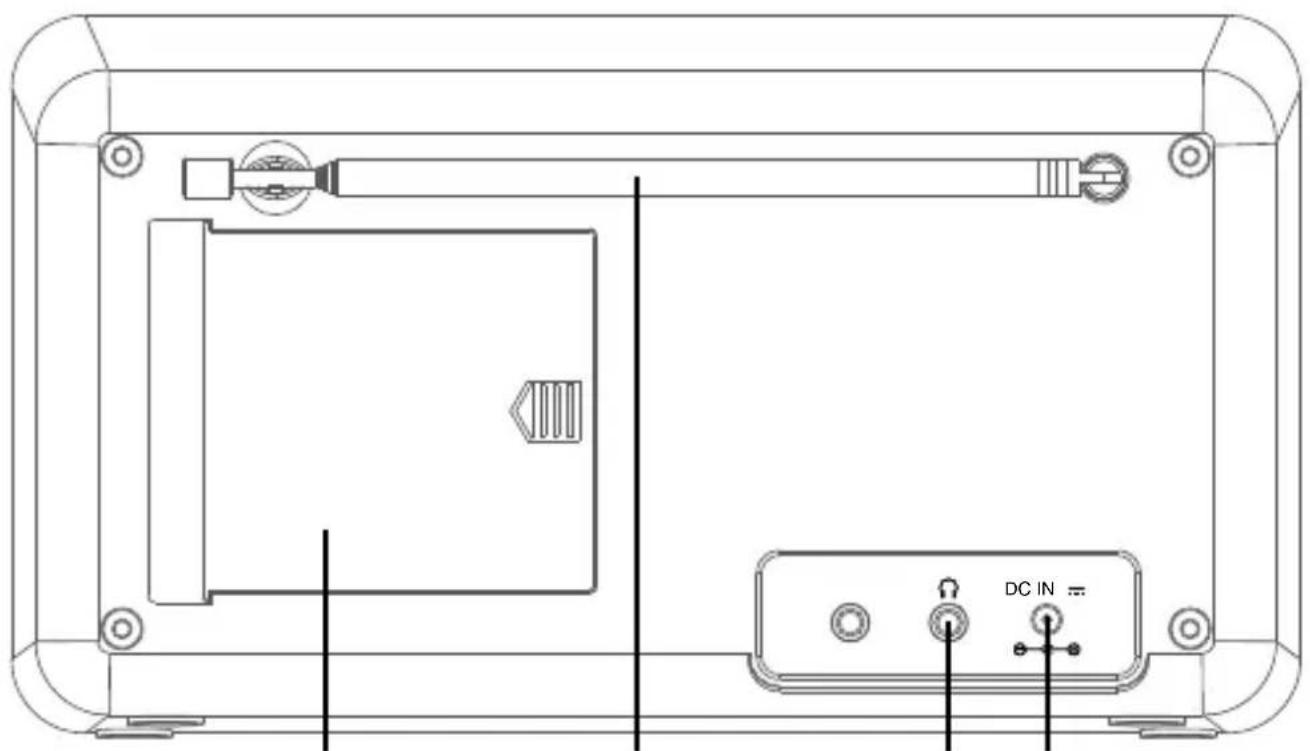
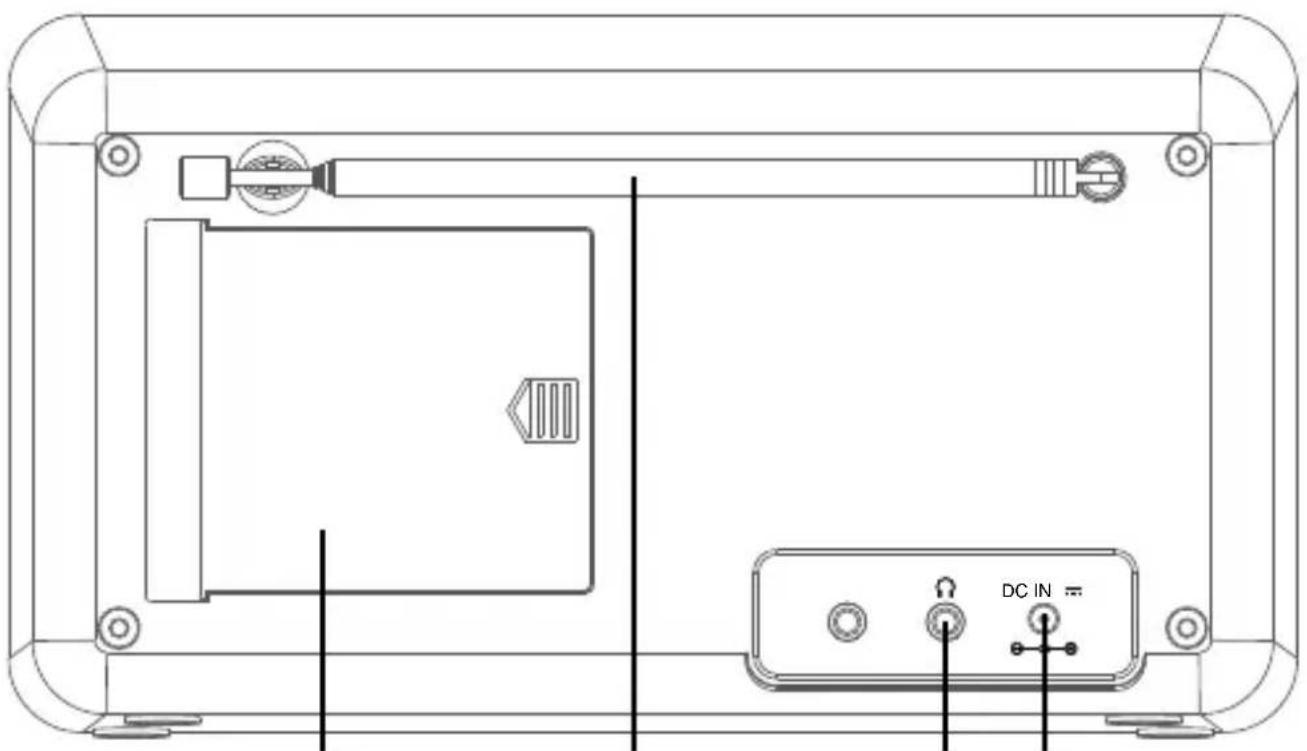
12 13 14 15

USER GUIDE
-
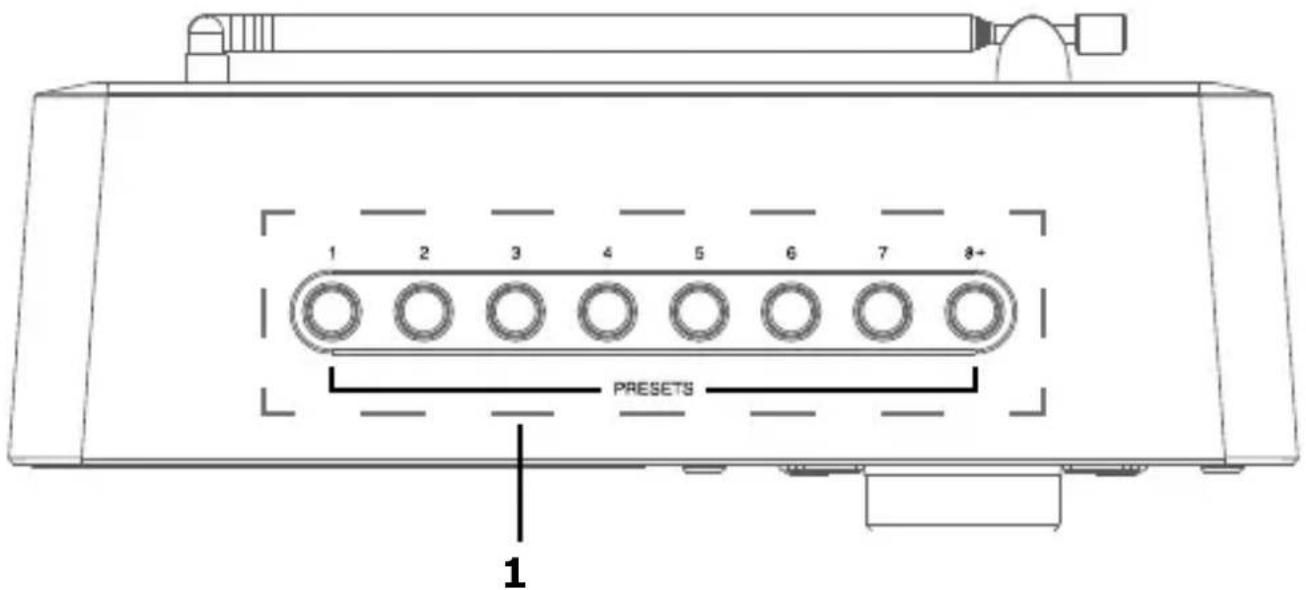
PRESETS BUTTON
-
⏻ STANDBY BUTTON
-
MODE BUTTON
-
DISPLAY
-
SELECT BUTTON
-
▲ BUTTON
-
INFO/MENU BUTTON
-
ALARM BUTTON
-
VOLUME DIAL
-
DIMMER/SNOOZE BUTTON
-
▼ BUTTON
-
BATTERY COMPARTMENT
-
ANTENNA
-
EARPHONES SOCKET
-
DC IN SOCKET

UNPACKING
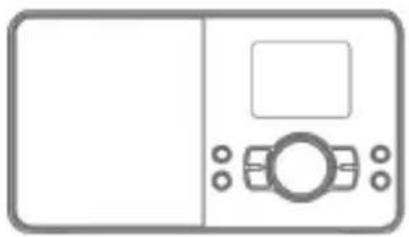
Remove all items from the packaging. Retain the packaging. If you dispose of it, please do so according to local regulations.
The following items are included:
natural_image
Simple line drawing of a rectangular device with a central screen and control buttons (no text or symbols)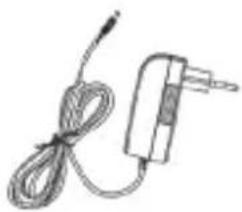
natural_image
Simple line drawing of a cable and plug device (no text or symbols)
natural_image
Blank white rectangular book or document (no visible text or symbols)Main Unit
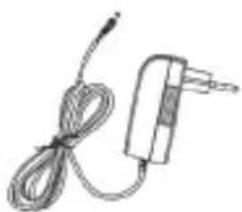
Mains Adapter
Instruction Manual
POWER SOURCE
Mains Power
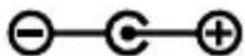
- Connecting the unit to any other power source may cause damage the unit. Unwind the mains adapter cable to its full length. Connect the end of the cable to the DC IN —— 🍴—←+ Socket at the rear of the unit and then connect the mains adapter to the mains socket. Make sure the mains adapter is firmly inserted into the mains socket. The unit is now ready to use.
- To switch the unit off completely, unplug the mains adapter from the mains socket.
Battery Power
Insert 4 X 1.5V AA batteries (not included) correctly by following the polarity (+ or -) indications in the battery compartment.
- When the batteries become weak, the display will show "Battery Low". The batteries should be replaced.
- When the batteries are completely exhausted, the power is turned off.
Handling the Batteries
- Improper or incorrect use of batteries may cause corrosion or battery leakage, which could cause personal injury or damage to property.
- Install the batteries correctly by following the polarity (+ and -) indications in the battery compartment.
- Use only the types of batteries which are indicated in this manual.
- Do not install new batteries with used ones and do not mix different types of batteries.
- Do not dispose of the used batteries as domestic waste. Dispose of them in accordance with local regulations.
- If you are not going to use the unit for a long time, remove the batteries to avoid damage from battery leakage and corrosion.
- Due to the short battery life span of some alkaline batteries, it is recommended to use rechargeable batteries. You will need to purchase a charger to charge the rechargeable batteries. This saves cost and is more environmental-friendly.
BASIC OPERATION
Powering ON/OFF
After connecting the mains adapter to the unit and the mains socket, the unit will enter Standby mode.
- Press the ⏻ STANDBY button to switch on the unit.
- Press the ⏻ STANDBY button again to switch the unit back to Standby mode.
- Disconnect the power cable of the mains adapter from the mains socket if you want to switch the unit off completely.
While using battery power,
- Press the ⏻ STANDBY button to switch on the unit.
- Press the ⏻ STANDBY button again to switch off the unit.
Selecting Modes
Press MODE button repeatedly to switch between modes (DAB or FM).
Adjusting the Volume
Turn the VOLUME dial to adjust the volume.
Automatically Setting the Clock
The clock will be updated automatically if you can receive DAB/FM signal in your location.
In order to synchronize to the current local time, you must leave the unit to receive signals from the DAB/FM station for a period of time.
DAB OPERATION
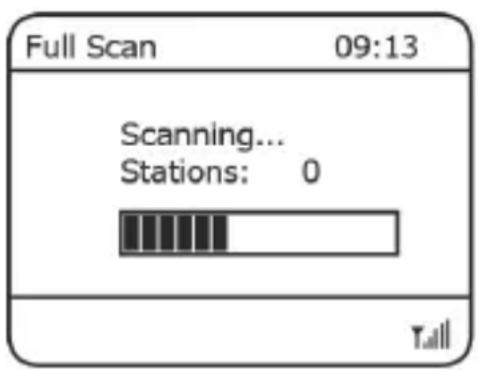
If the unit is connected to the mains power and then switched on for the first time, the unit will automatically enter into the DAB mode and perform full scan. During the scan the display will show "Scanning..." together with a slide bar that indicates the progress of the scan and the number of stations that have been found so far.
Once the scan has finished, the unit will select the first alphanumerically found station. To explore the found stations, press ▲ / ▼ buttons and then SELECT to confirm selection.
Station List
The Station List will show all the found DAB stations after scanning.
- Press and hold the INFO/MENU button, and then press ▲ / ▼ buttons to select
. Press SELECT button to confirm. - Press ▲ / ▼ buttons to select the station and press SELECT button to listen.
Full Scan
The full scan will search for the entire DAB Band III channels. After the scan has finished, the first alphanumerically found station will be automatically selected.
- To activate Full Scan, press and hold INFO/MENU then press ▲ / ▼ buttons to select
. Press the SELECT button to confirm. The display will show "Scanning..." and a progressing slide bar. - All the stations that have been found will be stored automatically. To explore and listen to the found stations, press ▲ / ▼ buttons and then SELECT to confirm selection.
Manual Tune
As well as the normal method of scanning, you can also manually tune to a particular channel / frequency. This can be useful for adjusting your antenna to achieve the best possible reception and scanning a particular channel to update the station list.
- Press and hold INFO/MENU and then press ▲ / ▼ buttons to select
. Press SELECT to confirm. - Press ▲ / ▼ buttons to go through the DAB channels, which are numbered from 5A to 13F.
- After your desired channel number is selected, press the SELECT button to enter the current multiplex. It will now display the multiplex and you will see the signal strength.
- You will not see any new radios stations or hear anything while in manual tune. To find the newly tuned in stations search through the Station List.
Now playing information (Slideshow)
While a station is playing, the screen shows its name and DLS (Dynamic Label Segment) information broadcast by the station such as programme name, track title and contact details.
Press SELECT button to cycle through the following slideshow displays:
- Station name, slideshow image and scrolling DLS text being broadcast by the current station.
- Full screen version of the slideshow image.
- Station name, slideshow image and DLS text being broadcast by the current station.
» If no slideshow image is available a default DAB thumbnail image is displayed.
DAB DISPLAY MODES
Every time you press INFO/MENU, the display will show the following display modes:
DLS text
This is a scrolling message giving real-time information, e.g. song titles, news headlines, etc.
» DLS information - This is only displayed if broadcast by the station.
Programme Type
This describes the "style" or "genre" of the programme that is being broadcast.
Ensemble Name
This display the name of the multiplex that contains the station you are listening to. A multiplex is a collection of radio stations that are bundled and transmitted on one frequency. There are national and local multiplexes. Local ones contain stations that are specific to that area.
Channel Number/Frequency
This display the frequency of the present station, such as "11C 220.352MHz".
Signal Strength
This shows a slide bar to indicate the signal strength, the stronger the signal, the longer the bar will be from left to right.
Power Status
This shows the power source (Mains Power or Battery) of the unit.
Date
This display the current date provided automatically by the broadcaster.
Prune Invalid
You may remove all unavailable stations from the list.
-
During DAB mode, press and hold INFO/MENU button, and then press ▲ / ▼ buttons to select
. Press SELECT to confirm. -
Press ▲ / ▼ buttons to select
to confirm delete. Or select to cancel.
Dynamic range compression (DRC)
This function reduces the difference between the loudest and quietest audio being broadcast. Effectively, this makes quiet sounds comparatively louder and loud sounds comparatively quieter.
-
During DAB mode, press and hold INFO/MENU button, and then press ▲ / ▼ buttons to select
. Press SELECT to confirm. -
Press ▲ / ▼ buttons to select High / Low / Off and press SELECT to confirm.
» DRC only works if it is enabled by the broadcaster for a specific station.
FM OPERATION
Switching from DAB to FM Mode
To switch the unit from DAB to FM mode, press MODE once.
Auto Scan
To search for an FM station, press ▲ / ▼ buttons to select the forward or reverse scanning, and then press SELECT to confirm.
Once a station has been found, the scanning will stop automatically.
Manual Scan
To search for FM stations manually, press ▲ / ▼ buttons repeatedly until your desired frequency is reached.
» With FM radio, it may be necessary to fine tune each station by pressing ▲ / ▼ repeatedly. Each press will adjust the frequency by 0.05 MHz. If reception is still poor, adjust the position of the aerial or try moving the radio to another location.
Scan Setting
This is a scanning option to scan all stations, or just scan stations with strong signal.
-
Press and hold INFO/MENU and then press ▲ / ▼ buttons to select
. Press SELECT to confirm. -
Press ▲ / ▼ buttons to select or
. Press SELECT to confirm.
FM DISPLAY MODES
Every time you press INFO/MENU, the display will show the following display modes:
RDS RadioText
This is a scrolling message information about the current programme.
Programme Type
This describes the "Style" or "genre" of programme that is being broadcast.
Name/Frequency
This display the frequency of the present station, such as "87.50 MHz".
Power status
This shows the power source (Mains Power or Battery) of the unit.
Date
This displays the current date provided automatically by the broadcaster.
PRESET
Presetting Stations
You can store up to 30 DAB stations & 30 FM stations to the memory. This will enable you to access your favorite stations quickly and easily.
- To store a preset, first tune to your desired station, then press and hold the Presets # (1-7) for longer than 2 seconds, the display will show "Preset # saved" and then save the station.
- To store in Presets # (8-30) press and hold the preset 8+ for longer than 2 seconds, the display will show "Save to Preset". Press ▲ / ▼ buttons to select presets location 8 - 30 and press the SELECT button to confirm. The display will show "Preset # saved" and then save the station.
Recalling a Preset Station
- To listen the preset stations 1-7, press the preset button and the unit will switch to desired preset location. If the preset has not been allocated, "Preset Empty" will be shown in the display.
- To listen the preset stations 8-30, press the Presets 8+ once, the display will show „Preset Recall“ then show up preset list, press ▲ / ▼ buttons to select the desired preset location and then press the SELECT button to confirm. If the preset has not been allocated, “Preset Empty” with preset# will be shown in the display.
ALARMS AND SNOOZE
As well as a clock/calendar, there are two wake-up alarms with snooze facility. The alarm sound for each alarm can use a Buzzer, Digital Radio or FM.
Alarms (Mains Power only)
- Press ALARM button to enter Alarm menu
- Press ▲ / ▼ buttons to select
or and press SELECT to confirm - Press the ▲ / ▼ buttons to select the option below:
Alarm
Press SELECT button to select On / Off, then press ▲ / ▼ buttons to next parameter.
Frequency
Press SELECT button and then press ▲ / ▼ buttons to select Daily, Once, Weekends or Weekdays to active the alarm, then press SELECT to confirm.
»If you choose 'Once', you are prompted to enter the required date.
Wake Up time
Press SELECT button and then press ▲ / ▼ buttons to adjust the hour and minute, then press SELECT to confirm.
Source
Press SELECT button and then press ▲ / ▼ buttons to select Buzzer, Digital Radio or FM, then press SELECT to confirm.
If DAB or FM is chosen as the audio source you will also be prompted to select the Last Listened or preset station (if set).
Duration
Press SELECT button and then press ▲ / ▼ buttons to select alarm duration 15, 30 45, 60, 90 or 120 minutes, then press SELECT to confirm. If the alarm is not cancelled, the unit returns to standby after this time period.
Volume
Press SELECT button and then press ▲ / ▼ buttons to adjust the alarm volume, then press SELECT to confirm. Initially the alarm sounds at a low volume and gradually gets louder to the set volume.
Press INFO/MENU button to return to Alarm menu and press INFO/MENU button again to exit Alarm setting.
In all listening modes active alarms are indicated by displaying the relevant Alarm 1 and/or Alarm 2 icons.
At the set time, the alarm will sound, quietly at first, then gradually building up to the set volume.
To cancel a sounding alarm and switch the radio to standby, press the Standby or ALARM button.
Snooze (Mains Power only)
To temporarily silence a sounding alarm, press DIMMER/SNOOZE button. You can change the snooze period by repeatedly pressing DIMMER/SNOOZE button. Snooze periods are 5, 10, 15 and 30 minutes. The radio returns to standby for the set time period with a snooze countdown displayed. When the countdown reaches 0 (zero) the alarm is triggered again.
Press Standby ⏻ or ALARM button to fully cancel a sounding alarm and switch the radio to standby.
DIMMER
Display Backlight (Mains Power only)
There are four backlight levels to choose from.
To set the backlight level, repeatedly press the DIMMER/SNOOZE button and the brightness of the display will change in sequence: Off>Low>Medium>High
SYSTEM SETTINGS
Sleep
- To set the sleep timer, press and hold INFO/MENU to enter Menu.
- Press ▲ / ▼ buttons to select
and press SELECT to confirm. - Press ▲ / ▼ buttons to select
and press SELECT to confirm. - Press ▲ / ▼ buttons to select the sleep delay time in minutes from: Sleep Off / 15 / 30 / 45 / 60 / 90 minutes, and press SELECT to confirm.
Once you select a sleep delay period, and returns to the Now playing. The screen will display a crescent moon icon to indicate that the sleep function is activated.
Time/Date
- To set the time & date, press and hold INFO/MENU to display the menu.
- Press ▲ / ▼ buttons to select
, and then press SELECT to confirm. Press ▲ / ▼ buttons to select - Press the ▲ / ▼ buttons and SELECT to select the option below:
Set Time/Date
Press ▲ / ▼ buttons to adjust the time and date, then press SELECT to confirm.
Auto Update
Press ▲ / ▼ buttons to select Auto Update from Any, Digital Radio, FM or No Update then press SELECT to confirm.
Set 12/24 Hour
Press ▲ / ▼ buttons to select 12 Hour or 24 Hour, then press SELECT to confirm.
Set Date Format
Press ▲ / ▼ buttons to select MM-DD-YYYY or DD-MM-YYYY, then press SELECT to confirm.
- Press INFO/MENU to exit the menu.
Language
- To select the language, press and hold INFO/MENU to enter Menu.
- Press ▲ / ▼ buttons to select
and press SELECT to confirm. - Press ▲ / ▼ buttons to select
and press SELECT to confirm. - Press ▲ / ▼ buttons to select language and press SELECT to confirm.
FACTORY RESET
- To perform factory reset, press and hold INFO/MENU to enter Menu.
- Press ▲ / ▼ buttons to select
and press SELECT to confirm. - Press ▲ / ▼ buttons to select
and press SELECT to confirm. - Press ▲ / ▼ buttons to select
to perform factory reset or to cancel.
Software Version
- To view the software version, press and hold INFO/MENU to enter Menu.
- Press ▲ / ▼ buttons to select
and press SELECT to confirm. - Press ▲ / ▼ buttons to select
and press SELECT to confirm.
USING EARPHONES
You can connect earphones (not included) by plugging into the earphone socket at the rear of the unit. Turn down the volume before connecting earphones. Slowly raise the volume with the earphones on until you reach your desired level.
» Long-term exposure to loud music may cause hearing damage. It is best to avoid extreme volume when using earphones, especially for extended periods of time.
MAINTENANCE
Cleaning the Unit
» Ensure the unit is fully unplugged from the mains socket before cleaning.
- To clean the unit, wipe the case with a slightly moist, lint-free cloth.
- Do not use any cleaning fluids containing alcohol, ammonia or abrasives.
- Do not spray an aerosol at or near the unit.
Simplified declaration of conformity as per the RED Directive
Schwaiger GmbH hereby declares that the described radio system product complies with Directive 2014/53/EU and other directives applicable to the product. The complete EU declaration of conformity is available online at: http://konform.schwaiger.de
Disposal

Do not dispose of batteries or electric and electronic devices in the normal household waste. The consumer is legally obliged to return electrical and electronic devices and batteries that are at the end of their useful life to the point of sale or public collection points that have been set up for this purpose. Legislation in the country of use governs individual details regarding disposal. The symbol on the product, the user guide or the packaging indicates this legal requirement.
Disclaimer
Schwaiger GmbH does not accept any liability or warranty for damages that are sustained due to improper installation or mounting, improper use of the product or non-compliance with the safety instructions.
Manufacturer's information
Dear Customer, please contact our Technical Support if you need technical advice and your retailer is unable to help you.
Office Hours (Technical Support in German)
Monday to Friday: 8:00 a.m. - 5:00 p.m.
HOTLINE
+49 (09101) 702-299
SPECIFICATION
| Model DAB400 513 | |
| Speaker Output Power 1 x 2W RMS | S |
| Radio Frequency FM 87.5 - 108 MHz | Hz |
| DAB 174 - 240 MHz | |
| Dimension approx. 210 (L) × 80 (W) × 120 (H) mm | |
| Net Weight ~ 0.5 kg | |
| Manufacturer's name and address | DONGGUAN DONGNIU ELECTRONIC TECHNOLOGY CO., LTD. 3th Floor, No.8, HengLing Street, HengJiao Industrial Park, ShiJie Town, Dongguan City, Guangdong, P.R. China |
| Model Number DNS051-0591000-AV | |
| Input Voltage and Input AC frequency | 100-240 V ~ 50-60Hz 0.2A max. |
| Output voltage DC 5.9 V | |
| Output current 1.0 A | |
| Output power 5.9 W | |
| Average active efficiency 75.0 % | |
| No-load power consumption 0.09 W | |
| Battery DC 1.5V AA size x 4 | |
Features and specifications are subject to change without prior notice.

MESURES DE SÉCURITÉ
VUE D'ENSEMBLE DU PRODUIT
12 13 14 15
-
TOUCHES PRESET
-
STANDBY
-
TOUCHE MODE
-
ÉCRAN
-
TOUCHE SELECT
-
TOUCHE ▲
-
TOUCHE INFO/MENU
-
TOUCHE ALARM
-
BOUTON VOLUME
-
TOUCHE DIMMER/SNOOZE
-
TOUCHE ▼
-
LOGEMENT BATTERIE
-
ANTENNE
-
PRISE OREILLETTES
-
PRISE DC IN

DÉBALLAGE
natural_image
Simple line drawing of a rectangular device with a central screen and control buttons (no text or symbols)Unité principale
Adaptateur secteur
natural_image
Simple line drawing of a cable and plug device (no text or symbols)natural_image
Blank white rectangular book or document with no visible text, symbols, or markingsSOURCE DE PUISSANCE
Liste des stations
natural_image
Simple line drawing of a rectangular device with a central screen and control buttons (no text or symbols)Unità principale
natural_image
Simple line drawing of a cable and resistor with a terminal connector (no text or symbols)Adattatore di rete

natural_image
Blank white rectangular book or document with no visible text, symbols, or markingsnatural_image
Simple line drawing of a rectangular device with a central screen and control buttons (no text or symbols)Unidad principal
natural_image
Simple line drawing of a cable and plug device (no text or symbols)Adaptador de red

natural_image
Blank white rectangular book or document with no visible text, symbols, or markingsLista de estaciones
APPARAAT NIET OPENEN STROOMSLAGGEVAAR
natural_image
Simple line drawing of a rectangular device with a central screen and control buttons (no text or symbols)Hoofdeenheid
Netadapter
natural_image
Simple line drawing of a cable and plug device (no text or symbols)natural_image
Blank white rectangular book or document with no visible text, symbols, or markingsVERMOGENSBRON
Netspanning
Dynamic range compression (DRC)
natural_image
Simple line drawing of a rectangular device with a central screen and control buttons (no text or symbols)
natural_image
Simple line drawing of a cable and plug device (no text or symbols)
natural_image
Blank white rectangular book with no visible text or symbols on the coverHuvudapparat
Nätdel
Bruksanvisning
STÖRKÄLLA
Sändarlista
Further languages of the operating instructions can be found under

- DAB 400
- SCHWAIGER®
- STROMQUELLE
- Safety
- Mains Adapter
- Interference
- Supervision
- Service/Maintenance
- PRODUCT OVERVIEW
- USER GUIDE
- UNPACKING
- POWER SOURCE
- Mains Power
- Battery Power
- Handling the Batteries
- BASIC OPERATION
- Powering ON/OFF
- Selecting Modes
- Adjusting the Volume
- Automatically Setting the Clock
- DAB OPERATION
- Station List
- Full Scan
- Manual Tune
- Now playing information (Slideshow)
- DAB DISPLAY MODES
- DLS text
- Programme Type
- Ensemble Name
- Channel Number/Frequency
- Signal Strength
- Power Status
- Date
- Prune Invalid
- Dynamic range compression (DRC)
- FM OPERATION
- Switching from DAB to FM Mode
- Auto Scan
- Manual Scan
- Scan Setting
- FM DISPLAY MODES
- RDS RadioText
- Name/Frequency
- PRESET
- Presetting Stations
- Recalling a Preset Station
- ALARMS AND SNOOZE
- Alarms (Mains Power only)
- Alarm
- Frequency
- Wake Up time
- Source
- Duration
- Volume
- Snooze (Mains Power only)
- DIMMER
- Display Backlight (Mains Power only)
- SYSTEM SETTINGS
- Sleep
- Time/Date
- Set Time/Date
- Auto Update
- Set 12/24 Hour
- Set Date Format
- Language
- FACTORY RESET
- Software Version
- USING EARPHONES
- MAINTENANCE
- Cleaning the Unit
- Simplified declaration of conformity as per the RED Directive
- Disposal
- Disclaimer
- Manufacturer's information
- Office Hours (Technical Support in German)
- HOTLINE
- MESURES DE SÉCURITÉ
- DÉBALLAGE
- SOURCE DE PUISSANCE
- Liste des stations
- Lista de estaciones
- APPARAAT NIET OPENEN STROOMSLAGGEVAAR
- VERMOGENSBRON
- Netspanning
- STÖRKÄLLA
- Sändarlista
Brand : Schwaiger
Model : DAB400
Category : Alarm system