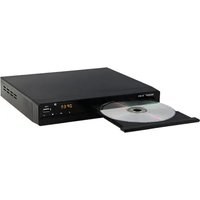
Regent DVD D-225 - DVD player Ferguson - Free user manual and instructions
Find the device manual for free Regent DVD D-225 Ferguson in PDF.


| Product type | DVD player |
| Brand | Ferguson |
| Model | Regent DVD D-225 |
| Power supply | 110-240 V ~ 50/60 Hz |
| Supported formats | DVD, VCD, CD, MP3, Photo CD, SVCD, JPEG, MPEG-4 |
| Color system | PAL / AUTO / NTSC |
| Video outputs | HDMI, Composite (RCA), SCART |
| Audio outputs | Stereo RCA, Digital coaxial SPDIF |
| USB port | Yes (front) |
| Remote control | Infrared, range 5 m |
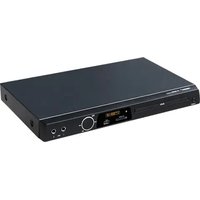
| Front panel | Disc tray, display, Play/Pause buttons, Stop, Open, IR sensor, USB port |
| Rear panel | HDMI, composite video output, stereo audio outputs, coaxial output, SCART |
| Laser safety | Class 1 |
| Standards | CE, double insulation, RoHS |
| Cleaning | Soft lint-free cloth with mild soap and water solution |
| Software | Update available at ferguson-digital.eu |
| Box contents | DVD player, remote control, user manual |
Frequently Asked Questions - Regent DVD D-225 Ferguson
User questions about Regent DVD D-225 Ferguson
0 question about this device. Answer the ones you know or ask your own.
Ask a new question about this device
Download the instructions for your DVD player in PDF format for free! Find your manual Regent DVD D-225 - Ferguson and take your electronic device back in hand. On this page are published all the documents necessary for the use of your device. Regent DVD D-225 by Ferguson.
USER MANUAL Regent DVD D-225 Ferguson
natural_image
Black rectangular electronic device labeled 'RECENT® 0-225' with open disc and digital display, surrounded by paint splatters (no readable text beyond branding)
natural_image
Woman holding a remote control, smiling at the camera (no text or symbols visible)instrukcja obsługi
users manual
Bedienungsanleitung
manuale d'uso
Downloadable software 13
About the instruction manual 14
Markings and signs applied to the receiver 14
- General information 15
1.1. Main features 15
1.2. Box content 15
1.3. Important instructions concerning
handling of the device 15
-
Remote Control Unit 16
-
Front panel and rear panel illustration 17
-
Handling and connection 18
-
Troubleshooting 20
Technical Specifications 21
Safety measures
We request that you read the instruction manual and recommendations set forward therein.
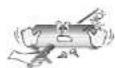
In order to avoid an electric shock, never open the housing. Damage to the warranty seal shall void the warranty.
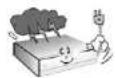
Disconnect the device from the mains during thunderstorms or when it is not to be used for an extended period of time. Please remember that the warranty does not cover damage to the equipment caused by a lightning strike.
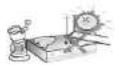
Do not expose the device to direct sunlight. Place it away from sources of heat and humidity. Do not cover ventilation ducts, in order to ensure the correct circulation of air.
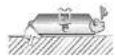
Place the device horizontally on a flat, even and stable surface.
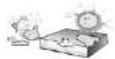
If you move the device from a room that is warm to one that is cold (or vice versa), wait at min. 1 hour before connecting it to the mains. Otherwise, problems may arise.
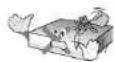
The device should be placed away from vases, bottles, aquariums and other water containers in order to avoid damage. Do not touch the mains plug with your bare hands.
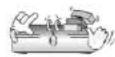
Do not place any objects on the housing of the device. This may cause overheating and reception problems.
Before starting any maintenance or installation work, disconnect the player from the mains. Do not use alcohol or liquids containing ammonia to clean the player. If necessary, clean it with a soft, lint-free cloth moistened with a mild soap and water solution.
- Do not connect any cables when the power plug is in the socket.
- Check if you have working cables. Damaged cables can cause a fire.
- Disconnect the player from the power supply while making all connections.
Downloadable software
Ferguson has taken every effort to provide users with software updates in order to ensure that the parameters of the device are up to date. Ferguson reserves itself the right to amend, change or modify the software used in the device as it shall choose and without prior notification. The latest version of the software is available on the website http://www.ferguson-digital.eu
About the instruction manual
Ferguson has made every effort to provide the most current information about its products. Ferguson does not grant any guarantee as to the contents of the present instruction manual and disclaims any implied guarantees concerning market value or suitability for specific purposes. The information contained herein is an instruction intended to enable the correct usage and maintenance of the player.
Ferguson reserves itself the right to introduce amendments, changes or translations of the instruction manual without prior notification thereof. For this reason, we recommend you regularly visit our website in order to obtain the latest information.
Markings and signs applied to the receiver
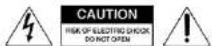
Risk of electric shock - do not open
This notice warns the user not to open the device housing. The housing may be opened solely by authorised service technicians.

CE logo
This mark tells you that the device is following the provisions of Council Directive 2014/30/EU on the approximation of the laws of the Member States relating to the electromagnetic compatibility and the provisions of Council Directive 2014/35/EU on the approximation of the laws of the Member States relating to low voltage and electrical safety.

Double insulation logo
This logo informs that the device is an electrically safe device, provided that it is used in accordance with the recommendations set forward in the chapter concerning safety.

Take an active part in protecting the natural environment!
Your device is made from materials that can be processed or recycled. To this end, you should deliver it to a designated collection point.

The RoHS mark
This mark tells you that the device is following The Directive on the Restriction of the Use of Certain Hazardous Substances in Electrical and Electronic Equipment 2011/65/EU (commonly referred to as the Restriction of Hazardous Substances Directive or RoHS).

Laser hazard logo
This player is a class 1 laser product, use of controls or adjustments or performance of procedures other than those specified herein may result in hazardous radiation exposure. As the laser beam used in this dvd video player is harmful to the eyes, do not attempt to disassemble the cabinet. Refer servicing to qualified personnel only.
1. General information
1.1. Main features:
• The DVD-video disc playing
• The multimedia files playing
1.2. Box content:
• RCU - remote controle unit
- user manual
- RCA cable
• DVD player
1.3. Important instructions concerning handling of the device
The DVD player have the simplified OSD interface, it is allowed to brows the media carrier content, you can browse with arrows on the RCU.
NOTE: File formats that DVD-player do not support can not display in media browser.
Device settings shows after pressing SETUP button.
NOTE: Please keep in mind that new software may change the functionality of the receiver. Photographs and descriptions included in the instruction manual are for informational purposes only. If you should notice an error, please report it - we shall make every effort to have it rectified.
2. Remote Control Unit
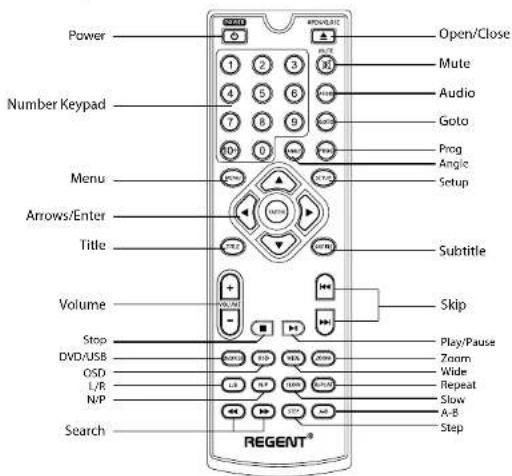
Description of buttons:
Power - Power the unit on and off
Number Keypad - For Input-
ting Number Digits
Menu – To bring up the DVD Player Menu
Arrows/Enter - Arrows are used
for moving around the Menus. En-
ter is used for Selecting.
Title - To Show the DVD Title
Volume – To adjust the DVD Player Volume
Stop - To Stop the DVD
DVD/USB - To select be-
tween DVD and USB Input
OSD – On Screen Display
L/R - Switches between the Left
and Right audio channels
N/P - To Select between NTC and PAL
Search – To search forward and backward
Open/Close - To open and clo-
se the DVD drawer
Mute - To mute the DVD Player
Audio - To change the audio setting
Goto - To go to a particular ti-
tle, chapter or time point
Prog - To play contents of disc in
the order you want by program-
ming the track to be played
Angle - To switch between Mul-
tiple Camera Angles
Setup - To access or exit the SETUP menu
Subtitle – To switch subtitles
Skip - To skip forward to back
Play/Pause - To play or Pause
Zoom - To enlarge the Picture
Wide - Change to wide view
Repeat - To toggle between dif-
ferent repeat modes
Slow - To view slowly
Step - Plays video frame by frame
3. Front panel and rear panel illustration
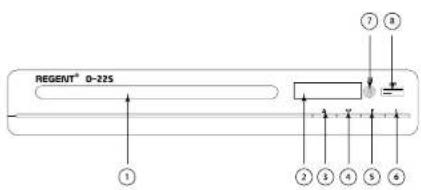
front of DVD player

- DVD door
- display window
- OPEN/CLOSE button
-
PLAY/PAUSE button
-
STOP button
- STANDBY button
- remote receiver window
- USB
back of DVD player
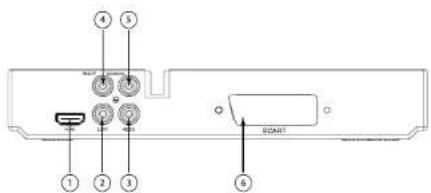
- HDMI connector
- RCA left audio output
-
RCA video output
-
RCA right audio output
- COAXIAL digital audio output
- SCART connector
4. Handling and connection
Power
Plug the attached AC cord into a standard AC power outlet to power the DVD player.
Connecting Video and Audio
Note: Before making or changing any connections, make sure that all the devices are disconnected from the power outlet.
Note: Both video and audio connections must be made from the DVD Player to your television.
RCA Stereo Audio Output:
- Use the RCA Stereo Audio Output to send audio from the DVD player to a television.
- Required an RCA audio cable.
- Use the RCA audio cable to connect the RCA Stereo Audio Output to an RCA stereo audio input on a television.
- Adjust the connected televisions input setting to match the input used in the previous step.
Coaxial Digital Audio Output:
- Use the Coaxial Digital Audio Output to send high quality audio from the DVD player to an audio system.
- Requires an RCA audio cable.
- Use the RCA audio cable to connect the Coaxial Digital Audio Output to a coaxial digital input on an audio system.
- Adjust the connected audio system's input setting to match the input used in the previous step.
- In the Digital Out portion of the setup menu, adjust to PCM, RAW or off.
Composite Video Output:
- Use the Composite Video Output to send video from the DVD player to a television.
- Requires an RCA video cable.
- Use the RCA video cable to connect the Composite Video Output to a composite video input on a television.
- Adjust the connected televisions input setting to match the input used in the previous step.
HDMI Output (Best):
Requires a HDMI cable (not Included)
- Use a HDMI cable to connect the HDMI Output to a HDMI input on a television.
- Adjust the connected televisions input setting to match the input used in the previous step.
- Set quality in the video settings.
DVD/CD
Loading a Disc
- Press the Open/Close button to open the Disc Drawer.
- Load a disc into the DVD player, label side facing up.
- Press the Open/Close button to close the Disc Drawer.
- After a disc is loaded, it will begin playing automatically.
Playing a Loaded Disc
- Follow the instructions for Loading a Disc.
- If the disc does not begin playing automatically, press Play/Pause button.
USB Disk/Stick
- Plug the USB drive into the port.
- The supported formats should appear in the file browser.
- Press DVD/USB to switch the mode.
- Use the navigation cross to navigate in the file browser.
5. Troubleshooting
Before Requesting Service check the following guide for possible cause of a problem before contacting service.
| Symptom Solution | |
| No power • Correctly connect the power cord to a wall outlet. | |
| No picture | • Select the correct picture input on the TV.• Connect the picture connector to the TV correctly.• Turn on the TV. |
| No sound | • Check the audio connections.• If you are using an AV receiver check a different connector or input settings. |
| The playback picture is of poor quality | • Clean up the disk. |
| DVD player does not start playback | • Insert a disc if there is no disc in the drive.• Insert a suitable disc in a supported format.• Clean the disc.• Insert the disc in the correct direction.• Disable the age lock or change its level. |
| There is a humming or noise | • Clean the device with a cloth moistened with alcohol.• Clean the disc.• Correctly connect the speakers and their components.• Move the TV away from the audio equipment. |
| The remote control is not working properly | • Point the remote control at the infrared sensor of the DVD.• Use the remote control within 5m.• Remove the obstacles.• Replace the batteries in the remote with working ones. |
| Color is distorted or not displayed | • If the picture is distorted or smudged, check that the color system is set to match that of the TV set. |
| The ø symbol appears in the display | • The DVD software is blocking the function at the moment.• The software does not support this function.• The function is not available at the moment. |
Technical Specifications
| System PAL/AUTO/NTSC | |
| Reception frequency 20HZ-20KHZ (at 1KHz 0dB) | |
| Signal to noise ratio ≥90dB (at 1KHz 0dB) | |
| Sound distortion and noise ≥-60dB (at 1KHz0dB) | |
| Audio output 2.0+0-1.0 Vrms | |
| Video output | Composite: 1.0±0.2Vp-pLoad impedance: 75Ω |
| Power Supply 110-240V~50/60Hz | |
| Supported drives | DVD/VCD/CD/MP3/Photo CD/SVCD/JPEG/MPEG-4 |
Inhaltsverzeichnis
DVD Player Frontplatte
- Safety measures
- Downloadable software
- About the instruction manual
- Markings and signs applied to the receiver
- Risk of electric shock - do not open
- CE logo
- Double insulation logo
- Take an active part in protecting the natural environment!
- The RoHS mark
- Laser hazard logo
- General information
- Main features:
- Box content:
- Important instructions concerning handling of the device
- Remote Control Unit
- Description of buttons:
- Front panel and rear panel illustration
- front of DVD player
- back of DVD player
- Handling and connection
- Power
- Connecting Video and Audio
- RCA Stereo Audio Output:
- Coaxial Digital Audio Output:
- Composite Video Output:
- HDMI Output (Best):
- Requires a HDMI cable (not Included)
- DVD/CD
- Loading a Disc
- Playing a Loaded Disc
- USB Disk/Stick
- Troubleshooting
- Inhaltsverzeichnis
Brand : Ferguson
Model : Regent DVD D-225
Category : DVD player