Milkstar 302772 - Milk frother Arendo - Free user manual and instructions
Find the device manual for free Milkstar 302772 Arendo in PDF.


| Product type | Milk frother |
| Brand | Arendo |
| Model | Milkstar 302772 |
| Power supply | 230-240 V ~, 50 Hz |
| Power consumption | 600-650 W |
| Standby consumption | ≤ 0.5 W |
| Frothing capacity | 175 ml (max) |
| Whisking capacity | 250 ml (max) |
| Operating modes | 3 (short heating, long heating, cold) |
| Hot frothing time | 60-240 seconds |
| Cold frothing time | 120 seconds |
| Hot whisking time | 300-420 seconds |
| LED indicator | Red, white, blue |
| Container material | Glass |
| Included accessories | Base station, glass jug with lid, frothing whisk, beating whisk, instruction manual |
| Dimensions (L x H x D) | 21 x 13 x 18 cm |
| Care | Wash with soapy water, do not immerse base |
| Safety | Automatic shut-off, overheat protection, do not touch hot parts |
| Use | Household only |
| Repairability | Cable replacement by qualified professional |
Frequently Asked Questions - Milkstar 302772 Arendo
User questions about Milkstar 302772 Arendo
0 question about this device. Answer the ones you know or ask your own.
Ask a new question about this device
Download the instructions for your Milk frother in PDF format for free! Find your manual Milkstar 302772 - Arendo and take your electronic device back in hand. On this page are published all the documents necessary for the use of your device. Milkstar 302772 by Arendo.
USER MANUAL Milkstar 302772 Arendo
MON-FRI 9:30am - 18pm CET
https://downloads.ganzeinfach.de/
Table of contents
- Deutsch....3
- English....22
- Français......40
- Italiano....60
- Español....78
- Produktdetails
natural_image
Line drawing of a hand holding a container with liquid, no text or symbols present8 Technische Daten
Important safety information
- Read all the instructions in this user manual carefully before using the appliance!
- This appliance can be used by children aged from 8 years and above or by persons with reduced physical, sensory or mental capabilities or lack of experience and knowledge if they have been given supervision or instruction concerning use of the appliance in a safe way and if they understand the hazards involved. Cleaning and user maintenance shall not be made by children unless they are older than 8 and supervised. Keep the appliance and its cord out of reach of children aged less than 8 years
• This appliance has to be grounded.
- Do not immerse in water or other liquids. There is a risk of short circuits
- Do not pour liquids on the plug
- Never operate damaged appliances
- Do not place the appliance on polished wood surfaces, as this could damage the wood.
- Never touch live parts
- Connect the appliance only to a properly installed socket with the correct voltage
- Do not use extension cords
- Never leave the main cable hanging loosely, do not remove the plug with wet hands, never lay or suspend the cable and the plug on hot surfaces and never let plugs and cables come into contact with oils
-
Unplug the appliance from the socket after every use
-
Unplug the appliance when it is not being used and before replacing any accessories or when cleaning the appliance as well
- Do not touch the metal parts and the body when the appliance is being used or has been used recently, as this may cause burns or scalding and the heating surface will still retain heat for some time after use.
• Always hold the appliance by its handle - Do not use this appliance with a damaged cable or plug. If the power cable is damaged, it must be replaced by the manufacturer, his service representatives or a similarly qualified person in order to avoid hazards.
-
Children should be supervised to ensure that they do not play with the appliance
-
Please do not operate outdoors!
- Please do not operate without milk in the container!
- Turn off the appliance and the main power when it is not being used.
- Never touch rotating parts. There is a risk of injury!
- The container may overflow if the capacity is exceeded.
- Use the appliance only in conjunction with the supplied base unit
- Never operate the product on uneven surfaces
- Use only fire blankets to extinguish fires on appliances
- The appliance is not designed for commercial or industrial purposes. It is only suitable for domestic use.
- Do not insert any objects and / or fingers into any openings in the appliance
arendio
- Turn off the appliance before disposal, disconnect the power cable and discard the appliance at an official disposal site
- Keep the appliance and the cable out of the reach of children under 8 years
- Never immerse the cable or plug in water or any other liquid to protect against fire, electric shock and injury to persons
- Supervision is necessary when the appliance is used by children or used in the vicinity of children
- Unplug before cleaning or remove the plug from the socket when the unit is not in use. Let the appliance cool down before cleaning, as soon as you fix or install parts
-
Never operate the appliance with a damaged cable or plug, after a defect or with any kind of damage.
-
Hand over the appliance to the nearest authorized dealer for checking, repair or adjustment.
- Using accessories, which are not recommended by the manufacturer may cause fire, electric shock or injury to persons
- Do not let the cable hang over the edge of the table or counter or touch hot surfaces
- Do not place on or near a hot gas or electric oven or in a heated oven
- Always insert the plug first in the appliance and then the cable into the socket. To switch off the appliance, turn the knob to "off" and then pull the plug out of the socket.
- Do not misuse the appliance for anything other than the intended purpose to prevent possible injury
aendio
- Scalding may occur if the lid is removed during operation
- This appliance is intended to be used in household and similar such as: Staff kitchen areas in shops and other working environments; Farm house; By clients in hotels and other residential type environments; Bed and breakfast offers
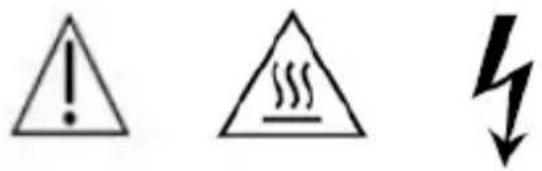
- Warning! The heating element is hot after use. Please let the device cool down before cleaning or touching in order to prevent injuries.
- Keep preserve these instructions carefully!
Thank you for choosing an Arendo product. Please read the following user manual carefully to have an enjoyable experience with your purchased product.
1. Scope of supply
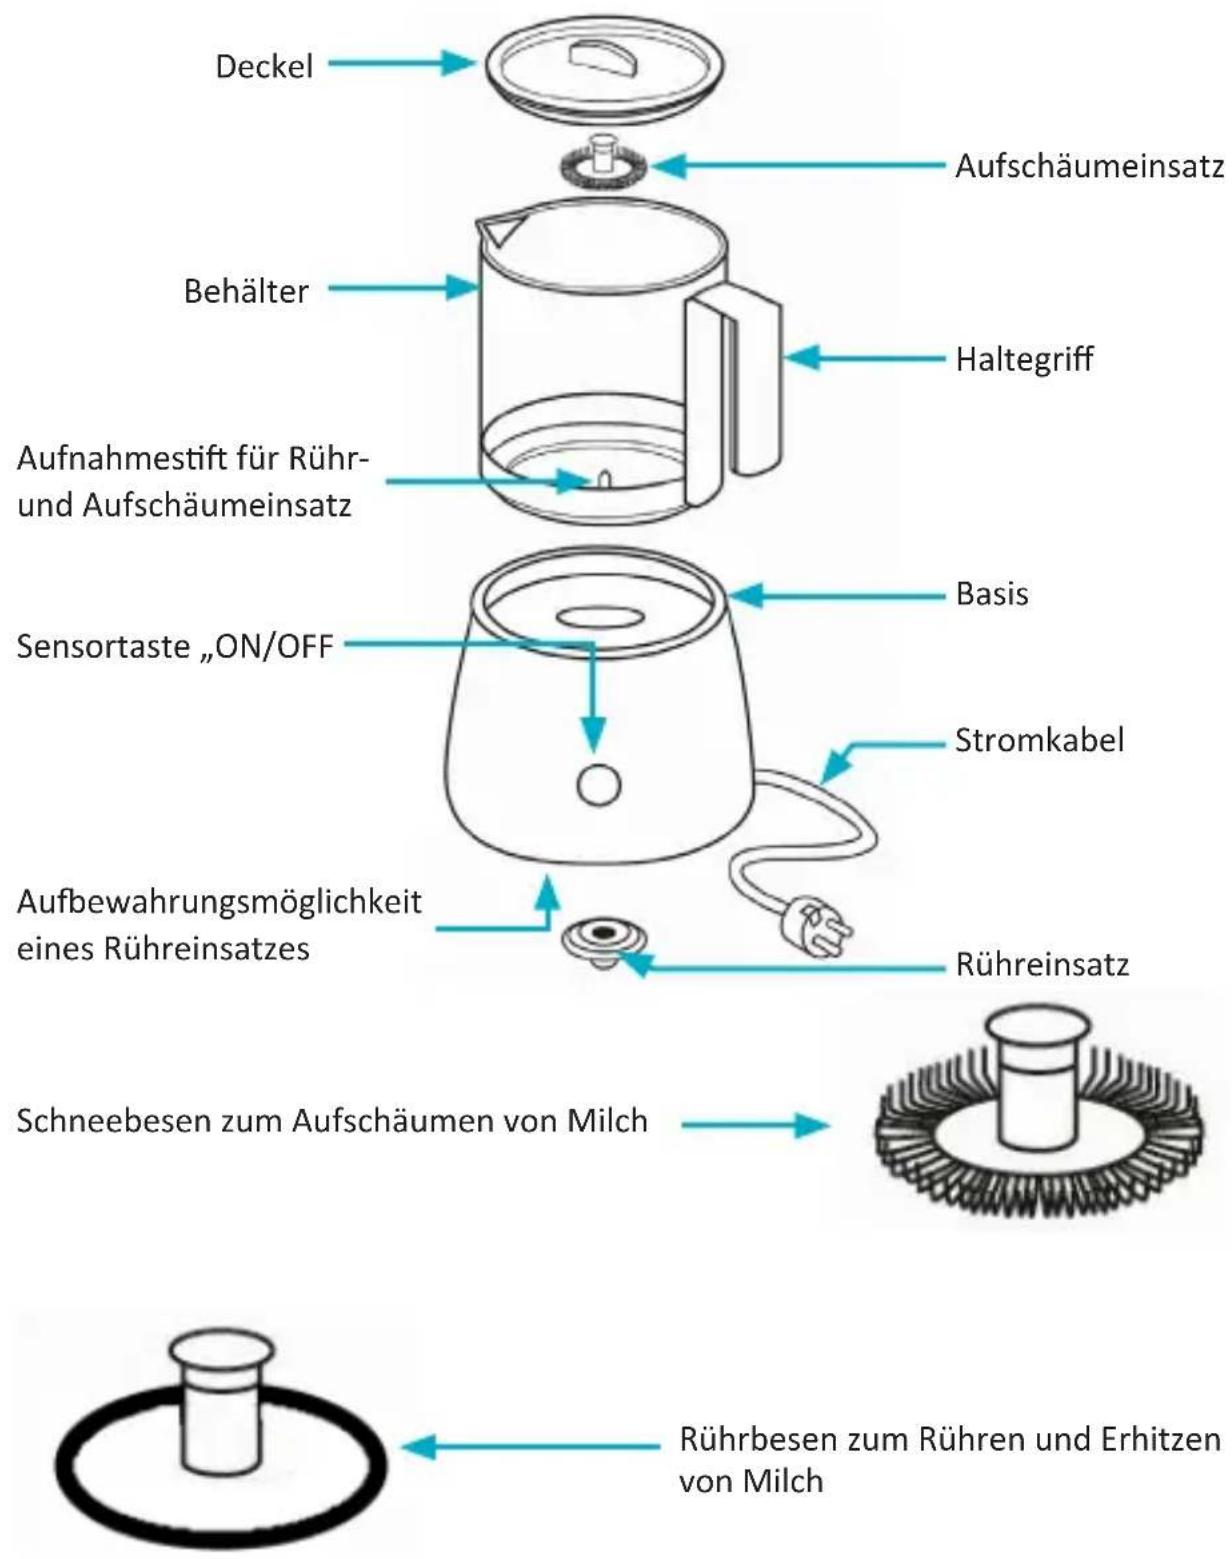
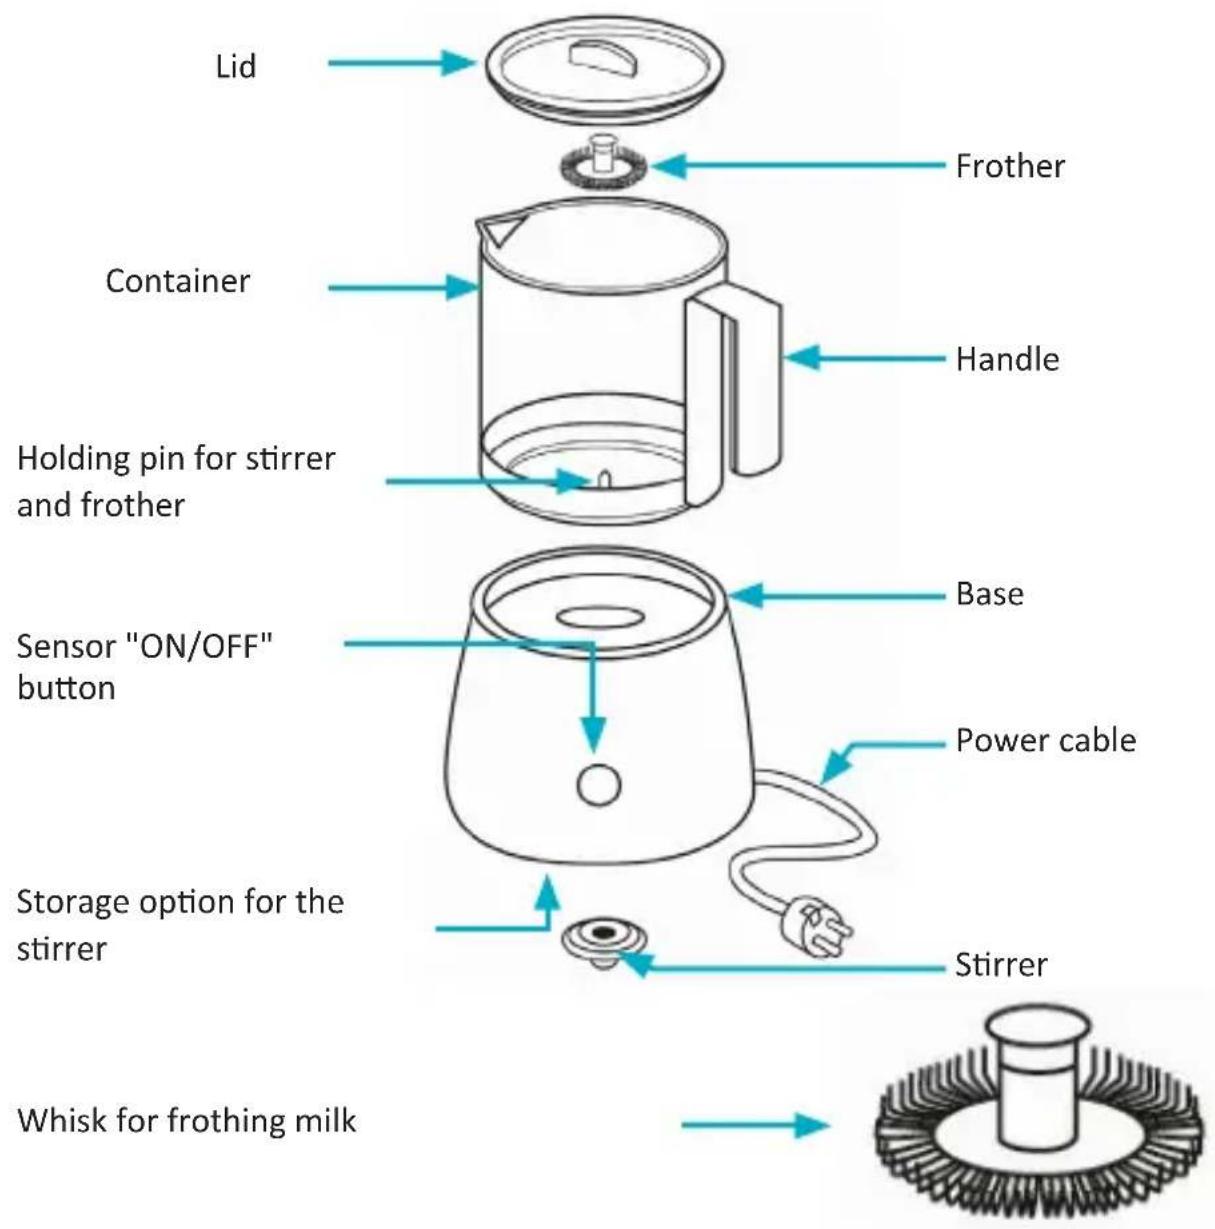
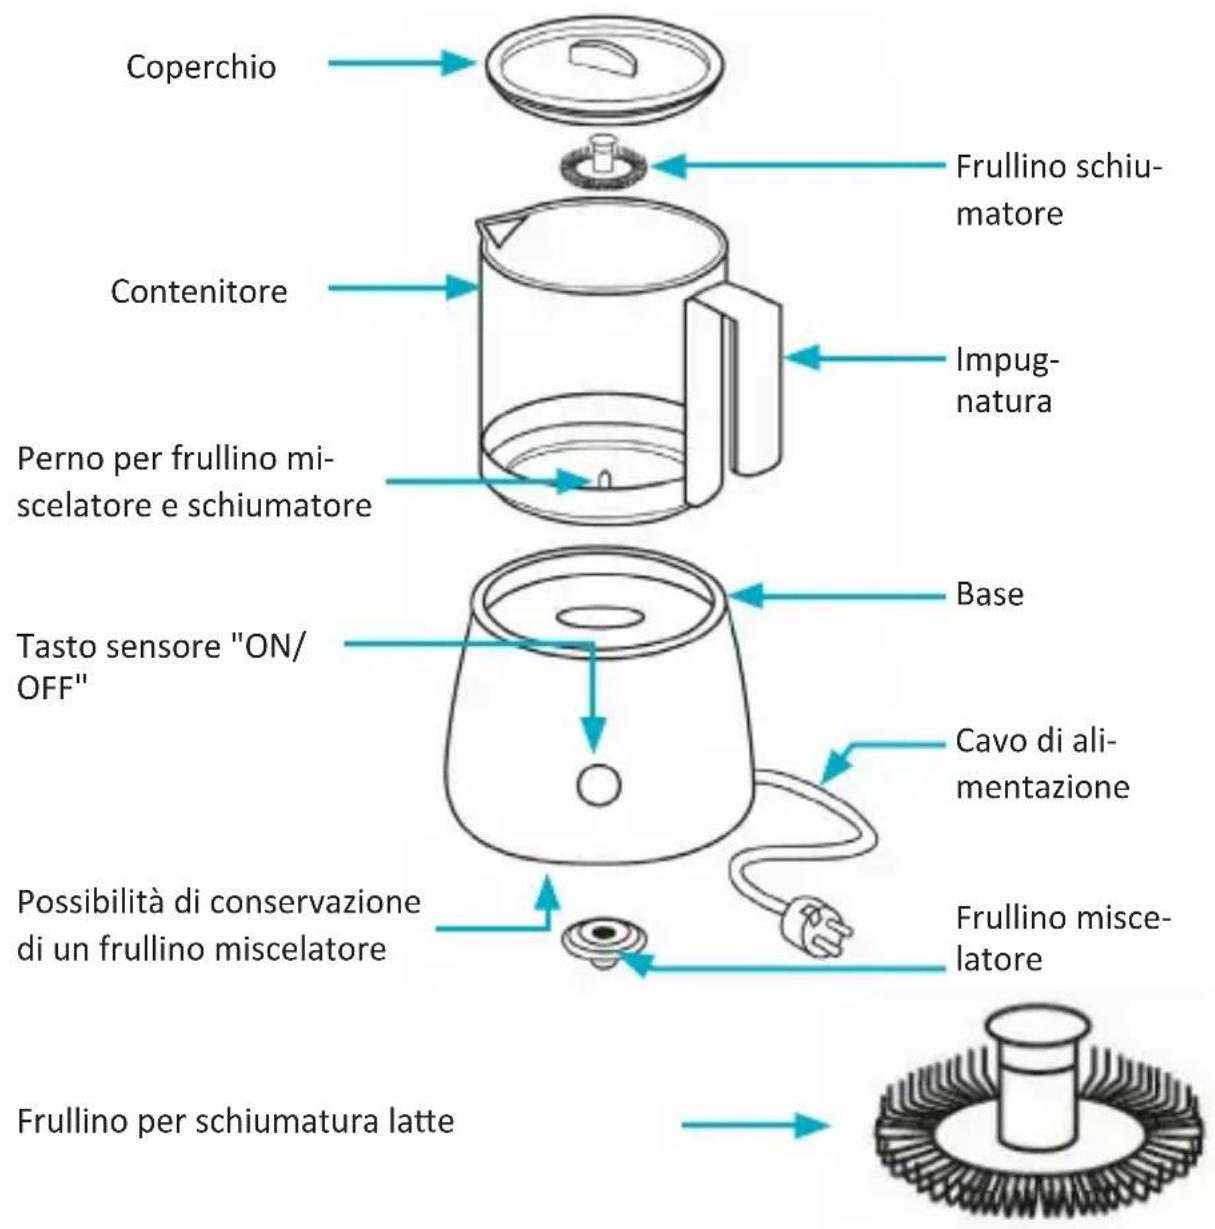
- Base unit with heating plate and connection cable
- Glass jug with lid
- Stirrer
- Frother
- User manual
2. Before You Start
- Unpack the carton carefully and keep all the packing materials until you ensure that the product is complete and working properly.
- Remove all packaging materials and films and preserve this booklet for possible future use. Check if the appliance has been delivered completely and is in proper condition.
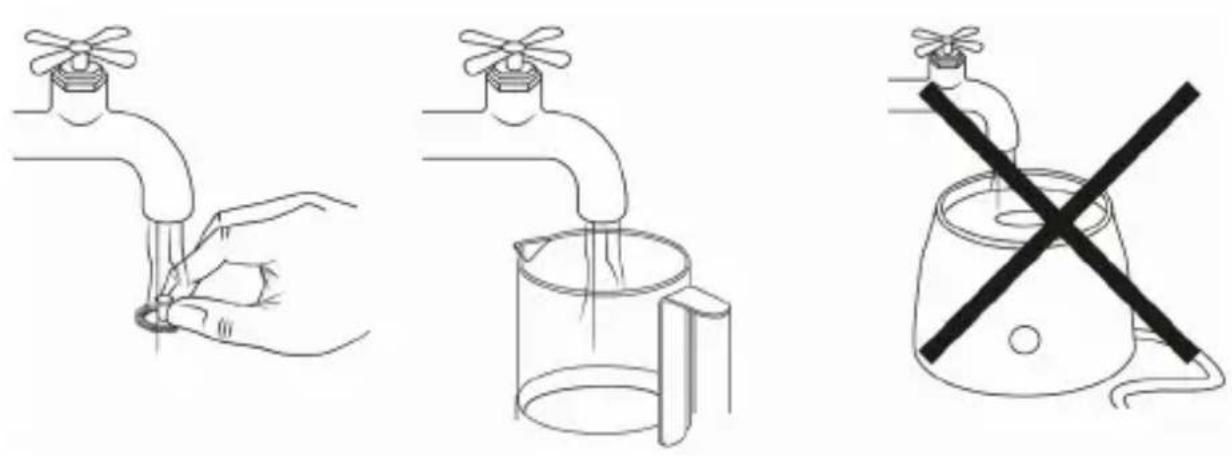
- Clean the container and the accessories before using the appliance for the first time as described in the chapter "Cleaning and Care", to remove dust or production residues.
- Never expose the base unit to water! Never immerse the appliance in water.
- Please note the tips and tricks in this manual!
3. Product details
4 Functions of the buttons
natural_image
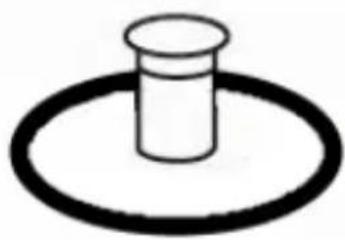
Simple line drawing of a cylindrical object on a circular base (no text or symbols)Whisk for stirring and heating milk
natural_image
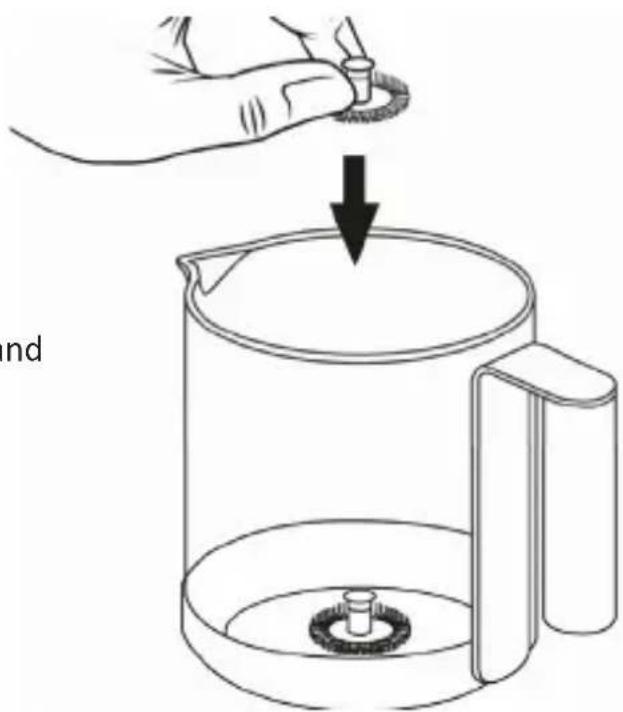
Illustration of a hand holding a small object above a container with a downward arrow, no text or symbols present.Select the appropriate attachment and fix it in the container.
The sensor button on the front of the base unit is used to switch on the appliance and to select the operating modes at the same time. The selection is confirmed by a short audible signal.
Caution! Use mode 2 (white LED) only for stirring mode!
| Sensor button | Function |
| Press once Sensor button glows red | |
| Press twice Sensor button glows white | |
| Press thrice Sensor button glows blue | |
| Press four times | Cancel / Switch off the appliance |
| LED colour Function | |
| Red Heating, | 60-240 seconds |
| White Heating, | 300-420 seconds |
| Blue normal flow (heating plate switched off), 120 seconds | |
5 Usage
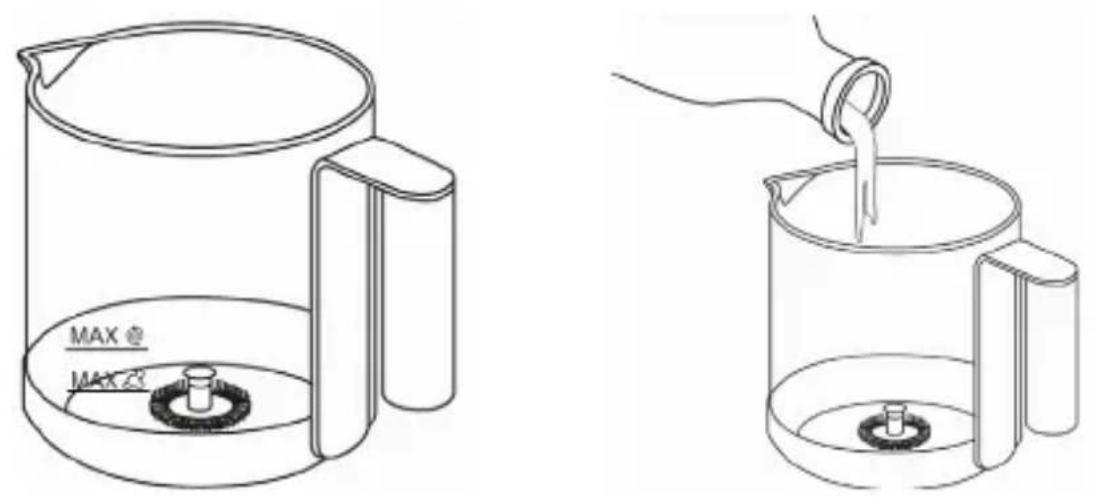
Please note that the maximum level is different for the various modes.
The maximum level is 175 ml for frothing ("MAX) The maximum level is 250ml for stirring ("MAX
5.1 Frothing function (milk froth)

- Remove the lid of the milk frother.
- Insert the desired attachment (stirrer or frother).
- Pour milk into the container. Ensure that you do not exceed the maximum level: Frothing 175 ml ("M:A Stirring 250ml (""). MAX
- Close the lid of the milk container and ensure that it is fixed correctly.
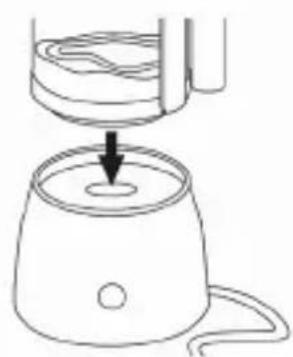
- Place the milk container on the base unit. Connect the power cable to a properly installed socket.
- Press the sensor button (" ") on the front of the base unit of the milk frother to switch on the appliance.
Press the sensor button "ON/OFF" on the front of the base unit to select the desired mode. An audible signal confirms the selection. And the ( ) symbol starts glowing in red on the button (heating plate switched on). If the ( ) symbol is blue, then the heating plate is switched off and the content is not being heated.
If the appliance is started, then the milk frother is automatically switched off after 60-240 seconds. The container is subsequently filled with hot or cold milk froth depending on whether you had switched the heating plate on or off ("red" or "blue" mode). If you want to switch off or stop the appliance during operation, press the sensor button ("") once again.
5.2 Stirring function (E.g. for cocoa)
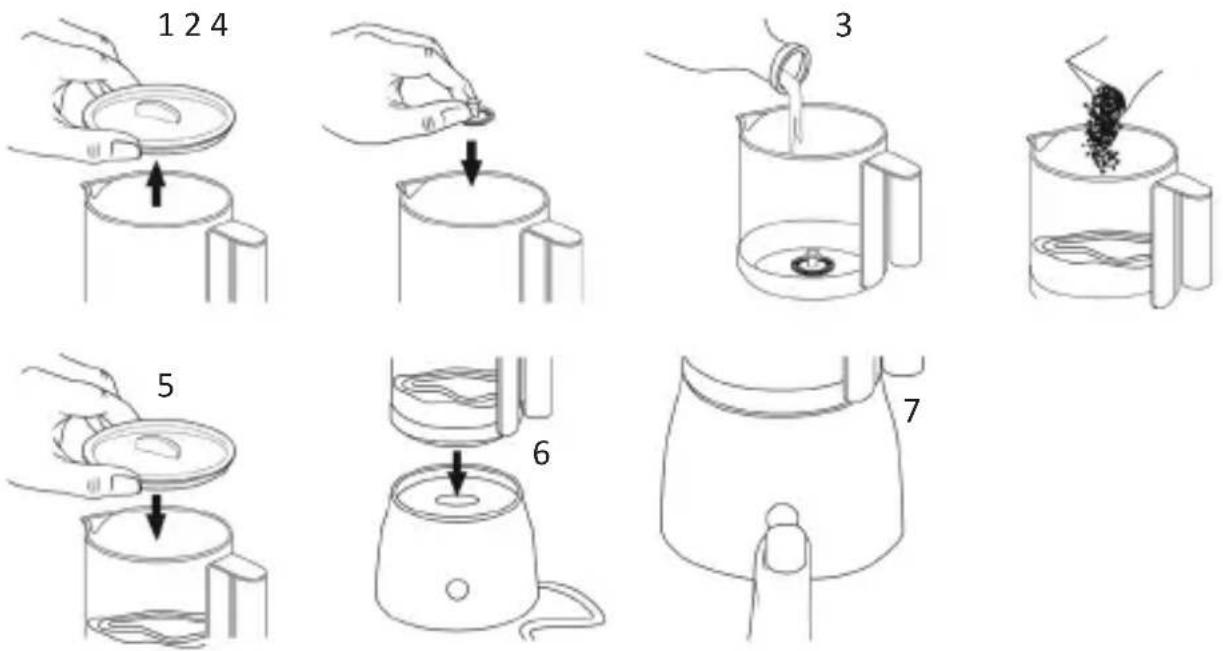
- Remove the lid of the milk frother.
- Insert the desired attachment (stirrer or frother).
-
Pour milk into the container. Ensure that you do not exceed the maximum level:
Frothing 175 ml ("M") Stirring 250ml ("").
MAX -
Add the desired mixing powder (e.g. cocoa powder).
-
Close the lid of the milk container and ensure that it is fixed correctly.
-
Place the milk container on the base unit. Connect the power cable to a properly installed socket.
-
Press the sensor button (" ") on the front of the base unit of the milk frother to switch on the appliance.
Press the sensor button (" ") on the front of the base unit to select the desired mode. An audible signal confirms the selection. And the ( ) symbol starts glowing in blue on the button (heating plate switched off). If the ( ) symbol is red or white, then the heating plate is switched on and the content is being heated. The white LED colour means a longer heating duration.
If the appliance is started, then the milk frother is automatically switched off after 300-420 seconds. The container is subsequently filled with hot or cold milk froth depending on whether you had switched the heating function on or off ("white" or "blue" mode). If you want to switch off or stop the appliance during operation, press the "ON/OFF" sensor button once again.
Tips and Tricks
Some useful tips are given in this chapter to help you get the most out of your milk frother.
| Whisk Functions | maximum level | |
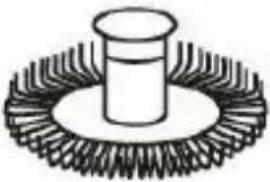 | Cold milk frothing | 175ml(MAX) |
| Frothing and heating | 175ml(MAX) | |
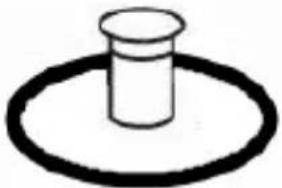 | Heating (with a very small amount of froth) | 250ml(MAX) |
natural_image
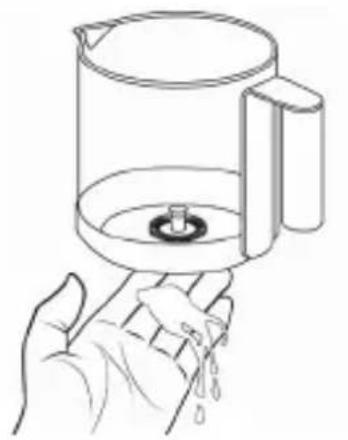
Line drawing of a hand holding a clear water dispenser with liquid dripping (no text or symbols)- If you want to speed up the frothing or stirring operation, we recommend you to wet the bottom of the milk container with some water.
- Use the milk frother to froth or heat milk. Prepare your coffee or hot chocolate during the process and serve the drink directly after completion.
- Use whole milk (fat content >3.0% ) for the best results.
- Cold milk can be foamed with this milk frother. But this does not mean that you can cool the milk with the appliance. The milk frother works in this state with the temperature of the milk.
- Store the brush in a safe place. These are very small in size and can be easily lost.
- Allow the appliance to cool down for two minutes after frothing or heating till the thermostat is reset and then the milk frother is ready for use again. Rinsing with water and subsequent drying after each use reduces this time.
- The milk frother is designed to froth and heat milk. If you add flavours such as coffee or cocoa powder in the milk frother, ensure that the appliance is cleaned immediately after use and thoroughly.
6. Tips on Serving
A selection of quick and easy drinks that you can prepare with the milk frother is given below.
7. Cleaning and care
| With frothed milk With hot milk | |
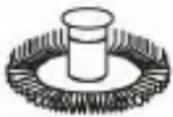 | 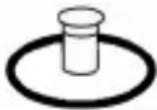 |
| Cappuccino:1/3 EspressoAdd 2/3 frothed milkAdd cocoa powder over the froth | Caffè Latte:1/3 EspressoAdd 2/3 hot milk and stir |
| Latte Macchiato:- Fill the frothed milk in a tall glass.- Carefully pour Espresso along the edge of the glass | Hot chocolate:- Add milk to the container- Add cocoa powder and mix milk and powder by stirring. Use the stirrer for this purpose |
Remove the container before cleaning the base unit. Separate the lid from the container. Never immerse the base unit in water. Do not start cleaning until the appliance has cooled down completely.
8 Technical data
| The container | Please clean it immediately after use. Rinse and clean the inside walls with warm soapy water and a non-abrasive cloth. Dry the container with a soft cloth. |
| The lid Wash it | directly with water. |
| The body | Clean the body with a soft cloth. Never use sharp cleaning objects,hard nylon brush or metal brush scratches on the stainless steel surface in order to avoid scratches on the stainless steel surface! Please do not clean with metal objects and scouring agents under any circumstances. Never immerse the base unit in water. |
| Stirring and frothing attachment | The attachments can be cleaned directly using water. Then thoroughly dry the attachments. |

| Power supply 230-240V AC ~, 50Hz | |
| Power input | max. 600-650WStandby: ≤0.5W |
| Capacity | up to 175ml (frothing) "MAX up to 250ml (heating/stirring) "MAX |
| Dimensions (HxWxD) in cm 21x13x18 cm | |

9. Safety instructions and liability disclaimer
Never try to open the device to carry out repairs or conversions. Avoid contact with mains voltages. Do not short-circuit the product. The device is not certified for use in the open air; only use it in dry conditions. Protect it from high humidity, water and snow. Keep it away from high temperatures. Do not subject the device to sudden changes in temperature or heavy vibration as this might damage electronic components. Examine the device for damage before using it. The unit should not be used if it has received an impact or has been damaged in any other way. Please observe national regulations and restrictions. Do not use the device for purposes other than those described in the instructions. This product is not a toy. Keep it out of the reach of children or mentally impaired persons. Any repair or alteration to the device not carried out by the original supplier, will invalidate the warranty or guarantee. The product may only be used by persons who have read and understood these instructions. The device specifications may change without any separate prior notice to this effect.

10. Disposal instructions
Electrical and electronic devices may only be disposed of in accordance with the European WEEE Directive and not with household rubbish. Components must be disposed of or recycled separately as dangerous, toxic elements can inflict sustained damage on the environment if they are disposed of incorrectly. As a consumer, you are bound by the Electrical and Electronic Devices Act (ElektroG) to return electrical and electronic goods free of charge at the end of their useful life to the manufacturer, the place of purchase or to specially set up, public collection points. The details in each case are governed by national law. The symbol on the product, the operating instructions and/or the packaging refers to these regulations. By separating materials in this way, recycling and disposing of old devices, you are making an important contribution towards protecting our environment.
WEEE guideline: 2012/19/EU
WEEE register number: DE 67896761
WD Plus GmbH, herewith declares that the products 302772 and 302704 conform to the principle requirements and other relevant stipulations. The complete Declaration of Conformity can be obtained from: WD Plus GmbH, Wohlenbergstraße 16, 30179 Hanover
natural_image
Simple line drawing of a cylindrical object on a circular base (no text or symbols)natural_image
Line drawing of a hand placing a small object into a container with a downward arrow indicating process (no text or symbols)natural_image
Line drawing of a coffee maker with labeled parts (MAX, MAX 23) and a central base (no text or symbols beyond labels)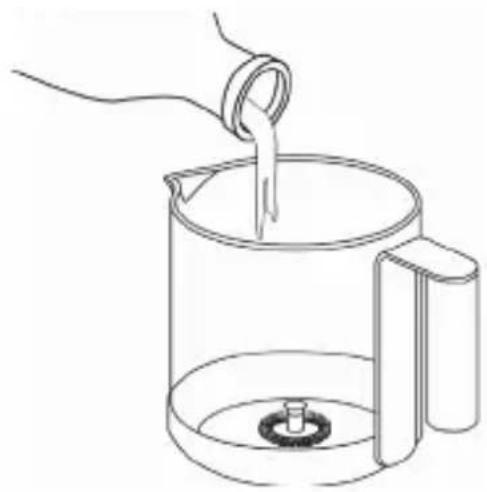
natural_image
Line drawing of a hand pouring liquid into a cylindrical container with a side handle (no text or symbols)natural_image
Illustration of a hand holding a lid above a container with an arrow indicating direction (no text or symbols)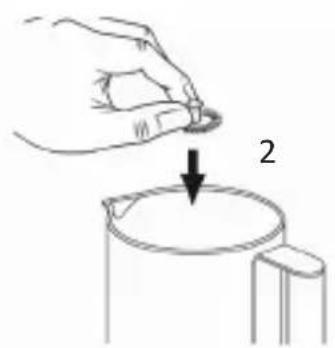
natural_image
Hand pouring liquid into a container with a downward arrow (no text or symbols)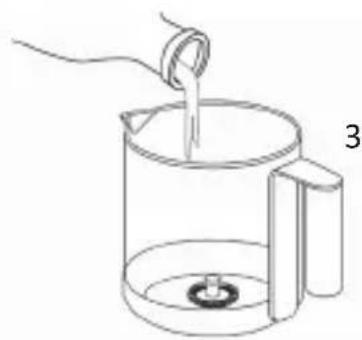
natural_image
Simple line drawing of a container pouring liquid into a cylindrical tank (no text or symbols)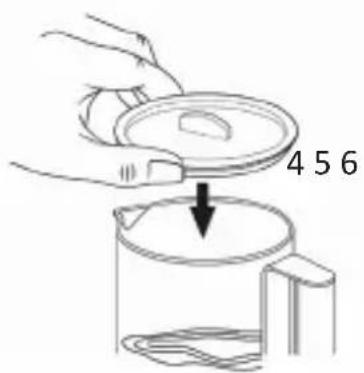
natural_image
Simple line drawing of a container being inserted into a container with a downward arrow indicating the process (no text or symbols)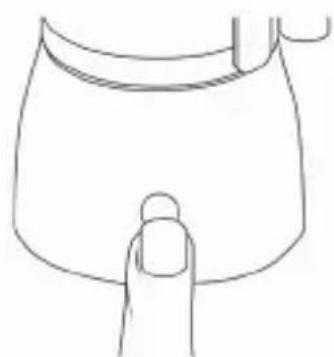
natural_image
Line drawing of a finger pressing down on a rounded object (no text or symbols)natural_image
Line drawing of a hand holding a glass container with liquid, no text or symbols present
- Funzione dei tasti
natural_image
Simple line drawing of a cylindrical object on a circular base (no text or symbols)natural_image
Illustration of a hand holding a small object being placed into a container with a side-mounted base (no text or symbols)natural_image
Line drawing of a hand holding a container with liquid, no text or symbols present8 Dati tecnici
natural_image
Simple line drawing of a cylindrical object on a circular base (no text or symbols)natural_image
Illustration of a hand holding a small object above a container with a downward arrow indicating process (no text or symbols)natural_image
Line drawing of a hand holding a transparent container with liquid, no text or symbols present8. Datos técnicos

- Table of contents
- Important safety information
- arendio
- aendio
- Scope of supply
- Before You Start
- Product details
- Usage
- Frothing function (milk froth)
- Stirring function (E.g. for cocoa)
- Tips and Tricks
- Tips on Serving
- Cleaning and care
- Safety instructions and liability disclaimer
- Disposal instructions
- Datos técnicos
Brand : Arendo
Model : Milkstar 302772
Category : Milk frother