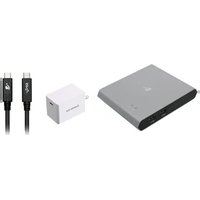
GUD3C04 - Network switch IOGEAR - Free user manual and instructions
Find the device manual for free GUD3C04 IOGEAR in PDF.


| Product Type | 2-Port USB-C KVM Switch |
| Brand | IOGEAR |
| Model | GUD3C04 |
| Number of Controlled Ports | 2 USB-C computers |
| Maximum Video Resolution | 3840 x 2160 at 30 Hz (PC source) / 1920 x 1200 at 60 Hz (smartphone) |
| Video Connectivity | 1 HDMI port |
| Peripheral Connectivity | 2 USB-A 3.0 ports |
| Host Connectivity | 2 USB-C ports with DP Alt |
| Power | USB-C Power Delivery (100 W adapter recommended, not included) |
| Power Distribution | Up to 75 W on port 1, 10 W on port 2 (with external 100 W adapter) |
| Switching | Remote switch included (2.5 mm cable) |
| LED Indicators | Selected port, blinking if insufficient power |
| Compatible Operating Systems | Windows 10+, macOS 10.12+, Android 8+, iPad Pro (2018+) |
| Special Features | Mirror mode, Samsung DeX support, USB sharing |
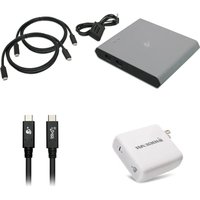
| Included Cables | 2 USB-C to USB-C cables |
| Included Accessories | Remote port switch, quick start guide, warranty card |
| Warranty | 3-year limited |
| Maintenance and Cleaning | Clean with a soft, dry cloth. Do not use liquids. |
| Safety | Use a certified LPS power adapter for optimal performance. |
| Spare Parts and Repairability | Cables and remote switch are replaceable. Power adapter is not included. |
Frequently Asked Questions - GUD3C04 IOGEAR
User questions about GUD3C04 IOGEAR
0 question about this device. Answer the ones you know or ask your own.
Ask a new question about this device
Download the instructions for your Network switch in PDF format for free! Find your manual GUD3C04 - IOGEAR and take your electronic device back in hand. On this page are published all the documents necessary for the use of your device. GUD3C04 by IOGEAR.
USER MANUAL GUD3C04 IOGEAR
2-Port USB-C™ KVM Switch with Power Delivery
1 x 2-Port USB-C KVM Switch
2 x USB-C to USB-C Cables
1 x Remote Port Selector
1 x Quick Start Guide
1 x Warranty
System Requirements
Console
- HDMI monitor
• Standard wired USB keyboard - Standard 3-button wired USB mouse
Computers
• USB-C sources with DP Alt mode over USB-C
Power
- For optimal performance, we recommend using a Limited Power Source (LPS) certified USB-C PD 100W power supply
Operating Systems
• Windows 10 (32/64 bit)+
- Mac OS X 10.12+
• Mac iOS X 10.12+ (iPad Pro® 2018 ^1 )
- Android 8 + ^2
^1 iPad Pro supports mirror video mode and USB keyboard
^2 Samsung DeX supported on Galaxy S10/S10+/S10e, Note9, S9/S9+, Note8, S8/8+, and Tab S4. Other Android devices support mirror screen.
Samsung and DeX are trademarks of Samsung Electronics Corp., Ltd. This product is not manufactured, sponsored, licensed or distributed by Samsung Electronics.
Overview
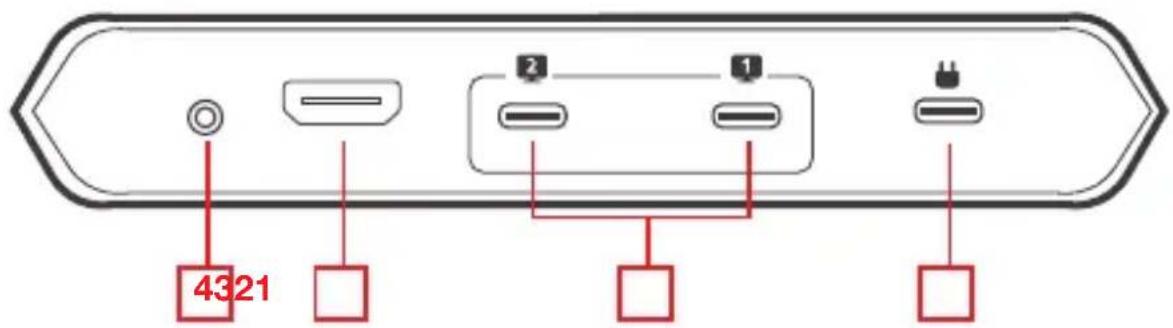
- USB-C power port (USB-C power supply not included in the package).
- Power Delivery pass-through requires USB-C external power adapter. For optimal performance, please use a Limited Power Source (LPS) certified USB-C PD 100W power supply The first 15W will supply the KVM, the next 10W will supply USB-C device connected to port #2, the last 75W will supply USB-C device connected to port #1. If no external power is connected, the KVM will draw 15W from USB-C device connected to port #1.
- HDMI video output
Up to 3840 x 2160 @30Hz for USB-C laptop sources
Up to 1920 x 1200 @60Hz for USB-C smartphone sources
- Remote selector port.
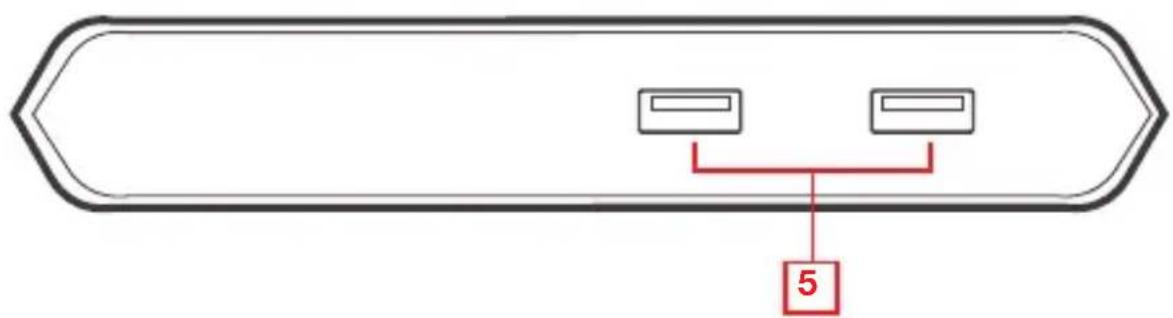
- 2 x USB 3.0 Type A ports for peripheral sharing.
flowchart
graph TD
    A[" "] --> C["5"]
    B[" "] --> C["5"]
Hardware Installation
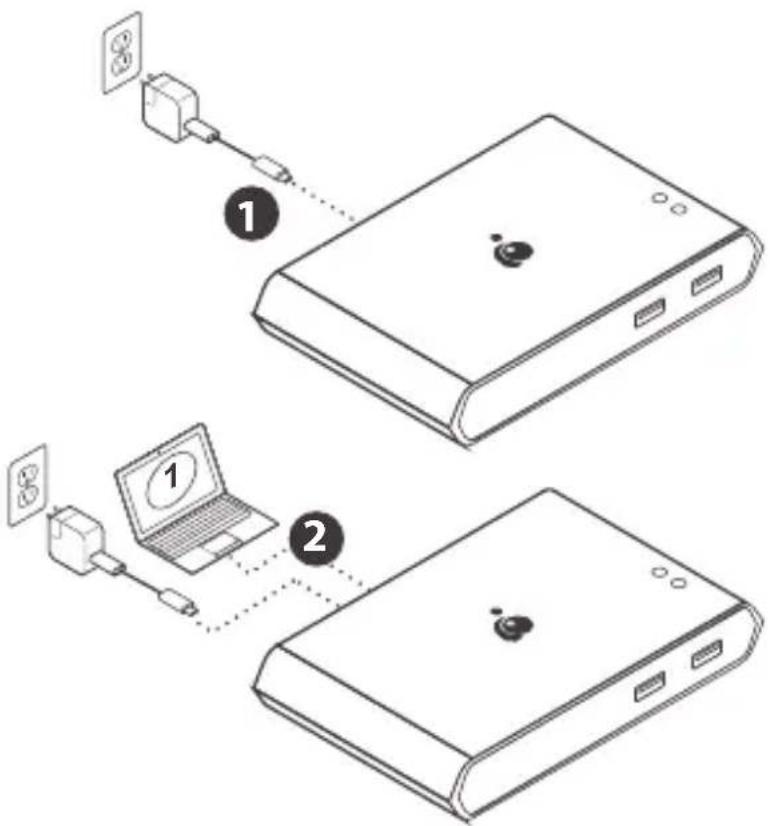
Step 1
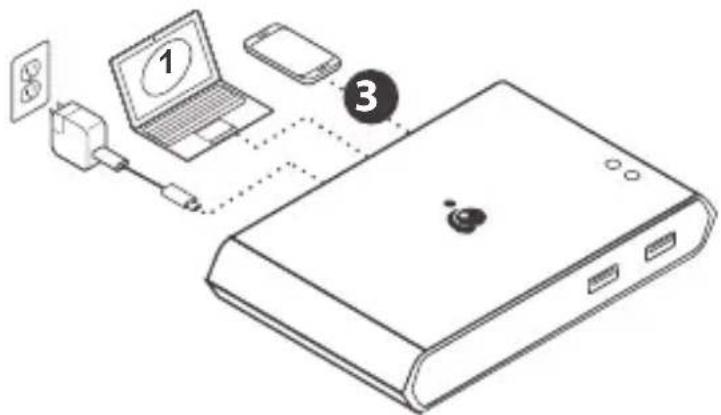
Connect an external USB-C power adapter (optional and not included) to the power port and the power source to support Power Delivery. We recommend not removing power source during setup.
Step 2
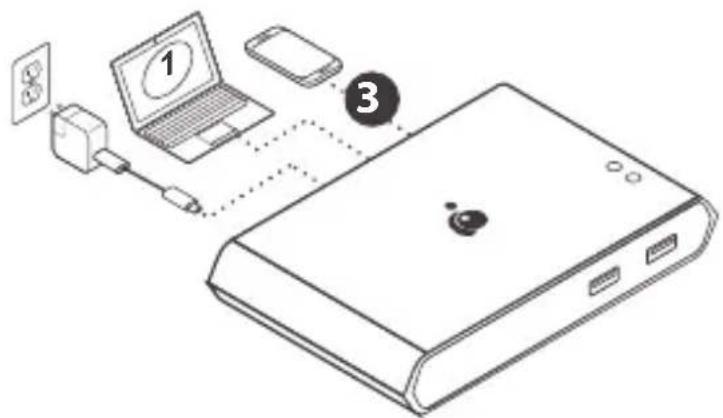
Connect the included USB-C cable from your USB-C computer to primary port #1 (up to 75W power delivery when an external USB-C power is connected).
Step 3
Connect the included USB-C cable from your second USB-C device to port #2 (up to 10W power delivery when an external USB-C power is connected).
Step 4
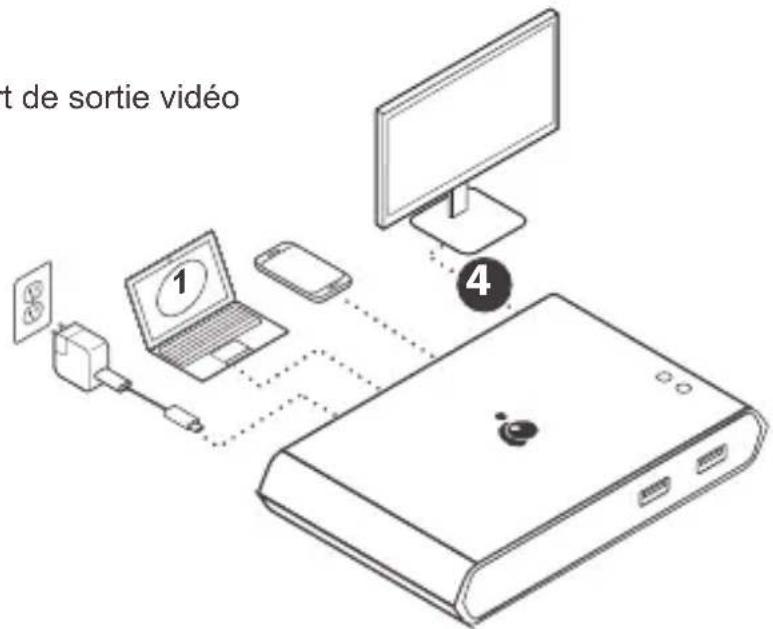
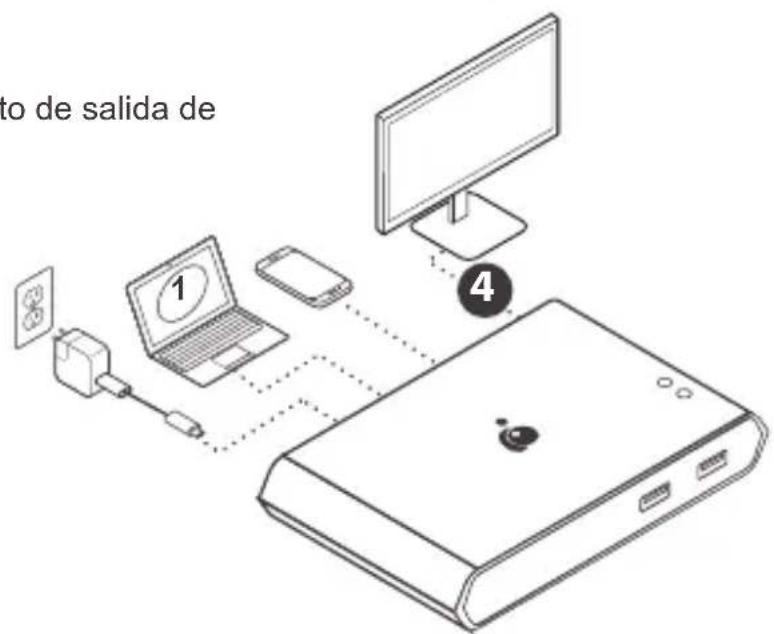
Connect an HDMI cable to the video output port and to an HDMI monitor.
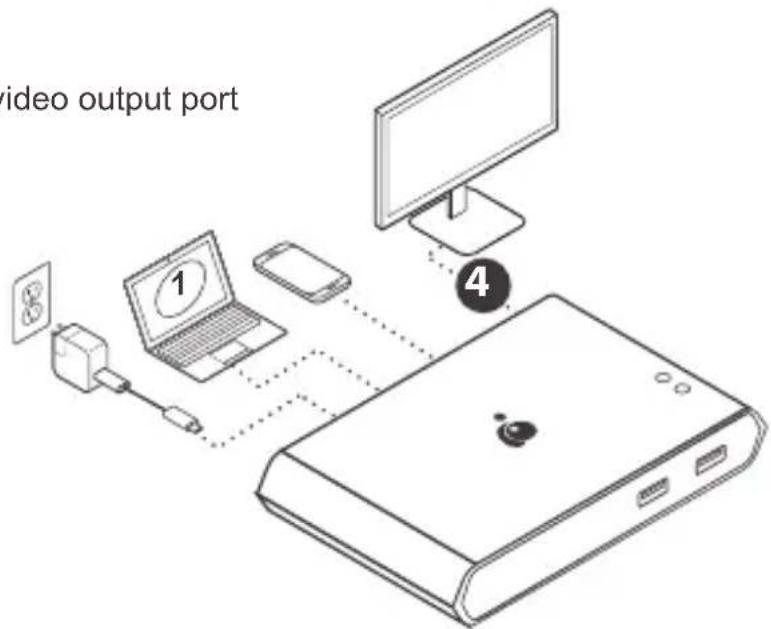
Step 5
Connect the USB-A peripheral devices to the USB-A ports.
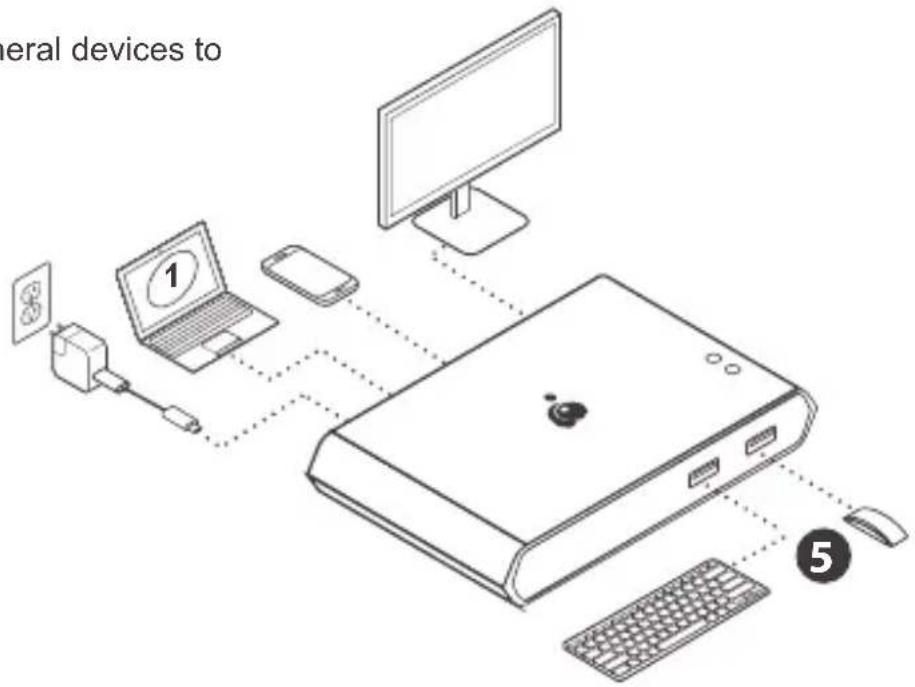
Step 6
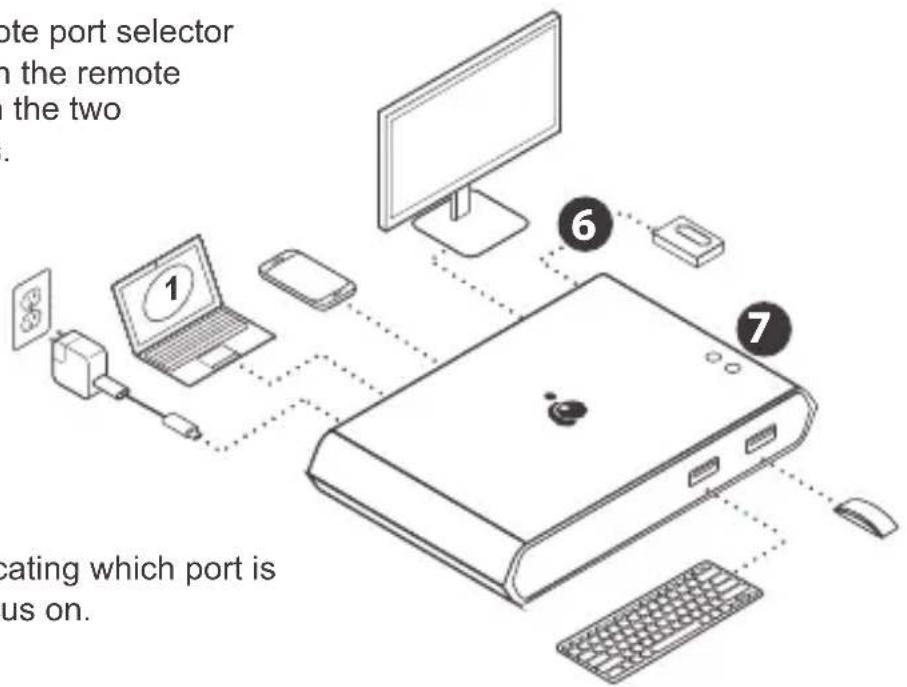
Connect the included remote port selector to the 2.5mm port. Click on the remote selector to switch between the two connected USB-C devices.
Step 7
Port LED will light up, indicating which port is selected and has KVM focus on.
Both port #1 and port #2 LED will flash if the KVM is drawing power more than 15W, and thus, needs to be connected to an external USB-C power adapter.
Federal Communication Commission Interference Statement
This equipment has been tested and found to comply with the limits for a Class B digital service, pursuant to Part 15 of the FCC rules. These limits are designed to provide reasonable protection against harmful interference in a residential installation. Any changes or modifications made to this equipment may void the user's authority to operate this equipment. This equipment generates, uses, and can radiate radio frequency energy. If not installed and used in accordance with the instructions, may cause harmful interference to radio communications. However, there is no guarantee that interference will not occur in a particular installation. If this equipment does cause harmful interference to radio or television reception, which can be determined by turning the equipment off and on, the user is encouraged to try to correct the interference by one or more of the following measures:
- Reorient or relocate the receiving antenna
- Increase the separation between the equipment and receiver
- Connect the equipment into an outlet on a circuit different from that to which the receiver is connected
- Consult the dealer or an experienced radio/TV technician for help
FCC Caution: Any changes or modifications not expressly approved by the party responsible for compliance could void the user's authority to operate this equipment.
This device complies with Part 15 of the FCC Rules. Operation is subject to the following two conditions:
(1) this device may not cause harmful interference, and
(2) this device must accept any interference received, including interference that may cause undesired operation.
CE Statement:
This device has been tested and found to comply with the following European Union directives: Electromagnetic Capability (2004/108/EC), Low Voltage (2006/95/EC) and R&TTED (1999/5/EC).
Limited Warranty
Warranty Information
This product carries a 3 Year Limited Warranty. For the terms and conditions of this warranty, please go to https://www.iogear.com/support/warranty
Register online at https://www.iogear.com/register
Important Product Information
Product Model
Serial Number
Contact
WE'RE HERE TO HELP YOU!
NEED ASSISTANCE SETTING UP THIS PRODUCT?
Make sure you:
- Visit www.iogear.com for more product information
- Visit www.iogear.com/support for live help and product support
IOGEAR
https://iogear.custhelp.com
support@iogear.com
www.iogear.com
flowchart
graph TD
    A[" "] --> C["5"]
    B[" "] --> C["5"]
Étape 1
https://iogear.custhelp.com
support@iogear.com
www.iogear.com
flowchart
graph TD
    A[" "] --> C["5"]
    B[" "] --> C["5"]
Paso 1
Paso 5
https://iogear.custhelp.com
support@iogear.com
www.iogear.com
- System Requirements
- Console
- Computers
- Power
- Operating Systems
- Overview
- Hardware Installation
- Step 1
- Step 2
- Step 3
- Step 4
- Step 5
- Step 6
- Step 7
- Federal Communication Commission Interference Statement
- CE Statement:
- Limited Warranty
- Warranty Information
- Contact
- WE'RE HERE TO HELP YOU!
- NEED ASSISTANCE SETTING UP THIS PRODUCT?
- IOGEAR
- Étape 1
- Paso 1
- Paso 5
Brand : IOGEAR
Model : GUD3C04
Category : Network switch