HA4000 - Receiver Hartke - Free user manual and instructions
Find the device manual for free HA4000 Hartke in PDF.


| Product type | Electric bass amplifier |
| Brand | Hartke |
| Model | HA4000 |
| Category | Receiver |
| Output power | 400 W RMS at 4 ohms |
| Minimum load impedance | 4 ohms |
| Instrument inputs | 2 1/4" jack inputs (passive and active) |
| Speaker outputs | 2 1/4" jack outputs for 4, 8 or 16 ohm speakers |
| Line outputs | Direct Out XLR, Preamp Out XLR, Line Out 1/4" jack |
| Tuner output | Tuner Out 1/4" jack (always active) |
| Subwoofer output | SBASS Out 1/4" jack (subharmonic signal) |
| Effects loop | Pre Send/Return and Post Send/Return (1/4" jack) |
| Equalization | 5 bands: Low, Parametric Mid Low, Parametric Mid High, High + Shape + DBASS |
| Special functions | Shape filter with Intensity, Mute with footswitch, Relay protection, Fan |
| Mains power | 115/230 V, 50-60 Hz |
| Fuse | 4 A/250 V (230 V) or 8 A/250 V (115 V) |
| Estimated consumption | Approximately 920 VA |
Frequently Asked Questions - HA4000 Hartke
User questions about HA4000 Hartke
0 question about this device. Answer the ones you know or ask your own.
Ask a new question about this device
Download the instructions for your Receiver in PDF format for free! Find your manual HA4000 - Hartke and take your electronic device back in hand. On this page are published all the documents necessary for the use of your device. HA4000 by Hartke.
USER MANUAL HA4000 Hartke
HA3000 Front Panel 5
HA3000 Rear Panel 6
HA4000 Front Panel 7
HA4000 Rear Panel 9
Setting Up and Using Your HA3000 / HA4000 11
Using Equalization and Shape 13
Specifications 45
FRANÇAIS
Introduction 15
Caractéristiques 16
Visite guidée 17
Produced by On The Right Wavelength for Samson Technologies Corp.
Copyright 1998, Samson Technologies Corp.
Printed September, 1998
Samson Technologies Corp.
575 Underhill Blvd.
P.O. Box 9031
Syosset, NY 11791-9031
Phone: 1-800-3-SAMSON (1-800-372-6766)
Fax: 516-364-3888
We know you don't like reading owners manuals, but you've just purchased one of the finest bass amplifiers around, and we want to tell you about it! So, before you plug in and start popping and slapping, we'd like to suggest you take just a few moments out to scan these pages. We'll make it as painless as possible, we promise—and, who knows, you might just pick up a tip or two.
Both the HA3000 and HA4000 are optimized for use with electric bass instruments. The two models differ in their power ratings—the HA3000 provides 300 watts of power (into 4 ohms), while the HA4000 provides 400 watts of power (into 4 ohms)—and the HA4000 also provides a number of advanced features, such as parametric equalization and a dedicated subwoofer output. You'll find either to be an ideal bass amplifier for live performance use in medium and large-size venues and in recording environments as well.
In these pages, you'll find a detailed description of the many features of the HA3000 and HA4000 Bass Amplifiers, as well as a guided tour through their front and rear panels, step-by-step instructions for setting up and using the amp, additional information about equalization and a unique Shape control, plus full specifications. You'll also find a warranty card enclosed—please don't forget to fill it out and mail it so that you can receive online technical support and so we can send you updated information about this and other Hartke and Samson products in the future.
SPECIAL NOTE: Should your Hartke HA3000 or HA4000 Bass Amplifier ever require servicing, a Return Authorization (RA) number is necessary. Without this number, the unit will not be accepted. If purchased in the United States, please call Samson at 1-800-372-6766 for a Return Authorization number prior to shipping. Please retain the original packing materials and, if possible, return the unit in its original carton and packing materials. If purchased outside of the United States, contact your local distributor for servicing information.
HA3000 / HA4000 Features
The Hartke HA3000 and HA4000 offer all the newest concepts in state-of-the-art bass amplification. Here are some of their main features:
- Power to spare—in the case of the HA3000, 300 watts into 4 ohms, and, in the case of the HA4000, a whopping 400 watts into 4 ohms.
- Two independent inputs that accommodate both passive and active bass guitars. It is almost impossible to overload the input of your HA3000 or HA4000!
- Dual speaker outputs so you can connect two 8 ohm speaker cabinets without the need for daisy-chaining.
- Protection relay circuitry that protects connected speakers from dangerous overloading and also prevents “thumps” when powering on or off.
- Fan-cooled to avoid thermal and overheating problems.
- Dual effect loop send and return jacks (one pair post-eq and the other pre-eq) that allow you to connect to professional outboard effects processors.
- Electronically balanced XLR Direct and Preamp outputs provide a convenient means of routing signal to professional mixing consoles in both live performance and recording environments. In addition, an unbalanced 1/4" Line output allows you to connect slave amplifiers.
- Ground lift switch helps prevent hum or buzz from entering the Direct Out and Preamp Out signals.
- Four bands of high-quality equalization, allowing you to create a broad range of tonal colors for your bass instrument. In the HA4000, the two mid-bands are fully parametric, with sweepable center frequency and adjustable bandwidth control. In addition, the HA4000 provides a fifth, "DBASS" (Deep Bass) band—a harmonic enhancer which adds extremely low frequencies to your bass signal.
- A unique contour filtering system called “Shape” which activates a multi-band equalization curve and notch filter specially designed to enhance the sound of the electric bass. Front-panel Shape and Intensity controls allow you to continuously sweep the filter through various frequency areas in order to customize the effect of the curve to the specific tonal characteristics of your particular bass instrument.
- In the HA4000, a unique dedicated "SBASS" (Sub Bass) output provides subharmonic line-level signal for connection to an external amplifier driving a subwoofer.
- In the HA4000, a front-panel Audio Mute control and rear-panel Mute footswitch input allow you to temporarily silence all outputs—except the dedicated Tuner output—while tuning your bass.
- Side handle for convenient, easy transporting.
- Rugged construction make both the HA3000 and HA4000 eminently roadworthy.
Guided Tour - HA3000 Front Panel
flowchart
graph LR
    A["1"] --> B["INPUT 1 INPUT 2"]
    B --> C["VOLUME SHAPE INTENSITY LOW AND LOW MID HIGH"]
    C --> D["HA3000"]
    D --> E["DIRECT OUT<br>ENLANCED<br>+10kV -500mA"]
    E --> F["POWER"]
    F --> G["6"]
    G --> H["7"]
    H --> I["8"]
    style A fill:#f9f,stroke:#333
    style I fill:#bbf,stroke:#333
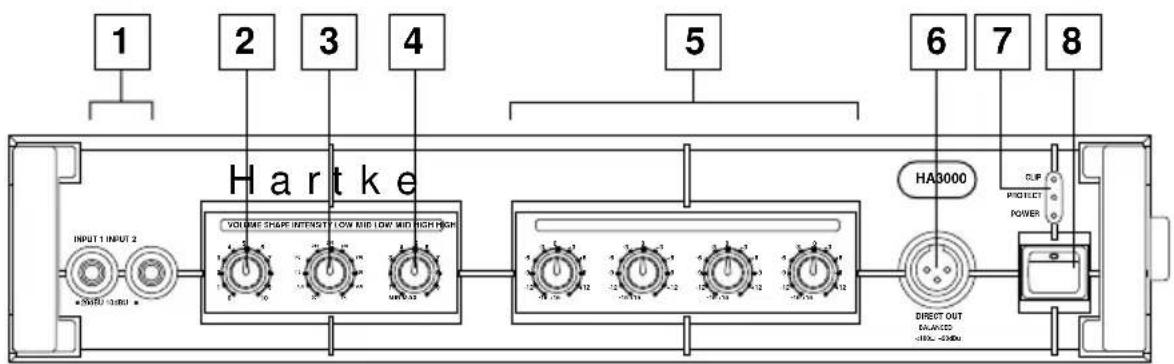
- Inputs - Connect your bass guitar to one of these standard 1/4" unbalanced jacks. If your bass has passive electronics (that is, if it has no battery), connect it to Input 1, which is designed to handle low-level signals. If your bass has active electronics (that is, if it has a battery), connect it to Input 2, which employs a 10 dB pad and is designed to handle hotter bass pickup signals.
- Volume control - This is the overall volume control. For best signal-to-noise ratio, keep the output of your bass at or near maximum and set the HA3000 Volume to the desired level.
- Shape control - In conjunction with the Intensity control (see #4 below), this control applies a specialized 20 dB notch filter to the specified frequency area so that you can customize the effect of the Shape curve to best complement your particular bass instrument. Moving the Shape control clockwise causes the notch filter to be applied to higher frequencies, while moving it counterclockwise causes it to be applied to lower frequencies. At the fully clockwise position, the filter is applied to the 1 kHz frequency area; this will act to attenuate mid-range frequencies and give your bass a deep, low tone. At the fully counterclockwise position, the filter is applied to the 90 Hz frequency area; this will act to attenuate low frequencies and give your bass a biting, trebly sound. For more information, see the "Using Equalization and Shape" section on page 11 in this manual.
- Intensity control - Determines the degree to which the Shape curve (set with the Shape control; see #3 above) affects the signal; the higher the Intensity, the greater the effect of the notch filter. When set to 0, the Shape curve has no effect.
- EQ controls - These four controls provides approximately 15 dB of cut or boost at each of four frequency areas: 80 Hz (Low), 220 Hz (Low Mid), 770 Hz (High Mid), and 5 kHz (High). When the equivalent knob is at the 12 o'clock ("0") position, there is no boost or attenuation (flat response). As it is turned clockwise from the "0" position, the corresponding frequency area is boosted; as it is turned counterclockwise from the "0" position, the corresponding frequency area is attenuated. For more information, see the "Using Equalization and Shape" section on page 11 in this manual.
- Direct Out - This standard balanced XLR jack provides an instrument-level output signal which is pre-EQ, pre-Shape and pre-Volume. This is generally used to send "dry" signal from the HA3000 to a PA system or recording mixing console.
- Status LEDs - The bottom "Power" LED lights whenever the HA3000 is powered on (see #8 below). The top "Clip" LED lights whenever the output signal rises to an unacceptably high distortion level. The center "Protection" LED goes on for approximately five seconds when the HA3000 is powered on and fades slowly when it is powered off. While it is lit, all connected speakers are muted via mechanical relay, thus preventing any "thump" from occurring.
- Power switch - Use this to power the HA3000 on or off.
Guided Tour - HA3000 Rear Panel
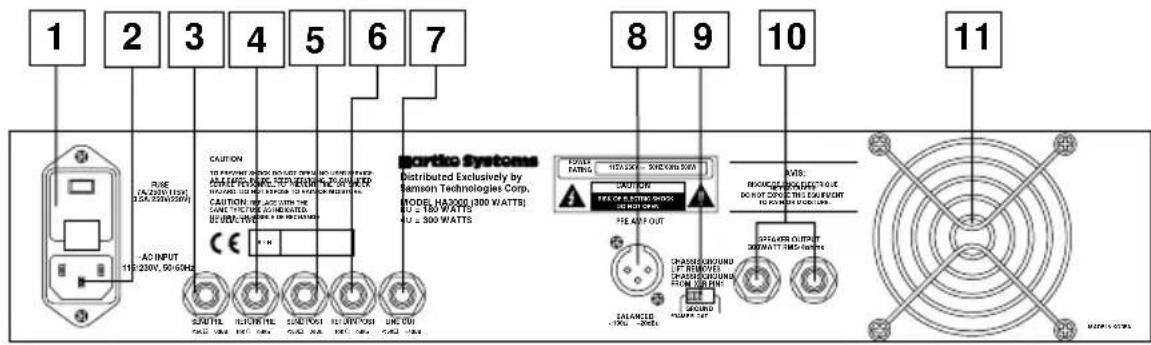
- Fuse holder - Holds a 5A/250V fuse for 115 volt operation or a 2.5A/250V fuse for 230 volt operation
- AC input - Connect the supplied standard 3-pin "IEC" plug here.
- Send Pre - Use this 1/4" unbalanced jack to send signal to a professional outboard effects processor.* Output level is approximately 0 dB to +4 dB and is pre-EQ and pre-Shape but post-Volume control.
- Return Pre - Use this 1/4" unbalanced jack to return signal from a professional outboard effects processor.* Signal is returned before the EQ and Shape controls but after the Volume control.
- Send Post - Use this 1/4" unbalanced jack to send signal to a professional outboard effects processor.* Output level is approximately 0 dB to +4 dB and is post-EQ, post-Shape, and post-Volume control.
- Return Post- Use this 1/4" unbalanced jack to return signal from a professional outboard effects processor.* Signal is returned after the EQ, Shape and Volume controls.
- Line Out - This standard unbalanced 1/4" jack provides a line-level (+4 dBu) post-EQ, post-Shape and post-Volume output signal from the HA3000. You'll usually use this to connect the HA3000 to additional slave amplifiers.
- Preamp Out - This standard balanced XLR jack provides a -20 dBu level post-EQ, post-Shape and post-Volume output signal from the HA3000. This is generally used to send the sound of the HA3000 (that is, the equalized, shaped signal) to a PA system or recording mixing console.
- Ground Lift switch - Used to reduce any hum or buzz that may be present in the Direct Out and Preamp Out signals (see #6 on page 3 and #8 above). When set to the right, "Float" position, chassis ground is removed from XLR pin 1.
- Speaker outputs - Connect any 4, 8, or 16 ohm bass cabinet(s) to these standard unbalanced 1/4" jacks. WARNING: Because of the high power levels and low frequency content of the signal generated by the HA3000, use only appropriately rated speaker cabinets (at least 300 watts at 4 ohms) that are specifically designed for bass instruments. The minimum impedance of all connected speakers must not go below 4 ohms (i.e., don't plug in two 4-ohm cabinets!).
- Fan - This variable speed fan provides vital cooling to your HA3000 (the hotter the amp gets, the faster the fan blows!). Make sure that it is kept free of all obstructions and that cool, fresh air is accessible at all times. Also, try to ensure that the HA3000 is used in a dust-free environment.
Guided Tour - HA4000 Front Panel
-
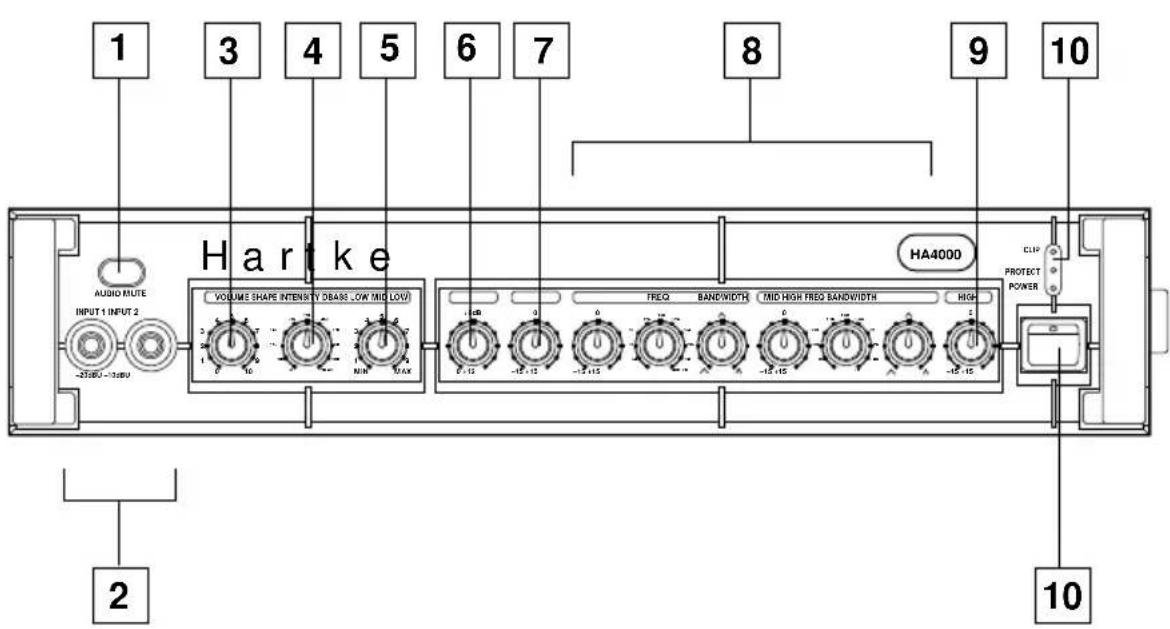
Audio Mute switch - When pressed in (down), all of the HA4000 outputs except the rear-panel Tuner Out (see #8 on page 8) are temporarily silenced, muting the audio signal and allowing you to easily tune your bass between songs. To restore audio signal to all outputs (including the Tuner Out, which is always active), simply press the Audio Mute switch again so it it in its "out" (up) position. A similar function can be provided by a footswitch (see #3 on page 7).
-
Inputs - Connect your bass guitar to one of these standard 1/4" unbalanced jacks. If your bass has passive electronics (that is, if it has no battery), connect it to Input 1, which is designed to handle low-level signals. If your bass has active electronics (that is, if it has a battery), connect it to Input 2, which employs a 10 dB pad and is designed to handle hotter bass pickup signals.
-
Volume control - This is the overall volume control. For best signal-to-noise ratio, keep the output of your bass at or near maximum and set the HA4000 Volume to the desired level.
-
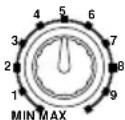
Shape control - In conjunction with the Intensity control (see #5 below), this control applies a specialized 20 dB notch filter to the specified frequency area so that you can customize the effect of the Shape curve to best complement your particular bass instrument. Moving the Shape control clockwise causes the notch filter to be applied to higher frequencies, while moving it counterclockwise causes it to be applied to lower frequencies. At the fully clockwise position, the filter is applied to the 1 kHz frequency area; this will act to attenuate mid-range frequencies and give your bass a deep, low tone. At the fully counterclockwise position, the filter is applied to the 90 Hz frequency area; this will act to attenuate low frequencies and give your bass a biting, trebly sound. For more information, see the “Using Equalization and Shape” section on page 11 in this manual.
-
Intensity control - Determines the degree to which the Shape curve (set with the Shape control; see #4 above) affects the signal; the higher the Intensity, the greater the effect of the notch filter. When set to 0, the Shape curve has no effect.
Guided Tour - HA4000 Front Panel
- DBASS control - This unique harmonic enhancer adds ultra-low frequencies ("Deep Bass") to the output of the HA4000. As you move the knob clockwise, more and more of this signal is added (up to 12 dB). When set to 0, no Deep Bass signal is added.
- Low EQ control - This control provides approximately 15 dB of cut or boost at 140 Hz, with a peak (bell) curve. When the knob is at the 12 o'clock ("0") position, there is no boost or attenuation (flat response). As it is turned clockwise from the "0" position, the frequency area is boosted; as it is turned counterclockwise from the "0" position, the frequency area is attenuated. For more information, see the "Using Equalization and Shape" section on page 11 in this manual.
- Mid Low and Mid High EQ controls - These controls provide two bands of fully parametric equalization for total customization of the HA4000 to match your instrument, selected speaker, and style of playing. Approximately 15 dB of cut or boost are available for each band. When the "Mid Low" or "Mid High" knob is at the 12 o'clock ("0") position, there is no boost or attenuation (that is, flat response). As it is turned clockwise from the "0" position, the selected frequency area is boosted; as it is turned counterclockwise from the "0" position, the selected frequency area is attenuated. The frequency of the Mid Low control can be swept between 40 and 400 Hz, while the frequency of the Mid High control can be swept between 300 Hz and 6 kHz. Each band also has an associated bandwidth control. As this is turned clockwise, the width of the equalization curve is narrowed and only a small frequency range is affected; as it is turned counterclockwise, the width of the equalization curve is expanded and a greater frequency range is affected. For more information on the use of these controls, see the "Using Equalization and Shape" section on page 11 in this manual.
- High EQ control - This shelving control provides approximately 15 dB of cut or boost at 5 kHz. When the knob is at the 12 o'clock ("0") position, there is no boost or attenuation (flat response). As it is turned clockwise from the "0" position, the frequency area is boosted; as it is turned counterclockwise from the "0" position, the frequency area is attenuated. For more information, see the "Using Equalization and Shape" section on page 11 in this manual.
- Status LEDs - The bottom "Power" LED lights whenever the HA4000 is powered on (see #11 below). The top "Clip" LED lights whenever the output signal rises to an unacceptably high distortion level. The center "Protection" LED goes on for approximately five seconds when the HA4000 is powered on and fades slowly when it is powered off. While it is lit, all connected speakers are muted via mechanical relay, thus preventing any "thump" from occurring.
- Power switch - Use this to power the HA4000 on or off.
Guided Tour - HA4000 Rear Panel
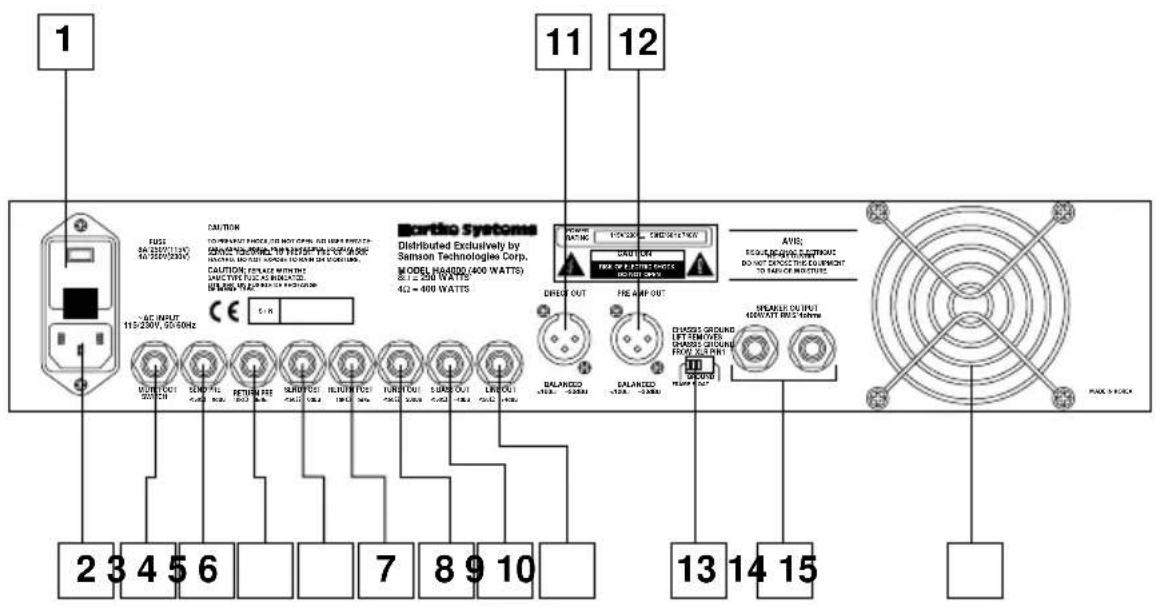
- Fuse holder - Holds a 8A/250V fuse for 115 volt operation or a 4A/250V fuse for 230 volt operation
- AC input - Connect the supplied standard 3-pin "IEC" plug here.
- Mute Footswitch - Connect a standard single-pole latched (maintained contact) footswitch to this 1/4" unbalanced jack here. To activate the footswitch, press in the front-panel Audio Mute switch (see #1 on page 5) so that it is in the "in" (down) position, then step on the footswitch. When you next step on the footswitch, all of the HA4000 outputs except the rear-panel Tuner Out (see #8 on page 8) are temporarily silenced, muting audio signal and allowing you to easily tune your bass between songs. To restore audio signal to all outputs (including the Tuner Out, which is always active), simply step on the footswitch again. To disable the footswitch, press the front-panel Audio Mute switch so that it is in the "out" (up) position
- Send Pre - Use this 1/4" unbalanced jack to send signal to a professional outboard effects processor.* Output level is approximately 0 dB to +4 dB and is pre-EQ and pre-Shape but post-Volume control.
- Return Pre- Use this 1/4" unbalanced jack to return signal from a professional outboard effects processor.* Signal is returned before the EQ and Shape controls but after the Volume control.
- Send Post - Use this 1/4" unbalanced jack to send signal to a professional outboard effects processor.* Output level is approximately 0 dB to +4 dB and is post-EQ, post-Shape, and post-Volume control.
- Return Post- Use this 1/4" unbalanced jack to return signal from a professional outboard effects processor.* Signal is returned after the EQ, Shape and Volume controls.
Guided Tour - HA4000 Rear Panel
- Tuner Out - This standard unbalanced 1/4" jack provides an instrument-level pre-EQ, pre-Shape and pre-Volume output signal from the HA4000 suitable for connection to any standard bass tuner. This output is always active, regardless of the setting of the front-panel Audio Mute switch (see #1 on page 5) or the status of the Mute Footswitch (see #3 on page 7).
- SBASS Out - This standard unbalanced 1/4" jack provides a line-level (+4 dBu) pre-EQ and pre-Shape (but post-Volume control) output signal which contains subharmonic information from the HA4000. WARNING: Because of the extremely low frequency signal output from this jack, this should only be connected to a separate amplifier (one with a volume control) that is driving a subwoofer. Connecting the SBASS output to an amplifier driving a standard speaker—even one designed for bass—may cause irreparable damage to the speaker.
- Line Out - This standard unbalanced 1/4" jack provides a line-level (+4 dBu) post-EQ, post-Shape and post-Volume output signal from the HA4000. You'll usually use this to connect the HA3000 to additional slave amplifiers.
- Direct Out - This standard balanced XLR jack provides an instrument-level output signal which is pre-EQ, pre-Shape and pre-Volume. This is generally used to send "dry" signal from the HA4000 to a PA system or recording mixing console.
- Preamp Out - This standard balanced XLR jack provides a -20 dBu level post-EQ, post-Shape and post-Volume output signal from the HA4000. This is generally used to send the sound of the HA4000 (that is, the equalized, shaped signal) to a PA system or recording mixing console.
- Ground Lift switch - Used to reduce any hum or buzz that may be present in the Direct Out and Preamp Out signals (see #11 and #12 above). When set to the right, "Float" position, chassis ground is removed from XLR pin 1.
- Speaker outputs - Connect any 4, 8, or 16 ohm bass cabinet(s) to these standard unbalanced 1/4" jacks. WARNING: Because of the high power levels and low frequency content of the signal generated by the HA4000, use only appropriately rated speaker cabinets (at least 400 watts at 4 ohms) that are specifically designed for bass instruments. The minimum impedance of all connected speakers must not go below 4 ohms (i.e., don't plug in two 4-ohm cabinets!).
- Fan - This variable speed fan provides vital cooling to your HA4000 (the hotter the amp gets, the faster the fan blows!). Make sure that it is kept free of all obstructions and that cool, fresh air is accessible at all times. Also, try to ensure that the HA4000 is used in a dust-free environment.
Setting Up and Using Your HA3000 / HA4000
Setting up your Hartke Systems HA3000 or HA4000 is a simple procedure which takes only a few minutes:
- Remove all packing materials (save them in case of need for future service) and decide where the amplifier is to be physically placed (we recommend you avoid putting it directly on top of your bass speakers). To avoid potential overheating problems, make sure that the rear panel is unobstructed and that there is good ventilation around the entire unit.
- Begin by hooking up your bass cabinet or cabinets, using the 1/4" unbalanced Speaker output connectors on the rear panel; it is never a good idea to power up any amplifier that is not connected to loudspeakers. We recommend the use of a single 4 ohm cabinet or two 8 ohm cabinets. Any appropriately rated bass cabinet with a minimum impedance of 4 ohms (that is, 4 ohms or greater) can be
used. In order to ensure correct phase correlation, the tip of the HA 3000 / HA4000
speaker jack should be connected to the “+” (hot) input of your loudspeaker, and the sleeve of the speaker jack should be connected to the “-” (ground) input of your loudspeaker.
SPEAKER OUTPUT
400WATT RMS/4ohms
WARNING: Hartke amplifiers can deliver very high power levels. Driven to full power, they can damage connected loudspeakers, regardless of brand, size, or configuration. Care should be taken not to strain connected loudspeakers as this can cause permanent damage and will degrade the performance of the entire system. If you see connected loudspeakers moving excessively, turn your system down immediately or use the equalization and/or Intensity controls to reduce the amount of subharmonic (extremely low frequency) signal.
- Connect the supplied 3-pin "IEC" plug to the rear panel AC connector and plug the other end into any grounded AC socket—but don't turn the amplifier on just yet. Because of the relay protection circuitry built into the HA3000 / HA4000, you can even plug it into the same power strip that other audio devices (such as a mixing console) are connected to.
You can then turn on all devices at once with the single power strip on-off switch, with no danger of damaging connected speakers by generating "thumps." CAUTION: Do not use an adapter to defeat the third grounding pin on the AC plug or severe electric shock may result!
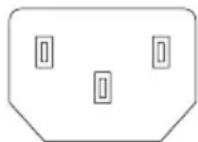
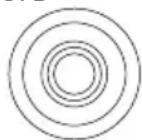
- Use a standard music instrument cable to connect your bass to one of the Input jacks on the front panel. If your bass has passive electronics (that is, if it has no battery), connect it to Input 1, which is designed to handle low-voltage signals. If your bass has active electronics (that is, if it has a battery), connect it
to Input 2, which has a 10 dB pad and is designed to handle hotter bass pickup signals.
INPUT 1 INPUT 2
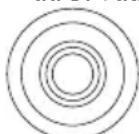
-20dBU -10dBU
-
On the front panel of the HA3000 / HA4000, turn the Volume and Intensity controls to their minimum (fully counterclockwise) position and all EQ controls to their "0" (12 o'clock) position. If you're using an HA4000, set the DBASS control to its minimum (fully counterclockwise) position.
-
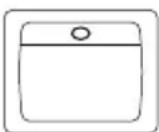
Press the front panel Power switch in order to turn on your HA3000 / HA4000. The Power LED will immediately light, and the Protection LED will go on for approximately five seconds, and then switch off (you'll hear a click when it does).
Setting Up and Using Your HA3000 / HA4000
- Set the output of your bass to maximum and then, while playing, slowly turn the Volume control up until the desired level is achieved. It's nearly impossible to overload the HA3000 or HA4000 input, so if you hear distortion even at low Volume settings, check for a faulty cable (if it's good, simply back off the output of your bass) or, if your bass has active electronics, a low or dead battery.
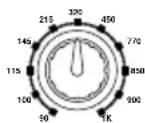
SHAPE INTENSITY
-
Experiment by setting the Intensity control to its 12 o'clock position and then turn the Shape knob both clockwise and counterclockwise to hear the effect of the Shape curve and filter on the sound of your bass. Leave the Intensity and Shape knobs at the point where they best complement your particular instrument and playing style. For more information on the use of these controls, see page 11 in this manual.
-
Adjust the equalization controls to taste (when you get a great setting that complements your instrument and playing style, it's a good idea to write it down for future use). For more information on the use of these controls, see page 11 in this manual.
- If you need to connect the HA3000 / HA4000 to a PA system or a recording mixing console, turn it off temporarily and then connect a cable between either the Direct Out or Preamp Out output and the mixer. (See #6 on page 3, #10 on page 8, #8 on page 4, or #12 on page 8 for more information). If you hear any hum or buzz in the signal, try changing the setting of the rear-panel Ground Lift switch.
- If you need to connect the HA3000 / HA4000 to an external slave amplifier, turn it off temporarily and then connect a cable between the Line Out output and a -20 dBu input on the external amplifier. (See #7 on page 4, or #11 on page 8 for more information).

SEND PRE
<50!! 0dBu

RETURN PRE
10KΩ 0dBu

SEND POST
<50Ω 0dBu

RETURN POST
10KΩ 0dBu
- If you're using a professional external signal processor that has line-level inputs and outputs, turn your HA3000 / HA4000 off momentarily and then connect a standard audio cable between one of the rear panel Send jacks and your effects processor input and another standard audio cable
between one of the Return jacks and your effects processor output (if required, multiple effects processors can be daisy-chained together, output to input). Use the Pre Send if you want the signal to be sent pre-EQ and pre-Shape; use the Post Send if you want the signal to be sent post-EQ and post-Shape. Use the Pre Return if you want the signal to be returned pre-EQ and pre-Shape; use the Post Return if you want the signal to be returned post-EQ and post-Shape. If required, both the Pre and Post sends and returns can be used simultaneously, though in matched pairs only (severe feedback and speaker damage can result if you use a Post Send and a Pre Return!). Once all Send and Return connections are made, turn the HA3000 / HA4000 back on and play your bass while adjusting the controls of your effects processor(s). For best results, set both the input and output gain of all connected effects processor(s) to 0 dB (unity gain), so that there is no increase or decrease in level whether the effects are switched in or out.
13. If you're using an HA4000 and want to use a Mute Footswitch and/or tuner, turn the power off temporarily and then connect it to the appropriate rear-panel jack (see #3 on page 7 and #8 on page 8 for more information). If you want to use the SBASS out to send subharmonic signal to an external amplifier driving a subwoofer, turn the power off temporarily before making the connection (see #9 on page 8 for more information).
If you encounter difficulty with any aspect of setting up or using your Hartke HA3000 or HA4000, call Samson Technical Support (1-800-372-6766) between 9 AM and 5 PM EST.
Using Equalization and Shape
The Hartke Systems HA3000 and HA4000 Bass Amplifiers give you enormous control over shaping the sound of your bass, using a process called equalization. To understand how this works, it's important to know that every naturally occurring sound consists of a broad range of pitches, or frequencies, combined together in a unique way. This blend is what gives every sound its distinctive tonal color. The HA3000 / HA4000 EQ controls allow you to alter a sound by boosting or attenuating specific frequency areas—they operate much like the bass and treble controls on your hi-fi amp, but with much greater precision.
HA3000 equalization controls
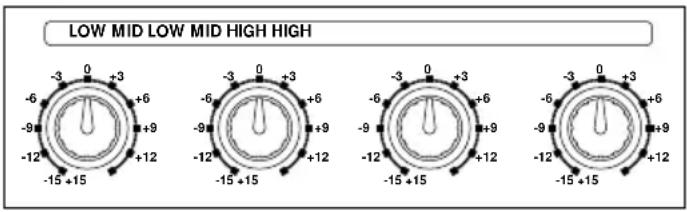
The HA3000 offers four bands of equalization. Each EQ knob (labeled Low, Mid Low, Mid High and High, respectively) affects a different frequency area (80 Hz, 220 Hz, 770 Hz and 5 kHz, respectively) and provides approximately 15 dB of boost and attenuation. We carefully selected these frequency areas because they have maximum impact on bass signals. For example, the Low (80 Hz) control affects the very lowest audible frequencies (in fact, most humans cannot hear below 20 Hz), while the High (5 kHz) control affects the “twang” of a bass string.

HA4000 equalization controls
The HA4000 also provides four bands of equalization, plus a special “DBASS” (for “Deep Bass”) band, which adds ultra-low subharmonic frequencies to the sound. As you move its knob clockwise, more and more of this signal is added (up to 12 dB). The Low and High EQ knobs affect the frequency areas of 140 Hz and 5 kHz, respectively. However, the two mid bands—Mid Low and Mid High—are fully parametric, which means that you can not only choose the frequency you want affected (between 40 Hz and 400 Hz in the case of Mid Low, and between 300 Hz and 6 kHz in the case of Mid High), but you can also set something called bandwidth for each frequency area. As you turn the Bandwidth knob clockwise, the width of the equalization curve is narrowed and only a small frequency range is affected; as it is turned counterclockwise, the width of the equalization curve is expanded and a greater frequency range is affected. Narrower bandwidths give you finer equalization control, while wider bandwidths give you broader control—kind of like a painter choosing between a fine brush or a wide brush. As with the HA3000, all four bands of equalization can be boosted or attenuated by approximately 15 dB.
Using Equalization and Shape
In both the HA3000 and HA4000, when an EQ knob is in its center detented position ("0"), it is having no effect. When it is moved right of center, the particular frequency area is being boosted; when it is moved left of center, the frequency area is being attenuated. Turning all EQ controls up the same amount will have virtually the same effect as simply turning up the Volume; conversely, turning them all down the same amount will have virtually the same effect as turning down the Volume. Both approaches are pointless (after all, that's why we gave you a Volume control!)
In many instances, the best way to deal with equalization is to think in terms of which frequency areas you need to attenuate, as opposed to which ones you need to boost. Be aware that boosting a frequency area also has the effect of boosting the overall signal; specifically, too much Low EQ boost (and, in the case of the HA4000, especially too much "DBASS" band boost) can cause overload distortion or even damage connected speakers. If you're using an HA4000, it's best to attenuate mid-range frequencies with relatively narrow bandwidths.
SHAPE INTENSITY
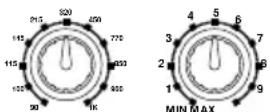
In addition, a unique Shape control employs a notch filter to remove specific frequency areas. At the same time, it overlays a special equalization curve that is designed to improve the sound of electric bass instruments. This curve provides boost at certain frequency areas and attenuation at other frequency areas. As the Shape knob is turned clockwise, the notch filter is imposed on higher frequency areas; as it is turned counterclockwise, the filter is imposed on lower frequency areas. At the fully clockwise position, the filter is applied to the 1 kHz frequency area, making for a deep, rich tone; at the fully counterclockwise position, the filter is applied to the 90 Hz frequency area, making for a bright, twangy tone. The associated Intensity control allows you to set the depth of the Shape curve; the higher the Intensity, the greater the effect of the notch filter. Note that, when Intensity is set to 0, the Shape curve has no effect.
The specific EQ (and/or Shape) you will apply to your bass signal is very much dependent upon your particular instrument and personal taste and playing style. However, here are a few general suggestions:
- For that super-deep reggae or Motown sound, boost the Low EQ (and, in the HA4000, the DBASS band) slightly while attenuating the High EQ. Set the Shape control to approximately 850 Hz, with an Intensity of 5 or 6.
- To remove boxiness and make your instrument sound more “hi-fi,” try attenuating the Mid Low and Mid High EQ controls (in the HA4000, set the frequencies to 354 Hz and 1.1 kHz, respectively, with both bandwidth controls at about 3 o'clock) and set the Shape control to approximately 320 Hz, with an Intensity of 6 or 7.
- For a twangy, cutting sound, try boosting the High EQ (putting new roundwound strings on your bass will help a lot also!) and set the Shape control to approximately 145 Hz, with an Intensity of 4 or 5.
- Whenever you get a really good EQ (and/or Shape) setting for a particular instrument or song, write it down (you'd be amazed how easy it is to forget these things!).
As you experiment with the EQ and Shape controls of your Hartke HA3000 or HA4000, don't forget that your bass also provides significant EQ control in the form of its pickup and tonal settings—this can be particularly effective in instruments that have active circuitry.
- Rated Output Power (@ 1 kHz, 4 ohm, 5% THD)
HA3000 350 Wrms
HA4000 450 Wrms
- Total Harmonic Distortion (@ 1 dB below rated output, 1 kHz typical)
HA3000 < 0.1%
HA4000 < 0.1%
- Rated Input Level (@ 1 kHz)
Input 1 -20 dBu
Input 2 -10 dBu
- Signal To Noise Ratio (re: 1 Wrms @ 1 kHz)
HA3000 approx. 68 dB
HA4000 approx. 78 dB
5a. Equalizer (HA3000)
Low (80 Hz) ±15 dB
Mid Low (220 Hz) ±15 dB
Mid High (770 Hz) ±15 dB
High (5 kHz) ±15 dB
5b. Equalizer (HA4000)
"DBASS" (70 Hz) 0 -> +12 dB
Low (140 Hz) ±15 dB
Mid Low (sweepable, 40 Hz - 400 Hz) ±15 dB
Mid High (sweepable, 300 Hz - 6 kHz) ±15 dB
High (5 kHz) ±15 dB
-
Shape Effect (Intensity control @ Max.) > 20 dB
-
Shape Range Sweepable, 90 Hz - 1 kHz
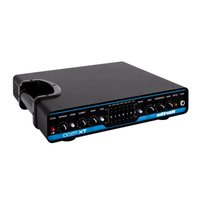


Brand : Hartke
Model : HA4000
Category : Receiver