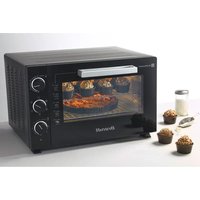
FC609MUB - Oven BRANDT - Free user manual and instructions
Find the device manual for free FC609MUB BRANDT in PDF.


| Product type | Freestanding electric oven |
| Brand | Brandt |
| Model | FC609MUB |
| Dimensions (H x W x D) | 588 x 513 x 375 mm |
| Net weight | 14.55 kg |
| Power supply | 230 V ~ 50-60 Hz |
| Power | 2200 W |
| Temperature range | 100 °C to 230 °C |
| Timer | 120 minutes (auto shut-off + alarm) |
| Cooking modes | Multifunction (top + bottom + fan), Fan grill, Natural convection, Grill + rotisserie, Multifunction + rotisserie |
| Rotisserie | Yes, with removable spit and forks |
| Number of rack positions | 4 positions |
| Included accessories | Rack, drip tray, tongs, rotisserie (spit + forks + handle) |
| Interior light | 15 W bulb (E14 / 25x17) |
| Door material | Tempered glass |
| Cleaning | Mild dish soap, non-abrasive sponge; glass door with glass cleaner |
| Safety | Automatic timer shut-off, child lock not specified |
| Installation | Free space of at least 10 cm on each side |
| Usage | Domestic and similar (staff kitchens, farms, hotels, bed & breakfasts) |
| Repairability | User-replaceable interior bulb |
Frequently Asked Questions - FC609MUB BRANDT
User questions about FC609MUB BRANDT
0 question about this device. Answer the ones you know or ask your own.
Ask a new question about this device
Download the instructions for your Oven in PDF format for free! Find your manual FC609MUB - BRANDT and take your electronic device back in hand. On this page are published all the documents necessary for the use of your device. FC609MUB by BRANDT.
USER MANUAL FC609MUB BRANDT
| This page is not printing content! |
| K5001-K55RCLE1Dkh-IB-K03 |
| Monochrome printing |
| A5 |
| 105g双铜 |
| Note: In warning content on P4 to P7, the initial of each paragraph shall be no less than 3mm high. |
Below logos can not be narrowed down:
text_image
12mm 8.5mm FR DOCUMENTS PAPIER BAC DE TRU 18.5mm 48mmBrandt

natural_image
Black-and-white illustration of a pie chart with wheat stalks, sun symbol, and a slice cut out (no text or symbols)MANUEL D'INSTRUCTION FR
INSTRUCTION MANUAL EN
MANUAL DEINSTRUCCIONES ES
GEBRUIKSHANDLEIDING NL
natural_image
Black brandt oven with open lid and control knobs, no visible text or symbols on the appliance itself.Chère Cliente, Cher Client,
natural_image
Circular diagram with a white circle at center and surrounding icons (no text or labels)natural_image
Diagram of a room with directional arrows and a central structure, no text or symbols presentnatural_image
Diagram of a mechanical device with internal components and no visible text or symbolstext_image
Diagram showing a device with labeled parts ① and ②, likely illustrating a physical or engineering setup.natural_image
Diagram of a mouse inside a control panel with two labeled parts (① and ②), no text or symbols present.Thank you for buying a BRANDT product and for your confidence in our company.
This product has been designed and manufactured for you considering your lifestyle and your requirements, so that it meets your expectations in the best way possible. We have invested it with our expertise, spirit of innovation and all the enthusiasm which has driven us for more than 60 years.
So that we are always able to satisfy your requirements as well as possible, our customer service is available, ready to listen and answer all your questions or suggestions.
You can also visit our website www.brandt.com where you will find our latest innovations, as well as additional useful information.
BRANDT is happy to support you daily and hopes you will enjoy your purchase to the full.

Important: Before starting your machine, please read this guide for installation and use carefully in order to familiarise yourself with how it operates quickly
CONTENTS
5) FOR THE USER'S ATTENTION....21
a) Safety Instructions.... 22
b) Technical Data 23
c) Environmental Protection....23
6) INSTALLATION OF YOUR MACHINE 23
a) Installing your machine safely....23
b) Electrical Connections.... 24
c) Description of your machine 25
a) Before Using your Machine for the First Time.... 25
b) Setting the temperature 26
c) Setting the cooking duration.... 26
d) Selection of the cooking mode 27
e) Recommendations for Use.... 30
8) LOOKING AFTER YOUR MACHINE 30
a) Cleaning Instructions.... 30
b) Changing the internal bulb.... 31
c) Storage Instructions.... 31
1) FOR THE USER'S ATTENTION

Keep these instructions with your machine. If this machine is sold or transferred to another person, make sure that you give the new owner these instructions for use. Please read these instructions before installing and using your machine. They are written for your safety and that of others.
a) Safety Instructions
Installation
- This appliance is intended to be used in household and similar applications such as:
- staff kitchen areas in shops, offices and other working environments;
- farm houses;
- by clients in hotels, motels and other residential type environments;
- bed and breakfast type environments.
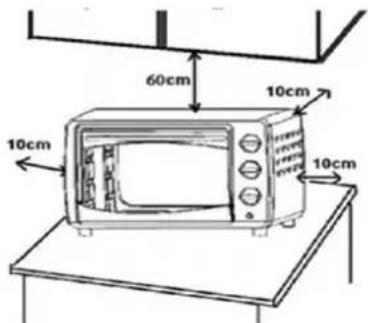
- Before using this machine, place it on a flat, dry surface that is resistant to heat such as a kitchen worktop. Leave a space of at least 10 centimetres on each side of the machine to ensure good air circulation.
- Keep the appliance and its cord out of reach of children aged less than 8 years.
- This machine is not intended to be put into operation using an external timer or a separate remote control system.
- Never pull the lead but disconnect the machine by holding the plug.
- If this machine is covered or in contact with a flammable material including curtains, drapes and similar
items, there is a fire risk when it is in operation.
• Children must not play with the machine.
- This appliance incorporates an earth connection for functional purposes only.
- The appliances are not intended to be operated by means of an external timer or separate remotecontrol system.
Use
- This appliance can be used by children aged from 8 years and above and persons with reduced physical, sensory, or mental capabilities or lack of experience and knowledge if they have been given supervision or instruction concerning use of the appliance in a safe way and understand the hazards involved.
- The accessible parts of this machine may become hot when it is operating.
- Children should be supervised to ensure that they do not play with the appliance.
- Do not touch the hot surfaces of this machine when it is working.
- Do not place anything on the machine when it is working.
- Do not cover any part of the oven with aluminium foil. This may cause malfunctions and a fire risk.
- Do not allow the power cable come into contact with hot surfaces.
- Do not put any of the following materials in the oven: cardboard, plastic, paper or similar materials that are sensitive to heat.
-
Make sure that utensils and food that are too big are not put in the oven. Utensils and food must not come into contact with the heating elements.
-
This machine is not intended for any use other than cooking or reheating food. Drying of food, towels, reheating wet towels or any other similar use may cause a fire risk or injuries.
- Handling accessories with a dish on them is dangerous is dangerous.
- In order to avoid the accessories (racks or trays) tipping forward and so that you are not injured, routinely remove the dish from the oven and always use the tongs when you put the accessories in or take them out.
- The use of accessories not recommended by the manufacturer of the machine may cause danger or injuries.
Maintenance
• Cleaning and user maintenance shall not be made by children unless they are aged from 8 years and above and supervised.
- Unplug the machine when you are not using it or before cleaning. Wait until the machine cools before putting objects in the oven or taking them out, or before cleaning it.
• To protect yourself from the risk of electric shock, never immerse any part of the oven in water or other liquids.
- Do not clean the machine with an abrasive sponge or a metal scraper.
- If the supply cord is damaged, it must be replaced by the manufacturer, its service agent or similarly qualified persons in order to avoid a hazard.
- This machine is fitted with a toughened glass door which will not crack but will break into minuscule pieces which will not cut. Avoid scratching the glass or distorting the door frame. If the door has scratches or impacts on it, contact customer service before using the oven.
- The light must only be used for the oven lighting. It must not be used in light fittings to provide lighting for the premises.
- For cleaning surfaces in contact with food please refer to the "Cleaning Instructions" section.
Non-compliant use
- The manufacturer denies all responsibility in the event of non-compliant use.
- This machine is exclusively intended for domestic use in private dwellings. The use of this product in communal or professional premises such as rooms for breaks in offices or workshops, camping or hotel premises, does not represent compliant use as defined by the manufacturer.

The surfaces of the machine are hot during use. Always wear insulation protection when you touch an oven, hot dishes or food, or when you insert or remove shelves or dishes from the oven dishes.
b) Technical Data
| Model | FC609MUB |
| Power supply | 230 V~ 50-60 Hz |
| Energy consumption | 2200W |
| Dimensions mm (HxWxD) | 588 x 513 x 375 mm |
| Net weight | 14.55 kg |
c) Environmental Protection
At the end of its life this product must not be discarded with household waste. It must be taken to a recycling centre or to your dealer. This makes it possible to avoid consequences resulting from inappropriate disposal that are harmful to health and the environment, and to recycle materials to save energy and significant resources.
A logo appears on the product reminding you not to discard it with household waste. For further information, contact your council offices or the shop where you bought this product.
2) INSTALLATION OF YOUR MACHINE
a) Installing your machine safely
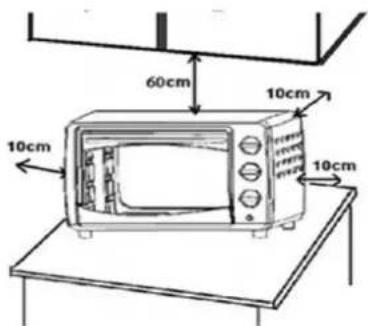
text_image
60cm 10cm 10cm 10cmIf the oven is placed too close to a wall this could be burnt or stained. Make sure that curtains, etc. are not in contact with the oven.

natural_image
Illustration of a two-step kitchen setup with an open oven and a lid, showing no text or symbols.Do not put anything between the base of the oven and the surface on which it stands. Anything placed under the oven could be burnt. Do not place anything on the oven when it is operation because the heat could possibly distort, crack or damage it.
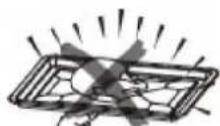
Do not heat food in bottles or tins because the receptacle could break and burn you.
Always use the tongs when you insert the tray or take it out. You risk serious burns if you touch it.
natural_image
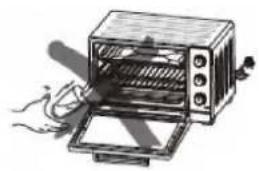
Illustration of a toaster oven with a handle and paper inside (no text or symbols)Never pour water into the oven or on the glass wall when it is hot. The glass wall could break.
natural_image
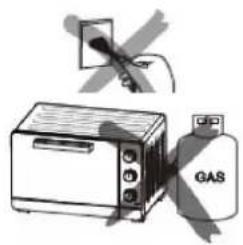
Illustration of a toaster with a gas cylinder and a crossed-out electrical outlet (no text or symbols)When you unplug the machine always take hold of the plug. Never pull on the lead as this could break the wires inside.
When in use never place the machine near a gas burner, a source of high heat or an electric fan, etc. This could damage the temperature control.
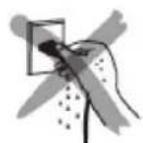
Never splash the power cable or handle the machine with wet hands. Always disconnect the lead after use or when the machine is left unsupervised. If it is left plugged in a malfunction could cause a fire.
When you cook dishes with oil, such as a roast chicken, it is recommended that 2 sheets of foil are used to reduce splashing. Place one sheet on the tray and the other on the chicken. In this way the oil will run between the two sheets.
Warning:

Check that your machine has not been damaged during transport (door or seals distorted, etc.). If you note any damage whatsoever contact your dealer before continuing to use the machine.
b) Electrical Connections
The oven must be connected to a suitable electrical socket. Make sure the plug is completely in the socket. Otherwise it could overheat. Do not use a lighting socket. Never connect several plugs to the same socket.
c) Description of Your Machine
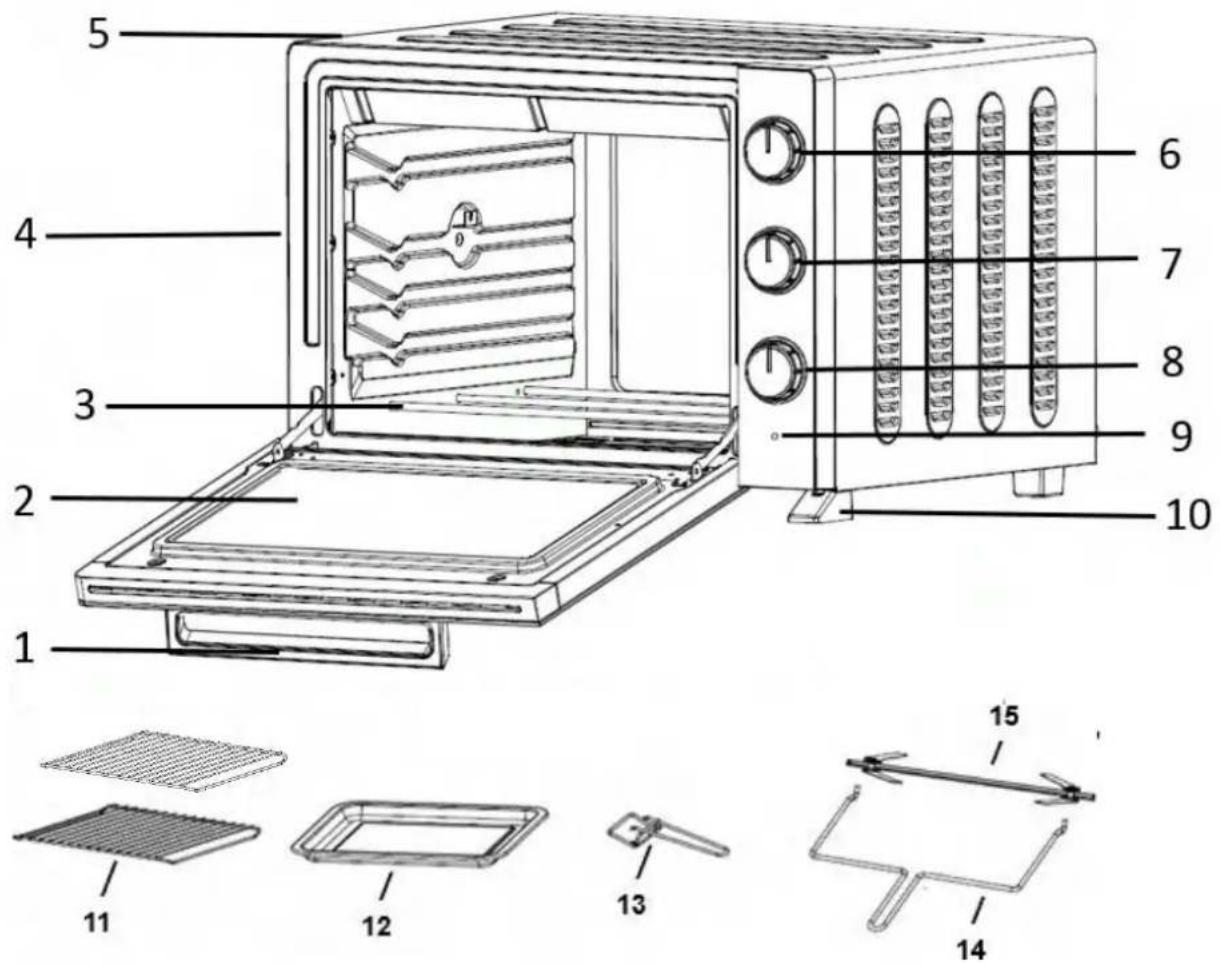
The oven
text_image
Labeled diagram of a microwave oven with numbered components and internal components shown in parts.- Handle
- Glass wall
- Heating elements
- Shelf levels
- External cavity
- Temperature adjustment
-
Cooking mode selector
-
Timer (120 minutes)
- Power on indicator light
- Oven foot
11.2 Grill rack - Drip pan
- Tongs
- Rotisserie handle
- Rotisserie skewer with detachable forks
3) USING YOUR OVEN
a) Before Using your Machine for the First Time
- Unpack the machine and check that the parts and accessories are all there and not damaged.
-
Check that all the packaging items (plastic, cardboard, polystyrene) have been removed from inside the machine.
-
Clean all the parts as described in the section "Looking after your machine".
• Dry all the parts carefully and assemble them. The machine can now be used.
Heat the oven empty.
- Insert the drip pan and the cooking rack
- Adjust the cooking mode selector to and the thermostat to "230°C" and then heat the oven empty for about 10 minutes.
• After leaving it to cool unplug and clean the spare parts again.
Note:
It is possible that there is a smell of smoke and burning. However, this is normal.
b) Setting the temperature
pie
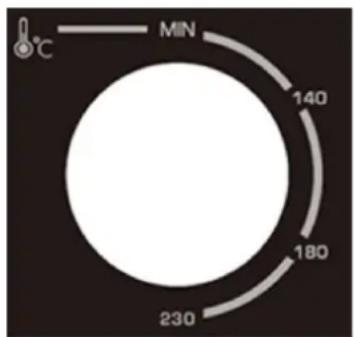
| Value | |---| | MIN | | 140 | | 180 | | 230 |Adjust the "temperature control" by turning it clockwise to select the appropriate temperature for the dish you are going to cook (Temperatures between 100°C and 230°C).
c) Setting the cooking duration
text_image
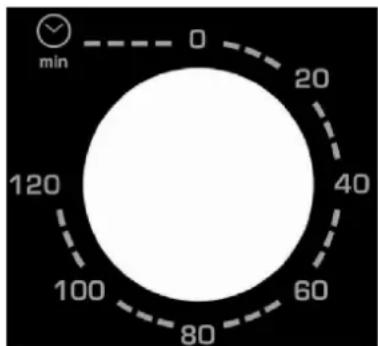
0 min 20 40 60 80 100 120Adjust the timer to the appropriate cooking duration (in minutes) for the dish you are going to cook by turning it clockwise.
The indicator light enables you to check the heating elements are functioning correctly. The oven will turn off automatically at the end of the selected cooking time and an alarm will sound.
You can turn off the oven manually during cooking by turning the timer anticlockwise to Position "0".
Note:
If the inside of the oven is dirty it may be that cooking has taken longer than usual.
d) Selection of the cooking mode
natural_image
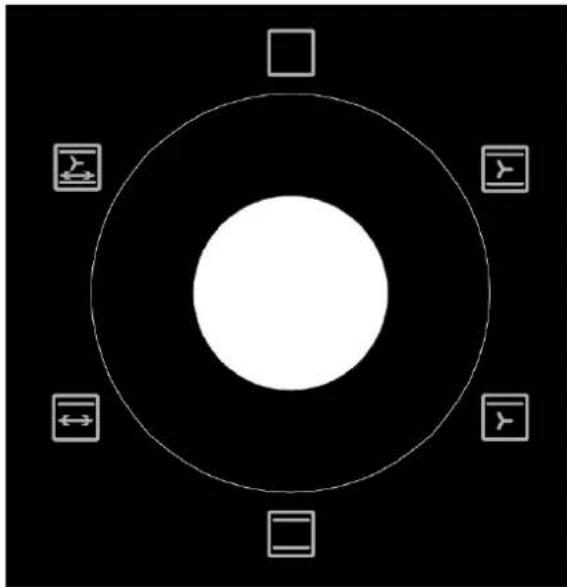
Circular diagram with a white circle at center and surrounding icons (no text or labels)| Sequences | Cooking mode |
 | Multifunction: Vault + Bottom + Fan |
 | Fan grill: Vault + Fan |
 | Natural convection: Vault + Bottom |
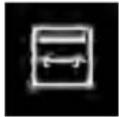 | Grill: Vault and Rotisserie |
 | Multifunction + Rotisserie: Vault + Bottom + Rotisserie + Fan |
Specific functions
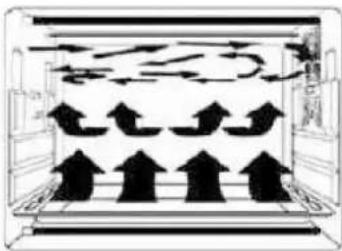
1. Multifunction (Vault + Bottom + Fan)
natural_image
Diagram of a room with upward-pointing arrows and a ceiling-mounted door, no text or symbols presentDue to the fan located on the side of the oven cavity the hot air circulates throughout the entire oven. The heat is therefore better distributed and cooking is more even.
2. Rotisserie function
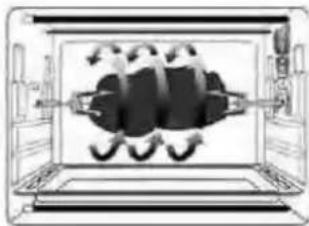
This function makes it possible to prepare food roasted on the skewer.
natural_image
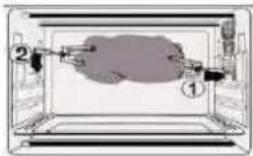
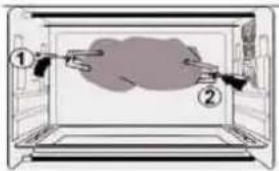
Diagram of a mechanical device with internal components and no visible text or symbols- Install the rotisserie forks
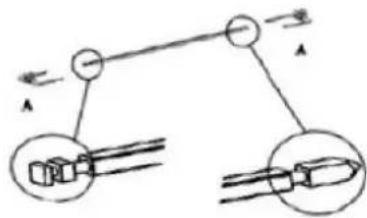
To operate the rotisserie must be positioned on the correct side with the small hook on the left of the oven
Left Right
text_image
Diagram showing mechanical linkage or motion with labeled points A and directional arrows, possibly illustrating a system or kinematics concept.2. Install the rotisserie 3. Remove the rotisserie Rotisserie handle
text_image
Diagram showing a device with labeled components, including a gray object inside a transparent chamber and numbered parts ① and ②.Insert the rotisserie forks into the rotisserie orifice and then place the drip pan under the rotisserie
text_image
Diagram showing a chamber with two labeled components (① and ②) and directional arrows indicating flow or movement.Remove the rotisserie forks using the rotisserie handle, and then remove the drip pan

To avoid burning yourself always use the rotisserie handle to take it out of the oven
Recommended cooking times:
| SEQUENCE | DISHES | TEMPERATURE | SHELF LEVEL | DURATION IN MINS |
 | FISH | 180°C/200°C | 2 | 15-20 |
 | ROAST BEEF | 230°C* | 2 | 30 for 1000 g |
 | CHICKEN | 220°C | Rotisserie | 55 for 1500g |
 | QUICHE | 200°C | 2 | 40-45 |
 | GRATIN DAUPHINOIS | 180°C/200°C | 2 | 40-45 |
 | LASAGNE | 180°C/200°C | 2 | 40-45 |
 | PIZZA | 220°C* | 2 | 15-20 depending on the thickness |
 | TARTS | 200°C | 2 | 30-35 |
 | TOAST | 230°C* | 2 | 3-6 on the grill |
 | CAKE | 170°C | 2 | 45-55 depending on the thickness |
 | CUPCAKES | 160°C | 2 | 25 |
 | SHORT BREADS | 170°C* | 3 | 10 |
* preheat the oven for 5 min
e) Recommendations for Use
3. Drip pan and grill rack
| Accessories | Food (for information only) | How to use the tongs? | ||
Drip pan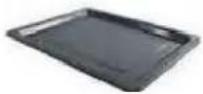 | Grilled chicken wings, minced steak, gratins, cakes and almost all other food prepared in the oven | 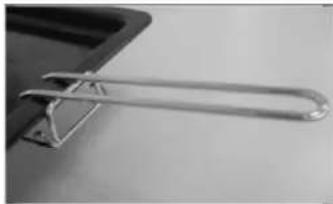 | ||
 | Note:We recommend you use it as a crumb tray | |||
Grill rack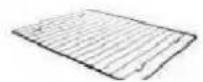 | Baked potatoes, dry food | 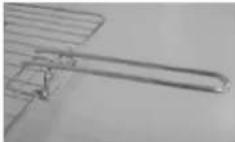 | ||
4. Shelf levels
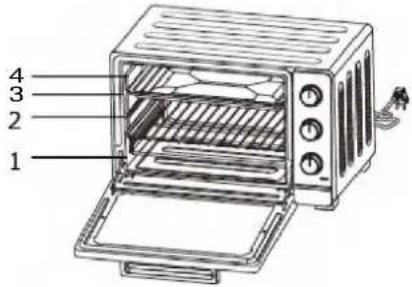
text_image
1 2 3 4You may adjust the height of the tray at different levels depending on the dishes you want to cook. For example, when you prepare a gratin and you want the top to be cooked more use the third level. To roast a chicken use the first or second level.
4) LOOKING AFTER YOUR MACHINE
a) Cleaning Instructions
Always unplug the machine and let it cool completely before cleaning or moving it. Clean the rotisserie and the forks, the grill rack, the dish handle and the drip pan after each use with washing up liquid for use both in the dishwasher and the sink. Clean the inside of the electric oven and all the detachable parts with a gentle, non-abrasive cleaner and a plastic scourer after each use. Rinse and dry carefully. Do not rub too hard on the internal surfaces of the oven which could be scratched. Clean the exterior glass door of the electric oven with a cleaner for glass surfaces or a gentle detergent and a damp cloth, or a plastic scourer. Do not use an abrasive scourer or cleaner which could scratch the machine's glass. Rinse and dry carefully using a clean cloth. Allow the oven to dry before closing the glass door.
b) Changing the internal bulb
To replace the bulb:
- Unplug the oven and let it cool
- Turn the window anti-clockwise.
- Clean it with hot water to which detergent has been added.
- Unscrew the bulb and replace it (15 W E14/25x17)
- Put the window back in place
c) Storage Instructions
Unplug the oven, allow it to cool and clean it before putting it away. Store the electric oven in its box and keep it in a cool, dry place. Never store the machine when it is hot or still plugged in. Never wind the power cable around the machine. Never put any tension on the power cable at the location where it enters the machine. It could be damaged and break.
Brandt
natural_image
Illustration of a toaster oven with a handle and paper inside (no text or symbols)natural_image
Illustration of a toaster with a gas cylinder and a crossed-out electrical outlet (no text or symbols)text_image
Labeled diagram of a microwave oven with numbered components and internal compartmentsnatural_image
Circular diagram with a white circle at center and surrounding icons (no text or labels)natural_image
Diagram of a room with upward-pointing arrows and a central horizontal line, no text or symbols present.natural_image
Diagram of a mechanical device with internal components and no visible text or symbolstext_image
Diagram showing a device inside a chamber with labeled components, including numbered parts ① and ②.natural_image
Illustration of a pig inside a container with two labeled parts (① and ②), no text or symbols present.2) INSTALLATIE VAN UW APPARAAT
a) Uw apparaat in alle veiligheid installeren
text_image
60cm 10cm 10cm 10cmnatural_image
Illustration of a toaster oven with a handle and paper inside, showing no text or symbols.natural_image
Illustration of a toaster and gas bag with no visible text or symbolstext_image
Labeled diagram of a microwave oven with numbered parts for identification and assembly reference.natural_image
Circular diagram with a white circle at center and surrounding icons (no text or labels)natural_image
Diagram of a room with directional arrows and ceiling-mounted furniture (no text or symbols)natural_image
Diagram of a mechanical device with internal components and no visible text or symbolstext_image
Diagram showing a mechanical linkage system with labeled components and directional arrows, including circular insets of two components.text_image
Diagram showing a mechanical or electrical setup with labeled components 1 and 2, likely representing a system or device.text_image
Diagram showing two labeled components (① and ②) inside a chamber with arrows indicating direction or flow.text_image
Diagram showing a device with labeled parts ① and ②, likely illustrating a physical or engineering setup.text_image
Diagram showing a device with labeled components, including a shaded area and numbered parts ① and ②.natural_image
Circular diagram with a white circle at center and surrounding directional icons (no text or labels)natural_image
Diagram of a room with directional arrows and up/down arrows, no text or symbols present- شواية
natural_image
Diagram of a mechanical or electrical component with internal components and no visible text or symbolstext_image
Labeled diagram of a microwave oven with numbered parts for identification and assembly reference.natural_image
Illustration of a toaster oven with cooling fins and a tray (no text or symbols)natural_image
Illustration of a toaster with a gas bag and a hand using a tool to clean the front panel (no text or symbols)١ ت Cobam mejahaz yidik. aglltien. afoil la tbel ssk thegizhe alke