306574 - Air purifier Brandson - Free user manual and instructions
Find the device manual for free 306574 Brandson in PDF.


| Product Type | Air Purifier |
| Brand | Brandson |
| Model | 306574 |
| Dimensions (Ø x H) | 250 mm x 452 mm |
| Power Supply | AC adapter 220-240 V AC / 50 Hz; Device 24 V DC / 48 W |
| Coverage Area | 90 m² |
| CADR (particles) | 402 m³/h |
| Max Noise Level | ≤ 55 dB(A) |
| Compatible Filter | Brandson WDP-306575 (H13 toxin filter) |
| Filter Lifespan | Approximately 6 months |
| Main Functions | App control, timer (1-12 h via app, 2-8 h on device), ionizer, sleep mode, auto mode, 4 speeds (Low, Medium, High, Turbo) |
| Air Quality Indicator | Light ring: green (good), yellow (moderate), red (poor) |
| Sensor | PM2.5 |
| Connectivity | WiFi 2.4 GHz via Smart Life app |
| Child Lock | Yes, activate by long press for 3 seconds |
| Package Contents | Air purifier, AC adapter (inside filter), quick guide |
| Cleaning and Maintenance | Clean with a damp cloth; replace filter every 6 months; clean the grille regularly |
| Safety | Automatic shutdown if grille is not properly installed; overheat protection; do not use near flames |
| Recycling Instructions | Do not dispose of with household waste; take to a recycling center or WEEE collection point |
| Warranty | See seller's terms |
Frequently Asked Questions - 306574 Brandson
User questions about 306574 Brandson
0 question about this device. Answer the ones you know or ask your own.
Ask a new question about this device
Download the instructions for your Air purifier in PDF format for free! Find your manual 306574 - Brandson and take your electronic device back in hand. On this page are published all the documents necessary for the use of your device. 306574 by Brandson.
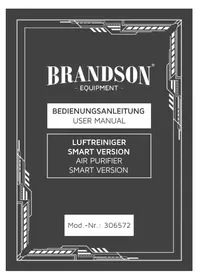
USER MANUAL 306574 Brandson
ENG: Current drivers, user manuals and other relevant documents for this product can be found on our homepage.
Choose Wi-Fi and enter password

Netgear2.4G

Next
Important safety instructions for this device
- Only use the appliance for private use and for its intended purpose. This appliance is not intended for commercial use. Do not use it outdoors and keep it away from heat and direct sunlight.
- Empty and clean the appliance before storing it. Clean it before the next use.
-
Caution! Microorganisms that may be present in the water or in the environment in which the appliance is used or stored can grow in the water tank and be blown into the air, which can lead to serious health risks if the water is not renewed and the tank is not properly cleaned every 3 days.
-
Switch off the air purifier and disconnect the mains plug before moving the appliance.
- The air purifier cannot switch on if the intake grille is not installed correctly.
- Maintain a distance of at least 10 cm between the air inlets and walls or other objects.
- Regularly remove dust, hair and other particles from the outer mesh screen of the filter to reduce the risk of bacterial growth.
- Remove dust, hair and particles from the air inlets of the air purifier to prevent a reduction in the air supply.
-
Cover the air outlet to prevent dust, hair and other particles from entering if the air purifier is not used for a long period of time.
-
Do not pull, twist or bend the mains adapter excessively as this could damage the adapter.
- The mains adapter must be connected to a suitable socket.
- Use the mains adapter supplied with the air purifier, do not use third-party mains adapters.
- Always unplug the air purifier before carrying out maintenance work or moving the air purifier.
- If the mains adapter is damaged, it must be replaced with an original mains adapter.
-
Stop operating the air purifier immediately if it makes unusual noises, emits bad odours, overheats or its fan rotates irregularly.
-
Do not insert any foreign objects into the protective parts, the moving parts, the air inlets or the air outlets.
- Keep objects such as hair or fabrics away from the air purifier to avoid blocking the air inlets or outlets.
- When using in conjunction with gas-powered appliances (e.g. gas cookers, gas heaters), please ventilate sufficiently to avoid carbon monoxide poisoning.
- Do not pour any liquids, powders or other small substances into the air outlet of the air purifier.
-
Do not use the appliance near open flames such as candles, incense burners, stoves, fireplaces, cigarettes, fireworks, lighters, multi-purpose torches, lighters or fire bowls.
-
Do not use the appliance near appliances that generate high temperatures, e.g. electric heaters, fan heaters, electric foot warmers, electric cookers, electric irons.
- Make sure that no flammable objects get into the air purifier.
• Always place the appliance on a flat, level surface so that it cannot tip over. - Do not use the appliance in environments that are extremely hot, humid or wet, e.g. in bathrooms.
- Children must not play with the appliance.
- Cleaning and maintenance by the user must not be carried out by children without supervision.
- Risk of electric shock - These maintenance instructions are intended for qualified personnel only. To avoid the risk of electric shock, do not carry out any maintenance work other than that described in the operating instructions unless you are qualified to do so.
Thank you for purchasing a Brandon product. Please read the following quick guide carefully so that you can enjoy your purchased appliance for a long time.
1. Scope of delivery
- Air purifier
- Mains adapter 24V DC (located in the filter)
- Quick guide
2. Technical data
| Power supply | Mains adapter: 220-240 V AC / 50 HzDevice: 24V DC / 48W |
| Coverage area 90m^2 | |
| CADR particles 402m^3/h | |
| dimensions ø250mm x 452mm | |
| Noise level ≤ 55 dB(A) | |
| Frequency range 2402-2480 MHz | |
| max. transmission power 17.83 dBm | |
| Compatible filter Brandon | mod. no. WDP-306575 (H13 toxin filter) |
| Features | App controlTimer function (1-12 hours via app; 2-8 hours on the device)Ionising functionVarious modes |
- Product details
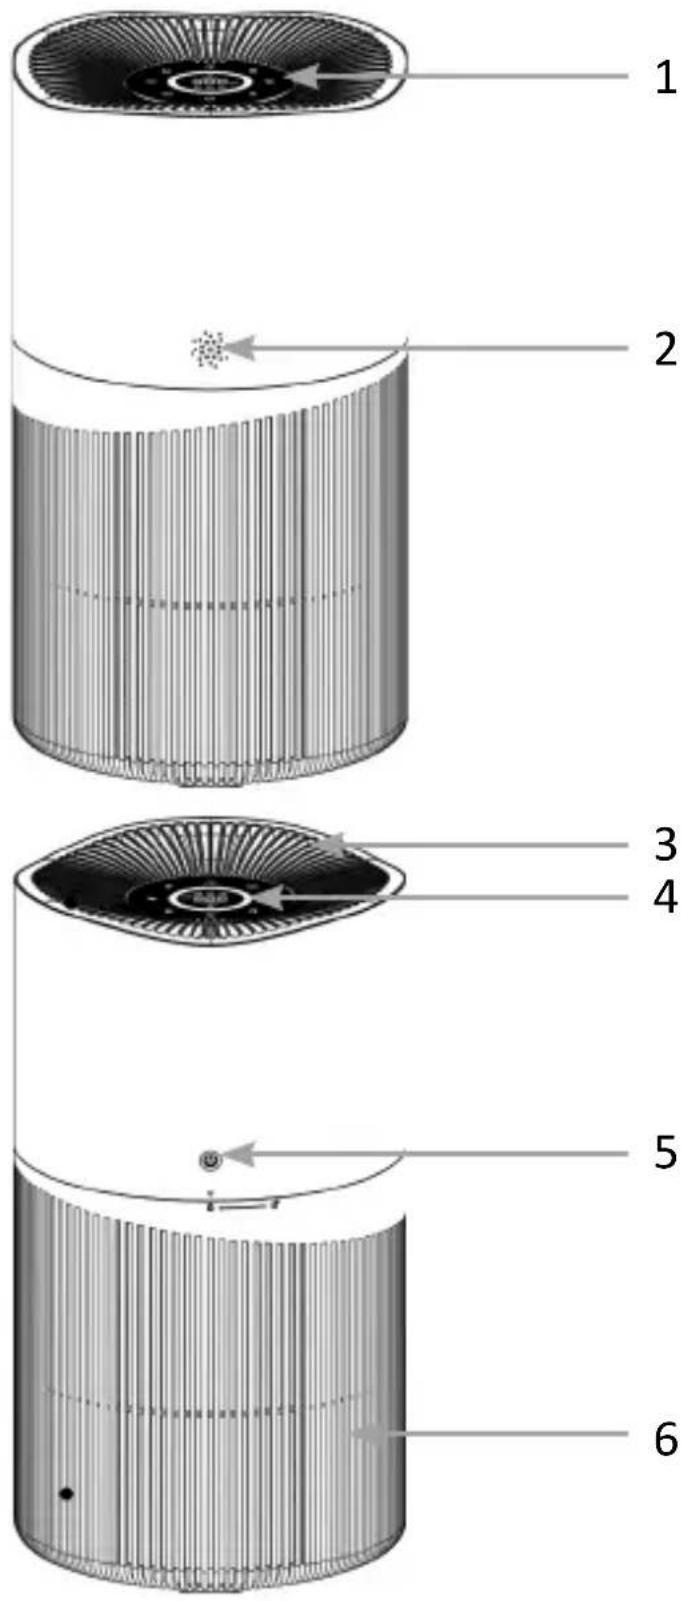
| Number Description | |
| 1 | Control elements |
| 2 Sensor | |
| 3 Air outlet | |
| 4 Light ring (air quality indicator) | |
| 5 Mains connection | |
| 6 Air inlet | |
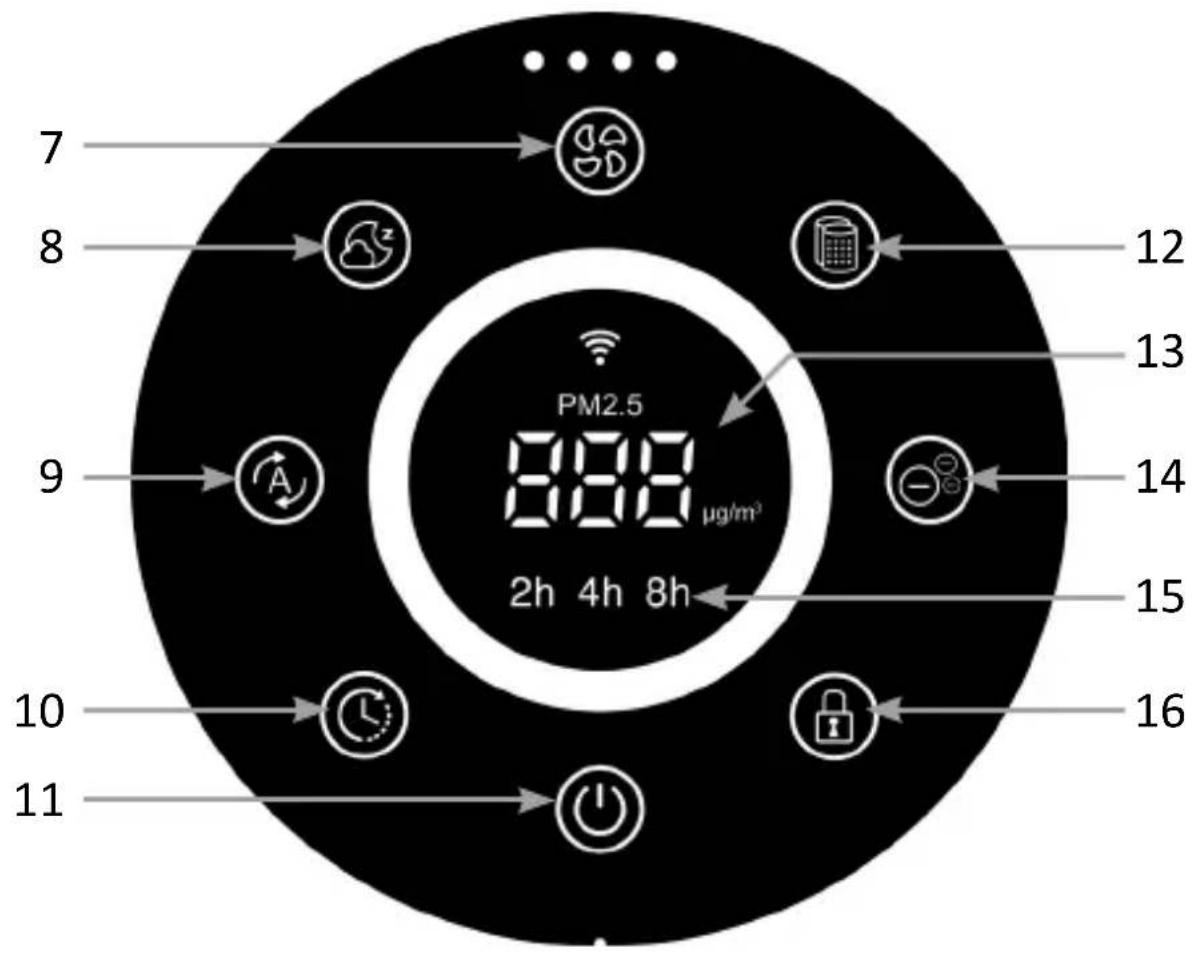
Control elements
other
| Hour | PM2.5 (µg/m³) | | ---- | ------------- | | 7 | 888 | | 8 | 888 | | 9 | 888 | | 10 | 888 | | 11 | 888 | | 12 | 888 | | 13 | 888 | | 14 | 888 | | 15 | 888 | | 16 | 888 || Number Description | |
| 7 | "SPEED" button |
| 8 "SLEEP" button | |
| 9 "AUTO" button | |
| 10 "TIMER" button | |
| 11 ON/OFF button | |
| 12 "FILTER" button | |
| 13 Display | |
| 14 "IONIZER" button | |
| 15 Timer display | |
| 16 Child lock | |
4. Key functions
| Button Description | |
| "SPEED" button | Press the button to change the speed. |
| "SLEEP" button Press | the button to switch to sleep mode. |
| "AUTO" button Tap | the button to activate automatic mode. |
| "TIMER" button Timer settings | |
| ON/OFF button | Press the button to switch the appliance on (default setting: automatic mode) or off. |
| "FILTER" button | Reset filter statistics (service life) |
| "IONIZER" button S | Switching the ionising function on/off |
| Child lock | Press and hold for 3 seconds to switch the air purifier to childproof mode. The button lights up red.Press and hold for 3 seconds to deactivate the childproof of lock. The button lights up white. |
5. Start-up
Remove the device from the packaging and check the device and the scope of delivery shown above. Please contact the seller if any part is missing or damaged. Connect the mains cable of the mains adapter to a properly connected socket and ensure that the mains voltage is correct, as shown on the rating plate. Connect the other end of the mains adapter to the mains connection of the appliance
Note: For better air purification, it is recommended to keep doors and windows closed when using the air purifier.
After connecting to a power socket, the air purifier performs a self-test and then remains in standby mode. The “ON/OFF” button lights up red while all other LEDs are off.
6. Usage
Adjust speed levels
You have the option of choosing between four different speed levels. Press the "SPEED" button on the control panel to set the speed of the fan. The following speed levels are available:
- LOW (low); MEDIUM(medium); HIGH(high); TURBO(very high)
Sleep mode
Press the “SLEEP” button to activate sleep mode. The button is highlighted in white. After 10 seconds, all lights go out. To reactivate the screen, simply touch any button.
Automatic mode
Touch the "AUTO" button to activate automatic mode. The air purifier automatically adjusts the fan speed to the real-time air quality index.
Timer function
The timer can be set between 2-8 hours. Press the „TIMER“ button to set the timer. Alternatively, you can set the timer between 1-12 hours via the app.
Childproof lock
Press and hold the "Child lock" button for 3 seconds to set the air purifier to child lock mode. The button is highlighted in red.
Press and hold the "Childproof lock" button for 3 seconds to deactivate the childproof lock. The button then lights up white again.
While this function is activated, all button functions are deactivated. Deactivate the childproof lock to reactivate the button functions.
loniser function
The ioniser function is switched on by default (bright white light) when the appliance is switched on. If you touch the button, the ioniser function is switched off.
7. Replacing the filter
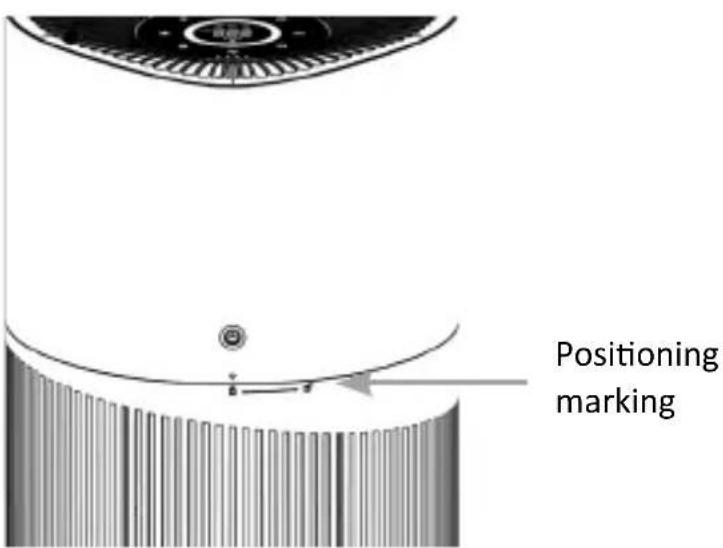
When the service life of the filter has reached the set time (approx. 6 months), the filter symbol is highlighted in red to remind the user to replace the filter. First unplug the power plug and place the air purifier upside down on a table. Then turn the air inlet grille anti-clockwise and remove it to access the old filter. Replace the old filter with a new one and attach the intake grille by turning it clockwise until it clicks into place according to the positioning mark.
7.1 Reset filter
Press and hold the “FILTER” button for 3 seconds. All indicator lights on the control panel will then flash 3 times and the button will light up white. At this point, the filter service life is reset.
7.2 Air Quality Indicator
The three-colour lights change colour in real time according to the air quality.
| Colour Air quality | |
| Green | Good |
| Yellow Medium (Normal) | |
| Red Poor | |
8. Setup via the app
Open the app store of your mobile device (e.g. smartphone or tablet PC) with which you want to control the device. Search for the „Smart Life“ app in the app store and install it.
Alternatively, you can find the app with the following QR code:

Log in to the app or register if necessary.
You can now add a new device in the main menu using the „+“ symbol.
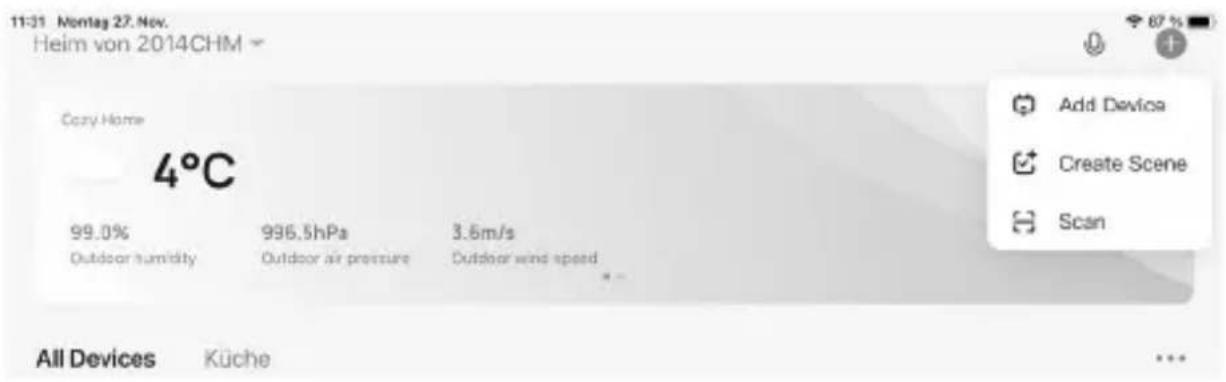
Disconnect the air purifier from the mains. Then connect it to a power socket and switch the air purifier on. To enter WIFI mode, press the “SPEED” button for 3 seconds until the WIFI symbol flashes. Make sure that the “ON/OFF” button on the appliance lights up white. The symbol flashes for 2 minutes. If the WIFI is successfully connected, the symbol lights up. If the WiFi connection is not successfully established within 2 minutes, the air purifier will exit WIFI mode.
Note: The air purifier, the mobile phone and the router must be in the same network. Only the 2.4 GHz WiFi network is supported here.
The air purifier then appears in your app.
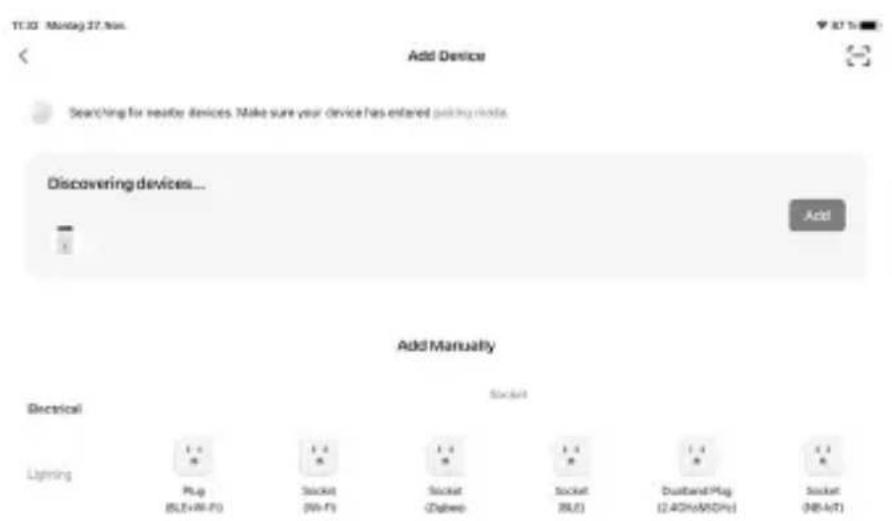
Tap on “Add” to add the device. A window will then open where you need to enter the WiFi data. Enter your WiFi information for a 2.4 GHz network.
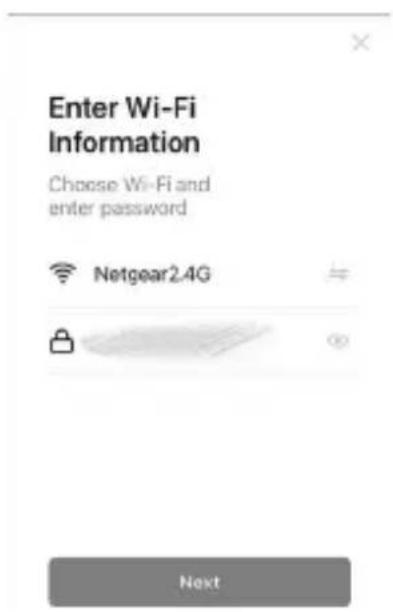
The app then connects to the device. As soon as the process is complete, the app indicates that the device has been successfully added.
9. Advanced settings of the app
To use the advanced functions of the appliance, such as the mode or countdown function, it is necessary to press the air purifier symbol in the menu.
An extended settings menu appears:
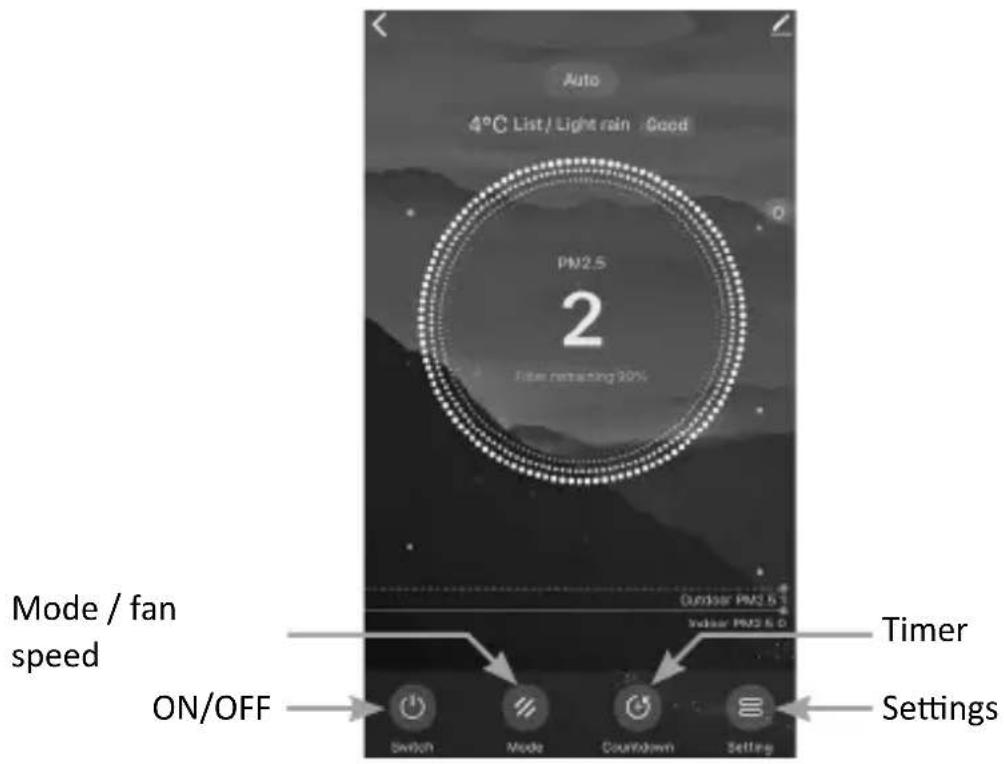
Mode / Fan speed (mode)
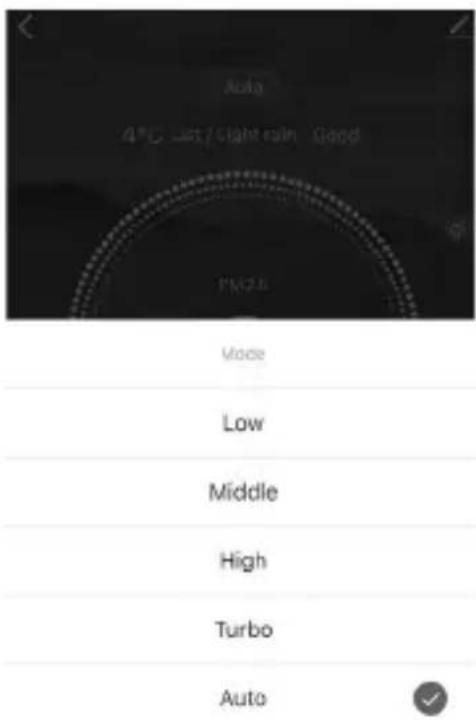
In the "MODE" menu item (mode / fan speed), you can choose between the 4 different fan speeds, set the automatic fan mode or select sleep mode.
Timer function (countdown)
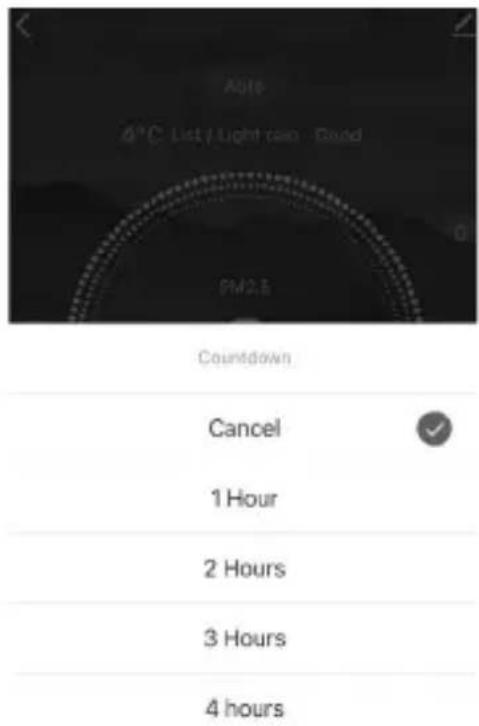
In the "Countdown" menu item (timer function), you can select the timer between 1-12 hours. As soon as the time has elapsed, the appliance switches off.
Settings (Settings)
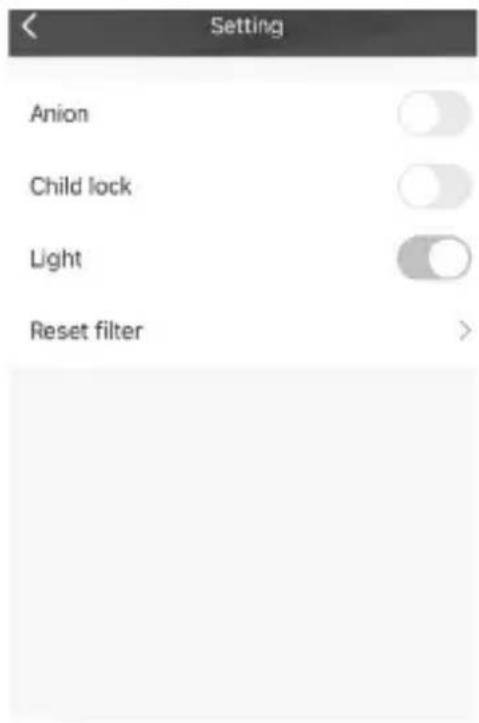
In the "Settings" menu item, you can switch the ionising function, the childproof lock and the light on or off. You can also reset the filter.
10. cleaning and care
Caution! Please disconnect the mains plug from the socket before you start cleaning!
Use a cloth slightly dampened with water for cleaning. The appliance must never be immersed in water for cleaning. This could lead to an electric shock or fire!
11. Safety instructions and disclaimer
Never attempt to open the appliance to carry out repairs or modifications. Avoid contact with the mains voltage. Do not short-circuit the product. The device is not waterproof, please only use it in dry conditions. Protect it from high humidity, water and snow. Keep the device away from high temperatures.
Do not expose the device to sudden temperature changes or strong vibrations, as this could damage the electronic parts. Check the device for damage before use. The appliance should not be used if it has been knocked or damaged in any other way. Please observe the national regulations and restrictions. Do not use the device for purposes other than those described in the instructions. This product is not a toy.
Keep it out of the reach of children or mentally impaired persons. Any repair or modification to the appliance that is not carried out by the original supplier will invalidate the warranty or guarantee. The appliance may only be used by persons who have read and understood these instructions. The device specifications may change without prior notice.
12. Disposal instructions
According to the European WEEE Directive, electrical and electronic devices may not be disposed of with household waste. Their components must be recycled or disposed of separately, as toxic and hazardous components can cause lasting damage to the environment if disposed of incorrectly. As a consumer, you are obliged under the Electrical and Electronic Equipment Act (ElektroG) to return electrical and electronic equipment free of charge at the end of its life to the manufacturer, the point of sale or to public collection centres set up for this purpose. Details are regulated by the respective state law. The symbol on the product, the operating instructions and/or
the packaging refers to these regulations. By separating, recycling and disposing of old appliances in this way, you are making an important contribution to protecting our environment.

The crossed-out dustbin symbol means that the battery must not be disposed of with household waste.

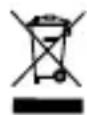
WEEE Directive: 2012/19/EU WEEE Register No.: DE 67896761
Hereby, WD Plus GmbH declares that the device 306574 is in compliance with the essential requirements and other relevant provisions of Directive 2014/53/EU. A complete declaration of conformity is available at WD Plus GmbH, Wohlenbergstraße 16, 30179 Hanover, Germany
Choose Wi-Fi and enter password

Netgear2.4G




Next
Choose Wi-Fi and enter password

Netgear2.4G

Next
MO-FR 9:30am - 18pm CET

brandson-equipment.de
- Important safety instructions for this device
- Scope of delivery
- Technical data
- Key functions
- Start-up
- Usage
- Adjust speed levels
- Sleep mode
- Automatic mode
- Timer function
- Childproof lock
- loniser function
- Replacing the filter
- Reset filter
- Air Quality Indicator
- Setup via the app
- Advanced settings of the app
- cleaning and care
- Safety instructions and disclaimer
- Disposal instructions
Brand : Brandson
Model : 306574
Category : Air purifier