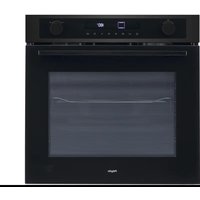
O360MAT - Oven Pelgrim - Free user manual and instructions
Find the device manual for free O360MAT Pelgrim in PDF.


User questions about O360MAT Pelgrim
0 question about this device. Answer the ones you know or ask your own.
Ask a new question about this device
Download the instructions for your Oven in PDF format for free! Find your manual O360MAT - Pelgrim and take your electronic device back in hand. On this page are published all the documents necessary for the use of your device. O360MAT by Pelgrim.
USER MANUAL O360MAT Pelgrim
Instructions for use
Oven
natural_image
Simple line drawing of a rectangular tray with side handles (no text or symbols)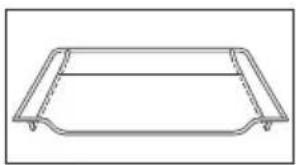
natural_image
Simple line drawing of a rectangular frame with side supports (no text or symbols)- Bakplaat
- Ovenrooster

Opmerking
natural_image
Simple diagram with a white circle and curved arrow on black background (no text or symbols)natural_image
Two identical diagrams showing a white circle with curved arrows on black background, no text or symbols present


Oven gebruiken
natural_image
Simple diagram with a white circle and curved arrows on a black background (no text or symbols)Kookwekker instellen
natural_image
Diagram of a microwave oven with internal cooling unit and three close-up views showing internal components (no text or symbols)natural_image
Diagram of a door handle with a knob and arrow indicating direction (no text or symbols)natural_image
Mechanical assembly diagram showing a bracket with a hanging component and an arrow indicating motion (no text or symbols)natural_image
Mechanical assembly diagram showing a bracket with a lock and a valve, no text or symbols presenttext_image
Prohibition sign with crossed-out trash bin and no text or symbolsnatural_image
Two technical line drawings of a rectangular tray or tray with handles, shown from top and bottom views (no text or symbols)- Lèchefrite
- Grille de four

Remarque
natural_image
Simple diagram with a white circle and curved arrow on black background (no text or symbols)natural_image
Two identical diagrams showing a white circle with directional arrows, no text or symbols present


Utilisation du four
natural_image
Simple diagram with a white circle and curved arrows on a black background (no text or symbols)natural_image
Diagram of a microwave oven with internal cooling unit and three close-up views showing internal components (no text or symbols)natural_image
Simple line drawing of a door with a knob and arrow indicating direction (no text or symbols)natural_image
Mechanical assembly diagram showing a bracket with a valve and directional arrow (no text or symbols)natural_image
Mechanical assembly diagram showing a bracket with a key inserted and a downward arrow indicating motion (no text or symbols)text_image
Diagram of a 3D printing machine with labeled parts and a wire mesh diagram showing internal structure.text_image
Prohibition sign with crossed-out trash bin and no text or symbolsnatural_image
Simple line drawing of a rectangular tray with side handles (no text or symbols)- Backblech
natural_image
Simple line drawing of a rectangular frame with rounded corners and side supports (no text or symbols)- Rost

Hinweis
natural_image
Simple diagram with a white circle and curved arrow on black background (no text or symbols)natural_image
Two identical diagrams showing a white circle with directional arrows, no text or symbols present
natural_image
Simple diagram with a white circle and curved arrows on a black background (no text or symbols)natural_image
Simple line drawing of a door with a knob and arrow indicating direction (no text or symbols)natural_image
Mechanical assembly diagram showing a bracket with a valve and housing, no text or symbols presentnatural_image
Mechanical assembly diagram showing a bracket with a key inserted and a downward arrow indicating motion (no text or symbols)text_image
Diagram of a 3D oven with labeled components and a wireframe diagram showing internal structurenatural_image
Symbol of a trash bin crossed with a diagonal line, no text or numbers presentInitial use 7 Operation 8
Oven settings 9
Kitchen timer 10
Childproof lock 10
Cleaning
Cleaning the oven 11 Removing the oven door 11 Removing the oven window 12 Removing the guide rails 13 Replacing the oven light 13
Solving problems
General 14
Technical specifications 15
Your oven and the environment
Disposal of the appliance and packaging 16
Introduction
Congratulations on the purchase of this oven. This product is designed to offer optimum user-friendliness. The oven has a wide range of settings enabling you to select the correct cooking method every time.
This manual shows how you can best use this oven.
In addition to information about operating the oven, you will also find background information that may be useful when using the appliance.

Please read the separate safety instructions carefully before using the appliance!
Read this manual before using the appliance and keep it in a safe place for future use.
Installation instructions are supplied separately.
You can find the most recent version of the instructions for use on our website.
Control panel
text_image
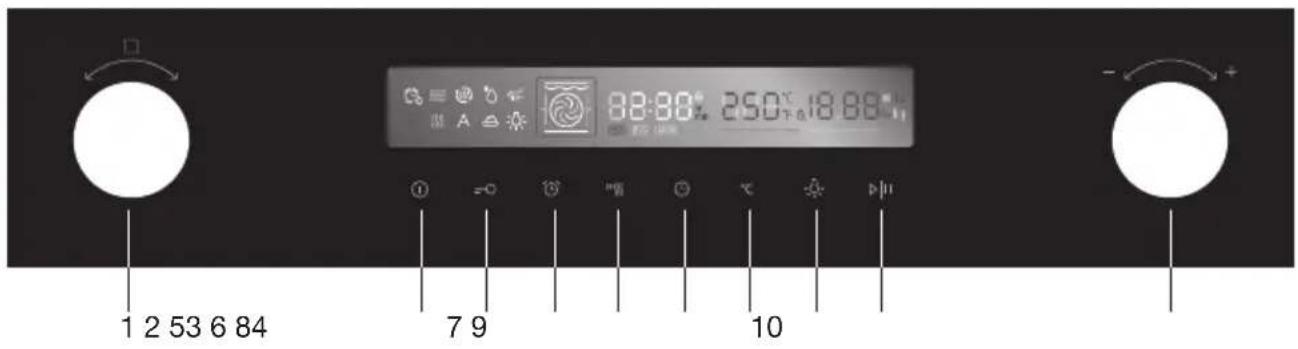
1 2 53 6 84 7 9 10| 1. |  | functions knob | Turn this knob to switch on the oven and to choose a heating mode. |
| 2. |  | Cancel key Cancel the current state and enter standby mode. | |
| 3. |  | Childproof lock key Use the childproof lock with 3s touch. | |
| 4. |  | Kitchen timer key Use the kitchen timer function. | |
| 5. |  | Quick preheat key Use this to preheat quickly. | |
| 6. |  | Cooking time /Clock setting key | Set a cooking time / set the clock (in standby mode). |
| 7. |  | Temperature setting key Touch this key to set the temperature. | |
| 8. |  | Oven lighting On / Off key Switch the oven lighting on or off. | |
| 9. |  | Start / Pause key Start or pause the cooking process. | |
| 10. |   | Selection dial knob Change the adjustment values shown in the display. |
Description
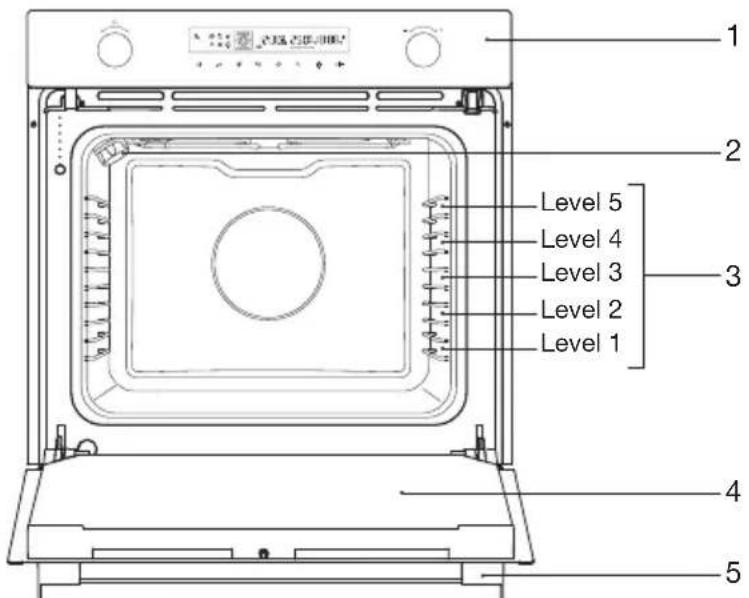
text_image
Level 1 Level 2 Level 3 Level 4 Level 5- Control panel
- Light
- Rack levels
- Oven door
- Handle
The following accessories are supplied with your oven:
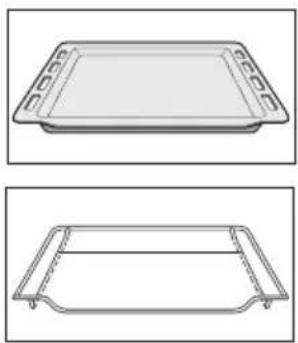
natural_image
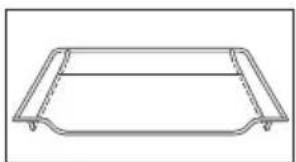
Two technical line drawings of a rectangular tray or tray with handles and side brackets (no text or symbols)- Baking tray
- Oven rack

Note
Consult the cooking guidelines in this user manual to select the correct accessory for your dishes.
Initial use
Prepare for use
- Remove all accessories from inside the oven and clean them thoroughly with warm soapy water. Close the door and switch the empty oven to maximum temperature for approximately 30 minutes. After this, switch on the grill for 15 minutes. Allow the oven to cool down before cleaning it with warm water.
natural_image
Simple diagram with a white circle and curved arrows on a black background (no text or symbols)Setting the current time
When the oven is connected to mains power ‘00:00’ will appear in the display.
- Touch the cooking time / clock setting key.
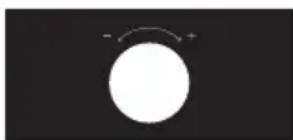
The hour display will flash. - Turn the selection dial knob to enter the correct hour.
- Touch the cooking time / clock setting key.
The minute indicator will flash. - Turn the selection dial knob to enter the correct minute.
- Touch the cooking time / clock setting key again to confirm the set time.

The time can be adjusted by touching the cooking time / clock setting key until the ‘hours’ indicator starts to flash. Set the clock as described above.
No aluminium on the oven floor
- Never cover the base of the oven with aluminium foil and also never place baking trays or tins on the base of the oven. Foil actually blocks the heat, damaging the enamel and negatively influencing the cooking result.
Clean immediately
- Spilled food containing sugar or fruit juices, such as prune juice or rhubarb, can damage the colour of the enamel. We recommend you clean such spillages immediately.
Remarks
- When heating the oven for the first time, you will notice a ‘new-oven smell’. This is normal.
- The temperature can be changed during cooking.
- Cooking times are rough estimates and can vary depending on a number of conditions.
- For certain dishes, the oven should be preheated.
-
If you use baking paper, this should be able to withstand high temperatures.
-
A lot of steam is released when cooking larger pieces of meat or dishes using dough, such as pies. This can cause condensation on the oven door. This is a normal occurrence and does not influence the functioning of the appliance. When the cooking process has ended, dry the door and the glass.
- Prevent condensation from forming and do not allow hot food to cool in a closed oven.
Operation
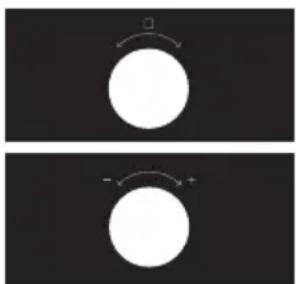
natural_image
Two identical diagrams showing a white circle with curved arrows on black background, no text or symbols present

Using the oven
The oven has 11 oven functions. Consult ‘Oven settings’ to select the correct oven function to cook the dish.
- Place the dish in the oven.
- Turn the oven functions knob and select the desired setting by choosing the right symbol in the display.
- Set the oven to the desired temperature using the selection dial knob.
- Touch the start / pause key to start the chosen function. The oven light switches on.
- If desired touch the cooking time / clock setting key and use the selection dial knob to set a cooking time.
- Touch the start / pause key to confirm the chosen cooking time. The oven switches on. The selected oven function and the temperature are flashing. As soon as the oven has reached the desired temperature, the oven function symbol and the temperature indication are displayed continuously.
-
At the end of the set cooking time the oven will switch off.
▶A signal will sound.
▶Touch the start / pause key to pause the cooking process. -
Touch the cancel key to end the cooking process.
Note
- For some dishes, the oven must be preheated first! Touch the quick preheat key. Consult the information about the dish.
Oven settings
Use the table to select the right oven function. Also consult the cooking instructions on the food packaging.

Note
Only use oven dishes that can withstand a temperature of 250 °C .
| Function Temperature Use | |||
 | Conventional 30 ~ 250 °C | For traditional baking and roasting on one level. Especially suitable for cakes with moist toppings. | |
 | Convection 50 ~ 250 °C | For baking and roasting on one or more levels. Heat comes from the ring heater surrounding the fan evenly. | |
 | ECO 140 ~ 240 °C For energy-saved cooking. | ||
 | Conventional + Fan 50 ~ 250 °C | For baking and roasting on one or more levels. The fan distributes the heat from the heating elements evenly around the cavity. | |
 | Radiant Heat 150 ~ 250 °C | For grilling small amounts of food and for browning food. Please put the food in the center part under the grill heating element. | |
 | Double Grill + Fan 50 ~ 250 °C | For grilling flat items and for browning food. The fan distributes the heat evenly around the cavity. | |
 | Double Grill 150 ~ 250 °C For grilling flat items and for browning food | ||
 | Pizza 50 ~ 250 °C | For pizza and dishes which need a lot of heat from underneath. The bottom heater and ring heater will work. | |
 | Bottom Heat 30 ~ 220 °C | For adding extra browning to the bases of pizzas, pies, and pastries. Heating come from the bottom heater. | |
 | Defrost - For gently defrosting frozen food. | ||
 | Dough Proving 30 ~ 45 °C | For making yeast dough and sourdough to prove and culturing yogurt. | |
Kitchen timer
The kitchen timer can be set from 1 minute to up to 9 hours. The kitchen timer can only be used if the current time is set.

natural_image
Simple diagram with a white circle and curved arrow on black background (no text or symbols)Setting the kitchen timer
- Touch the kitchen timer key to select the kitchen timer function.
- Set the kitchen timer to the required number of hours using the selection dial knob.
- Touch the kitchen timer key again.
- Set the kitchen timer to the required number of minutes using the selection dial knob.
- Touch the kitchen timer key again to confirm the setting. ▶When the set time has elapsed, a beep will sound.
Childproof lock
The childproof lock function can be used to prevent undesired use of the oven.
- Touch the childproof lock key for 3 seconds.
The ‘lock symbol’ appears in the display. The childproof lock function is activated. - Touch the childproof lock key again for 3 seconds.
The ‘lock symbol’ disappears from the display. The childproof lock function is deactivated.
Cleaning the oven
Clean the oven regularly to prevent fat and leftover food from accumulating, especially on interior and exterior surfaces, the door and seal.
- Clean exterior surfaces with a soft cloth and soapy warm water. Wipe afterwards with a clean, damp cloth and dry the surfaces.
- Remove splashes and stains on the interior surfaces with a soapy cloth. Wipe afterwards with a clean, damp cloth and dry the surfaces.
- Clean the interior of the oven.
Important

• Take care that NO water enters the vents.
• NEVER use abrasive cleaning materials or chemical solvents.
- ALWAYS ensure that the door seal stays clean. This prevents accumulation of dirt and allows you to close the door properly.
Removing the oven door

Note
Keep your fingers away from the hinges of the oven door.
The hinges are spring loaded and can cause injury if they spring back. Make sure that the hinge latches are applied correctly to lock the hinges.
- First, fully open the door (as far as it will go).
- Fold open the two locking levers on the left and right.
- Slowly close the door as far as the limit stop. With both hands, slightly lift the door and pull it out from both hinge beds on the appliance.
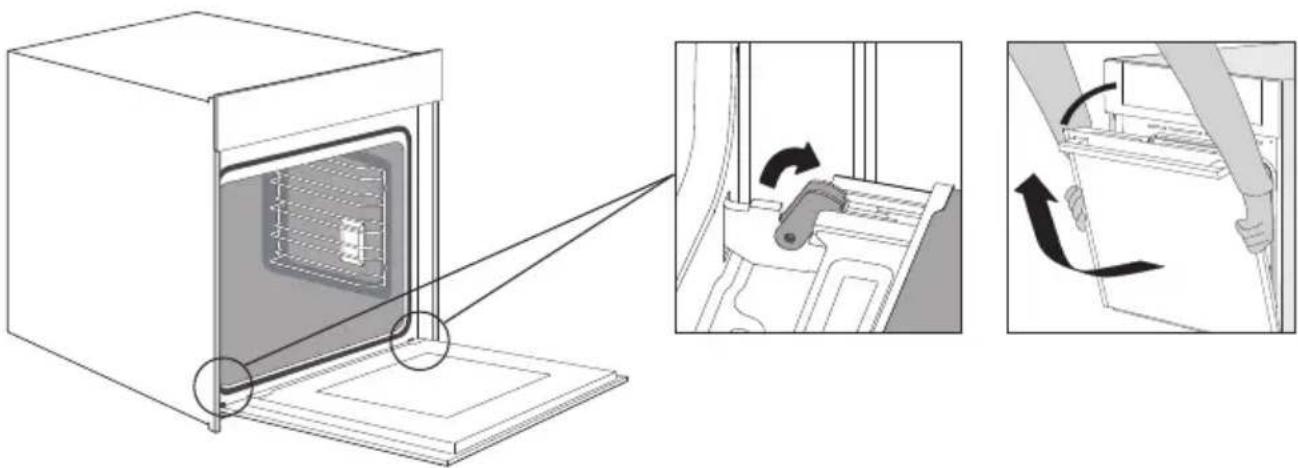
natural_image
Diagram of a microwave oven with internal components and three views showing the interior and exterior views (no text or symbols present)To replace the door repeat these actions in reverse. If the door does not open or close properly, make sure the hinges are positioned correctly in their slots.
Removing the oven window
natural_image
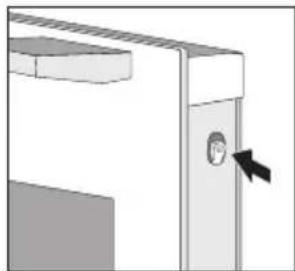
Simple line drawing of a door with a knob and arrow indicating direction (no text or symbols)The glass in the oven door can be cleaned from the inside, but you do need to remove the glass from the door to do this. First remove the oven door (see chapter 'Removing the oven door').
natural_image
Mechanical assembly diagram showing a bracket with a valve and a rotating arrow (no text or symbols)-
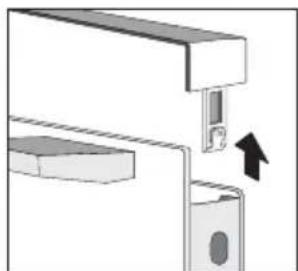
Press on the right and left side of the cover.
-
Remove the cover. After removing the door cover, that rest parts of the appliance door can be easily taken off so that you can go on with the cleaning.
natural_image
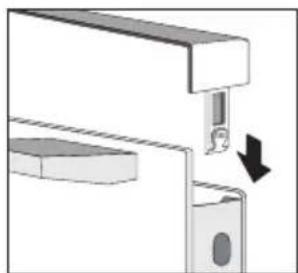
Mechanical assembly diagram showing a bracket with a key inserted and a downward arrow indicating motion (no text or symbols)- When the cleaning of the appliance door has finished, put the cover back in place and press on it until it clicks audibly into place.
Replace the glass in the oven door in reverse order.
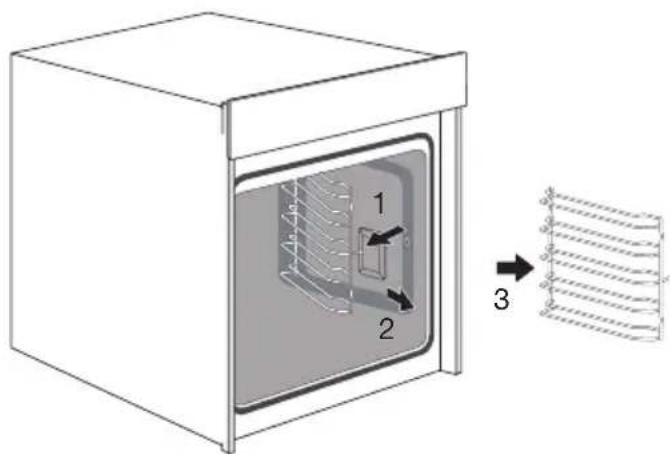
Removing the guide rails
Use conventional cleaning products to clean the guide rails.
- Grasp the guide rails at the front and pivot them towards the middle of the oven.
- Remove the guide rails from the holes in the side wall.
- Take the guide rails out of the oven.
text_image
Diagram of a heating unit with labeled components and a schematic showing internal structure and heat distribution.Replacing the oven light
The light is a consumer item and therefore does not fall under the guarantee. The lamp in this household appliance is only suitable for illumination of this appliance. The lamp is not suitable for household room illumination.
Cut the power to the appliance by removing the plug from the socket or switching off the fuse in the fuse box!
Top cavity lamp
- Turn the cover to the left to remove it.
- Turn the bulb out of the fitting.
Side wall cavity lamp
- Use a flat-blade screwdriver to snap and remove the lamp cover from the holder.
- Be careful not to damage the enamel.
- Turn the bulb out of the fitting.
Note
The light can be very hot! Use protection to remove the bulb.
General
Try the solutions below if you have problems with your oven.
You could save yourself the time and effort of an unnecessary phone call to customer services.
The food is not cooked
- Close the door properly.
- Check whether a fuse has blown and whether a circuit breaker has been activated.
Food is overcooked or undercooked
- Check whether the temperature has been set.
There is condensation on the interior of the oven
- This is normal. Wipe the oven clean after use.
The fan keeps working after the oven is switched off
- This is normal. Once the oven has been switched off, the cooling fan may continue to run for a little while.
Air flow can be felt at the door and the exterior of the appliance
- This is normal.
Steam escapes from the door or the vents
- This is normal.
Storing or repairing the oven
Repairs should only be performed by a qualified service technician.
If maintenance is required, take the plug from the socket and contact the customer service.
Have the following information to hand when you call:
- The model number and serial number (stated on the inside of the oven door) and guarantee details.
- A clear description of the problem.
Choose a clean, dry place if you have to store the oven temporarily, as dust and moisture can damage the appliance.
| Model O360 | --- |
| Power source 220-240 V ~ 50 Hz | |
| Energy consumption | |
| Maximum power | 2900 W |
| Grill function (small) | 2000 W |
| Grill function (large) | 2900 W |
| Top heat | 900 W |
| Bottom heat | 1000 W |
| Hot air | 1800 W |
| Cooling method Motor cooling fan | |
| Dimensions | |
| Appliance dimensions: | W 595 x H 596 x D 566 mm |
| Built-in dimensions: | W 560 x H 590 x D 550 mm |
| Volume 72 L |
Data determined according to standard EN 60350-1 and Commission Regulations (EU) No 65/2014 and (EU) No 66/2014.
| Pelgrim | ||
| Model identification O360 | --- | Unit |
| Energy Efficiency Index per cavity (EEI cavity) 94 | ||
| Energy Efficiency Class per cavity A+ | ||
| Energy consumption required to heat a standardised load in a cavity of an electric heatedoven during a cycle in conventional mode per cavity (electric final energy) (EC electric cavity) | 1.06 kWh/cycle | |
| Energy consumption required to heat a standardised load in a cavity of an electric heatedoven during a cycle in fan-forced mode per cavity(electric final energy) (EC electric cavity) | 0.69 kWh/cycle | |
| Number of cavities 1 | ||
| Heat source per cavity (electricity or gas) electricity | ||
| Volume per cavity (V) 72 L | ||
| Type of oven | ||
| Mass of the appliance (M) | 32.0 kg | |
| (1) 1 kWh/cycle = 3.6 MJ/cycle. | ||
| Data determined according to standard EN 60350-1 and Commission Regulations (EU) No 65/2014 and (EU) No 66/2014. | ||
| Energy saving tipsDuring cooking, the oven door should remain closed except for turning food over.Do not open the door frequently during cooking to maintain the oven temperature and to save energy.If cooking time is more than 30 minutes, the oven may be switched off 5-10 minutes before the end of the cooking time to save energy. The residual heat will complete the cooking process.Plan oven use to avoid turning the oven off between cooking one item and the next to save energy and reduce the time for re-heating the oven.Wherever possible cook more than one item at a time. | ||
Disposal of the appliance and packaging
This product is made from sustainable materials. However, the appliance must be disposed of responsibly at the end of its useful life. The government can provide you with information about this.
The appliance packaging is recyclable. The following materials have been used:
- cardboard
• polyethylene wrapping (PE)
• CFC-free polystyrene (hard PS foam)
Dispose of these materials responsibly in accordance with legal provisions.
text_image
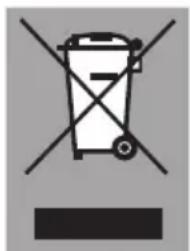
Prohibition sign with crossed-out trash bin and no text or symbolsThe product has a pictogram of a rubbish bin with a cross through it. This indicates that household appliances must be disposed of separately. This means that the appliance may not be processed via the regular waste flow at the end of its useful life. You should take it to a special municipal waste depot or a sales outlet that offers to do this for you.
Collecting household equipment separately prevents harm to the environment and public health. The materials used in manufacturing this appliance can be recycled, which provides considerable savings in energy and raw materials.

Declaration of conformity
We hereby declare that our products comply with the relevant European directives, standards and regulations as well as all requirements referred to in the standards.

text_image
Warning symbol with exclamation mark inside a triangleThe appliance identification card is located on the inside of the appliance.
When contacting the service department,
have the complete type number to hand.
You will find the addresses and phone numbers of the service organisation on the guarantee card.
www.pelgrim.nl
www.pelgrim.be
913561
Pelgrim