X5 - Vacuum Cleaner INVICTUS - Free user manual and instructions
Find the device manual for free X5 INVICTUS in PDF.


User questions about X5 INVICTUS
0 question about this device. Answer the ones you know or ask your own.
Ask a new question about this device
Download the instructions for your Vacuum Cleaner in PDF format for free! Find your manual X5 - INVICTUS and take your electronic device back in hand. On this page are published all the documents necessary for the use of your device. X5 by INVICTUS.
USER MANUAL X5 INVICTUS
GB Instruction manual from page 21
natural_image
Technical line drawing of a mechanical device with internal components (no text or symbols)Handgerät X5
natural_image
Line drawing of a vacuum cleaner with a mounted device (no text or symbols)natural_image
Line drawing of a cleaning tool with a handle and base (no text or symbols)Extra-Soft Abstaub-Bürste

natural_image
Illustration of a cylindrical mechanical component with flanges and ends (no text or symbols)natural_image
Technical line drawing of a mechanical shaft assembly (no text or symbols)Flexibler Winkeladapter
text_image
Flexible Fugendüse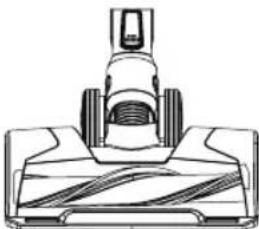
natural_image
Technical line drawing of a vacuum cleaner component (no text or symbols)natural_image
Line drawing of a rectangular box with internal compartments and a curved top (no text or symbols)mit Ladefunktion
natural_image
Line drawing of a hand holding a handheld device with a left-pointing arrow indicating action (no text or symbols)Saugrohr montieren
natural_image
Line drawing of a hand using a handheld device to interact with a wall-mounted device (no text or symbols present)Saugrohr abnehmen
natural_image
Illustration of hands fastening a cable or connector with directional arrows indicating motion (no text or symbols)natural_image
Diagram of a mechanical component with arrows indicating motion or movement, no text or symbols presentnatural_image
Line drawing of a mechanical device with a cable and housing (no text or symbols)natural_image
Mechanical assembly diagram showing a rotating component with directional arrows (no text or labels)natural_image
Hand inserting a device into a battery with an AC power outlet (no text or symbols visible)natural_image
Technical line drawing of a mechanical device with internal components (no text or symbols)natural_image
Technical line drawing of a mechanical device with no visible text or symbolsnatural_image
Technical line drawing of a mechanical component with a base and top view (no text or symbols)natural_image
Technical line drawing of a mechanical clip or bracket with mounting holes and a separate clip, showing no text or symbols.natural_image
Illustration of a hand operating a mechanical device with a circular component and directional arrow (no text or symbols)natural_image
Line drawing of a hand holding a portable device with a handle and internal components, no text or symbols present.natural_image
Line drawing of hands holding a handheld device with paper inside (no text or symbols)natural_image
Two-step illustration showing hands using a tool to adjust or install a mechanical component (no text or symbols present)natural_image
Technical line drawing of a mechanical device with no visible text or symbolsnatural_image
Line drawing of a printer with a hand holding a clip, showing mechanical components and a directional arrow (no text or symbols)natural_image
Technical line drawing of a mechanical assembly with no visible text or symbolsnatural_image
Line drawing of hands operating a mechanical component with a bolt and nut (no text or symbols)natural_image
Technical line drawing of a mechanical device with wheels and a handle (no text or symbols)natural_image
Technical line drawing of a mechanical assembly with no visible text or symbolsnatural_image
Line drawing of a hand cleaning a mechanical component (no text or symbols)1 Safety and warning notices....21
1.1 Approved use ....22
1.2 Safety notice 22
2 Before first use 25
3 Product components 26
4 Main unit 27
5 Use of attachments ....28
6 Starting up 30
6.1 Assembly 30
6.2 Charging the battery ....31
7 Use 32
8 Care and cleaning 34
9 Troubleshooting ....37
10 Disposal....38
11 Technical details....39
Customer service 39
Please take the time to read these operating instructions carefully.
The section on safety notices and the warnings included in this document are particularly important for your own and other people's safety.
Keep the operating instructions in case you need to refer to them later on. If you give the appliance to another person, always make sure you include the operating instructions with it.
The illustrations in these operating instructions are intended as a guide to correct use. Some details may deviate from the original product.
1 Safety and warning notices
SYMBOL KEY

WARNING!
Failure to observe this warning could lead to a serious or potentially lethal accident.

CAUTION!
Failure to observe this caution could lead to injury.

NOTE!
Information about potential material damage.
1.1 Approved use
The appliance is intended for home use only. It is not suitable for commercial or industrial use. Only use the appliance for the cleaning of dry surfaces.
This appliance is not suitable for the following applications:
- Vacuuming people, animals, plants or garments which are being worn – high risk of accident
-
Vacuuming hot ash/coals, cigarettes, matches or any other combustible or flammable substances – risk of fire
-
Vacuuming water and other liquids – risk of short circuit
- Vacuuming very fine dust (e.g. concrete dust or ash)
- Use near explosive or highly flammable substances – risk of fire and explosion
Only use the appliance with original accessories, otherwise you will damage it and impair its safety.
Only use the appliance as described in the operating instructions. All other uses are regarded as improper uses.
1.2 Safety notice
ELECTRICAL SAFETY – RISK OF ELECTROCUTION AND FIRE
Never use the appliance if it has been dropped or otherwise damaged. Maintenance and repairs to the appliance should only be performed by a qualified technician. Repairs performed by persons without the necessary qualifications can lead to injuries or serious performance impairments to the appliance.
Before use check the power cable for possible damage. Never use the appliance if the adapter or cable is damaged. Only use the adapter in power sockets with the electric voltage specified on the adapter.
the appliance's power cable is damaged it has to be replaced with a special cable which can be obtained from the manufacturer or its customer service department.
When you unplug the adapter, hold the adapter and not the cable. Do not pull the cable.
Don't allow the power cable to run across sharp metal edges, or place any heavy objects on it or expose it to heat. Do not bend, twist or knot the power cable. Never wrap the power cable around the appliance or the adapter.
Never immerse the appliance, adapter or power cable in water or other liquids.
Before cleaning the appliance, ensure that it is switched off and disconnected from the mains.
Charge the battery with the supplied adapter only. Do not charge any other appliances with the supplied adapter. Always use the original batteries. Other batteries will impair the appliance's safety.
Do not use the appliance when it is connected to the adapter or the mains.
SAFETY OF SPECIFIC CATEGORIES OF PEOPLE
Do not allow children aged under 8 years or people with physical, sensory or mental handicaps or a lack of experience or knowledge use the appliance without supervision or instruction on the safe use of the appliance and potential risks.
Never allow children to play with the appliance.
●cleaning and maintenance may not be performed by children without supervision.
Store the appliance and power cable out of reach of children and animals.
SAFETY DURING USE
Ensure an adequate distance between the appliance and heat sources (e.g. hotplates or ovens) and open flames to prevent damage.
The appliance is not suitable for outdoor use. Store it in a dry place.
Do not use the appliance in rooms where there are highly inflammable substances, or where there are toxic or explosive vapours.
Do not touch the appliance, the adapter or the plug with wet hands.
Do not use the appliance to vacuum people, animals or plants. Keep body parts and items of clothing away from the moving parts and apertures of the appliance when it is in operation because the appliance may suck them in and cause injury.
Do not allow the power brushes to run over cables etc. because they can get caught up in the rotating brush and damaged.
Never insert any objects into the appliance's apertures. Do not use the appliance if an aperture is blocked. Remove blockages caused by dust, fluff, hair etc. because they reduce the appliance's suction power.
Never use the appliance without dust container and filter.
De especially careful when vacuuming stairs.
Switch the appliance off before changing accessories.
Check the appliance for damage before each time you use it. Never use a damaged appliance.
RISK OF INJURY FROM RECHARGEABLE BATTERIES
When a battery leaks, avoid contact between the battery acid and the skin, eyes and mucous membranes. If contact does occur, wash the affected areas immediately with plenty of clean water and seek medical attention without delay.
Never open the battery case, throw the battery on a fire, immerse it in liquid or short circuit it.
2 Before first use

CAUTION!
Plastic foil and bags can be dangerous!
To avoid danger of suffocation, keep them away from children and pets.
Check that the set includes all the parts and inspect them for transport damage. The content of the set that you have purchased is indicated on the packaging or a separate insert. If you wish to make a complaint, please contact our customer service team.
■Remove the packaging and any labels that have been affixed to the product for protection during transportation or advertising purposes.
Insert the battery and charge it.
3 Product components
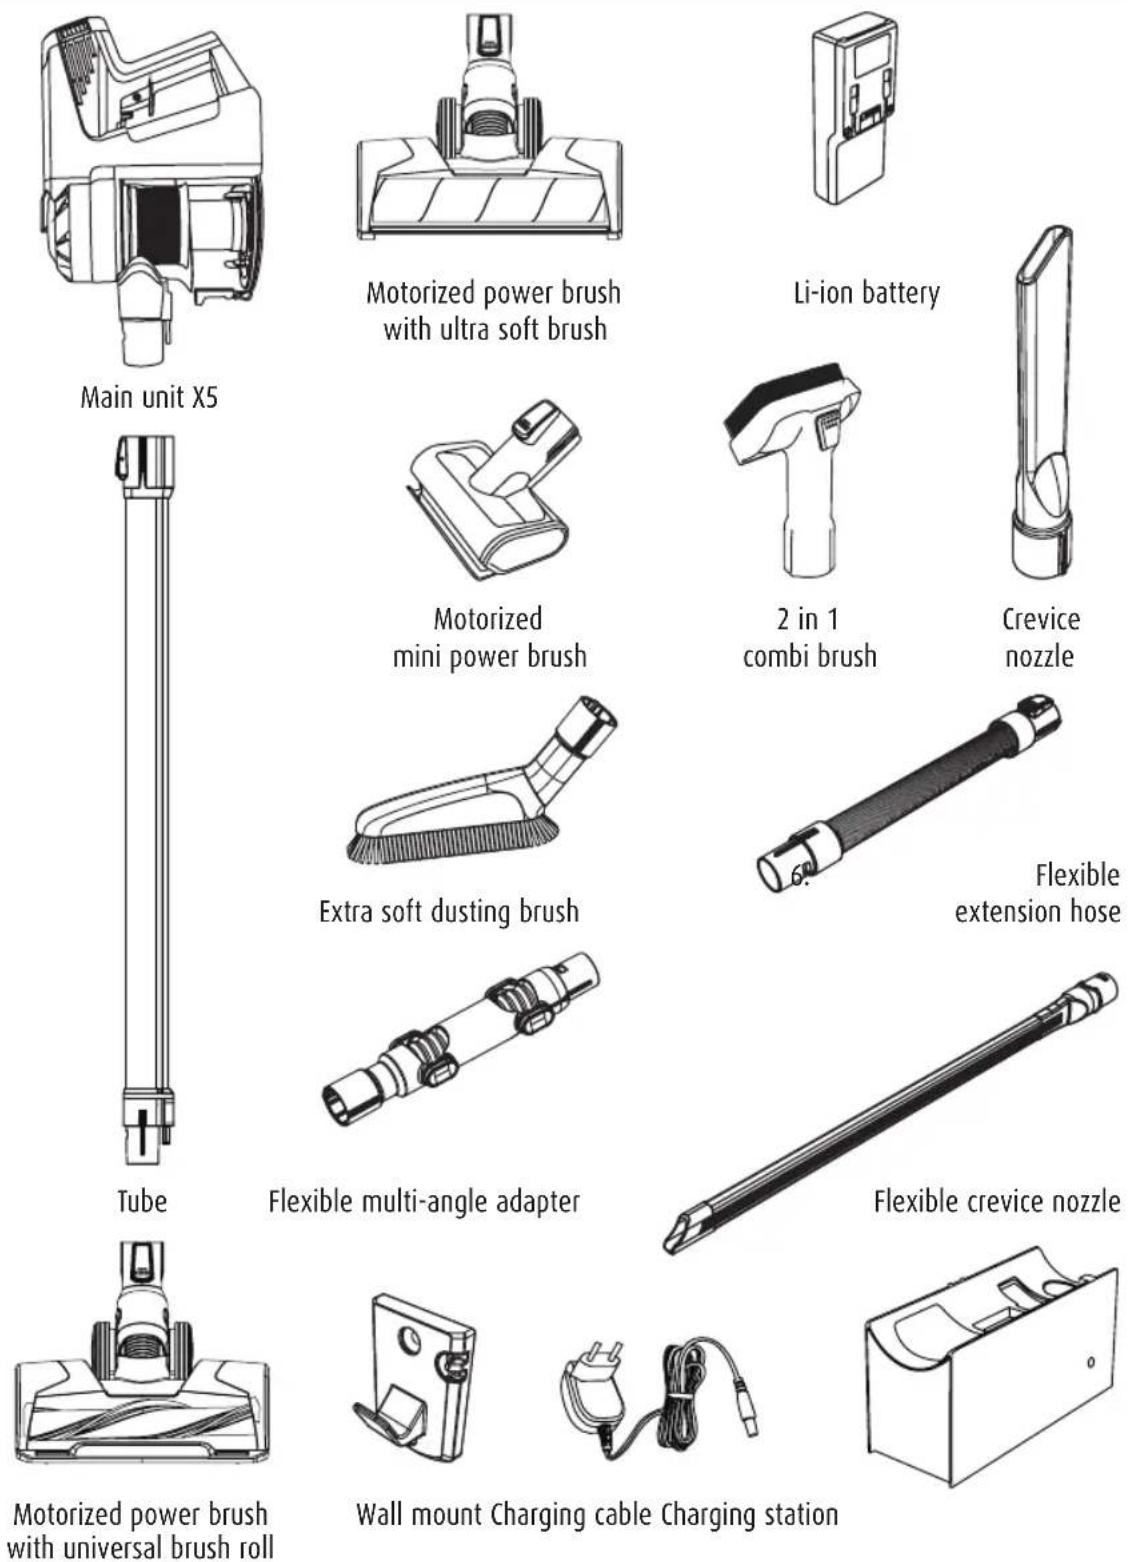
These operating instructions cover all available accessories for the appliance. The content of the set that you have purchased is indicated on the packaging or a separate insert. You can also purchase additional accessories which are not included in your set.
4 Main unit
text_image
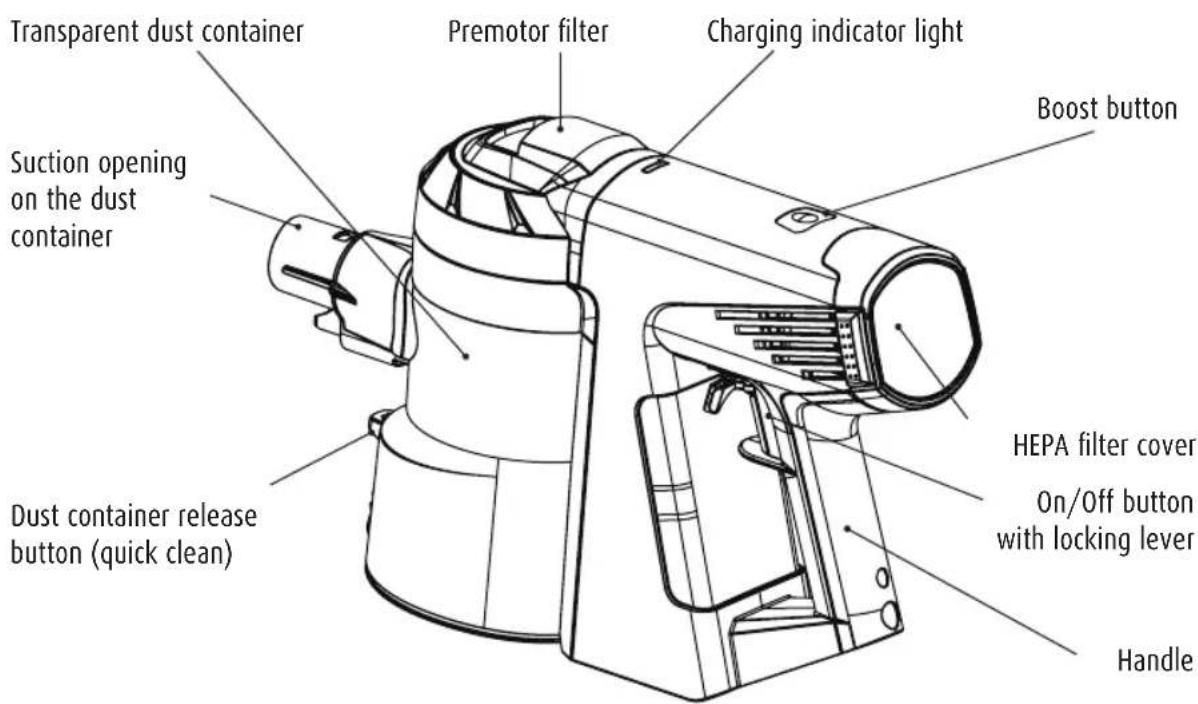
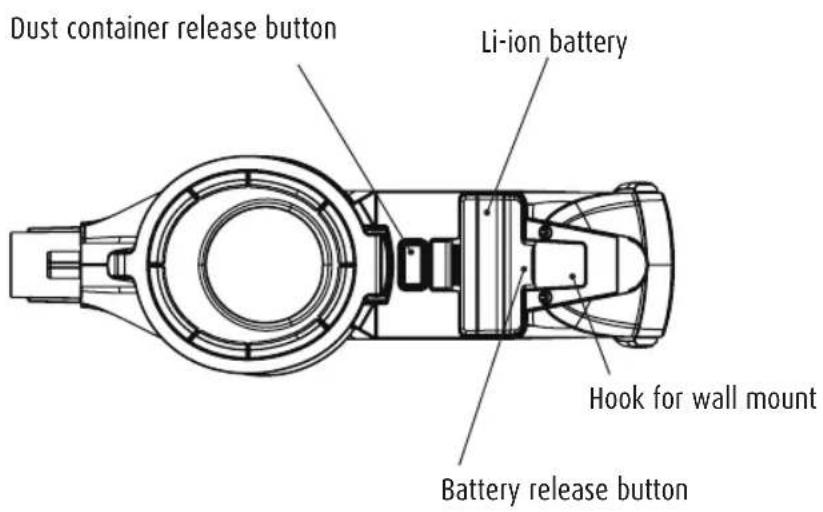
Transparent dust container Suction opening on the dust container Dust container release button (quick clean) Premotor filter Charging indicator light Boost button HEPA filter cover On/Off button with locking lever HandleView of device from below:
text_image
Dust container release button Li-ion battery Hook for wall mount Battery release button5 Use of attachments
| Accessories Picture Use | ||
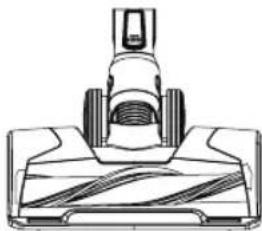
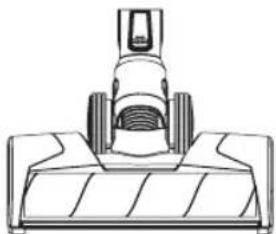
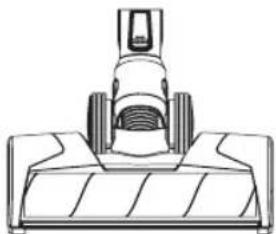
| Motorized power brush | 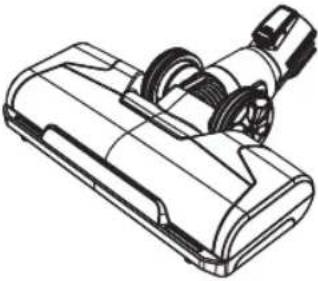 | - Has an integrated electric motor which rotates the brush at up to 10,000 r.p.m.- Use optionally with the universal brush roll or the ultra soft brush roll- For cleaning large areas such as hard flooring and carpets |
| Universal brush roll | 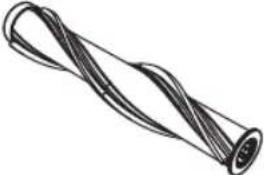 | - Insert into the motorized power brush- Ideal for rugs/carpets- Can also be used for vacuuming smooth floors |
| Ultra soft brush roll | 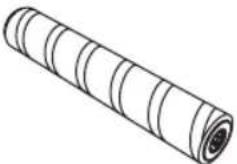 | - Insert into the motorized power brush- Ideal for hard floors, vacuums coarse and fine dirt at the same time- Also suitable for sensitive floors |
| Motorized mini power brush | 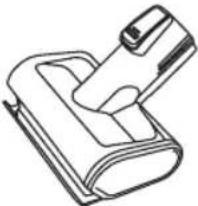 | - Has an integrated electric motor which rotates the brush at up to 8,000 r.p.m.- For vacuuming upholstered furniture, mattresses etc.- Also removes ingrained dirt |
| 2 in 1 combi brush | 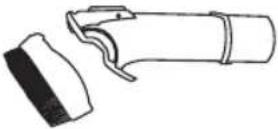 | - The frame with the brushes can be removed by pressing the release button- For vacuuming upholstered furniture, curtains etc. |
| Extra soft dusting brush | 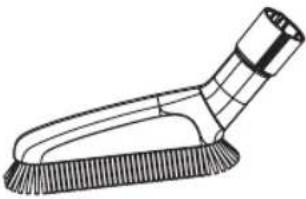 | - Very soft brush for cleaning of sensitive surfaces such as keyboards, lamps etc. |
Crevice nozzle - For narrow and difficult to access corners 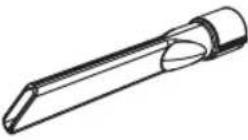 | or niches | |
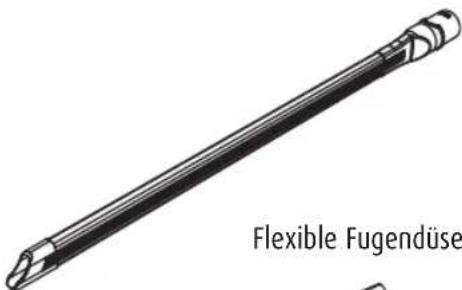
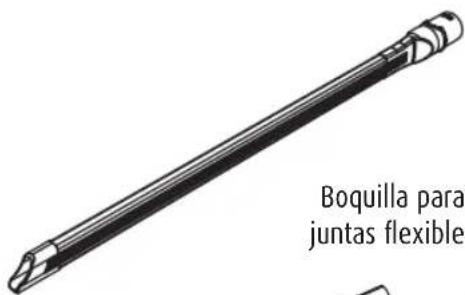
| Flexible crevice nozzle | 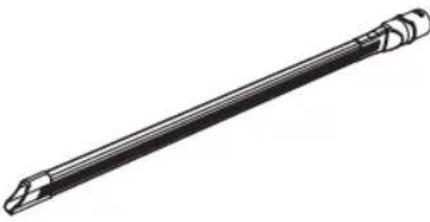 | - Flexible crevice nozzle to increase reach when cleaning narrow and difficult to access corners and niches |
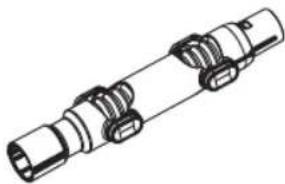
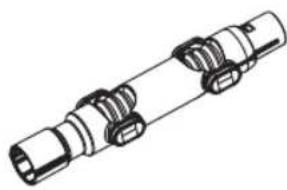
| Flexible multi-angle adapter | 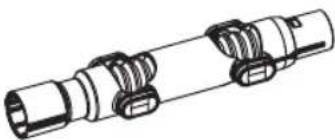 | - Increases reach and flexibility- Infinitely adjustable |
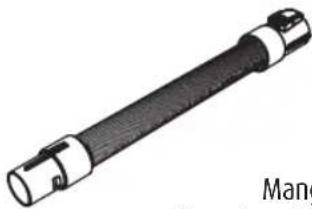
| Flexible extension hose | 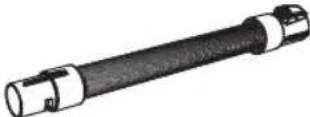 | - To increase reach |
Wall mount - For simple and practical storage 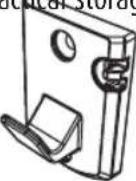 | ||
Charging station - For space-saving storage and battery 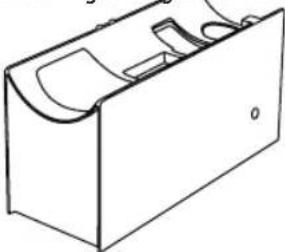 | charging | |
Charging cable - For battery charging 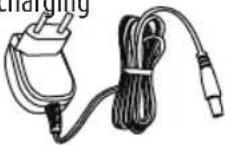 | ||
6 Starting up
6.1 Assembly
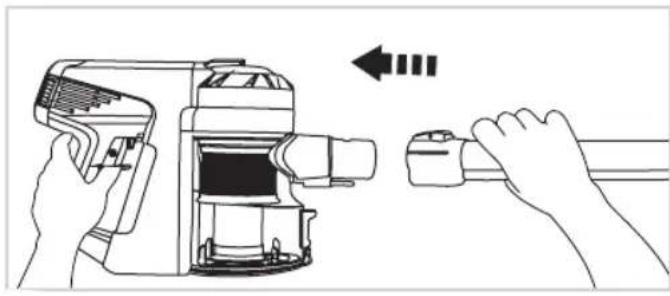
natural_image
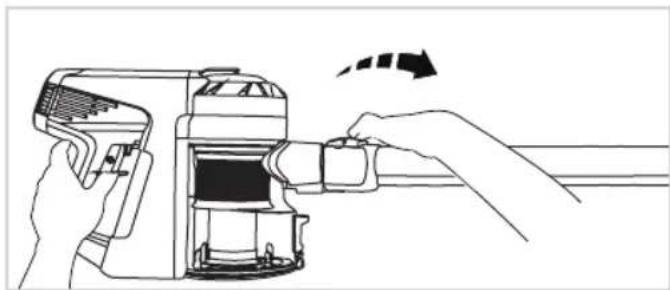
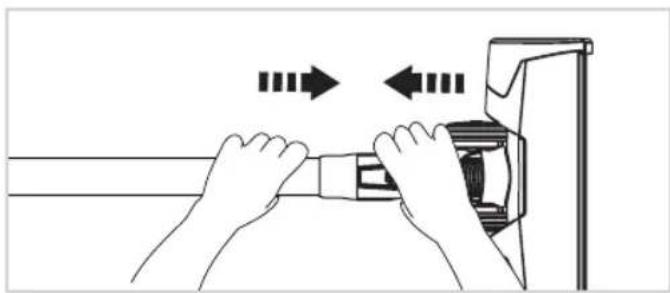
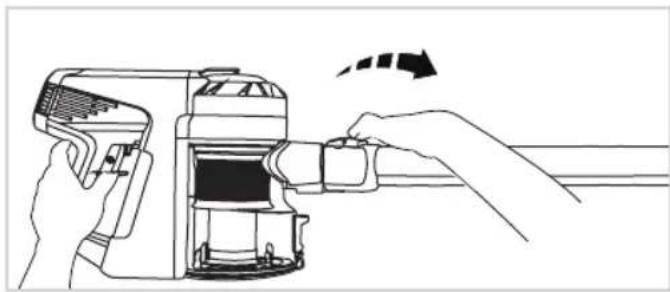
Line drawing of a hand holding a handheld device with a left-pointing arrow indicating action (no text or symbols)Insert tube
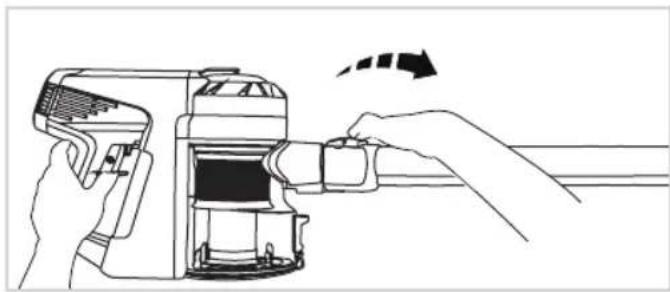
natural_image
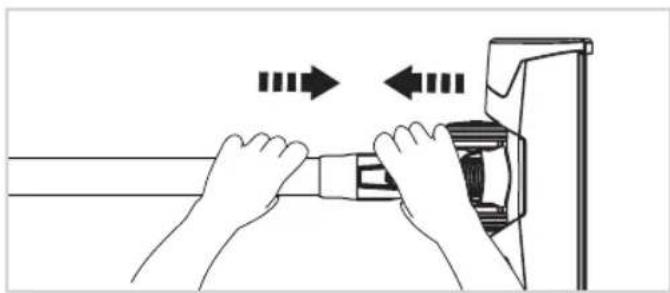
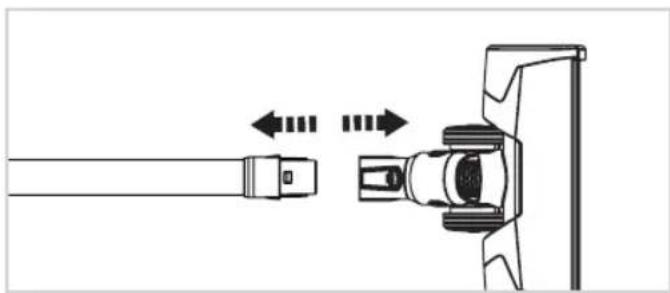
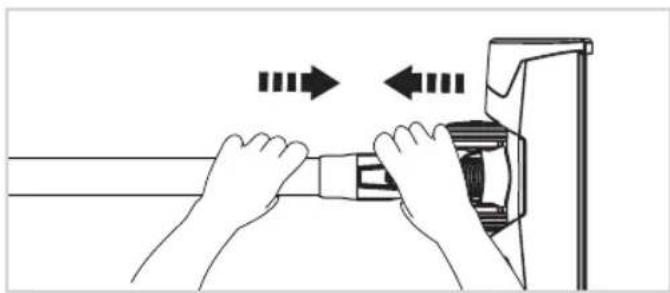
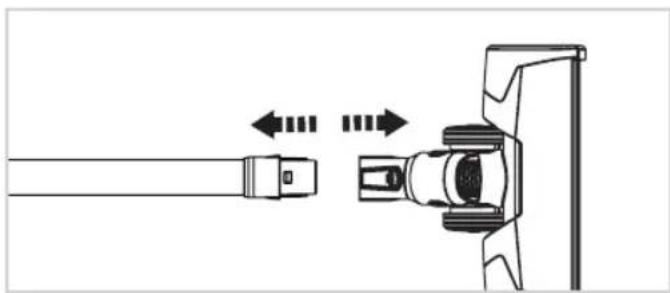
Line drawing of a hand using a handheld device to interact with a toolbar, showing motion arrows (no text or symbols)Remove tube
natural_image
Illustration of hands fastening a cable or connector with directional arrows indicating motion (no text or symbols)Insert motorized power brush
natural_image
Diagram showing a connector with directional arrows indicating movement or force (no text or symbols present)Remove motorized power brush
The motorized power brush and the motorized mini power brush are driven by a separate integrated motor and have to be directly connected to the main unit or the tube to ensure a power supply.
All other accessories can be directly connected to the main unit or, to increase the appliance's reach, to the tube, the extension hose and the multi-angle adapter.
Note: Test an inconspicuous area of a sensitive surface before using an accessory on it. Always follow the manufacturer's cleaning instructions.
6.2 Charging the battery
NOTE!
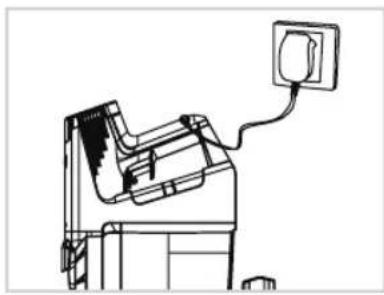
Charge the battery with the supplied charging cable only. Always use original batteries Disconnect the cable from the mains when it isn't being used.
natural_image
Line drawing of a mechanical device with a cable and attached electrical outlet (no text or symbols)When the vacuum cleaner is in use the indicator light is blue. It changes to red when the battery power becomes depleted.
To recharge the battery connect the charging socket to the mains with the charging cable.
The indicator light flashes blue during the charging process. When it goes out the battery is fully charged.
natural_image
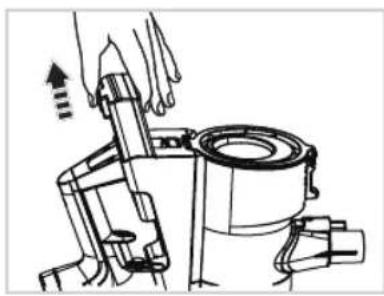
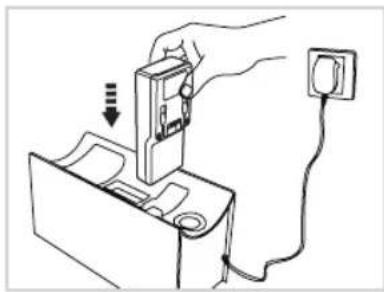
Technical line drawing of a mechanical assembly with no visible text or symbolsThe battery can also be recharged on the separate charging station.
Remove the battery from the main unit by pressing the release button at the end of the battery and pulling it out.
natural_image
Hand inserting a device into a battery with a power outlet (no text or symbols visible)Connect the charging station to the mains with the supplied charging cable and insert the battery into the correct aperture. Position the charging station so that nobody can trip over it or the cable.
The indicator light flashes during the charging process. When it goes out the battery is full charged and can be returned to the main unit.
7 Use

CAUTION!
Never use the appliance on wet surfaces or to vacuum liquid.
Keep body parts and items of clothing away from the moving parts and apertures of the appliance when it is in operation.
Do not use the appliance when connected to the charging cable.
Switching the appliance on and off - boost button
natural_image
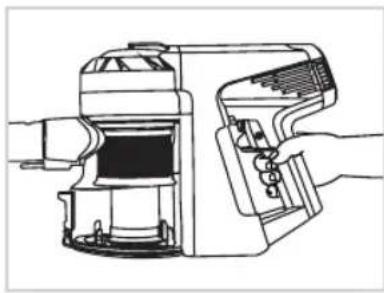
Technical line drawing of a mechanical device with internal components (no text or symbols)Use the on/off button to switch the vacuum cleaner on and off. It continues operating until you release the button.
You can also use the locking lever for continuous operation.
natural_image
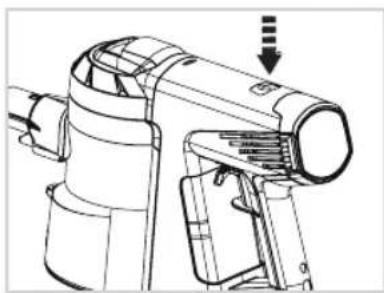
Technical line drawing of a mechanical device with no visible text or symbolsPress the boost button to maximise suction. When the appliance is switched off, boost mode is automatically deactivated. You can also deactivate boost mode by pressing the boost button again.
Cleaning carpets and hard floors
Read the manufacture's care instructions before cleaning floors and carpets.
Rotating brushes can cause damage to some carpets and floors. Some carpets pill when cleaned with rotating brushes. Test an inconspicuous area of the floor or carpet before cleaning it.
Before cleaning polished floors (wood, linoleum etc.) ensure that there are no foreign bodies on the underside of the motorized power brush that might cause scratches.
Charging Station
natural_image
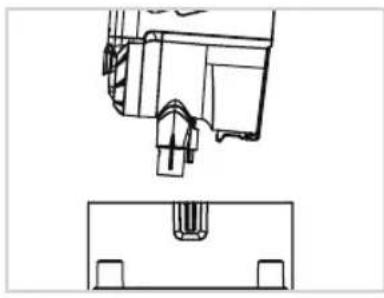
Technical line drawing of a mechanical component with a base and top view (no text or symbols)Specially designed for the space-saving and safe storage of the appliance. Remove the tube from the main unit and place it on the charging station as illustrated.
There is a recess on the front side for the motorized power brush (with or without tube) and 2 accessory holders.
Also has a battery charging function (See: Charging the battery).
Wall Mount
natural_image
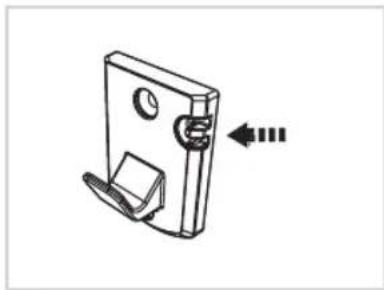
Technical line drawing of a mechanical clip or bracket with mounting holes and a separate clip, showing no text or symbols.Affix the wall mount to the wall using the supplied screws. Ensure that there are no pipes or electric cables behind the screw insertion points in the wall.
The recesses on the mount can be used for cable storage to prevent the charging cable from hanging on the floor when not in use.
Emptying the Dust Container (quick clean)
natural_image
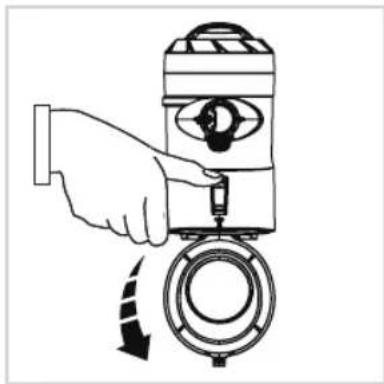
Illustration of a hand operating a mechanical device with a circular component and directional arrows indicating motion (no text or symbols)Do not empty the dust container until the dust has reached the max. line. Detach the tube and any accessories before emptying the dust container.
Hold the appliance with dust container over a waste bin. Press the dust container's release button. The flap opens and the dust falls into the bin.
natural_image
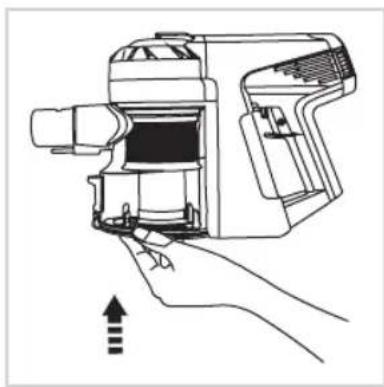
Line drawing of a hand holding a portable device with a handle and internal components, no text or symbols present.Close the dust container flap again after emptying the container.
8 Care and cleaning

WARNING!
Risk of electronic shock!
Always switch off and unplug the appliance before cleaning it or performing maintenance.
Never hold the main unit and battery under water or immerse the appliance in water or other liquids.

NOTE!
Do not use soap or detergent to clean the premotor filter or HEPA filter because this will damage the filter.
Allow the filter to dry naturally in the air. Do not use a hair dryer or other appliance to dry it.
Do not use any aggressive or abrasive cleaning agents to clean the housing. They could damage the surface. Clean the housing with a damp, soft cloth when necessary.
Cleaning the dust container and cyclone filter
natural_image
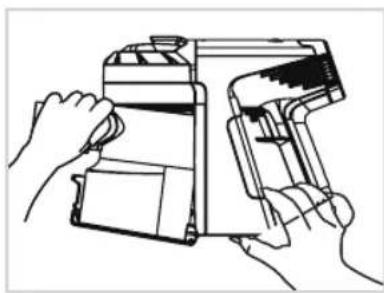
Line drawing of two hands operating a handheld device (no text or symbols visible)The dust container can be detached from the main unit for thorough cleaning.
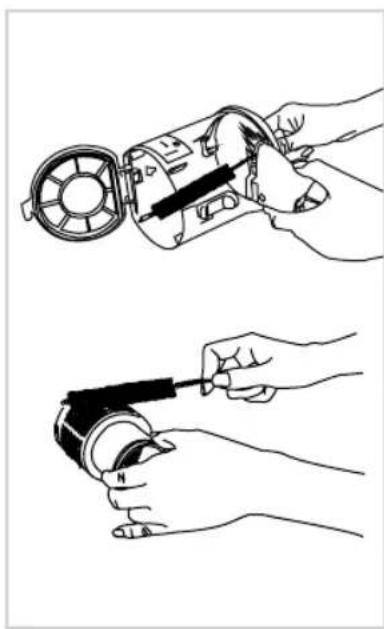
First open the dust container and remove the cyclone filter by twisting it in an anti-clockwise direction and pulling down. Close the dust container and press the release button on the main unit's base. Hold the button down, tip the dust container away from the main unit and remove it with your other hand.
natural_image
Two-step illustration showing hands using a tool to adjust or install a mechanical component (no text or symbols present)To insert the dust container back into the main unit connect it at the top front side first (ensure that you have positioned it correctly). Then press it into the main unit until you hear it click into place and replace the cyclone filter. Observe the markings on the filter and inside the dust container.
Clean the dust container with a brush or damp cloth.
There are power cables for the motorized power brushes inside the dust container. Take care not to get them wet when you clean the dust container.
The cyclone filter can be cleaned with a brush or under running water, if necessary.
Cleaning the premotor filter

natural_image
Technical line drawing of a mechanical device with no visible text or symbolsPull the premotor filter up and out of the main unit. Both components (the outer fabric ring and the inner foam rink) can be tapped against a hard surface or held under running water to clean them.
Cleaning/replacing the HEPA filter
natural_image
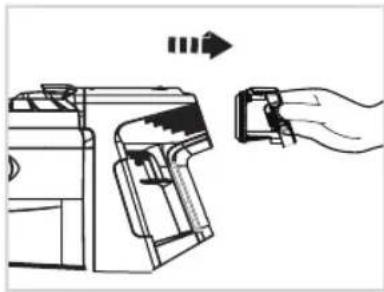
Line drawing of a printer with a hand holding a clip, showing mechanical components and motion arrows (no text or symbols)To ensure full functionality, the HEPA filter should be cleaned regularly and replaced every 4-6 months.
Remove the filter unit by pressing the locking mechanism together with two fingers and pulling it out of the main unit.
To remove the HEPA filter, unscrew the screw on the inside of the filter unit.
Clean the HEPA filter by tapping it on a hard surface. If it is very dirty, wash it under running water.
Put the cleaned or new filter in the filter unit and replace the screw.

NOTE!
Only use cold water to clean the filter and allow all parts to dry COMPLETELY before reassembling.
Changing the battery
natural_image
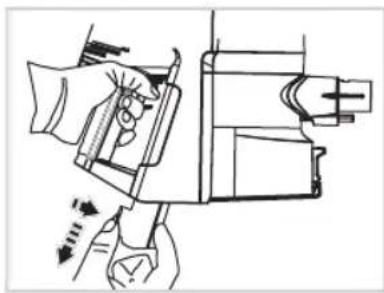
Technical line drawing of a mechanical device with hands operating it (no text or symbols present)Switch the appliance off. Press the battery release button and hold it down. Remove the battery.
natural_image
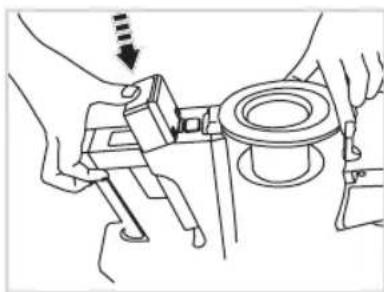
Line drawing of hands assembling a mechanical component with a circular base and shaft (no text or symbols)Insert a new battery and make sure you hear it clicking into place. If you cannot insert the battery completely into the main unit, check to see whether you have positioned it correctly.

NOTE!
If the appliance is not used for a long time, store the semi-charged battery in a cool, dry place.
Cleaning - replacing the motorized power brush
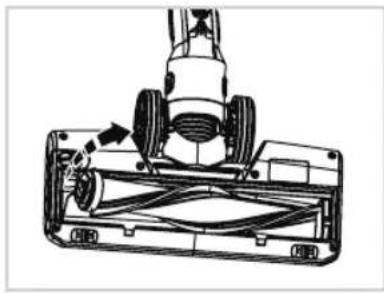
natural_image
Technical line drawing of a mechanical component with no visible text or symbolsRemove the screw and take off the side cover.
Take out the brush in the direction indicated by the arrow and remove the dirt. If necessary, the brushes can be cleaned under running water.
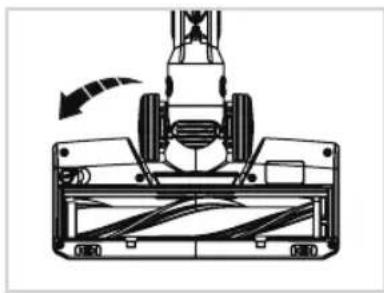
natural_image
Technical line drawing of a mechanical device with a rotating arrow indicating motion (no text or symbols)Always allow the brushes to dry completely before replacing them.
When you replace the brush ensure that it is correctly positioned and that it is in the correct recesses. Replace the cover and the screw.
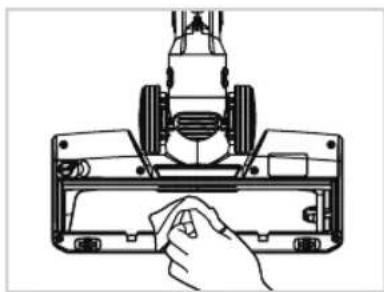
natural_image
Line drawing of a hand holding a tool on a mechanical component (no text or symbols)Clean the motorized power brush with a damp cloth or a soft brush.
The motorized power brush should never be cleaned under running water because it has an integrated motor.
9 Troubleshooting

WARNING!
Always switch off and unplug the appliance before attempting to resolve a problem, otherwise you risk injury and electrocution!
| PROBLEM POSSIBLE CAUSE/SOLUTION | |
| The appliance doesn’t work Check whether the battery is charged and charge it if necessary. | |
| The battery isn’t charging Check whether the charging cable is correctly inserted into the charging socket. | |
| Weak suction power Check whether the suction opening on the dust container is blocked and clean it if necessary. | |
| Abnormal motor sounds Check whether the tube or the suction opening on the dust container is blocked and clean it if necessary. | |

NOTE!
If you cannot solve the problem, please contact our customer service team. Never open the appliance's housing!
10 Disposal
Packaging

The packaging material can be recycled. Dispose of the packaging in an environmentally friendly way for recycling.
Electrical appliances
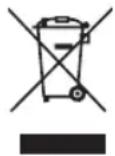
The symbol with the crossed out dustbin means that this product cannot be disposed of in the household waste. Electrical waste should be taken to a local acceptance point.
You can obtain further information about the disposal and recycling of this appliance from your municipal utility company, the retailer where you purchased it or the manufacturer.
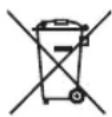
Before disposing of the appliance remove the batteries because they have to be disposed of separately. Batteries cannot be put in the household waste as they pose an environmental risk. Take them to a battery collection point. Contact your local authority to find out where you can dispose of batteries in your area.
Even empty batteries have a residual charge. Before you dispose of them, cover the poles with insulating tape to prevent them short circuiting, which could cause fire or an explosion.
11 Technical details
| Model | X5 |
| Size (H x W x D) | 123 x 22,5 x 26 cm |
| Tube length Approx. 71 cm | |
| Power (with power brush) 180 W | |
| Battery 21.6 V li-ion battery | |
| Battery capacity 2,000 mAh | |
| Battery charging time 3 - 4 h | |
| Operating time Max. 30 min. (in boost mode: 15 min) | |
| Dust container capacity Approx. 0.5 l | |
| ADAPTER | |
| Power supply: IN 100 - 240 V ~50/60 Hz | |
| Power supply: OUT 26 V, | = 400 mA |
| Protection class II | |
CUSTOMER SERVICE
If you have any questions about the device or spare parts/accessories, please contact your local retailer.
TABLE DES MATIÈRES
natural_image
Technical line drawing of a mechanical device with internal components (no text or symbols)Appareil portable X5
natural_image
Line drawing of a vacuum cleaner with a mounted device (no text or symbols)natural_image
Line drawing of a cleaning brush with bristles and handle (no text or symbols)natural_image
Illustration of a cylindrical mechanical component with flanges and end caps (no text or symbols)Tuyau de rallonge flexible
natural_image
Technical line drawing of a mechanical shaft assembly (no text or symbols)text_image
Suceur flexible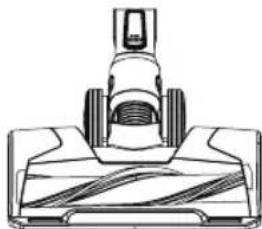
natural_image
Technical line drawing of a mechanical component with textured base and protruding shaft (no text or symbols)natural_image
Line drawing of a rectangular box with internal compartments (no text or symbols)natural_image
Line drawing of a hand holding a handheld device with a left-pointing arrow indicating action (no text or symbols)natural_image
Line drawing of a hand using a handheld device to interact with a toolbar, showing motion arrows (no text or symbols)natural_image
Illustration of hands fastening a cable or connector with directional arrows indicating motion (no text or symbols)natural_image
Diagram showing a mechanical component with arrows indicating motion or movement, no text or symbols presentnatural_image
Line drawing of a mechanical device with a cable and socket (no text or symbols)natural_image
Mechanical assembly diagram showing a rotating component with directional arrows (no text or labels)natural_image
Hand inserting a plug into a device with an outlet cable (no text or symbols visible)natural_image
Technical line drawing of a mechanical device with internal components (no text or symbols)natural_image
Technical line drawing of a mechanical device with no visible text or symbolsnatural_image
Technical line drawing of a mechanical component with a base and top view (no text or symbols)natural_image
Technical line drawing of a mechanical clip or bracket with mounting holes and a separate clip, showing no text or symbols.natural_image
Illustration of a hand operating a mechanical device with a circular component and directional arrow (no text or symbols)natural_image
Line drawing of a hand holding a portable device with a handle and internal components, no text or symbols present.natural_image
Line drawing of hands operating a handheld device with paper and scroll (no text or symbols)natural_image
Two-step line drawing showing hands using a mechanical device to adjust or install a circular component (no text or symbols present)natural_image
Technical line drawing of a mechanical device with no visible text or symbolsnatural_image
Line drawing of a printer with a hand holding a clip, showing the process from left to right (no text or symbols)natural_image
Technical line drawing of a mechanical device with hands operating it (no text or symbols)natural_image
Line drawing of hands operating a mechanical component with a circular base and adjustment knob (no text or symbols)natural_image
Technical line drawing of a mechanical device with wheels and a handle (no text or symbols)natural_image
Technical line drawing of a mechanical assembly with no visible text or symbolsnatural_image
Line drawing of a hand using a tool to clean or adjust a mechanical component (no text or symbols visible)natural_image
Technical line drawing of a mechanical device interior (no text or symbols)Handapparaat X5
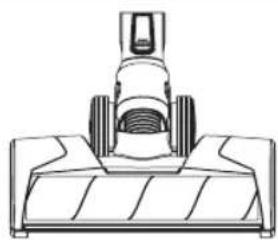
natural_image
Line drawing of a mechanical device with a top component and base (no text or symbols)natural_image
Technical line drawing of a vertical cylindrical mechanical component with mounting flanges (no text or symbols)Zuigbuis
natural_image
Line drawing of a cleaning brush with a handle and bristles (no text or symbols)natural_image
Illustration of a flexible cylindrical tool with no text or symbols on its bodyFlexibele verlengslang
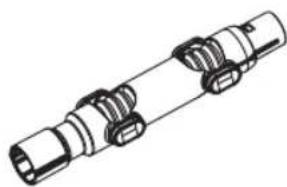
natural_image
Technical line drawing of a mechanical shaft assembly (no text or symbols)Flexibele hoekadapter
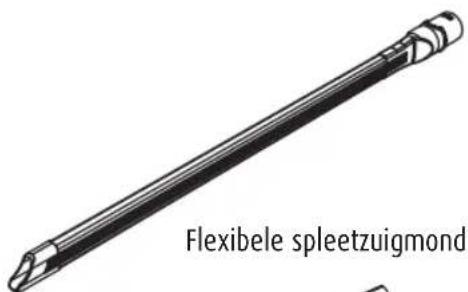
text_image
Flexibele spleetzuigmond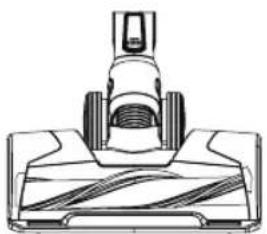
natural_image
Technical line drawing of a mechanical component or fixture (no text or symbols visible)natural_image
Line drawing of a rectangular box with internal compartments and a curved top (no text or symbols)oplaadfunctie
natural_image
Line drawing of a hand holding a handheld device with a left-hand rule arrow (no text or symbols)zuigbuis monteren
natural_image
Line drawing of a hand using a handheld device to interact with a toolbar, showing motion arrows (no text or symbols)zuigbuis eraf halen
natural_image
Illustration of hands fastening a cable or connector with directional arrows indicating motion (no text or symbols)elektroborstel monteren
natural_image
Diagram of a mechanical component with arrows indicating motion or movement (no text or symbols)elektroborstel eraf halen
natural_image
Line drawing of a mechanical device with a cable and housing, no text or symbols presentnatural_image
Mechanical assembly diagram showing a rotating component with directional arrows indicating motion (no text or symbols)natural_image
Hand inserting a device into a battery with an electrical outlet (no text or symbols visible)natural_image
Technical line drawing of a mechanical device with internal components (no text or symbols)natural_image
Technical line drawing of a mechanical device with no visible text or symbolsnatural_image
Technical line drawing of a mechanical component with a base and top view (no text or symbols)natural_image
Technical line drawing of a mechanical clip or bracket with mounting holes and a separate clip, showing no text or symbols.natural_image
Illustration of a hand operating a mechanical device with a circular component and directional arrows indicating motion (no text or symbols)natural_image
Line drawing of a hand holding a portable device with a handle and internal components, no text or symbols present.natural_image
Line drawing of two hands operating a handheld device with paper and scroll (no text or symbols)natural_image
Two-step line drawing showing hands using a mechanical device to adjust or install a circular component (no text or symbols present)natural_image
Technical line drawing of a mechanical device with no visible text or symbolsnatural_image
Line drawing of a printer with a hand holding a clip, showing mechanical components and a directional arrow (no text or symbols)natural_image
Technical line drawing of a mechanical assembly with no visible text or symbolsnatural_image
Line drawing of hands assembling a mechanical component with a bolt and nut (no text or symbols)natural_image
Technical line drawing of a lawn mower assembly with visible blades and wheel (no text or labels)natural_image
Technical line drawing of a mechanical device with a rotating arrow indicating motion (no text or symbols)natural_image
Line drawing of a hand inserting a component into a mechanical device (no text or symbols)natural_image
Technical line drawing of a mechanical device with internal components (no text or symbols)natural_image
Line drawing of a mechanical device with a top component and base (no text or symbols)natural_image
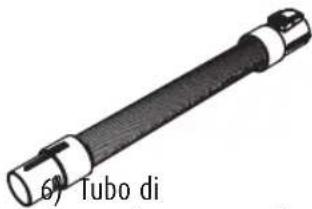
Technical line drawing of a vertical cylindrical mechanical component with mounting flanges (no text or symbols)Tubo di aspirazione
natural_image
Line drawing of a cleaning brush with a handle and bristles (no text or symbols)Spazzola da spolvero extra morbida
natural_image
Illustration of a tubo diener with labeled part (no text or symbols on the object itself)natural_image
Technical line drawing of a vacuum cleaner component (no text or symbols)natural_image
Technical line drawing of a mechanical shaft assembly (no text or symbols)natural_image
Line drawing of a 3D box with cutouts and a handle (no text or symbols)natural_image
Line drawing of a hand holding a handheld device with an arrow indicating rotation (no text or symbols)natural_image
Line drawing of a hand using a handheld device to interact with a toolbar, showing motion arrows (no text or symbols)natural_image
Illustration of hands fastening a cable or connector with directional arrows indicating motion (no text or symbols)natural_image
Diagram showing a mechanical component with arrows indicating motion or movement, no text or symbols presentnatural_image
Line drawing of a mechanical device with a cable and housing, no text or symbols presentnatural_image
Mechanical assembly diagram showing a rotating component with directional arrows indicating motion (no text or symbols)natural_image
Hand inserting a device into a battery with an AC power outlet (no text or symbols visible)natural_image
Technical line drawing of a mechanical device with internal components (no text or symbols)natural_image
Technical line drawing of a mechanical device with no visible text or symbolsnatural_image
Technical line drawing of a mechanical component with a base and top view (no text or symbols)natural_image
Technical line drawing of a mechanical clip or bracket with mounting holes and a separate clip, showing no text or symbols.natural_image
Illustration of a hand operating a mechanical device with a circular component and directional arrow (no text or symbols)natural_image
Line drawing of a hand holding a device with an arrow indicating motion or force (no text or symbols present)natural_image
Line drawing of two hands operating a handheld device (no text or symbols visible)natural_image
Two-step line drawing showing hands using a tool to adjust or install a mechanical component (no text or symbols present)natural_image
Technical line drawing of a mechanical device with no visible text or symbolsnatural_image
Line drawing of a printer with a hand holding a clip, showing mechanical components and motion arrows (no text or symbols)natural_image
Technical line drawing of a mechanical assembly with no visible text or symbolsnatural_image
Line drawing of hands operating a mechanical component with a circular base and adjustment arrow (no text or symbols)natural_image
Technical line drawing of a mechanical device with wheels and a handle (no text or symbols)natural_image
Technical line drawing of a mechanical assembly with no visible text or symbolsnatural_image
Line drawing of a hand using a tool to clean or adjust a mechanical component (no text or symbols visible)natural_image
Technical line drawing of a mechanical device with internal components (no text or symbols)natural_image
Line drawing of a mechanical device with a top component and base (no text or symbols)natural_image
Technical line drawing of a vertical cylindrical mechanical component with a flanged end and central fastener (no text or symbols)Tubo de aspiración
natural_image
Line drawing of a cleaning brush with a handle and bristles (no text or symbols)Cepillo ultrasuave para polvo
natural_image
Illustration of a cylindrical mechanical component with flanges and end caps (no text or symbols)Manguera alargadora flexible
natural_image
Technical line drawing of a mechanical shaft assembly (no text or symbols)Adaptador angular flexible
text_image
Boquilla para juntas flexible