SlimStyle HSX3315FTSCA - Heating DELONGHI - Free user manual and instructions
Find the device manual for free SlimStyle HSX3315FTSCA DELONGHI in PDF.

User questions about SlimStyle HSX3315FTSCA DELONGHI
0 question about this device. Answer the ones you know or ask your own.
Ask a new question about this device
Download the instructions for your Heating in PDF format for free! Find your manual SlimStyle HSX3315FTSCA - DELONGHI and take your electronic device back in hand. On this page are published all the documents necessary for the use of your device. SlimStyle HSX3315FTSCA by DELONGHI.
USER MANUAL SlimStyle HSX3315FTSCA DELONGHI
Instructions for use. Keep these instructions
Visit www.delonghi.com for a list of service centers near you.
ELECTRIC CHARACTERISTICS
120 V\~60 Hz 1500 W
natural_image
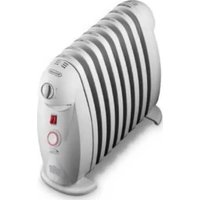
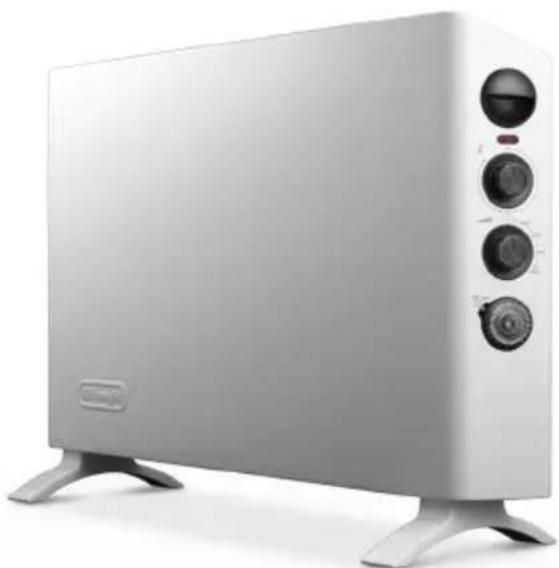
Exterior view of a modern electric heater with three control knobs and a brand logo (no visible text or symbols on the device body)DēLonghi

text_image
500mm 20 in. "800mm" "32 in. 200mm 8 in. 200mm 8 in. 200mm 8 in. 75mm 3 in. 4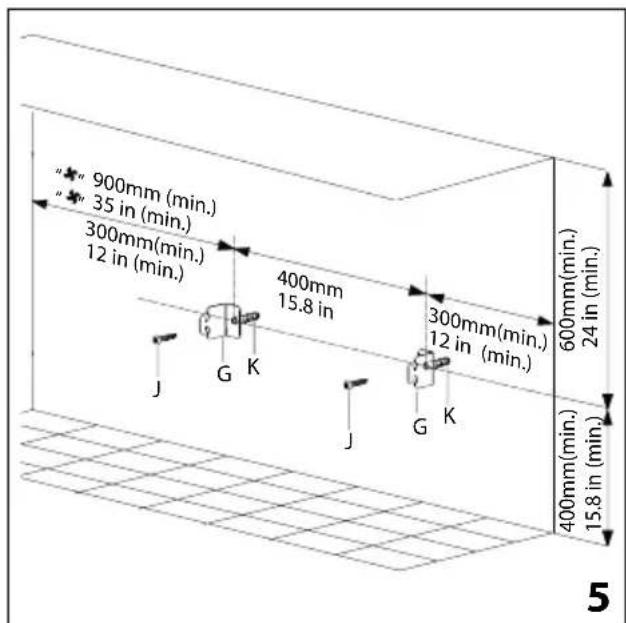
text_image
"900mm (min.) "35 in (min.) 300mm(min.) 12 in (min.) 400mm 15.8 in 300mm(min.) 12 in (min.) 600mm(min.) 24 in (min.) 400mm(min.) 15.8 in (min.) J G K J G K 5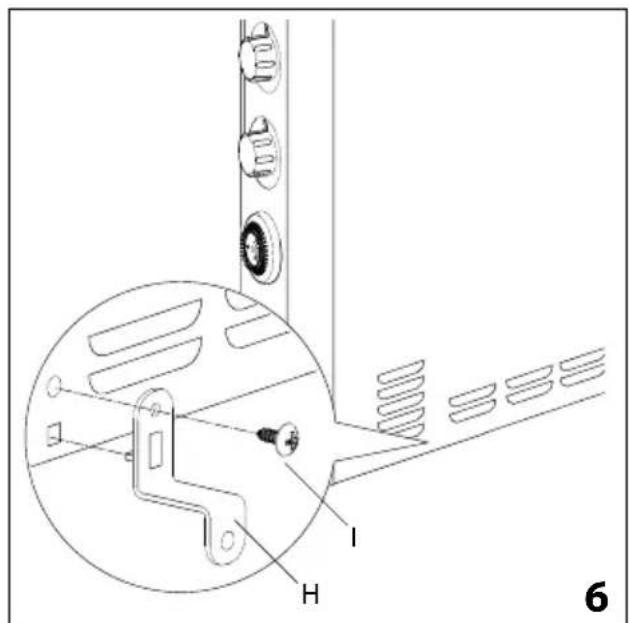
text_image
Technical diagram showing mechanical assembly with labeled parts H and I, including a magnified inset view of a bracket-like structure.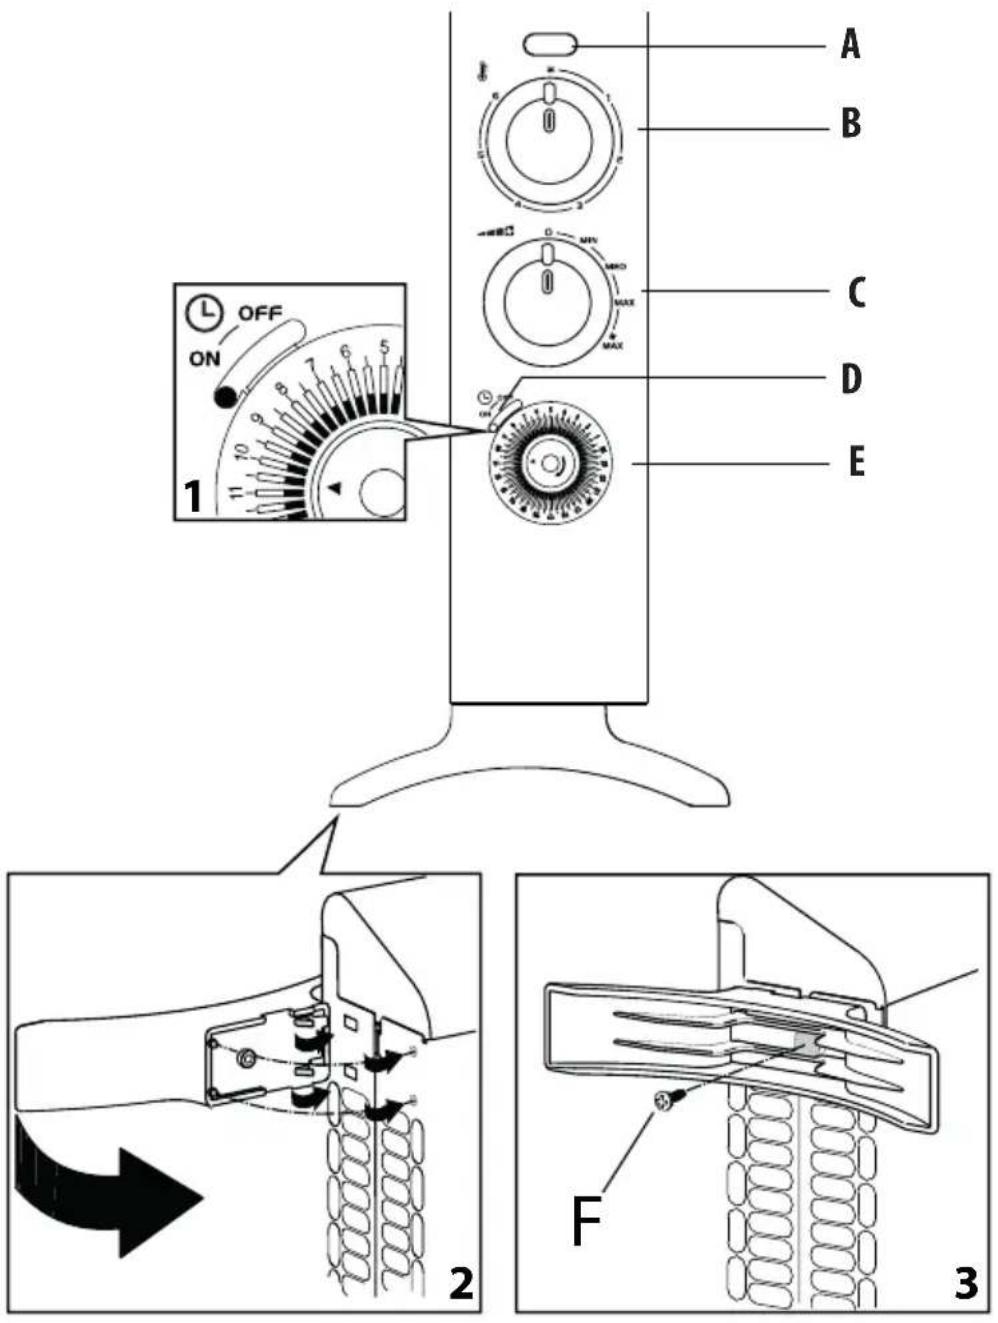
text_image
A B C D E OFF ON 1 2 F 3
text_image
2 X (F) 3,5x13 PH 2 X (G) 2 X (H) 2 X (I) 3,5 X 9,5 PH 4 X (J) 4,5 X 25 PH 4 X (K) 6 X 30MISES EN GARDE IMPORTANTES
When using any electrical appliance, some basic safety precautions should always be observed to reduce the risk of fire, electric shock, and/or injury to persons. Read all instructions carefully before using the appliance. Specifically:

Danger!
Failure to observe the warning may result in life threatening injury by electric shock.
- The appliance must not be placed immediately under a fixed power socket.
- Do not use the appliance outdoors.
- Do not operate any heater with a damaged cord or plug or after the heater malfunctions, has been dropped or damaged in any manner. Return heater to authorized service facility for examination, electrical or mechanical adjustment, or repair.
- This heater is not intended for use in bathrooms, laundry areas and similar indoor locations. Never locate heater where it may fall into a bath tub or other water container.
- If the power cable is damaged, stop using the product. Power cable must be replaced by the manufacturer, an authorised service centre or a qualified electrician in order to eliminate all risk.
- Do not use this heater in the immediate surroundings of a bath, a shower and sinks or a swimming pool.
- Do not insert or allow foreign objects to enter any ventilation or exhaust opening as this may cause an electric shock, fire, or damage the heater.
- CAUTION: to prevent electric shock match wide blade of plug to wide
slot, then fully insert.
- CAUTION: In order to avoid a hazard due to inadvertent resetting of thermal cutout, this appliance must not be supplied through an external switching device, such as a timer, or connected to a circuit that is regularly switched on and off by the utility.
- If you intend to fix your appliance to the wall, make sure that the switch or other control devices are not within reach of persons in the bath or shower.

Important!
Failure to observe the warning could result in injury or damage to the appliance.
- The appliance is not intended for use by persons (including children) with reduced physical, sensory or mental capabilities, or lack of experience and knowledge, unless they have been given supervision or instruction concerning use of the appliance by a person responsible for their safety. Children should be supervised to ensure that they do not play with the appliance.
- CAUTION — Some parts of this product can become very hot and cause burns.
- Extreme caution is necessary when any heater is used by or near children and whenever the heater is leftoperating and unattended.
- Always disconnect the plug from the power outlet when the appliance is not in use.
- Do not wrap the cord around the appliance immediately after use.
- The internal parts of the appliance can become very hot or produce sparks during operation.
Do not use the appliance in areas where gasoline, paints, or other flammable liquids are used or stored.
- Use this heater only as described in this manual. Any other use not recommended by the manufacturer may cause fire, electric shock, or injury to persons.
- To prevent overload and blown fuses, be sure that no other appliance is plugged into the same outlet (receptacle) or into another outlet (receptacle) wired into the same circuit.
- Make sure that the plug is fully inserted into the outlet. Wall outlets may deteriorate with time, so check the plug periodically for signs of overheating or deformation. If the outlet has deteriorated, stop using it and have it repaired.
- Do not use the appliance in small rooms when they are occupied by persons that are not capable of leaving the room, unless constant supervision is provided.

Danger of burns!!
Failure to observe the warning could result in burns or scalds.
- WARNING: To avoid overheating, never under any circumstances cover the appliance during operation as this would lead to a dangerous rise in temperature, and risk of fire.
- Do not use the appliance on soft surfaces, such as beds, where the openings may become blocked.
- This heater is hot when in use. To prevent burns, do not let bare skin touch hot surfaces. Use handle when moving this heater. To prevent burns, do not touch hot surfaces with bare
skin. Use the handle when moving the appliance. Keep all flammable materials, such as furniture, pillows, bedding, paper, clothing, and curtains at least 3 feet (90 cm) from the front and top of the appliance also avoid contact with the sides and back.
- Do not run cord under carpeting. Do not cover cord with throw rugs, runners, or the like. Arrange cord away from traffic area and where it will not be tripped over.
- It is normal for the heater's plug and cord to feel warm to the touch. A plug or cord which becomes hot to the touch or becomes distorted in shape may be a result of a worn electrical outlet. Worn outlets or receptacles should be replaced prior to further use of the heater. Plugging heater into a worn outlet /receptacle/ may result in overheating of the power cord or fire.
- WARNING: Do not cover the appliance while it is functioning in order to avoid overheating which may cause risk of fire.
Symbol meaning

This simbol indicates:
(If provided) Class II equipment

Please note:
This symbol indicates recommendations and important information for the user.
- If your appliance is equipped with a polythene tape used as carry handle, remove it before connecting appliance to the outlet.
- Always use the appliance in an upright position.
- To disconnect heater, turn controls to off, then remove plug from outlet.
- Connect to properly polarized outlets only.
- This heater is not intended for use with an extension cord or outlet strip. Plug the cord directly into an appropriate wall receptable.
- Check that neither the appliance nor the power cable have been damaged in any way during transportation.
- Make sure that no pieces of polystyrene or other packaging material have been left on the appliance.
It may be necessary to pass over the appliance with a vacuum cleaner.
- When switching on the appliance for the first time, allow it to run at full power for at least two hours to get rid of the unpleasant smell.
Make sure that the room in which the appliance is located is well ventilated during this operation. It is normal for the appliance to emit small cracking sounds when you turn it on.
- Do not use the appliance in rooms with a floor area of less than 4m^2 (43 square feet).
- Before putting the appliance away, make sure it is completely off and unplugged from the outlet. Wrap the cable around the base.
Do not store in dusty atmospheres.
- Do not rest anything on the appliance.
- Do not obstruct the air intake and outlet grilles (danger of overheating).
- Do not place the heater near a bed because objects such as pillows or blankets can fall off the bed and be ignited by the heater.
- A tip over safety device turns the appliance off if it falls over or is positioned inappropriately in such a
way as to jeopardise safety.
SAVE THESE INSTRUCTIONS
THIS PRODUCT IS FOR HOUSEHOLD USE ONLY
Your product is equipped with a polarized alternating current line plug (a plug having one blade wider than the other). This plug will fit into the power outlet only one way. This is a safety feature. If you are unable to insert the plug fully into the outlet, try reversing the plug. If the plug should still fail to fit, contact your electrician to replace your obsolete outlet. Do not defeat the safety purpose of the polarized plug.
DESCRIPTION
A Pilot lamp
B Thermostat
C Power selector
D Slider
E Timer
General instructions
Remove the appliance from the packaging.
Check that neither the appliance nor the power cable has been damaged during transport. Do not operate the heater if damaged.
Remove all publicity material from the appliance. The appliance is suitable for free-standing or wall-mounted usage. Do not assemble the feet if wall-mounted.
Electrical connection
- Before connecting the appliance to the power socket, check that the voltage indicated on the appliance rating plate is the same as your electrical system and that it can support the power consumption (Watt) indicated.
- If more than one appliance is used at the same time, it is important to ensure that the electrical system is able to support the power required.
Use on the floor, feet assembly
Tools required:
Screwdriver PH2x100 (crosshead)
2 supplied screws 3.5x13 PH (F)
Place the appliance on a stable surface.
For mounting the feet, proceed as follows:
- Insert the two hooks in the slots and rotate the foot until it is engaged as shown in figure 2.
- Insert the two pins in their respective holes.
- Fix the foot with the screw (F) supplied (figure 3).
- See Figure 4 for the minimum distances of the device from the walls. The measurements are indicated both for models equipped with fan "✗" and for models without.

Important! never use the appliance without feet if it is not mounted on the wall.
Installation on the wall
The kit for wall installation contains:
2 metal brackets for mounting above (G)
2 metal brackets for mounting below (H)
2 screws 3.5 x 9.5 PH (I)
4 screws 4.5 x 25 PH (J)
4 plastic wall plugs 6 x 30 (K)
Tools required for installation and estimated time for installation
Drill
Screwdriver PH 2x100 (crosshead)
Estimated time for installation: 30 minutes
Before installing the unit, ensure the following:
a. The device must not be placed directly under a power socket.
b. The plug and power socket must be easy to reach after installation.
c. No electric cables or other pipework could be damaged during installation.
d. Keep away from curtains or flammable materials.
For wall mounting, proceed as follows:
Place the appliance on a stable surface. Use a screwdriver to fix the two brackets H with screws I as shown in Fig. 6.
- Before drilling the wall, mark the exact spot, respecting the minimum distances as shown in Fig. 5. The measurements are indicated both for models equipped with fan "and for models without.
- Drill following the marks that you have made and insert the wall plugs K. For brick walls use a masonry bit of 6 mm. For plasterboard or false walls (empty), we recommend the use of appropriate screws and anchors (not supplied).
- Fix the 2 metal brackets G to the wall using the screws J provided.
-
Hang the appliance on the brackets.
-
Mark the lower fixing points corresponding to the holes of the brackets H. Remove the appliance, drill the lower holes and insert the wall plugs K.
- Now you can hang the unit on the brackets and secure the bottom of the appliance with the 2 screws J remaining.
USE
Operation and use
Insert the plug into the socket and switch on at the socket if necessary, turn the thermostat knob (B) to position 6 and turn the appliance on via the power selector (C) as follows:
• The warning lamp (A) lights up.
- Turn the power selector knob to Min to select minimum power.
- Turn the power selector knob to Med to select medium power.
- Turn the power selector knob to Max to select maximum power.
- To switch off the appliance completely: turn the power selector to "0" and the thermostat to *then disconnect at the power socket.
Adjusting the thermostat
When the room has reached the required temperature, turn the thermostat knob (B) slowly counterclockwise until you hear a click and no further. The warning lamp (A) goes out.
The thermostat will automatically maintain the temperature. In spring or autumn or on mild days, you can save energy by using minimum power.
Freezing protection
With the knob of the thermostat (B) in position and one of the power levels selected, the appliance will maintain the room at a temperature of about 5°C (41°F) preventing freezing with minimum energy consumption.
Models with fan
The appliance is equipped with a fan that provides even more rapid and uniform heating.
To start this function, turn the power selector (C) to Max
Models with 24-hour timer
When the appliance is connected to the power supply the timer is always active so as to stay synchronized with the local time. To operate the appliance without timer, position the timer slider (D) to OFF.
To operate the appliance at the times set, position the timer slider to ON (Fig. 1) and proceed as follows:
- Check the time on your clock or watch. If it is 10.00 for example, turn the numbered programmer disk until the number 10 coincides with the pointer marked on the programmer device.
- Set the periods of time during which you want the appliance to operate by pushing the teeth outwards (see figure). Each tooth corresponds to a period of 30 min. At the end of the procedure, the sectors corresponding to the periods of operation will be visible.
- In this way, the appliance will function automatically each day at the times set. (Important: the appliance must always be connected to the power supply).
- To modify the settings, return the teeth to the initial position and set the new operating periods.
- To turn the appliance off, turn the power selector to "0".
SAFETY FUNCTIONS
- Safety device: The appliance is fitted with a safety cutoff device which will switch the appliance off in case of accidental overheating. To reset the cutoff, disconnect the plug from the power supply for a few minutes, remove the cause of overheating, then reconnect the
appliance. If this abnormal situation happens several times, contact customer service.
- Tip-over safety device: This device turns the appliance off if it falls over or is positioned inappropriately in such a way as to jeopardize safety. The appliance resumes operation a few seconds after being placed in an upright position again.
MAINTENANCE
Before carrying out any maintenance, disconnect the appliance from the power supply and wait for it to cool down completely. This appliance requires no particular maintenance.
It is sufficient to remove dust with a soft, dry cloth. Never use abrasive powders or solvents. If necessary remove areas of concentrated dirt with a vacuum cleaner.
TROUBLESHOOTING
| PROBLEM CAUSE SOLUTION | ||
| The appliance doesn't work | The plug is not inserted properly into the power socket or the socket switch is off. | Insert the plug into the power socket and switch on if necessary. |
| Check for any obstruction. | Remove the obstruction, disconnect the power plug of the heater and let the appliance cool down. If the appliance doesn't work please contact the De longhi toll free number | |
| The power selector is in the "0" position. | Move the power selector to position MIN, MED, MAX or MAX ✗. | |
| The thermostat is set too low. | Turn the thermostat knob clockwise to higher settings until the heater restarts. | |
| Timer setting. | Make sure the timer is correctly set to local time and check the position of the teeth. | |
| The tip-over switch has been activated. | Make sure the appliance is standing upright on a flat surface, if the problem persists contact our toll free number to assist you. | |
Register Now

www.delonghi.com/register