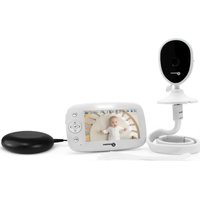
AMPLICALL SENTINEL - Baby monitors GEEMARC - Free user manual and instructions
Find the device manual for free AMPLICALL SENTINEL GEEMARC in PDF.


| Product type | Video baby monitor |
| Brand | Geemarc |
| Model | AMPLICALL SENTINEL (AC Sen1) |
| Power supply (parent unit) | Mains adapter 5V DC/1.5A, built-in rechargeable battery |
| Power supply (camera) | Mains adapter 5V DC/1A |
| Maximum number of cameras | 4 |
| Radio power | < 250 mW |
| Two-way audio | Yes, 1W speaker and microphone |
| Night vision | Yes, light sensor and infrared LED |
| Lullabies | 4 melodies with auto repeat |
| Feeding timer | Adjustable to 2, 3, 4 or 5 hours with alarm |
| Motion detection | Yes, with audible alarm and/or light flash |
| Sound detection | Yes, high/medium/low sensitivity |
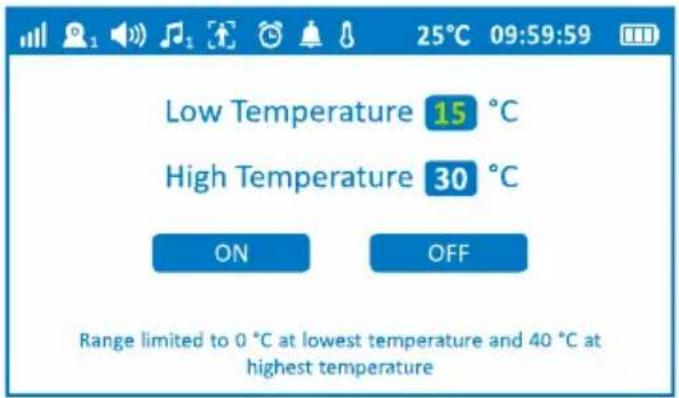
| Temperature alarm | Range 0°C to 40°C, low alarm 15°C, high alarm 30°C |
| Alarm types | Sound and/or light flash, adjustable |
| Vibrator | Included (5V power supply) |
| ECO mode | Parent screen turns off after 10 seconds of inactivity |
| Digital zoom | ×2 |
| Menu languages | French, English, German, Spanish, Dutch |
| Warranty | 2 years (applicable in France) |
| Included accessories | 1 baby unit, 1 camera, 2 mains adapters, 1 foldable stand, 2 adhesive tapes, 1 vibrator, 1 user guide |
| Safety instructions | Do not place within 1 m of the baby; keep out of reach of children; use only the provided adapters |
Frequently Asked Questions - AMPLICALL SENTINEL GEEMARC
User questions about AMPLICALL SENTINEL GEEMARC
0 question about this device. Answer the ones you know or ask your own.
Ask a new question about this device
Download the instructions for your Baby monitors in PDF format for free! Find your manual AMPLICALL SENTINEL - GEEMARC and take your electronic device back in hand. On this page are published all the documents necessary for the use of your device. AMPLICALL SENTINEL by GEEMARC.
USER MANUAL AMPLICALL SENTINEL GEEMARC
Video baby monitor with Shaker, Flash and Loud Alarms
Please refer to our website: www.geemarc.com for an up to date user guide, as there may be important updates and changes you need to be aware of.
Note: This User's Guide provides you with all the information you need to get the most from your product.

Before you can use the baby monitor, we recommend you insert and fully charge the battery in the Baby monitor, so that it continues to work if you disconnect it from the mains power to carry it to another location. Please read the Safety Instructions on page 2 before you install the units.
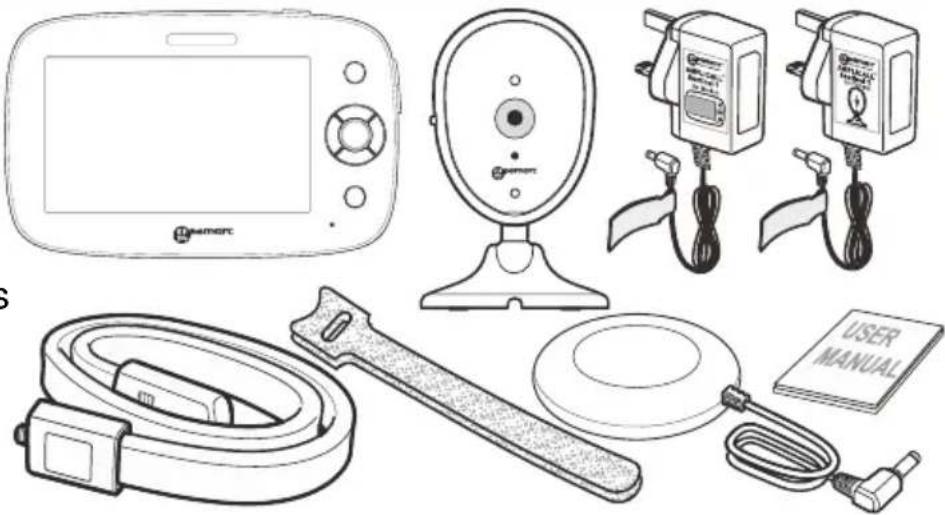
Package Contents
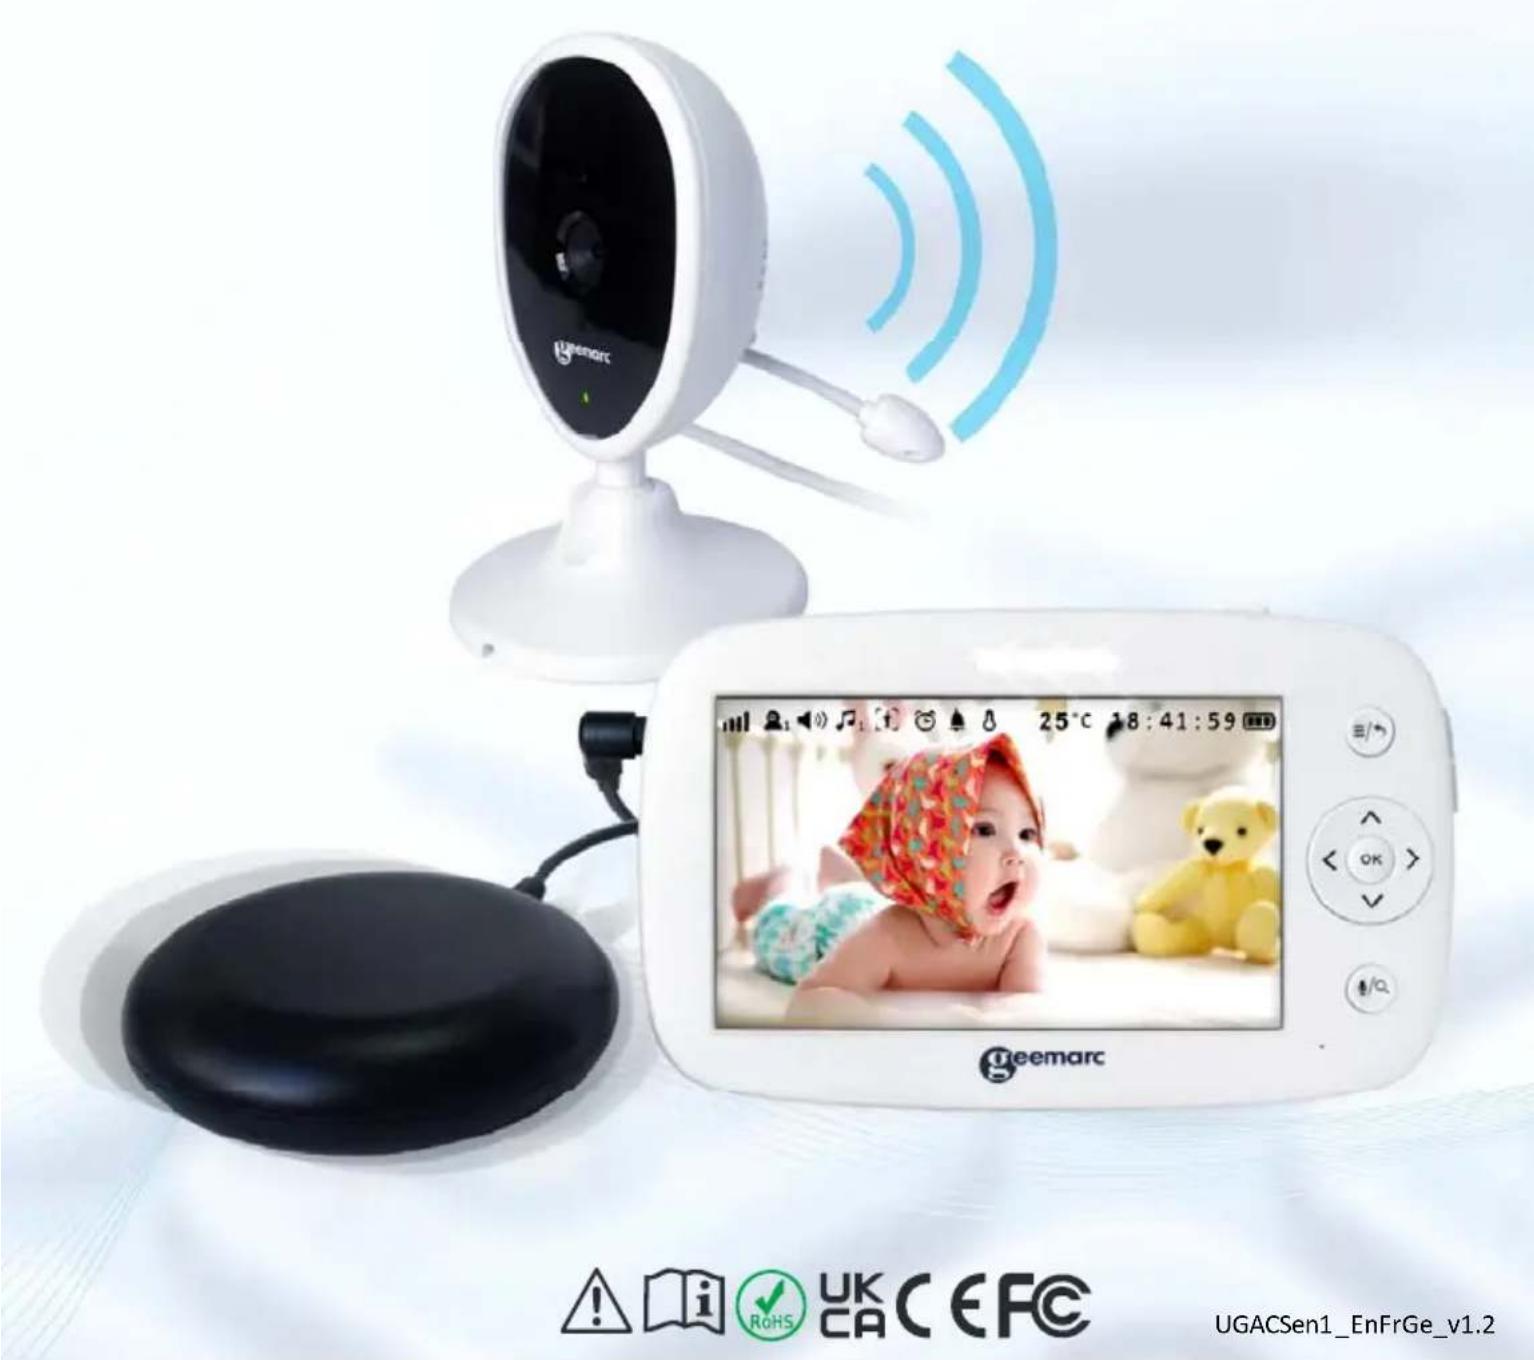
The AC Sen1 (AMPLICALL™ Sentinel 1) box contains the following items:
● 1 Baby monitor
● 1 Baby unit (camera)
● 2 AC/DC power adaptors
● 1 Foldable stand
- 2 magic tapes
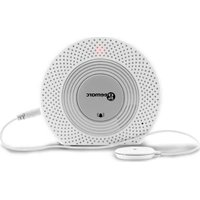
- 1 shaker
● 1 user manual
natural_image
Illustration of various household electronic devices including a digital camera, a digital camera with a screen, and a USB cable (no text or symbols present)Table of contents
- Safety Instructions 2
- Overview of your Baby monitor 2
- Setting up your Video Baby Monitor 4
3.1 Camera power supply 4
3.2 Baby monitor power supply 4
- Monitoring Screen Icons ....5
- Menu function (Baby monitor) 5
5.1 Camera 5
5.2 View 6
5.3 Lullabies 6
5.4 Feeding Timer 6
5.5 Setting 6
- Technical Features ...... 10
- Guarantee 10
- Declarations 11
1. Safety Instructions

WARNING:
This baby monitor is compliant with all relevant standards regarding electromagnetic fields and is, when handled as described in the User's
Guide, safe to use.
Therefore, always read the instructions in this User's Guide carefully before using the device.
● Adult assembly is required. Keep small parts away from children when assembling.
● This product is not a toy. Do not allow children to play with it.
● This baby monitor is not a substitute for responsible adult supervision.
- Do not place the camera or cables in the cot or within arm's reach of the baby (at least 1 meter away).
- Keep the cords out of reach of children.
- Do not use the baby monitor near water or a heat source.
- Only use the power adapters provided.
- Do not touch the plug contacts with sharp or metal objects.
2. Overview of your Baby monitor

A1. Flash / Indicators A6. OK Button
A2. Power Button A7. Speaker
A3. Menu / Back Button A8. Talk / Zoom Button
A4. Volume +/- A9. Mic
A5. Navigation key
| Baby Monitor – Basic operation of the keys | ||
| Power button | Turn ON/OFF - Press and Hold 3 seconds Screen Sleep/Wake - Press One time | |
 | Menu button | Press to access different menu options |
| Back button | Press to back to previous directory | |
 | Navigation key | Press to move up, down, left, right to select optional item on the screen |
| OK button | Press to confirm or accept the selection | |
 | Talk button | Press and hold to talk |
| Zoom button | Press to digital zoom | |
| +/- button | Press to adjust volume level | |
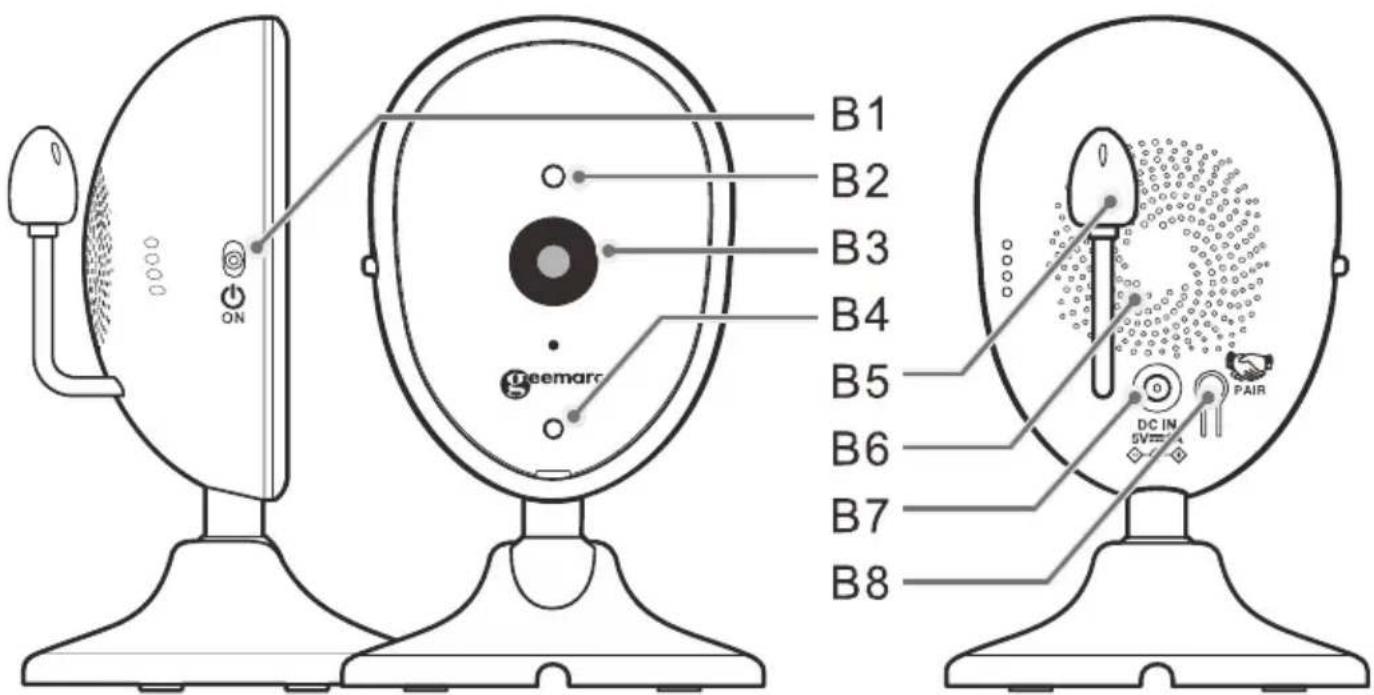
B1. Power Button B5. Temperature Probe
B2. Light Sensor B6. Speaker
B3. Lens B7. DC input
B4. Indicator B8. Pair button
| Camera – Basic operation of the keys | |||
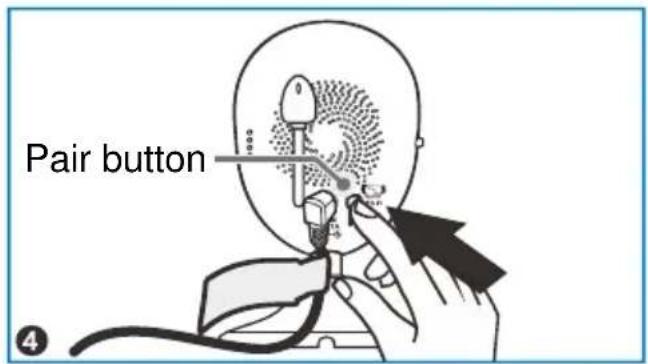
 | Power button :Slide to turn ON/OFF |  | PAIR button :Press to pair the Baby monitor |
Note:
The enclosed camera has already been paired, You do not need to register it again unless the camera loses its link with the Baby monitor. See section "5.1 Camera" for more details.
3. Setting up your Video Baby Monitor
3.1 Camera power supply
- Connecting the power adapter for the camera.
- Connect the small plug of the adapter to the Camera and the other end to the power socket.
- Only use the enclosed adapter (5V DC/1 A).
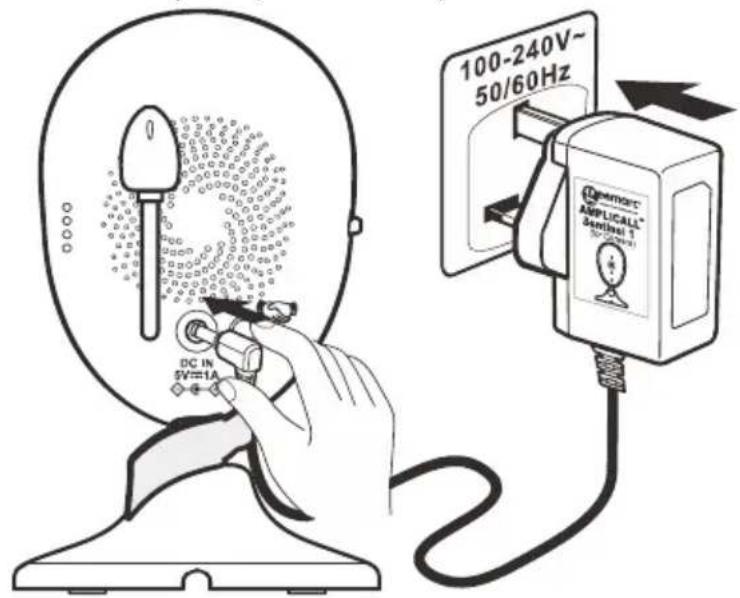

WARNING:
Do not place the camera or cables in the cot or within arm's reach of the baby (at least 1 meter away).
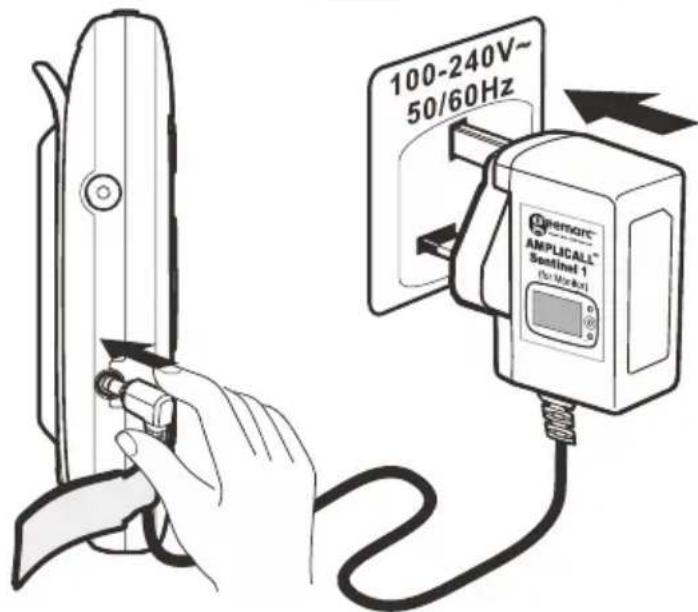
3.2 Baby monitor power supply
- Connecting the power adapter for the Baby monitor if is in low battery status.
- Connect the small plug of the adapter to the Baby monitor and the other end to the power socket.
- Only use the enclosed adapter (5V DC / 1.5A).
- Press and hold the POWER button ⏻ on the Baby monitor to turn it ON.
4. Monitoring Screen Icons
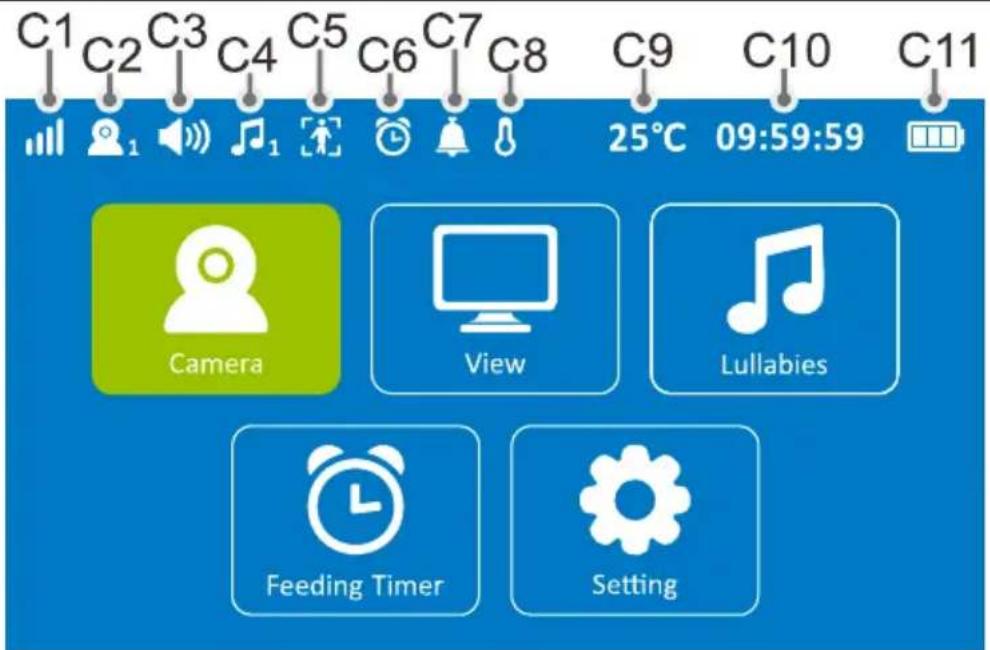
C1. Signal strength indicator C7. VOX mode
C2. Camera number C8. Temperature Alarm
C3. Vocal / Mute mode C9. Baby room's temperature
C4. Lullabies C10. Time
C5. Motion Detecting C11. Battery indicator
C6. Feeding Timer
5. Menu function (Baby monitor)
5.1 Camera
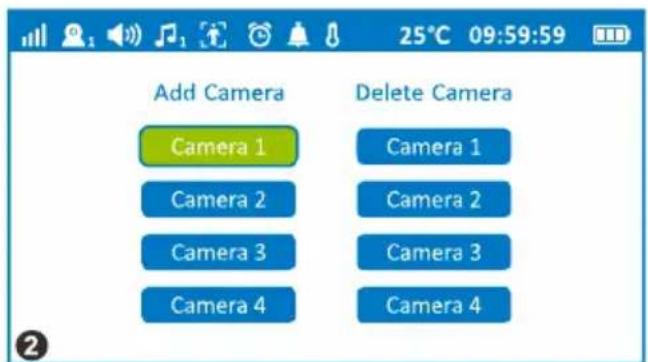
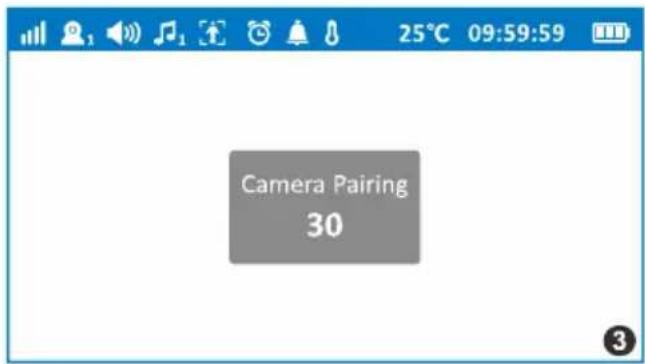
- User can add 4 camera at most.
- Select "Camera" → Select "Add Camera" → Press "OK" → Press the Pairing Button on Camera.

5.2 View
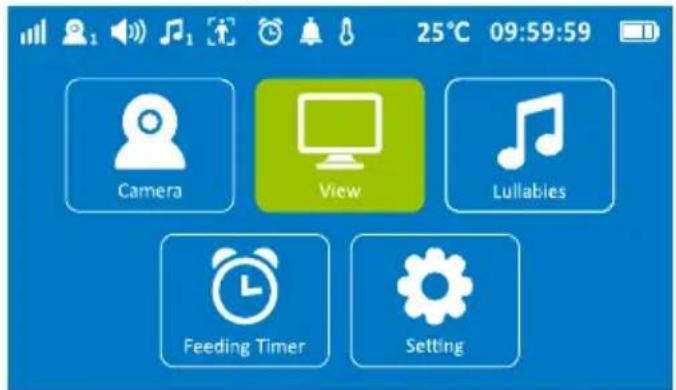
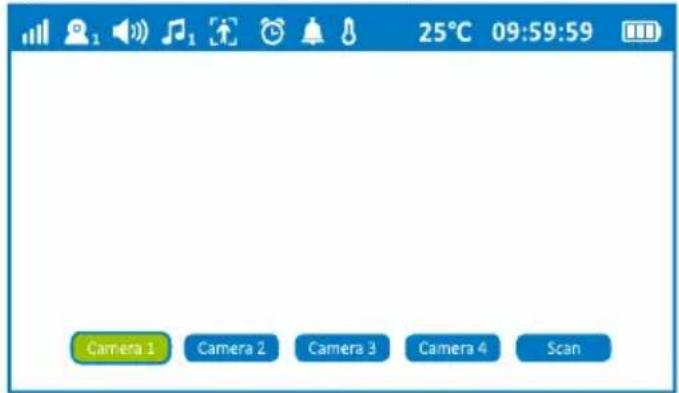
User can change view of different camera (if add different camera).
5.3 Lullabies
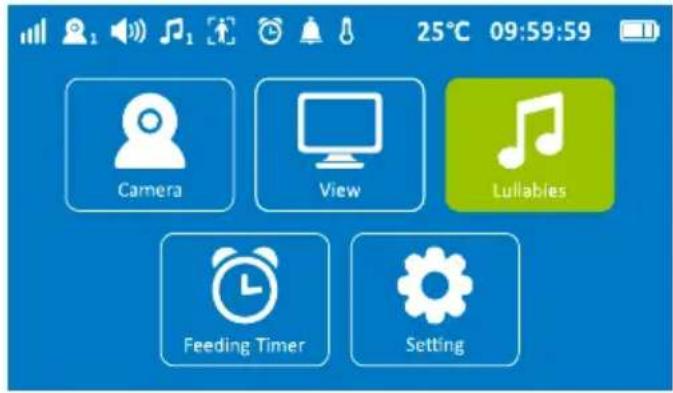
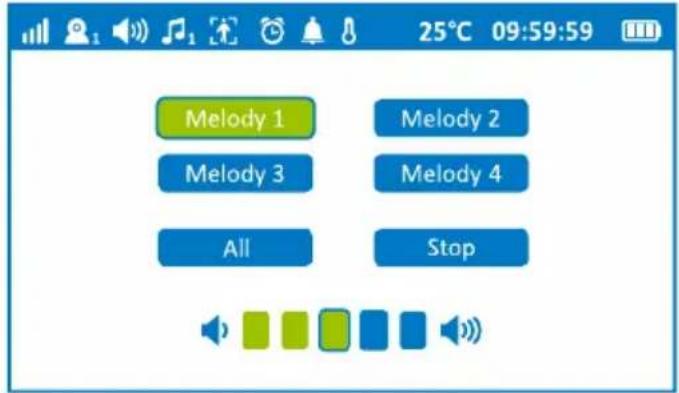
User can choose lullaby to play from lullabies list. It will automatically single cycle once you chose one of lullaby; If chose All, it will automatically repeat all lullabies list. Press OK button to valid your selection.
5.4 Feeding Timer
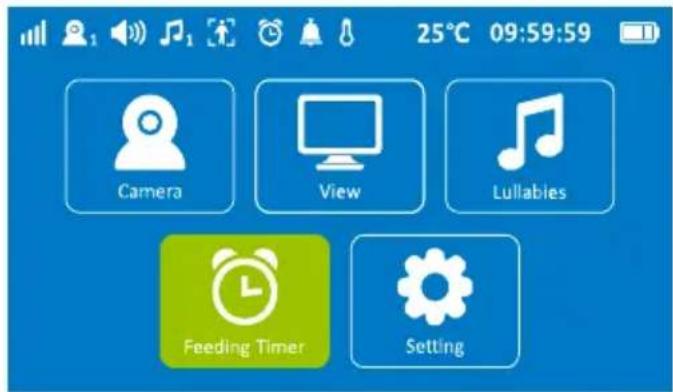
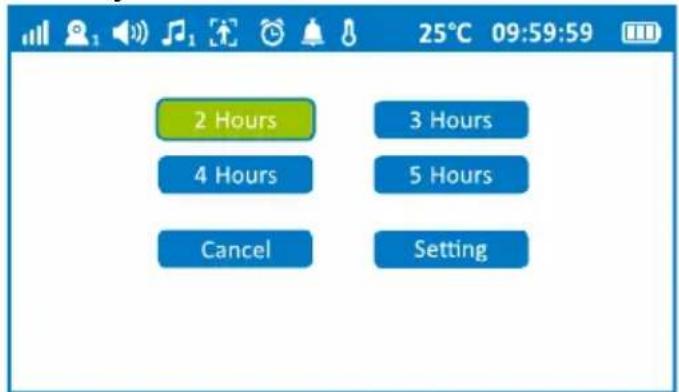
User can choose the time to remind for feeding kids, after selected, count down bar will appear in video view interface, when up to predefined time, monitor will alarm for 5 seconds. Press OK button to valid your selection.
5.5 Setting
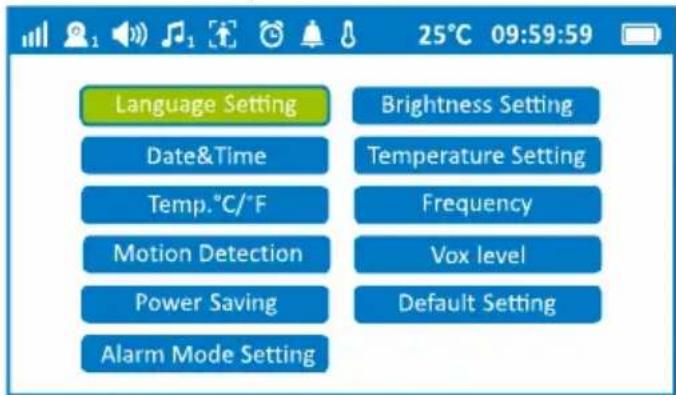
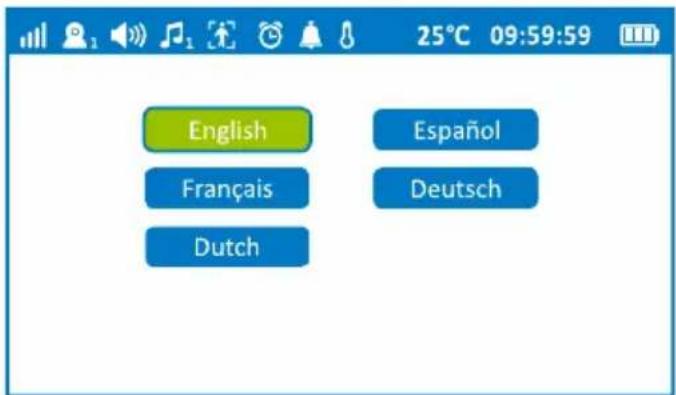
5.5.1 Language Setting
Include 5 languages (English, Español, Français, Deutsch, Dutch). Press OK button to valid your selection.
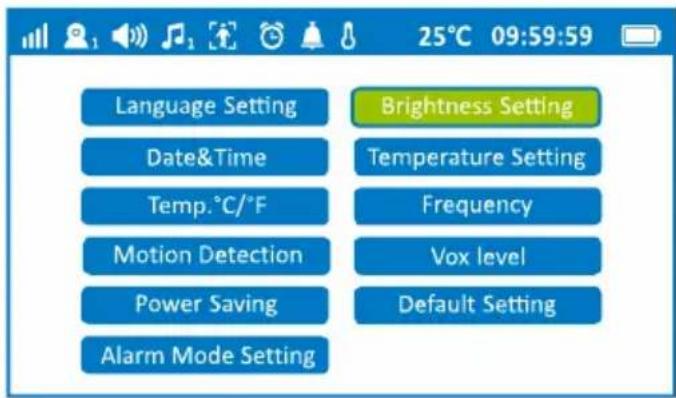
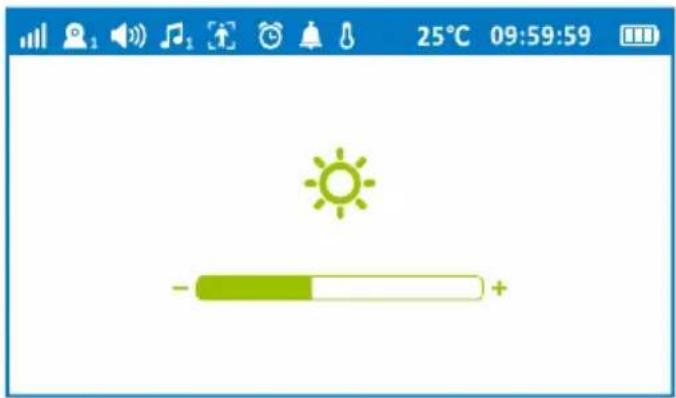
5.5.2 Brightness Setting
Select brightness level (1\~5 levels), user right or left arrow to set your level. Press OK button to valid your selection.
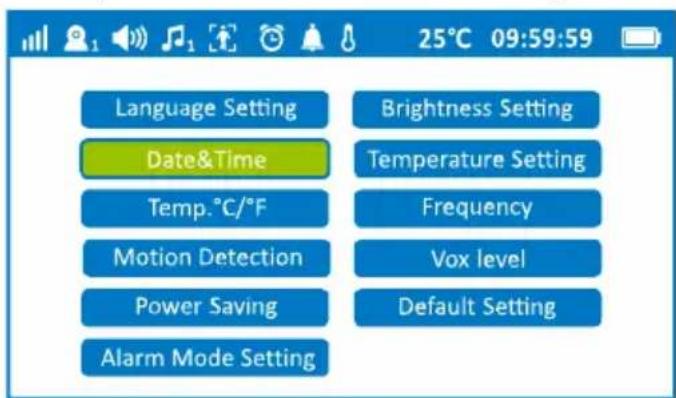
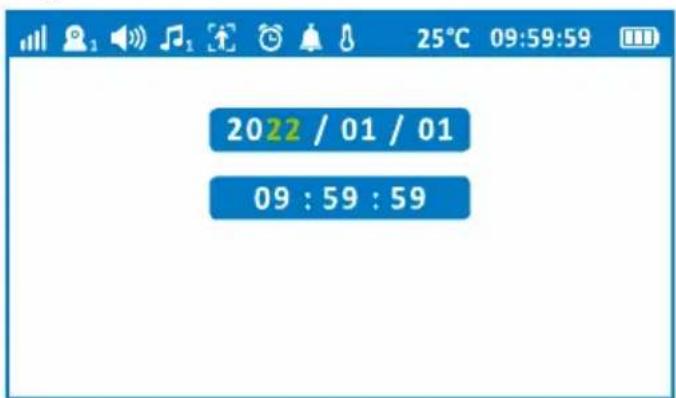
5.5.3 Date & Time
Set date (Year / Month / Day) and Time (Hour / Minute / Second).
Press Up or Down arrow to set the date and use Right or Left arrow to move in the setting. Press OK button to valid your setting.
5.5.4 Temperature Alarm
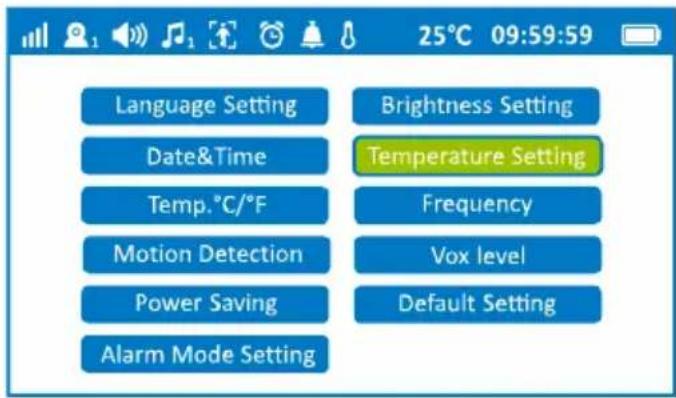
Baby camera detects baby room's temperature. User can set the temperature limit. Alarm for 5 seconds when over / below limits. Press Up or Down arrow to set the temperature and use Right or Left arrow to move in the setting. Select ON and press OK button to activate the function.
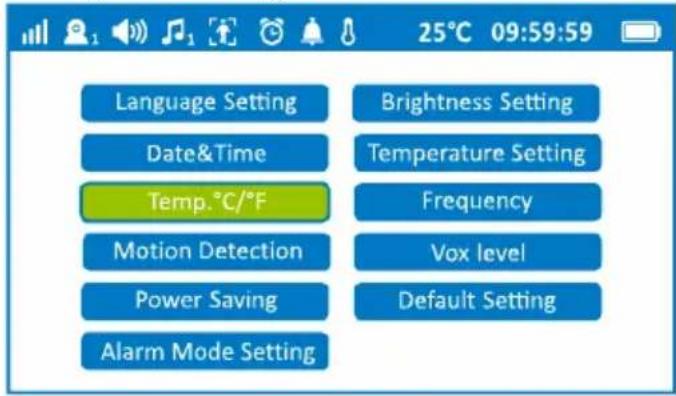
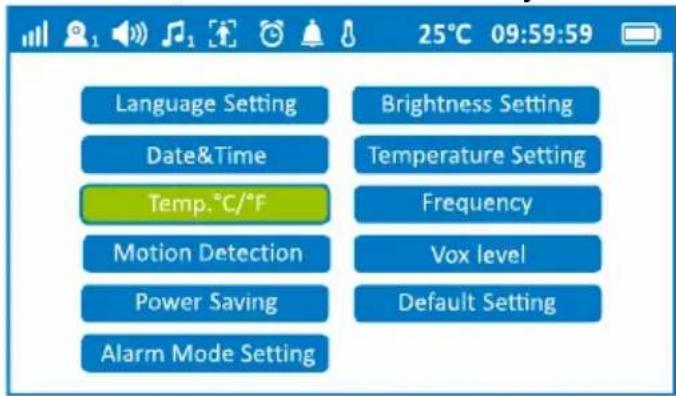
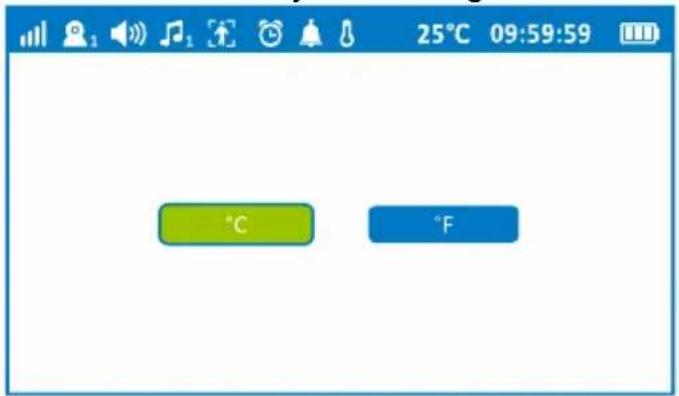
5.5.5 Temp. °C / °F
Select temperature display with Celsius / Fahrenheit (°C / °F). Press OK button to valid your setting.

5.5.6 Frequency
User can switch wireless frequency between 60Hz / 50Hz. 60Hz more smoother than 50Hz, but use more battery. Press OK button to valid your setting.
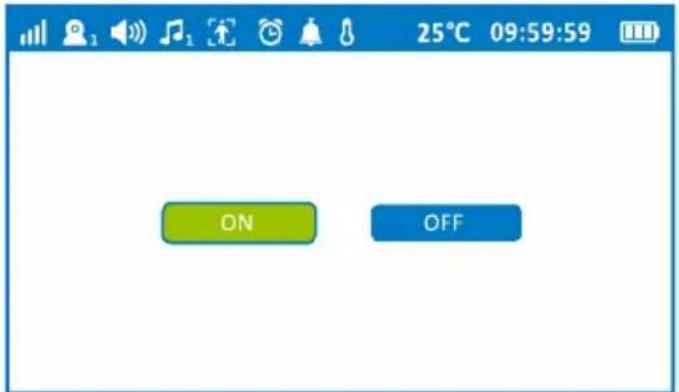
5.5.7 Motion Detecting
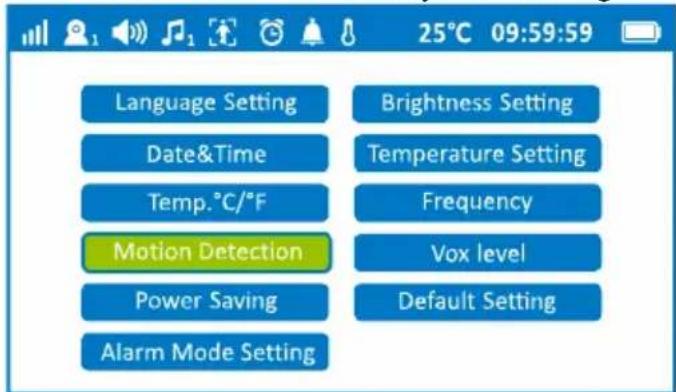
By this function selected to ON, user can hear alarm once any movement happened.
Press OK button to valid your setting.
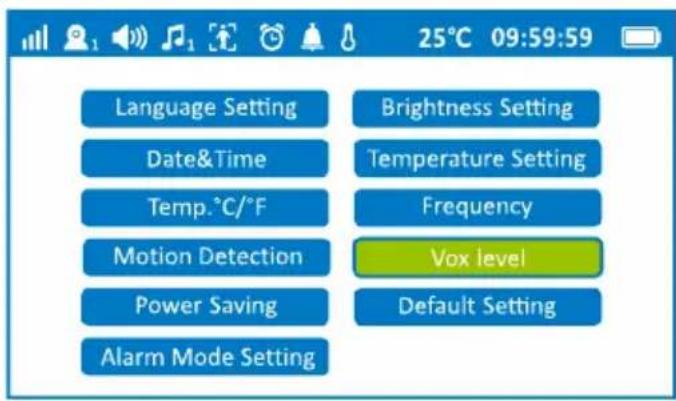
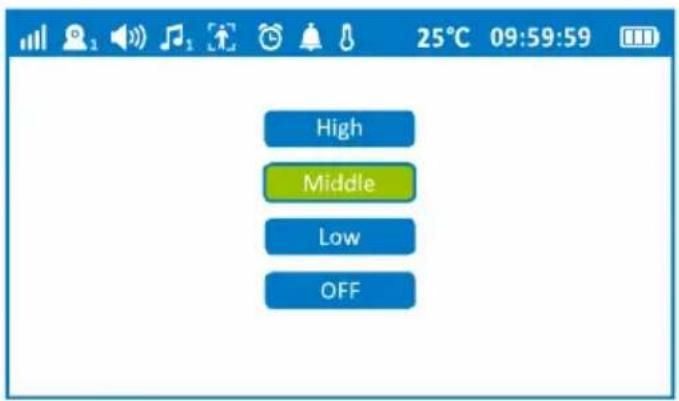
5.5.8 VOX
Select sensitivity level (High, Middle, Low) with Up or Down arrow keys. User can hear alarm once any abnormal sound or noise happened. Press OK button to valid your selection.
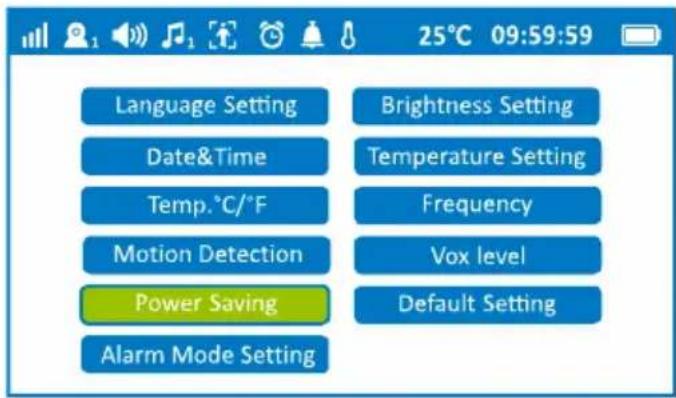
5.5.9 Power Saving (ECO mode)
Select ON/OFF with the Right or Left arrow keys.
Set to ON (the battery icon turn to Orange 📄), baby monitor Display sleep automatically within 10 seconds in idle status and press OK button to valid.
Press any key to wake up Display.
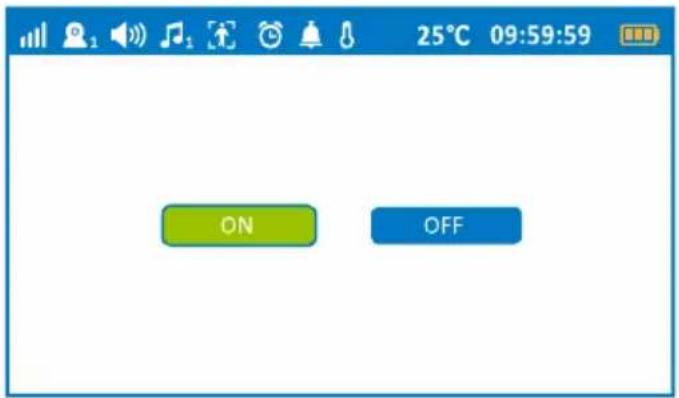
5.5.10 Default Setting
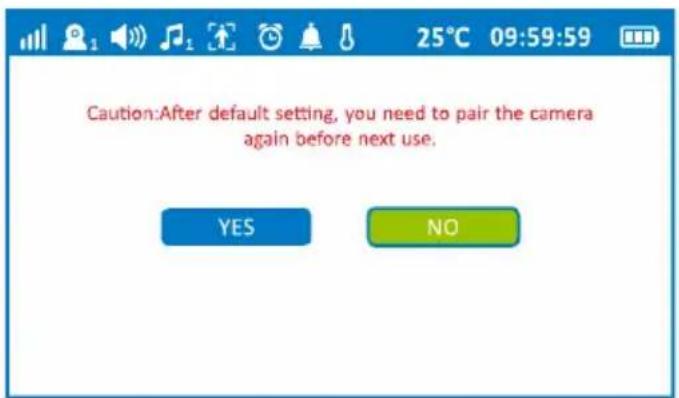
Select ON/OFF to restore factory default setting with the Right or Left arrow keys. Press OK button to valid your setting.
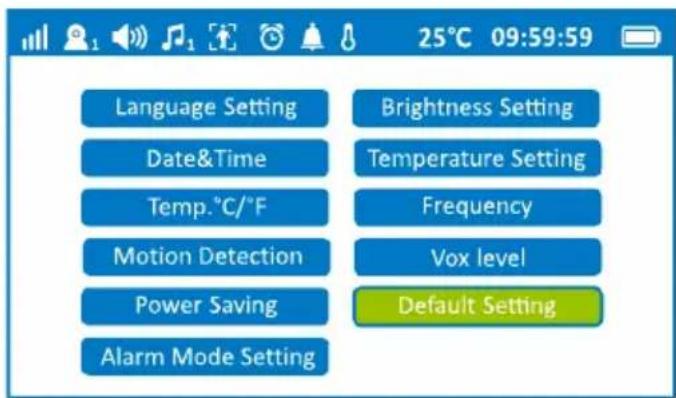
5.5.11 Alarm Mode Setting
Select Sound or Flash Light with UP or Down arrow keys.
Select ON/OFF with the Right or Left arrow keys.
Press OK button to valid your selection.
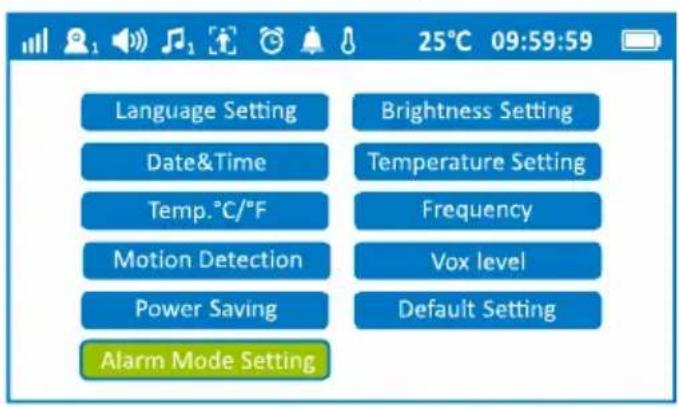
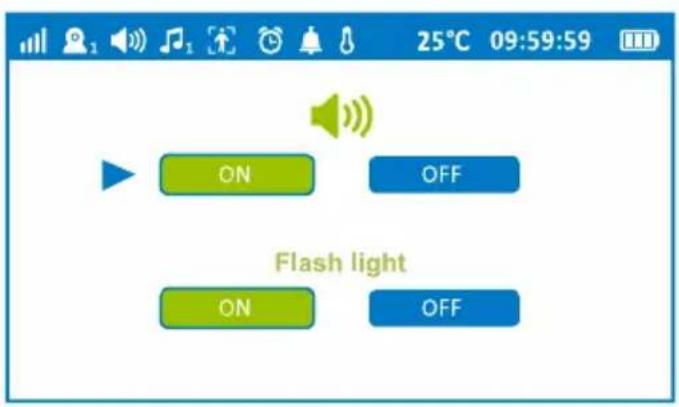
Note: These two settings will be applied to 3 alarms detection mode: Temperature, Motion Detection and Vox.
6. Technical Features
| Features Parameters Features | Parameters | ||
| Two way speaker | Monitor: Speaker: 1W Mic: -42±3Camera: Speaker: 1W Mic: -34±3 | Brightness | 5 levels |
| Light bar | 5 levels | ||
| Volume | 5 levels | ||
| Temperature detection | 0°C-40°C | Multi-language | 5 languages (English, Spanish, French, German, Dutch) |
| H/L temperature alarm | Low Temperature: 15°CHigh Temperature: 30°C | Upside down view | Rotate 180° |
| Frequency adjust | 50Hz / 60Hz | Power saving (ECO) mode | Parent display sleep automatically with 10 seconds in idle status. |
| VOX | High / Middle / Low | ||
| Motion Detection | ON / OFF | Vibration | Voltage: 5V |
| Feeding Timer | 2h, 3h, 4h, 5h setting | Zoom | x 2 |
| Lullabies | 4 lullabies | RF power | < 250mW |
7. GUARANTEE
From the moment your Geemarc AMPLICALL™ Sentinel 1 (AC Sen1) is purchased, Geemarc guarantee is for the period of two years. During this time, all repairs or replacements (at our discretion) are free of charge. Should you experience a problem then contact our help line or visit our website at www.geemarc.com. The guarantee does not cover accidents, negligence or breakages to any parts. The product must not be tampered with or taken apart by anyone who is not an authorized Geemarc representative. The Geemarc guarantee in no way limits your legal rights.
IMPORTANT: YOUR RECEIPT IS PART OF YOUR GUARANTEE AND MUST BE RETAINED AND PRODUCED IN THE EVENT OF A WARRANTY CLAIM.
Please note: The guarantee applies to the United Kingdom only.
UKCA Directives
Geemarc Telecom SA hereby declares that this AMPLICALL™ Sentinel 1 (AC Sen1) is in compliance with the essential requirements and other relevant provisions of the Radio Equipment Directive 2014/53/UE.
The UKCA declaration of conformity may be consulted at www.geemarc.com
This equipment has been tested and founded to comply with limits for a class B digital device, pursuant to part 15 of the FCC rules.
Operation is subject to the following two conditions:
(1) this device may not cause harmful interference
AND
(2) this device must accept any interference received, including interference that may cause undesired operation.
FCC ID: 2A9CR-AMPLICALL
IC: 29704-AMPLICALL
Recycling Directives
The WEEE (Waste Electrical and Electronic Equipment) has been put in place for the products at the end of their useful life are recycled in the best way.
When this product is finished with, please do not put it in your domestic waste bin. Please use one of the following disposal options:
- Remove the batteries and deposit them in an appropriate WEEE skip. Deposit the product in an appropriate WEEE skip.
- Or, hand the old product to the retailer. If you purchase a new one, they should accept it. Thus if you respect these instructions you ensure human health and environmental protection.

For product support and help visit our website at www.geemarc.com
E-mail : help@geemarc.com
telephone 01707 387602
lines are open 09h00 to 16h00 Mon to Fri
Table des matières
5.2 Ansicht




UGACSen1_EnFrGe_v1.2

- Package Contents
- Table of contents
- Safety Instructions
- WARNING:
- Overview of your Baby monitor
- Note:
- Setting up your Video Baby Monitor
- Camera power supply
- Baby monitor power supply
- Monitoring Screen Icons
- Menu function (Baby monitor)
- Camera
- View
- Lullabies
- Feeding Timer
- Setting
- Language Setting
- Brightness Setting
- Date & Time
- Temperature Alarm
- Temp. °C / °F
- Frequency
- Motion Detecting
- VOX
- Power Saving (ECO mode)
- Default Setting
- Alarm Mode Setting
- Technical Features
- GUARANTEE
- UKCA Directives
- Recycling Directives
- Table des matières
- Ansicht
Brand : GEEMARC
Model : AMPLICALL SENTINEL
Category : Baby monitors