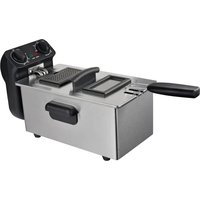
AF-400DW - Deep fryer Brentwood - Free user manual and instructions
Find the device manual for free AF-400DW Brentwood in PDF.

User questions about AF-400DW Brentwood
0 question about this device. Answer the ones you know or ask your own.
Ask a new question about this device
Download the instructions for your Deep fryer in PDF format for free! Find your manual AF-400DW - Brentwood and take your electronic device back in hand. On this page are published all the documents necessary for the use of your device. AF-400DW by Brentwood.
USER MANUAL AF-400DW Brentwood
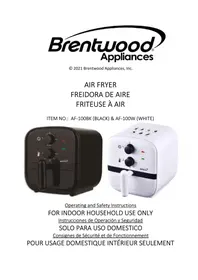
Brentwood® Appliances
© 2021 Brentwood Appliances, Inc.
XL DIGITAL AIR FRYER
FREIDORA DE AIRE DIGITAL
FRITEUSE À AIR DIGITALE
Item No.: AF-400DBK (Black), AF-400DR (Red) & AF-400DW (White)
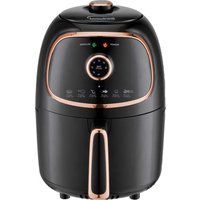
natural_image
Black electric air fryer with digital display and control knob (no visible text or symbols)
natural_image
Red electric air fryer with digital display and control knob (no visible text or symbols)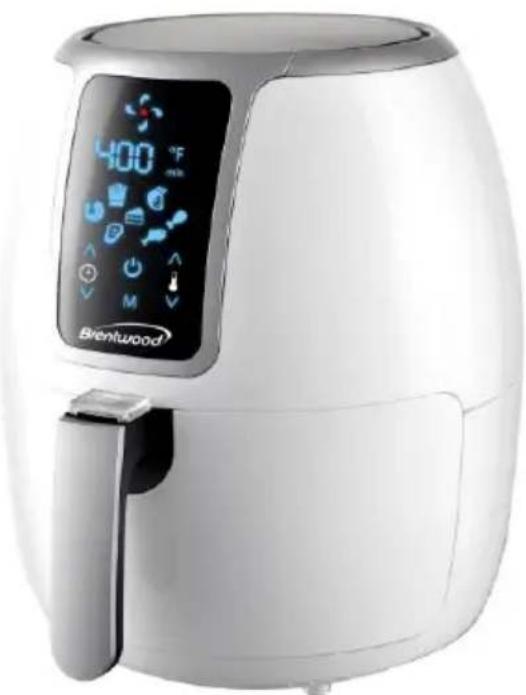
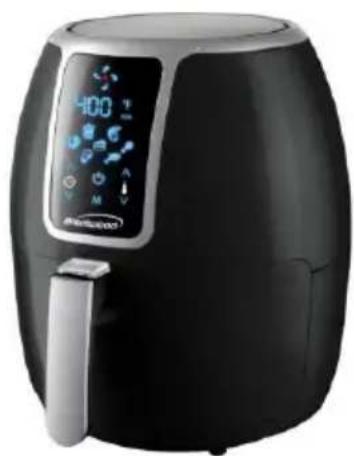
natural_image
White Brentwood air fryer with digital display showing temperature and control buttons (no readable text beyond branding)Operating and Safety Instructions
FOR INDOOR HOUSEHOLD USE ONLY
When using this or any other electrical appliance, always follow these basic safety precautions, especially when children are present.

READ ALL INSTRUCTIONS BEFORE USE

text_image
ENGLISH⚠ WARNING-- To reduce the risk of fire, electric shock, serious personal injury and property damage please note the following:
- This product is not to be used by persons or children with reduced physical, sensory, or mental capabilities, or lack of knowledge and experience unless they have supervision and instruction concerning use of the product by a person responsible for their safety.
- Close supervision is required when any appliance is used by or near children.
- Always ensure the product is unplugged from the electrical outlet and allowed to cool before assembling, disassembling, relocating, or cleaning it.
- Do not leave the product unattended while it is in use. Always unplug the product from the electrical outlet when not in use.
- Do not immerse the Base, Power Cord, or Plug of this product in or expose the Power Cord or Plug to water or other liquids.
- Do not touch hot surfaces. Use handles or knobs when handling product. Use protective oven mitts or gloves when removing the Lid or handling hot containers to avoid burns or personal injury.
- Take proper precautions to prevent burns, fire, or personal or property damage as this appliance generates heat and steam during use.
- Do not use attachments not recommended or sold by the product manufacturer.
- Do not place on or near a hot gas or electric burner, in a heated oven, or other heated surfaces.
- Use extreme caution when moving an appliance containing hot food, water, or other liquids.
- Do not cover the air inlet and the air outlet openings while the appliance is operating. Keep at least 4-6 inches of space on all sides of the product to allow adequate air circulation.
- During use, air and hot steam are released from the air intake. Keep your hands and face at a safe distance from the air intake.
- When you remove the container from the appliance body, hot air and steam come out. Keep your hands and face far from the container.
- Use appliance on a table or flat surface. Keep the product away from curtains, wall coverings, clothing, dishtowels, or other flammable materials.
- Do not plug or unplug the product from the electrical outlet with a wet hand.
- This product is intended solely for non-commercial, non-industrial, household use in cooking of food for human consumption; do not use the product outdoors or for any other purpose.
- Do not let cord hang over edge of table or counter where it may be tripped over or pulled. Do not allow cord to touch hot surfaces. Do not apply stress on the power cord where it connects to the product, as the power cord could fray and break.
- Do not operate the product if it has a damaged or cut Power Cord or plug, if wires are exposed, if it malfunctions, if it is dropped or damaged, or if the Motor Housing is dropped in or exposed to water.
- Do not operate the appliance outdoors or in areas exposed to moisture, such as basements or garages.
- No responsibility will be accepted if damage results from improper use, or if these instructions are not complied with. Improper use also results in any form of warranty being forfeited.
- Do not attempt to examine or repair this product yourself. Please review the Warranty Policy on Page 10.
SPECIAL INSTRUCTIONS:
A short power supply cord is provided to reduce the risk of becoming entangled in or tripping over a longer cord. An extension cord is not recommended for use with this product, but if one must be used:
— The marked electrical rating must be at least as great as that of the product.
- If the product is of a 3-prong grounding type, the extension cord must be a grounding-type 3-wire cord.
- Arrange the extension cord so that it will not drape over the countertop or tabletop where it can be tripped over or pulled.
WARNING: This product is equipped with a polarized plug (one blade is wider than the other blade) to reduce the risk of electrical shock. This is a safety feature. The plug will fit into a polarized outlet only one way. If you are unable to insert the plug into the electrical outlet, try reversing the plug. If the plug still does not fit, contact a qualified electrician. Never use the plug with an extension cord unless you can fully insert the plug into the extension cord. Do not alter the plug. Do not attempt to defeat the safety purpose of the polarized plug.
Before First Use
IMPORTANT: Please check all packaging material carefully before discarding as there may be accessory parts contained within the packaging material.
WARNING: Do not place any part of the product in a dishwasher.
- Make sure the Fryer is unplugged.
- To remove any dust that may have accumulated, wash the Fryer Basket with warm soapy water and dry thoroughly. Wipe the interior and exterior of the Fryer with a damp towel. Dry thoroughly.
SAVE THESE INSTRUCTIONS FOR FUTURE REFERENCE
text_image
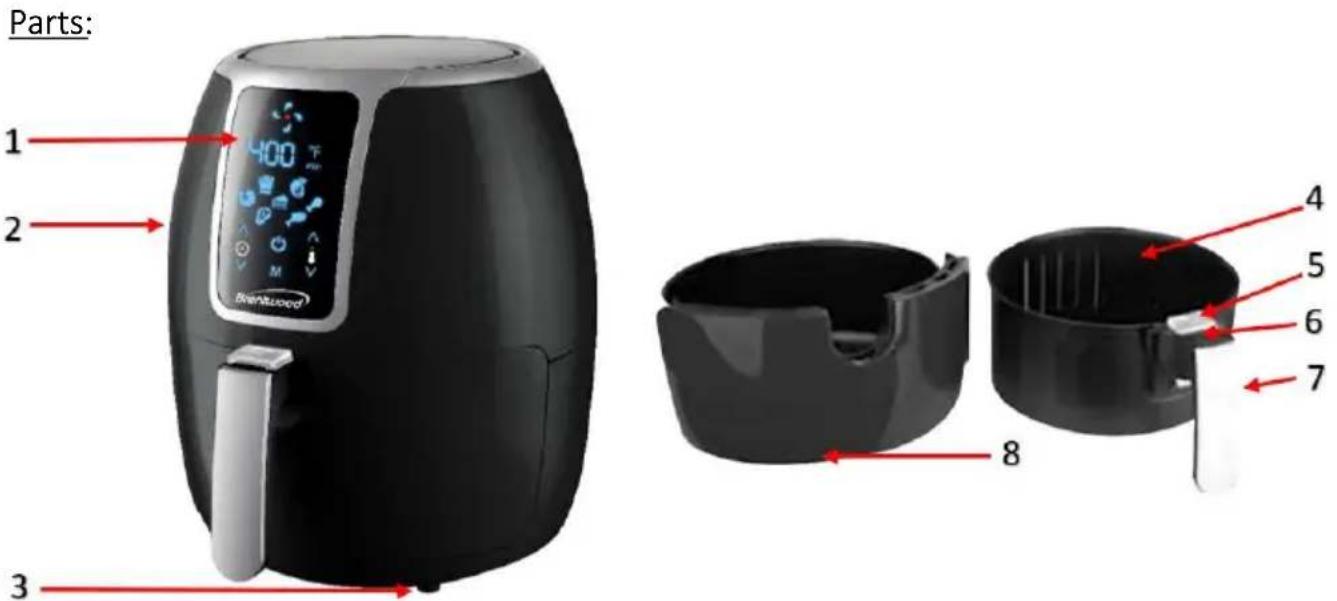
Parts: 1 2 Brandtwood 400 °F M 3 4 5 6 7 8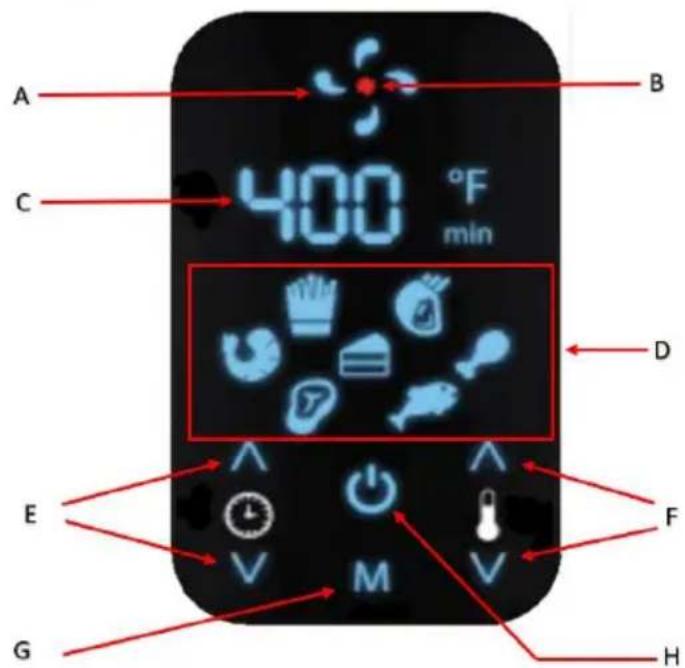
text_image
A B C 400 °F min D E F G M H- Touch Control Panel
- Appliance body
- Non-slip feet
- Basket
- Protective cover
- Basket release button
- Basket handle
- Pan
A. Ventilation indicator light
B. Cooking indicator light
C. Temperature/time display
D. Cooking program
E. Cooking time setting buttons
F. Cooking temperature setting buttons
G. Program selection button
H. On/Off – Start/Stop button
Automatic shut-off function:
The appliance is equipped with an automatic shut-off function. If no button is pressed within 60 minutes, the appliance switches off automatically.
Using Your Fryer:
Attention: First use may cause a slight odor or small smoking upon heating, it is normal. This is a result of the heating element chemical reaction. It quickly goes away.
WARNING: This is an air fryer that works on hot air. Do not fill the pan with oil or frying fat.
Note: NEVER immerse the fryer body, cord, or plug in water.
- Completely unwind the power cord.
- Put the ingredients in the basket (4). Do not exceed the MAX level marking. NEVER use the pan (8) without the basket (4) in it.
Note: If desired, you can preheat the appliance without food for about 3 minutes before use.
-
Insert the basket (4) in the pan (8).
-
Insert the pan (8) in the body of the appliance.
-
Connect the plug to the socket outlet.
-
Press the On/Off button (H) to activate the touch control panel (1).
-
Press the temperature setting buttons (F) to select the cooking temperature.
-
Press the cooking time setting buttons € to set the timer.
-
Alternatively, press the program selection button (G) to select the cooking program corresponding to the type of food shown.
-
Once you set cooking time and temperature or you select a preset cooking program, the cooking process will start. The cooking indicator light (B) and ventilation indicator light (A) will light up.
-
During cooking the temperature and time are shown alternately.
-
To pause the cooking process, press the Start/Stop button (H). To resume the cooking process, press the Start/Stop button (H) again. The device is automatically in pause mode when you pull out the pan and the basket. The cooking process continues when the pan and the basket are put in the appliance again.
WARNING: Do not touch the basket, the pan, and the internal metallic parts during and some minutes after use. Danger of burns!
-
After cooking, the appliance beeps and turns off. If the ingredients are not ready, simply reinsert the pan (8) into the appliance body and set the timer for a few minutes.
-
Remove the pan (8) from the appliance body. Place on a flat heat resistant countertop.
-
Slide the basket release button protective cover (5) forwards, then press the basket release button (6) and remove the basket (4) lifting it upwards.
-
Pour the ingredients on a plate and serve out.
TIPS:
- The smaller ingredients require a shorter cooking time compared to the bigger ingredients.
- With larger quantities, the cooking time increases. It is recommended to turn the food frequently to obtain a more uniform cooking.
• For a crispier result add a tablespoon of oil to fresh or frozen potatoes.
• Snack that can be prepared in an oven can also be prepared in the air fryer. - Do not prepare extremely greasy ingredients such as sausages in the air fryer.
Cleaning Your Fryer:
⚠️ Remove the plug from the socket before cleaning as there is a risk of an electric shock!
⚠️ Wait until the air fryer has cooled down completely (30mins). Otherwise, there is a risk of burns!
- The air fryer itself must not be immersed in water as there is a risk of an electric shock!
- The pan (8) and the basket (4) can be removed for cleaning. First, remove large remaining food particles.
- The pan (8) and basket (4) can then be cleaned in a basin of warm water and dishwashing liquid. Rinse the pan (8) and basket (4) with clear water afterwards and dry them completely before inserting them again. Never use a wire brush or other abrasive objects.
NOTE: Do not place in dishwasher. Do not immerse the appliance, power cord or plug in water or other liquids.
- Use a slightly damp cloth to clean the inner and outer surfaces and never use any solvent or cleaner that would corrode the plastic materials.
Troubleshooting:
| PROBLEM | POSSIBLE CAUSE | SOLUTION |
| The appliance does not work | The plug has not been inserted | Connect the plug to the socket outlet, which must be earthed. |
| The timer has not been set | Press the cooking time control buttons ad set the required preparation time. Press the Start/Stop button to start cooking. | |
| The pan has not been inserted correctly | Insert the pan in the appliance body correctly. | |
| The ingredients are cooked unevenly | Some ingredients required to be stirred several times while cooking | See the “Food table” for more information. |
| The pan cannot be slid into the appliance properly | The quantity of ingredients in the basket is too big | Put less ingredients in the basket. Small food quantities are easier to be cooked evenly. |
| The basket has not been inserted correctly in the pan | Keep the basket well positioned within the pan. | |
| White smoke comes out of the appliance | You are cooking ingredients rich in fats | When frying greasy ingredients there will be a larger amount of oil in the pan which produces white smoke. This will not affect the appliance or end result. |
| In the container there are some residuals of grease left from the previous cooking | The white smoke is caused by the warming of the grease or oil in the pan. Clean the pan accurately after use. | |
| Home-made chips are not fried evenly | The chips have not been soaked properly before frying | Soak the potatoes in a bowl for at least 30 minutes, take them out and dry them on kitchen paper before frying. |
| Home-made chips are not crispy when they come out of the air fryer | The crispness of the fried potatoes depends on the amount of water contained in the potatoes and the quantity of oil introduced in the fryer | Make sure to dry the water from the external parts of the potatoes before frying. |
| Cut the potatoes in smaller sticks for a crispier result. | ||
| Add a bit more oil for more crispiness. |
Specifications:
Power Supply: 120V\~60Hz
Power: 1400W
Basket Capacity: 4.0 Quarts / 3.7 Liters
Automatic Shut-Off Function:
The appliance is equipped with an automatic shut-off function. If no button is pressed within 60 minutes, the appliance switches off automatically.
Suggested Food Table Reference:
The food table below helps you select the basic settings for the types of food you want to prepare. Keep in mind that these settings are suggestions.
Note: Keep in mind that these settings are indications. As ingredients differ in origin, size, shape as well as brand, we cannot guarantee the best setting for your ingredients.
When preparing large amount of food (e.g., fries, prawns, drumsticks, frozen snacks) shake, turn or stir the ingredients in the basket 2 or 3 times to achieve a consistent result.
| Ingredients | Min-max quantity (g) | Time (min) | Temperature (°C) | Shake or stir halfway | Extra information |
| Potatoes and Fries | |||||
| Thin frozen fries | 300-700 | 12-16 | 200 | Yes | |
| Thick frozen fries | 300-700 | 12-20 | 200 | Yes | |
| Home-made fries(8x8mm) | 300-600 | 18-25 | 180 | Yes | Add 1/2 tbsp of oil |
| Home-made potato wedges | 300-600 | 18-22 | 180 | Yes | Add 1/2 tbsp of oil |
| Home-made potato cubes | 300-700 | 12-18 | 180 | Yes | Add 1/2 tbsp of oil |
| Rosti | 250 | 15-18 | 180 | ||
| Potato gratin | 700 | 18-22 | 180 | ||
| Meat and Poultry | |||||
| Beef steak | 100-400 | 8-12 | 180 | ||
| Pork chops | 100-400 | 10-14 | 180 | ||
| Hamburger | 100-400 | 7-14 | 180 | ||
| Drumsticks | 100-400 | 18-22 | 180 | ||
| Chicken breast | 100-400 | 10-15 | 180 | ||
| Snacks | |||||
| Spring rolls | 100-400 | 8-10 | 200 | Yes | Use oven-ready |
| Frozen chicken nuggets | 100-500 | 6-10 | 200 | Yes | Use oven-ready |
| Frozen fish fingers | 100-400 | 6-10 | 200 | Use oven-ready | |
| Frozen breadcrumbed cheese snacks | 100-400 | 8-10 | 180 | Use oven-ready | |
| Stuffed vegetables | 100-400 | 10 | 160 | ||
| Bakery products | |||||
| Cakes | 300 | 20-25 | 160 | Use oven-ready | |
| Quiche | 400 | 20-22 | 180 | Use oven-ready | |
| Muffins | 300 | 15-18 | 200 | Use oven-ready | |
| Sweet snacks | 400 | 20 | 160 | Use oven-ready | |
Recipes
Tip: A variety of pre-made packaged foods can be cooked in the Air fryer. As a guide, lower the conventional oven temperature by 70 degrees and reduce the cooking time by half. Exact times and temperatures will vary by food.
Garlic Brown Sugar Air Fryer Salmon, Serves 4:
Ingredients:
- 1 lb Salmon
- Salt & Pepper
-
2 tbls Brown Sugar
• 1 tsp of Chili Powder -
12 tsp Italian Seasoning
- 12 tsp Paprika
- 1 tsp garlic powder
Directions:
In a small bowl add the brown sugar, chili powder, paprika, Italian seasoning, and garlic powder. Rub on to the salmon, if desired add salt and pepper first. Open air fryer and place the salmon skin side down in the basket. Turn the temperature to 400 degrees and cook for 10 min. If you are cooking with asparagus add to the basket after 5 min.
Homemade Thick Cut Fries:
Ingredients:
500g large, waxy potatoes, ½ tbsp. cooking oil (such as olive oil)
- Peel the potatoes and cut into long 8mm-thick sticks.
- Soak the potato sticks in water for at least 30 minutes. Then drain them thoroughly and dry them with kitchen paper.
- Preheat the air fryer to 300^ F. Dip the potato sticks carefully in oil in a large bowl and place them in the basket (4).
- Insert the pan (8) and basket (4) into the air fryer and set the timer (E) to 5 minutes. Pre-fry the chips (potato sticks) until they are cooked and crispy; then let them cool.
- Now increase the temperature of the air fryer to 392^ F. Reinsert the pan (8) and basket (4) with the chips into the air fryer and set the timer (E) to 12-16 minutes. Fry the chips (potato sticks) until they are golden brown. We recommend that you shake the chips after 1/3 and 2/3 of the cooking time to ensure that they are cooked evenly.
Stuffed Puff Pastry:
Ingredients:
200g (frozen or chilled) ready-made puff pastry
2 tbsp. milk
Filling:
- Apple and cinnamon:
- Mix half an apple cut into small pieces with
- 12 tbsp. sugar,
- 1 teaspoon of grated orange zest and
- 1 teaspoon of cinnamon.
- Preheat the air fryer to 392^ .
- Cut the dough into 16 squares of 5 x 5cm in size and place a heaped teaspoon of filling on each square.
- Fold the squares into triangles and moisten the edges with a little water. Press the edges together firmly with a fork.
- Place eight appetizers in the basket (4) and glaze with milk. Insert the pan (8) and basket (4) into the air fryer and set the timer (E) to 10 minutes. Fry the appetizers until they are golden brown.
- Fry the remaining appetizers in the same manner. Serve the puff pastry appetizers on a platter.
ONE YEAR LIMITED WARRANTY
Write down the following information about your appliance to better help you obtain assistance or service if you ever need it.
CUSTOMER RECORD
Date of Purchase ____ Store/Dealer ____
Model/Item No: ____
THIS WARRANTY APPLIES TO PRODUCTS PURCHASED AND USED IN THE CONTINENTAL U.S. AND CANADA ONLY. This is the only express warranty for this product and is in lieu of any other warranty or condition. This product is warranted to be free from defects in material and workmanship for a period of one (1) year from the date of original purchase. During this period, your exclusive remedy is repair or replacement of this product, at our option; however, you are responsible for all costs associated with returning the product to us and our returning a product or component under this warranty to you. If the product or component is no longer available, we will replace with a similar one of equal or greater value. This warranty does not cover glass, filters, wear from normal use, use not in conformity with the printed directions, or damage to the product resulting from accident, alteration, abuse, or misuse.
THIS WARRANTY EXTENDS ONLY TO THE ORIGINAL CONSUMER PURCHASER. KEEP THE ORIGINAL SALES RECEIPT, AS PROOF OF PURCHASE IS REQUIRED TO MAKE A WARRANTY CLAIM.
This warranty is void if the product is used for other than single-family household use or subjected to any voltage and waveform other than what is specified on the rating label (E.G., 120V\~60Hz). We exclude all claims for special, incidental, and consequential damages caused by breach of express or implied warranty. All liability is limited to the amount of the purchase price. Every implied warranty, including any statutory warranty or condition of merchantability or fitness for a particular purpose, is disclaimed except to the extent prohibited by law, in which case such warranty or condition is limited to the duration of this written warranty. This warranty gives you specific legal rights. You may have other legal rights that vary depending on where you live. Some states do not allow limitations on implied warranties or special, incidental, or consequential damages, so the foregoing limitations may not apply to you. To make a warranty claim do not return this appliance to the store.
TO OBTAIN WARRANTY SERVICE AND/OR TROUBLESHOOTING INFORMATION:
Call Customer Service at 1-888-903-0060 in the U.S.
Monday through Friday: 9:00 am – 5:00 pm PT
U.S. Customers Please Email: warranty@brentwoodus.com
Canadian Customers Please Email: canada.warranty@brentwoodus.com
Go online at www.brentwoodus.com
PRECAUCIONES IMPORTANTES
| PROBLEM | POSSIBLE CAUSE | SOLUTION |
| The appliance does not work | The plug has not been inserted | Connect the plug to the socket outlet, which must be earthed. |
| The timer has not been set | Press the cooking time control buttons ad set the required preparation time. Press the Start/Stop button to start cooking. | |
| The pan has not been inserted correctly | Insert the pan in the appliance body correctly. | |
| The ingredients are cooked unevenly | Some ingredients required to be stirred several times while cooking | See the "Food table" for more information. |
| The pan cannot be slid into the appliance properly | The quantity of ingredients in the basket is too big | Put less ingredients in the basket. Small food quantities are easier to be cooked evenly. |
| The pan cannot be slid into the appliance properlyWhite smoke comes out of the appliance | The quantity of ingredients in the basket is too big | Put less ingredients in the basket. Small food quantities are easier to be cooked evenly. |
| The basket has not been inserted correctly in the panYou are cooking ingredients rich in fats | Keep the basket well positioned within the pan.When frying greasy ingredients there will be a larger amount of oil in the pan which produces white smoke. This will not affect the appliance or end result. | |
| In the container there are some residuals of grease left from the previous cooking | The white smoke is caused by the warming of the grease or oil in the pan. Clean the pan accurately after use. | |
| Home-made chips are not fried evenly | The chips have not been soaked properly before frying | Soak the potatoes in a bowl for at least 30 minutes, take them out and dry them on kitchen paper before frying. |
| Home-made chips are not crispy when they come out of the air fryer | The crispness of the fried potatoes depends on the amount of water contained in the potatoes and the quantity of oil introduced in the fryer | Make sure to dry the water from the external parts of the potatoes before frying. |
| Cut the potatoes in smaller sticks for a crispier result. | ||
| Add a bit more oil for more crispiness. |
© 2021 Brentwood Appliances, Inc.