
Hi Move III - Vacuum Cleaner GORENJE - Free user manual and instructions
Find the device manual for free Hi Move III GORENJE in PDF.
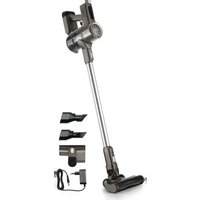


| Product type | Cordless vacuum cleaner |
| Brand | Gorenje |
| Model | Hi Move III |
| Rated voltage of the device | 25.2 V |
| Battery capacity | 2,000 mAh (Lithium-ion) |
| Nominal power | 400 W |
| Adapter voltage | 32 V / 450 mA |
| Battery life (depending on speed) | Low: up to 60 min, Medium: up to 35 min, High: up to 13 min |
| Number of speeds | 3 (Low, Medium, High) |
| Battery type | Removable lithium-ion |
| Battery warranty | 12 months |
| Usage | Household, indoor |
| Included accessories | 2-in-1 motorized brush, narrow nozzle, round brush, upholstery tool, wall mount with adapter and cord |
| Filter type | Washable filter |
| Dust container | Washable, with fill indicator |
| Indicators | Digital battery charge, foreign object in brush, dust container full |
| Charging | On docking station or separate battery |
| Safety | Do not immerse, do not vacuum liquids or hot objects |
Frequently Asked Questions - Hi Move III GORENJE
User questions about Hi Move III GORENJE
0 question about this device. Answer the ones you know or ask your own.
Ask a new question about this device
Download the instructions for your Vacuum Cleaner in PDF format for free! Find your manual Hi Move III - GORENJE and take your electronic device back in hand. On this page are published all the documents necessary for the use of your device. Hi Move III by GORENJE.
USER MANUAL Hi Move III GORENJE
Hi Move III
Sl Navodila za uporabo .... 3
USING THE VACUUM CLEANER
CHARGING THE DEVICE
OPERATING THE VACUUM CLEANER

USING THE VACUUM CLEANER
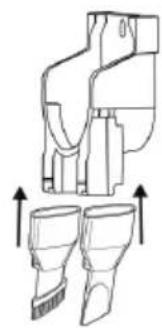
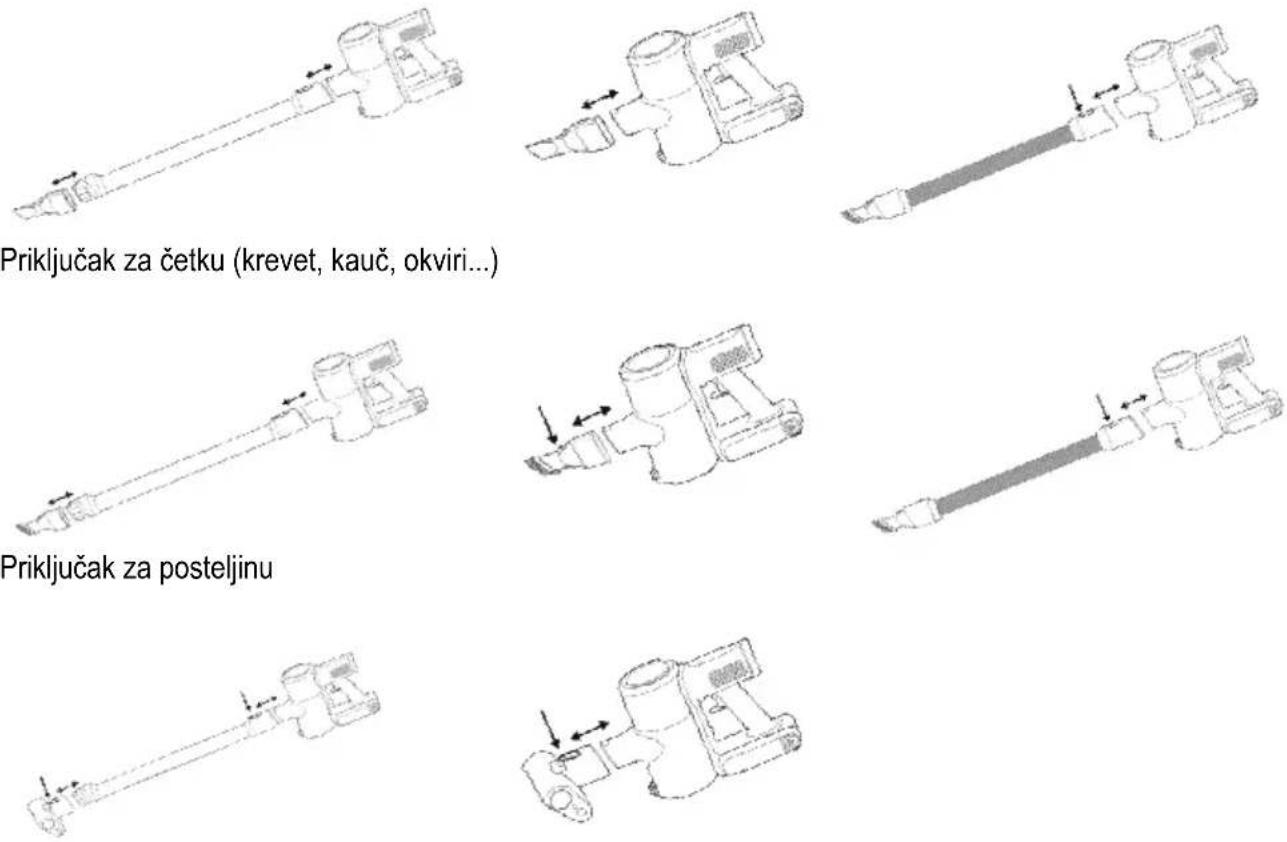
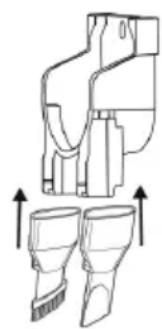
The narrow nozzle attachment is intended for vacuuming narrow, hard-to-reach places (corners, sofas, cobwebs, behind radiators, etc.).
CHARGING THE DEVICE
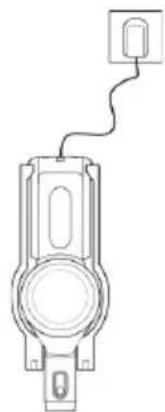
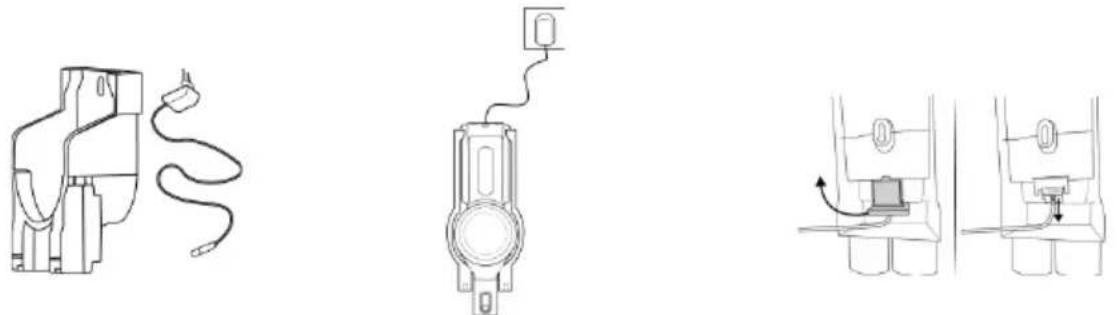
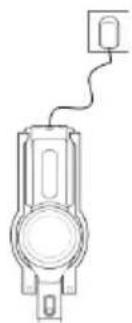
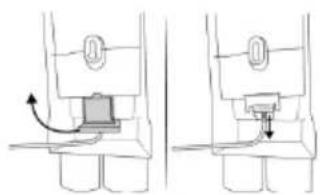
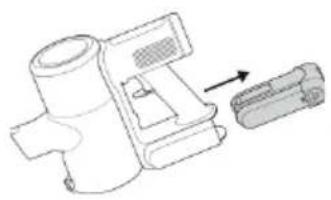
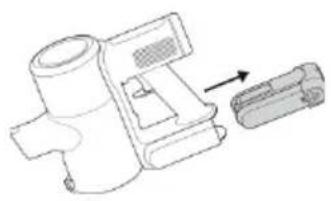
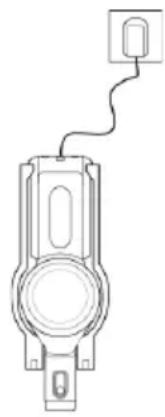
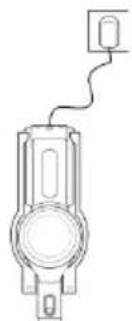
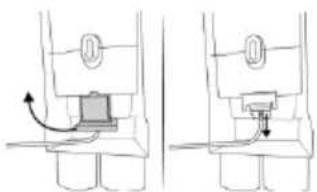
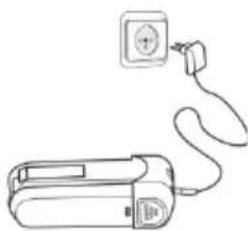
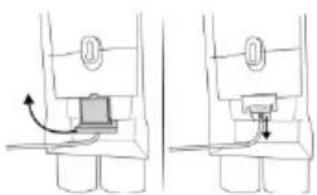
The adapter and charging cable are already built into the charging station. If you do not wish to charge the vacuum cleaner at the charging station, despite the warnings, follow the instructions for safely removing the adapter and charging cable.
OPERATING THE VACUUM CLEANER
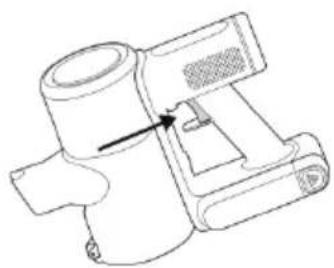
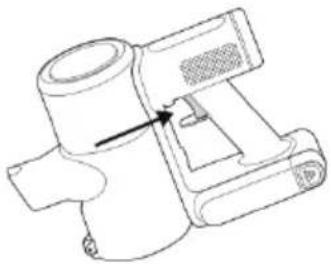
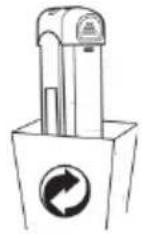
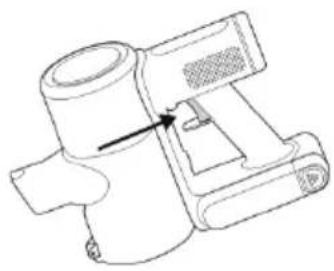
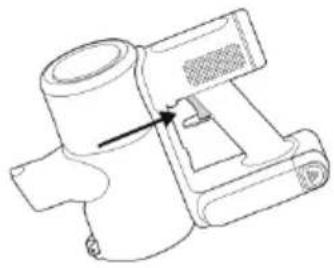
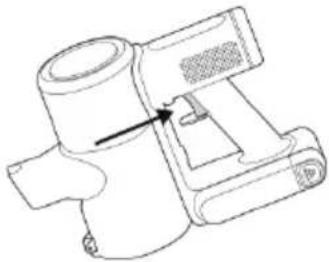
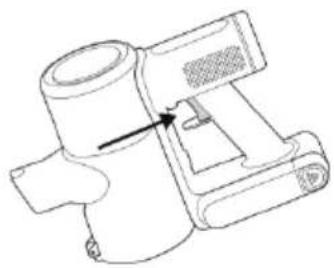
To empty the dust container, pull the lever on the right side of the motor unit handle. The lower part of the lid will open. Turn the inner part of the large filter to the left to remove it. Properly replace the dust container and turn it in the opposite direction. Close the lid. When you hear a click, you will know that the dust container is properly installed.
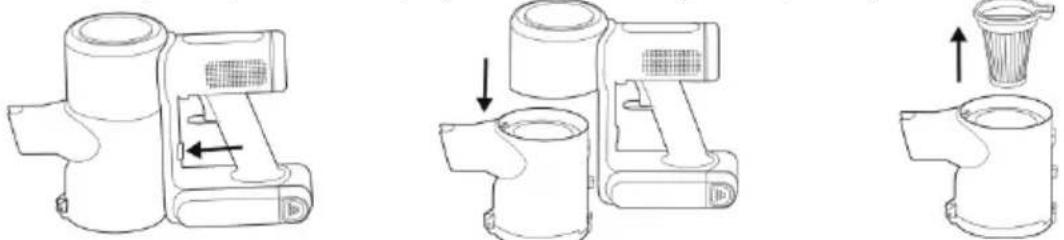
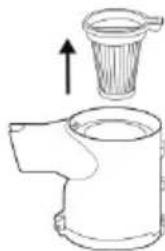
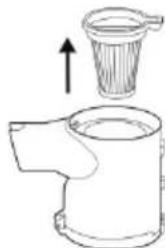
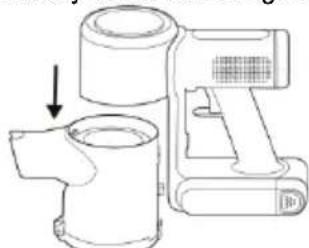
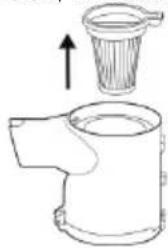
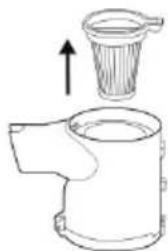
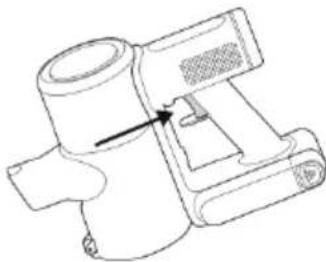
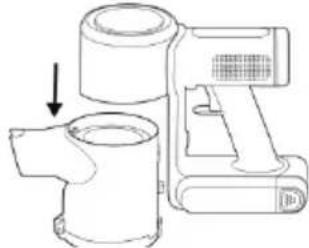
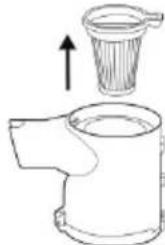
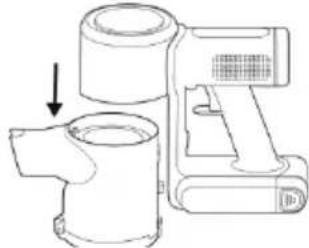
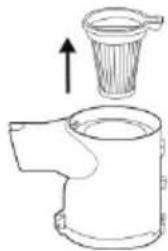
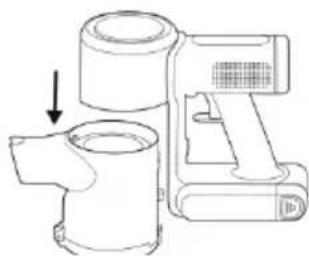
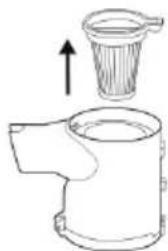
To remove the dust container, press the button in the middle of the inner side of the handle to the left. The filter can be removed from the top, while the filter container can be removed by pressing the button on the rear lower part of the dust container. When replacing the dust container on the motor unit, make sure all parts are properly assembled and installed. Check that the two plugs on the front of the dust container are aligned with the slots on the motor unit. When you hear a click, you will know that the dust container is properly installed.
| Naziv proizvoda: | Usisavač |
| Nazivni napon uređaja: | 25,2 V / 2000 mA / litij-ionske baterije |
| Nazivna snaga uređaja: | 400 W |
| Napon adaptera: | 32 V: 450 mA |
General warnings
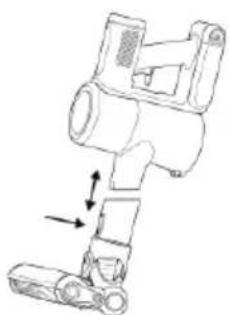
The narrow nozzle attachment is intended for vacuuming narrow, hard-to-reach points (corners, sofas, cobwebs, spaces behind radiators, etc.).

CHARGING THE DEVICE
OPERATING THE VACUUM CLEANER
The device has a digital battery charge indicator. It shows the current battery charge during use or during the charging process.
This icon lights up if a foreign object gets stuck or tangled in the brush. When this icon is on, find and remove the foreign object.
This icon lights up when the dust bin is full. When this icon is on, empty the container before continuing to use the vacuum cleaner.
The speed control button is located on the battery charge indicator.
On the lower part of the dust container there is a button that can be rotated to partially clean the filter using a special attachment. Cleaning the filter this way is recommended during vacuuming if the dust container is full before you finish cleaning. We recommend cleaning the filter and dust container after each use.
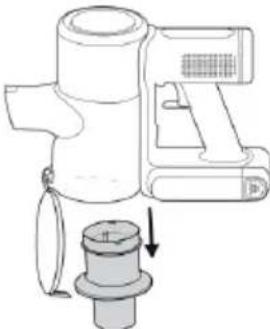
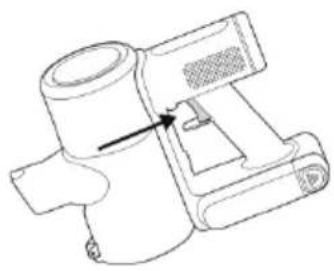
To empty the dust container, pull the lever on the right side of the motor unit handle. The bottom part of the lid will open. Turn the inner part of the large filter to the left to remove it. Properly replace the dust container and turn it in the opposite direction. Then close the lid. The dust container is correctly installed when you hear a click.
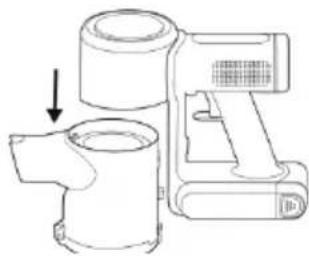
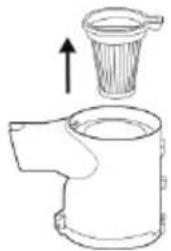
To remove the dust container, press the button on the middle of the inner side of the handle to the left. The filter can be removed from the top, while the filter container can be removed by pressing the button on the rear lower part of the dust container. When replacing the dust container on the motor unit, make sure all parts are correctly assembled and mounted. Check that the two plugs on the front of the dust container are aligned with the slots on the motor unit. The dust container is correctly installed when you hear a click.
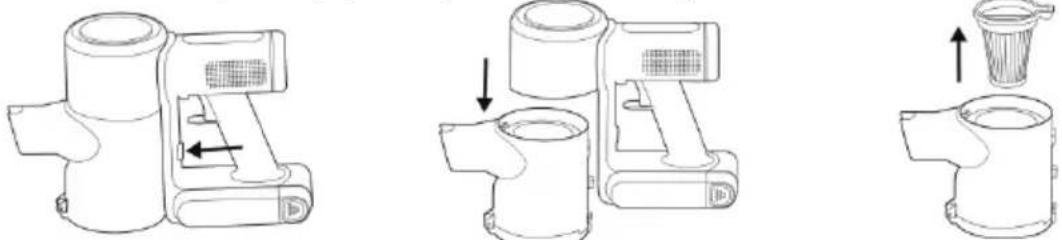
The dust container, filter, and filter frame can be washed; however, you must ensure that these parts are completely dry before reassembling them. Flawless operation can only be ensured if the parts are dry; if the parts are not dried, it may lead to problems caused by improper use. It is not recommended to dry the parts in direct sunlight.
Carefully clean the filter to prevent it from tearing. If the filter is damaged, it must be replaced; otherwise, the debris you vacuum may damage the motor unit.
Cleaning the brush
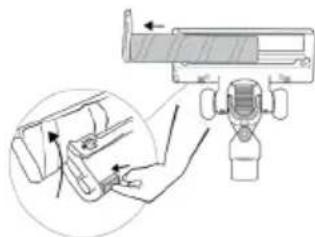
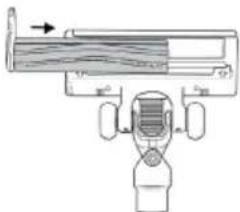
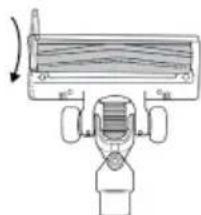
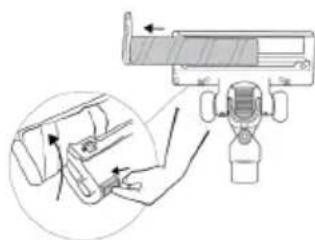
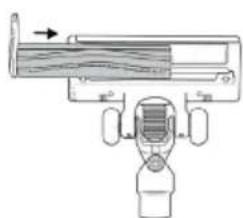
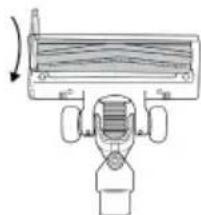
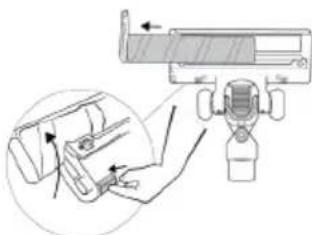
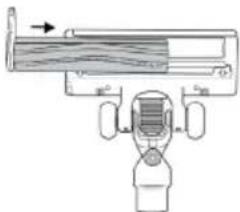
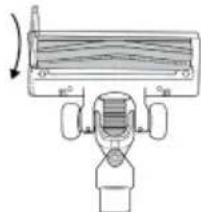
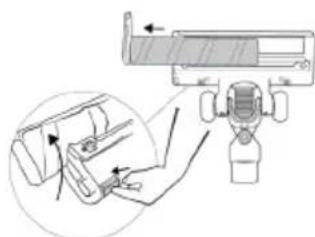
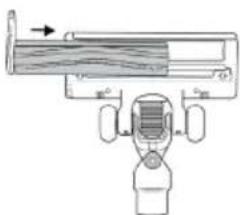
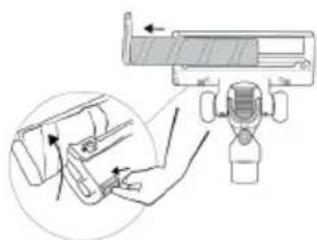
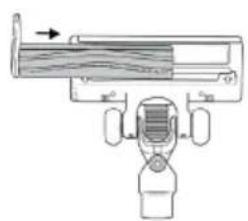
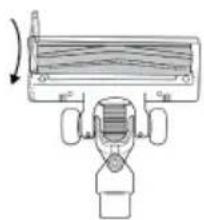
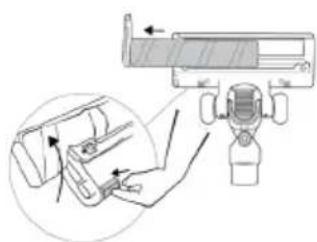
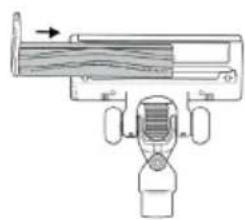
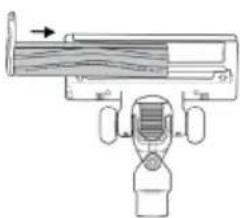
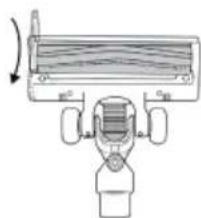
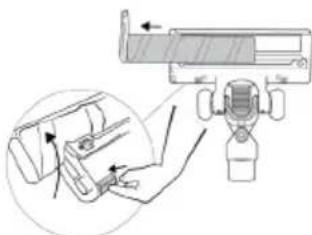
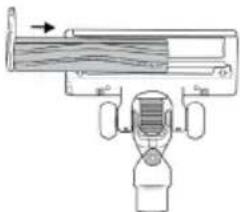
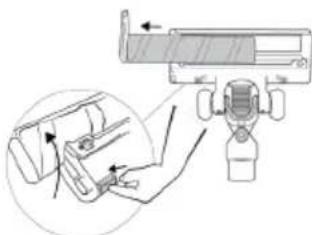
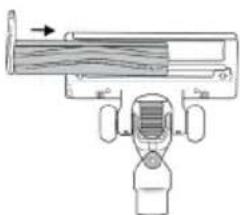
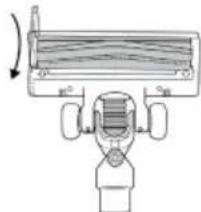
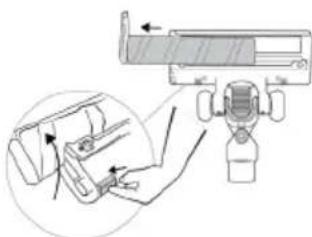
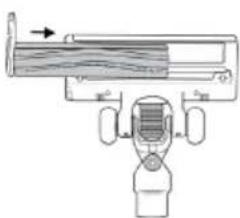
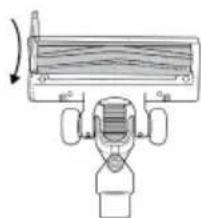
Press the small button on the back of the brush to remove the roller. Use scissors or another sharp object to carefully cut along the grooves in the roller to remove fabric or hair that has become tangled on the roller. Do not pull tangled threads, as this may damage the bristles on the roller. Replace the roller by properly inserting the corresponding side of the roller into the slot and securing it. The roller is correctly installed when it locks and the outer part fits firmly inside the brush.

| Naziv proizvoda: | Usisivač |
| Nominalni napon uređaja: | 25,2 V / 2000 mA / litijum-jonske baterije |
| Priključna snaga uređaja: | 400 W |
| Napon adaptera: | 32 V: 450 mA |
CHARGING THE DEVICE
OPERATING THE VACUUM CLEANER
When using the vacuum cleaner, always observe the following basic safety precautions: Carefully read this instruction manual and only use the appliance in accordance with the instructions herein. Before using the appliance for the first time, remove all protective film or plastics. Never leave the appliance unattended during use. Before using the appliance, carefully assemble all of its parts. Only use the appliance indoors and in dry areas. Only use the appliance with the parts recommended by the manufacturer. Do not use the appliance if it has been dropped, if it is damaged, if it has been kept outdoors, or if it has been dropped or immersed in a liquid. Regular cleaning can extend the appliance's useful life. Make sure your hair, loose parts of your garments, fingers, or other parts of the body do not come into contact with the vents or moving parts of the appliance. The appliance complies with all required standards regarding electricity and radio interference regulations. The appliance is not intended to be used by children and persons with impaired physical or mental abilities. This appliance may be used by children aged 8 years and more, and by persons with reduced physical, sensory, or mental capabilities or lack of experience and knowledge, if they are supervised during the use of the appliance or if they have been provided relevant instructions regarding the use of the appliance in a safe way, and they understand the hazards involved. Keep children under supervision while they are using the appliance and make sure they do not play with it. Children should not perform any cleaning or maintenance tasks on the appliance, unless they are older than 8 years, and they do so under supervision. Switch off the appliance after use.
Danger
Do not immerse the main unit/appliance housing or the charging base in water or any other liquid and do not rinse them under running water.
Special warnings
Before connecting the appliance or the charging base with the power cord to the power mains, make sure the indicated voltage matches the voltage of the power mains in your home. Do not use a damaged vacuum cleaner or a damaged charging base (or adapter – depending on your vacuum cleaner model). If the charging base (or adapter) is damaged, replace it only with an original spare part in order to avoid danger. A transformer is integrated into the adapter. Removal and replacement of adapter with another one are not allowed as this may lead to a dangerous situation. Only charge the vacuum cleaner with the supplied adapter and charging base. The adapter may heat up during charging. This is a normal occurrence. (Depending on your model, if it has an adapter.) Switch off the appliance during charging. Never use the vacuum cleaner without filters or filtering unit in place. The exhaust vents may not be blocked during vacuum cleaning. Only use the appliance for household purposes and indoors. Keep the suction vents clean and free in order to ensure optimum and unimpeded suction power of the appliance. It is highly recommended to regularly clean the open parts of the suction hose, and to remove dust, hair, or anything else that may block the airflow. Before cleaning the support or the charging base, unplug it from the power socket. Never use the vacuum cleaner to clean up embers or filings, cigarette butts,
matches, liquids (e.g. water, carpet cleaning foam), or sharp or pointed objects (broken glass etc.). Keep the suction tube or the open part of the appliance away from your face and body. Never use the appliance to vacuum construction material (such as fine sand, lime, cement powder, toner dust etc.). This can cause damage to the appliance.
Problems and solutions
| Problem | Possible reason | Solution |
| Not working. | The battery is dead.The handy VC is not assembled correctly. | Charge.Assemble the handy VC correctly. |
| Suction power has decreased. | The dust cup is full.Block in filter.Block in the air inlet tunnel or on the roller of electrical brush. | Pour out the dust.Clean or change filter.Clean the electrical brush. |
| The VC is not charging. | The charger is not connected on socket.The connector of charger is not connected to the hole of base body.The handy VC is not assembled to the body. | Connect the charger on socket.Connect the charger with base body of VC.Assemble the handy VC on body. |
| Use very short time after charging. | Not enough charging time.The battery is aging. | Charge according to instruction.Change the battery. |
Environment
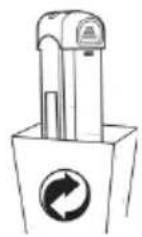
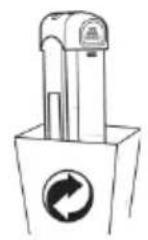
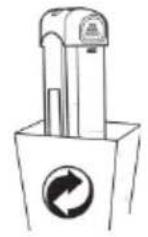
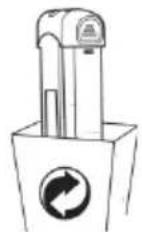
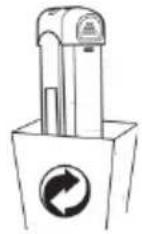
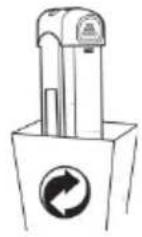
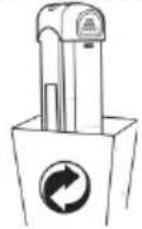
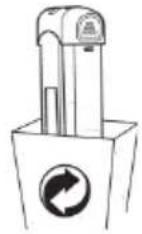
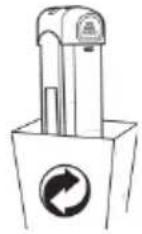
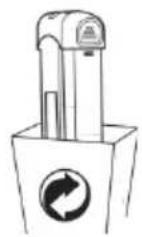
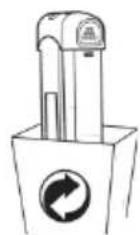
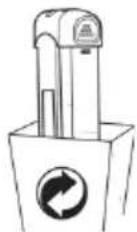
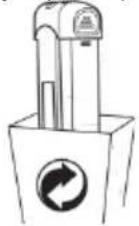
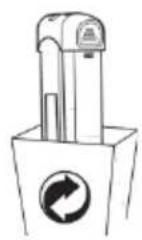
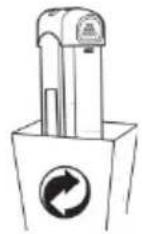
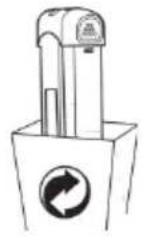
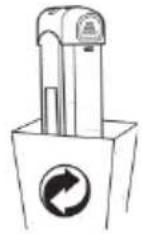
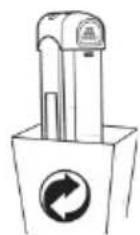
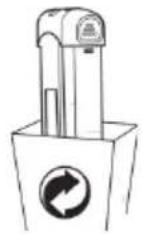
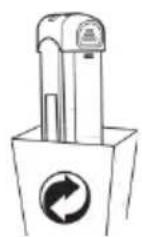
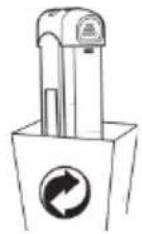
Do not throw away the appliance with the normal household waste at the end of its life. Hand it in at an official collection point for recycling. By doing this, you help to preserve the environment.
This appliance is marked according to the European directive 2012/19/EU on Waste Electrical and Electronic Equipment (WEEE). This guideline is the frame of a European-wide validity of return and recycling on Waste Electrical and Electronic Equipment.
Guarantee & service
If you need information or if you have a problem, please contact the Hisense Customer Care Centre in your country (the phone number is in the worldwide guarantee leaflet). If there is no Customer Care Centre in your country, go to your local Hisense dealer or contact the Service department of Hisense domestic appliances.
Note: The warranty on the battery of vacuum cleaner is 12 months.
For personal use only!
For easier transport, some appliance parts are packed separately and safely placed in the main packaging unit. Before first use, read and observe the instructions for assembly and safe use.
Due to its design, the appliance is not free-standing. Therefore, we recommend safe placement on the charging station. The appliance is intended for household use, for dry vacuum cleaning.
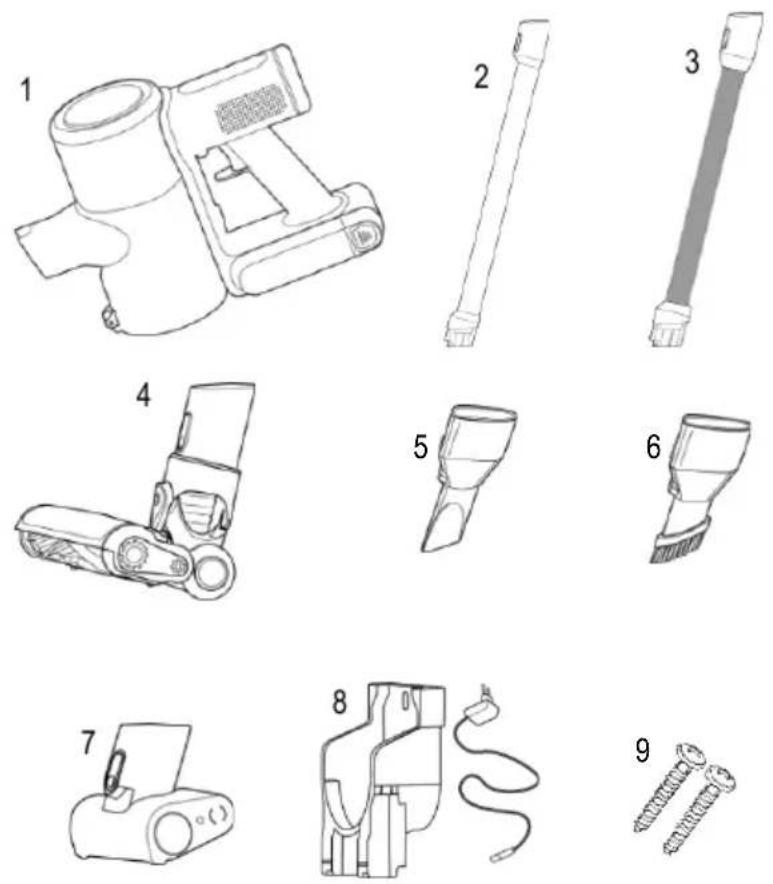
APPLIANCE PARTS
1 Housing with motor unit, battery, and dust bin
2 Suction tube
3 Flexible hose
4 2 in 1 motorized brush
5 Narrow nozzle
6 Dust attachment
7 Bedding attachment
8 Wall holder with adapter and power cord
9 3 screws
APPLIANCE ASSEMBLY
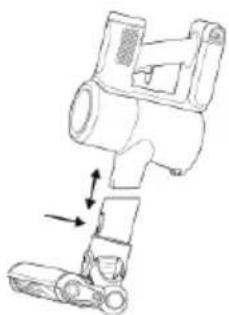
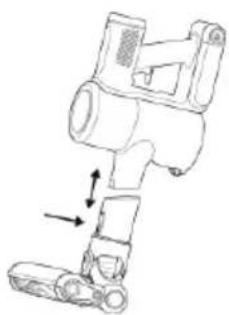
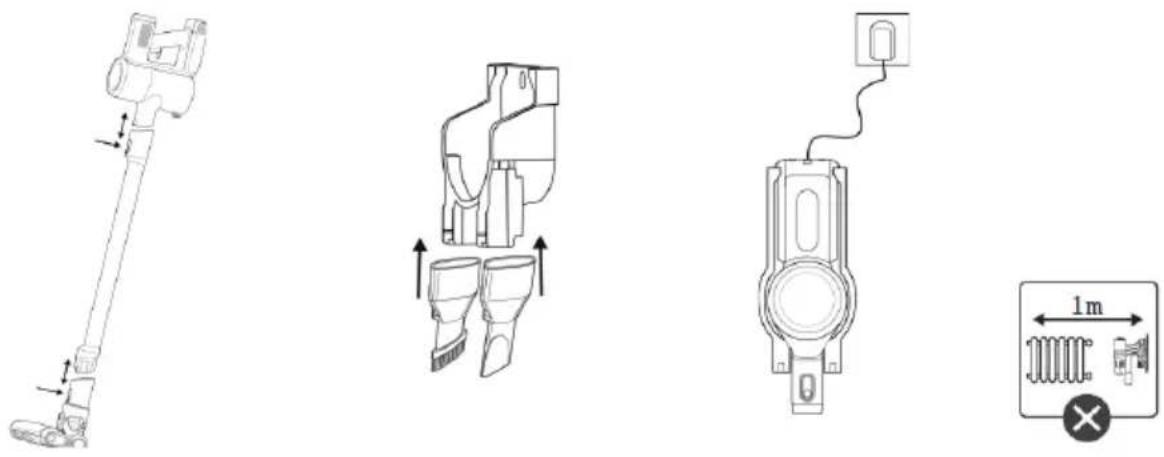
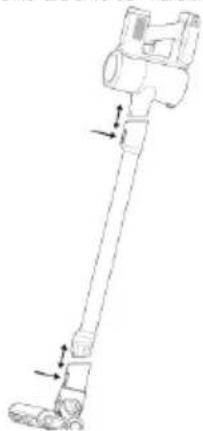
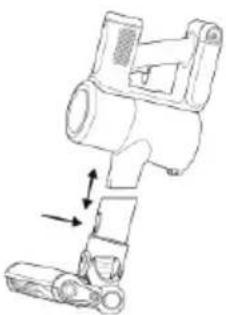
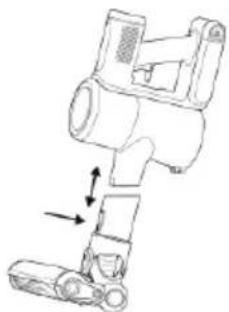
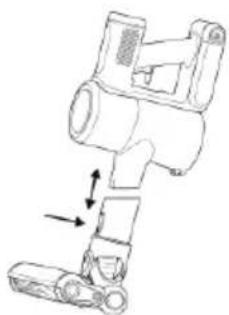
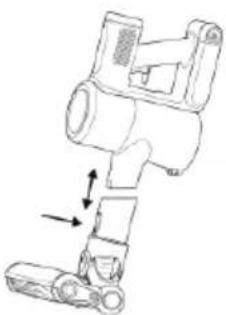
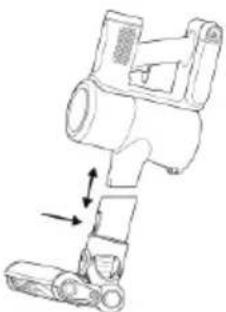
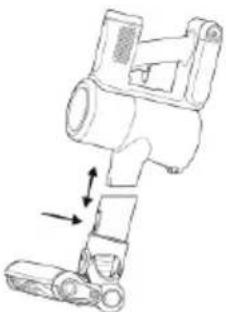
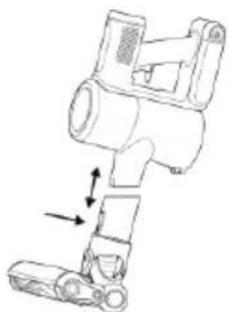
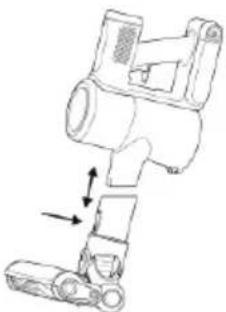
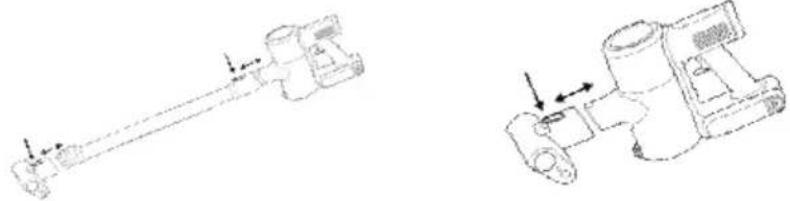
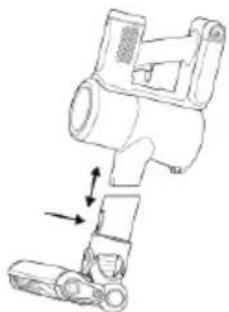
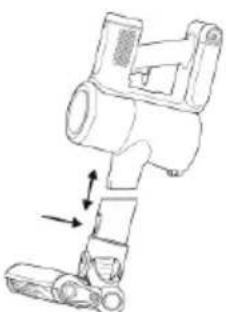
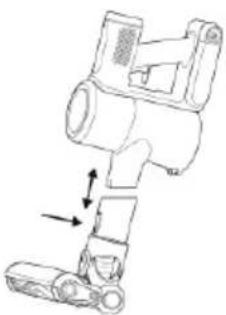
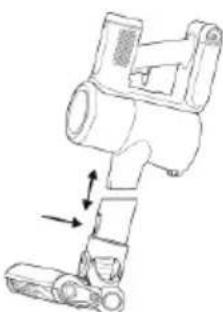
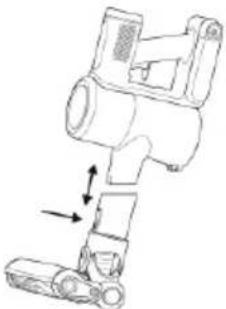
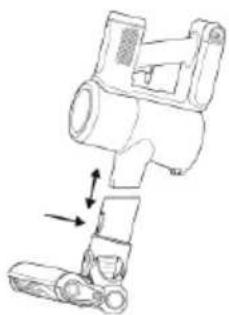
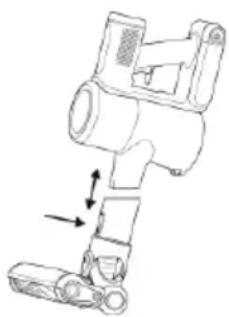
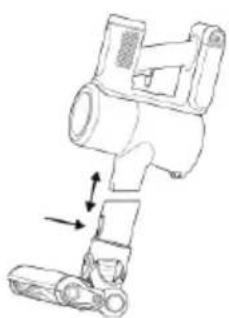
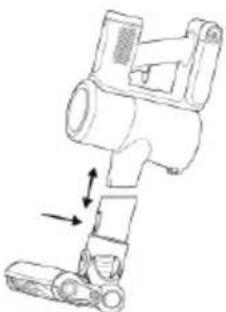
Assemble the tubes and connect the upper part to the motor unit and the lower part to the floor brush. The appliance is correctly assembled when it is firmly attached all the way to the grooves.
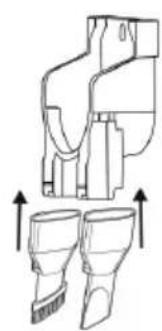
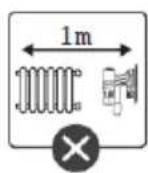
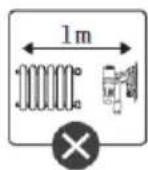
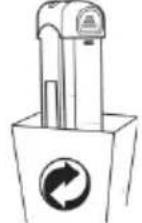
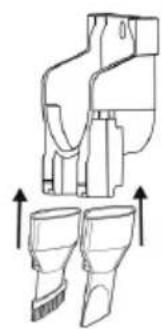
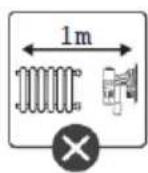
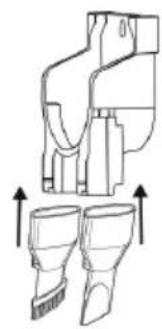
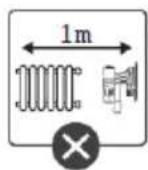
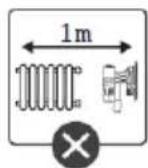
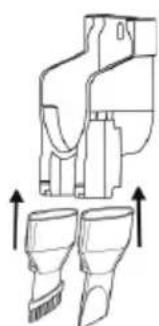
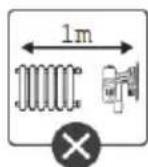
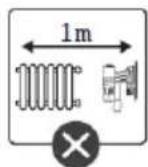
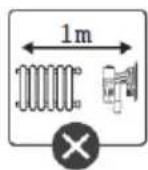
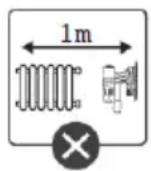
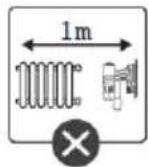
Also supplied with the appliance is the charging station onto which two smaller attachments may be placed for storage. The charging station should be placed at least 1 m away from any heat-radiating body. Due to its design, the appliance is not free-standing.
USE OF THE VACUUM CLEANER
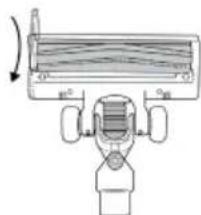
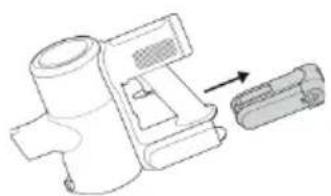
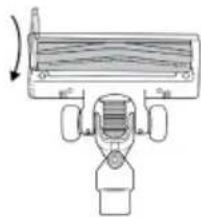
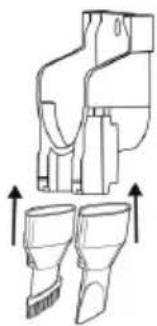
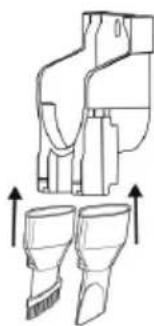
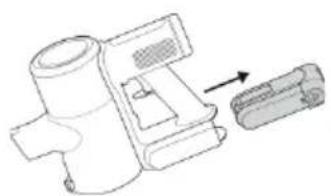
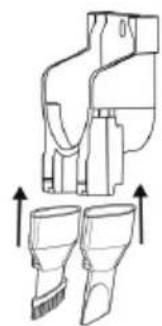
Tubes can be adjusted as desired, and the brush fits on any tube, as well as directly onto the motor unit. Vacuuming attachments also fit on both the vacuuming tube and the motor unit. Press the button on the brush or the tube to change the attachment as required.
Floor brush: use it to vacuum any type of flooring (vacuum cleaning dry flooring).

The narrow nozzle attachment is intended for vacuuming narrow hard-to-reach spots (corners, sofa, spider webs, behind the radiators ...).
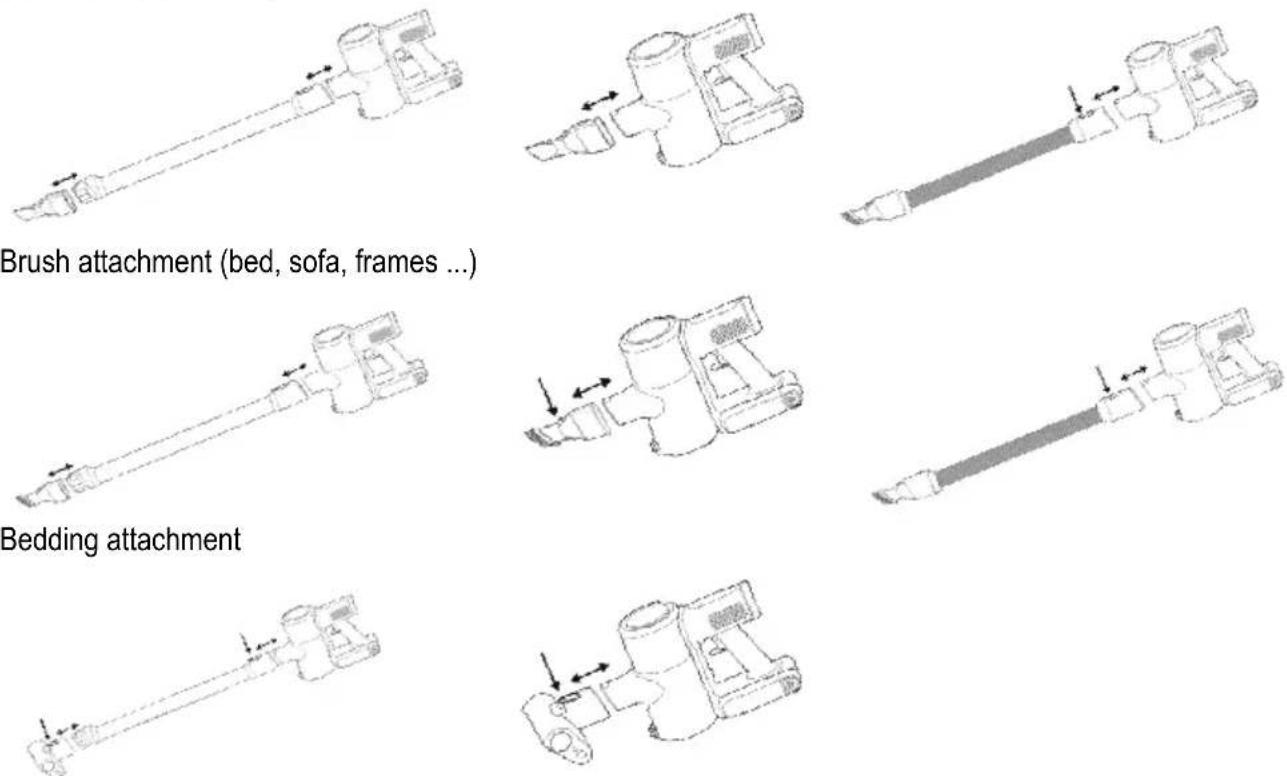
CHARGING THE APPLIANCE
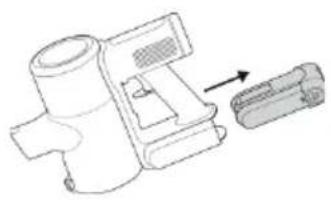
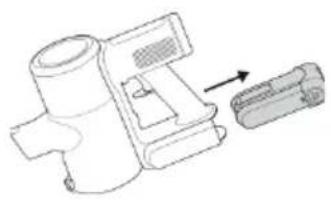
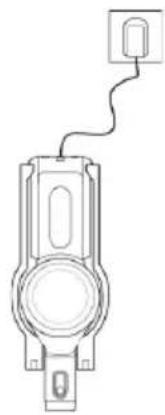
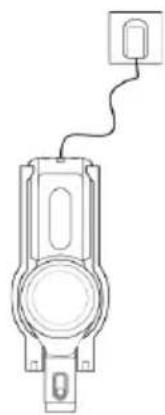
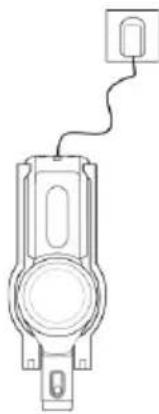
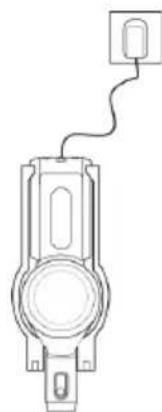
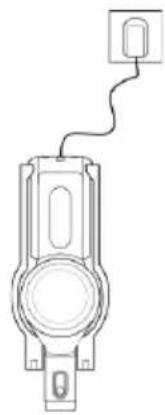
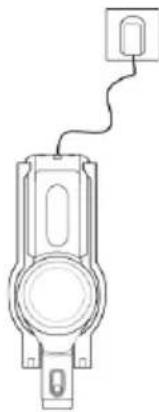
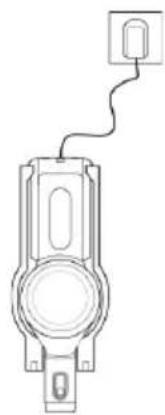
Adapter and the charging cord are already installed in the charging station. If you do not wish to charge the vacuum cleaner on the charging station, despite the warnings, please observe the instructions for safe removal of the adapter and charging cord.

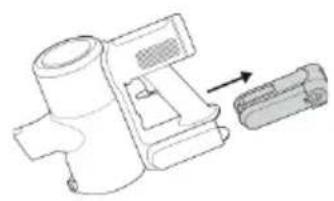
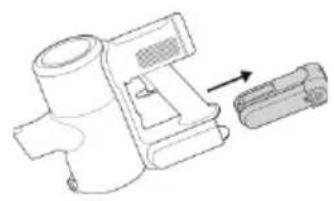
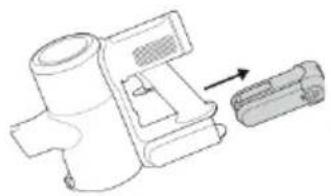
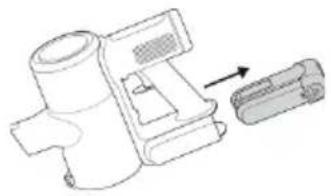
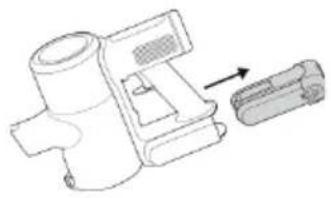
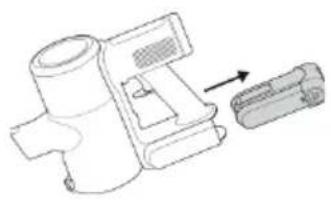
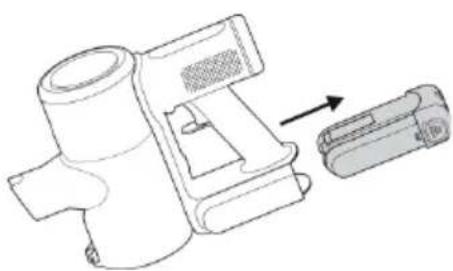
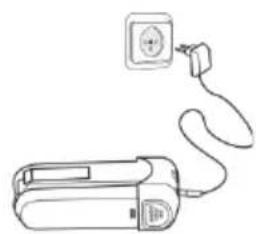
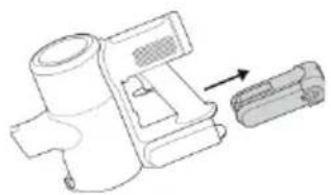
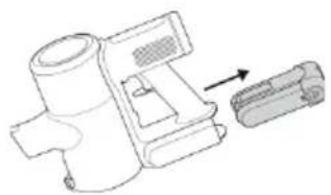
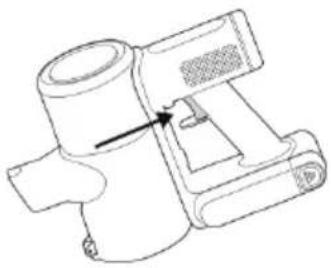
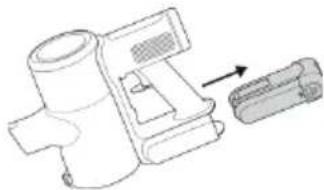
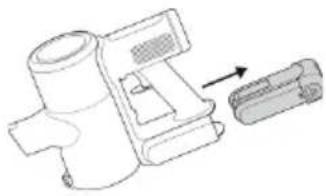
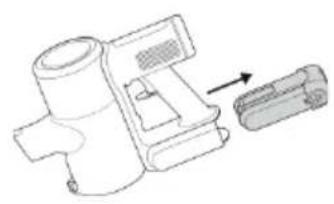
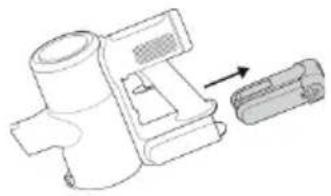
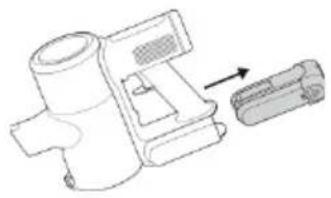
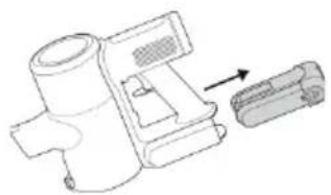
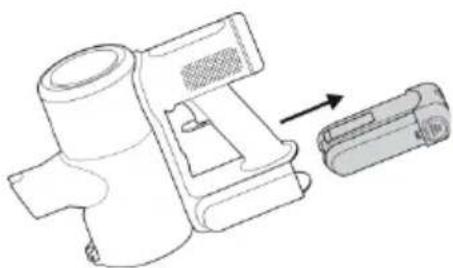
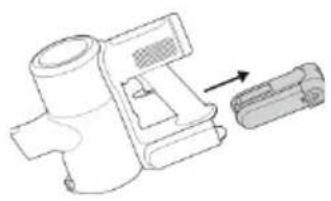
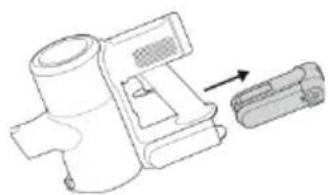
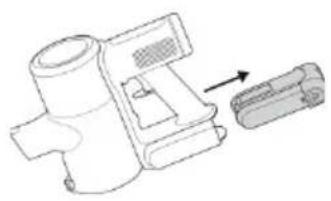
The appliance can be charged on both the charging station and any other surface. Press the button on the back of the vacuum cleaner to safely remove the battery from the appliance. This way, the battery can also be charged separately from the vacuum cleaner.
For safety, we recommend placing the appliance at least 1 metre away from the nearest heat-radiating body during the charging process.
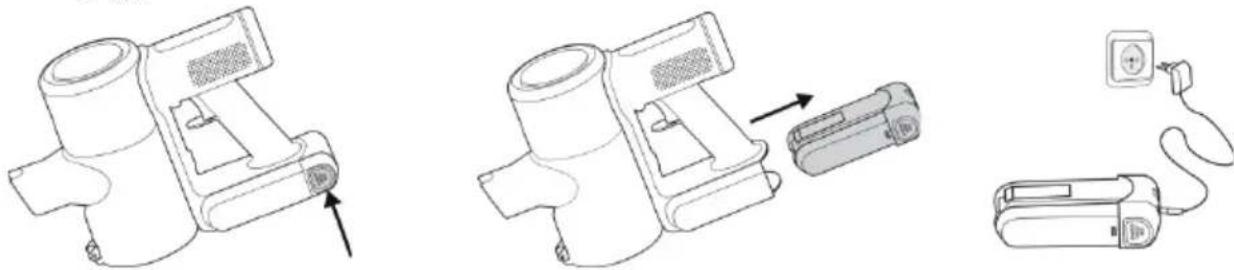
The appliance cannot be switched on during the charging process
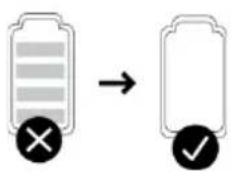
Removing the battery from the vacuum cleaner
Before discarding the vacuum cleaner, please remove the battery.
To safely remove the battery, make sure it is completely empty. If the appliance battery is not removable, observe the instructions in the pictorial instructions booklet.
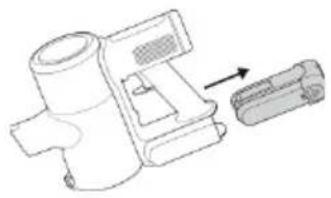
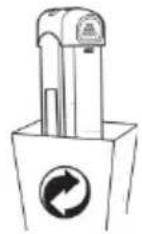
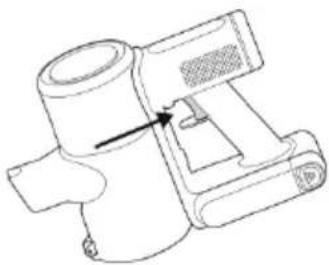
The on/off button is located on the motor unit handle
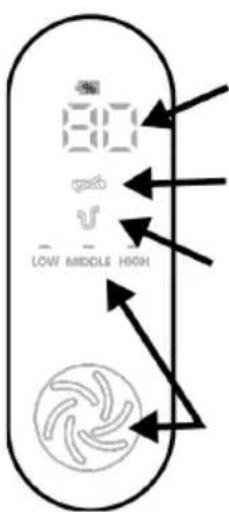
The appliance has a digital battery charge indicator. It indicates the current battery charge during use or during the charging process.
This icon lights up if a foreign object is lodged or entangled in the brush. When this icon is lit, locate and remove the foreign object.
This icon lights up when the dust bin is full. When this icon is lit, empty the bin before using or resuming the use of the vacuum cleaner.
The speed control button is located on the battery charge indicator. The appliance has three vacuuming speeds:
Low – up to 60 min. of operation / medium (up to 35 min. of operation) / High (up to 13 min. of operation on a single charge)
CLEANING THE VACUUM CLEANER
Cleaning the dust bin and the filter
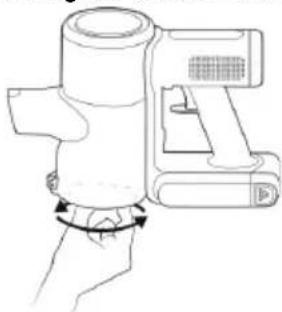
There is a knob on the bottom part of the dust bin that can be rotated to partially clean the filter by means of a special attachment. Cleaning the filter in this way is recommended during vacuum cleaning if the dust bin is full before you are done with the cleaning. We recommend cleaning the filter and the dust bin after each use.
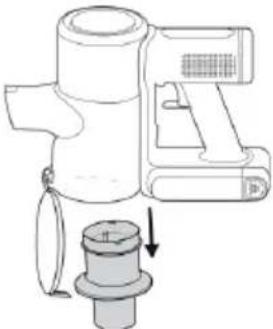
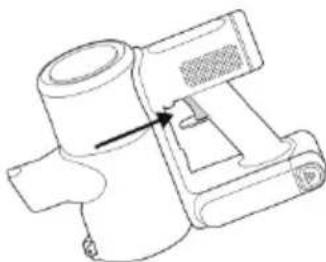
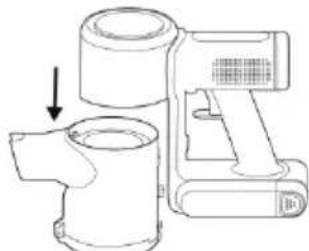
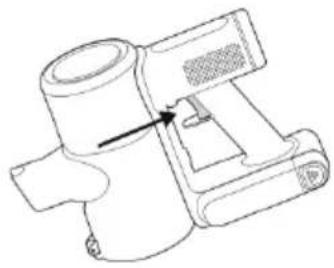
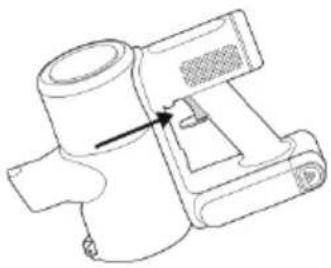
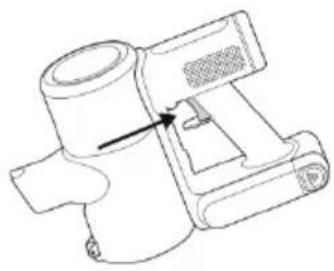
To empty the dust bin, pull the lever on the right-hand side of the motor unit handle. The bottom part of the cover will open. Rotate the inner part of the large filter to the left to remove it. Correctly replace the dust bin and rotate it in the opposite direction. Then, close the cover. The dust bin is correctly placed once you hear a click.
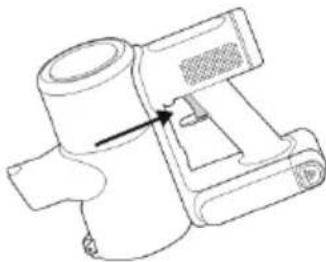
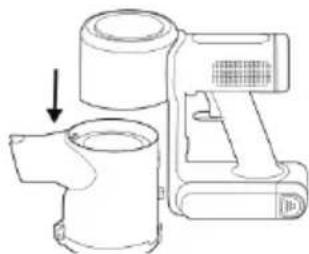
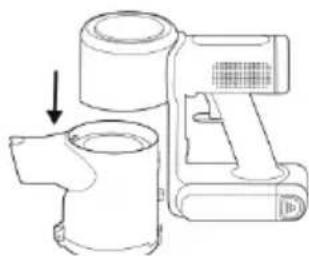
To remove the dust bin, push the button in the middle of the inner side of the handle to the left. The filter can be removed from the top side, while the filter container can be removed by pressing on the button on the rear bottom part of the dust bin. When replacing the dust bin onto the motor unit, make sure all parts are correctly assembled and installed. Make sure the two plugs on the dust bin's front part are aligned with the grooves on the motor unit. The dust bin is correctly placed once you hear a click.
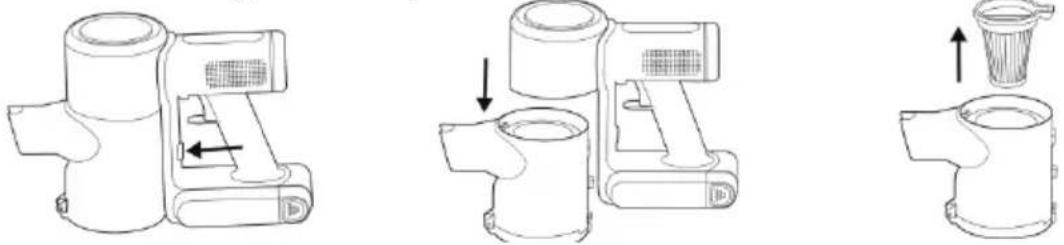
The dust bin, the filter, and the filter frame are washable; however, make sure these parts are completely dry before reassembling them. Flawless operation can only be ensured if the parts are dry; failure to dry the parts could lead to problems resulting from incorrect use. Drying the parts in direct sunlight is not recommended.
Clean the filter carefully to prevent tearing it. If the filter is damaged, it must be replaced; otherwise, the debris you are vacuuming may damage the motor unit.
Cleaning the brush
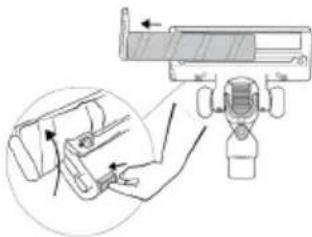
Press the small button on the rear part of the brush to remove the roller. Use scissors or some other blade to carefully cut along the groove in the roller to remove any fabric or hair entangled on the roller. Do not pull on the entangled threads, as this may damage the bristles on the roller. Replace the roller by correctly inserting the side of the roller into the groove and fasten it. The roller is correctly in place when it latches in and the outer part sits firmly inside the brush.

| Product name: | Vacuum cleaner |
| Appliance nominal voltage: | 25,2 V / 2000 mA / lithium-ion batteries |
| Appliance nominal power: | 400W |
| Adapter voltage: | 32 V: 450 mA |
VACUUM CLEANER OPERATION
The appliance has a digital display for battery charging. During use or charging, it digitally shows the battery charging progress.
| Názov produktu. | Vysávač |
| Menovité napätie spotrebiča: | 25,2 V / 2000 mA / lítium-iónové batérie |
| Menovitý výkon spotrebiča: | 400W |
| Napätie adaptéra: | 32 V: 450 mA |
CONTROL OF THE VACUUM CLEANER

USE OF THE VACUUM CLEANER
OPERATION OF THE VACUUM CLEANER
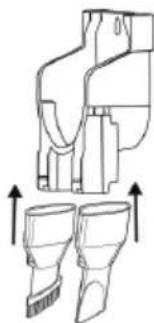
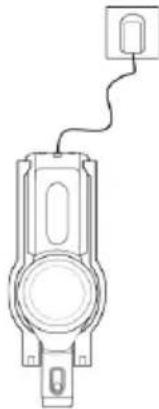
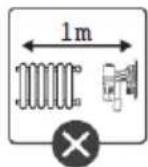
USE OF THE VACUUM CLEANER
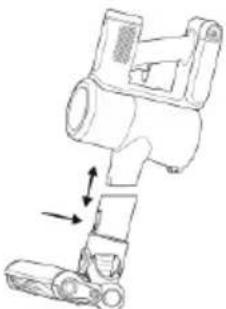
OPERATION OF THE VACUUM CLEANER
Bed nozzle
CHARGING THE APPLIANCE
CLEANING WITH THE VACUUM CLEANER
| Laitteen nimellisjännite: | 25,2 V / 2000 mA / litiumioniakut |
| Laitteen nimellisteho: | 400 W |
| Sovittimen jännite: | 32 V: 450 mA |
ASSEMBLY OF THE APPLIANCE
CHARGING THE APPLIANCE
OPERATION OF THE VACUUM CLEANER
The dust container, filter, and filter insert can be washed, but you must ensure that these parts are completely dry before assembling them. Trouble-free operation can only be guaranteed if the parts are dry. Failure to dry the parts may cause problems due to incorrect use. It is advised not to dry the parts in direct sunlight.

USING THE VACUUM CLEANER
USING THE VACUUM CLEANER
USING THE VACUUM CLEANER
| Apparatens nominella spänning: | 25,2 V/2000 mA/litiumjonbatterier |
| Apparatens nominella effekt: | 400 W |
| Adaptersn spänning: | 32 V: 450 mA |
USING THE ELECTRIC BROOM
REMOVING THE BATTERY FROM THE ELECTRIC BROOM
OPERATION OF THE ELECTRIC BROOM
CLEANING THE ELECTRIC BROOM
| Emri i produktit: | Fshesë me korrent me opson pastrimi dyshemeje |
| Tensioni nominal i pajisjes: | 25,2 V / 2000 mA / bateri litium-jonike |
| Fuqia nominale e pajisjes: | 400W |
| Tensioni i adaptorit: | 32 V: 450 mA |
USING THE VACUUM CLEANER

USING THE VACUUM CLEANER
- USING THE VACUUM CLEANER
- CHARGING THE DEVICE
- OPERATING THE VACUUM CLEANER
- GENERAL WARNINGS
- CLEANING THE BRUSH
- DANGER
- SPECIAL WARNINGS
- ENVIRONMENT
- GUARANTEE & SERVICE
- APPLIANCE PARTS
- APPLIANCE ASSEMBLY
- USE OF THE VACUUM CLEANER
- CHARGING THE APPLIANCE
- REMOVING THE BATTERY FROM THE VACUUM CLEANER
- CLEANING THE VACUUM CLEANER
- VACUUM CLEANER OPERATION
- CONTROL OF THE VACUUM CLEANER
- OPERATION OF THE VACUUM CLEANER
- CLEANING WITH THE VACUUM CLEANER
- ASSEMBLY OF THE APPLIANCE
- USING THE ELECTRIC BROOM
- REMOVING THE BATTERY FROM THE ELECTRIC BROOM
- OPERATION OF THE ELECTRIC BROOM
- CLEANING THE ELECTRIC BROOM
Brand : GORENJE
Model : Hi Move III
Category : Vacuum Cleaner