ISC L-1625 - Vacuum Cleaner Starmix - Free user manual and instructions
Find the device manual for free ISC L-1625 Starmix in PDF.


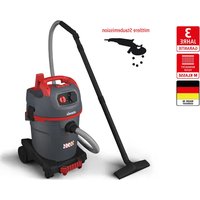
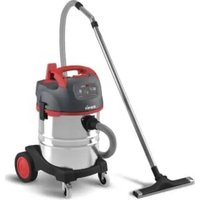
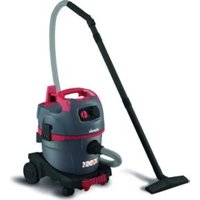
| Product type | Wet and dry vacuum cleaner |
| Brand | Starmix |
| Model | ISC L-1625 |
| Dust category | L (limit values > 1 mg/m³) |
| Voltage | 220-240 V |
| Frequency | 50/60 Hz |
| Rated power | 1200 W |
| Max. power | 1600 W |
| Max. airflow | 75 l/s (270 m³/h) |
| Max. depression | 280 hPa/MG |
| Sound pressure | 69 dB(A) |
| Weight | 12.1 kg |
| Dimensions (L x W x H) | 45 x 39 x 49 cm |
| Container capacity | 25 L (approx.) |
| Main filter type | Pleated polyester filter cassette |
| Functions | Suction of solids and liquids, power tool automation, automatic filter vibration, fill level indicator |
| Application | Commercial (hotels, schools, hospitals, etc.) |
| Maintenance | Regular filter cleaning, emptying the container, annual efficiency test |
| Safety | Explosion and fire protection, automatic shut-off in case of foam/liquid |
| Spare parts | Filter cassettes, filter bags, PE bags available |
Frequently Asked Questions - ISC L-1625 Starmix
User questions about ISC L-1625 Starmix
0 question about this device. Answer the ones you know or ask your own.
Ask a new question about this device
Download the instructions for your Vacuum Cleaner in PDF format for free! Find your manual ISC L-1625 - Starmix and take your electronic device back in hand. On this page are published all the documents necessary for the use of your device. ISC L-1625 by Starmix.
USER MANUAL ISC L-1625 Starmix
natural_image
Exterior view of a Starmix vacuum cleaner with coiled tubing and control panel (no visible text or symbols on device body)Bedienungsanleitung (original)
Operating instructions
| DE | Beschreibung | |||
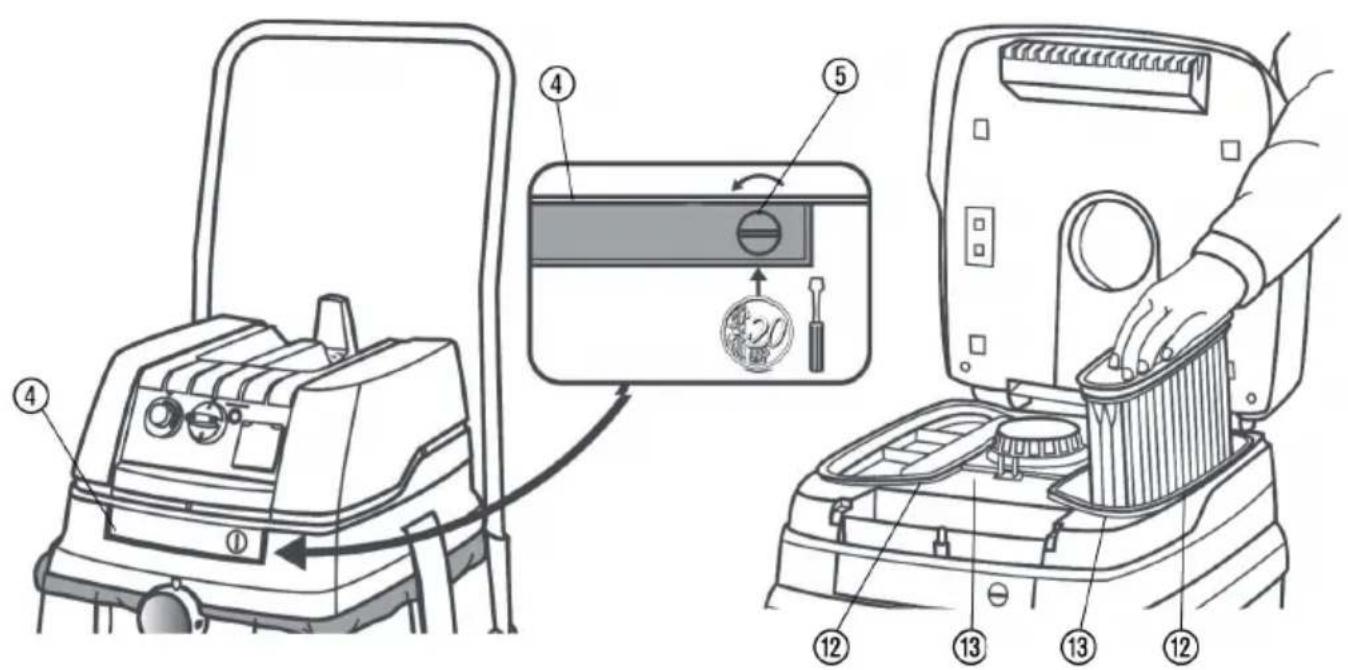
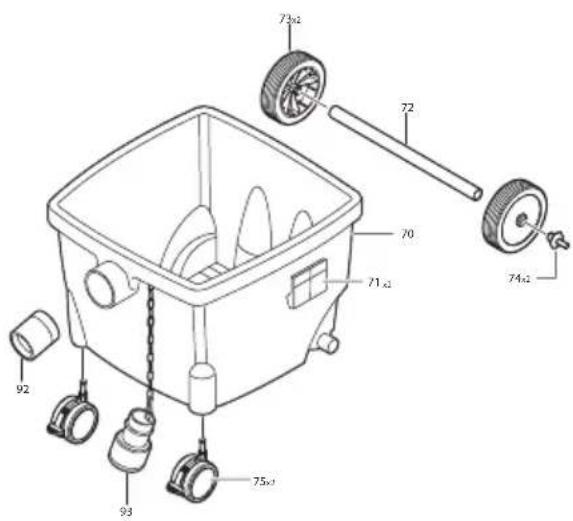
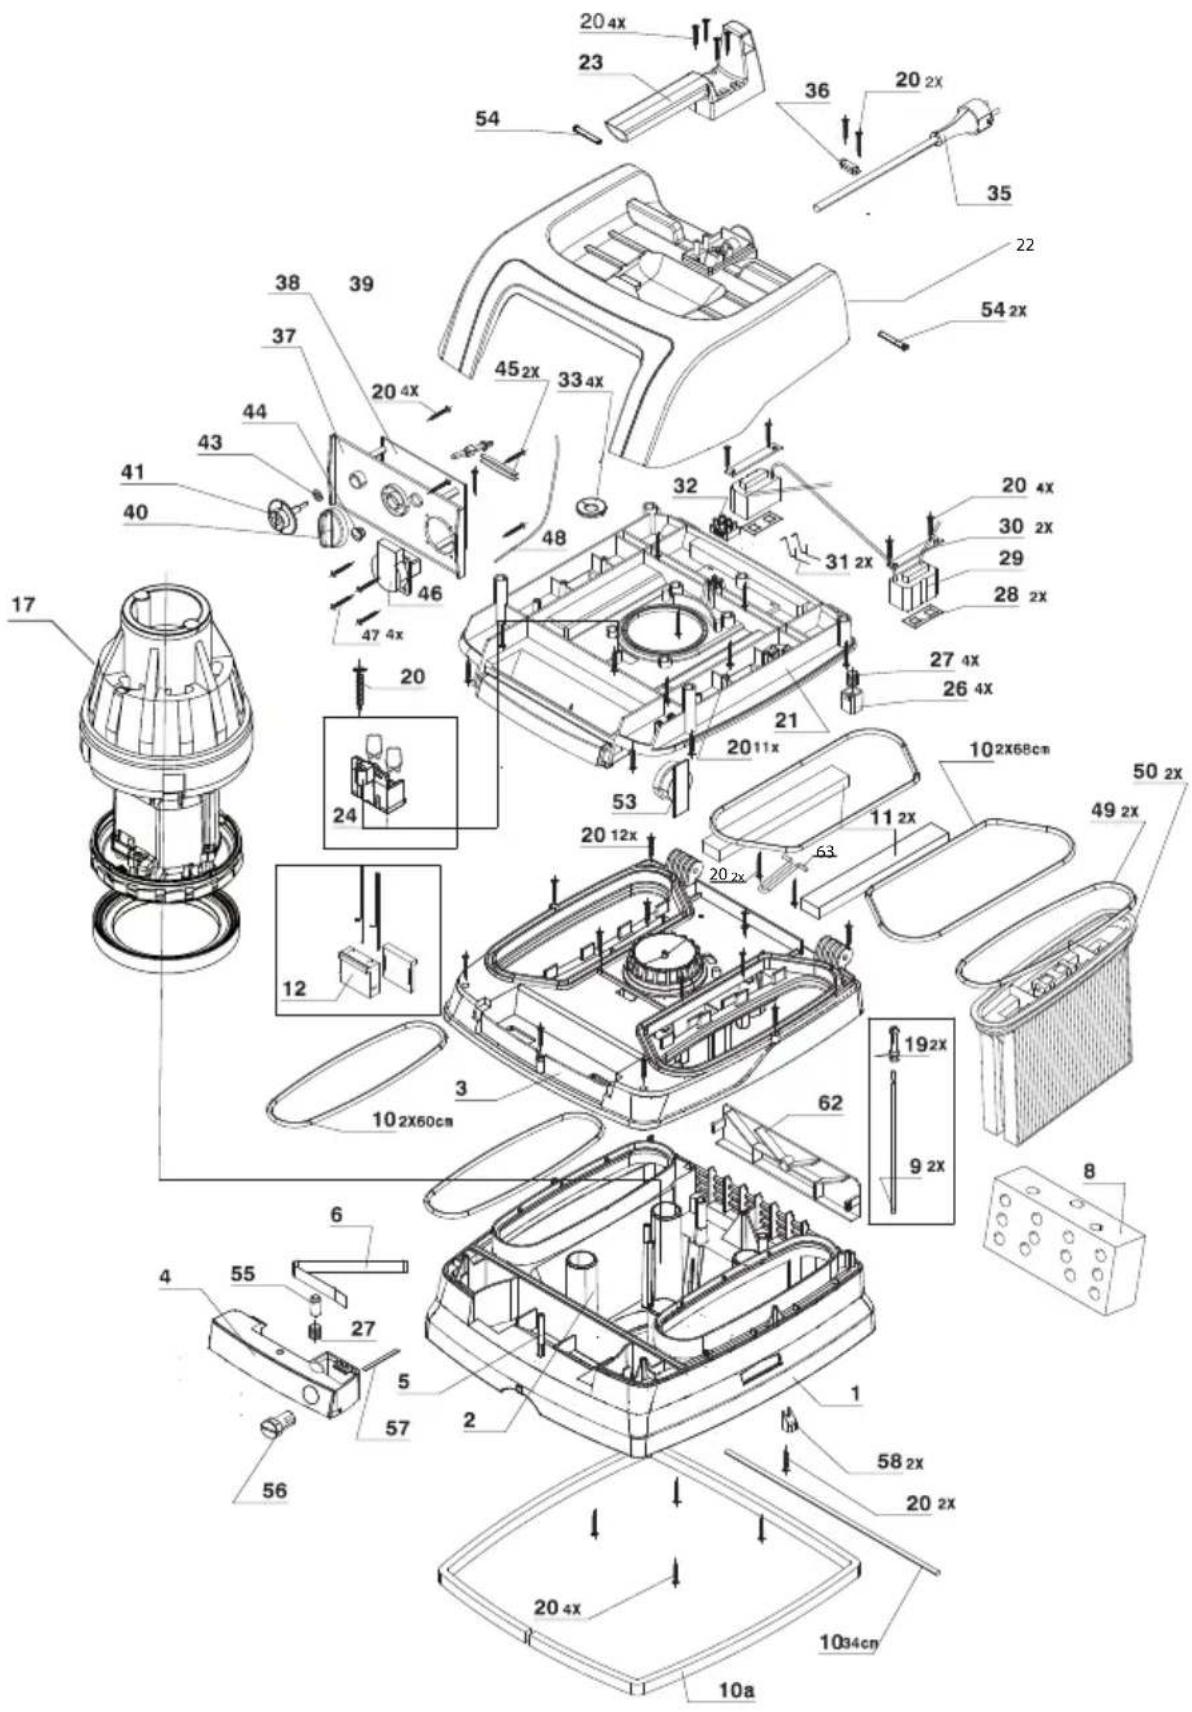
| 1 | Oberteil 3 Kühlufteintritt | 8a Verschlussstopfen mit Kette 14 | Vlies-Filterbeutel | |
| 2 | Funktionsplatte 4 Riegel 9 Rastverschlüsse 15 Kunststoff-Entleerbeutel | |||
| 2a | Drehschalter 5 Verschluss 10 Räder 16 Einhängung für Drahtkorb | |||
| 2b | Steckdose für Elektrowerkzeug 6 Anschlussleitung 11 Lenkrollen 17 Zubehördepot * | |||
| 2c | Volumenstromanzeige 7 Behälter 12 Filterkassetten 19 Fahrbügel * (Füllanzeige) | |||
| 2d | Drehzahlregulierung 8 Saugöffnung 13 Motorschutzfilter * je nach Modell | |||
| EN | Description | |||
| 1 | Top section 3 Cooling air inlet | 10a Sealing plug with chain | 13 Fleece filter bag | |
| 2 | Functional plate 4 Latch | 9 Snap-in locks | 15 Plastic emptying bag | |
| 2a | Rotary switch 5 Lock | 10 Wheels | 16 Suspension for wire basket | |
| 2b | Power socket for electric tools 6 Connecting line | 11 Steering castors | 17 Accessories box * | |
| 2c | Volume flow display (Fill level indicator) 7 Container | 12 Filter cassettes | 18 Driving handle * | |
| 2d | Speed control 8 Suction opening | 13 Motor protection filter | * dependig on model | |
| F | Description | |||
| 1 | Partie supérieure 3 Entrée air de refroidissement | 10a Bouchons de fermeture à chaîne | 14 Sac filtre non tissé | |
| 2 | Plaque de fonctionnement 4 Verrou | 9 Fermeture à crans | 15 Sac de vidange en plastique | |
| 2a | Interrupteur rotatif 5 Fermeture | 10 Roues | 16 Suspension pour le panier en fil métallique | |
| 2b | Prise de courant pur outil électrique 6 Conduite de raccordement | 11 Roues-guides | 17 Porte-accessoires * | |
| 2c | Affichage du débit volumétrique (Indicateur de niveau de remplissage) 7 Cuve | 12 Cassettes filtre | 18 Etrier de conduite * | |
| 2d | Régulation du nombre de tours 8 Oiverture d'aspiration | 13 Filtre de protection du moteur | * selon la variante d'équipement | |
| E | Descripción | |||
| 1 | Parte superior 9 Entrada de aire frío | 10a Tapón de cierre con cadena | 14 Bolsa de filtro de fieltro | |
| 2 | Disco de funciones 4 Enclavamiento | 9 Cierre a presión | 15 Bolsa desechable de plastico | |
| 2a | Conmutador giratorio 5 Cierre | 10 Ruedas | 16 Gancho para cesta de alambre | |
| 2b | Toma de corriente para herramientas eléctricas 6 Cable de alimentatción | 11 Redecillas de dirección | 17 Soporte para accesorios * | |
| 2c | Indicator de flujo (Indicator de recipiente lieno) 7 Recipiente 12 Estuche de filtro | 13 Barra de transporte * | ||
| 2d | Regulacion de velocidad 8 Abertura de spiración | 13 Filtro de protección del motor | * dependiendo del modelo | |
| PDescrição | ||||
| 1 | Parte superior 3 Entrada do ar de arrefecimento | 10a Bujão de fecho com corrente | 14 Saco de filtro de vlies | |
| 2 | Placa de funções 4 Trinco | 9 Encravamentos | 15 Saco de esvaziamento de material plástico | |
| 2a | Interruptor rotativo 5 Fecho | 10 Rodas | 16 Gancho para o cesto | |
| 2b | Tomada para as ferramentas eléctricas 6 Condutor de alimemação | 11 Rodas dirigíveis | 17 Depósito de acessórios * | |
| 2c | Sinalizador da vazão (Indicador do enchimento) 7 Recipiente 12 Cartuchos de filtração | 18 Estribo de condução * | ||
| 2d | Regulação da rotação 8 Bocal de aspiração | 13 Filtro de proteção do motor | * conforme o modelo | |
| I | Descrizione | |||
| 1 | Parte superiore 3 Entrata aria di raffreddamento | 10a Tappo con catena | 14 Sacchetto filtrante in vello | |
| 2 | Pannello di funzionamento 4 Blocco | 9 Chiusure ad incastro | 15 Saccheni di scarico in plastica | |
| 2a | Manopola 5 Chiusura | 10 Ruote | 16 Anacco per cesto metallico | |
| 2b | Presa per utensili elenrici 6 Linea di collegamemo | 11 Rulli di guida | 17 Porta accessori * | |
| 2c | Indicazione del flusso del volu me (Indicatore serbatoio) 7 Serbatoio | 12 Cartuccia filtro | 18 Maniglione * | |
| 2d | Regolazione numero giri 8 Bocca di aspirazione | 13 Filtro di protezione motore | * in base al modello | |
| NL | Beschrijving | |||
| 1 | Bovendeel 9 Koelluchtinvoeropening | 10a Sluitdop met kening | 13 Vlies-filterzak | |
| 2 | Bedieningspaneel 4 Vergrendeling | 9 Ketelklemmen | 15 Kunststof opvangzak | |
| 2a | Draaischakelaar 5 Slot | 10 Wielen | 16 Onhanging voor opergmand | |
| 2b Stopcontact voor elektrisch gereedschap | 6 Netsnoer 1 Zwenkwielen 17 Toebehorenhouder * | |
| 2c Volumestroomaanduiding (Niveau-indicatie) | 7 Zwenkwieltje 12 Filtercassetten 13 Duwbeugel * | |
| 2d Toerentalregeling | 8 Zu igopening 13 Motorveiligheidsfilter * Al naar model | |
| DK Beskrivelse | ||
| 1 Overdel 3 Køleuftindgang | 8a Tillukningsprop med kaede 14 Vlies-filterpose | |
| 2 Funktionsplade 4 Spærre | 9 Snaplas 15 Kunststofpose til at tømme | |
| 2a Drejekontakt | 5 Lukkemekanisme 10 Hjul 16 Holder til trådkurv | |
| 2b Stikkontakt til El-værktøj 6 Tilslutningskabel 11 Styreruller 17 | Tilbehørsdepot * | |
| 2c Strømvisning (volumen) (Fyld-ningsindikator) | 7 Beholder 12 Filterkassetter 18 | Kørebøjle * |
| 2d Regulering af omdrejningstal | 8 Sugeåbning 13 Motorvaernsfilter | * alt efter model |
| SBeskrivning | ||
| 1 Ovandel 3 Kylluftsintag | 8a Förslutningsplugg med kedja 13 Fiberduk filterpåse | |
| 2 Funktionsplatta 4 Regel | 9 Ihakningslås 15 Tömningspase av plast | |
| 2a Vridbrytare | 5 Lås 10 Hjul 16 Upphängning för tillbehörskorg | |
| 2b Utag för elverktyg | 6 Anslutningskabel 11 Svängbarahjul | 17 Tillbehörsförvaring * |
| 2c Volymströmindikering (Fyllnads-indikering) | 7 Behållare 12 Filterpatroner | 18 Körhandtag* |
| 2d Varvtalsreglering | 8 Sugöppning 13 Motorskyddsfilter | * beroende på modell |
| N Beskrivelse | ||
| 1 Overdel 3 Kjøleluftinngang | 8a Låsepropper med kjede 19 Fleece-filterpose | |
| 2 Funksjonsplate | 4 Sperre | 9 Låslukking 15 Tømmepose i kunststoff |
| 2a Dreiebryter | 5 Lås 10 Hjul 16 Innhengning for trådkurv | |
| 2b Stikkontakt for elektroverktøy | 6 Forbindelsesledn | 11 Styreruller 17 Tilbehørsdepot * |
| 2c Volumstrømangivelse (Fyl-lingsindikator) | 7 Beholder 12 Filterkassetter 18 | Kjørebøyyle * |
| 2d Turtallsregulator | 8 Sugeåpning 13 Motorvernefilter | * alt etter modell |
| FIN Kuvaus | ||
| 1 Yläosa | 3 Jäähdytysilman tuloaukko | 6a Ketjulla varustettu sulkutulppa 18 Kuitukangaspölypussi |
| 2 Toimintopaneeli | 4 Lukitsin | 9 Sulkimet 16 Muovinen tyjhennyspussi |
| 2a Kiertokytkin | 5 Kiinnitin | 10 Pyörät 15 Lankakorin ripustin |
| 2b Pistorasia sähkötyökalulle | 6 Verkkojohto | 11 Ohjausrullat 17 Lisätarviketeline * |
| 2c Tilavuusvirtanäyttö (Täyttötason osoitin) | 7 Säiliö | 12 Suodatinkasetit 18 Ohjaustanko * |
| 2d Kierrosluvunsäädin | 8 Imuaukko | 13 Moonorinsuojasuodatin * riippuen mallista |
| GR Περιγραφή | ||
| 1 Επάνω τμήμα 3 Εισοδος αέρα ψύζης | 14 Πώμα με αλυσίδα 15 Φλις σακούλα σκόνης | |
| 2 Πλάκ λειτουργίας | 4 Μηχανισμός ασφάλισης | 16 Κλείστρα ασφάλισης 15 Πλαστική σακούλα εκκένωσης |
| 2a Περιστρεφόμενος διακόττης | 5 Ασφάλεια | 16 Τροχοί 17 Στήριγμα συρμάτινου καλαθιού |
| 2b Μπρίζα για ηλεκτρικές συσκευές | 6 Καλώδιο σύνδεσης | 18 Θήκη εζαρτημάτων * |
| 2c Ένδειξη όγκου ρεύματος (Ενδει-ξη πληρότητας) | 7 Κάδος | 19 Κασέτες με φίλτρο 20 Λαβή οδήγησης σχήματος U * |
| 2d Ρύθμιση αριθμού στροφών | 8 Οπή αναρρόφησης | * ανάλογα το μοντέλο |
| TRAçıklama | ||
| 1 Üst kısım | 3 Soğuk hava girişi için döner düğme | 15 īpek elyaf filtre torbası |
| 2 Fonksiyon levhası | 4 Kilit sürgüsü | 16 Sentetik madde boşaltma torbası |
| 2a Çevirmeli şalter | 5 Kilit | 17 Tel sepet için askı |
| 2b Elektrikil takım için priz | 6 Bağlantı hattı | 18 Aksesuar deposu * |
| 2c Hacim akım göstergesi (Dolum göstergesi) | 7 Depo | 19 Tutma demiri * |
| 2d Devir sayısı ayarı | 8 Havalandırma deligi | * modele göre |
| PL Opis | ||
| 1 Część górna 3 Wlot powietrza zimnego | 10 Worek filtrujący z włókniny | |
| 2 Panel sterowania 4 | Zasuwa | 9 Zatrzaski 15 Worek do opróźniania ze sztucznego tworzywa |
| 2a Przełącznik obrotowy | 5 Zamek | 10 Koła 16 Zawieszenie drucianego kosza |
| 2b Gniazdko wtykowe dlanarz ędzia elektr. | 6 Kabel zasilający 11 Rolki kierowane 17 Pojemnik na akcesor * | |
| 2c Wskaźnik strumienia objętości (Wskaźnik wypełnienia) | 7 Pojemnik | 12 Kasetki filtrujące 18 Uchwyt do przenoszenia * |
| 2d Regulacja prędkości obrotowej | 8 Otwór ssący 13 Filtr silnika * | Zależnie od modelu |
| HLelrás | ||
| 1 Felsőrész 3 Hűtőlevegő-belépés | 13 a Záró dugó láncal 14 Fátyolszűrő zacskó | |
| 2 Funkciólemez 4 | Retesz | 15 Becsappanó zárszerkezetek 16 Műanyag úritőzsák |
| 2a Forgókapcsoló | 5 Zár | 17 Kerekek 18 Drótkosár beakasztó szerkezete |
| 2b Dugaszoló aljzat villamos szerszámokhoz | 6 Csatlakozó vezeték 19 Kormánygörgők 17 Tartozék tároló * | |
| 2c Térfogatáram-kijelző (Töltés kijelző) | 7 Tartály | 18 Szűrőkazetták 19 Mozgó kengyel * |
| 2d Fordulatszám szabályozó | 8 Szívónyilás | 19 Motorvédő szűrő * modelltől függően |
| CZPopis | ||
| 1 Horní část | 3 Vstup chladícího vzduchu | 20 Zátka s řetlzkem 15 Rounový filtrační sáček |
| 2 Funkční deska | 4 Západka | 21 Západkové uzávěry 16 Plastový vyprazdňovací sáček |
| 2a Otočný spínač | 5 Uzávěr | 19 Kolečka 16 Zavěšení pro drátěný koš |
| 2b Zásuvka pro elektrické nářadí | 6 Připojovací vedení | 17 Pojezdová kolečka 17 Přihrádka na příslušenství * |
| 2c Indikátor objemového proudu (Indikace stavu naplnění) | 7 Zásobník | 18 Filtrační kazety 18 Madlo * |
| 2d Regulace otáček | 8 Sací otvor | 19 Ochranný filtr motoru * podle modelu |
| SK Popis | ||
| 1 Horná časť | 3 Vstup chladiaceho vzduchu | 20 Zátka s retiazkou 14 Tkaninové filtračné vrecko |
| 2 Funkčná doska | 4 Kolieska | 21 Západkové uzávery 15 Plastové vyprázdnovacie vrecko |
| 2a Otočný spínač | 5 Uzáver | 16 Kolieska 16 Zavesenie pre drôtený koš |
| 2b Zásuvka pre elektrick náradie | 6 Pripojovacie vedenie | 17 Pojazdná kolieska 17 Miesto na uloženie príslušenstva * |
| 2c Indikátor objemového prúdu (Indikátor stavu naplnenia) | 7 Nádoba | 18 Filtračné kazety 18 Oblúková rukovát * |
| 2d Regulácia otáčok | 8 Sací otvor | 19 Ochranný filter motora * podl’a modelu |
| RO Descriere | ||
| 1 Parte superioará 3 Intrare aer rece | 20 Dop de închidere cu lant 14 Sac filtrant din vlies | |
| 2 Placă funcțională | 4 Sistem de blocare | 21 Închizátoare cu cuplare 15 Sac de golire din plastic |
| 2a Comutator rotativ | 5 Sistem de închidere | 22 Roti 16 Dispozitiv de suspendat coşu din sârmă |
| 2b Priză pentru scula electrică | 6 Cablu de racordare | 27 Roie de ghidare 17 Suport accesorii * |
| 2c Indicatorul curentului volumetric (Indicator nivel umplere) | 7 Container | 28 Cartuše de filtru 18 Mâner tracțiune * |
| 2d Buton reglarea turației | 8 Orificiu de aspiratie | 29 Filtru de protectie a motoruluil * în funcție de mode |
| SLO Opis | ||
| 1 Zgornji del | 3 Vhod hladilnega zraka | 30 Zaporni zatič z verigo 18 Filtrirna vrečka iz flisa |
| 2 Funkcijska plošča | 4 Zapah | 31 Zaskočna zapirala 19 Plastična vrečka za pražnjenje |
| 2a Vrtljivo stikalo | 5 Zapiralo | 32 Kolesa 20 Obešalnik za žično košaro |
| 2b Vtičnica za električno orodje | 6 Priključní vod | 33 Krmilna kolesca 21 Shranjevalnik za opremo * |
| 2c Indikator volumskega toka (Prikaz polne posode) | 7 Posoda | 34 Filtrske kasete 22 Ročaj za vožnjo * |
| 2d Regulacija vrtljajev | 8 Sesalna odprtina | 35 Filter za zaščito motorja * odvisno od modela |
| HROPis | ||
| 1 Gornji dio | 3 Ulaz za rashladni zrak | 36 Zatvarač s lancem 27 Vrećica filtra od flisa |
| 2 Funkcijske ploče | 4 Zapor | 38 Polazna-zaustavni zatvarači 28 Plastična vrećica za pražnjenje |
| 2a Okretna sklopka | 5 Brava | 10 Kotači 13 Kuka za vješanje za žičanu korpu | |
| 2b Utičnica za električni alat 6 | Priključni vod 11 Upravljački kotači | 17 Spremište za pribo * | |
| 2c Prikaz prostorne struje (Prikaz punjenja) | 7 Posuda | 12 Filtarske kasete 18 Vozni stremen * | |
| 2d Regulacija broja okretaja | 8 Usisni otvor 13 Filtar za zaštitu motora * ovisno o modelu | ||
| SCG Opis | |||
| 1 Gornji deo 3 Ulaz rashladnog vazduha | 8a Zatvarač sa lancem 14 Vrećica filtra od flisa | ||
| 2 Funkcijska ploca 4 | Zasovnica | 9 Sklopní zatvarači 15 Plastična kesica za pražnjenje | |
| 2a Obrtni prekidač | 5 Zatvarač | 10 Točkovi 16 Vešalica za žičanu košaru | |
| 2b Utičnica za električni alat 6 | Priključni vod 11 Točkići za vođenje | 17 Sprema za pribor * | |
| 2c Pokazivač volumne struje (Indikator punjenja) | 7 Posuda | 12 Filterske kasete 18 Upravljački obruč * | |
| 2d Regulacija broja obrtaja | 8 Usisni otvor | 13 Filter za zaštitu motora * zavisno od modela | |
| BG Описание | |||
| 1 горна част | 3 вход за охлаждащ въздух | 8a Tapa c верига | 14 Филтърна торба от кече |
| 2 функционален панел | 4 Ключалка | 9 фиксатори | 15 Найлонова торба изправване |
| 2a Въртящ се ключ 5 Затвор | 10 колела | 16 окачване за телена кошница | |
| 2b контакт за електроуред | 6 съединителен кабел | 17 направляващи ролки | 17 Кутия за принадлежности * |
| 2c индикатор за обемния поток (Индикатор за напълване) | 7 Резервоар | 12 филтърни касети | 13 Желязна дръжка * |
| 2d Регулатор на оборотите | 8 смукателен отвор | 13 защитен филтър за двигателя | * В зависимост от модела |
| EST Úldine kirjeldus | |||
| 1 Ülemine osa | 3 Jahutusõhu sissevool | 8a Ketiga kork | 14 Fliisist filtrikott |
| 2 Funktsioonide paneel | 4 Riiv | 9 Fiksaatorid | 15 Plastist tühjenduskott |
| 2a Pöördlülti | 5 Kate | 10 Rattad | 16 Riputus traatkorvi jaoks |
| 2b Pistikupesa elektrilise tööriista jaoks | 6 Ühendusjuhe | 11 Juhtrullikud | 17 arvikute kinnitusalus * |
| 2c Öhukulumõõtur (Taseme indikaator) | 7 Mahuti | 12 Filterkassetid | 18 Käepide * |
| 2d Pöörete arvu valits | 8 Imemisava | 13 Mootori kaitsefilter | * olenevalt mudelist |
| LT Aprašas | |||
| 1 Viršutinė dalis | 3 Aušinimo oro įtraukimas | 8a Kamštis su grandinèle | 14 Flisinis filtro maišas |
| 2 Funkcinė plokštė | 4 Užraktas | 9 Užsifiksuojantys užrakta | 15 Plastikinis ištuštinimo maišelis |
| 2a Reguliavimo rankenėlė | 6 Fiksatorius | 10 Ratukai | 16 Vielinio krepšio pakabinimas |
| 2b Šakutės lizdas elektriniam įrankiui | 6 Maitinimo laidas | 11 Kreipiamieji ratukai | 17 Priedų laikiklis * |
| 2c Debito matuoklis (Pripildymo rodinys) | 7 Rezervuaras | 12 Filtro kasetės 19 Transportavimo rėmas * | |
| 2d Sūkių skaičiaus reguliavimas | 8 Siurbimo anga | 13 ariklio apsaugos filtras | * priklausomai nuo modelio |
| LV Apraksts | |||
| 1 Augšējā dala | 3 Dzesēšanas gaisa ieplūde | 8a Aizbāznis ar kēdi | 14 „Vlies” filtra maisiņš |
| 2 Vadības panelis | 4 Aizbidnis | 9 Stiprinājuma aizslēgi | 15 Plastmasas atkritumu maisiņš |
| 2a Pagriežams slēdzis | 5 Stiprinājums | 10 Riteņi | 16 Stieples groza turētājs |
| 2b Kontaktligzda elektroinstrumenta pieslēgšanai | 6 Pieslēguma kabelis | 11 Vadāmie riteni | 17 Piederumu turētājs * |
| 2c Plūsmas apjoma indikators (Pilnas tvertnes indikators) | 7 Tvertne 12 Filtru kasetnes | 13 Vadības rokturis | |
| 2d Apgriezienu skaïta regulēšana | 8 lesūkšanas atvere | 14 Dzinēja aizsargfiltris | * atkarībā no modela |
| CN 产品说明 | |||
| 1 上半部分 | 3 冷却空气进口 | 8a 密封插头带链 | 14 无纺布过滤袋 |
| 2 功能面板 4闩锁 | 9 咬接模块锁定 | 15 塑料袋废物处置 | |
| 2a 旋转开关 | 5 锁定 | 13 轮子 | 16 悬挂在篮筐 |
| 2b 电源插座,用于电动工具 | 6 连接线 | 11 脚轮 | 17 附件框 * |
| 2c 流量指示器(容器完全指示器) | 7 容器 | 12 过滤器盒式磁带 | 13 驾驶处理 * |
| 2d 速度控制 | 8 吸进风口 13 马达保护滤网 | * 视型号而定 | |
| DE Zubehör EN Description F Accessoires E Accesorios | ||||
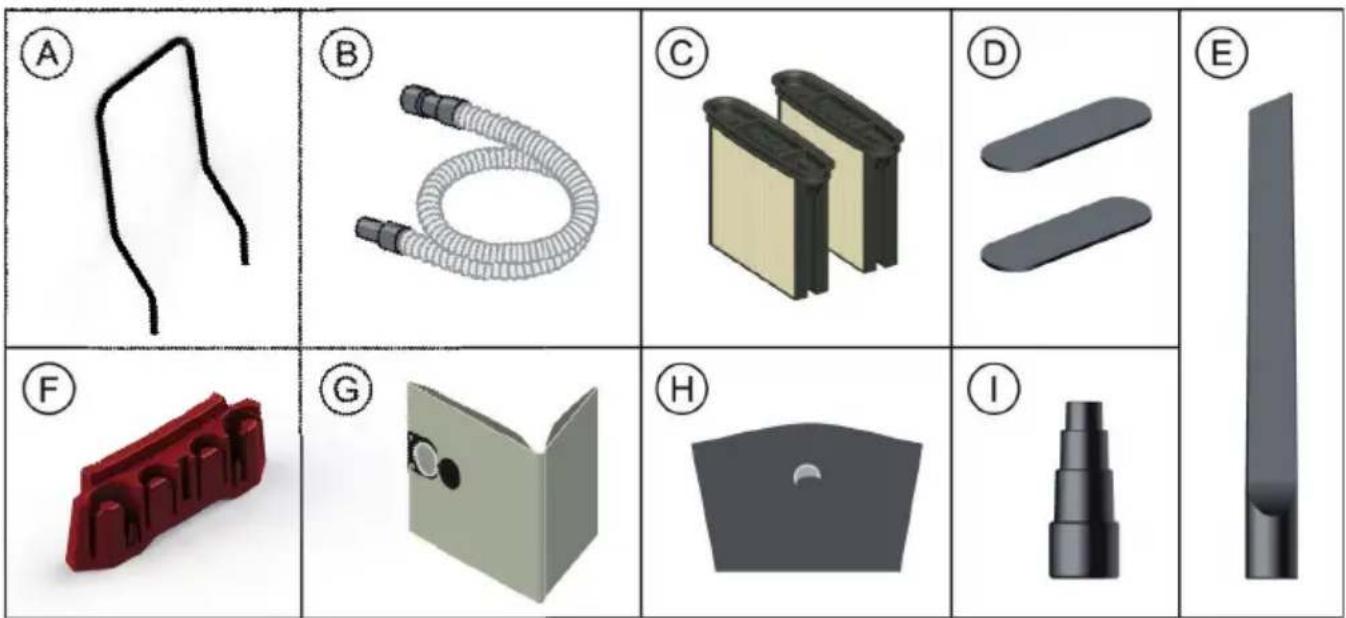
| A Fahrbügel A Driving handle A Etrier de conduite A Barra de transporte | ||||
| B Saugschlauch B Suction hose B Flexible d'aspiration B Manguera de aspiración | ||||
| C Faltenfi Iterkassetten C Folding fi Iter cartridges C Cassettes à fi ltre plissé C Cartuchos de fi ltro en fuelle | ||||
| D Motorschutzfilter | D Motor protection filter | D Filtre de protection-moteur | D Filtro protector del motor | |
| E Gummidüse | E Rubber nozzle | E Buse caoutchouc | E Tobera de goma | |
| F Zubehördepot | F Accessory storage | F Porte-accessoires | F Soporte para accesorios | |
| G Vlies-Filterbeutel | G Fleece filter bag | G Sac filtre non tissé | G Bolsa de filtro de fieltro | |
| H PE-Entleer- und Entsorgungsbeutel | H PE emptying and disposal bag | H Sac PE de vidange et d'élimination | H Bolsa de vaciado y eliminación de PE | |
| I Reduzierstück | I Reducer | I Pièce réductrice | I Pieza reductora | |
| P Acessórios | I Accessori | NL Toebehoren | DK Tilbehør | |
| A Estribo de condução | A Maniglione | A Duwbeugel | A Kørebøjle | |
| B Mangueira de aspiração | B Tubo flessibile di aspirazione | B Zuigslang | B Sugeslange | |
| C Cassete de filtros plissados | C Cartucce filtro pieghettato | C Vouwfiltercassette | C Filterkassetter til foldefilter | |
| D Filtro de protecção do motor | D Filtro di protezione motore | D Motorfilter | D Motorfilter | |
| E Bocal em borracha | E Bocchetta di gomma | E Rubbermondstuk | E Gummidyse | |
| F Depósito de acessórios | F Porta accessori | F Toebehorenhouder | F Tilbehørsdepot | |
| G Saco de filtro de vlies | G Sacchetto filtrante in vello. | G Vlies-filterzak | G Vlies-filterpose | |
| H Saco em PE para esvaziamento e eliminação | H Sacchetto PE per svuota-mento e smaltimento | H PE-zak voor legen en afvoer | H PE-tømnings- og bortskaf-felsespose | |
| I Redutor | I Giunto di riduzione | I Reduceerstuk | I Reduktionsstykke | |
| S Tillbehör | N Tilbehør | FIN Lisätarvikkeet | GR Εξοπλισμός | |
| A Körhandtag | A Kjørebøyyle | A Ohjaustanko | A Λαβή οδήγησης σχήματος U | |
| B Sugslang | B Sugeslange | B Imuletku | B Εύκαμπτος σωλήνας αναρρόφησης | |
| C Veckfilterkassetter | C Foldefilterkassetter | C Suodatinkasetteja | C Κασέτες πτυχωτών φίλτρων | |
| D Motorskyddsfilter | D Motorbeskyttelsesfilter | D Moottorin suojasuodatin | D Φίλτρο προστασίας μοτέρ | |
| E Gummimunstycke | E Gummidyse | E Kumisuutin | E Ακροφύσιο από καουτσούκ | |
| F Tillbehörsförvaring | F Tilbehørsdepot | F Lisätarviketeline | F Θήκη εξαρτημάτων | |
| G Fiberduk filterpåse | G Fleece-filterpose | G Kuitukangaspölypussi | G Φλις σακούλα σκόνης | |
| H PE-tömnings- och bortskaff - ningspåse | H PE-tømme- og avfallspose | H PE-tyhjennys- ja hävi-tyspussi | H Σάκος απόρριψης πολυεστέρα | |
| I Reduceringsdel | I Reduksjonsstykke | I Sovitin | I Συστολικός σύνδεσμος | |
| TR | Aksesuar | PL | Akcesoria | H | Kiegészítő tartozékok | CZ | Příslušenství |
| A | Tutma demiri | A Uchwyt do przenoszenia | A Mozgó kengyel | A Madlo | |||
| B | Emiș hortumu | B Wąż ssący | B Szívótömlő | B Sací hadice | |||
| C | Katlanmış filtre haznesi | C Kasety filtra skladanego | C Redőzött szűrő kazetta | C Kazety se skládaným filtrem | |||
| D | Motor koruma filtresi | D Filtr ochronny silnika | D Motorvédő szűrő | D Ochranný filtr motoru | |||
| E | Plastik nozül | E Dysza gumowa | E Gumi fúvóka | E Pryžová hubice | |||
| F | Aksesuar deposu | F Pojemnik na akcesoria | F Tartozék tároló | F Příhrádka na příslušenství | |||
| G | Ipek elyaf filtre torbası | G Worek filtrujący z włókniny | G Fátyolszűrő zacskó | G Rounový filtrační sáček | |||
| H | PE boşaltma ve imha kesesi | H Worki | H PE úrítő és hulladékkezelő tasak | H Polyetylenový sáček pro vyprazdňování a likvidaci prachu | |||
| 1 | Redüksiyon parçası | 1 Reduktor | 1 Csökkentő idom | 1 Redukční kus | |||
| SK | Príslušenstvo | RO Accesorii | SLO Oprema | HR | Pribor | ||
| A | Oblúková rukovát' | A Mâner de tractiune | A Ročaj za vožnjo | A Vozni stremen | |||
| B | Sacia trubica | B Furtun de aspirare | B Sesalna cev | B Usisno crijevo | |||
| C | Kazety so skladaným filtrom | C Cartuše filtru cu pliuri | C Kasete z nagubanim filtrom | C Kasete za nabrani filter | |||
| D | Ochranný filter motora | D Filtru protectie motor | D Zaščitní filtri za motor | D Filter za zaštitu motora | |||
| E | Gumová hubica | E Ajutaj din cauciuc | E Gumijasta šoba | E Gumena sapnica | |||
| F | Miesto na uloženie príslušenstva | F Suport accesorii | F Shranjevalnik za opremo | F Spremište za pribor | |||
| G | Tkaninové filtračné vrecko | G Sac filtrant din vlies. | G Filtrirna vrečka iz flisa | G Vrećica filtra od flisa | |||
| H | PS vyprázdnovacie a likvidačné vrecko | H Sac colector PE | H PE-vrečka za praznjenje in odstranjevanje | H PE vrečica za pražnjenje i uklanjanje | |||
| 1 | Redukčný kus | 1 Reductor | 1 Reducirni kos | 1 Redukcijski komad | |||
| SCG | Pribor | BG Принадлежности | EST Tarvikud | LT | Priedai | ||
| A | Upravljački obruč | A Желязна дръжка | A Käepide | A Transportavimo rèmas | |||
| B | Usisno crijevo | B Смукателен маркуч | B Imemisvoolik | B Siurbimo žarna | |||
| C | Naborani filter (umeci) | C Kasети с нагънат филтър | C Kurdfiltri kassetid | C Klostuotų filtrų kasetės | |||
| D | Zaštitní filter motora | D Предпазен филтър на двигателя | D Mootori kaitsefilter | D Apsauginis variklio filtras | |||
| E | Gumena mlaznica | E Гумен накрайник | E Kummiotsak | E Guminis antgalis | |||
| F | Sprema za pribor | F Кутия за принадлежности | F Tarvikute kinnitusalus | F Priedų laikiklis | |||
| G | Vrećica filtra od flisa | G Филтърна торба от кече | G Flisist filtrikott | G Flisinis filtro maišas | |||
| H | PE-vreća za pražnjenje i uklanjanje | H Полиетиленова торбичка за изпразване и изхвърляне | H Polüetüleenist tühendus- ja käitlemiskott | H PE ištuštinamas ir utilizuojamas maišelis | |||
| 1 | Reducir | 1 Редуцираща муфа | 1 Siirdmik | 1 Reduktorius | |||
| LV | Piederumi | RUS | CN 说明书 | ||||
| A | Vadības rokturis | A Поручень | A 操作弓架 | ||||
| B | Sūkšanas šlútene | B Всасывающий шланг | B 吸入软管 | ||||
| C | Kroku filtru kārtridži | C Складчатый кассетный фильтр | C 折叠过滤盒 | ||||
| D | Motora aizsargfiltrs | D Защитный фильтр мотора | D 电机保护过滤器 | ||||
| E | Gumijas sprausla | E Резиновая насадка | E 橡胶喷嘴 | ||||
| F | Piederumu turētājs | F Место для хранения принадлежностей | F 配件存放处 | ||||
| G | „Vlies" filtra maisinš | G Флисовый фильтр-мешок | G 无纺布过滤袋 | ||||
| H | PE iztukšošanas un likvidēšanas maiss | H Полиэтиленовый фильтр-мешок | H 聚乙烯废物清空清理袋 | ||||
| 1 | Reducēšanas uzgalis | 1 Переходник | 1 渐缩管 |
Deutsch (original)
Head of Quality Assurance
English
1 Explanation of symbols and signs used
| Symbol / Signal word Description | |
| ⚠️ | This is the warning symbol. It warns against possible risk of injury. Follow all instructions which are marked with this sign to avoid injury or death. The warning symbol always appears in association with the signal words DANGER, WARNING and CAUTION. |
| DANGER! | Identifies a hazard with a high degree of risk which will cause death or serious injury if not avoided. |
| WARNING! | Identifies a hazard with a medium degree of risk which could cause death or serious injury if not avoided. |
| CAUTION! | Identifies a hazard with a low degree of risk which could cause minor or moderate injury if not avoided. |
| NOTE | Identifies advice or instructions to simplify work and to ensure safe operation. |
| △ | Identifies a requirement which needs to be met before an action is taken. |
| ▶ | Identifies steps to be taken one after the other by the user. |
| ↳ Identifies the results of an action. | |
2 Important safety information
| ⚠ WARNING! |
| Danger of suffocation! Do not allow children to play with packaging material, e.g. plastic bags.Do not climb onto or sit on the vacuum cleaner.Risk of falling when working on stairs. Pay attention to standing safely.Do not pull the mains connection cable and suction hose over sharp edges, do not bend it or clamp it.The mains connection cable and suction hose always must be routed in such a way that no one can trip over it.If any foam or liquid is discharged, immediately switch off the vacuum cleaner.Always keep the inside of the lid dry.Do not use the vacuum cleaner including accessories in the following cases:Mains connection cable or extension cable is defective or showing cracksThere is visible damage to the vacuum cleaner, e.g. cracks in the housingIf you suspect an invisible defect, e.g. after a fall |
| ⚠ DANGER! |
| Risk of explosion and fire! Do not run the vacuum cleaner in a potentially explosive environment.Keep away the vacuum cleaner from flammable gases and substances. |
| ⚠ DANGER! |
| Risk of explosion and fire! Do not use the vacuum cleaner to vacuum up the following:flammable or explosive solventsmaterials soaked in solventspotentially explosive dustsliquids such as petrol, oil, alcohol, diluentsmaterials hotter then 60 °C |
WARNING!
Improperly repaired devices pose a hazard for the user. Only have repairs carried out by experts, e.g. the customer service. Only use original accessories and spare parts.
WARNING!
Only use the socket on the vacuum cleaner for the purposes specified in the operating instructions.
In case of any inappropriate usage, improper operation or repair, the producer shall be exempt from liability.
Do not use damaged extension cables.
If the mains connection cable of the vacuum cleaner is damaged, it must be replaced by a special mains connection cable, which is available from the manufacturer or its customer service.
Never allow electrical brushes to come into contact with the mains connection cable.
The voltage on the rating plate must match the mains voltage.
Switch off the vacuum cleaner and disconnect the mains plug after use and before maintenance.
When unplugging, only pull on the mains plug and not on the mains connection cable.
Never touch the mains plug with wet hands.
Only connect the vacuum cleaner to a sufficiently protected electric socket.
Do not open the vacuum cleaner outdoors in the rain or during a thunderstorm.
Store the vacuum cleaner dry and indoors, protected from frost.
WARNING!
Dust-removing machines are tested according to DIN EN 60335-2-69 and divided into dust classes.
Vacuum cleaners for dust class L are suitable for vacuuming/sucking up dry, non flammable dusts that are hazardous to health with workplace exposure limits (OEL) > 1 mg/m 3 .
Vacuum cleaners for dust class M are suitable for vacuuming/sucking up dry, non-flammable dusts, non-flammable liquids, wood dusts and hazardous dusts with workplace exposure limits ≥ 0.1 mg/m 3 .
Vacuum cleaners for dust class H are suitable for vacuuming/sucking up dry, non-flammable dusts, carcinogenic and pathogenic particles as well as non-flammable liquids, wood dusts and toxic dusts with workplace exposure limits < 0.1 mg/m 3 .
WARNING!
Vacuum cleaners for dust class H-asbestos are suitable for vacuuming and extracting dust containing asbestos. Observe national regulations for operation and maintenance of asbestos removal tools.
WARNING!
The machine may not be used by persons (including children) who have reduced physical, sensory or metal capabilities or who are inexperienced or lack the knowledge of how to use the machine.
Children must be supervised to ensure that they do not play with the device.
Do not point nozzle, tube or hose at people or animals.
WARNING!
Only use the brushes supplied with the vacuum cleaner or those specified in the operating instructions.
Using other brushes can compromise safety.
When being used in food processing businesses: Immediately clean the vacuum cleaner after use and disinfect it to avoid microbial contamination.
Do not use any steam jets or high-pressure cleaners for cleaning.
Only operate the vacuum cleaner under supervision.
Disconnect the vacuum cleaner from the mains in the event of a longer work interruption.
Do not clean filter cartridges using compressed air.
Read the operating manual carefully before starting to use the vacuum cleaner. The operating manual provides important instructions for safety, commissioning, operation, maintenance and care. Keep the operating manual in a safe place and, in case you sell the unit, hand it on to the next owner.
The manufacturer reserves the right to carry out modifications to the design and equipment.
Do not perform any other work than described in this manual.
This machine is intended for commercial use, for example, in hotels, schools, hospitals, factories, shops, offices and in the rental business.
When unpacking, check for completeness and transport damage.
Before use, the operators should be provided with information, instructions and training for the use of the vacuum cleaner and the substances that it is to be used for, including the safe procedure for the removal of the gathered material.
3 Display and control elements
| Switch position Function Description | ||
| 0 | Vacuum cleaner is switched off | - Plug socket under voltage |
| I Vacuum cleaner is running | - Plug socket under voltage- Automatic filter cleaning function off | |
| A | Standby mode for ON/OFF automatic mode | - Plug socket under voltage- The vacuum cleaner is switched on and off via the connected electrical/ compressed air tool* at the plug socket |
| RA | Standby mode for ON/OFF automatic mode | - Standby mode like >A< plus automatic filter cleaning |
| Automatic filter cleaning function | - Filter cleaning is performed automatically during the next working break when the minimum volume flow level is reached (switch setting RA) | |
| Fill level indicator * | - When the container is full and/or there is a blockage in the suction hose, the full indicator lights up. On the M and H vacuum cleaners, an acoustic signal is also emitted | |
 | Setting the suction hose diameter * | - On M-/H-/H-asbestos vacuum cleaners for volume flow monitoring, to trigger an audible warning signal if the air speed falls below 20 m/s |
 | Setting the motor speed* | - Adjust the suction power with the speed control |
4 Commissioning
4.1 Before every use
Make sure that the following conditions are met:
△ Vacuum cleaner, mains cable, suction hose and accessories are not damaged.
△ All filters have been inserted and are not damaged.
4.2 Switching on and off
The plug socket on the vacuum cleaner remains always under voltage, regardless of the main switch position.
WARNING!
Danger of injury by automatically starting power tool!
- Switch off power tool or pneumatic tool before connecting to the vacuum cleaner.
NOTE
With switch in position >0<, the plug socket on the vacuum cleaner can be used as an extension cable.
△ Power consumption: vacuum cleaner + connected power tool (max. 2000 W) max. 16 A.
4.2.2 Switching on the vacuum cleaner
Functions see „3 Display and control elements“ on page 23.
▶ Insert plug into plug socket.
▶ Set switch to position >|<.
→ Vacuum cleaner starts immediately.
or:
▶ Set switch to position >A< or >RA<.
→ Vacuum cleaner is in standby mode for power tools.
4.2.3 Setting the suction hose diameter\*
▶ Set suction hose diameter at the switch.
⚠️ CAUTION!
Selector switch for minimum air volume flow signal (horn and light) on vacuum cleaners with dust classes „M“ and „H“ In the modes >RA< and >I< the following setting is made, depending on the diameter of the hose:
| Selector switch for suction hose inner diameter | Volume air flow |
| ∅ 35 mm | 70 l/s |
| ∅ 27 mm | 41 l/s |
| ∅ 21 mm | 25 l/s |
| The speed can be adjusted individually after setting the hose diameter. | |
4.2.4 Adjusting the suction power\*
▶ Adjust motor speed on the switch.
or
▶ Set auxiliary air slide on the handle tube.
4.2.5 Switching off the vacuum cleaner
▶ Set switch to position >0<.
→ Vacuum cleaner is switched off.
▶ After switching off, pull the mains plug out.
▶ Roll up mains connection cable.
- Store the mains connection cable on the cable hook.
- Store the suction tube by inserting it into the accessories holder* on the container rear wall.
- Put the suction hose ends together so that no dirt particles leak out.
▶ Remove Power tool.
5 Operating modes
5.1 Sucking up dry materials
▶ Only use a dry filter, vacuum cleaner and accessories, so that the dust does not stick and or cake.
- When vacuuming soot, cement, plaster or similar dusts: Insert a PE disposal bag in the dirt container.
▶ Always use disposal bags in combination with folded filter cartridges.
NOTE
M, H and H-asbestos class vacuum cleaners should be preferably used as vacuum cleaners for dry dusts.
5.2 Sucking up liquids
WARNING!
Electrical shock hazard!
If any foam or liquid is discharged, immediately switch off the vacuum cleaner.
▶ Empty dirt container and folded filter cartridge.
NOTE

Regularly clean the water level sensors (1) and inspect for signs of damage.
▶ Vacuum cleaning without fleece filter bags.
The folded filter cartridge designed for wet vacuum cleaning.
The built-in sensor switches the motor off when the container is full. The handling of the vacuum cleaner can be compromised by a full container.
▶ Empty container (see „7 Emptying the container“ on page 25).
NOTE
If the vacuum cleaner is not switched off, the re-start protection remains effective. The vacuum cleaner is ready for operation only after the unit has been switched off and switched on again.
- Remove the suction hose from the liquid before emptying.
▶ After switching off, a small quantity of water can flow back out of the hose, as a result of the high suction level and the favourable flow condition in the container.
▶ After wet vacuum cleaning insert dry filters for picking up dry dust.
NOTE
When changing frequently between dry and wet vacuum cleaning, use a second set of filters, preferably polyester folded filter cartridges.
5.3 Sucking up asbestos-containing substances
Only vacuum cleaners of dust class H-asbestos may be used for vacuuming asbestos-containing substances.
▶ Only work with a dry filter, vacuum cleaner and accessories to prevent dust from sticking and becoming incrusted.
For sucking up asbestos-containing substances: Insert the PE emptying bag or fleece filter bag into the dirt container.
▶ Always use filter bags in conjunction with folded filter cartridges.
NOTE
H-asbestos class vacuum cleaners should be preferably used as vacuum cleaners for dry dusts.
WARNING!
Health hazard!
Asbestos fibres in the air.
▶ Supply the work area with sufficient outside air (fresh air).
▶ Guide or clean extracted air in such a way that asbestos fibres do not get into the breathing air of other persons.
- When filtering the extracted air, transport any dust in dust-tight containers.
▶ Do not decant dust.
If there is a possibility of asbestos fibres becoming free:
▶ Absorb asbestos fibres at the outlet or point of origin.
▶ Then dispose of asbestos fibres in accordance with the state of the art without any danger to persons or the environment.
If complete absorption of asbestos fibres is not possible:
▶ Take additional ventilation measures in accordance with the state of the art.
After completion of the work:
- Carefully clean tools, including suction tubes and work equipment.
▶ Carefully clean the working area. - Moisten and properly remove objects contaminated with asbestos fibres that cannot be cleaned.
After cleaning:
▶ Ventilate the working area sufficiently.
6 Permanent filter cleaning
The vacuum cleaner is fitted with an electromagnetic filter cleaning system, which can be used to clean any attached dust from the filter cartridges.
Filter cleaning is performed automatically during the next working break when the minimum volume flow level is reached (switch setting >RA<).
7 Emptying the container
NOTE
Only permitted for dust with workplace exposure limits > 1 mg/m 3 .
▶ Switch off the vacuum cleaner, pull out the mains plug.
▶ Open the latches.
Remove the cover and suction hose from the container.
▶ Empty the container by pouring out.
7.1 Dispose of the fleece filter bag
▶ Switch off vacuum cleaner.
▶ Disconnect mains plug.
▶ Wear appropriate breathing mask.
▶ Remove suction hose.
▶ Close off intake socket with cap.
▶ Open side latches.
▶ Remove top section.
- Carefully pull the flange off the intake socket and close off the flange.
- Dispose of gathered material in accordance with legal requirements.
7.2 Dispose of the PE emptying and disposal bag
▶ Set switch to position >RA<.
Folded filter cartridges are cleaned automatically.
→ Residual dust in the filters falls into the bag.
▶ Switch off vacuum cleaner.
▶ Disconnect mains plug.
▶ Wear appropriate breathing mask.
▶ Remove suction hose.
▶ Close off intake socket with cap.
▶ Open side latches.
- Carefully close the PE emptying and disposal bag with the enclosed sealing tape.
- Carefully pull the flange off the intake socket and close off the flange.
- Carefully remove the PE emptying and disposal bag from the container.
- Dispose of gathered material in accordance with legal requirements.
7.3 Insert fleece filter bag
NOTE
Only use fleece filter bags for dry vacuum cleaning.
▶ Slide the flange completely over the intake socket.
NOTE
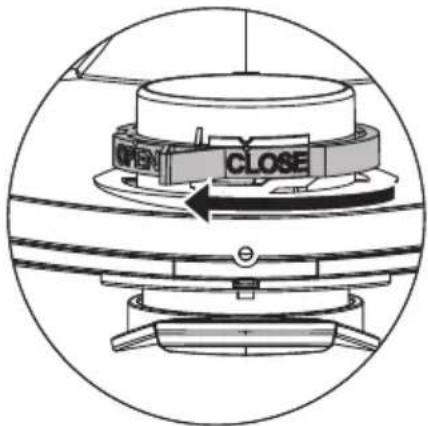
Operating the rotary slide
▶ Turn the red rotary slide inside to position CLOSE to the stop on the marker ▲.
7.4 Insert PE emptying and disposal bag\*
NOTE
Only the vacuum cleaners class M and H with special containers and rotary slider in the suction aperture of types IS/ISC ARM, IS/ISC ARH and IS/ISC ARH-ASBEST are suitable for the use of PE Emptying and disposal bags.
NOTE
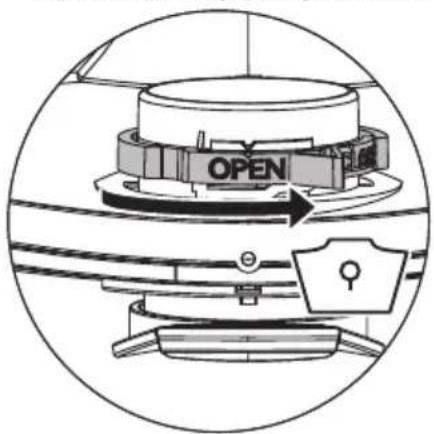
Operating the rotary slide
▶ Turn the red rotary slide inside to position OPEN to the stop on the marker ▲.
▶ Slide the flange completely over the intake socket.
Place the upper bag opening over the container rim.
8 Changing the filter
8.1 Changing the folded filter cartridges
▶ Clean the filter cartridges before changing them.
▶ Turn the lock on the latch through 90° in a counter-clockwise direction with a coin or similar object and push the latch to the rear.
▶ Fold up the cover.
▶ Immediately isolate the folded filter cartridges that you have removed in a dust-tight plastic bag and dispose of properly in accordance with the requirements.
▶ Insert new folded filter cartridges.
▶ Lift the locking bracket up, fold down the cover and click in place with light pressure.
9 Changing the motor protection filter
NOTE
If motor protection filter is contaminated, this indicates defective filter cartridges.
▶ Replace folded filter cartridges.
▶ Replace motor protection filter or wash the motor protection filter under flowing water, dry and re-insert.
10 Transport
▶ Remove suction hose.
▶ Close off intake socket with cap.
▶ Securely fix the motor head to the container.
▶ Close the side latches.
- Place the accessories in a suitable plastic bag and seal the plastic bag or place it in the tool storage compartment.
- Put the suction hose ends together so that no dirt particles leak out.
- Place the hose around the vacuum cleaner and clamp onto the handle.
11 Maintenance
NOTE
Switch off the vacuum cleaner and pull out the mains plug before carrying out any maintenance work.
For maintenance by the user, the vacuum cleaner must be
- dismantled,
- cleanded and
- maintained,
as far as possible without creating any danger to the maintenance personnel or other.
Precautionary measures
Suitable precautionary measures include:
- Cleaning before dismantling
- Provision of local filtered positive ventilation where the vacuum cleaner is to be dismantled
- Cleaning of the maintenance area
- Suitable personal protection equipment
Precautionary measures with vacuum cleaners class H and M
The outside of the vacuum cleaner should be cleaned by dust extraction procedures and wiped down, or should be treated with a sealing agent before being removed from the hazardous area. All parts of the vacuum cleaner must be considered to be contaminated when they are removed from the hazardous area, and suitable handling must be used to prevent dust distribution.
Contaminated items
When carrying out maintenance or repair work, all contaminated items which have not been adequately cleaned, must be disposed of. Such items must be disposed of in impermeable bags in accordance with the applicable regulations concerning the disposal of such waste.
11.1 Testing the effectiveness of the vacuum cleaner
At least once a year, the manufacturer or an instructed person must perform a technical inspection including filters, air tightness of the vacuum cleaner, and control mechanisms.
In addition, the effectiveness of the vacuum cleaners with dust class H and H-asbestos must be checked at least once a year or more frequently. The test method, which can be used for demonstrating the effectiveness of the device, is defined in EN 60335-2-69 AA.22.201.2. If the test is not passed, it must be repeated with a new main filter.
There must be an adequate air exchange rate L in the room if the exhaust air returns to the room. Observe national regulations.
If the suction power of the vacuum cleaner is reduced and the cleaning of the filter cartridges is no longer sufficient (assuming that tank is emptied and fleece filter bag is replaced), it is necessary to replace the folded filter cartridges (see „8.1 Changing the folded filter cartridges“ on page 26).
11.2 Inspection and maintenance of vacuum cleaners for dust class H-asbestos
Vacuum cleaners of dust class H-asbestos must be serviced by a certified company as required, but at least once a year, and repaired if necessary. For starmix vacuum cleaners for dust class H asbestos, a contract exists with ASUP GmbH, Beckendorfer Bogen 10, 21218 Seevetal, Germany, Tel. +49 (0) 41 05 / 59 888-16, Fax +49 (0) 41 05 / 59 888-99, e-mail thomas.opara@asup.info, contact person Mr. Opara.
If necessary, please contact the above-mentioned company directly to discuss the details of the process.
The serviced vacuum cleaner is identified by a maintenance stamp and receives a maintenance report with test certificate. The maintenance report must be kept and presented on request.
Repairs that occur outside of maintenance will be announced in the form of a cost estimate and carried out after confirmation.
Please note before shipping:
- Clean and empty the vacuum cleaner, pack it safely and dust-proof
- Where necessary: affix labelling in accordance with hazardous substances legislation
12 Cleaning
NOTE
Acids, acetone and solvents can damage parts of the vacuum cleaner.
▶ Clean container and accessories with water.
▶ Wipe the top section with a damp cloth.
▶ Allow the container and accessories to dry.
13 Repair
WARNING!
Improperly repaired vacuum cleaners pose a hazard for the user!
▶ Have repairs carried out by qualified personnel only, e.g. the customer service.
14 Troubleshooting and repair
| NOTE | ||
| Malfunctions cannot always be traced back to defects in the vacuum cleaner. | ||
| Fault Cause Remedy | ||
| Suction power drops Filter dirty Clean | ||
| Filter bag full Change | ||
| Container full Empty | ||
| Motor protection filter blocked Clean | ||
| Nozzle, tube or hose blocked Clean | ||
| Vacuum cleaner does not start Mains plug | not in socket Plug mains plug into socket | |
| No mains voltage Check fuse | ||
| Mains connection cable defective Replace | ||
| Cover not properly closed Close | ||
| Water sensor switched off Empty container | ||
| Vacuum cleaner in standby mode >A< or >RA< | Set switch to >I< (see „3 Display and control elements“ on page 23) | |
| The vacuum cleaner does not start when the tool is switched on in the >A< or >RA< mode | Electrical tool not plugged into socket on the vacuum cleaner | Plug mains plug into socket on the vacuum cleaner |
| Solenoid valve of pneumatic on-off unit*contaminated | Rinse with alcohol | |
| PE emptying and disposal bag is sucked against the filter | Incorrect position of rotary slide | Set rotary slide to position OPEN ▲ (see „7.4 Insert PE emptying and disposal bag*“ on page 26) |
| Vacuum cleaner with dust classes M or H: with inserted filter bag, dust is accumulating in the container | Incorrect position of rotary slide | Set rotary slide to position CLOSE ▲ (see „7.3 Insert fleece filter bag“ on page 26) |
Do not try anything else, contact customer services.
15 Genuine accessories
| NOTE | ||
| Only use original accessories. | ||
| Article designation Properties/material | Order no. | |
| Folded filter cartridge FKP 4300 | Polyester material, dust class M approved (Ti15) | 416069 |
| Folded filter cartridge FKP 4300 HEPA | Polyester material, glass fibre and cellulose material, dust class H approved (Ti26) | 419190 |
| Folded filter cartridge FKPN 3000 NANO | Polyester material with nanofibre layer, dust class M approved (Ti201) | 425740 |
| Filter bags 25 l: | ||
| Fleece filter bag FBV 25/35 (5 pcs.) | for 25-litre- and 35-litre plastic container, dust class M approved (VIT610/TMO908) | 411231 |
| PE emptying and disposal bag FBPE 25/35 (5 pcs.) | Only for vacuum cleaners dust class M and H | 425764 |
| PE emptying and disposal bag Asbestos FBPE 35 (5 pcs.) | Only for vacuum cleaners dust class H-Asbestos | 425757 |
| Fleece filter bag FBVPE 25/35 (5 pcs.) | Only for vacuum cleaners dust class M and H (VIT610/TMO908) | 445267 |
| Fleece filter bag FBVPE 25/35 (5 pcs.)Article designation Properties/material Order no. | Only for vacuum cleaners dust class H-Asbestos (VIT610/TMO908) | 445755 |
| Filter bags 50 l: | ||
| Fleece filter bag FBV 45/55 (5 pcs.) | for 50-litre plastic container, dust class M approved (VIT610/TMO908) | 435039 |
| PE emptying and disposal bag FBPE 50 (5 pcs) | Only for vacuum cleaners dust class M and H | 421742 |
| PE emptying and disposal bag Asbest FBPE 50 (5 pcs.) | Only for vacuum cleaners dust class H-Asbestos 423951 | |
Additional accessories can be found in the special accessory list which can be obtained on request from the starmix Service Team on the internet: www.starmix.de, E-Mail: info@starmix.de.
16 Technical Data
| Typ: IS | ISC L/M/H-1425(1450) 110/120V | ISC L/M/H-1425(ISC L/M/H-1450) | ISC L/M/H-1625(ISC L/M/H-1650) | ISC H-1225 AsbestISC H-1250 Asbest | |
| Voltage V 110-120 220-240 | 220-240 | ||||
| Frequency Hz 50/60 | |||||
| Rated power W 1200 1200 | 400 1000 | ||||
| Max. power W | 1400 1400 1600 1200 | ||||
| Air flow* | l/s (m3/h) | 74 (266) | 73 (263) | 75 (270) | 70 (252) |
| Negative pressure* | hPa/MG | 234 | 270 | 280 | 265 |
| Air flow** | l/s (m3/h) | 35 (126) | 42 (151) | 45 (162) | 40 (144) |
| Negative pressure** | hPa/SE | 200 | 235 | 245 | 230 |
| Noise level | dB(A) | 69 | |||
| Weight | kg | 12,1 / 17,1 | |||
| Dimensions (l x w x h) | cm | 45 x 39 x 49 / 59,5 x 46,5 x 96 | |||
* at the fan
** at the hose
Max. power on vacuum cleaners with plug socket: 2000 W (220-240V\~) / 400 Watt (120V\~)
Mains connection cable on vacuum cleaners for dust class L with plug socket: H05RR-F 3G1,5
Mains connection cable on vacuum cleaners for dust class M, H and H Asbestos with plug socket: H07RR-F 3G1,5
17 Tests and approvals
Electro-technical tests must be carried out in accordance with the accident prevention regulations (DGUV V3) and in accordance with DIN VDE 0701 Part 1 and Part 3. These tests are required in accordance with DIN VDE 0702 at regular intervals and after repair or modification.
The vacuum cleaners are successfully tested in accordance with IEC/EN 60335-2-69.
NOTE
Old equipment contains valuable materials which are designed for re-processing. The vacuum cleaners must not be thrown away in the normal household waste, but should be disposed of at a suitable proper collection system, e. g. via your communal disposal location.
18 Declaration of conformity
We hereby declare that the machine described below complies with the relevant basic safety and health requirements of the EC Directives, both in its basic design and construction as well as in the version put into circulation by us.
This declaration shall cease to be valid if the machine is modified without our prior approval.
Product: Vacuum cleaner for wet and dry operation
Type:
IS
The design of the appliance corresponds to the following pertinent regulations:
EC Machinery Directive 2006/42/EU
EC Directive EMC 2014/30/EC
ROHS 2011/65/EU
EC Machinery Directive 2006/42/EU including amendments:
Category II requirements
The following institute has tested and certified the product:
Authorized documentation representative:
Head of Quality Assurance
Français
Directive relative aux machines UE 2006/42/UE
Directive UE EMC 2014/30/UE
La directive ROHS 2011/65/UE
3 Display- en bedieningselementen
natural_image
Technical line drawing of a mechanical housing or enclosure with labeled components (no text or symbols present)3 Display og kontrolelementer
7.3 Sett inn fiberduk-filterpose
MERK
natural_image
Technical line drawing of a mechanical housing or enclosure with labeled components (no text or symbols present)natural_image
Technical line drawing of a mechanical housing or enclosure with labeled components (no text or symbols present)natural_image
Technical line drawing of a mechanical housing or enclosure with labeled components (no text or symbols present)natural_image
Technical line drawing of a mechanical housing or enclosure with labeled components (no text or symbols present)3 Zaslonski in kontrolni elementi
3 Elementi prikaza i rukovanja
| Položaj preki-dača | Funkcija Opis | |
| 0 Usisivač isključen | - Utičnica pod naponom | |
| I Usisivač uključen | - Utičnica pod naponom- Isključena automatska funkcija trešnje | |
| A | Pogonska spremnost za automatiku uključivanja/isključivanja | - Utičnica pod naponom- Usisivač uključuje i isključuje na utičnici se preko priključenog električnog alata i alata komprimiranog zraka* |
| RA | Pogonska spremnost za automatiku uključivanja/isključivanja | - Pogon radne spremnosti kao >A< plus Automatsko čišćenje filtra |
| Funkcija automatskog čišćenja filtra | - Ovo čišćenje filtra slijedi automatski u idućoj radnoj stanki nakon što se dostigne podešena najmanja prostorna struja (položaj sklopke >RA<) | |
| Indikator razine punjenja* | - Indikator razine punjenja svijetli kada je spremnik pun i/ili je usisna cijev blokirana. Usisavači s klasama prašine M i H također emitiraju i zvučni signal | |
| Postavljanje promjera usisnog crijeva * | - Na M/H/H-azbestnim usisavačima za praćenje volumena protoka, aktivira se zvučni signal upozorenja ako minimalna brzina zraka padne ispod 20 m/s | |
 | Podešavanje brzine motora* | - Podešavanje usisne snage pomoću regulacije brzine |
4 Puštanje u rad
4.1 Prije svake upotrebe
Uvjerite se da su ispunjeni sljedeći uvjeti:
△ Usisavač, mrežni kabel, usisno crijevo i pribor nisu oštećeni.
△ Svi filtri su postavljeni i nisu oštećeni.
natural_image
Technical line drawing of a mechanical housing or enclosure with labeled components (no text or symbols present)Senzore razine vode (1) redovito očistite i pregledajte da li imaju naznake oštećenja.
▶ Usisavanje bez vrećice filtra od flisa.
7.4 Umetnite PE vrećicu za pražnjenje i odlaganje\*
NAPOMENA
Samo usisivači klase M i H sa specijalnim posudama i okretnim kliznikom u otvoru za usisavanje tipa IS/ISC ARM, IS/ISC ARH i IS/ISC ARH-ASBEST prikladni su za primjenu PE verčica za pražnjenje i uklanjanje.
NAPOMENA
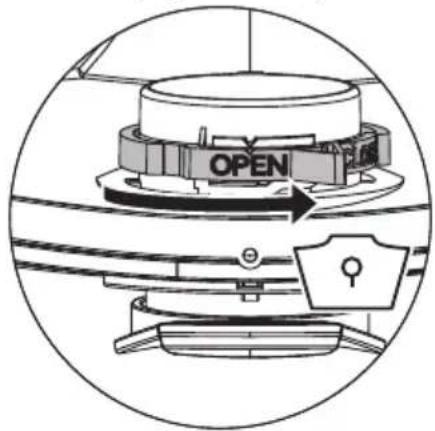
Upravljanje okretnim kliznikom
- Okrenite crveni okretni kliznik u položaj OPEN dok se ne zaustavi na oznaci ▲.
▶ Gurnite u potpunosti prirubnicu preko usisnog priključka.
Postavite gornji otvor vrećice preko ruba spremnika.
8 Promjena filtra
3 Elementi za prikaz i kontrolu
| Položaj prekidača | Funkcija Opis | |
| 0 | Usisivač je isključen | - Utikač je pod naponom |
| I Usisivač radi | - Utikač je pod naponom- Automatska funkcija trešenja je isključena | |
| A Pripremljenost za automatsko uključivanje/isključivanje | - Utikač je pod naponom- Usisivač se usljed priključenog električnog uređaja ili uređaja za pneumatski vazduh* na utikač uključuje i isključuje. | |
| RA Pripremljenost za automatsko uključivanje/isključivanje | - Pogon radne spremnosti kao >A< plus Automatsko čišćenje filtera. | |
| Automatska funkcija čišćenja filtera | - Ovo čišćenje filtera obavlja se automatski kod postizanja podešene minimalne volumne struje. u sledećim radnim fazama (položaj prekidača >RA<). | |
| Indikator nivoa napunjenosti* | - Indikator nivoa napunjenosti se pali kad je rezervoar pun i/ili je usisno crevo blokirano. Na usisivačima sa klasom prašine M i H, emituje se i zvučni signal | |
 | Postavljanje prečnika usisnog creva * | - Na M-/H-/H-azbest usisivačima za kontrolu količine protoka, za aktiviranje zvučnog signala ako brzina vazduha pada ispod 20 m/s |
 | Podešavanje brzine motora* | - Prilagodite snagu usisavanja pomoću kontrole brzine |
4 Puštanje u rad
4.1 Pre svake upotrebe
natural_image
Technical line drawing of a mechanical housing or enclosure with labeled components (no text or symbols present)natural_image
Technical line drawing of a mechanical housing or enclosure with labeled components (no text or symbols present)7.4 levietojiet PE vienreizlietojamo maisu\*
PIEZIME
3 显示和控制元件
7.4 插入聚乙烯废物清空清理袋\*
注意
Stand / issue 08/2017
IS
Stand / issue 10/2013
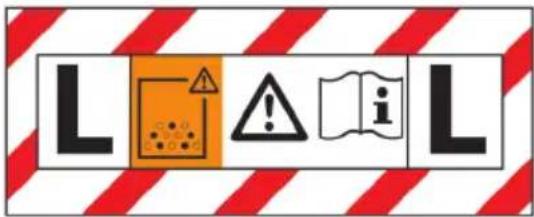
Class L vacuum devices are suitable for aspiration/clearing of dry, non-combustible dusts and hazardous dusts with occupational expo- sure limit values (AGW) > 1 mg/m 3 .
Class M vacuum devices are suitable for aspiration/clearing of dry, non-combustible dusts, non-combustible liquids, wood dusts and hazardous dusts with workplace limit values of ≥ 0.1 mg/m 3 .
- Deutsch (original)
- English
- WARNING!
- Commissioning
- Before every use
- Switching on and off
- NOTE
- Switching on the vacuum cleaner
- Setting the suction hose diameter\*
- ⚠️ CAUTION!
- Adjusting the suction power\*
- Switching off the vacuum cleaner
- Operating modes
- Sucking up dry materials
- Sucking up liquids
- Sucking up asbestos-containing substances
- Permanent filter cleaning
- Emptying the container
- Dispose of the fleece filter bag
- Dispose of the PE emptying and disposal bag
- Insert fleece filter bag
- Operating the rotary slide
- Insert PE emptying and disposal bag\*
- Changing the filter
- Changing the folded filter cartridges
- Changing the motor protection filter
- Transport
- Maintenance
- Precautionary measures
- Precautionary measures with vacuum cleaners class H and M
- Contaminated items
- Testing the effectiveness of the vacuum cleaner
- Inspection and maintenance of vacuum cleaners for dust class H-asbestos
- Cleaning
- Repair
- Troubleshooting and repair
- Genuine accessories
- Tests and approvals
- Declaration of conformity
- Français
- Display- en bedieningselementen
- Display og kontrolelementer
- Sett inn fiberduk-filterpose
- MERK
- Puštanje u rad
- Prije svake upotrebe
- Umetnite PE vrećicu za pražnjenje i odlaganje\*
- NAPOMENA
- Upravljanje okretnim kliznikom
- Promjena filtra
- Pre svake upotrebe
- levietojiet PE vienreizlietojamo maisu\*
- PIEZIME
- 显示和控制元件
- 插入聚乙烯废物清空清理袋\*
- 注意
Brand : Starmix
Model : ISC L-1625
Category : Vacuum Cleaner