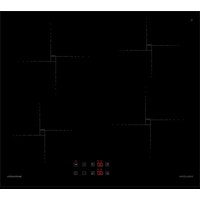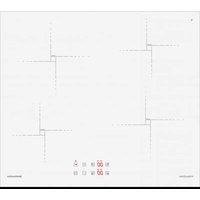
1PIDS90N - Cooker BARAZZA - Free user manual and instructions
Find the device manual for free 1PIDS90N BARAZZA in PDF.


User questions about 1PIDS90N BARAZZA
0 question about this device. Answer the ones you know or ask your own.
Ask a new question about this device
Download the instructions for your Cooker in PDF format for free! Find your manual 1PIDS90N - BARAZZA and take your electronic device back in hand. On this page are published all the documents necessary for the use of your device. 1PIDS90N by BARAZZA.
USER MANUAL 1PIDS90N BARAZZA
EN Use and installation manual
natural_image
Illustration of hands holding a flexible tube with a curved line, no text or symbols presentFig. 2
text_image
~ 2 mmFig. 4

natural_image
Diagram of a lever mechanism with hand and inset showing a cutting tool (no text or symbols)
natural_image
Technical diagram of a structural beam with supports and load arrows (no text or labels)Fig. 5
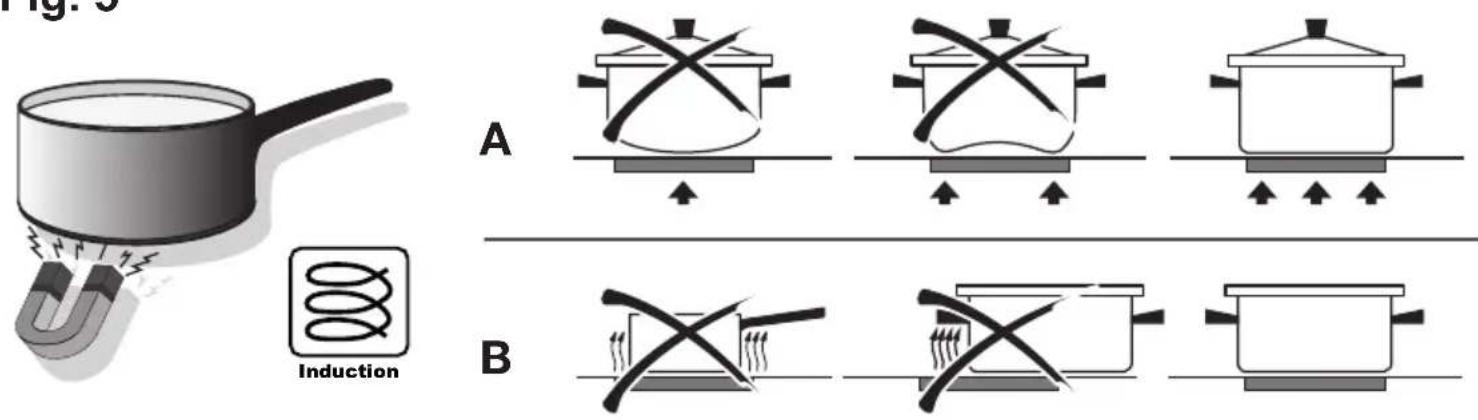
Fig. 6
text_image
3P+N N L123L1 35241 N L1L2 35241 2P+N 1P+N N L1 35241 230V/230V L3 L1 L2 35241 230V/230V L2 L1230V 2PFig. 7
text_image
g. 7 G 0.00 min I - - + - H O= I II F E DBACITALIANO
IT
Carefully read the contents of this leaflet since it provides important instructions regarding safety of installation, use and maintenance.
Keep the leaflet for possible future consultation. All the operations relating to installation (electrical connections) must be carried out by specialised personnel in accordance with current regulations.
SAFETY WARNINGS
- Use the cooktop only in household-type situations for the preparation and warming of food. All other types of use are not permitted.
- Individuals who are incapable of using the appliance safely because of their physical, sensory or mental capabilities or their lack of experience or knowledge must not use this appliance without supervision or instruction by a responsible person.
- Children under 8 years of age must be kept away from the cooktop unless they are under constant supervision.
- Children 8 years and older must only be allowed to use the cooktop if they have been given supervision or instruction concerning use of the appliance in a safe way and understand the hazards involved.
- Children shall not play with the appliance.
- Cleaning and user maintenance shall not be made by children without supervision.
- Installation, repair and maintenance work should only be performed by an authorized service technician. Work by unqualified persons could be dangerous for the user.
- RISK OF ELECTRIC SHOCK! If the cooktop is defective or chipped, cracked or broken in any way, immediately switch it off and do not continue to use it. Disconnect it from the electrical power supply.
- WARNING: If the supply cord of the appliance is damaged, it must be replaced by the manufacturer, its service agent or similarly qualified persons in order to avoid a hazard.
- WARNING: The appliance and its accessible parts become hot during use. Care should be taken to avoid touching heating elements.
- WARNING: Unattended cooking on a hob with fat or oil can be dangerous and may result in fire. NEVER try to extinguish a fire with water, but switch off the appliance and then cover flame e.g. with a lid or a fire blanket.
- WARNING: The cooktop is hot during use and remains so for some time after being switched off. The risk of burns remains until the residual heat indicators have gone out.
- CAUTION: The cooking process has to be supervised. A short term cooking process has to be supervised continuously.
- DANGER OF FIRE: Do not store items on the cooking surfaces! Metallic objects such as knives, forks, spoons and lids should not be placed on the hob surface since they can become hot.
- Always switch the cooking zones off after use!
- The appliance is not intended to be operated by means of an external timer or separate remote-control system.
INSTALLATIONINSTRUCTIONS
These instructions are for a specialized installer and are a guide for the installation process, regulations and maintenance in accordance with the law and current standards.
If the built-in oven or any other appliances that produce heat, need to be installed directly underneath the cooking hobs in ceramic glass, IT IS NECESSARY THAT THE APPLIANCE (oven) AND THE COOKING HOBS IN CERAMIC GLASS ARE ADEQUATELY
ISOLATED, in such a way that the heat generated from the oven, measured on the right hand side of the bottom of the cooking hobs, does not exceed 60^ C. Failure to follow this precaution, could cause a malfunction in the TOUCH CONTROL system.
POSITIONING
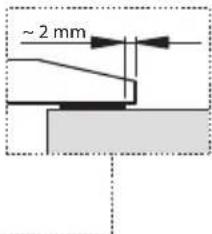
The domestic appliance was built in order to be encased on a work surface, the way it is illustrated in the graph (Fig.1). Predispose sealing material (Fig.2) along the whole perimeter (for dimensions of the cut see Fig.1). Lock the domestic appliance into place with 4 supporters, keeping in mind the width of the surface (Fig.4). If the lower part of the appliance after installation, is accessible via the lower part of the furniture, it is necessary to mount a separating panel keeping in mind the distances indicated (Fig.3).
VENTILATION
The distance between the cooktop and built-in kitchen's furnitures or cooking apparatuses must guarantee sufficient ventilation of the air (Fig.3). Not to use the cooktop if in the oven is in course the pyrolysis process.
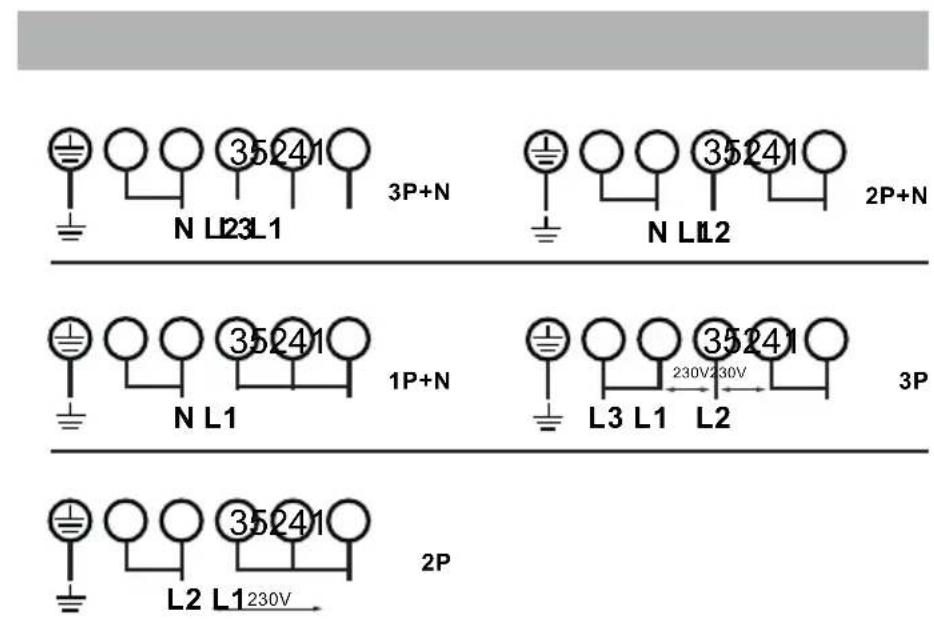
ELECTRICAL CONNECTIONS (Fig.6)
Before making the electrical connections, check that:
- the system ratings meet the ratings indicated on the identification plate fixed on the lower part of the worktop;
- the system is fitted with efficient ground wires in accordance with the laws and current standards.
Grounding is mandatory by law. If the domestic appliance is not supplied with a cable and/or suitable plug, use material suitable for the absorption value indicated on the identification plate and the operating temperature. If wishing to make a direct connection to the mains, an omnipolar switch must be installed with a minimum 3 mm opening between the contacts and appropriate for the load indicated on the plate and in accordance with current standards (the yellow/green ground conductor must not be disconnected by a switch). When the appliance has been installed, the omnipolar switch must be easily reachable.
INDUCTION COOKING
The fundamental characteristic of the induction system is the direct transference of heat from the generator to the cooking recipient.
This system offers the following advantages:
- The transference of power takes place only when the recipient is placed on the cooking zone.
- The heat is generated only at the base of the recipient and transferred directly to the food to be cooked.
- Reduced heating time and low consumption of power during the beginning of cooking, allowing a global saving of power.
- The fibreglass top remains cold, the heat felt on the cooking top is that reflected from the base of the recipient.
COOKING RECIPIENTS
The use of appropriate recipients is an essential factor for induction cooking. Check that your pots are suitable for the induction system. Only ferromagnetic cookware made of the following materials is suitable for induction cooktops:
- Enameled steel
- Cast iron
- Induction-capable cookware of stainless steel.
To determine whether the cookware is suitable, check whether the base of the pot or pan attracts a magnet (Fig.5).
There are other induction-capable pots and pans whose bases are not completely ferromagnetic. If the base of the cookware it's not completely ferromagnetic, only the area that is magnetizable will get hot.
Thus it can happen that the heat is not distributed evenly.
To get good cooking results, we recommend that the dimension of the ferromagnetic area of the cookware match the size of the burner.
We advise recipients having a flat base (Fig.5A). This way you can use the power optimally.
Do not use recipients with a rough base to avoid scratching the thermal surface of the top.
A very important factor in induction cooking is the dimension of the pot compared to the plate used (Fig.5B). The cooking zones allow the use of recipients with bases of various diameters.
It is, however, preferable to use the appropriate cooking zone for the dimension of the pot.
USING THE COOKTOP
The appliance is operated using the control panel sensor keys.
Functions are controlled by touching the sensor keys and confirmed by displays and acoustic signals. Touch the sensor keys from above, without covering other sensor keys.
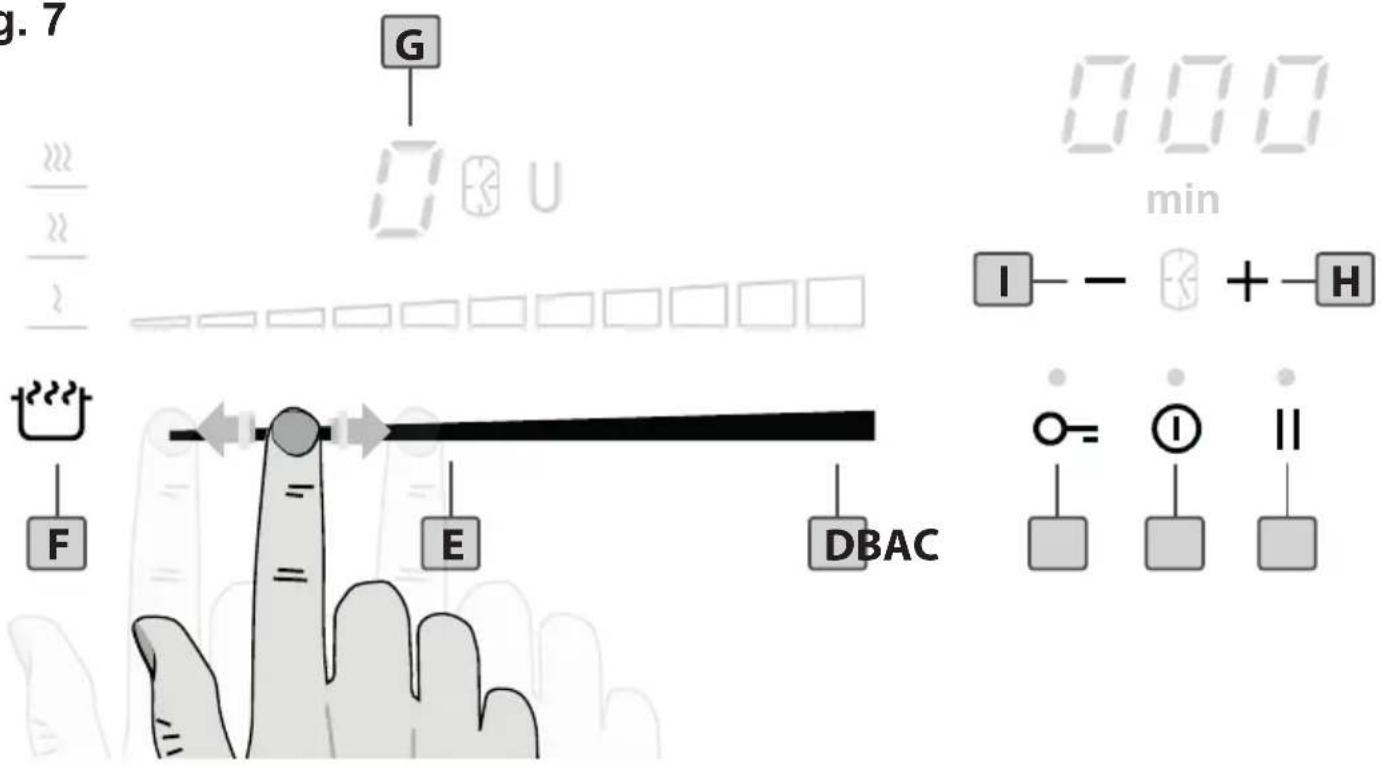
• TOUCH CONTROL (Fig. 7)
text_image
Fig. 7 G 0.00 min I - + H F E DBAC O= I IIA. On/Off key
B. Control Lock key
C. Pause key
D. Booster key
E. Cooking Zone Slidebar
F. Programs key
G. Cooking zone Display
H. Timer [+] key (increase)
I. Timer [-] key (decrease)
L. Timer Display
• SWITCHING THE APPLIANCE ON
Press the On-Off key to switch the hob on. All the displays relative to the cooking zones switch on in the «0» standby position. The control unit remains active for 10 seconds. If no cooking zone is selected within this time, the appliance switches off automatically.
•AUTOMATIC POT DETECTION
This cooktop is fitted with an interactive control system that makes it very easy and comfortable to use. When the hob is switched on, brightness of displays is at 30% (even during operation). When a pot is placed on a cooking zone, it is automatically recognized and brightness of related display will be at 100% and the corresponding slider will switch on indicating «0». You then just have to set the desired cooking level. If the cookware is removed, the display shows the symbol «∅» and disappear when the cookware is repositioned on the cooking zone, continuing with the previous settings. After use, always bring power to «0» (do not leave on the symbol «∅»).
The symbol «◀» also appears on one of the cooking zones displays when:
1) The recipient being used is not suitable for induction cooking.
2) The diameter of the recipient used is inferior to that allowed by the appliance.
• SWITCHING A COOKING ZONE ON
Select the desired cooking zone and press or slide on the corresponding slider. The power of the single cooking zone can be adjusted in 9 different positions and will be shown on the relative luminous display with a level from «1» to «9». Slide right on the slider to increase the power level, slide left to decrease it.
- BOOSTER
This function further reduces the cooking time of a certain cooking zone, by bringing the temperature to the maximum heat level for 10 minutes.
At the end of this timeframe, the cooking zone heat level will automatically go back to level «9». The use of this function is recommended for heating large quantities of liquids (e.g. water to cook pasta) or food in a very short time.
To activate this program press the Booster key or slide right on the slider until the «P» symbol appears on the cooking zone display.
- PAUSE
When at least one cooking zone is operating it is possible to momentaneously pause the appliance switching off the heating elements by pressing the Pause key. When the pause function is active the relative led is on.
The pause function has a maximum duration of 10 minutes. If the status is not terminated within this time the appliance switches off.
The pause function can be deactivated by pressing the Pause key and within 10 seconds any of the control keys. Previously programmed timers will be stopped during the pause.
- RECALL
When the appliance has been switched off by mistake it is possible to quickly recall the previously active settings by pressing the On-Off key within 6 seconds, then pressing the Pause key within another 6 seconds. If the recall function is available the relative led of the Pause key will be enlightened when the appliance is switched on again.
- TIMER
This function allows you to set the time from «01» (1 minute) to «99» (99 minutes) for the automatic switch off of a cooking zone.
Switch on a cooking zone by sliding on the slider to adjust the heat level. To activate the timer press simultaneously the timer [+] and [-] keys until the clock symbol lights up beside the cooking zone display, then set the desired time using the timer [+] and [-] keys within 5 seconds. Wait for 5 seconds for the automatic confirmation. The time countdown will be start on the timer display.
When time elapses the cooking zone will automatically switch off, the timer display will show a flashing «00» and an acoustic signal will be heard. Press the [+] or [-] key to stop the signals.
To disable the timer of a cooking zone press repeatedly and simultaneously the [+] and [-] keys until the clock symbol lights up beside the display of the desired cooking zone, press again the timer [+] and [-] keys simultaneously, then bring the timer value back to «00» by using the timer [-] key. Wait for 5 seconds for the automatic confirmation. The clock symbol beside the cooking zone display goes off.
• EGG TIMER/REMINDER
When no cooking zone is active it is possible to set an acoustic reminder which stays active after switching the appliance off. When the Egg timer/Reminder function is active, the Timer function cannot be selected.
To enable this function press simultaneously the timer [+] and [-] keys. The clock symbol lights up below the timer display. Set the time, ranging from «01» (1 minute) to «99» (99 minutes), by pressing the timer [+] and [-] keys. Wait for 5 seconds for the automatic confirmation. The time countdown will be shown on the timer display.
When time elapses the display will show a flashing «00» and an acoustic signal will be heard. Press the [+] or [-] key on to stop the signals.
To disable the Egg timer/Reminder
function press simoultaneously the timer [+] and [-] keys. The clock symbol lights up below the timer display. Bring the timer value back to «00» by using the [-] key. Wait for 5 seconds for the automatic confirmation. The clock symbol beside the timer display goes off.
• CONTROL LOCK
Controls can be locked in order to prevent any risk of unintentional changes to the settings (children, cleaning operations, etc.). To activate this function press the Control Lock key. The relative led will light up. The function remains active when the appliance is switched off and on again.
To disable the Control Lock function simply press the Control Lock key. The relative led will go off.
• BRIDGE FUNCTION
This function allows you to combine the front cooking zone to the rear cooking zone to create one large zone where to place the pots. It is particularly suitable when it comes to cooking with large pans (eg. oven pans). To activate the Bridge function between two cooking zones press simoultaneously on both Booster keys. The bridge luminous symbols U and N will appear on the side of the two cooking zones display indicating that the function is active. The settings of the bridge zone are only enabled by the front cooking zone slider and sensor keys. The function can be disabled by pressing simoultaneously the two Booster keys.
• SPECIAL PROGRAMS
The cooktop has three special programs that have already been set to perform special cooking operations:
1) Warming
The “Warming” program sets the heat temperature of the selected cooking zone at 45^ C to keep food warm.
To activate this program press the Programs key once. The Warming led lights up besides the cooking zone display.
2) Melt
The “Melt” program sets the heat temperature of the selected cooking zone at 70^ C to melt chocolate, butter or the like. To activate this program press the Programs key twice. The Melt led lights up besides the cooking zone display.
3) Simmer
The “Simmer” program sets the heat temperature of the selected cooking zone at 94^ C to bring to a boil slowly preparing sauces or soups and stews. To activate this program press three times the Programs key, the Simmer led lights up besides the cooking zone display.
• SWITCHING A COOKING ZONE OFF
To switch a cooking zone off bring its level back to «0» by sliding left on the slider.
• SWITCHING THE APPLIANCE OFF
To turn off the cooking top entirely hold down the On-Off key.
• POWER MANAGEMENT
All cooking zones are connected to one phase. The phase has a maximum electricity loading of 3700 W/230V (see “Technical specifications” paragraph).
The function divides the heat level between cooking zones and activates when the total electricity loading of the cooking zones exceeds 3700 W. The function decreases the heat level to the other cooking zones. The heat setting display of the reduced zones changes between two levels.
- RESIDUAL HEAT
If the temperature of the cooking zone is still high (over 50^ ) after it has been
switched off, the relative display will indicate the «H» symbol (residual heat). The symbol will only switch off when the burn risk in no longer present.
- SAFETY SWITCH
The appliance has a safety switch that automatically switches off the cooking zones when they have been operating for a certain amount of time at a given power level.
| POWER LEVEL | OPERATING TIME LIMIT (hours) |
| 1 - 2 6 | |
| 3 - 4 5 | |
| 5 | 4 |
| 6 - 7 - 8 - 9 1,5 |
CLEANING AND MAINTENANCE
Remove any residues of food and drops of grease from the cooking surface by using the special scraper supplied on request.
Clean the heated area as thoroughly as possible using suitable products, and a cloth/paper, then rinse with water and dry with a clean cloth.
Using the special scraper immediately remove any fragments of aluminium and plastic material that have unintentionally melted on the heated cooking area, or residues of sugar or food with a high sugar content.
In this way, any damage to the cooktop surface can be prevented. Under no circumstances should abrasive sponges, or corrosive chemical detergents, such as oven sprays or stain removers, be used.
WARNING: STEAM CLEANERS MUST NOT BE USED.
DISPOSAL OF OLD ELECTRICAL APPLIANCES
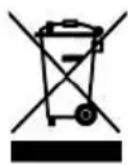
The European Directive 2002/96/EC on Waste Electrical and Electronic Equipment (WEEE), requires that old household electrical appliances must not be disposed of in the normal unsorted municipal waste stream. Old appliances must be collected separately in order to optimise the recovery and recycling of the materials they contain and reduce the impact on human health and the environment.
The crossed-out dustbin symbol on the product reminds you of your obligation regarding separated waste collection. Consumers should contact their local public service or their local dealer for more information on the correct disposal of exhausted household appliances.
| Problem Possible cause Remedy | ||
| You cannot activate or operate the appliance. | The appliance is not connected to an electrical supply or it is connected incorrectly. | Check if the appliance is correctly connected to the electrical supply. Refer to “electrical connection” chapter. |
| The fuse is released. Make sure that the fuse is the cause of the malfunction.If the fuse releases again and again, contact a qualified electrician. | ||
| it’s been more than 10 seconds from the switching on of the appliance. | Activate the appliance again and set the heat setting in less than 10 seconds. | |
| You touched 2 or more sensor keys at the same time. | Touch only one sensor key. | |
| Pause function operates. Refer to “Using the cooktop” chapter. | ||
| There is water or fat stains on the control panel. | Clean the control panel. | |
| The hob deactivates. | You put something on the sensor key ON-OFF. | Remove the object from the sensor key. |
| Residual heat indicator does not come on. | The zone is not hot because it operated only for a short time. | If the zone operated sufficiently long to be hot contact an Authorised Service Centre. |
| Automatic Warm Up function does not operate. | The zone is hot. Let the zone become sufficiently cool. | |
| The highest heat setting is set. | The highest heat setting has the same power as the function. | |
| The heat setting changes between two levels. | Power management function operates. | Refer to “Using the cooktop” chapter. |
| The sensor keys become hot. | The cookware is too large or you put it too near to the controls. | Put large cookware on the rear zones if possible. |
| ☐ comes on. Automatic Switch Off operates. | Deactivate the appliance and activate it again. | |
| ☐ comes on. The Child Lock function operates. | Refer to “Using the cooktop” chapter. | |
| # comes on. | Water or cooking utensils above the control panel. | Remove the objects from the control panel. |
| # comes on. There is no cookware on the zone. | Put cookware on the zone. | |
| The cookware is incorrect. Use the correct cookware. Refer to “Induction Cooking” chapter. | ||
| The dimension of the bottom of the cookware is too small for the zone. | Use cookware with correct dimensions. Refer to “Induction Cooking” chapter. | |
| The cookware does not cover the cooking zone. | Cover the cooking zone fully. | |
| E and a number come on. | There is an error in the appliance. | Disconnect the appliance from the electrical supply for some time. Disconnect the fuse from the electrical system of the house. Connect it again. If comes on again, contact an Authorised Service Centre. |
| E2 comes on. | The induction coils are overheated. | Allow the appliance to cool down. |
| E21 comes on. | The appliance is overheated. The cooling fan might be blocked. | Allow the appliance to cool down. Check if objects block the cooling fan. If comes on again, contact an Authorised Service Centre. |
| E31 comes on. | Incorrect data configuration. New configuration needed. Contact an Authorised Service Centre. | |
| E47 comes on. | None or faulty communication between control panel and induction coils. | Ensure that connection cable is plugged on correctly and functional. |
| U400 comes on. | Control Panel is wrongly connected. | Connect to correct mains voltage. |
| E22, E20, E36, E5, E6 or E9 comes on. | An internal component of the appliance needs replacing. | Contact an Authorised Service Centre. |
If you cannot find a solution to the problem yourself, contact your dealer or an Authorised Service Centre. Give the data from the rating plate.