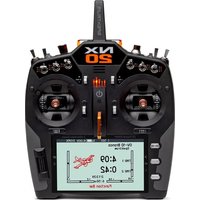
NX20 - Remote control toy SPEKTRUM - Free user manual and instructions
Find the device manual for free NX20 SPEKTRUM in PDF.


| Product Type | 20-channel DSM2/DSMX radio transmitter |
| Modulation | DSM2 / DSMX (automatic or forced) |
| Number of channels | 20 |
| Power supply | Integrated 3.7V 6000mAh Li-Ion battery |
| Battery life | Approximately 6 to 7 hours initial charge, variable depending on use |
| Screen | Color LCD |
| Switches and controls | 4 2-position switches, 6 3-position switches, 4 trims, 2 slider switches, 1 rotary button, 1 momentary button |
| Telemetry | Integrated, compatible with Spektrum sensors and Smart technology |
| Flight modes | Up to 10 configurable modes depending on model type |
| Supported model types | Airplane, helicopter, glider, multirotor |
| Internal memory | 250 models |
| External storage | microSD card (not included), FAT32 or exFAT format depending on capacity |
| Connectivity | USB-C port (charging and data transfer), serial port (SRXL2, Crossfire), wired trainer input, wireless (DSMX) |
| Software update | Via SD card or USB, Spektrum AirWare software |
| Safety features | Model Match, switch position alarms, range test, motor cut, fail safe |
| Special features | On-the-fly adjustment (OTF), pre-installed BNF files, flight mode assistant, haptic (vibrator) and audio feedback |
| Warranty | Conforms to legal provisions of the country of purchase (6 months legal warranty, 18 months warranty obligation) |
| Maintenance and cleaning | Clean with a soft, dry cloth. Do not use solvents. Protect from moisture and extreme temperatures. Remove protective film if desired. |
| Recommended age | 14 years and up (not a toy) |
Frequently Asked Questions - NX20 SPEKTRUM
User questions about NX20 SPEKTRUM
0 question about this device. Answer the ones you know or ask your own.
Ask a new question about this device
Download the instructions for your Remote control toy in PDF format for free! Find your manual NX20 - SPEKTRUM and take your electronic device back in hand. On this page are published all the documents necessary for the use of your device. NX20 by SPEKTRUM.
USER MANUAL NX20 SPEKTRUM
All instructions, warranties and other collateral documents are subject to change at the sole discretion of Horizon Hobby, LLC. For up-to-date product literature, visit horizonhobby.com or towerhobbies.com and click on the support or resources tab for this product.
Meaning of Special Language
The following terms are used throughout the product literature to indicate various levels of potential harm when operating this product:
WARNING: Procedures, which if not properly followed, create the probability of property damage, collateral damage and serious injury OR create a high probability of superficial injury.
CAUTION: Procedures, which if not properly followed, create the probability of physical property damage AND a possibility of serious injury.
NOTICE: Procedures, which if not properly followed, create a possibility of physical property damage AND little or no possibility of injury.

WARNING: Read the ENTIRE instruction manual to become familiar with the features of the product before operating.
Failure to operate the product correctly can result in damage to the product, personal property and cause serious injury.
This is a sophisticated hobby product. It must be operated with caution and common sense and requires some basic mechanical ability. Failure to operate this Product in a safe and responsible manner could result in injury or damage to the product or other property. This product is not intended for use by children without direct adult supervision. Do not attempt disassembly, use with incompatible components or augment product in any way without the approval of Horizon Hobby, LLC. This manual contains instructions for safety, operation and maintenance. It is essential to read and follow all the instructions and warnings in the manual, prior to assembly, setup or use, in order to operate correctly and avoid damage or serious injury.

WARNING AGAINST COUNTERFEIT PRODUCTS: Always purchase from a Horizon Hobby, LLC authorized dealer to ensure
authentic high-quality Spektrum product. Horizon Hobby, LLC disclaims all support and warranty with regards, but not limited
to, compatibility and performance of counterfeit products or products claiming compatibility with DSM or Spektrum technology.
NOTICE: This product is only intended for use with unmanned, hobby-grade, remote-controlled vehicles and aircraft. Horizon Hobby disclaims all liability outside of the intended purpose and will not provide warranty service related thereto.
Age Recommendation: Not for Children under 14 years. This is not a toy.
Warranty Registration
Visit www.spektrumrc.com today to register your product.
NOTICE: While DSMX technology allows you to use more than 40 transmitters simultaneously, when using DSM2 receivers, DSMX receivers in DSM2 mode or transmitters in DSM2 mode, do not use more than 40 transmitters simultaneously.
General Notes
- Models are hazardous when operated and maintained incorrectly.
- Always install and operate a radio control system correctly.
- Always pilot a model so the model is kept under control in all conditions.
- Please seek help from an experienced pilot or your local hobby store.
- Contact local or regional modeling organizations for guidance and instructions about flying in your area.
- When working with a model, always power on the transmitter first and power off the transmitter last.
- After a model is bound to a transmitter and the model is set up in the transmitter, always bind the model to the transmitter again to establish failsafe settings.
Pilot Safety
- Always make sure all batteries are fully charged before flying.
- Time flights so you can fly safely within the time allotted by your battery.
- Perform a range check of the transmitter and the model before flying the model.
- Make sure all control surfaces correctly respond to transmitter controls before flying.
- Do NOT fly a model near spectators, parking areas or any other area that could result in injury to people or damage to property.
- Do NOT fly during adverse weather conditions. Poor visibility, wind, moisture and ice can cause pilot disorientation and/or loss of control of a model.
- When a flying model does not respond correctly to controls, land the model and correct the cause of the problem.
BEFORE USING YOUR TRANSMITTER
Before going any further, visit the Spektrum Community website at www.spektrumrc.com to register your transmitter and download the latest Spektrum AirWare™ firmware updates. A registration reminder screen occasionally appears until you register your transmitter. When you register your transmitter, the reminder screen does not appear again.
The transmitter comes with a thin, clear plastic film applied to some front panels for protection during shipping. Humidity and use may cause this film to come off. Carefully remove this film as desired.
BOX CONTENTS SPECIFICATIONS
- NX20 Transmitter
(SPMR20500, SPMR20500EU, and SPMR205001) - Manual
- USB-C magnetic charge cable and adapter
- Decal set
- Neck strap
| Type DSM2/DSMX | 20 CH Telemetry Transmitter |
| Application Airplanes, Helicopters, Sailplanes, Multirotors | |
| Channels 20 | |
| Wireless Trainer DSM2*/DSMX Compatible | |
| Switches | 4 - 2 Position, 6 - 3 Position, 4 - Trimmers, 2 - Sliders, 1 rotary knob, 1 Momentary Button |
| Modulation DSM2*/DSMX | |
| Telemetry Integrated | |
| Bind Method Bind | Button or From Within Menu |
| Frame Rate | 22ms Default, 11ms Selectable (Digital Servos Required) |
| Resolution 2048 | |
| Battery 3.7V 6,000 mAh Lilon | |
| Band 2.4GHz | |
| Feedback | Tone, Vibration, Voice |
- EU versions of the NX20 are not compatible with DSM2® receivers.
For helpful videos on programming the NX20 and other Spektrum AirWare equipped transmitters, go to www.spektrumrc.com.
TABLE OF CONTENTS
Basic Operation 5
Transmitter Functions 6
Powering the NX20 On and Off. 7
Charging the Lithium Ion Battery Pack. 8
Navigation 9
Main Screen 9
Keyboard Style 10
Auto Switch Select 10
OTF (On The FLY) Trim Functions. 10
Pre-installed BNF model files. 11
USB and Internal Memory 11
External Memory card. 11
Memory card Functions 12
Update Spektrum AirWare™ Software 12
Model Type Programming Guide 13
System Setup. 14
Model Select. 14
Model Type 14
Model Name 15
Flight Mode Examples. 15
Flight Mode Setup. 16
Spoken Flight Mode 16
Channel Assign 17
Channel Input Configuration 17
Rx Port Assignments 17
Trim Setup 17
Model Utilities 18
Create New Model 18
Delete Model 18
Copy Model 19
Model Reset 19
Sort Model List 19
Validate All Models. 19
Delete All Models 19
Warnings 19
Telemetry 20
Telemetry data 20
Telemetry Auto-Configuration 20
Settings 21
File Settings 21
Preflight Setup 22
Frame Rate, RF Mode, and Failsafe 22
Bind. 23
Serial Port Setup 23
Trainer 24
Wired Trainer 24
Wireless Trainer 24
Instructor Transmitter Configuration 25
Binding Wireless Trainer 25
Head Tracking FPV Setup. 25
Center Tone 26
Sound Utilities 26
Palette Utilities 26
System Settings 26
User Name 26
Roller Menu 26
Brightness 27
Mode* 27
Battery Alarm. 27
Selecting a Language 27
Inactive Alarm 27
Extra Settings 28
System Sounds 28
Vibrator Intensity Adjustment 28
Keyboard 28
Trim Style 28
Volume Controls. 28
Channel Monitor 28
Set Date/Time 29
Power Sounds 29
Factory Reset. 29
Calibrate 29
WiFi Utilities 29
USB Settings 29
Transfer SD Card. 30
Category 30
Model Import/Export 30
Memory Location 30
File/Folder Management 31
Palette Import/Export 31
Special Features 31
About/Regulatory 32
Serial Number 32
Exporting the Serial Number to the Memory card 32
Locating the Transmitter Spektrum AirWare Software Version.....32
Function List 33
Servo Setup 33
Travel Adjust 33
Sub-Trim 33
Reverse 33
Speed 34
Absolute (Abs.) Travel 34
Channel Name 34
Balance 34
Rates and Expo. 34
Throttle Cut. 35
Throttle Curve 35
Analog Switch Setup 35
Digital Switch Setup. 36
Logical Switch Setup 36
Combo Switch Setup 36
Mixing 37
Normal Mix 37
Curve Mix. 38
Curve (Page) Advanced Configuration Options. 38
Sequencer 38
Range Test 39
Timer 40
Telemetry 40
Telemetry Auto-Configuration 40
Forward Programming 40
Audio Events 41
JTX Setup 41
Function Bar 41
Bind 42
Start Trainer 42
System Setup 42
Charge Status 42
Monitor 43
ACRO (Airplane) 43
Aircraft Type (System Setup) 44
Recommended Servo Connections. 44
Elevon Servo Control. 45
Flap System (Function List) 45
ACRO Mixing (Function List) 45
Differential (Function List) 46
V-Tail Differential (Function List) 46
Gyro Menu (Function List). 46
Pitch Curve (Function List) 46
Multi-Engine Control (System Setup) 47
JELI (Helicopter) 48
Swash Type (System Setup) 48
Collective Type (System Setup) 48
Pitch Curve (Function List) 48
Swashplate (Function List) 49
Gyro (Function List) 49
Tail Curve (Function List) 49
Mixing (Function List) 49
Sail (Sailplane) 50
Sailplane Type (System Setup) 50
- Sailplane Image 50
Camber Preset (Function List) 50
Camber System (Function List) 50
SAIL Mixing (Function List) 51
Multi (Multirotor) 52
F-Mode Setup (System Setup). 52
Trim Setup (System Setup) 52
Rates and Expo (Function List) 52
Motor Cut (Function List) 53
Motor Curve (Function List) 53
Physical Transmitter Adjustments 54
Antenna Position 54
Gimbal Adjustments 54
Adjust Stick Tension 54
Control Stick Length Adjustment 54
Gimbal Travel Limit 54
Ratcheted Throttle - Smooth Throttle Adjustment 55
Mode Conversion 55
Troubleshooting Guide. 56
-Year Limited Warranty 57
Warranty and Service Contact Information 58
CC Information 58
C Information 58
Compliance Information for the European Union 59
BASIC OPERATION
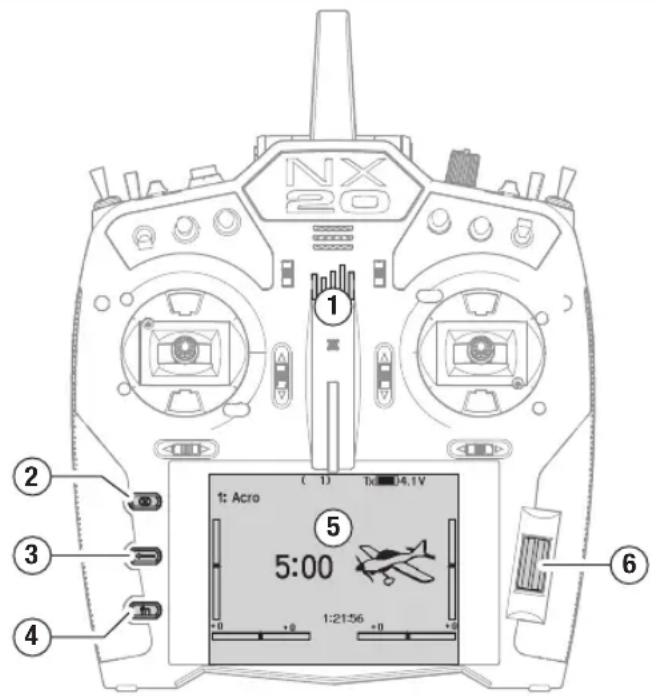
Interface
The power button is the Spektrum logo (1); press and hold for several seconds to power the transmitter ON or OFF. There are three buttons on the left side of the screen; Clear (2), Back (3) and Function (4). The scroll wheel (6) can be pressed or rolled to access functions and change values.
Main Screen
When powered ON the system will display the Main Screen (5) which will show basic information for use during operation. Telemetry screens and a channel monitor are available from the Main Screen by rolling the scroll wheel.
System Setup
The transmitter will power OFF the RF when you enter the System Setup menu, power OFF the receiver when entering the System Setup menu to prevent accidental motor operation. Press the scroll wheel to open the Function List from the Main Screen, scroll to the bottom of the list and select System Setup by pressing the scroll wheel again. The System Setup menu is where you set model features that define your model (wing and tail type, assign switches and trims, configure flight modes, etc). This is also where system-wide settings reside including sound and palette utilities, wifi, USB and SD card settings.
Function List
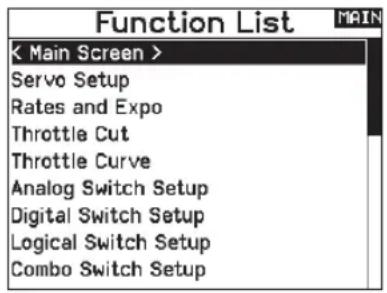
Press the scroll wheel to open the Function List from the Main Screen. This is where model specific features for final model setup are accessed such as servo settings, rates and expo, throttle settings, mixing, range testing, etc. These settings are unique to each model file. Select the model you want to work with first, define your settings in the system setup menu, and then use the features in the function list to finalize setup for your model.
Model Files
All the settings for a model are stored under a model file. To configure a new model, begin by selecting the model file you want to use. When selecting a new model file you may choose a preprogrammed BNF model file, select a generic BNF template, or define the model type to begin a custom setup.
Model Match technology
The system is designed so the transmitter will only connect to the receiver it was bound to, and the connection is unique to the selected model file. The transmitter will only connect with a receiver when the model file it was bound to is selected, preventing operation with the wrong model file.
Binding
Binding is the process of linking the transmitter and receiver. Verify the transmitter is set to the model file you want to use. To bind the transmitter to the receiver, first put the receiver into bind mode. Then put the transmitter into bind mode from the System Setup menu, Function List, or by pressing the I button when powering the transmitter ON. A connection is established when the LED on the receiver illuminates solid orange.
BNF Setup
The NX20 is pre-loaded with model files for many Horizon Hobby BNF aircraft.
- From the Main Screen press the Clear and Back buttons at the same time to enter the Model Select menu.
-
Choose Add New BNF, and select the brand of your airplane and then the model. or Chose Add New from Template for a generic BNF template desgined for simple models with 4 channels or less.
-
Remove the propeller on electric aircraft as a safety precaution where applicable.
- Follow your aircraft manual for binding and setup details which may include SAFE Select. Bind the transmitter to the receiver. Receivers with AS3X or SAFE must remain still after powering ON before the transmitter gains control.
- Check all control surfaces for correct response.
- Re-install the propeller and test fly.
Custom Model Setup
- Enter the Model Select menu.
- Choose Add New Model. Model type is selected when you set up a new model and will dictate other options within the menus.
- Enter the System Setup menu to define basic settings for your model. If you want to change the model type do that first, all settings within the model file will be reset when the model type is changed.
- Name the model file.
- Select wing and tail type, which enables functions like flaps and built-in mixing for dual aileron servos or elevons. The menus for items like flaps will not appear in the Function List until a feature requiring its use is selected in the wing and tail type settings. Changing the wing or tail type will reset any changes from default in the Channel Assign menu.
- Remove the propeller on electric aircraft as a safety precaution where applicable.
- Bind the transmitter to the receiver.
- Configure servo directions, center control surfaces, adjust travel, set rates and flight modes.
- Configure auxiliary functions.
- Check all control surfaces for correct response.
- Re-install the propeller and test fly.
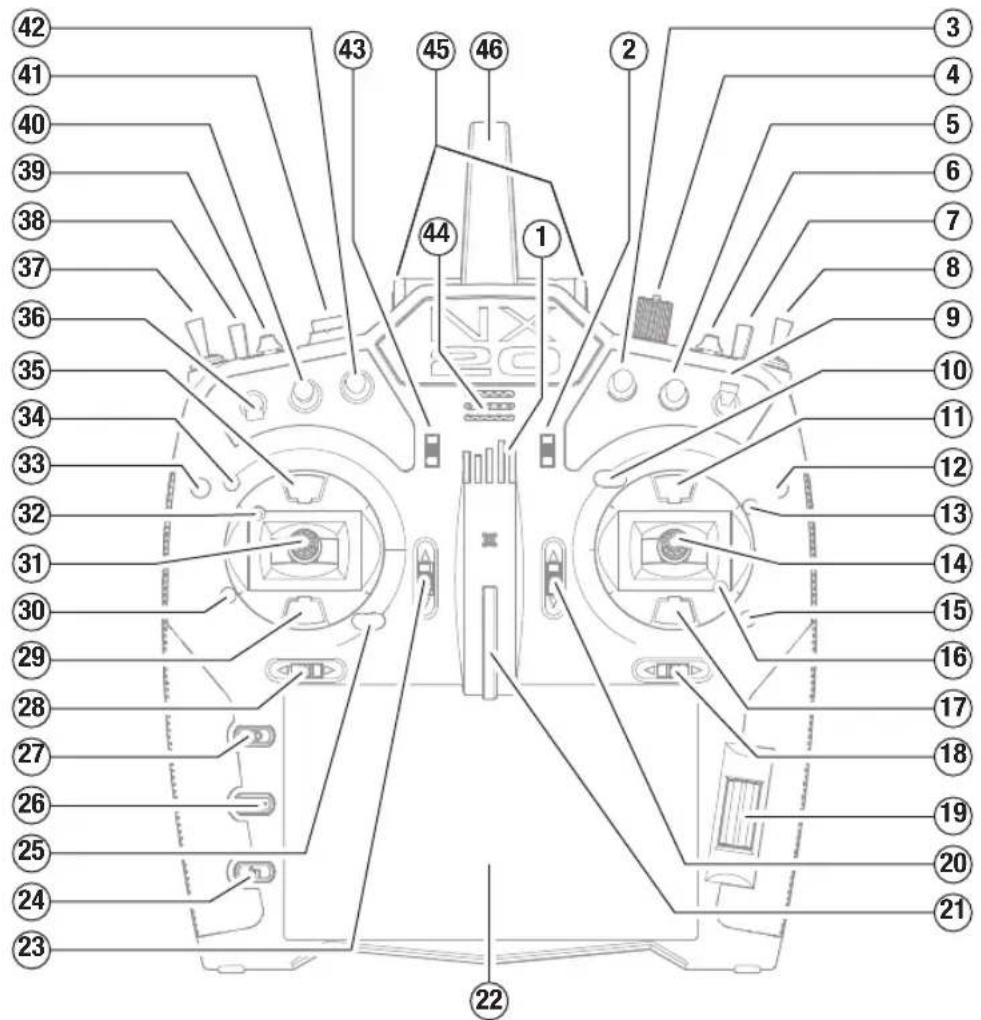
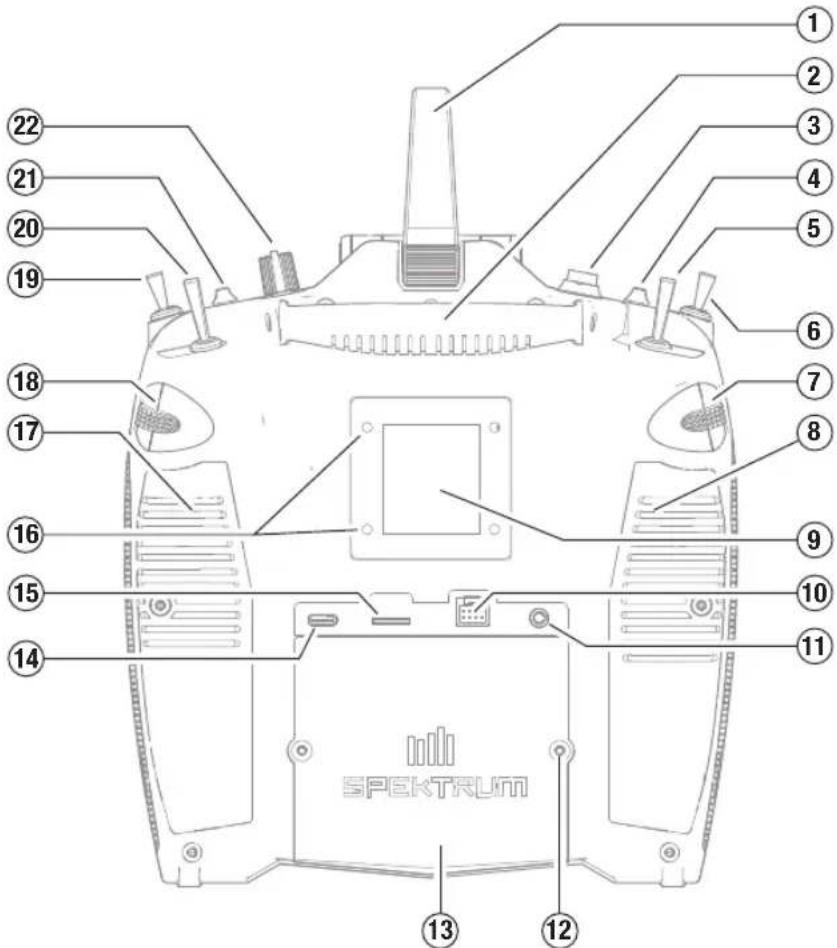
TRANSMITTER FUNCTIONS
| Function | |
| 1 | On/Off Switch and RF LED Indicator |
| 2 | Trimmer |
| 3 | Switch E2 |
| 4 | Knob |
| 5 | Switch E |
| 6 | Right Top Trimmer |
| 7 | Switch H |
| 8 | Switch G |
| 9 | Switch F |
| 10 | Throttle Tension Adjustment Throttle Ratchet Adjustment (Mode 1, 3) |
| 11 | Gimbal Travel Limiter Access Panel |
| 12 | Rear Lever Tension Adjustment* |
| 13 | Mode Change |
| Function | |
| 14 | Throttle/Aileron Stick (Mode 1) Elevator/Aileron Stick (Mode 2) Throttle/Rudder Stick (Mode 3) Elevator/Rudder Stick (Mode 4) |
| 15 | Up/Down Gimbal Stick Tension Adjustment |
| 16 | Left/Right Gimbal Stick Tension Adjustment |
| 17 | Gimbal Travel Limiter Access Panel |
| 18 | Aileron Trim (Mode 1, 2) Rudder Trim (Mode 3, 4) |
| 19 | Scroll wheel |
| 20 | Elevator Trim (Mode 1, 3) Throttle Trim (Mode 2, 4) |
| 21 | Neck Strap Mount |
| 22 | LCD |
| Function | |
| 23 | Elevator Trim (Mode 2, 4) Throttle Trim (Mode 1, 3) |
| 24 | Function Button |
| 25 | Throttle Tension Adjustment Throttle Ratchet Adjustment (Mode 2, 4) |
| 26 | Back Button |
| 27 | Clear Button |
| 28 | Rudder Trim (Mode 1, 2) Aileron Trim (Mode 3, 4) |
| 29 | Gimbal Travel Limiter Access Panel |
| 30 | Mode Change |
| 31 | Elevator/Rudder Stick (Mode 1) Throttle/Rudder Stick (Mode 2) Elevator/Aileron Stick (Mode 3) Throttle/Aileron Stick (Mode 4) |
| Function | |
| 32 | Left/Right Gimbal Stick Tension Adjustment |
| 33 | Rear Lever Tension Adjustment* |
| 34 | Up/Down Gimbal Stick Tension Adjustment |
| 35 | Gimbal Travel Limiter Access Panel |
| 36 | Switch C |
| 37 | Switch B |
| 38 | Switch A |
| 39 | Left Top Trimmer |
| 40 | Switch D |
| 41 | Button |
| 42 | Switch D2 |
| 43 | Trimmer |
| 44 | Speaker |
| 45 | RF LED Indicators |
| 46 | Antenna |
| Function | |
| 1 Antenna | |
| 2 Handle | |
| 3 Button | |
| 4 Left Top Trimmer | |
| 5 A Switch | |
| 6 B Switch | |
| 7 Left Slider | |
| 8 Left Rubber Grip | |
| 9 Compliance label | |
| 10 Wired Trainer and CSRF Connection Port | |
| 11 Audio Port | |
| 12 Battery Tray Mounting Screws | |
| 13 Battery Tray | |
| 14 USB-C | |
| 15 Memory Card Port | |
| 16 M3 threaded mounting holes for CSRF module (not included) | |
| 17 Right Rubber Grip | |
| 18 Right Lever | |
| 19 G Switch | |
| 20 H Switch | |
| 21 Right Top Trimmer | |
| 22 R Knob |
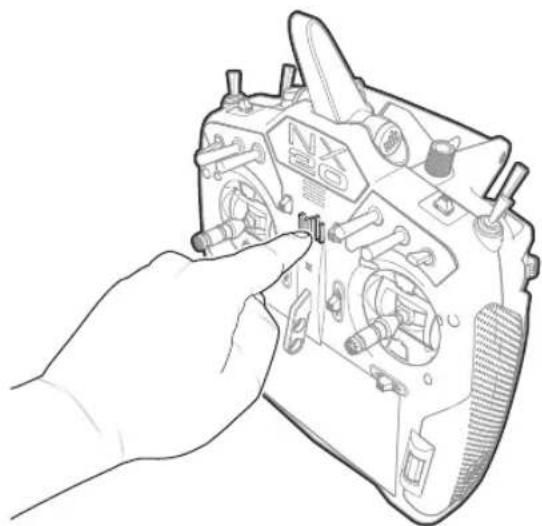
POWERING THE NX20 ON AND OFF
- Press and hold the power button (Spektrum logo) for several seconds to turn ON the NX20.
- Press and hold the power button for about 4 seconds to power OFF the NX20.
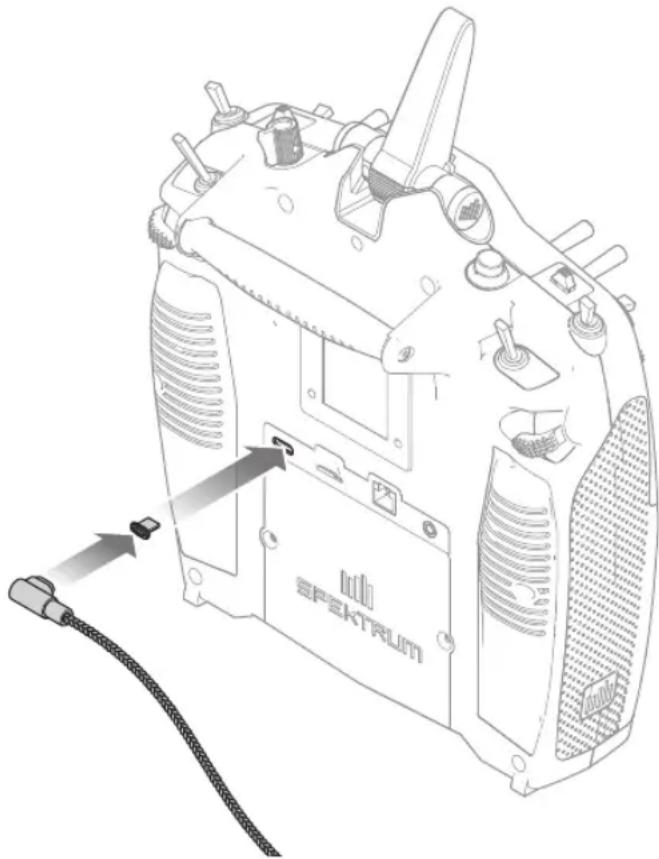
CHARGINGWARNINGS

WARNING: Failure to exercise caution while using this product and comply with the following warnings could
result in product malfunction, electrical issues, excessive heat, FIRE, and ultimately injury and property damage.
- NEVER LEAVE CHARGING BATTERIES UNATTENDED.
- Never attempt to charge dead, damaged or wet battery packs.
- Never attempt to charge a battery pack containing different types of batteries.
- Never allow children under 14 years of age to charge battery packs.
- Never charge batteries in extremely hot or cold places or place in direct sunlight.
- Never charge a battery if the cable has been pinched or shorted.
- Never connect the charger if the power cable has been pinched or shorted.
- Never attempt to dismantle the charger or use a damaged charger.
- Always use only rechargeable batteries designed for use with this type of charger.
Always inspect the battery before charging.
Always keep the battery away from any material that could be affected by heat. -
Always monitor the charging area and have a fire extinguisher available at all times.
-
Always end the charging process if the battery becomes hot to the touch or starts to change form (swell) during the charge process.
- Always connect the positive leads (+) and negative leads (-) correctly.
Always disconnect the battery after charging, and let the charger cool between charges. - Always charge in a well-ventilated area.
- Always terminate all processes and contact Horizon Hobby if the product malfunctions.
- Charge only rechargeable batteries. Charging non-rechargeable batteries may cause the batteries to burst, resulting in injury to persons and/or damage to property.
- The USB outlet shall be installed near the equipment and shall be easily accessible.

CAUTION: Always ensure the battery you are charging meets the specifications of this charger. Not doing so can
result in excessive heat and other related product malfunctions, which can lead to user injury or property damage.

CAUTION: If at any time during the charging process the battery pack becomes hot or begins to puff, disconnect
the battery immediately and discontinue the charge process as batteries can cause fire, collateral damage and injuries.
For optimum charging results, the built-in charger requires a USB power supply capable of at least 2-3A output. Using a power supply with a lower output will result in very long charge times or the transmitter not charging if it is powered on while attempting to charge. The first time the transmitter is charged, the charge time may be 6-7 hours. Charge the transmitter when the low battery alarm sounds. See the System Settings section for information on setting the low battery alarm level.
Always charge the transmitter on a heat-resistant surface.

CAUTION: Never change the low voltage limit for Li-Ion
battery and damage both battery and transmitter.

CAUTION: Never leave a charging battery unattended.

CAUTION: Never charge the battery outside of the transmitter. Charging the battery outside of the
transmitter may interfere with the battery monitoring system, which can give false low battery warnings.
- Connect a 2-3A USB power supply (not included) to an AC outlet.
- Connect the included magnetic USB charging cable to the power supply.
- Insert the included magnetic USB-C adapter in the USB port on the back of the transmitter.
- Connect the USB charging cable to the magnetic adapter.
- The power button will illuminate green while charging. A fast press of the power switch will bring the battery charge status icon to the display.
- Charging is complete when the green light on the power button goes out. Disconnect the USB cable once charging is complete.
Disconnect the power supply from the power outlet.
The magnetic micro USB adapter can be left in the transmitter USB port for future use.
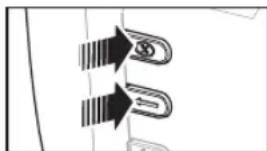
NAVIGATION
- Scroll the scroll wheel to move through the screen content or change programming values. Press the scroll wheel to make a selection.
- Use the Back button to go to the previous screen (for example, to go from the Mixing Screen to the Function List).
- Use the Clear button to return a selected value on a screen to the default setting.
- Direct Model Access enables you to access the Model Select screen without powering off the transmitter. Anytime the transmitter power is on, press the Clear and Back buttons to access the Model Select screen.
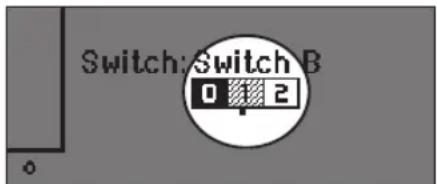
TIP: The tick mark below shows the current switch position. Roll to select the box, then click the scroll wheel to change the selected box. When the selected box is black it indicates the value or condition will act on that position, white means that position is not selected, and grey means that position is not assigned to anything (with the default color palette).
The following example shows the switch for Rates is in the 1 position (tick below the box), and the grey means the 1 switch position is not assigned to anything.
In order to reset back to default; select the switch position first, then set the curve number to match the switch position, then set the box for that switch position to black.
- Press and hold the scroll wheel while powering on the transmitter to show the System Setup list. No radio transmission occurs when a System Setup screen is displayed, preventing accidental damage to linkages and servos during changes to programming.
- Scroll from the main screen to view telemetry screens and the servo monitor.
- The Main Screen appears when you power on the transmitter. Press the scroll wheel once to display the Function List.
- When you want to change a value in a screen for a particular control position, move the control to the desired position to highlight the value you want to change, such as 0/1/2, up/down or left/right.
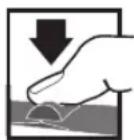
Enter, Choose or Exit
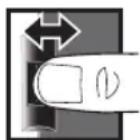
Scroll HoldPress
Move between options or change value in an option
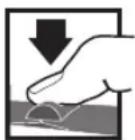
Hold for 3 seconds and release to move to the Main Screen
MAIN SCREEN
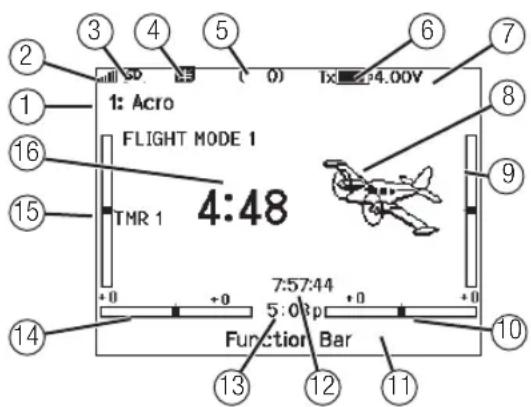
| Function | |
| 1 | Model name |
| 2 | Forward signal strength as reported by the telemetry |
| 3 | Telemetry data being recorded |
| 4 | Smart device connected |
| 5 | Throttle stick position (0-100) |
| 6 | Digital battery voltage (an alarm sounds and the screen flashes if the battery charge gets down to 3.2V.) |
| 7 | Modulation type, shown after binding (DSMX/DSM2) |
| 8 | Model avatar |
| 9 | Elevator trim (Mode 2, 4) Throttle trim (Mode 1, 3) |
| 10 | Aileron trim (Mode 1, 2) Rudder trim (Mode 3, 4) |
| 11 | Function bar |
| 12 | Transmitter system clock |
| 13 | Time |
| Function | |
| 14 | Rudder trim (Mode 1, 2) Aileron trim (Mode 3, 4) |
| 15 | Throttle trim (Mode 2, 4) Elevator trim (Mode 1, 3) |
| 16 | Model timer |
KEYBOARD STYLE
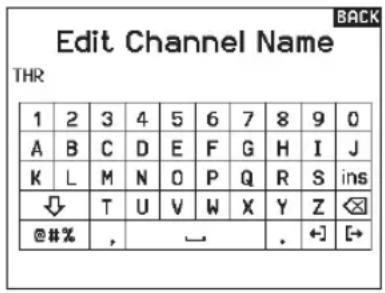
There are three different styles of keyboard entry for the letters.
- SwiftBoard - Full keyboard with numbers on top (default)
- RapidBoard - Full Keyboard with number pad on right
- As you scroll to the next line the selection will jump down to the next line. Scrolling through the keyboard characters is normally side to side. Holding the function key down while scrolling changes the navigation direction to up and down.
- A set of letters with accents appear when a vowel is highlighted. Press and hold the function key and click the scroll wheel to select an accented letter.
- Legacy - Original single line input, with scrolling through individual characters
AUTO SWITCH SELECT
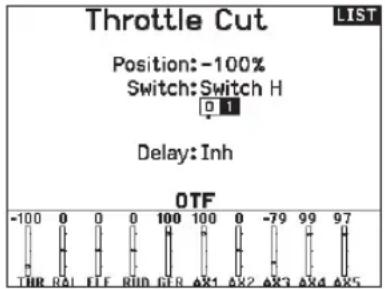
To easily select a switch in a function, such as a program mix, roll with the scroll wheel to highlight the switch selection box, and press the scroll wheel. The box around the switch should now flash. Verify the switch selection is now displayed as desired. When correct, press the scroll wheel to select this switch and complete the switch selection.
OTF (ON THE FLY) TRIM FUNCTIONS
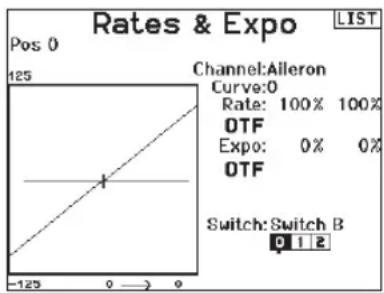
Many functions of the NX20 allow for making fine adjustment using available trim switches while flying your aircraft including:
- Dual Rate
- Exponential
- Programmable Mixes
- Pre-Configured Mixes
Flap System
To activate the OTF feature for a given function:
- Navigate to the desired function screen.
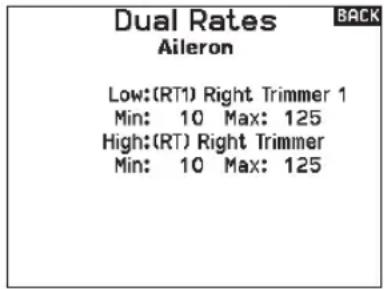
- Select OTF to open the Configuration screen.
- Select Inhibit to select a switch.
- Select the desired trim switch to assign to the trimmer value. Each trim button may only be assigned to a single function at a time. If a trim button is already in use elsewhere, a warning dialog appears asking to confirm the change to the new function.
- Select the Min / Max values to assign a minimum and maximum value for the trimmer. The minimum value is the lowest value the trim button will adjust to. The maximum value is the highest. Touch OK when the Min / Max values are set.

CAUTION: Never assign a minimum or maximum value that could negate the travel of a control surface, such as
with dual rates. Setting a dual rate value of 0% will keep the control surface from moving and could cause a loss of control of the aircraft.
PRE-INSTALLED BNF MODEL FILES
The NX20 is pre-loaded with model files for many Horizon Hobby BNF aircraft. For new product releases download the latest selection of model files from www.HorizonHobby.cc/NXreload
BNF: Select Add new BNF from Model Select and search for your model. When you choose a BNF model file a new model will be created using the preconfigured settings based on the aircraft manual recommendations.
Template: There are generic model files available under Model Select to cover model files that are not available in the BNF model file list. Select Add New from Template for simple aircraft setups.
IMPORTANT: After selecting a BNF or template model file you must follow the instructions from your aircraft manual to complete setup prior to flight.
USB AND INTERNAL MEMORY
The internal memory may be accessed via the USB-C port on the transmitter to enable the following tasks:
- Update Spektrum AirWare software in the transmitter
Install/Update sound files - Back up models for safe keeping
- Export or import model setup files for sharing with friends
- Import/Export Color Palettes
To connect to the internal memory:
- Connect a Micro USB cable to your PC and the micro USB connector on the back of the transmitter.
- Power ON the transmitter, enter the system menu -> USB storage, select Access Internal Storage, the NX20 will connect to your PC.
- Complete your file transfer(s).
- Press the Back button or the roller to exit.
- Disconnect the USB cable from your transmitter.
Mass Storage
BACK
USB Mass Storage/Transfer Mode, other functions deactivated.
Attach a USB cable to the radio and your PC.
Click BACK or Roller to exit.
EXTERNAL MEMORY CARD
Installing An External Memory Card
A micro memory card (not included) enables you to:
- Import (copy) models from any compatible* Spektrum AirWare™ transmitter
- Export (transfer) models to any Spektrum AirWare transmitter*
- Update Spektrum AirWare software in the transmitter
Install/Update sound files - Back up models for safe keeping
- NX radios only export NSPM files. NSPM files may be read by any NX or IX radio. You can go from DX to NX, but not from NX to DX.
To install or remove a Memory card:
- Power OFF the transmitter.
- Press the Memory card into the card opening with the card label facing up.
IMPORTANT: Memory cards over 32gb may be used. When cards are 32gb or smaller, they must be in FAT or FAT32 format. When larger than 32gb, the cards must be in exFAT format. Cards must be SDHC or SDXC type. "Ultra Capacity" (SDUC) cards are not compatible.
MEMORY CARD FUNCTIONS
Update Spektrum AirWare™ Software
NOTICE: The orange LED Spektrum bars flash and a status bar appears on the screen when Spektrum AirWare software updates are installing. Never power off the transmitter when updates are installing. Doing so may damage the system files.
NOTICE: Before installing any Spektrum AirWare files, always Export All Models to an Memory card separate from the Memory card containing the update. The update may erase all model files.
For more information on Spektrum AirWare software updates, visit www.spektrumrc.com.
Software updates may be completed with either the micro Memory card or using WiFi. See the section in this manual covering WiFi for more information about updating with WiFi.
Automatically Installing Spektrum AirWare Software Updates
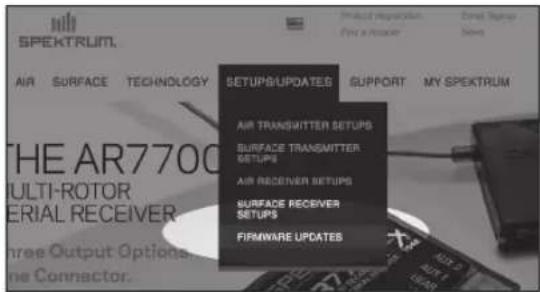
- Go to www.sphektrumrc.com. Under the Settings/Updates pull down tab, select the Firmware Updates link (shown).
- Log into your Spektrum account.
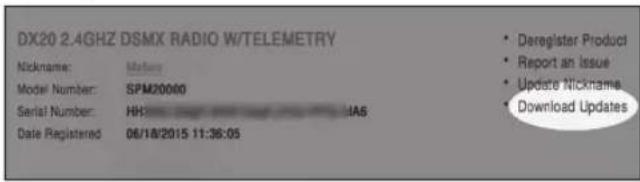
- Find your registered transmitter in the MY PRODUCTS list and click on Download Updates. Follow directions on the screen for downloading the update to an Memory card through your computer.
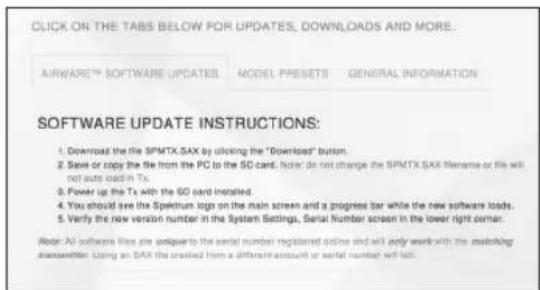
- Eject the Memory card from the computer.
- Make sure the transmitter is powered off and install the Memory card into the transmitter.
- Power on the transmitter and the update automatically installs in the transmitter.
Manually Installing Spektrum AirWare Software Updates
- Save the desired Spektrum AirWare version to a memory card.
- Insert the memory card into the transmitter.
- Enter the System Setup menu and open Transfer SD Card.
- Scroll down to SD Card and press to change. Internal is the memory built into the transmitter and External is the memory card which is removable. Select External.
- Select Category and scroll to Special Functions.
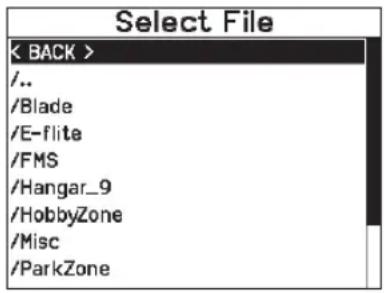
- Scroll to Options, press the scroll wheel to select, and scroll to Update Firmware. Press the scroll wheel and the Select File screen appears.
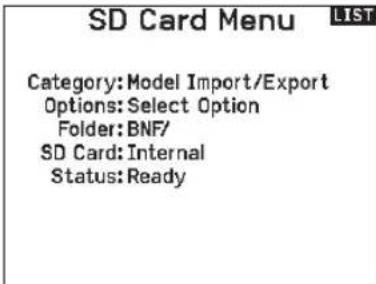
- Select the desired Spektrum AirWare version from the File List. When updates are installing, the transmitter screen is dark. The orange LED Spektrum bars flash and the update status bar appears on the screen.
NOTICE: Do not power off the transmitter when updates are installing. Doing so will damage the transmitter.
Screen shots from www.spektrumrc.com are correct at time of printing but may change at a future date.
MODEL TYPE PROGRAMMING GUIDE
Menu options show up on model type selection. These menu options vary between Model Types (Airplane, Helicopter, Sailplane and Multirotor), but are identical for all models in that type. Subsequent aircraft type (Aircraft, Swashplate, Sailplane or Multirotor) selections make other menu options appear.
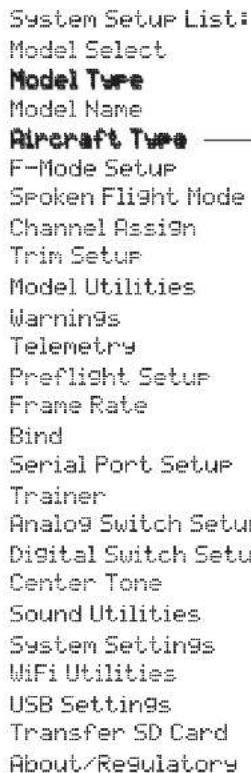
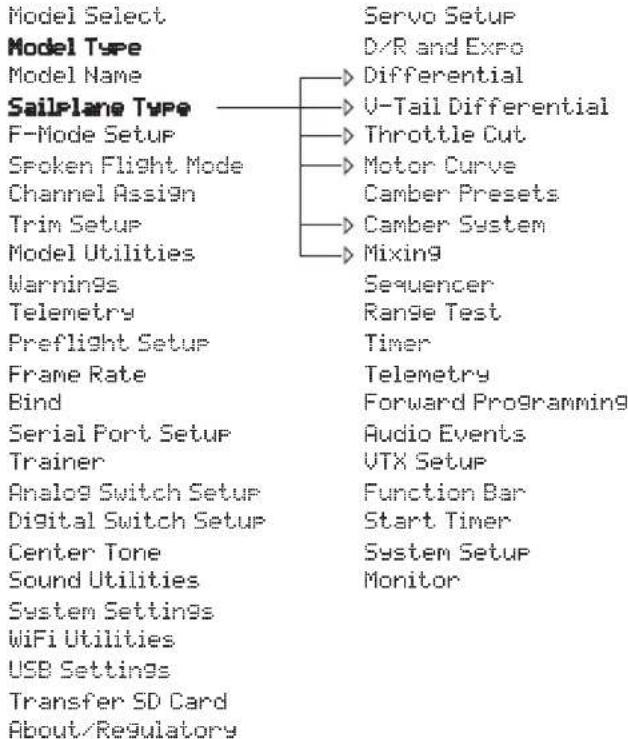
System Setup List: Model Select
Model Type
Model Name
Suashplate Type F-Mode Setup
Spoken Flight Mode Channel Assign
Trim Setup
Model Utilities
Warnings
Telemetry
Freflight Setup
Frame Rate
Bind
Serial Port Setup Trainer
Analog Switch Setup
Digital Switch Setup
Center Tone
Sound Utilities
System Settings
WiFi Utilities
USB Settings
Transfer SD Card
About/Regulatory
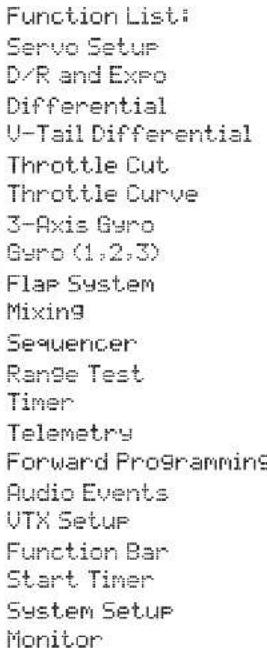
Function List:
Servo Setup
D/R and Expo
Throttle Cut
Throttle Curve
Pitch Curve
SwashPlate
Guro
Tail Curve
Mixing
Sequencer
Range Test
Timer
Telemetry
Forward Programming
Audio Events
UTX Setup
Function Bar
Start TimerSystem Setup
Monitor
Model Select
Model Type
Model Name
Aircraft Type
F-Mode Setup
Spoken Flight Mode
Channel Assign
Trim Setup
Model Utilities
Warnings
Telenetry
Preflight Setup
Frame Rate
Bind
Serial Port Setup
Trainer
Analog Switch Setup
Digital Switch Setup
Center Tone
Sound Utilities
System Settings
WiFi Utilities
USB Settings
Transfer SD Card
About/Regulatory
Control Setup
D/R and Expo
Motor Cut
Motor Curve
Mixing
Sequencer
Range Test
Tiner
Telemetry
Forward Programming
Audio Events
UTX Setup
Function Bar
Start Timer
System Setup
Monitor
SYSTEM SETUP
Enter the System Setup menu to define baseline settings for your model such as what type of aircraft, wing type, flight mode setup, etc. The options chosen in the system menu configures the function list for the chosen model number for your requirements. Some options, such as the flap menu, will not appear at all in the function list until they are selected within the System Setup menu.
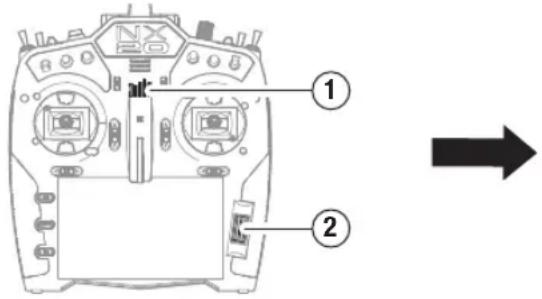
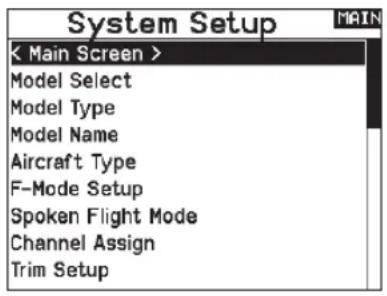
Press and hold the scroll wheel (2) while powering ON the transmitter (1). You can also enter the System Setup from the Function list without turning the transmitter off. No radio transmission occurs when a System Setup screen is displayed, preventing accidental damage to linkages and servos during changes to programming.
A caution screen will appear that warns that RF will be disabled (the transmitter will no longer transmit). Press YES if you are sure and want to access the System List. If you are not sure, press NO to exit to the main screen and continue operation.

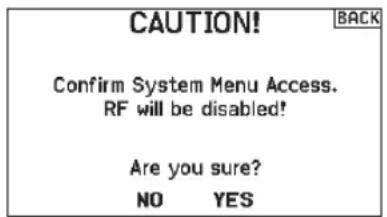

WARNING: Do not press YES unless the model is turned off or the model is secured.
If you do not press YES or NO, the system will exit to the main screen and continue operation within approximately 10 seconds.
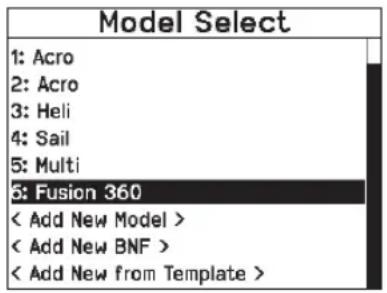
Model Select
Model Select enables you to access any of the 250 internal model memory locations in the Model Select list.
- Scroll to the desired model memory in the Model Select list.
- When the desired model memory is highlighted, press the scroll wheel once to select the model. The transmitter returns to the System Setup List.
- Add a new model by rolling to the bottom of the list. You will then be prompted with the Create New Model screen, with the option to create a new model or cancel. If you select Cancel, the system will return to the Model Select function. If you select Create, the new model will be created and now be available in the model select list.
Model Type
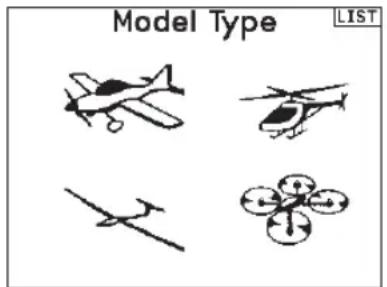
Model type defines some of the basic features in the Function List and the System Setup menus. When you set the model type it changes what the options are in the Wing Type/Swash Type menu, and that selection further defines which options are available in the Function List. Select from Airplane, Helicopter, Sailplane or Multicopter model types.
Model type is set when adding a new model, or it may be changed in the System Setup menu:
- Select Model Type in the System Setup menu.
- Scroll to the desired model type and press the scroll wheel. The Confirm Model Type screen appears.
- Select Yes and press the scroll wheel to confirm the model type. All data will be reset. Selecting No will exit the Confirm Model Type screen and return to the Model Type screen.
IMPORTANT: When you select a model type, the transmitter will delete any programming data in the current model memory. Always confirm the desired model memory before changing model types. It will be necessary to re-bind after resetting the model type
Model Name
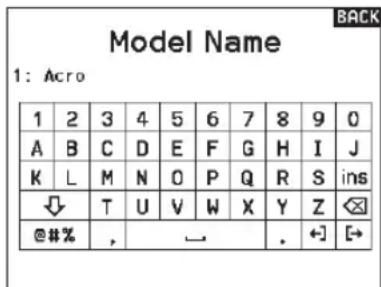
Model Name enables you to assign a custom name to the current model memory. Model names can include up to 20 characters, including spaces.
Aircraft Type
This menu is only available in Airplane Mode. See ACRO (Airplane) section for set up.
Sailplane Type
This menu is only available in Sailplane Mode. See SAIL (Sailplane) section for set up.
Swash Type
This menu is only available in Helicopter Mode. See HELI (Helicopter) section for set up.
Aircraft Options
This menu is only available in Multirotor Mode. See MULTI (Multirotor) section for set up.
Flight Mode Examples
Flight modes enable a pilot to organize transmitter functions into groups so they are easier to manage, eliminating the need to flip multiple switches for flying configuration changes. If a single 3 position switch doesn't offer enough flight mode choices, you can expand the flight mode configuration by using 2 or more switches, enabling up to 10 flight modes, depending on the model type chosen. A setup table helps you define what each switch position does. Changing flight modes can also trigger voice callouts, giving you confidence in what the switch change will do.
For example, if your airplane has flaps, retracts, and SAFE: On a single switch you may configure one flight mode for takeoff which adds a small amount of flaps with the gear down and SAFE activated in one switch position, a second flight mode for normal flight with flaps and gear up and SAFE off on a second switch position, and a third flight mode for landing with flaps fully deployed, retracts down and SAFE activated on a third switch position. By putting all of these features on one flight mode switch, you don't have to work separate flaps, gear and SAFE switches during the flight.
Helicopters take advantage of flight modes by using throttle curves. Having a "normal" flight mode enables the model to start from a stop (or idle) and bring the rotor head up to speed and get the helicopter in the air with a low headspeed. Flight modes are essential for helicopters to be able to fly inverted and do aerobatics. "Idle up" or "stunt" modes enable the use of a throttle curve which keeps the motor running at the same speed for all throttle stick positions. While in this mode the throttle stick is used to control collective pitch exclusively. Setups commonly include multiple "idle up" flight modes, one for medium head speed, and another for high head speed.
Sailplanes take advantage of flight modes in many ways by changing the way the control surfaces respond to control inputs. In a launch mode the throttle stick may move the flaps and ailerons away from neutral with the stick all the way up, to a slight amount of camber (flaps down) with the stick all the way down. In a cruise mode all the flaps and ailerons travel together, up stick offers a small amount of reflex (flaps move up), and down stick offers a small amount of camber. There may be an aerobic mode with high rates and flaps mixed to operate with the ailerons. A crow mode can provide maximum drag with the flaps and ailerons moving in opposite directions. In this mode, when the stick is up the control surfaces are neutral, and when the stick is down the flaps and ailerons are deployed. Elevator trim compensation needs change with these mode changes as well, so for each different flight mode, different elevator compensation values are necessary.
Flight Mode Setup
Use the Flight Mode Setup menu to assign switches to flight modes. Select Switch 1, scroll to choose a switch. Enabled Flight Modes will show how many flight modes are available with the chosen switch(es). Flip the switch to see what the flight mode will be in each switch position, the mode is displayed at the bottom of the page. If you require more than 3 flight modes, select another switch for Switch 2.
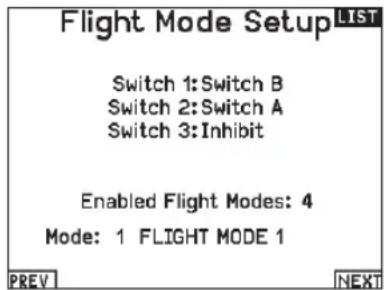
You can assign up to ten flight modes using any combination of up to three switches. The maximum number of flight modes and switches available depend on model type.
See the options based on aircraft type in the table below. In Sailplane mode you can also assign a priority switch. When the priority switch position is active, only the current flight mode is active, regardless of other switch positions.
| Mode Number of Switches Number of Flight Modes | ||
| ACRO 3 10 | ||
| HELJ 3 (incl.uding Throttle Hold) 5 (incl.uding Throttle Hold) | ||
| SAIL 3 10 | ||
| MULTI 2 5 | ||

Flight Mode Table
Select NEXT from the Flight Mode Setup menu to access the Flight Mode Table menu. This is where you define how the combination of switches is used to access all of the available flight modes. The assigned switch(es) and their current position are shown at the top. In the center of the screen the table gives a visual representation of the switch position. Press the scroll wheel when FLIG is selected and the box will change to show flight mode selection. Then, you can roll the scroll wheel to change the flight mode for that position on the table. Flip through all possible combinations on your selected switches and define what flight modes you want for each combination.
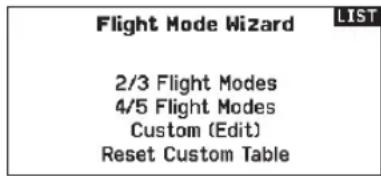
Flight Mode Wizard
Press PREV from the Flight Mode Setup menu to access the Flight Mode Wizard.
Spoken Flight Mode
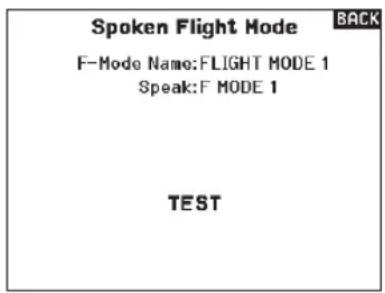
Spoken Flight Mode enables you to chose what you want the transmitter voice callout to be for flight mode changes.
- Set up the flight modes on the Flight Mode Setup page.
- View the Spoken Flight Mode page from the System Setup menu.
- Set the flight mode switch position(s) so the flight mode where you want to make changes is selected. Select the flight mode you wish to change by setting the flight mode switch position(s) to that flight mode. The selected flight mode is shown in the F-Mode Name (by default, unless you change the flight mode names).
- Select F-Mode Name to change the written name of the flight mode. Choose the name of the flight mode by pressing the scroll wheel to select and rolling to change the selection. Press the back key to exit.
- Select Speak to choose the desired voice callout.
IMPORTANT: If you select a telemetry data point it must have that sensor information available from the model or it will just say "no data"
- Test the voice callout by scrolling to TEST and pressing the scroll wheel.
Channel Assign
Channel Input Configuration
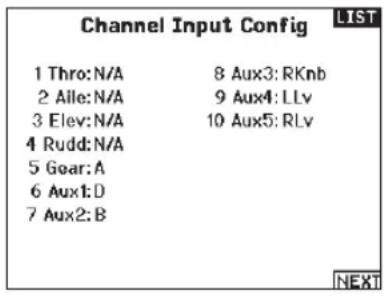
The Channel Input Configuration screen enables you to assign a transmitter channel to a different control stick or switch.
- Select NEXT on the RX Port Assignments screen to access the Channel Input Configuration screen.
- Scroll to the transmitter channel you wish to re-assign and press the scroll wheel. The box around the current input selection flashes.
- Scroll left or right to select the desired control stick or switch.
- Press the scroll wheel to save the selection.
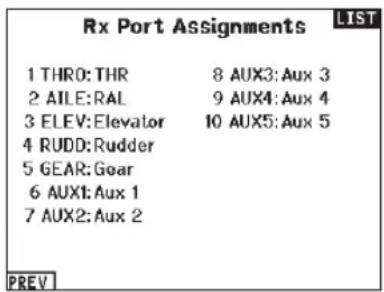
Rx Port Assignments
The RX Port Assignment screen is a sub menu past Channel Input Configuration. Select Next in the lower right corner of the Channel Input Configuration screen to open RX port Assignments. This function allows you to re-assign almost any receiver channel to a different transmitter channel.
- Scroll to the receiver channel you wish to change.
- Press the scroll wheel once and scroll left or right to change the receiver input selection.
- Press the scroll wheel a second time to save the selection.
IMPORTANT: You cannot assign a mix to a channel that has been moved. Create the mix first, then move the channel. This includes wing and tail type settings which feature integrated mixing. Select the type first, then re-assign if neccessary.
NOTICE: Assignment changes made on the transmitter do not change AS3X or SAFE settings in the receiver.
Trim Setup
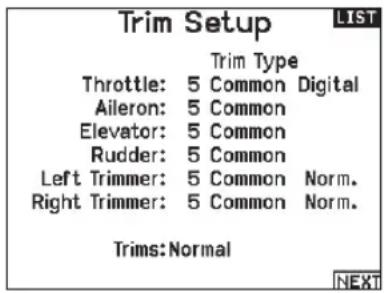
Use the Trim Setup screen to change the size of the trim step and the trim type.
Trim Step
Adjusting the trim step value determines how many " clicks" of trim you input each time you press the trim button. Changing the trim step value to 0 disables the trim for the channel.
To change the trim step value:
- Scroll to the trim step channel you wish to change.
- Select the trim step value and scroll left or right to change the value.
- Press the scroll wheel to save the selection.
Trim Type
The two Trim Type options are Common and F Mode.
Common trim type maintains the same trim values for all flight modes.
FMode trim type enables you to save trim values for individual flight modes if you find, for example, the aircraft requires aileron trim in Flight Mode 1 but not in Flight Mode 2.
Trim Assignment
In a few instances, you can reassign a trim to a different location.
Aircraft Model Type
Throttle
- Throttle Digital trim button (default)
Left Lever
Right Lever
Throttle Trim Type
Common
- Flight Mode
Trim Location
Normal and Cross trim types are available. Normal trims align with the control stick; for example, the throttle trim is next to the throttle stick.
Cross trims reverse the position of the trims; for example, the throttle trim is next to the elevator stick and vice versa.
To change the Trim Position from Normal to Crossed, select Normal at the bottom of the Trim Setup screen and press the scroll wheel.
IMPORTANT: Crossed trims will cross both sets of trims for both gimbals.
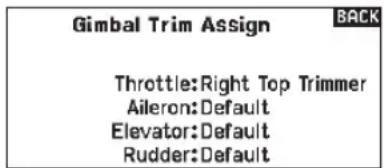
Gimbal Trim Assign
Select Next to view open trim mapping of the primary four flight controls. Options for these include left or right trimmer or top trimmer.
Model Utilities
In the Model Utilities function you can create a new model, delete a model, copy a model, reset a model to default settings and sort the model list.
Create New Model
Use this selection to create a new model in the model select list.
- Select Create New Model. Within this screen, you will have the option to create a new model or cancel.
- Select the model type. Choose the aircraft image to define the model type for a blank model file, or select Template to load a template file. A SAFE template and a SAFE Select template come pre-loaded on your NX20.
- Templates are saved in the templates folder on the internal memory (accessible with the USB connection, new .NSPM files may be added)
- The SAFE template puts the 3 position flight mode switch (Channel 5) on switch B. The Panic button is on the I button (Channel 6). SAFE airplanes have a fixed configuration in the receiver and will match this setup after binding.
- The SAFE Select template uses the D switch for flaps (Channel 5), the A switch for retracts (Channel 6), and the B button to turn SAFE select ON or OFF (Channel 7). Selecting this template alone will not enable SAFE Select, it must be done during the bind process. Also, the switch must be assigned in the receiver after binding, and the flap travel values need to be applied. See your airplane manual for more information.
- If you select Cancel, the system will return to the Model Select function.
- If you select Create, the new model will be created and now be available in the model select list.
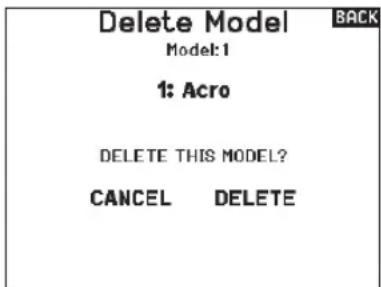
Delete Model
Use this selection to permanently delete a model from the model select list. If you do not wish to delete a model, select Cancel to exit the page.
- To delete a model, highlight the model listed. Press to select, then roll to the model name. Press the scroll wheel to select.
- Select DELETE to delete the model.
Model Utilities

Create New Model
Delete Model
Copy Model
Reset Model
Sort Model List
Validate All Models
Delete All Models
Export as Template
Create New Model
Do you want to create a new model?
Model Type:
CANCEL
CREATE

WARNING: Complete a preflight check before
attempting to fly any model with a new model file or
template. If you have the controls set up incorrectly for your aircraft, it may result in loss of control and a crash.
Select the BNF model type setting to access a list of pre-configured model files for Horizon Hobby BNF aircraft.
Copy Model
The Model Copy menu enables you to duplicate model programming from one Model List location to another.
Use Model Copy to:
- Save a default model copy before experimenting with programming values
- Expedite programming for a model using a similar programming setup
IMPORTANT: Copying a model program from one model memory to another will erase any programming in the "To" model memory.
To copy model programming:
- Make sure the model program you wish to copy is active. If the desired model program is not active, select Cancel and change the active model in the Model Select menu.
- Select the model memory next to "To" and scroll to the desired model memory. Press the scroll wheel once to save the selection.
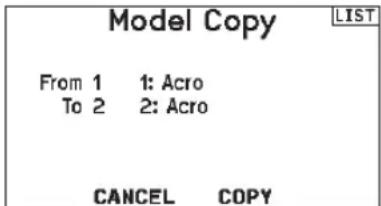
- Select Copy and the Confirm Copy screen appears.
- Select Copy to confirm. Selecting Cancel will return to the System Setup screen.
- Select the "To" model as the current model, then bind the transmitter and receiver. Copying a model does not copy the bind from the original model.
You cannot use the Model Copy screen to copy model programming to a memory card. To copy model programming to a memory card, see "Transfer Memory Card".
Model Reset
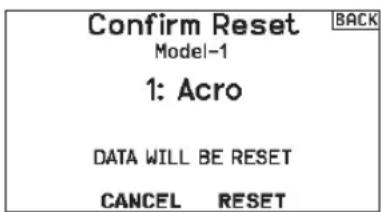
Use the Model Reset menu to delete all model programming in the active model memory. Reset returns all model settings to the default settings and erases all programming in the selected model. After a model reset, it is necessary to re-bind.
Sort Model List
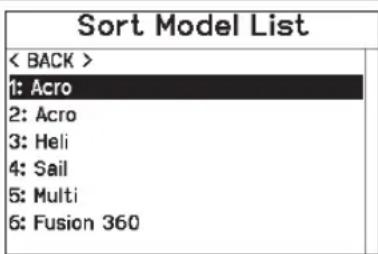
With this function you can sort the model order in the model select function. This is helpful to group similar models together to make them easy to find. To move a model, highlight the model that you wish to move with the scroll wheel, then press the scroll wheel to select it. Scroll the scroll wheel to move the selected model to the position desired. Press the scroll wheel when you have the model in the position desired.
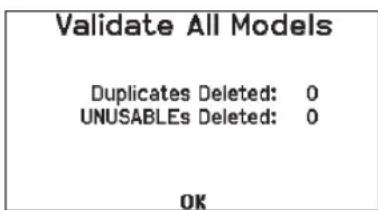
Validate All Models
Run this option to verify your model files are valid. If there are any corrupted model files this process can detect them.
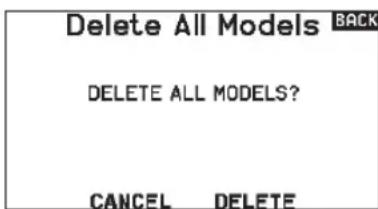
Delete All Models
This option will delete all model files. Only run this option if you want to remove all models files, they cannot be recovered once this option has been executed.
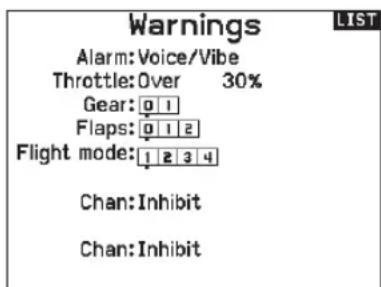
Warnings
TheWarnings menu enables you to program a voice, tone or vibration alert during power on of the transmitter for any selected switch or channel position.
The alarm activates and an alert message appears on the screen if a specific switch or control stick is in an unsafe position when you power the transmitter on.
Return the switch or control stick to the safe position to silence the alarm.
For safety reasons, the default throttle alarm activates if the throttle position is above 10% .
Telemetry

CAUTION: If you access the Telemetry menu from the Function List, you may see a Frame Loss appear when
you exit the menu. The Frame Loss is not an error, but there will be a momentary loss of radio signal when exiting the Telemetry screen. DO NOT access the Telemetry menu during flight.
The telemetry system in the NX20 is compatible with all generations of Spektrum telemetry DSMX telemetry systems including module based, receivers with integrated telemetry, and Smart technology.
Telemetry data
Select the Telemetry menu. Each slot on the telemetry list can be populated with one telemetry sensor. Select a sensor to adjust by scrolling to the line with the scroll wheel, and press the scroll wheel. Scroll to select the sensor. Press the scroll wheel to open the page where you can adjust the details for that sensor. Each sensor will have a different page to reflect that type of data. Select Inh under Alarm to choose the type of alarm desired. Options include Inh, Tone, Vibe and Voice.
Set the Status and Warning Reports to alert you of telemetry data.
Status Reports:
Status Reports automatically report the data on a given interval. Leave the setting at INH to keep it off, or select a time setting for how often the transmitter reports the data for that sensor.
Warning Reports:
Warning Reports determine how often a telemetry alert occurs, if an alarm is active.
Voice reports may also be set in Audio Events, which is accessible from the Function List.
Telemetry Auto-Configuration
When a receiver is bound to the transmitter, it will complete the auto-config setup automatically.
IMPORTANT: The Auto-Config option is not available from the System Setup>Telemetry menu. RF signal must be transmitting when you use the Auto-Config option. When the System Setup menu is active, RF signal is off. Use the Telemetry menu in the Function list to access Auto-Config.

Settings
Display
Tele: When you press the scroll wheel, the Telemetry screens appear and the Main Screen is disabled.
Main: Telemetry alerts appear on the Main screen, but all Telemetry screens are disabled.
Roller (Default): Allows you to toggle between the Telemetry screens and the main screen by pressing the scroll wheel.
Auto: The Telemetry screen automatically appears as soon as the transmitter receives data from the telemetry module.
Units
Scroll to Units and press the scroll wheel to change between US and Metric.
Priority Monitor
Priority Monitor enables a screen showing the most active sensors reporting data. It is a tool for third parties developing their own sensors and custom telemetry applications. It may be set to Active or inhibit (default).
Settings
Display:Roller
Units:US
Priority Monitor:Inhibit
File Settings
This is used to select the data logging settings. Default is to automatically create a telemetry log file on the internal drive in a folder named AutoLog. This can be inhibited by changing the "Enabled" mode in the Telemetry File Settings menu from Auto to either Yes (logs based on the user settings) or No (no logging). The filename for autogenerated log files is based on the model number, name, and date. Only the five most-recent log files will be retained.
File Name
- Select File Name to assign a custom file name.
- The File Name screen appears, allowing you to name the file as you would for a Model Name or Flight Mode Name. The file name can include a maximum of 8 characters.
- Press BACK to save the name.Start
- Select Start to assign a specific switch position or stick position that activates Data Logging.
- Press the scroll wheel once to save the selection.
One Time
When active the telemetry data logging will automatically start logging at connection. This feature may be set to Active or inhibit (default).
Enabled
When Enabled is set to NO, Data Logging is turned off. Select YES to save Telemetry data to the Memory card. Auto will save to the internal memory if no external card is inserted and will save to the root folder on the external card if it is inserted.
Input Data
This feature records stick and switch positions, when combined with other telemetry sensor data it can help diagnose flight conditions or crashes. It may be set to Active or inhibit (default).
File Settings
File Name:001~1 Acro.TLM
Start:Inhibit
One Time:Inhibit Enabled?Yes
Input Data?No
BACK
Preflight Setup
The Preflight Setup menu option enables you to program a pre-flight checklist that appears each time you power on the transmitter or when you select a new model memory. Each item on the list must be confirmed before you can access the Main Screen.
Preflight Setup
LIST
Preflight 1:Act Prop Secured
Preflight 2:Act Flight Batt. Charged
Preflight 3:Act Flight Mode Selected
Preflight 4:Act Low Rates Confirmed
Preflight 5:Inh
Praflight 6:Inh
Preflight 7:Inh
Modulation:Act
Execute:Per Session
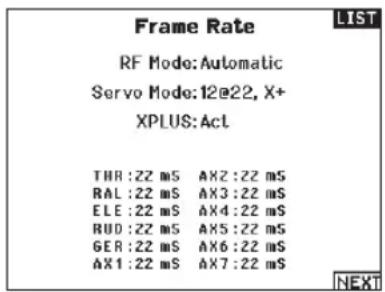
Frame Rate, RF Mode, and Failsafe
The Frame Rate menu enables you to change the frame rate and modulation mode. Select the option you wish to change and press the scroll wheel.
You must use digital servos if you select 11ms frame rate. Analog and digital servos can be used with a 22ms frame rate.
RF Mode
We recommend using Automatic (default) modulation mode. When Automatic is active, the transmitter operates in DSMX with DSMX receivers and DSM2^® with DSM2 receivers. The transmitter automatically detects DSM2 or DSMX during binding and changes the mode accordingly to match the receiver type you are using. If you select Force DSM2, the transmitter operates in DSM2 regardless of whether it is bound to a DSM2 or DSMX receiver. DSM2 is not available on EU versions of the NX20.
Servo Mode
Options for Servo Mode are Default 22ms, Hybrid 11/22ms, or 14 Channel 22ms.
Always use 22ms when using analog servos.
- When bound to a 14CH mode capable receiver, a 14CH mode option is available which offers 14 channels at 22ms.
- 11ms settings require digital servos or direct communication with the Spektrum serial signal (e.g., a flight controller).
XPLUS
Enabling XPLUS defaults the frame rate to 22 ms. This enables access to all 20 channels available on the NX20 through the XPLUS 8 module (SPMXP8000), the Spektrum AR20310T or AR20400T receiver (SPMAR20310T, SPMAR20400T).
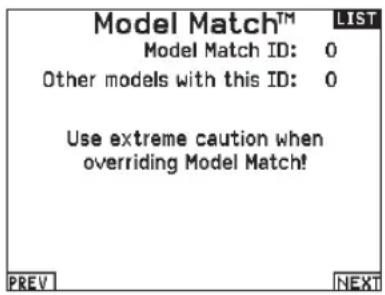
Model Match
Select NEXT to view the Model Match over-ride page. Each model file has a model match number associated with it. Normally each file has a unique number, but the Model Match ID page enables the pilot to assign more than one model file to the same Model Match ID (On the same transmitter). A pilot may have several different model setups for the same model, and with the same Model Match ID assigned they will connect without having to rebind (You will have to rebind once after changing the model match ID). When you change the Model Match ID, the system will show the number of other models with that ID assigned, along with the model name(s).
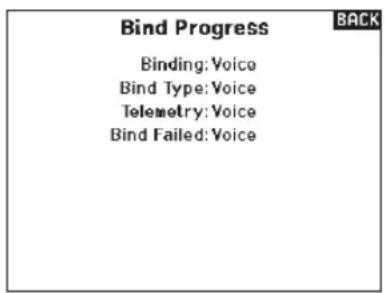
Bind Progress
Select NEXT to view the Bind Progress page. This page enables settings for the bind status to be reported at binding. Binding, Bind Type, Telemetry, and Bind Failed can all be set to Voice or INH.
NOTICE: While DSMX allows you to use more than 40 transmitters simultaneously, do not use more than 40 transmitters simultaneously when using a DSM2 receiver or a transmitter in DSM2 mode.
IMPORTANT: For EU versions, DSM2 operation is not available.
Bind
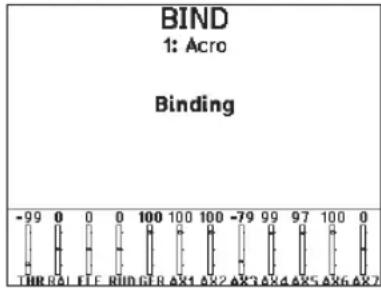
The Bind menu enables you to bind a transmitter and receiver without powering off the transmitter. This menu is helpful if you are programming a model and need to bind the receiver for failsafe positions.
See your receiver manual for information about setting failsafe positions.
Serial Port Setup
Serial Output
The Serial Output menu manages serial port usage on the back of the transmitter. This port is designed to communicate with external RF devices using digital communication protocols. The NX20 includes the SRXL2 as well as the CRFS protocols for compatibility with the TBS Cross Fire and Cross Fire 2. In addition, the NX20 is engineered to deliver a 9.5V power supply for external devices. Any changes made in this menu will not be applied until the RF is re-enabled.
Serial Port Protocol
Scroll to the Protocol. Select Inhibit, SRXL2, Cross Fire 1 or
Cross Fire 2. Selecting the Cross Fire 1 or Cross Fire 2 options will enable the CRFS data stream. Connecting the Cross Fire system requires the Cross Fire serial port adaptor (SPMA3090, not included). Consult the manufacturer's manual for use of any external RF device. Horizon Hobby does not provide support for external RF devices connected to the NX20 transmitter.
Spektrum RF
Select Active to transmit Spektrum RF along with the data stream coming from the data port when other protocols are selected. The switch defaults to Active when the Protocol is set to Inhibit.
External Power (9.5v)
Select On when using an external power source for the external device. Select Off to use the internal power of the NX20 to power the device.
IMPORTANT: Battery use will be affected and the expected use time will decrease when using this option to power external devices.
Crossfire Telemetry
Crossfire telemetry is supported through Auto-Config in the telemetry menu, although not all crossfire telemetry sensors are supported. When Crossfire is connected with telemetry the RF indicator on the main screen will show the Crossfire signal strength. Color coding based on telemetry data may also be configured to use information from your Crossfire.
Serial Output
Protocol:Inhibit Spiktrum RF:Active ExtPower:Off
Trainer
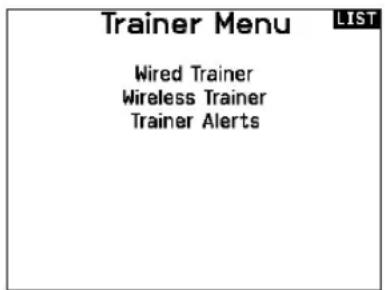
All options related to programming and using the trainer functions are controlled with the Trainer menu.
Three options are available in the trainer menu:
Wired Trainer
Wireless Trainer
- Trainer Alerts
Wired Trainer and Wireless Trainer have similar options when connecting two transmitters for the purpose of training a student pilot. In addition, an advanced menu for FPV pilots in both the Wired and Wireless Trainer menus provides specialized functions needed specifically for FPV head tracking applications.
Wired Trainer
Wired Trainer enables a student and instructor to work together by physically connecting two transmitters together with a cable. The optional Spektrum wired trainer adaptor (SPMA3091, not included) and trainer cable (SPM6805, not included) are required for wired trainer operation. The wired trainer adaptor connects to the serial port on the back of the transmitter. The trainer cable plugs into the adaptor.
Wired trainer supports up to 8 input channels with PPM based trainer systems connected. If the NX20 is used with a wired connection, the correct wired trainer option must be selected in the trainer menu and the student mode started or the wired trainer connection will not work.
When Wired Trainer mode is selected, a menu will appear. Select from the following trainer options:
Standard Instructor
This training mode designates the NX20 as the instructor, and requires the student transmitter to be fully configured, including reversing, travel, mixes, etc. This mode is helpful when the student has the full model configuration complete.
Wireless Trainer
Wireless Trainer enables instructors and students to work together without any cables connecting the transmitters. Wireless Trainer supports up to 10 channels of input depending on the number of channels available from the student transmitter or wireless headtracker. It is only necessary to put the instructor transmitter into the special wireless trainer bind mode. The student transmitter uses the normal binding process. Wireless Trainer modes are compatible with any Spektrum DSMX or DSM2 transmitter, Spektrum Focal Headsets, and the small MLP4 and MLP6 transmitters from Horizon Hobby RTF models which include Spektrum technology.
Pilot Link Instructor
This training mode designates the NX20 as the instructor, and requires the student transmitter to have no settings applied, all of the reverse settings to normal and all travel settings at 100% . This option is intended to make it as simple as possible to connect any student transmitter to any airplane.
FPV
This mode is available for connecting a head tracking system to the NX20 for FPV use. See the Headtracking FPV Setup section for more information.
P-Link Student
This training mode designates the NX20 as the student transmitter. Use this option if the instructor transmitter is set up with Wired Pilot Link Instructor. A Start Student Mode button appears, which activates and deactivates wired trainer student capabilities. In this mode, the NX20 should be left on a default ACRO model with no changes.
Normal Student
This training mode designates the NX20 as the student transmitter. Use this option if the instructor transmitter is set up with Wired Programmable Instructor. A Start Student Mode button appears, which activates and deactivates wired trainer student capabilities. In this selection the NX20 must be fully configured to operate the aircraft.
When wireless trainer mode is selected, a drop down menu will appear with the following options:
Programmable Instructor
This training mode designates the NX20 as the instructor and requires the student transmitter to be fully configured, including reversing, travel, mixes, etc. This mode is helpful when the student has the full model configuration complete.
Pilot Link Instructor
This training mode designates the NX20 as the instructor and requires the student transmitter to have no settings applied, all of the reverse settings to normal and all travel settings at 100% . This option is intended to make it as simple as possible to connect any student transmitter to any airplane.
FPV
This mode is available for connecting a head tracking system to the NX20 for FPV use. This option is covered further in the Headtracking FPV Setup section.
Instructor Transmitter Configuration
- Select the type of trainer mode for the application (Wired or Wireless, Programmable Instructor or Pilot Link Instructor).
- Choose whether or not to enable Instructor Over-Ride. This setting defines how the instructor can resume control from the student. When enabled, the instructor must not move the sticks when the student is given control. Moving the sticks or moving the selected trainer switch will return control to the instructor.
With Instructor Over-Ride disabled, the switch position determines who is in control.
When Switch I or the right or left trim button is selected, Instrutor Over-Ride is disabled by default. When any other switch is selected, Instrutor Over-Ride is enabled.
- If Wireless Trainer mode was selected in step 1, Bind the student transmitter to the instructor transmitter. See the Binding Wireless Trainer section.
- Determine which channels to assign to the student when given control by moving the on-screen switch for each channel. Students can be given control of a single channel or all channels, as the instructor sees fit.
Binding Wireless Trainer
Binding the NX20 wireless trainer feature as an instructor transmitter is not the same as binding the NX20 to an aircraft. The NX20 has a built-in receiver dedicated to the wireless trainer. The wireless trainer menu screens include a Bind button within the menu.
-
Touch the Bind button in the Wireless Trainer screen to enter trainer bind mode.
-
Long press on BIND.
- Place the student transmitter in normal bind mode.
- When the transmitters have completed the binding process, check the settings by opening the monitor screen on the instructor transmitter, giving control to the student transmitter and checking the monitor for correct control outputs.
Head Tracking FPV Setup
Wired FPV Mode: Enables the use of a headset with head tracking or another transmitter to control an onboard camera gimbal by physically connecting to the NX20 with a cable. The optional Spektrum wired trainer adaptor (SPMA3091, not included) and a trainer cable (SPM6805, not included) are required for wired FPV operation. The wired trainer adaptor connects to the serial port on the back of the transmitter. The trainer cable plugs into the adaptor. The wired trainer is compatible with PPM based trainer links.
Wireless FPV Mode: Enables the use of a headset with wireless head tracking or another DSMX or DSM2 transmitter to control an airborne camera gimbal without connecting the NX20 to a cable. Wireless FPV modes are compatible with Spektrum DSMX/DSM2 based systems.
Each individual output channel can be mapped to any input channel from the student signal, leaving all other controls on the instructor transmitter. Primary flight control channels default to instructor control. Leave all channels connected to flight controls set up as instructor when using a headtracker.
To configure headtracking FPV:
- Select either Wired or Wireless Trainer from the Trainer menu.
- Select the FPV trainer mode.
- Select the switch to enable/disable the head tracker.
- Select the first Output Channel to be controlled. For example, if the pan servo is plugged into channel 5, select channel 5 as the output. Each axis of the gimbal will go to a separate output channel.
- Change the mode to STUDENT. This selection only applies to the selected output channel.
- Select the Input Channel from the trainer that controls the selected output channel when trainer is activated.
- Input channels can be reversed or scaled in this menu to configure the student controls for correct response on the output channels. Normal servo setup menus for the output channel will be ignored when the trainer signal is commanding a given channel.
- Repeat steps 4-7 to configure all the required output channels; select the Output Channel first, change the mode to Student, select the Input Channel and scale and reverse the travel as necessary.
- For wireless connections, touch the Bind button to put the NX20 into trainer bind mode before powering on the wireless head tracker (student transmitter). See the Binding Wireless Trainer section for more information.
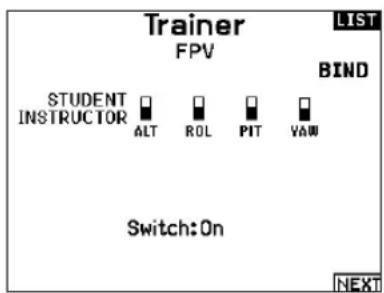
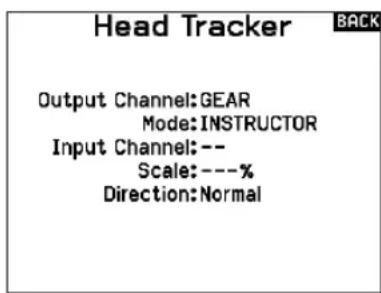
Center Tone
The Center Tone menu allows you to select or change the sound the NX20 makes when the selected control is at neutral.
- Select a switch from the list.
- Select the desired alarm. The choices are Inh, Tone, Vibe, Tone/Vibe, Voice, Voice/Vibe.
- If either of the Voice alarms are chosen, select from the available spoken sound list.
Center Tone
Switch:Select Alarm:Inh
Thr. Stick < Silence >
Ail. Stick < Silence >
Ele.Stick
Rud. Stick < Silence >
R Knob = Tone L Lever = Tone

Sound Utilities
Sound Utilities menu allows you to create, organize or remove your list of most commonly used voices, sounds and words into a category, allowing you to select those things most commonly used for sound events easily.
Choose Select/Add Category to enable Add Sound, Remove Sounds and Sort Sounds.
Palette Utilities
The colors on the NX20 may be customized as you wish. Select from the pre-defined color options listed under Global Customized, or select Personalize to create your own RGB color scheme.
Sound Utilities
Select/Add Category
Rename/Delete Category
Sort Categories
Add Sound to Category
Remove Sounds from Category Sort Sounds Within Category
Category:'All Sounds'List Sound:

Palette Utilities
New Models: Spektrum
This Model: Spektrum
Personalize "Global Customized"
Personalize This Model
Copy a Palette
Personalize Border Colors

System Settings
The System Settings menu consists of four screens:
- System Settings
- Extra Settings
- Serial Number
- Calibrate
Select NEXT or PREV to move between screens.
System Settings
```bash User Name:
Roller Menu: Bounded
Brightness:30s 100%
Mode:2
Battery:Lilion
Alarm:3.50V
Display:English
Voice: English
Default Palette:Spektrum
Inactive Alarm:10 min.

UserID
The User Name field displays your name in the lower right corner of the main screen.
To Program a User Name:
- Scroll to User Name and press the scroll wheel. The User Name screen appears.
- Scroll to the desired character position and press the scroll wheel. Scroll left or right to change the character and press the scroll wheel to save the selection. The User Name can contain a maximum of 20 characters, including spaces.
- Press the Back button to save the User Name and return to the System Settings screen.
Roller Menu
The Roller menu allows you to choose how the menu structure will operate. Press the scroll wheel to change the selection
- Bounded - Traditional scroll interface, stops at top and bottom of list
- Circular - When the bottom or top of list is reached, scrolling past will bring cursor to top or bottom, respectively.
Brightness
The Brightness field adjusts the backlight appearance time and brightness. The brightness time options are:
On: The backlight is always on.
Set Time: The backlight is on for 3, 10, 20, 30, 45 or 60 seconds before automatically dimming. Press the scroll wheel once to turn the backlight on.
The backlight percentage adjusts the backlight intensity and it is adjustable in 10% increments from 10% (darker) to 100% (brighter).
Mode*
To change the gimbal stick mode:
- Scroll to Mode and press the scroll wheel.
- Scroll left or right to change the gimbal stick mode. Press the scroll wheel to save the selection.
-
Select NEXT in the lower left corner until the Calibration screen appears.
-
Move all transmitter controls to the center position and complete the calibration process before exiting the System Settings menu. See "Calibrating Your Transmitter" for more information.
-
For more information, see Physical Transmitter Adjustments in the back of the manual.
Battery Alarm
The Battery Alarm is set to Lilon battery type for the NX20 and cannot be changed. The alarm activates when the battery reaches the low voltage limit.
To change the battery voltage trigger point for the alarm:
- Scroll to the battery voltage and press the scroll wheel.
- Turn the scroll wheel left or right to change the voltage level.
- Press the scroll wheel again to save the selection.
Selecting a Language
In the Systems Settings screen, scroll to highlight language, then press the scroll wheel to select the language function. Scroll to select the desired Language. When the desired Language is selected, press the scroll wheel to accept that Language. Names you input will not be affected by language change. After changing the language for the text, you may also want to change the language for the spoken alerts.
Inactive Alarm
An alarm activates if the transmitter sees a period of inactivity for a certain amount of time. The alarm is helpful in reminding you to power off the transmitter and avoiding a situation where the transmitter battery completely discharges.
The Inactive Alarm options are:
Inh (No alarm
sounds)
- 5 min
30 min
-
10 min (Default)
-
60 min
To change the Inactive alarm time:
- Scroll to the current alarm time and press the scroll wheel.
- Scroll left or right to change the alarm time. Press the scroll wheel to save the selection.
Extra Settings
The Extra Settings screen enables you to:
- Turn sounds off or on
- Change the appearance of the trim indicators
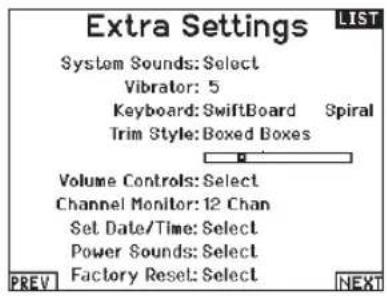
System Sounds
Scrolling to System Sounds and pressing the scroll wheel turns sounds on (Active) or off (Inhibit).
You may disable all sounds by changing the volume to 0.
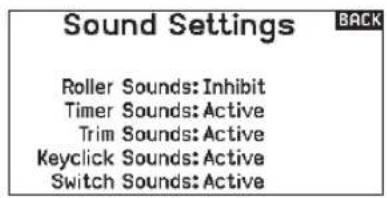
Vibrator Intensity Adjustment
Adjust this value to change the intensity of the built-in vibrator.
Keyboard
There are three different styles of keyboard available.
- Legacy - Original single line input, with scrolling through individual characters
- SwiftBoard - Full keyboard with numbers on top
- RapidBoard - Full Keyboard with number pad on right Keyboards with Spiral next to the name will jump to the next line when scrolling through the end of a line on a keyboard. The default scrolling direction through the keyboard characters is side to side. Holding the function key down while scrolling changes the navigation direction to up and down.
A set of letters with accents appear when a vowel is highlighted. Press and hold the function key and click the scroll wheel to select an accented letter.
Trim Style
Trim style changes the shape of the trim indicators on the Main Screen. Display options include:
- Boxed Boxes (Default)—The indicators appear as an outlined box when you adjust the trim.
- Boxed Arrows—The indicators appear as outlined arrows when you adjust the trim.
- Arrows on Lines—The indicators appear as arrows on lines when you adjust the trim.
Volume Controls
When you select this option another screen is opened and each subsystem has a volume setting that can be adjusted from 0-100.
Inhibit removes all trim bars and indicators from the Main Screen.
To change the Trim style:
- Scroll to Trim style and press the scroll wheel once.
- Scroll left or right to change the Trim style option.
- Press the scroll wheel to save the selection.
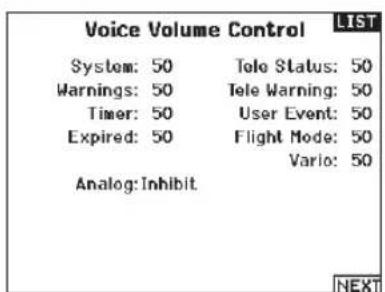
Channel Monitor
Select how many channels you want to display on the channel monitor (select from Default, 4, 6, 7, 8, 9, 10, 12, or 14 channels)
Set Date/Time
When you select this option another screen is opened. Set the time and choose the options to suit your needs.
IMPORTANT: Set your Timezone Offset (time zone) first, then your Daylight Savings mode, then your 12/24 mode. After that, entering the date and time will show correctly.
Date/Time
BACK
Time:5:16PM
Date:22 September, 2022
Time Format:12-hr
Display on Screen? Yes
Sync to WiFi
Sync to GPS Telem? Yes
Timezone Offset: 0.0hours
Daylight Savings: Inh
Power Sounds
Select from a variety of sound options the system will play at power up and power down.
Power Sounds
BACK
System Start:Bells Arise
System Stop:Bells Depart
Volume: 50
Factory Reset
Select this option to reset the NX20 back to factory settings. Choosing this option will reset any settings and all models that have been set in the NX20 programming, as well as any WiFi and My Spektrum account information from the transmitter. It does not change your firmware back to the factory version, nor does it affect the Stick Mode as this is a mechanical setting as well as a configuration setting.
Factory Reset
BACK
Erase everything?
NO YES
Calibrate
The Calibration screen stores the potentiometer endpoints for all proportional controls. It is mandatory to complete the calibration after changing the stick mode selection.
Calibrate
Left Right
Cycle Sticks:???
Center Sticks:???
Sliders:??
Knobs 22
CANCEL SAVE
To Calibrate the Transmitter:
- Carefully move the gimbal sticks in a + shape moving from left to right, then up and down. Press gently on the gimbals at the stops to achieve an accurate calibration. Return both gimbal sticks to the center position.
- Select SAVE to store the calibration.
WiFi Utilities
First start an account at SpektrumRC.com first on your PC, Mac, or mobile device.
- Select WiFi Utilities. The NX20 will search for WiFi networks in range and display the options for you to connect with.
- Select your WiFi connection. Load the SSID and password for connection and select Connect.
- Select Log In and fill in your account information.
- Select Check For Updates to check for the newest updates on your NX20, and download them automatically.
- If you wish to erase your registration information from your NX20 you may do so. Otherwise, select Log Out to resume normal operation.
IMPORTANT: You do not need to re-enter your password every time you log in, but if you go to the Password editor it will be erased and you will need to re-enter it.
WiFi Utilities
LIST
Connect to Network
Saved Networks
Erase Credentials
WiFi Credentials
LIST
SSID:SeaShells
Password:
Auto-Connect:Inhibit
CONNECT
USB Settings
The USB Settings menu allows for setting the transmitter to Game Controller mode and for easy access to the internal memory storage. Setting the NX20 to Game Controller mode puts the system into USB HID mode, allowing for connection to compatible simulators directly as a game controller. The system uses the active model and disables the RF signal. Set the Mode to Inhibit to return to normal RF function.
Select Access Internal Storage to access the internal memory through the USB cable without transmitting an RF signal. Click the Back button or the roller to exit and enable the RF signal.
USB Settings
BACK
Mode:Inhibit
Access Internal Storage
Transfer SD Card
This menu enables you to:
- Import (copy) models from another NX20 transmitter
- Export (transfer) models to another NX20 transmitter
- Update Spektrum AirWare™ software in the transmitter
Install/Update sound files - Take screen shots
- Import or export color palettes
- Select from internal or external memory locations
- Manage files and folders on the memory card.
- Format memory card
Category
Within the category Options lets you select the action; Folder lets you choose what folder your file is in on the memory card, SD Card lets you chose from internal or external memory, and Status informs you if the memory card is ready or if there is no card inserted.
Model Import/Export
Model Import
Ensure the models currently stored in the internal transmitter memory are saved to a memory card separate from the transmitter before performing this function.
To import an individual model file from the Memory card:
- Save the model file to the Memory card.
- Select the Model List location where you wish to import the new model file.
- In the Memory card menu, scroll to Select Option and press the scroll wheel once.
- Scroll to Import Model and press the scroll button again to save the selection. The Select File screen appears.
IMPORTANT: When you select Import, the transmitter leaves the System Setup List.
- Select the model file you wish to import. The Overwrite screen appears.
- Select the model that you would like to import the model to.
- Select Import to confirm overwriting the current model file. The transmitter activates the new model file and the Main Screen appears.
A Preflight Checklist may appear prior to the Main Screen if the checklist was active during the model file export. Select MAIN to exit the Preflight Checklist.
See "Preflight Setup" for more information.
Export Model
You can use the Export Model option to export a single model file to the memory card.
- Make sure the active model file is the one you wish to Export.
- In the Transfer memory card menu, scroll to Options and press the scroll wheel once.
- Scroll to Export Model and press the scroll wheel again to save the selection. The Export to SD screen appears. The first two characters of the file name correspond to the Model List number (01, for example).
- (Optional) If you wish to rename the model file before exporting it to the Memory card:
a. Scroll to "Save to:" and press the scroll wheel. The File Name screen appears.
b. Assign a new file name. The file name can contain up to 25 characters including the .SPM file extension.
c. When you are done assigning the new file name, press the Back button to return to the Export to SD screen.
SD Card Menu
LIST
Category: Model Import/Export
Options: Select Option
Folder:1:/
SD Card:External
Status:Ready
Import All Models
To import all models from the Memory card:
- Select Import All Models.
- Confirm by selecting IMPORT.
IMPORTANT: After importing a model, you must rebind the transmitter and receiver. The Main Screen must show DSM2 or DSMX in the upper left corner.
You can import a model to any location you want. If you prefer to use Import All, you can use your PC to rename the SPM file. The first two digits (01 to 50) are the destination model number. Your Memory card can only contain 50 models. Save files to folders on the card then remove from the card all unused models. Files are selected by their position in the directory table.
Memory Location
In the SD Card selection you can choose from the Internal or External memory locations.
Select the internal memory location to save to the memory bank built into the NX20. Select the external memory location to save to the micro memory card slot.
- Select Export to save the file to the memory card. When the export is complete, the transmitter returns to the memory card menu screen.
Export All Models
To export all models to the Memory card:
- Select export all models in the Transfer Memory card menu options. The Export All Models screen appears.
IMPORTANT: Export All Models will overwrite any model files that:
- are already saved to the Memory card
have the same name. Always save model files to a different memory card if you are not sure. - Select Export to overwrite files on the memory card or Cancel to return to the memory card menu.
File/Folder Management
The File and Folder management option enables you to create a folder, rename a file, or delete a file. Select the function you want to change and follow the on screen prompts.
Palette Import/Export
Import Palette
You can use the Import Palette option to load a Palette from your memory card.
- Load your color palette onto a memory card or the internal memory.
- In the Transfer Memory Card menu, scroll to Options and press the scroll wheel once.
- Select the memory card location (Internal or external) where your Palette has been loaded.
- Scroll to Palette Import/Export and select Import Color Palette.
- Select the Palette you want to load from your memory card.
Export Palette
You can use the Export Palette option to export a color configuration to the memory card.
- Make sure the active palette is the one you wish to Export.
- In the Transfer Memory Card menu, scroll to Options and press the scroll wheel once.
- Scroll to Palette Import/Export and select Export Color Palette.
- (Optional) If you wish to rename the Palette before exporting it to the memory card:
a. Scroll to "Options" and select Export Color Palette
b. Scroll to "Save to:" and press the scroll wheel. The File Name screen appears.
c. Assign a new file name. The file name can contain up to 25 characters including the .SPM file extension.
d. When you are done assigning the new file name, press the Back button to return to the Export to SD screen.
- Use the Folder selection if you want to save to a sub folder on the card
- The Volume enables you to choose from the internal or external memory card locations.
- Status informs you if the card is ready to use.
- Select Export to save the file to the memory card. When the export is complete, the transmitter returns to the memory card menu screen.
Special Features
Update AirWare
NOTICE: The orange LED Spektrum bars flash and a status bar appears on the screen when AirWare updates are installing. Never power off the transmitter when updates are installing. Doing so may damage the system files.
Before installing any AirWare files, always export all models to a memory card separate from the memory card containing the update. The update may erase all model files.
For more information on AirWare updates, visit www.spektrumrc.com.
Manually Installing Airware Updates With Memory Card
- Save the desired AirWare version to the memory card.
- Select Update Firmware in the memory card menu options. The Select File screen appears.
- Select the desired AirWare version from the file list. When updates are installing, the transmitter screen is dark. The orange LED Spektrum bars flash and the update status bar appears on the screen.
Export Sound Categories
Select a folder and card as a target to export the sound categories.
Screen Print
You can capture snapshots of the screen being displayed with this feature. When you select this feature the system first requests you choose a switch to activate this function.
Format SD Card
Select this option if you want to format the SD Card.
IMPORTANT: Use a PC to back up all contents of the internal card before formatting it. If you format the internal card, it will delete all contents of the card, including those pre-loaded at the factory for for speech, model BNFs and Templates.
About / Regulatory
Serial Number
The Serial Number screen displays the transmitter serial number and Spektrum AirWare software version.
Reference the Serial Number screen any time you need to register your transmitter or update the Spektrum AirWare software from the Spektrum Community website.
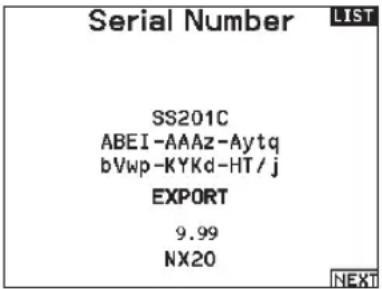
Exporting the Serial Number to the Memory card
You may find it helpful to export the transmitter serial number to a text file for your personal records or when you are registering the transmitter on the Spektrum Community.
To export the transmitter serial number:
- Insert an Memory card in the card slot on the transmitter.
- Scroll to EXPORT and press the scroll wheel. The SD Status screen appears and should display MY_NX20.xml in the middle of the screen.
- Press the scroll wheel again to return to the Serial Number screen.
- Power off the transmitter and remove the Memory card from the transmitter.
- Install the Memory card in a card reader connected to your computer.
- Open the MY_NX20.xml file from the Memory card location. You can then copy and paste the serial number into your personal records or to the Spektrum Community website.
Locating the Transmitter Spektrum AirWare Software Version
The transmitter Spektrum AirWare software version appears between PREV and NEXT at the bottom of the Serial Number screen. Register your NX20 to get Spektrum AirWare software updates and other news at spektrumrc.com
IMPORTANT: Spektrum AirWare files are specific to the transmitter serial number and you cannot transfer Spektrum AirWare files between transmitters, ie., downloading an Spektrum AirWare software update once and attempting to install it on multiple transmitters.
FUNCTION LIST
Once you have selected the model number you want to use and have defined the aircraft type, wing and tail type and other details in the System Setup menu, use the Function list to define the details specific to your model's setup such as servo travel, reversing, mixing, etc. The Main Screen appears when you power on the transmitter. Press the scroll wheel once to display the Function List.
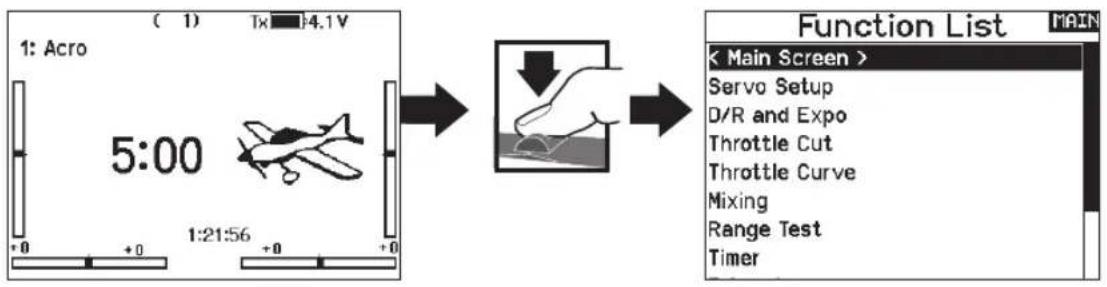
Servo Setup
The Servo Setup menu contains the following functions:
-
Travel Adjust
-
Reverse
-
Absolute Travel
-
Sub-Trim
-
Speed
-
Channel Name
Travel Adjust
Travel Adjust sets the overall travel or endpoints of the servo arm movement.
To adjust travel values:
- Scroll to the channel you wish to adjust and press the scroll wheel. When adjusting travel values assigned to a control stick:
a. Center the control stick to adjust both directions at the same time.
b. To adjust travel in one direction only, move the control stick in the direction you wish to adjust. Continue holding the control stick in the desired direction while you are adjusting the travel value. - Scroll left or right to adjust the travel value. Press the scroll wheel to save the selection.
IMPORTANT: ALT, ROL, PIT and YAW replaces THR, AIL, ELE and RUD channels in multirotor to more closely reflect the flight axis in the multirotor aircraft. This change is throughout the multirotor menu options.
Sub-Trim
Sub-Trim adjusts the servo travel center point.
NOTICE: Use only small sub-trim values or you may cause damage to the servo.
Balance
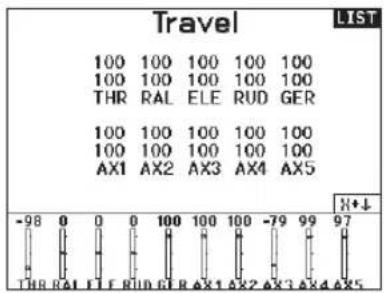
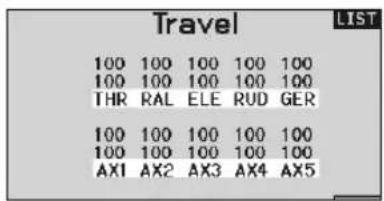
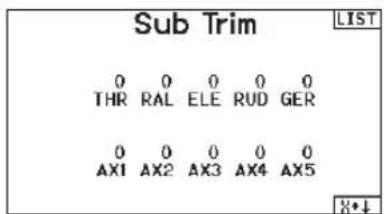
Reverse
Use the Reverse menu to reverse the channel direction. For example, if the elevator servo moves up and it should move down.
To reverse a channel direction:
- Scroll to Travel and press the scroll wheel. Scroll left until Reverse appears and press the scroll wheel again to save the selection.
- Scroll to the channel you wish to reverse and press the scroll wheel.
If you reverse the Throttle channel, a confirmation screen appears. Select YES to reverse the channel. A second screen appears, reminding you to bind your transmitter and receiver.
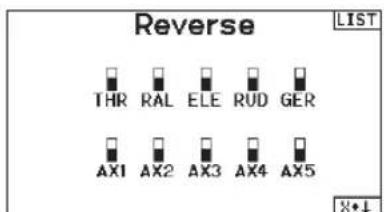

CAUTION: Always rebind the transmitter and receiver after reversing the Throttle channel. Failure to do so will the throttle moving to full throttle if failsafe activates.
Always perform a control test after making adjustments to confirm the model responds properly.

CAUTION: After adjusting servos, always rebind the transmitter and receiver to set the failsafe position.
Speed
The Speed menu enables you to slow the response time on any individual channel (such as retracts).
The Speed is adjustable in the following ranges:
- Nor (No Delay) - 0.9s in 0.1 second increments
- 1s - 2s in 0.2-second increments
- 2s - 8s in 1-second increments
To adjust the Speed:
- Scroll to the channel you wish to adjust and press the scroll wheel.
- Scroll left or right to adjust the speed and press the scroll wheel to save the selection.
Absolute (Abs.) Travel
The Abs. Travel function limits the amount of travel on a channel. Adjust the Abs. Travel value to prevent a servo from binding when a mix is applied.
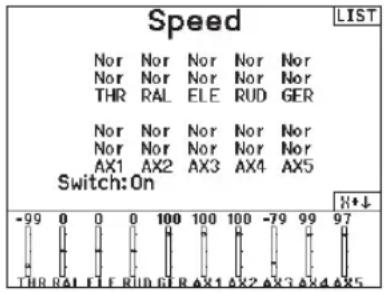
Channel Name
This page enables you to rename each channel to suit your setup.
To rename a Channel:
- Press the scroll wheel to select the menu.
- Scroll down to select the channel you want to rename.
- When the channel is selected press the scroll wheel again to open the sub page.
- Enter a short name and a long name for the channel.
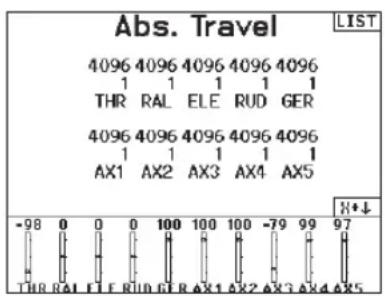
Balance
Balance is available on all channels to fine-tune the servo position at up to 7 points. This is a precision curve mix that is normally used to prevent binding when multiple servos are used on a single control surface.
You can also use the Balance menu option to match throttle response on twin engine aircraft or level the swashplate on a helicopter.
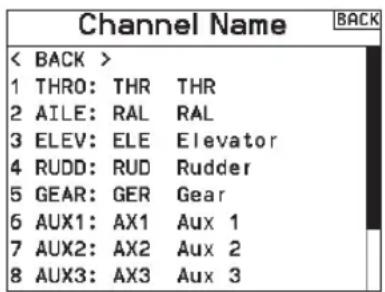
Rates and Expo
Multiple travel rates and exponential (expo) are available on the aileron, elevator and rudder channels. Rates enable the pilot to set up different amounts of control travel which can be selected from a switch or flight mode. Exponential affects control response sensitivity around center but has no affect on overall travel. Positive exponential decreases the sensitivity around the center of gimbal movement.
To adjust the Dual Rate and Exponential:
- Scroll to the channel and press the scroll wheel once. Scroll left or right to select the channel you wish to change and press the scroll wheel again to save the selection.
- Scroll to Switch and select the switch to activate D/R and Expo for that channel.
- Scroll to dual rate and press the scroll wheel. Scroll left or right to change the value and press the scroll wheel again to save the selection.
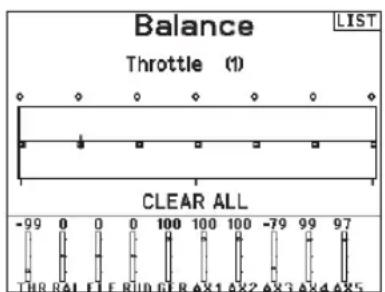
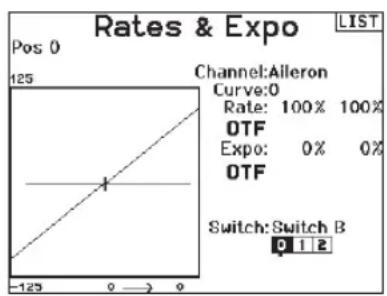
Throttle Cut
The Throttle Cut menu* option enables you to assign a switch position to stop an engine or motor. Throttle Cut activates regardless of Flight Mode.
When you activate Throttle Cut, the throttle channel moves to the pre-programmed position (normally Off).
You may need to use a negative value to move the Throttle channel to the off position.

CAUTION: Always test the model after making adjustments to make sure the model responds to
controls as desired.
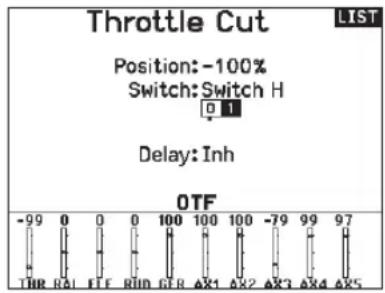
Throttle Curve
You can use the Throttle Curve menu* option to optimize the throttle response. A maximum of 7 points are available on the throttle curve.
To add points to a Throttle Curve:
- Move the throttle stick to the position where you wish to add the new point.
- Scroll to Add Pt. and press the scroll wheel to add the point.
To remove points from a Throttle Curve:
- Move the Throttle stick until the cursor is near the point you wish to remove.
- Scroll to Remove Pt. and press the scroll wheel once to remove the point.
If you program multiple throttle curves and you wish to edit one of the curves, that curve must be active in the Throttle Curve screen before you can make any changes.
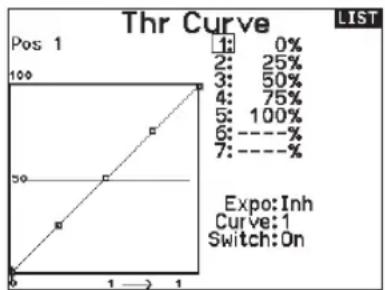
*Not enabled by default in sailplane type. If you need motor control features on a sailplane, select your motor control input stick or switch in the Sytem Setup ->Sailplane type, select Motor: and change from Inhibit.
Analog Switch Setup
Allows all sticks, knobs, and sliders to be used as a kick point to turn on functions like mixes. A kick point is the position along the travel where the stick acts like a switch.
To add a kick point:
- Move the control stick, lever or knob to the desired kick point position.
- Scroll to the desired kick point and press the scroll wheel once to save the selection.
To delete a kick point, scroll to the desired kick point and press the Clear button.
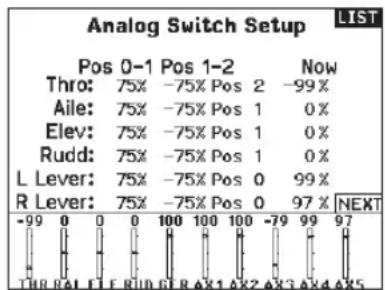
Digital Switch Setup
Digital Switch Setup allows you to define the position values of each digital switch and flight mode switch. The switch can be assigned to a channel in the Channel Input Config function, and the output of the channel set in the Digital Input Setup screen. Additionally, the Flight Mode switch can have position values defined for each flight mode, and may be used as a mix input or channel input source, with the values defined in Digital Input Setup.
To use the Digital Switch Setup function:
- Enter the Digital Input Setup screen, and press the roller with Inhibit selected.
- Roll to select the switch or Flight Mode switch and press to select.
- Roll to the desired position to adjust, and press the roller to select.
- Roll to select the desired value, then press to select.
- Repeat step 4 and 5 for all positions that you wish to adjust.
- If you want to select a switch to control a channel, roll to select Channel: Inhibit on the bottom of the screen and press the roller. This will take you to the Channel Input Config screen to assign a channel to a switch.
- Repeat 2 through 6 for all switches desired.
Logical Switch Setup
Logical Switch Setup enables you to use two inputs to select as many as nine different switch positions. There are 16 logical switch setups available. Once the table is set up and defined, you can select the logical switch positions anywhere in the programming menus where you can select a switch
To use the Logical Switch Setup function:
- Enter the Logical Switch Setup screen, and select the logical switch you want to use.
- Select the two input devices.
- Explore all the switch/stick positions of the two input devices and define the output values for all the cells on the table.
Combo Switch Setup
Combo Switch Setup enables you to use two input devices to activate a switch, with an AND/OR option to tie the two input devices together. Once this page is defined you can select Combo Switch positions anywhere in the programming menus where you can select a switch.
To use the Combo Switch Setup function:
- Select the first switch, define the switch position where you want the function to be active.
- Select AND/OR
- Select the second switch and define the switch position(s) you want the function to be active.
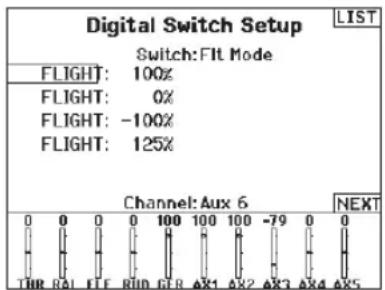
IMPORTANT: After you exit the Digital Input Setup screen, the return screen will show Inhibit at the top of the screen. If you wish to adjust a previously set value, select the switch and the previously set values can then be viewed and re-adjusted as desired.
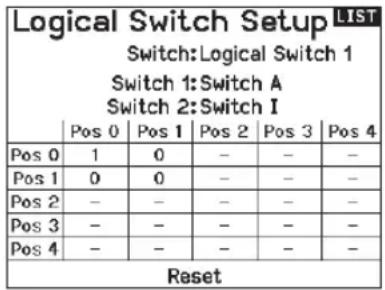
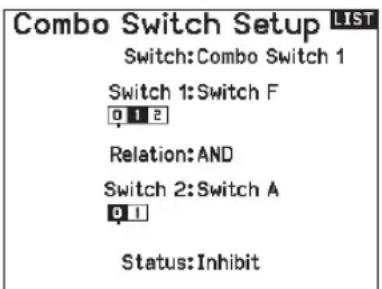
Mixing
Mixing allows control input for a channel to affect more than one channel at a time. Mixing functions support:
- Mixing a channel to another channel.
- Mixing a channel to itself.
- Assigning offset to a channel.
- Linking primary to secondary trim.
These mixes are available for each model memory:
14 programmable mixes
Cyclic to Throttle (HELI)
- Swashplate (HELI)
Elevator to Flap (ACRO)
Aileron to Rudder (ACRO)
Rudder to Aileron/Elevator
(ACRO)
Aileron>Rudder (SAIL)
Aileron>Flap (SAIL)
Elevator>Flap (SAIL)
Flap>Elevator (SAIL)
When you choose a new programmable mix you can select from either a normal mix or a curve mix. Specialized mixes will populate the mixing menu, and change based on aircraft type and wing type selections. Each specialized mix has specific features for its intended function.
Precision Mixing
To adjust values by 0.1% at a time, highlight a mixing variable and then press and hold the function key while rolling the scroll wheel. Release the function key and the value will change in whole number increments.
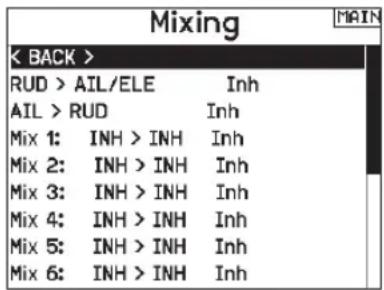

Normal Mix
On the second line select a channel for master control on the left and slave on the right. Inputs for the master channel control both the master and slave channels. For example, Throttle > Rudder makes Throttle the master channel and Rudder the slave channel. A channel monitor at the bottom of the screen shows how channels respond to input during setup. To view a mix on the monitor, the mix switch must be in the active position or the switch set to ON.
Rate
Change the rate value to control the travel and direction (positive or negative value to reverse) of the slave channel.
Offset
Change the Offset value to move the effective center position of the slave channel. Positive or negative value determines the direction of the offset. Offset is not available for curve mixes.
Trim
If the master channel trim should also adjust the slave channel, set Trim to Act.
Curve (Page)
The Curve value corresponds to each page of values assigned to a switch position. Leave the Curve value matching the highlighted box below the switch position for a basic configuration.
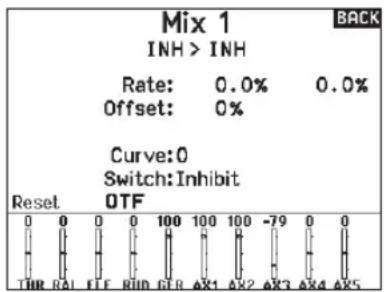
Switch
Select the switch you wish to use to activate the mix. The black box indicates the switch position where the currently displayed curve page is active, and the tick below the boxes indicates the current switch position.
Select ON if you wish to activate the mix full time and do not want to use a switch.
TIP: Use Auto Switch Select to select the switch.

CAUTION: Always do a Control Test of your model after changing mixes.
Curve Mix
If you want to be able to assign the output channel to respond on a curve or act as a switch, the Curve mix option will enable you to move the output channel to any value at up to 7 points along the travel of the input channel. Below the curve values, select a channel for master control on the left and slave on the right. For example, Throttle > Rudder makes Throttle the master channel and Rudder the slave channel.
A channel monitor at the bottom of the screen shows how channels respond to input during setup. To view a mix on the monitor, the mix switch must be in the active position or the switch set to ON.
Trim
If the master channel trim should also adjust the slave channel, set Trim to Act.
Curve
The Curve value corresponds to each page of values assigned to a switch position. Leave the Curve value matching the highlighted box below the switch position for a basic configuration.
Curve (Page) Advanced Configuration Options
The Curve selection in either Normal or Curve mixes can enable you to set up to 9 different settings pages. Curve settings within one mix do not carry over to other mixes. This can be useful if you want to test mixes and not have delete current configurations, or can come into play when using numerous flight modes. With this option there can be a separate mix page for each flight mode.
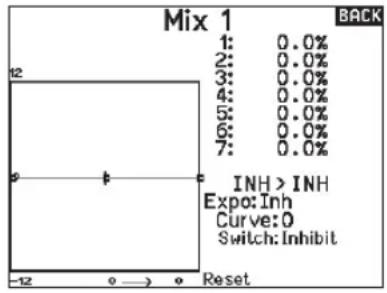
Switch
Select the switch you wish to use to activate the mix. The black box indicates the switch position where the currently displayed curve page is active, and the tick below the boxes indicates the current switch position.
Select ON if you wish to activate the mix full time and do not want to use a switch.
TIP: Use Auto Switch Select to select the switch.

CAUTION: Always do a control test of your model after changing mixes.
To select the page you want to adjust:
- Assign the switch and begin with your first switch position.
- Scroll to the Curve option and change the value to the number you want for that curve (page).
- Scroll to the box above the active switch position and press the scroll wheel to assign the curve (page) to that switch position.
- Move the switch(es) to the next position you want to configure, select the curve (page) you want to use, and repeat the process.
Sequencer
The Sequencer menu option provides this-then-that mixing with a time delay. Eight sequences are available to control two functions each (A and B), in 2 timing directions (forward or reverse). Sequences appear throughout function screens as assignable switches.
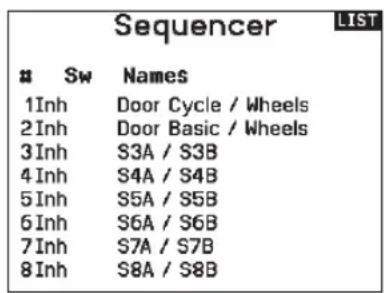

CAUTION: Always review the action of a sequence on the Monitor screen BEFORE operating the model to
ensure controls act as desired. Failure to do so could cause a crash, resulting in property damage and or injury.
You can program multiple functions to sequentially activate in response to an assigned switch. For example, an assigned Gear switch can open gear doors, lower the gear, then close the doors. In reverse, gear doors open, the gear retracts and the gear doors close. You can assign each Sequencer function to a switch in most Function screens such as Flight Mode, Dual Rate, Mixing, Throttle Curve, Pitch Curve, etc.
You can assign several functions to a sequence to decrease the number of controls you need to touch during complex flight transitions—for example, applying your assigned dual rates and exponential when the landing gear deploys and the flight mode changes.
If you select an S-Number-A sequence (e.g. S3A), the sequence operates as a timed 5-position switch. An S-Number-B sequence operates as a timed 3-position switch. The 5 positions correspond to the sequencer values shown on the time delay graph in the second Sequencer screen. In a function screen, highlight each point (0-4) and select the switch position desired for a function to be active.
When S1B (or another sequence-number-B) is selected as a switch in a function, the sequence will operate as a timed 3-position switch. The 3 positions act as 'kick points' of the movement at fixed percentages (equal thirds) of the sequencer output. In a function screen, highlight each point (0-2) and select the switch position desired for a function to be active.
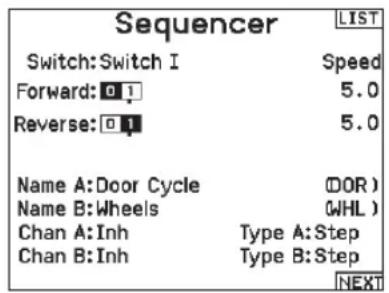
Sequencer Set Up
- In the first Sequencer screen, select 1 of the 5 available sequences.
- In the second Sequencer screen, assign a switch to the sequence. We recommend using a 2-position switch.
TIP: If you need to use a 3-position switch, you must assign one direction to two adjacent switch positions—e.g., 0 and 1. Assign the opposite direction to the third switch position.
- Assign the timing for the Forward and Reverse directions as desired. There is no delay when you use the Nor option. You may also select a delay time between 0 and 30 seconds.
- Assign names for each sequencer function as desired.
- Select either Step (S) or Proportional (P) for the Sequencer output.
Step: The sequence only changes at kick points. Otherwise, there is a delay in the sequence until it reaches the next kick point.
Proportional: The sequence movement is proportional between kick points. The sequence maintains rate and direction until it reaches the next kick point.
- Adjust the Sequencer motion percentages in the third screen.
For example, you may move points 1, 2 and 3 closer to the beginning of the sequence so the motion occurs earlier. This results in a delay between point 3 and point 4 at the end of the sequence.
Testing the Sequence
The Sequencer function determines the response for channels included in the sequence.
Refer to the Monitor screen to see how respective channels interact in the Sequencer.
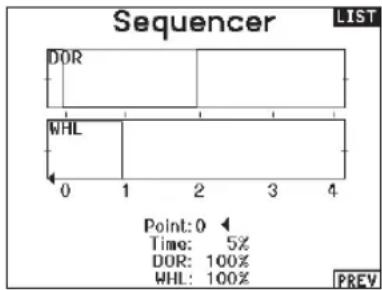
Range Test
The Range Test function reduces the power output. This allows for a range test to confirm the RF link is operating correctly. Perform a range check at the beginning of each flying session to confirm system operation.
To Access the Range Test screen:
- With the transmitter on and the main or telemetry screen displayed, press the scroll wheel. The Function list displays.
- Scroll to highlight Range Test, then press the scroll wheel to access the Range Test function.
- With the Range Test screen displayed, push and hold the trainer button. The screen displays Reduced Power. In this mode the RF output is reduced allowing for an operational range test of your system.
- If you let go of the trainer button, the transmitter will go back to Full Power.
IMPORTANT: Telemetry alarms are disabled during the Range Test.
Range Testing the NX20
- With the model restrained on the ground, stand 30 paces (approx. 90 feet/28 meters) away from the model.
- Face the model with the transmitter in your normal flying position and place the transmitter into Range Test mode (see above). Then push the trainer button; the power output will be reduced.
- Operate the controls. You should have total control of your model with the transmitter in Range Test mode.
- If control issues occur, contact the appropriate Horizon Product Support office for assistance.
- If performing a range test while a telemetry module is active, the display will show flight log data.
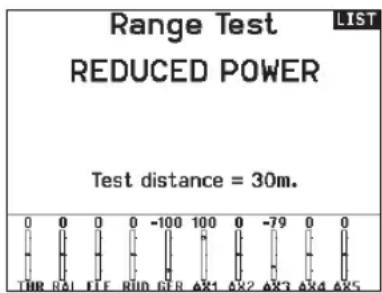
Timer
The NX20 Timer function allows you to program a countdown timer or stop watch (count up timer) to display on the main screen. An alarm sounds when the programmed time is reached. You can program the timer to start using the assigned switch position or automatically when throttle is raised above a programmed position. Two internal timers are available that show run time for a specific model displays on the Main Screen. A total system timer is also available.
Press NEXT to select the Timer Event Alerts settings. These include options for the alerts at every minute for down timers, 1 minute remaining alert, 30 seconds remaining alert, 10 second to 1 second remining alerts, expiration alert, and every minute up alert. Press NEXT again to select the Timer Control Alerts settings. Available options include Timer Start alert, Timer Stop alert, and Timer Reset alert.
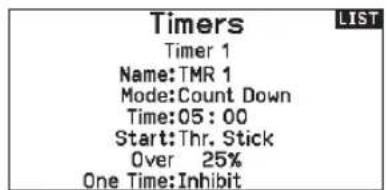
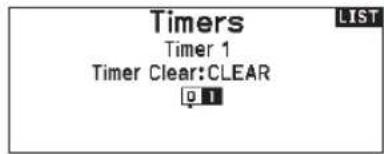
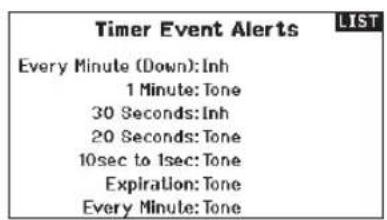
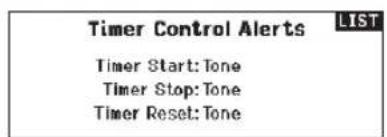
Telemetry
The telemetry menu is in both the system setup and the function list so you can access the telemetry functions from either list. You must power off the receiver and transmitter, then power them both on to reset the telemetry data. You can reset min/max values by pressing the CLEAR button.

WARNING: NEVER change Telemetry Settings when the aircraft is powered on. There is a brief interruption in RF when exiting the Telemetry screen, and may cause a condition.
Telemetry Auto-Configuration
When a receiver is bound to the transmitter, it will complete the auto-config setup automatically. Select Auto-Config to detect new telemetry sensors and automatically populate the telemetry list.
To select Telemetry Auto-Config:
- Make sure all telemetry components are bound to the transmitter and receiver.
- Power on the transmitter, then power on the receiver.
- Select Telemetry from the Function List, then select Auto Config. "Configuring" flashes for 5 seconds and any new sensors appear in the list.
- Adjust the sensor alert values as necessary.
Forward Programming
If you bind a forward programming capable receiver to your NX20, the Forward Programming menu will appear in the Function List. Think of the Forward Programming menu as a programming interface for your connected receiver. The menu structure, options and any changes made are done directly on the receiver, the transmitter is only an interface. Each device may have different menu structure and operate in a different manner than the next forward programming device. The receiver must be powered on and bound to be able to enter the forward programming menu.
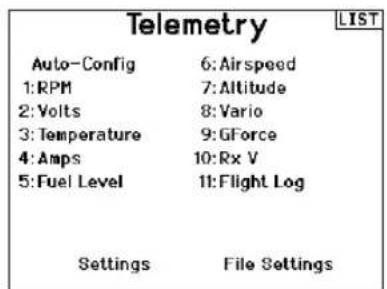
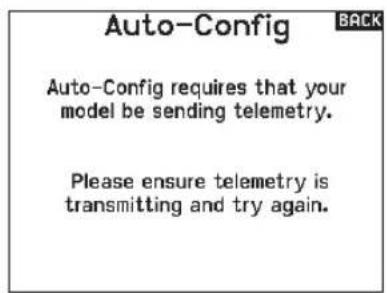
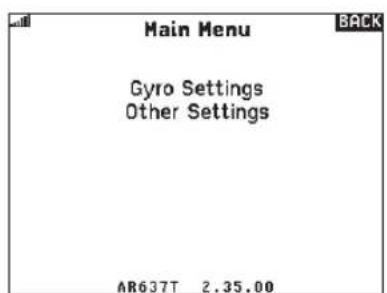
Audio Events
This menu enables you to manage the audio output from the radio, including tones and voice output.
Switch Changes
Use the switch change report to call out what your switch positions are. With this menu you can assign audio reports for events such as changing modes or rates, retract position, flap position, etc.
Stepping Reports
Stepping reports let you select from a list of reports to announce at each flip of a switch. Stepping reports move to the next report at every flip of the switch.
Generic Reports
Select Report At Power-Up and check off your desired switches to get a switch position report of those switches when you power ON the transmitter.
Center Tone
This menu gives you the ability to add a tone at the center of each stick travel.
Flight Modes
Choose your audio reports to go with each flight mode in this menu.
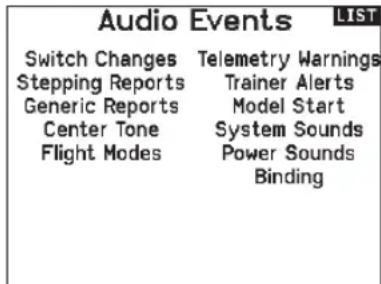
TelemetryWarnings
Shortcut to the TelemetryWarnings screen.
Trainer Alerts
This menu gives the user the setup the type of audio alerts with trainer.
Model Start
This menu gives you options for tones and voice for when your model starts operation, based on throttle or a switch of your choice.
System Sounds
Gives you control over the inactivity alarm and the low voltage alarm
Binding
Givestyoucontrolovertheaudioeventsduringthedbinderprocess.
VTX Setup
For compatible video transmitters, this menu can select the options directly from your NX20. Set the power level and frequency of your video transmitter, and select SEND to make the change.
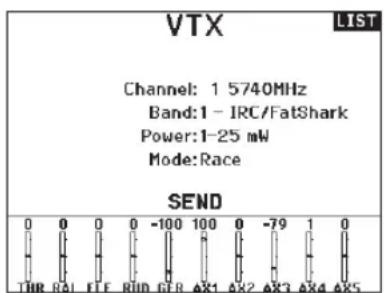
Function Bar
The Function Bar on the NX20 offers 2 features, a Ticker Tape to show telemetry values and My List which allows quick access to menu items that are frequently used.
When the NX20 transmitter is showing the normal display (home screen), the system shows the telemetry scrolling across the bottom of the screen.
Select Function Bar on the Function List to access the setup screen. Select the Ticker Tape Setup or the My List Setup for configuration.
Ticker Tape Setup
The screen can display up to 10 features on the bar.
Each slot can be configured to hold:
A telemetry sensor report
- The position of an input switch
Sensor Configuration
Pick the sensors you want to display from the list of sensors in the active telemetry list. After selecting a sensor, configure the data to display to suit your needs.
Field
Select the input you want to have displayed, and the amount of time it should be shown.
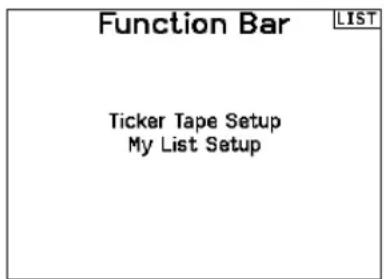
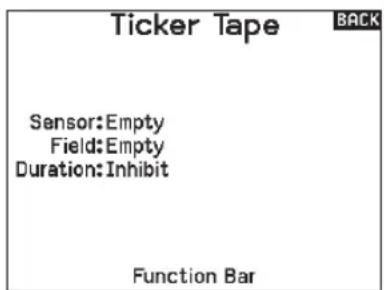
My List Setup
My List gives you quick access to a short list of commonly used menu items you create.
- Press the Function button to open My List
- Scroll to select the menu you want, and click to choose that option
- CLEAR will take you to the first entry on the list
- BACK or FUNC will exit to original screen
IMPORTANT: If a menu option is not available on the Function List such as due to a Wing/Tail type change, it will not be selectable from the My List.
IMPORTANT: You can pick entries from the Function List, however you cannot pick sub-options for the My List setup.
Bind
The Bind menu allows access to the bind screen from the Function List. After selecting Bind, a caution screen appears warning the transmitter RF will be disabled. Press YES to continue to the bind screen or NO to return to the Function List.
The Bind menu enables you to bind a transmitter and receiver without powering off the transmitter. This menu is helpful if you are programming a model and need to bind the receiver for failsafe positions.
See your receiver manual for information about setting failsafe positions.
Start Trainer
The Start Trainer menu allows you to put the transmitter in either instructor or student mode, from the Function List.
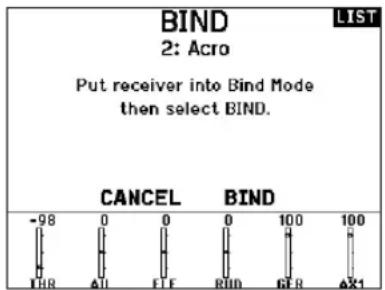
System Setup
Use System Setup to enter the System List from the Function list without turning the transmitter off. A caution screen will appear that warns that RF will be disabled (the transmitter will no longer transmit). Press YES if you are sure and want to access the System List. If you are not sure, press NO to exit to the main screen and continue operation.
If you do not press YES or NO, the system will exit to the main screen and continue operation within approximately 10 seconds.

WARNING: Do not press YES unless the model is turned off or the model is secured.
Start Trainer
Mode:Student
LIST
[26]
CAUTION!
Confirm System Menu Access. RF will be disabled!
Are you sure?
NO YES
BACK
Charge Status
View this page to see the status of the battery including the percentage of charge. When the transmitter is connected to a USB power supply this page will also show the charge current and input voltage.
IMPORTANT: When you are charging the radio during operation, you will see a charge status indicator on the right side of the LCD, in all screens.
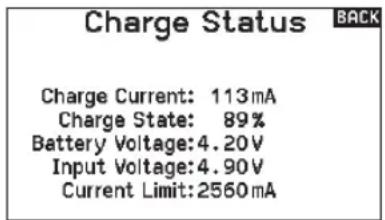
Monitor
The Monitor screen displays the servo positions for each channel graphically and numerically. This is useful to verify programming functions, trim settings, mix directions, etc. The numeric value is directly relative to the travel adjust and mix values (e.g. 100% travel adjust equals 100% value in the Monitor). Scroll past the main monitor to view the X-Plus Monitor, which shows up to channel 20.
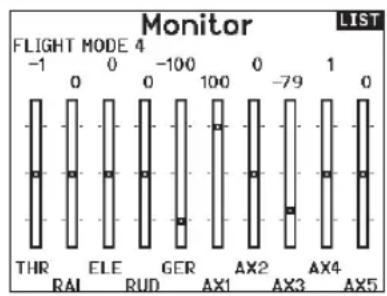
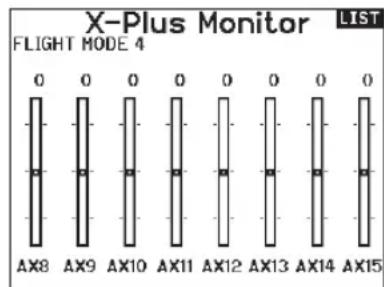
The following menu options are only available when they are enabled from the Model Type screen.
(Aileron) Differential
Only available in Acro and Sailplane Type when a dual aileron servo wing type is active. See Acro (Airplane) section for set up.
V-Tail Differential
Only available in Acro and Sailplane Type when V-Tail A or V-Tail B is active. See Acro (Airplane) section for set up.
Camber Preset
Only available in Sailplane Type when a 2+ aileron wing type is selected. See SAIL (Sailplane) section for set up.
Camber System
Only available in Sailplane Type when a 2+ aileron wing type is selected. See SAIL (Sailplane) section for set up.
Flap System
Only available in Airplane Type when a flap-enabled wing type is selected. See ACRO (Airplane) section for set up.
Pitch Curve
Only available in Helicopter Type. See HELI (Helicopter) section for set up.
Swashplate
Only available in Helicopter Type. See HELI (Helicopter) section for set up.
Gyro
Only available in Helicopter Type. See HELI (Helicopter) section for set up.
Tail Curve
Only available in Helicopter Type. See HELI (Helicopter) section for set up.
Motor Cut
Only available in Multicopter Type. See MULTI (Multicopter) section for set up.
Motor Curve
Only available in Multicopter Type. See MULTI (Multicopter) section for set up.
ACRO (AIRPLANE)

CAUTION: Always do a Control Test of your model with the transmitter after programming to make sure your model responds as desired.
NOTICE: Refer to your airplane manual for recommended control throws.
Aircraft Type (System Setup)
Aircraft wing and tail type settings are a pivotal step in your model setup. Making these selections may reveal setup menus in the function list to support the chosen wing and tail type. Some models require electronic mixing and for those there are pre-configured options in dedicated menus to make model setup straight forward.
Use the Aircraft Type Screen to select wing and tail types to match your airplane model. Diagrams and setup names show on the transmitter screen to show the available setups.
Select wing and tail types before doing any other programming.
Refer to spektrumrc.com for more information about new NX20 AirWare software updates to support these options.
Wing
Normal
Flaperon*
- Dual Aileron
- 1 Aileron 1 Flap
- 1 Aileron 2 Flap
- 2 Ailerons 1 Flap
- 2 Ailerons 2 Flap
Elevon A
Elevon B
4 Aileron
- 6 Aileron
- Canard with elevon
Tail
Normal
V-Tail A**
V-Tail B**
- Dual Elevator
- Dual Rudder
- Dual Rudder/Elevator
- Taileron
- Taileron B
- Taileron + 2 Rudders
- Taileron B + 2 Rudders
In most cases, setting up the wing and tail type to match your model will eliminate the need to use open mixes for primary flight controls.
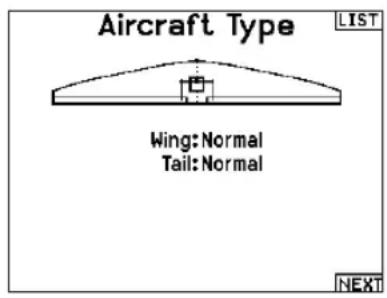
Selection of multiple ailerons activates the Differential menu option.
* Think of "V-Tail A" and "V-Tail B" function as swapping the servo plugs inside the system. If V-Tail A does not work correctly with your aircraft, try V-Tail B. You may also need to use a combination of servo reversing to get the proper control surface response.
Recommended Servo Connections
Transmitter based configurations
When selecting the wing and tail type, the transmitter will re-order the channel outputs as neccessary. Any changes made to the channel assign menu will be reset when a wing or tail type is selected. After setting the wing and tail type, refer to the RX Port assignments menu (sub menu under Channel Assign) or the channel monitor for servo port assignments.
For an airplane with two aileron servos, selecting Dual Aileron will change the servo setup menu to reflect the second aileron servo by showing left and right aileron options, and also add the (aileron) differential menu to the function list. Selecting Flaperon uses all the options for Dual Aileron but adds a flap menu to support the ailerons operating as both flaps and ailerons.
For an airplane with flaps and ailerons with four independent servos you can select 2 aileron 2 flap. With that selection made the servo menu will include options for both servos, the function list will include an (aileron) differential menu, flap menu, and the mixing for the flap servos is integrated into the values in the flap menu.
For a V-tail, selecting one of the V-tail types will add a menu to the function list to manage the values for the V-tail configuration.
For a flying wing with elevons you can select an Elevon option, and then an elevon setup menu will appear in the function list to manage the mix of the two servos to get the desired output.
BNF
BNF airplanes with AS3X and SAFE address mixing needs on the airplane by using Y harnesses. Refer to your airplane manual for setup information and always check controls prior to flight.
For a BNF airplane with three or four channels a Normal wing type selection is used.
For BNF airplanes with flaps, choose 1 aileron 1 flap.
Servo port assignments may vary from the examples shown when multiple multi servo types are selected.
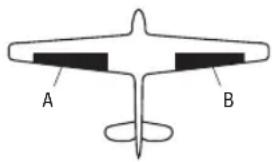
Dual Aileron Wing Type Connection
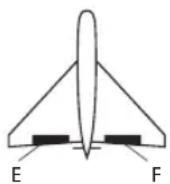
Elevon Wing Type Connection
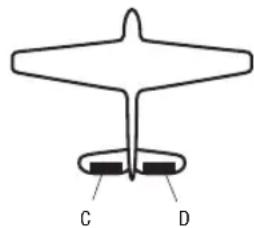
V-Tail Type Connection
A Ch 6 servo port (left aileron)
B Ch 2 servo port (right aileron)
C Ch 4 servo port (left V-tail)
D Ch 3 servo port (right V-tail)
E Ch 3 servo port (left aileron)
F Ch 2 servo port (right aileron)
IMPORTANT: Transmitter based mixing options are not viable on BNF airplanes with AS3X and SAFE because the receivers are pre-configured to work on the suggested channel layout, with Y harnesses. For example, if you select 2 ailerons and connect each directly without using a Y harness, only 1 aileron will be stabilized and SAFE will not function correctly.
Elevon Servo Control
The possible servo reversing options for a delta wing model are:
| Aileron Elevator | |
| Normal Reverse | |
| Normal Normal | |
| Reverse Reverse | |
| Reverse Normal | |
TIP: If you test all servo reversing options and the control surfaces do not move in the correct direction, change the Elevon wing type in the System Setup list from Elevon A to Elevon B.
IMPORTANT: If you are using a stabilized receiver, refer to the instructions included with your receiver or BNF aircraft.

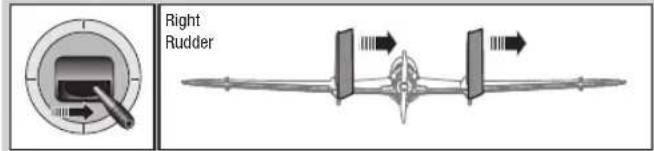
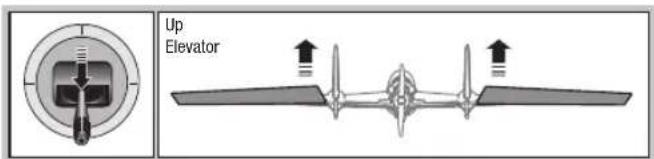
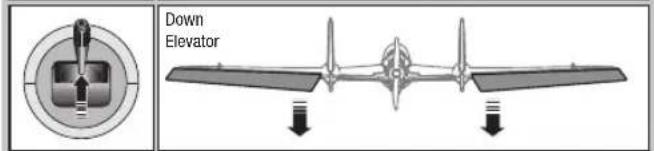
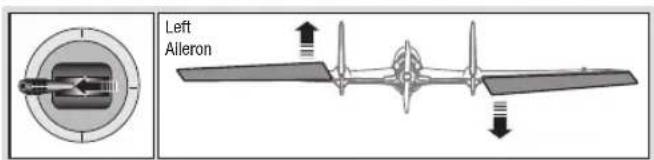
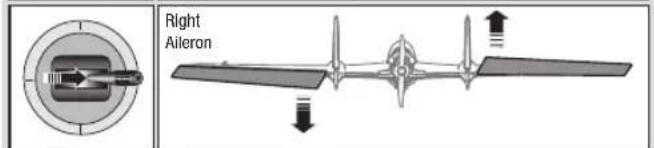
Flap System (Function List)
The Flap System menu option enables flap programming as well as elevator mixing. You must select a flap-enabled wing type in Aircraft Type or the Flap System menu does not appear.
To activate the Flap System:
- Access the System Setup list and select Aircraft Type.
- Select a flap-enabled wing type and exit the System Setup list.
- Access the Function List from the Main Screen and select Flap System.
-
Select Inhibit and scroll to the switch or lever you wish to use to control the flap channel.
-
Assign the Flap travel values and any desired Elevator mixing.
- Select a Flap speed, if desired. Norm (default) does not have a delay. Flap speed options range from 0.1s to 30 seconds.
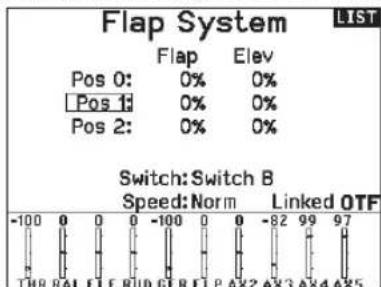
ACRO Mixing (Function List)
Rudder to Aileron/Elevator
Rudder to Aileron/Elevator mixing corrects coupling in knife edge flight.
- Add Elevator mixing if the aircraft pitches toward the landing gear or canopy
- Add Aileron mixing if the aircraft rolls in knife edge flight
Aileron to Rudder
Use Aileron to Rudder mixing to overcome adverse yaw characteristics with certain types of aircraft (such as high-wing aircraft).
Elevator to Flap
Elevator to Flap mixing enables Flap movement when the Elevator stick moves. Use Elevator to Flap mixing to add theSpoileron function to 3D aerobatic aircraft. This mix is available when a flap or dual aileron wing type is selected.
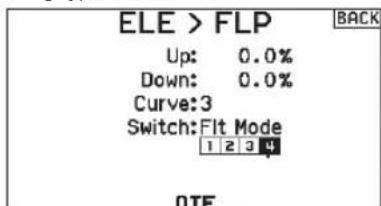
Differential (Function List)
If you enable a wing type with two aileron servos, the function menu will have a Differential menu added. This feature is intended for you to be able to set the ailerons for equal travel, or to be able to set them for more up travel than down travel, depending on your aircraft and intentions.
To use the Differential System:
- Select the switch you want to use. If you want to use one setting full-time, set the Switch to ON.
- Set your values to achieve your desired results. Positive and negative values will have an opposite effect.
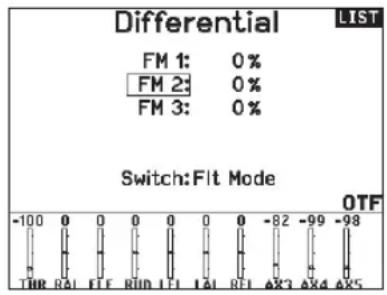
V-Tail Differential (Function List)
If you enable a V-Tail tail type, the function menu will have a V-Tail Differential menu added. This feature is intended for you to be able to set the control surfaces for equal travel, or to be able to set them for more up travel than down travel, depending on your aircraft and intentions.
To use the V-Tail Differential System:
- Select the switch you want to use. If you want to use one setting full-time, set the Switch to ON.
- Set your values to achieve your desired results. Positive and negative values will have an opposite effect.
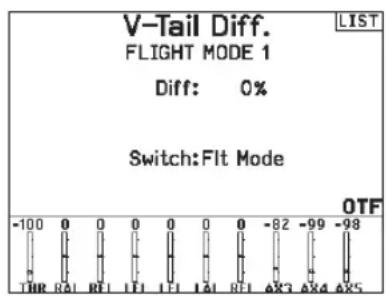
Gyro Menus (Function List)
Gyro menus can be used to control a gain value. Enable the menu you wish to use in the Aircraft Type -> Aircraft Options selection in the System Menu.
3-Axis Gyro
Select the Channel and switch you want to use and fill in your gain values in the switch positions.
Gyro (1,2,3)
This menu selection can give you more finite control over gain values along specific points of input. Select your input channel and your gain channel, and fill in the values you want to use. move the input channel and press Ad Pt. to add a point along the curve. select a different Curve (page) to store multiple sets of values for testing.
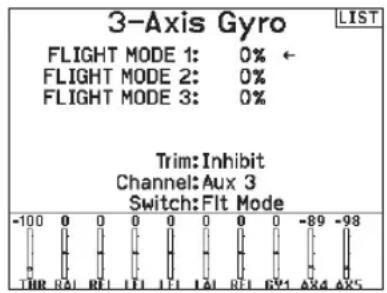
Pitch Curve (Function List)
In Acro mode a Pitch Curve screen is available that allows a variable pitch propeller to be used. Up to 4 programmable curves are available that can be selected via a switch, knob or stick position. Up to 7 points can be programmed at the desired position on each curve. Note that the Pitch curve is driven by the throttle stick position.
To access the Pitch Curve screen:
- In the System Setup List, highlight Aircraft Type.
- In the Aircraft Type Screen, select NEXT at the bottom right of the screen. This will access the Aircraft Options screen. Activate the Pitch Curve function. When the Pitch Curve function is activated, the Pitch Curve function appears in the Function List.
- Assign the pitch channel in the Channel Assignment function after activating the Pitch Curve Function.
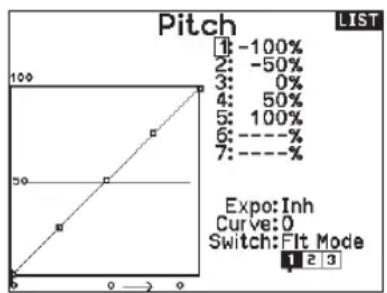
Multi-Engine Control (System Setup)
In Acro mode a Multi-Engine screen is available that allows programing for up to 4 engine aircraft.
To activate Multi-Engine Control:
- In the System Setup List, highlight Aircraft Type.
- In the Aircraft Type Screen, select NEXT at the bottom right of the screen. This will access the Aircraft Options screen.
- Scroll to Multi-Engine, press the scroll wheel and roll right to select number of engines.
- Activate the Multi-Engine Control by selecting 2, 3 or 4 engines.
To program a switch for independent Multi-Engine Control:
- In the Aircraft Options Screen, select NEXT at the bottom right of the screen. This will access the Multi-Engine switch assign screen.
- Scroll to Switch to select the 3 position switch that will allow you to independently control the engines.
TIP: Selecting LTrA/RTrA will turn the Left/Right Trims into a 3 position Analog switch. The trim will work as a 3 position switch, but will only change the position of the 'switch' when you reach each end point in either direction, or reach the center point.
TIP: Selecting LTrD/RTrD will turn the Left/Right Trims into a 3 position Digital Switch. It is recommended to select the 'Linked Position' to be Pos 1 so that both throttles will operate without holding the trim in either direction.
The Linked position determines in which switch position that all throttle channels will operate from the throttle stick/trim. Each throttle not currently active when not in the linked position will hold their previous positions before the switch was moved.
To re-name the throttles:
- In the Multi-Engine Screen, select NEXT at the bottom right of the screen. This will access the Throttle Names screen.
- Names are adjusted like Model Naming.
IMPORTANT Multi-Engine set up will not automatically select the aux channels to use for the additional throttle channels, they must be selected in the Channel Assign function. After completing the set up, go to the Channel Assign menu in the Function list, and on the RX Port Assignments page, select the open channel you wish to use for the additional throttle channels.
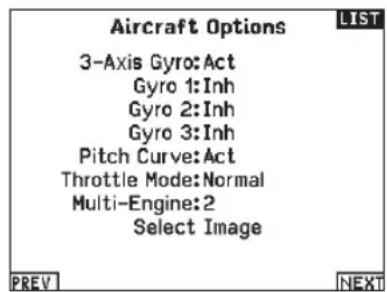
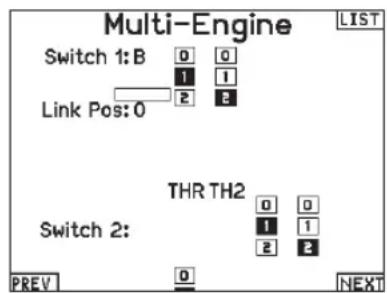
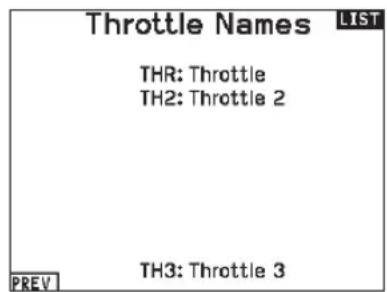
HELI (HELICOPTER)

CAUTION: Always do a Control Test of your model with the transmitter after programming changes to make sure your model responds as desired.
NOTICE: Refer to your helicopter, gyro and governor manuals for programming recommendations.
To change the Helicopter Icon:
From the Collective Type Screen, Choose Select Image, roll the scroll wheel left or right for optional icons.
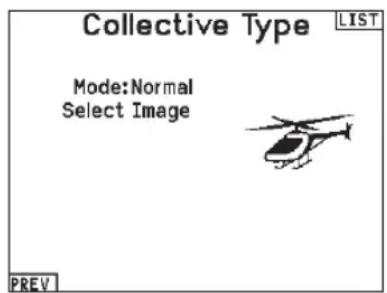
Swash Type (System Setup)
The Swash Type menu option assigns the swash type for your particular helicopter model. Select the Swash Type before completing any programming in the Function List. The Swash Type will affect menu options in the Function List.
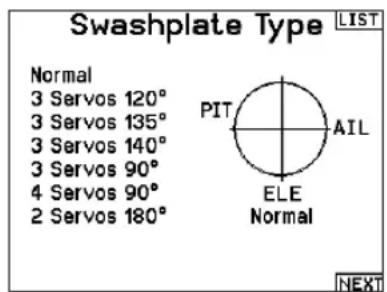
Collective Type (System Setup)
The collective type is used to turn on "Pull" collective for reversed collective. Available settings are Normal and Reverse. Press NEXT from the Swashplate Type screen to access the Collective Type screen. The Collective Type allows the throttle/pitch stick to operate in reverse and ensures trims, curves and all other functions that are to work in reverse function properly.
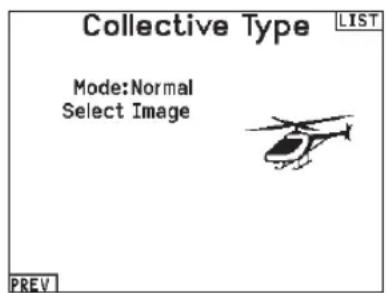
Pitch Curve (Function List)
This function supports adjustment of collective pitch in 5 flight modes.
To adjust the Pitch Curve:
- Select the Pitch Curve you wish to edit (N, 1 or 2).
- Scroll right to select the points on the curve and edit the respective values.
- Press the BACK button to save the Pitch Curves and return to the Function List.
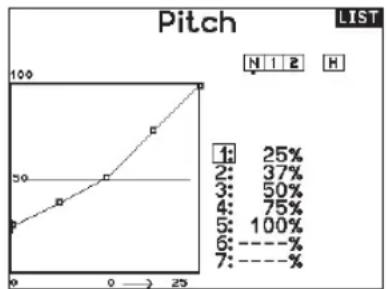
Swashplate (Function List)
The Swashplate menu option will only appear for heli swash types which use transmitter based mixing.
IMPORTANT: Most flybarless control systems address mixing requirements in the flight controller. Transmitter based mixing options are for direct swashplate control.
The Swashplate menu enables you to adjust the following when using a swash type with transmitter based mixing:
- Swashplate Mix
- Exponential
E-Ring
Elevator Compensation
Use positive or negative Swashplate mix values as needed for correct direction response of the helicopter.
Before making adjustments to the Swashplate mix, make sure the throttle/collective pitch input moves the entire swashplate up or down. If the servos are not moving in the same direction, reverse them as necessary in the Servo Setup menu option.
When the entire swashplate moves up or down:
- Adjust the mix value for the Aileron and Elevator channels. If the servos do not move in the correct direction, change the direction of the mix—for example, a positive value instead of a negative value.
- Adjust the mix value for the Pitch. If the swashplate does not move in the correct direction, change the direction of the value (negative instead of positive).
Gyro (Function List)
The Gyro menu option enables you to assign a gyro gain value to an independent switch or a Flight Mode. Assign the receiver channel connected to the gyro, then assign the switch for gyro options. You can also assign values to available switch positions (from 1 to 4 rates are available, depending on the switch assigned). Make sure the gyro operates correctly and compensates in the correct direction.
Tail Curve (Function List)
The Tail Curve function mixes tail rotor input with the throttle/ collective function to counter torque from the main rotor blades when using a non-heading hold (tail lock) gyro or when using rate mode on a gyro. See Pitch Curve for more information on programming curves.
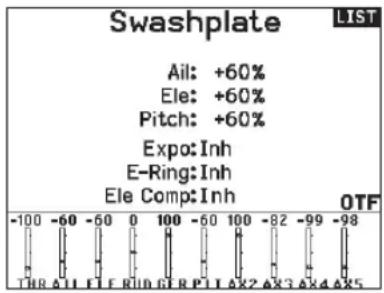
Always enable Expo when using a standard rotating-arm servo. The Expo delivers linear movement of the swashplate from a standard rotary servo. When Expo is inhibited, the arm on a rotary servo moves on a curved path with decreased swashplate movement at the extremes of the servo arm travel.
NOTICE: Do not enable Expo when using a linear servo.
Electronic E-Ring
This feature prevents over driving servos by limiting servo travel if the sum of your cyclic and pitch inputs exceeds servo limits.
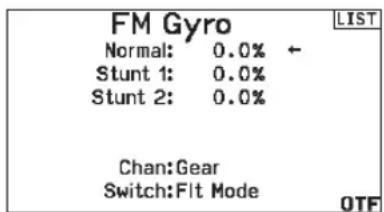
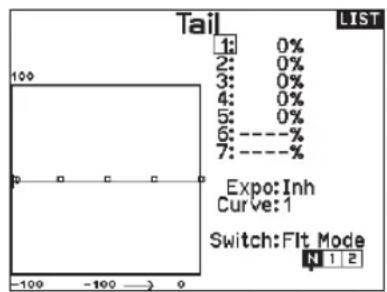
Mixing (Function List)
Cyclic to Throttle
Cyclic to Throttle mix prevents rpm loss when aileron, elevator or rudder inputs are given. This mix advances the throttle position with cyclic or rudder control to maintain rpm. At full throttle, Cyclic to Throttle mixing prevents the throttle from over driving the servo.
IMPORTANT: Do not use Cyclic to Throttle mix when using a governor.
To verify that the Cyclic to Throttle mix is working properly and in the correct direction, move the flight mode switch to one of the active positions. Move the programmed cyclic or rudder channel, noting the throttle position. The throttle position should increase. If the throttle decreases, then the opposite value (positive vs. negative) is needed.
Swashplate
The Swashplate Mix typically corrects swashplate timing issues by mixing Aileron to Elevator and Elevator to Aileron. When adjusted correctly, the Swashplate causes the helicopter to roll and pitch accurately with minimal interaction.
SAIL (SAILPLANE)

CAUTION: Always do a Control Test of your model with the transmitter after programming to make sure your model responds as desired.
NOTICE: Refer to your sailplane manual for recommended control throws.
Sailplane Type (System Setup)
Use the Sailplane Type Screen to select wing and tail types to match your sailplane model. Diagrams and setup names show on the transmitter screen to show the available setups. Refer to spektrumrc.com for more information about new NX20 Spektrum AirWare updates to support these options.
Wing
- 1 Servo
- 2 Aileron*
- 2 Aileron 1 Flap*
- 2 Aileron 2 Flap*
- 4 Aileron 2 Flap*
Tail
Normal
V-Tail A**
V-Tail B**
Motor
Inhibit
- Assign to a Switch (optional)
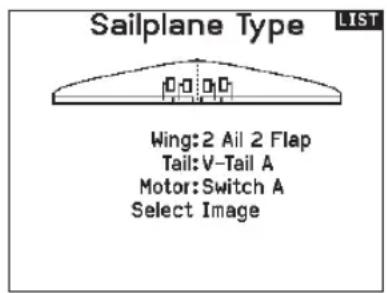
- Selection of multiple ailerons activates the Differential menu option.
** "V-Tail A" and "V-Tail B" function as internal servo reversing. If V-Tail A does not work correctly with your aircraft, try V-Tail B.
Sailplane Image
In the Sailplane Type screen, select NEXT at the bottom right of the screen. This will access the Sailplane Image screen. Click once on the image and roll the scroll wheel left or right to for optional images.
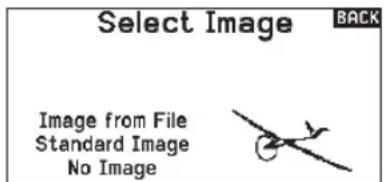
Camber Preset (Function List)
Camber Preset is only available when a multiple aileron servo wing type is selected in Sailplane Type. The Camber Preset function enables you to program the ailerons, flaps, wing tips and elevator for a specific position in each Flight Mode.
If flight modes are not active, only one preset position is available and it is always active.
The Camber Preset Speed enables the control surfaces to transition over a period of time, up to 30 seconds, when you change flight modes.
Move the flight mode switch to the desired position to change the Camber Preset values.
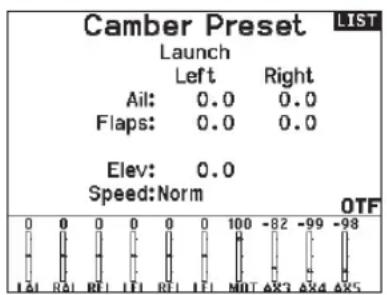
Camber System (Function List)
Camber System is only available when a multiple aileron wing type is selected in Sailplane Type. The Camber System allows in-flight camber adjustment and is also used as the braking system, often referred to as Crow or Butterfly. The Camber System enables you to assign the Camber System to a different switch in each flight mode.
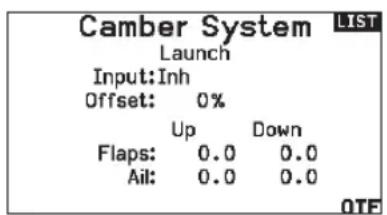
SAIL Mixing (Function List)
For each of these mixes, you can program each flight mode with different mix values or at 0% if no mix is desired for that specific flight mode. Programming values include independent control of the direction and amount a slave surface moves in relationship to the master surface.
Aileron to Rudder
The Aileron to Rudder mix is commonly used for coordinated turns. When active, as aileron is applied the rudder moves in the same direction as the turn (right aileron input results in right rudder output). If you assign the flight mode to a switch, a Sub Switch option allows you to assign an additional switch to activate up to 3 Aileron to Rudder mixes for that flight mode.
Aileron to Flap
The Aileron to Flap mix allows the entire trailing edge of the wing (aileron and flap) to operate as ailerons. When active, as aileron is applied the flaps also move. Always program the flaps to move in the same direction as the turn (so that right aileron is equivalent to flaps moving as right ailerons).
Elevator to Flap
Elevator to Flap mix creates additional lift, allowing a tighter turn. The entire trailing edge of the wing (aileron and flap) operates as flaps (camber increase) when you apply elevator. An offset is provided, which is typically used for Snap Flaps. With Snap Flap, no Elevator to Flap mix occurs until the offset value is reached. Typically, this offset is at 70% up elevator so that beyond 70% the down flap mix comes in, providing additional lift for more aggressive turning (for tight thermals or racing turns).
Flap to Elevator
Flap to Elevator mix prevents pitch up tendency that occurs when you apply Crow or Butterfly. This mix is typically used only with the Camber System. The Flap to Elevator mix operates as a curve so that the elevator moves down the most during the first 20% of flap deployment, decreases over the next 40% , then remains the same from 60 to 100% of flap travel.
For sailplanes with ailerons/tips/flaps, make sure an appropriate Sailplane Type is selected so that tips appear in the transmitter as RAIL and LAIL. Decrease or increase travel on the tip ailerons by creating an AIL > RAIL mix.
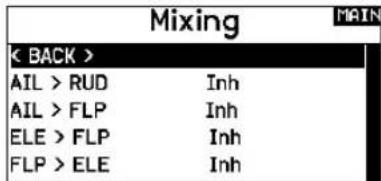
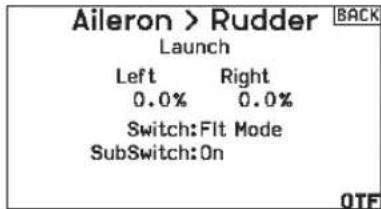
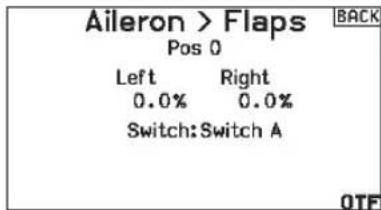
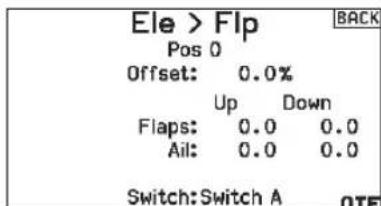
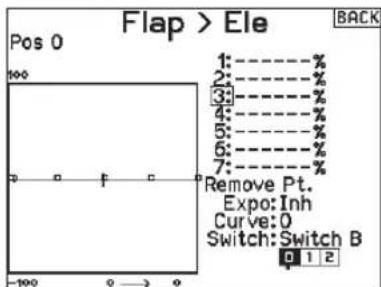
MULTI (MULTIROTOR)

CAUTION: Always do a Control Test of your model with the transmitter after programming to make sure your model responds as desired.
NOTICE: Refer to your multirotor manual for programming recommendations.
The Aircraft Options menu allows you to select a camera gimbal axis. Select None, 1-Axis, 2-Axis or 3-Axis from the Camera Options box.
The model icon can be changed by selecting the icon and scrolling left or right to select.
Multirotor Image
In the Aircraft Options screen, roll to the image. Click once on the image and roll the roller left or right for optional images.
Aircraft Options
Camera:None
FPV Racer:Active Select Image
F-Mode Setup (System Setup)
By default switch B is assigned 3 Flight Modes. You can assign up to five flight modes using any combination of up to two switches.
Channel Assign
Scroll and Select Channel to assign channel inputs and outputs for each Flight Mode. Each channel can be assigned any switch on the transmitter including but not limited to trim switches, gimbals and the Clear/Back buttons.
EXAMPLE: Assign Flight Mode 1 to be your primary flight mode where your gimbals control primary flight axis. Switching to Flight Mode 2, you can have the gimbals control the camera axis and the trim buttons control primary flight axis.
TIP: You can also access the Channel Assign from the Channel Assign Menu in System Setup.
F Mode Setup
Switch 1:Switch B
Switch 2:Inhibit
Switch 3:Inhibit
Enabled Flight Modes: 3
Channel:Inhibit
Mode:1FLIGHTMODE1 100%
Trim Setup (System Setup)
By default Trims are setup for FMode, and the trim steps are defaulted to zero for multirotors. If you want to utilize trim in multirotor mode, increase the trim step values above zero.
F Mode trim type enables you to save trim values for individual flight modes if you find, for example, the aircraft requires Roll trim in Flight Mode 1 but not in Flight Mode 2.
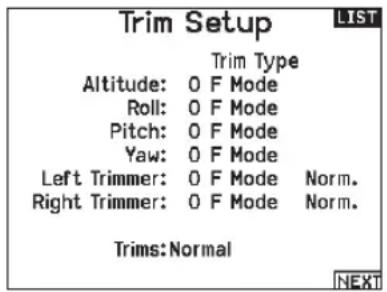
Rates and Expo (Function List)
Rates and Expo are available on the PIT, ROL and YAW channels.
To adjust the Dual Rate and Exponential:
- Scroll to the channel and press the scroll wheel once. Scroll left or right to select the channel you wish to change and press the scroll wheel again to save the selection.
- Scroll to Switch and press the scroll wheel to select. Move the switch you want to assign to D/R.
- Scroll to dual rate and press the scroll wheel. Scroll left or right to change the value and press the scroll wheel again to save the selection.
Exponential affects control response sensitivity around center but has no affect on overall travel. Positive exponential decreases the sensitivity around the center of gimbal movement.
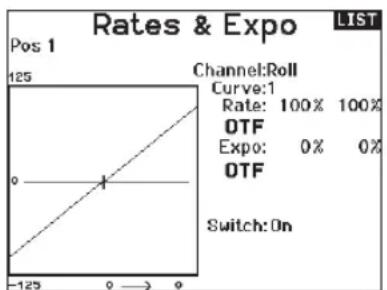
Motor Cut (Function List)
The Motor Cut menu option enables you to assign a switch position to stop the motor. Motor Cut activates regardless of Flight Mode.
When you activate Motor Cut, the ALT channel moves to the preprogrammed position (normally Off).
You may need to use a negative value to move the ALT channel to the off position.

CAUTION: Always test the model after making adjustments to make sure the model responds to
controls as desired.
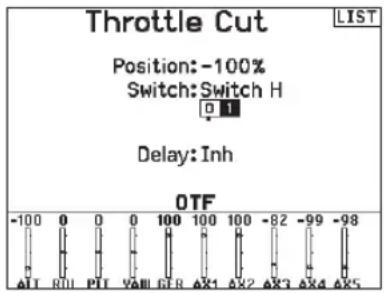
Motor Curve (Function List)
You can use the Motor Curve menu option to optimize the throttle response. A maximum of 7 points are available on the throttle curve.
To add points to a Motor Curve:
- Move the throttle stick to the position where you wish to add the new point.
- Scroll to Add Pt. and press the scroll wheel to add the point.
To remove points from a Motor Curve:
- Move the motor stick until the cursor is near the point you wish to remove.
- Scroll to Remove Pt. and press the scroll wheel once to remove the point.
If you program multiple throttle curves and you wish to edit one of the curves, that curve must be active in the Motor Curve screen before you can make any changes.
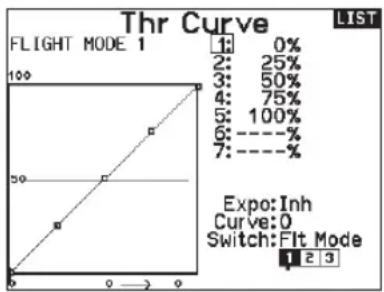
PHYSICAL TRANSMITTER ADJUSTMENTS
Antenna Position
We recommend setting up your antenna to be positioned vertical when you are in your most comfortable position for flying. The antenna may also be folded for storage.
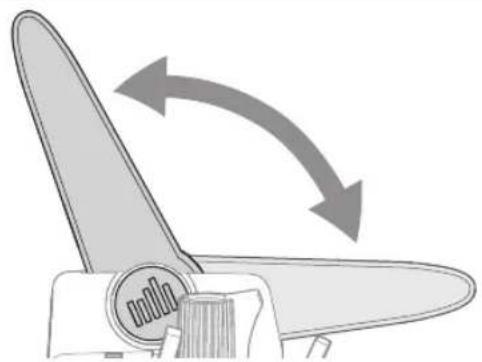
Gimbal Adjustments
The NX20 has all the physical transmitter adjustments located around the gimbal face of each gimbal. This arrangement allows for quick and easy adjustments with out taking the back cover off or removing any plugs to access adjustment screws.
Available adjustments:
- Adjust the stick cvtension
- Change between throttle tension modes (smooth or ratchet)
Gimbal travel limit
Mode conversion
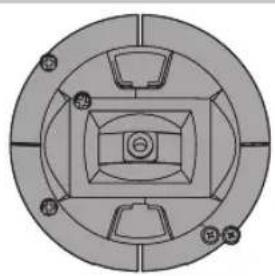
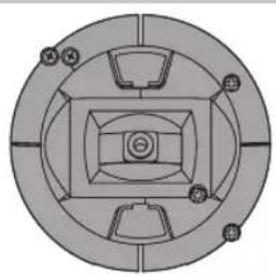
Adjust Stick Tension
Turn the screws clockwise a small amount using a small Phillips screwdriver to tighten the stick tension and counter clockwise to loosen.
NOTICE: Always do a test of stick tension while turning these screws to ensure stick tension is not too loose or too tight.
Tightening a screw too much can damage a spring. Loosening a screw too much can let a spring fall off and cause short-circuit in the transmitter.
Vertical Tension Horizontal Tension
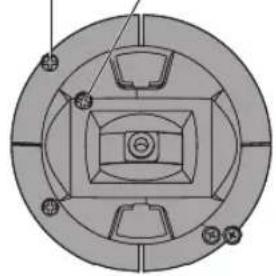
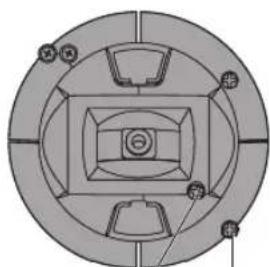
Horizontal Tension
Vertical Tension
Control Stick Length Adjustment
- Using a 2mm Allen wrench, turn the setscrew in the stick counterclockwise to loosen it.
- Make the stick shorter by turning it clockwise or longer by turning it counterclockwise.
- After adjustment of stick length, tighten the setscrew.
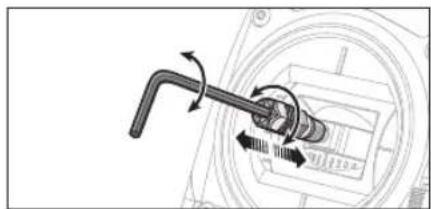
Gimbal Travel Limit
Each gimbal has a switch at the top and bottom that can limit the travel on that stick's vertical movement.
Adjusting the gimbal travel limits
- Remove the covers
- Move the switches toward the center of the transmitter to use the full travel available.
Move the switch to the outside of the case to reduce travel.
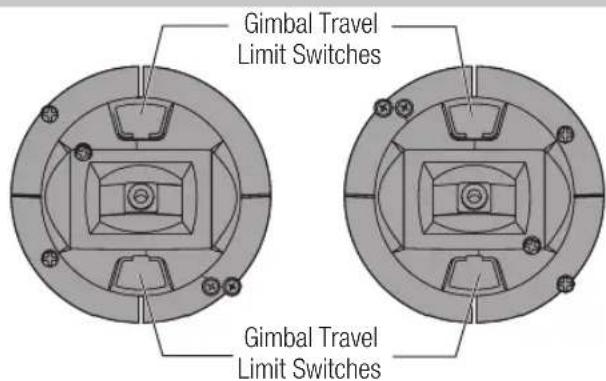
Ratcheted Throttle - Smooth Throttle Adjustment
Ratchet
- Locate the throttle strap adjustment screws on both gimbals. The ratchet set screw engages a serrated section on the gimbal for a ratchedeted throttle, while the tension set screw engages a strap for smooth tension on the gimbal.
- To engage the throttle ratchet turn the ratchet set screw clockwise until the ratchet engages.
- To disengage the throttle ratchet turn the screw counter clockwise until the gimbal moves freely.
Smooth Tension
- To engage the throttle tension, turn the tension set screw clockwise until the Tension engages.
- To disengage the throttle Tension turn the screw counter clockwise until the gimbal moves freely.
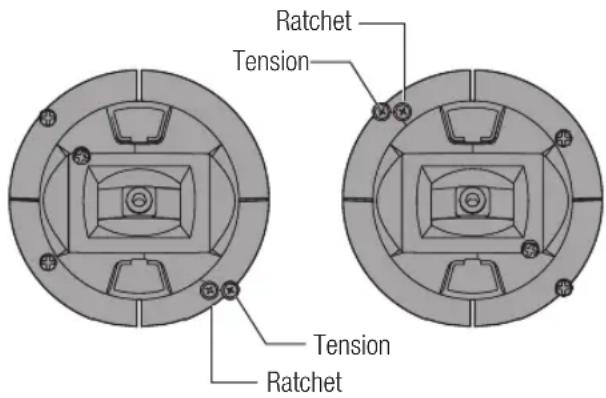
Mode Conversion
You can select transmitter modes 1, 2, 3 or 4 for the NX20. Converting the mode requires both a mechanical and programming change.
Mechanical Conversion
Mechanical conversion is required to change between Modes 1 and 2 or between Modes 3 and 4. The mechanical conversion consists of the following steps:
- Change the throttle ratchet/throttle tension; remove the tension on the side that was throttle, and apply the tension on the side that will be throttle.
- Adjust the elevator centering screw. When changing between modes 1 and 2, or between modes 3 and 4, you must adjust the elevator centering screw.
a. Hold the elevator or throttle stick in the full up or full down position when you are adjusting the elevator centering screw. Holding the gimbal stick reduces the load on the elevator centering mechanism and makes it easier to adjust the centering screw.
b. Use a Phillips screwdriver to adjust the elevator centering screw. Tightening the screw will disengage the centering spring. Loosening the screw will engage the spring.
IMPORTANT: Do not remove the mode change screws too far or you will have to open the case to put it back together.
Programming Conversion
- Enter the System Setup menu, Scroll down and select System Settings. Scroll down and select the mode you wish to use. Exit to the mains screen
- Power the transmitter OFF.
- Power the transmitter ON, the system will force you to calibrate the sticks after a mode change
- Resume normal operation with the selected mode of operation.
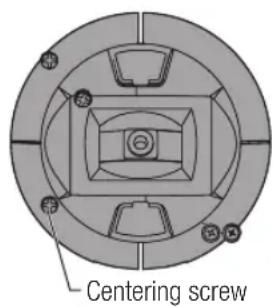
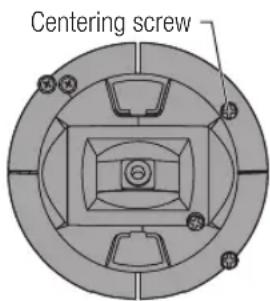
TROUBLESHOOTING GUIDE
| Problem Possible Cause Solution | ||
| Aircraft will not bind (during binding) to transmitter | Transmitter too near aircraft during binding process | Move powered transmitter a few feet from aircraft, disconnect and reconnect flight battery to aircraft |
| Aircraft or transmitter is too close to large metal object | Move the aircraft or transmitter away from the large metal object | |
| The bind plug is not installed correctly in the bind port | Install bind plug in bind port and bind the aircraft to the transmitter | |
| Flight battery/Transmitter battery charge is too low | Replace/recharge batteries | |
| Transmitter is a NX20 EU version and receiver is DSM2 | The NX20 EU version is not compatible with DSM2 receivers | |
| Aircraft will not link (after binding) to transmitter | Transmitter too near aircraft during linking process | Move powered transmitter a few feet from aircraft, disconnect and reconnect flight battery to aircraft |
| Aircraft or transmitter is too close to large metal object | Move the aircraft or transmitter away from the large metal object | |
| Bind plug left installed in bind port | Rebind transmitter to the aircraft and remove the bind plug before cycling power | |
| Aircraft bound to different model memory (ModelMatch™ radios only) | Select correct model memory on transmitter | |
| Flight battery/transmitter battery charge is too low | Replace/recharge batteries | |
| Transmitter may have been bound using different DSM protocol | Bind aircraft to transmitter | |
| Damaged remote receiver or receiver extension. Required remote receiver is not connected | ||
| The receiver goes into failsafe mode a short distance away from the transmitter | Check the receiver antenna to be sure it is not cut or damaged | Replace or contact Horizon Product Support |
| Main and remote receivers too near each other | Install main and remote receivers at least 2 inches (51mm) apart | |
| Receiver quits responding during operation | Low battery voltage Completely recharge flight battery | |
| Loose or damaged wires or connectors between battery and receiver | Do a check of the wires and connection between battery and receiver. Repair or replace wires and/or connectors | |
| Receiver loses its bind | Bind button pressed before transmitter powered on | Rebind by performing binding instructions |
| Receiver slowly blinking at landing (DSM2 Only) | Loss of power to the receiver during flight Check battery voltage | |
| System powered on and connected, then receiver powered off without powering off transmitter | Power off transmitter when receiver is powered off | |
| Flight log registers undesirable number of fades, losses or holds or aircraft responds irregularly to controls | Poor signal reception | Reposition remote receivers for improved RF signal path diversity |
| Electronic feedback | Check for and stop feedback from servos or motor systems to the ESC or receiver | |
| Low power | Check aircraft power draw and increase battery power or decrease power demand by installed systems. Ensure all aircraft batteries are fully charged. Ensure the installed BEC for an electric aircraft is adequate for the power demand | |
1-YEAR LIMITED WARRANTY
What this Warranty Covers
Horizon Hobby, LLC, (Horizon) warrants to the original purchaser that the product purchased (the "Product") will be free from defects in materials and workmanship for a period of 1 year from the date of purchase.
What is Not Covered
This warranty is not transferable and does not cover (i) cosmetic damage, (ii) damage due to acts of God, accident, misuse, abuse, negligence, commercial use, or due to improper use, installation, operation or maintenance, (iii) modification of or to any part of the Product, (iv) attempted service by anyone other than a Horizon Hobby authorized service center, (v) Product not purchased from an authorized Horizon dealer, (vi) Product not compliant with applicable technical regulations or (vii) use that violates any applicable laws, rules, or regulations.
OTHER THAN THE EXPRESS WARRANTY ABOVE, HORIZON MAKES NO OTHER WARRANTY OR REPRESENTATION, AND HEREBY DISCLAIMS ANY AND ALL IMPLIED WARRANTYES, INCLUDING, WITHOUT LIMITATION, THE IMPLIED WARRANTYES OF NON-INFRINGEMENT, MERCHANTABILITY AND FITNESS FOR A PARTICULAR PURPOSE. THE PURCHASER ACKNOWLEDGES THAT THEY ALONE HAVE DETERMINED THAT THE PRODUCT WILL SUITABLY MEET THE REQUIREMENTS OF THE PURCHASER'S INTENDED USE.
Purchaser's Remedy
Horizon's sole obligation and purchaser's sole and exclusive remedy shall be that Horizon will, at its option, either (i) service, or (ii) replace, any Product determined by Horizon to be defective. Horizon reserves the right to inspect any and all Product(s) involved in a warranty claim. Service or replacement decisions are at the sole discretion of Horizon. Proof of purchase is required for all warranty claims. SERVICE OR REPLACEMENT AS PROVIDED UNDER THIS WARRANTY IS THE PURCHASER'S SOLE AND EXCLUSIVE REMEDY.
Limitation of Liability
HORIZON SHALL NOT BE LIABLE FOR SPECIAL, INDIRECT, INCIDENTAL OR CONSEQUENTIAL DAMAGES, LOSS OF PROFITS OR PRODUCTION OR COMMERCIAL LOSS IN ANY WAY, REGARDLESS OF WHETHER SUCH CLAIM IS BASED IN CONTRACT, WARRANTY, TORT, NEGLIGENCE, STRICT LIABILITY OR ANY OTHER THEORY OF LIABILITY, EVEN IF HORIZON HAS BEEN ADVISED OF THE POSSIBILITY OF SUCH DAMAGES. Further, in no event shall the liability of Horizon exceed the individual price of the Product on which liability is asserted. As Horizon has no control over use, setup, final assembly, modification or misuse, no liability shall be assumed nor accepted for any resulting damage or injury. By the act of use, setup or assembly, the user accepts all resulting liability. If you as the purchaser or user are not prepared to accept the liability associated with the use of the Product, purchaser is advised to return the Product immediately in new and unused condition to the place of purchase.
Law
These terms are governed by Illinois law (without regard to conflict of law principals). This warranty gives you specific legal rights, and you may also have other rights which vary from state to state. Horizon reserves the right to change or modify this warranty at any time without notice.
WARRANTY SERVICES
Questions, Assistance, and Services
Your local hobby store and/or place of purchase cannot provide warranty support or service. Once assembly, setup or use of the Product has been started, you must contact your local distributor or Horizon directly. This will enable Horizon to better answer your
questions and service you in the event that you may need any assistance. For questions or assistance, please visit our website at www.horizonhobby.com, submit a Product Support Inquiry, or call the toll free telephone number referenced in the Warranty and Service Contact Information section to speak with a Product Support representative.
Inspection or Services
If this Product needs to be inspected or serviced and is compliant in the country you live and use the Product in, please use the Horizon Online Service Request submission process found on our website or call Horizon to obtain a Return Merchandise Authorization (RMA) number. Pack the Product securely using a shipping carton. Please note that original boxes may be included, but are not designed to withstand the rigors of shipping without additional protection. Ship via a carrier that provides tracking and insurance for lost or damaged parcels, as Horizon is not responsible for merchandise until it arrives and is accepted at our facility. An Online Service Request is available at http://www.horizonhobby.com/content/service-center_render-service-center. If you do not have internet access, please contact Horizon Product Support to obtain a RMA number along with instructions for submitting your product for service. When calling Horizon, you will be asked to provide your complete name, street address, email address and phone number where you can be reached during business hours. When sending product into Horizon, please include your RMA number, a list of the included items, and a brief summary of the problem. A copy of your original sales receipt must be included for warranty consideration. Be sure your name, address, and RMA number are clearly written on the outside of the shipping carton.
NOTICE: Do not ship LiPo batteries to Horizon. If you have any issue with a LiPo battery, please contact the appropriate Horizon Product Support office.
Warranty Requirements
For Warranty consideration, you must include your original sales receipt verifying the proof-of-purchase date. Provided warranty conditions have been met, your Product will be serviced or replaced free of charge. Service or replacement decisions are at the sole discretion of Horizon.
Non-Warranty Service
Should your service not be covered by warranty, service will be completed and payment will be required without notification or estimate of the expense unless the expense exceeds 50% of the retail purchase cost. By submitting the item for service you are agreeing to payment of the service without notification. Service estimates are available upon request. You must include this request with your item submitted for service. Nonwarranty service estimates will be billed a minimum of 12 hour of labor. In addition you will be billed for return freight. Horizon accepts money orders and cashier's checks, as well as Visa, MasterCard, American Express, and Discover cards. By submitting any item to Horizon for service, you are agreeing to Horizon's Terms and Conditions found on our website http://www.horizonhobby.com/content/service-center_render-service-center.
ATTENTION: Horizon service is limited to Product compliant in the country of use and ownership. If received, a non-compliant Product will not be serviced. Further, the sender will be responsible for arranging return shipment of the un-serviced Product, through a carrier of the sender's choice and at the sender's expense. Horizon will hold non-compliant Product for a period of 60 days from notification, after which it will be discarded.
10-15
WARRANTY AND SERVICE CONTACT INFORMATION
Country of Purchase Horizon Hobby Contact Information Address
| United States of America | Horizon Service Center (Repairs and Repair Requests) | servicecenter.horizonhobby.com/RequestForm/ | 2904 Research Rd Champaign, Illinois, 61822 USA | |
| Horizon Product Support (Product Technical Assistance) | productsupport@horizonhobby.com | |||
| 877-504-0233 | ||||
| Sales | websales@horizonhobby.com | |||
| 800-338-4639 | ||||
| EU | Horizon Technischer Service Service@horizonhobby.de Sales: Horizon Hobby GmbH +49 (0) 4121 2655 100 | Hanskampring 9 D 22885 Barsbüttel, Germany | ||
FCC INFORMATION
FCC ID: BRWSPMR20500
This equipment complies with FCC and IC radiation exposure limits set forth for an uncontrolled environment. This equipment should be installed and operated with minimum distance 20cm between the radiator and/or antenna and your body (excluding fingers, hands, wrists, ankles and feet). This transmitter must not be co-located or operating in conjunction with any other antenna or transmitter.
Supplier's Declaration of Conformity
FC Spektrum NX20 Transmitter Only (SPMR20500, SPMR205001):This device complies with part 15 of
FCC Rules. Operation is subject to the following two conditions: (1) This device may not cause harmful interference, and (2) this device must accept any interference received, including interference that may cause undesired operation.

CAUTION: changes or modifications not expressly approved by the party responsible for compliance could e user's authority to operate the equipment.
NOTE: This equipment has been tested and found to comply with the limits for a Class B digital device, pursuant to part 15 of the FCC Rules. These limits are designed to provide reasonable protection against harmful interference in a residential installation. This equipment generates, uses and can radiate radio frequency energy and, if not installed and used in accordance with the instructions, may cause harmful interference to radio communications. However, there is no guarantee that interference will not occur in a particular
installation. If this equipment does cause harmful interference to radio or television reception, which can be determined by turning the equipment off and on, the user is encouraged to try to correct the interference by one or more of the following measures:
- Reorient or relocate the receiving antenna.
- Increase the separation between the equipment and receiver.
- Connect the equipment into an outlet on a circuit different from that to which the receiver is connected.
- Consult the dealer or an experienced radio/TV technician for help.
Note: The Grantee is not responsible for any changes or modifications not expressly approved by the party responsible for compliance. Such modifications could void the user's authority to operate the equipment.
The device has been evaluated to meet general RF exposure requirement. To maintain compliance with FCC's RF exposure guidelines, the distance must be at least 20~cm between the radiator and your body, and fully supported by the operating and installation configurations of the transmitter and its antenna(s).
Horizon Hobby, LLC
2904 Research Rd.,
Champaign, IL 61822
Email: compliance@horizonhobby.com
Web: HorizonHobby.com
IC INFORMATION
CAN ICES-3 (B)/NMB-3(B)
IC: 6157A-SPMR20500
This device complies with ISED licence-exempt RSS standard(s). Operation is subject to the following two conditions:(1) this device may not cause interference, and (2) this device must accept any interference, including interference that may cause undesired operation of the device.
The device has been evaluated to meet general RF exposure requirement. To maintain compliance with RSS-102 — Radio Frequency (RF) Exposure guidelines, this equipment should be installed and operated with a minimum distance of 20cm between the radiator and your body.
COMPLIANCE INFORMATION FOR THE EUROPEAN UNION

EU Compliance Statement:
Spektrum NX20 Transmitter Only
(SPMR20500EU); Hereby, Horizon Hobby, LLC declares that the device is in compliance with t
following: EU Radio Equipment Directive 2014/53/EU; RoHS 2 Directive 2011/65/EU; RoHS 3 Directive - Amending 2011/65/EU Annex II 2015/863.
The full text of the EU declaration of conformity is available at the following internet address: https://www.horizonhobby.com/content/support-render-compliance.
NOTE: This product contains batteries that are covered under the 2006/66/EC European Directive, which cannot be disposed of with normal household waste. Please follow local regulations.
Wireless Frequency Range and Wireless Output Power:
Control and Trainer: 2402-2478 MHz /WiFi: 2412-2462 MHz
Control: 18.7 dBm / Trainer: 1.43 dBm / WiFi: 18.5dBm
EU Manufacturer of Record:
Horizon Hobby, LLC
2904 Research Road
Champaign, IL 61822 USA
EU Importer of Record:
Horizon Hobby, GmbH
Hanskampring 9
22885 Barsbüttel Germany
WEEE NOTICE:

This appliance is labeled in accordance with European Directive 2012/19/EU concerning waste of electrical and electronic equipment (WEEE). This label indicates that this product should not be disposed of with household waste. It should be deposited at an
appropriate facility to enable recovery and recycling.
HINWIES
| 1 | 2 | 3 | 4 | 5 | 6 | 7 | 8 | 9 | 0 |
| A | B | C | D | E | F | G | H | I | J |
| K | L | M | N | O | P | Q | R | S | ins |
| T | U | V | W | X | Y | Z | × | ||
| ⊗#% | , | - | . | ←] | [→ | ||||
- Wahlen Sie im Menu Systemkonfiguration die Option Model Type [Modelltyp].
- Scroll to the desired model type and press the scroll wheel. The Confirm Model Type screen appears.
- Select Yes and press the scroll wheel to confirm the model type. All data will be reset. Selecting No will exit the Confirm Model Type screen and return to the Model Type screen.
Head Tracking FPV Setup
Brightness [Helligkeit]
Battery Voltage:3.90V
Input Voltage:0.00V
Current Limit:2560mA
Servomonitor
22885 Barsbüttel Germany
WEEE-HINWEIS

| 1 | 2 | 3 | 4 | 5 | 6 | 7 | 8 | 9 | 0 |
| A | B | C | D | E | F | G | H | I | J |
| K | L | M | N | O | P | Q | R | S | ins |
| T | U | V | W | X | Y | Z | × | ||
| # | % | , | - | . | + | [→ | |||
SELECTION AUTOMATIQUE DES INTERRUPEURS
Access Internal Storage
Options: Importation/Exportation
Options:Selectionner Option
Dossier:0:/
Carte SD:Interne
Statut:Prat
Binding (Affectation)
Battery Voltage:3.82V
Input Voltage:0.00V
Current Limit: 2560 mA
Moniteur
22885 Barsbüttel Germany
DIRECTIVE DEEE

HELI (Helicopter) 220
Tipodi piatto 220
Connession (Binding)
Priority Monitor: Inibito
INDI
Inter:Inter. Combinato
Interr 1:Interr F
Relazione:ED
Interr 2:Interr A
Stato:Inibito
Miscelazione
Battery Voltage:3.86V
Input Voltage:0.00V
Current Limit:2560mA
Monitor
22885 Barsbüttel Germany
AVVISO RAEE

© 2022 Horizon Hobby, LLC
DSM, DSM2, DSMX, the DSMX logo, Bind-N-Fly, BNF, the BNF logo, Spektrum AirWare, ModelMatch, AS3X,
SmartSafe, and the Horizon Hobby logo are trademarks or registered trademarks of Horizon Hobby, LLC.
The Spektrum trademark is used with permission of Bachmann Industries, Inc.
US 7,391,320.US 9,930,567.US 10,419,970.US 10,849,013. Other patents pending.
www.spektrumrc.com
Created 11/2022 145156 SPMR20500, SPMR20500EU, SPMR205001

- Meaning of Special Language
- Age Recommendation: Not for Children under 14 years. This is not a toy.
- Warranty Registration
- General Notes
- Pilot Safety
- BEFORE USING YOUR TRANSMITTER
- BOX CONTENTS SPECIFICATIONS
- TABLE OF CONTENTS
- BASIC OPERATION
- Interface
- Main Screen
- System Setup
- Function List
- Model Files
- Model Match technology
- Binding
- BNF Setup
- Custom Model Setup
- POWERING THE NX20 ON AND OFF
- CHARGINGWARNINGS
- - NEVER LEAVE CHARGING BATTERIES UNATTENDED.
- NAVIGATION
- KEYBOARD STYLE
- AUTO SWITCH SELECT
- OTF (ON THE FLY) TRIM FUNCTIONS
- To activate the OTF feature for a given function:
- PRE-INSTALLED BNF MODEL FILES
- USB AND INTERNAL MEMORY
- Mass Storage
- EXTERNAL MEMORY CARD
- Installing An External Memory Card
- MEMORY CARD FUNCTIONS
- Update Spektrum AirWare™ Software
- Automatically Installing Spektrum AirWare Software Updates
- Manually Installing Spektrum AirWare Software Updates
- MODEL TYPE PROGRAMMING GUIDE
- Model Select
- Model Type
- Model Name
- Aircraft Type
- Sailplane Type
- Swash Type
- Aircraft Options
- Flight Mode Examples
- Flight Mode Setup
- Spoken Flight Mode
- Channel Assign
- Channel Input Configuration
- Rx Port Assignments
- Trim Setup
- Trim Step
- To change the trim step value:
- Trim Type
- Trim Assignment
- Aircraft Model Type
- Throttle Trim Type
- Trim Location
- Gimbal Trim Assign
- Model Utilities
- Create New Model
- Delete Model
- Copy Model
- Use Model Copy to:
- To copy model programming:
- Model Reset
- Sort Model List
- Validate All Models
- Delete All Models
- Warnings
- Telemetry
- Telemetry data
- Status Reports:
- Warning Reports:
- Telemetry Auto-Configuration
- Settings
- Display
- Units
- Priority Monitor
- File Settings
- File Name
- One Time
- Enabled
- Input Data
- Preflight Setup
- Frame Rate, RF Mode, and Failsafe
- RF Mode
- Servo Mode
- XPLUS
- Model Match
- Bind Progress
- Bind
- Serial Port Setup
- Serial Output
- Serial Port Protocol
- Spektrum RF
- External Power (9.5v)
- Crossfire Telemetry
- Trainer
- Wired Trainer
- Standard Instructor
- Wireless Trainer
- Pilot Link Instructor
- FPV
- P-Link Student
- Normal Student
- Programmable Instructor
- Instructor Transmitter Configuration
- Binding Wireless Trainer
- Head Tracking FPV Setup
- To configure headtracking FPV:
- Center Tone
- Sound Utilities
- Palette Utilities
- System Settings
- UserID
- To Program a User Name:
- Roller Menu
- Brightness
- Mode*
- To change the gimbal stick mode:
- Battery Alarm
- Selecting a Language
- Inactive Alarm
- Extra Settings
- System Sounds
- Vibrator Intensity Adjustment
- Keyboard
- Trim Style
- Volume Controls
- To change the Trim style:
- Channel Monitor
- Set Date/Time
- Date/Time
- Power Sounds
- Factory Reset
- Calibrate
- To Calibrate the Transmitter:
- WiFi Utilities
- WiFi Credentials
- USB Settings
- Transfer SD Card
- Category
- Model Import/Export
- Model Import
- Export Model
- SD Card Menu
- Import All Models
- Memory Location
- Export All Models
- File/Folder Management
- Palette Import/Export
- Import Palette
- Export Palette
- Special Features
- Update AirWare
- Manually Installing Airware Updates With Memory Card
- Export Sound Categories
- Screen Print
- Format SD Card
- About / Regulatory
- Serial Number
- Exporting the Serial Number to the Memory card
- To export the transmitter serial number:
- Locating the Transmitter Spektrum AirWare Software Version
- Servo Setup
- Travel Adjust
- To adjust travel values:
- Sub-Trim
- Reverse
- To reverse a channel direction:
- Speed
- To adjust the Speed:
- Absolute (Abs.) Travel
- Channel Name
- Balance
- Rates and Expo
- To adjust the Dual Rate and Exponential:
- Throttle Cut
- Throttle Curve
- Analog Switch Setup
- Digital Switch Setup
- To use the Digital Switch Setup function:
- Logical Switch Setup
- To use the Logical Switch Setup function:
- Combo Switch Setup
- To use the Combo Switch Setup function:
- Mixing
- Precision Mixing
- Normal Mix
- Rate
- Offset
- Trim
- Curve (Page)
- Switch
- Curve Mix
- Curve
- Curve (Page) Advanced Configuration Options
- Sequencer
- Sequencer Set Up
- Testing the Sequence
- Range Test
- To Access the Range Test screen:
- Range Testing the NX20
- Timer
- To select Telemetry Auto-Config:
- Forward Programming
- Audio Events
- Switch Changes
- Stepping Reports
- Generic Reports
- Flight Modes
- TelemetryWarnings
- Trainer Alerts
- Model Start
- VTX Setup
- Function Bar
- Ticker Tape Setup
- Sensor Configuration
- Field
- My List Setup
- Start Trainer
- CAUTION!
- Charge Status
- Monitor
- (Aileron) Differential
- V-Tail Differential
- Camber Preset
- Camber System
- Flap System
- Pitch Curve
- Swashplate
- Gyro
- Tail Curve
- Motor Cut
- Motor Curve
- ACRO (AIRPLANE)
- Aircraft Type (System Setup)
- Select wing and tail types before doing any other programming.
- Wing
- Tail
- Recommended Servo Connections
- Transmitter based configurations
- BNF
- Elevon Servo Control
- Flap System (Function List)
- ACRO Mixing (Function List)
- Rudder to Aileron/Elevator
- Aileron to Rudder
- Elevator to Flap
- Differential (Function List)
- To use the Differential System:
- V-Tail Differential (Function List)
- To use the V-Tail Differential System:
- Gyro Menus (Function List)
- 3-Axis Gyro
- Gyro (1,2,3)
- Pitch Curve (Function List)
- To access the Pitch Curve screen:
- Multi-Engine Control (System Setup)
- HELI (HELICOPTER)
- Swash Type (System Setup)
- Collective Type (System Setup)
- Swashplate (Function List)
- When the entire swashplate moves up or down:
- Gyro (Function List)
- Tail Curve (Function List)
- Electronic E-Ring
- Mixing (Function List)
- Cyclic to Throttle
- SAIL (SAILPLANE)
- Sailplane Type (System Setup)
- Motor
- Sailplane Image
- Camber Preset (Function List)
- Camber System (Function List)
- SAIL Mixing (Function List)
- Aileron to Flap
- Flap to Elevator
- MULTI (MULTIROTOR)
- Multirotor Image
- F-Mode Setup (System Setup)
- F Mode Setup
- Trim Setup (System Setup)
- Rates and Expo (Function List)
- Motor Cut (Function List)
- Motor Curve (Function List)
- To add points to a Motor Curve:
- To remove points from a Motor Curve:
- PHYSICAL TRANSMITTER ADJUSTMENTS
- Antenna Position
- Gimbal Adjustments
- Adjust Stick Tension
- Control Stick Length Adjustment
- Gimbal Travel Limit
- Adjusting the gimbal travel limits
- Ratcheted Throttle - Smooth Throttle Adjustment
- Ratchet
- Smooth Tension
- Mode Conversion
- Mechanical Conversion
- Programming Conversion
- 1-YEAR LIMITED WARRANTY
- What this Warranty Covers
- What is Not Covered
- Purchaser's Remedy
- Limitation of Liability
- Law
- WARRANTY SERVICES
- Questions, Assistance, and Services
- Inspection or Services
- NOTICE: Do not ship LiPo batteries to Horizon. If you have any issue with a LiPo battery, please contact the appropriate Horizon Product Support office.
- Warranty Requirements
- Non-Warranty Service
- WARRANTY AND SERVICE CONTACT INFORMATION
- FCC INFORMATION
- FCC ID: BRWSPMR20500
- Supplier's Declaration of Conformity
- IC INFORMATION
- CAN ICES-3 (B)/NMB-3(B)
- IC: 6157A-SPMR20500
- COMPLIANCE INFORMATION FOR THE EUROPEAN UNION
- EU Compliance Statement:
- Spektrum NX20 Transmitter Only
- Wireless Frequency Range and Wireless Output Power:
- EU Manufacturer of Record:
- EU Importer of Record:
- WEEE NOTICE:
- HINWIES
- Brightness [Helligkeit]
- Servomonitor
- WEEE-HINWEIS
- SELECTION AUTOMATIQUE DES INTERRUPEURS
- Binding (Affectation)
- Moniteur
- DIRECTIVE DEEE
- Connession (Binding)
- Miscelazione
- AVVISO RAEE
Brand : SPEKTRUM
Model : NX20
Category : Remote control toy