Wengen - Air purifier Sonnenkönig - Free user manual and instructions
Find the device manual for free Wengen Sonnenkönig in PDF.


User questions about Wengen Sonnenkönig
0 question about this device. Answer the ones you know or ask your own.
Ask a new question about this device
Download the instructions for your Air purifier in PDF format for free! Find your manual Wengen - Sonnenkönig and take your electronic device back in hand. On this page are published all the documents necessary for the use of your device. Wengen by Sonnenkönig.
USER MANUAL Wengen Sonnenkönig
natural_image
White industrial air purifier with perforated grille and black top (no visible text or symbols)INDEX
text_image
SMART REMOTE KINGtext_image
Mobile phone status bar screenshot showing menu options and control buttonstext_image
Indoor Temp245°C 23°C OK Cancel OK Cancel OK Cancel OKnatural_image
Line drawing of a portable air purifier with ventilation grilles and control buttons (no text or symbols)natural_image
Technical line drawing of a white industrial fan or air purifier unit with visible blades and vent slots (no text or symbols)Alle 2 Wochen
natural_image
Simple 3D diagram of a rectangular frame with a vertical slot and an arrow pointing left (no text or symbols)natural_image
Diagram of a 3x4 grid panel with mounting tabs and an arrow indicating leftward movement (no text or symbols)natural_image
Diagram of a rectangular device with a grid pattern and an arrow indicating leftward movement (no text or symbols)Alle 2 Wochen
natural_image
White industrial air purifier with perforated grille and black top (no visible text or symbols)SOMMAIRE
text_image
SMART REMOTE KINGnatural_image
Line drawing of a portable air purifier with ventilation grilles and control panel (no text or symbols)natural_image
Technical line drawing of a white industrial air purifier with fan blades and vent (no text or symbols)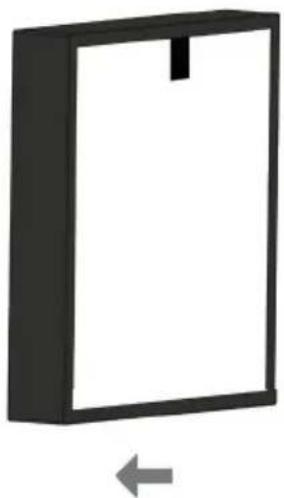
natural_image
Simple 3D diagram of a rectangular frame with a vertical slot, no text or symbols present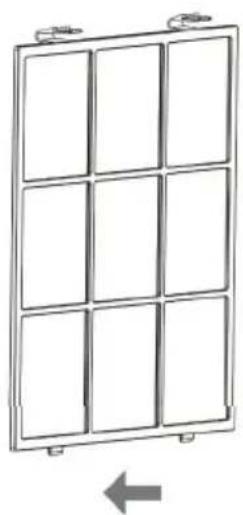
natural_image
Diagram of a 3x4 grid panel with mounting tabs and an arrow indicating leftward movement (no text or symbols)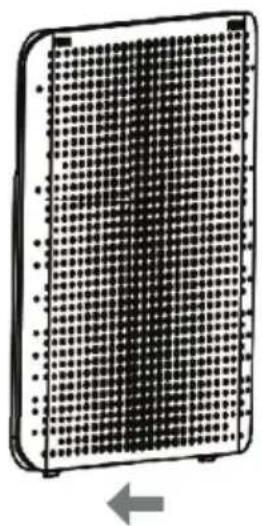
natural_image
Diagram of a rectangular device with a grid pattern and an arrow indicating leftward movement (no text or symbols)HEPA-filtreDispositif Pré-filtre Couverture
Toutes les 2 sem.
Modifications techniques
natural_image
White industrial air purifier with perforated panel and digital display (no visible text or symbols)IT
INDICE
text_image
Technical diagram of a portable air purifier with labeled components including front panel, side panel, and interior panel.natural_image
Icon of a Wi-Fi signal icon with concentric rings and signal waves (no text or symbols)SMART REMOTE KING
text_image
Indoor Temp/80°C 23°C * Insale Help Reset Set Help ONnatural_image
Line drawing of a portable air purifier with ventilation grilles and control buttons (no text or symbols)natural_image
Line drawing of a white industrial air purifier with fan blades and ventilation slots (no text or symbols)Ogni 2 settimane
natural_image
Simple 3D diagram of a rectangular frame with a vertical slot, no text or symbols present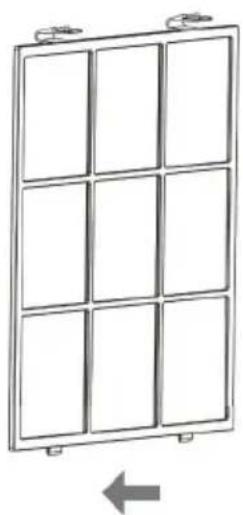
natural_image
Diagram of a 3x4 grid panel with mounting tabs and a directional arrow below (no text or symbols)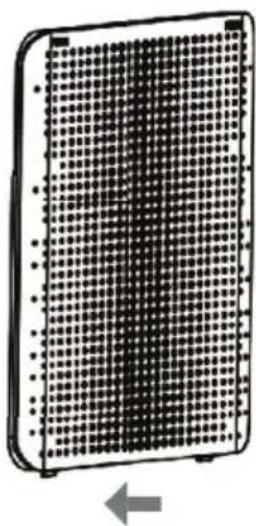
natural_image
Diagram of a rectangular device with a grid pattern and an arrow indicating leftward movement (no text or symbols)Filtro HEPADispositivo Pre-filtro Copertina
Ogni 2 mesi
natural_image
White industrial air purifier with perforated grille and digital display (no visible text or symbols)NL
INHOUD
text_image
SMART REMOTE KINGtext_image
Indoor Temp2/FC 23°C Hot temp ONnatural_image
Line drawing of a portable air purifier with ventilation grilles and control panel (no text or symbols)natural_image
Technical line drawing of a white industrial air purifier with fan blades and vent slots (no text or symbols)Elke 2 weken
natural_image
Simple 3D diagram of a rectangular frame with a vertical slot, no text or symbols presentHEPA-FilterApparaat
Elke 2 maanden
natural_image
Diagram of a 3x4 grid panel with mounting tabs and a directional arrow below (no text or symbols)Voorfilter Deksel
Elke maand
natural_image
Diagram of a rectangular device with a grid pattern and an arrow indicating leftward motion (no text or symbols)Elke 2 weken
Landline 14 Cent/Minute
Mobiel network 42 Cent/Minute
WENGEN
AIR CLEANER
Manual
natural_image
White industrial air purifier with perforated panel and digital display (no visible text or symbols)EN
INDEX
1 Safety instructions.... 51
2 Description of parts....52
3 Operation....53
4 WIFI setup ....54
5 Cleaning.... 56
6 Troubleshooting....57
7 Warranty / Removal / Technical changes.... 58
1 Safety instructions
- Only use the air purifier as described in this manual.
- Before plugging in, ensure that the voltage is equal to that specified on the product data plate (AC220-240V/50Hz).
- The purifier must be positioned on a flat, stable surface. To avoid risk of electric shock, short circuit and fire, do not use the appliance if the power cord is damaged or if the electrical socket has worked loose.
- To disconnect the purifier, push the switch to OFF and remove the plug from the socket. When removing the plug, grasp the plug and not the cord. Do not use extensions.
- Do not damage the cord by winding it around sharp corners, twisting it, resting heavy objects on it, positioning it close to hot surfaces or allowing it to hang from the edge of a table.
- Do not make changes to the purifier. If the purifier needs to be repaired or a damaged power cord requires replacement, contact an authorised service centre.
- Before cleaning the purifier or removing the collector, turn the appliance off and unplug.
- Never touch the plug or purifier with wet hands.
- Do not operate the purifier in the presence of mosquito sprays.
- The purifier is not fitted with protection against humidity. As such, only use inside and away from showers, baths and washbasins or similar such places.
- Not suitable for outdoor use.
- Do not immerse in water or other liquids.
- Do not operate near a heater.
- Do not use near flammable gases such as natural gas or propane.
- Do not use near flames, kitchen appliances or heating appliances or, more generally, a hot surface.
- To avoid risk of accidents, keep the purifier away from children and the disabled.
- Do not put fingers and/or any objects in the air inlet/outlet grilles.
- Do not place objects on top of the appliance.
- When not in use for long periods, remove the plug from the socket.
- If rugs are present, the purifier must not be used on the floor. Optimal distance from the floor is 90 cm.
- Do not use the purifier with plugs other than that supplied with the purifier.
2 Overview
EN
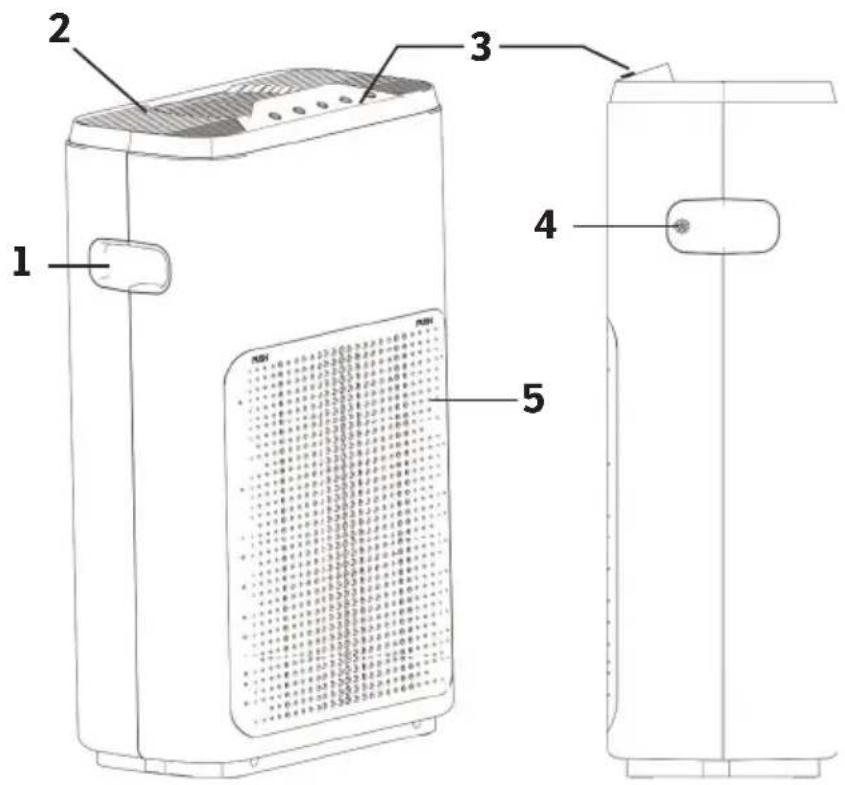
text_image
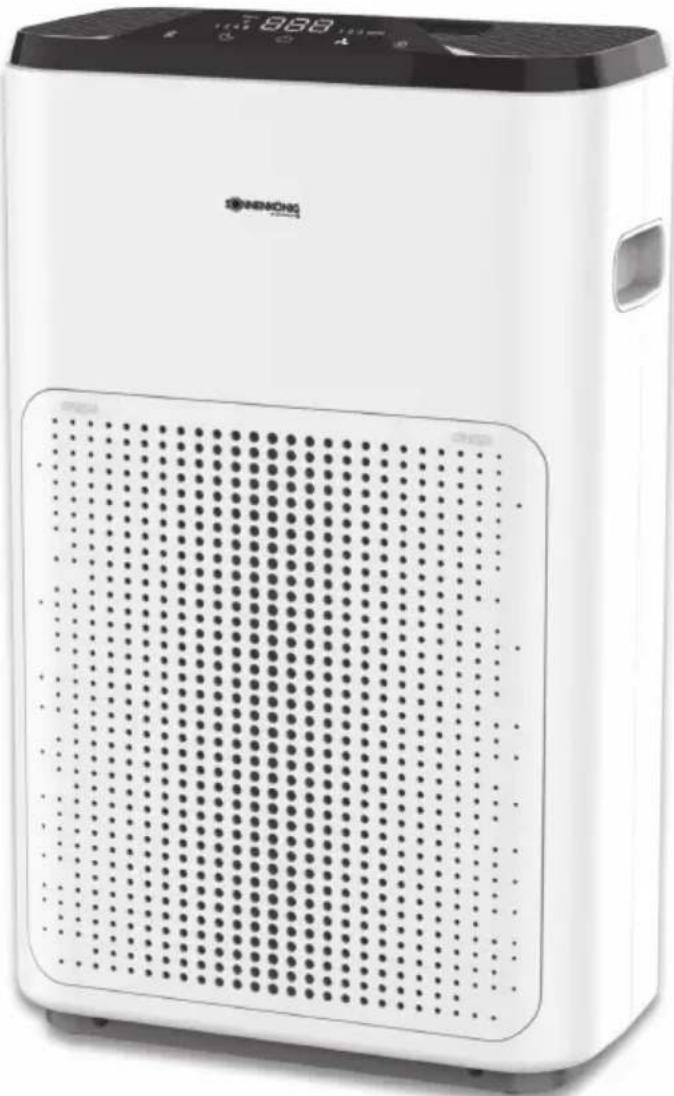
Technical diagram of a portable air purifier with labeled components including front panel, side panel, and internal grid cover.- Handle
- Air-Outlet
- Control Panel
- Air-Intake and Filter
- Sensor
- Remote control
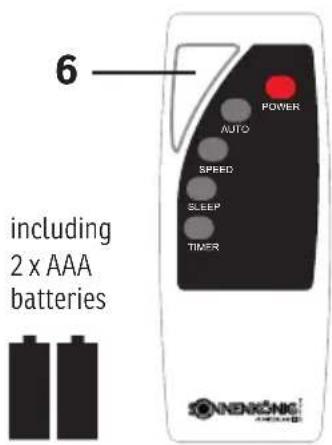
text_image
6 including 2 x AAA batteries POWER AUTO SPEED SLEEP TIMER NENNKÖNG CREAM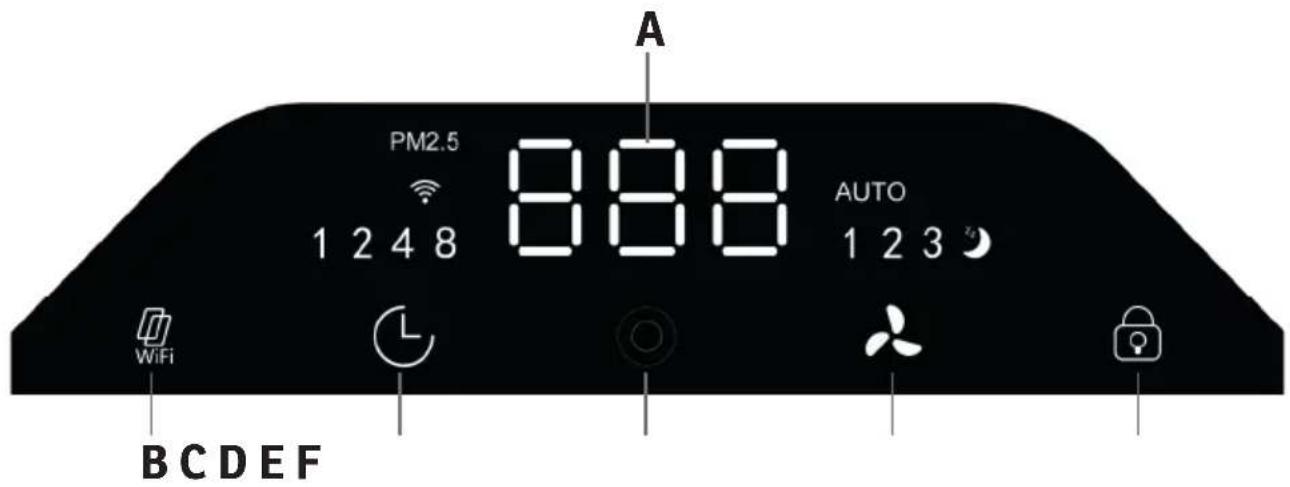
text_image
A PM2.5 888 AUTO 1 2 4 8 1 2 3 WiFi BCDEF(A) Quality indicator
(B) Filter Control lamp
(C) Timer
(D) ON / OFF (Colour Indicator)
(E) Air speed
(F) Child-Lock
3 Operation
1. ON / OFF
Press the on/off switch to switch the unit on and off. When the unit is switched on, it switches to automatic mode
2. Timer
The working time of the device can be set by the timer button. Set the time to 1 h, 2 h, 4 h or 8 h.
3. Air speed

Press the wind speed button to change the speed of the ventilation or to select the auto mode. In Auto mode, the air speed is selected based on the surrounding air quality:
1-100 Green Good Quality 1. Gear
101-200 Yellow Medium Quality 2. Gear
201-500 Red Bad Quality 3. Gear
4. Child-Lock

When the parental control button is pressed, the key function of the device goes into the locked state and all keys cannot be operated. Long Press this button for 3 seconds to cancel the lock.
5. Filter / WIFI-Reset

This unit is equipped with a time-controlled fi lter change function which fl ashes until the request to change the fi lter after 1500 hours. Press and hold the button for 5 seconds to clear the fi lter display and reset the function.
If you want to reset the WIFI setting of the device, switch the device to standby mode with the OFF button and press the reset button for 5 seconds. The WIFI indicator should now flash and you can set up the device again.
EN
4 WIFI setup

Please proceed as follows to remotely control your device via WIFI.
text_image
SMART REMOTE KING- Start the Play Store (Android) or App Store (Apple) on your smartphone and search for the «SMART REMOTE KING» from SONNENKÖNIG. Download the app.
- The app will be installed on your smartphone.
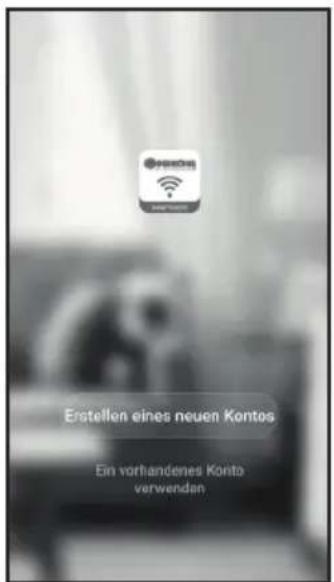
- Enter your mobile phone number, the country code is already entered.
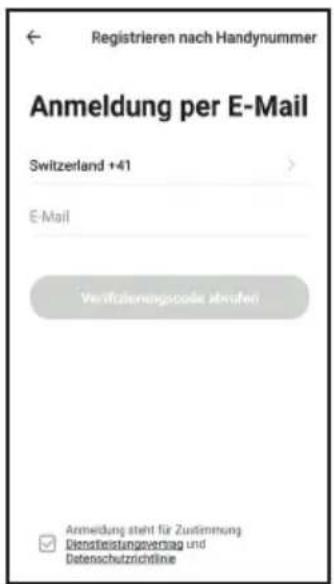
- You will receive the so-called «confi rma-tion code» by SMS. Enter the code and the password you have chosen within 60 seconds and select «Confi rm» to complete the regis-tration.
MAKE SURE THAT THE SMARTPHONE YOU WANT TO USE TO CONTROL YOUR DEVICE AND THE DEVICE ARE CONNECTED TO THE SAME WIRELESS MODEM.
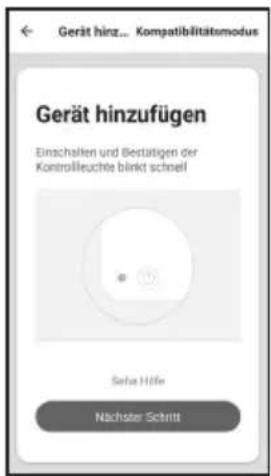
- Enter the correct WIFI password.
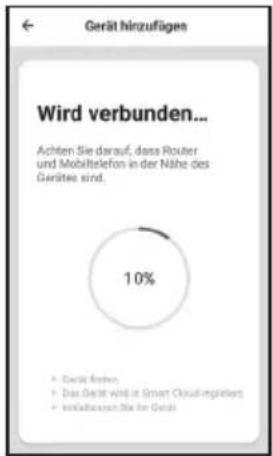
- Select «Close» when the connection has been successfully established. If no connection has been established, follow the instructions on the app.
text_image
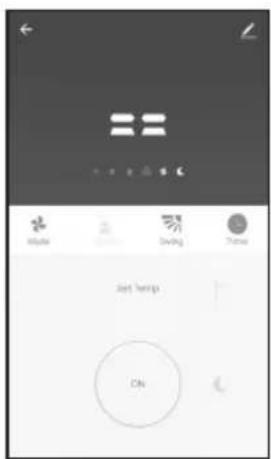
Mobile Saving Theme Just wins CN- The operation screen of the machine appears.
text_image
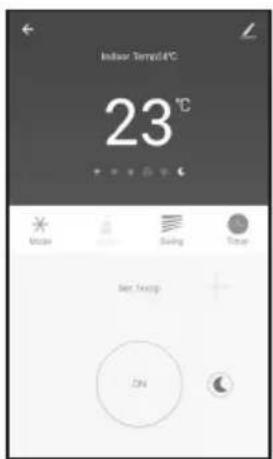
Indoor Temp/4°C 23°C Unsure Swing Temp Best Temp DN- Select «...» at the top right of the operation screen and then select «Change device name» to give your device a logical name so that you know which device it is.
Your device and smartphone are now set up for remote control via WIFI.
EN
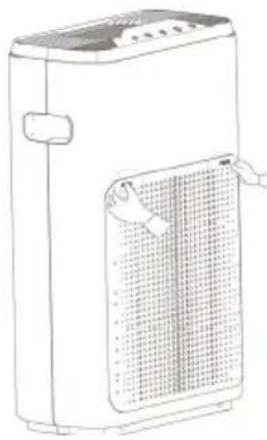
TURN OF THE DEVICE AND REMOVE IT FROM THE POWER SUPPLY BEFORE CLEANING / MAINTENANCE
natural_image
Line drawing of a portable air purifier with ventilation grilles and control panel (no text or symbols)Remove the filter cover by pressing the two markers with the inscription: „PUSH“.
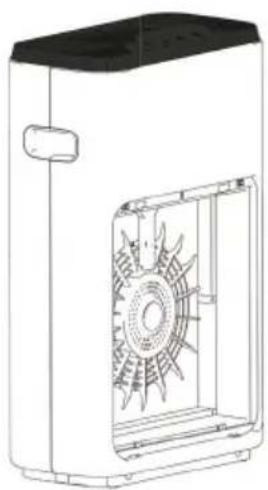
After pushing it in, the cover should come towards you and you can now remove it.
natural_image
Technical line drawing of a mechanical device with internal fan-like structure (no text or symbols)Every 2 weeks
If necessary, clean the device with a damp cloth.
Do not use caustic or abrasive cleaning agents!
natural_image
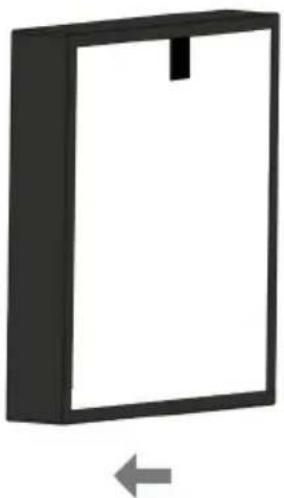
Simple 3D diagram of a rectangular frame with a vertical slot and an arrow pointing left (no text or symbols)HEPA-FilterDevice
Every 2 months
After removal, place the fi liter in a well-ventilated place, as previously absorbed particles or bacteria could now escape.
natural_image
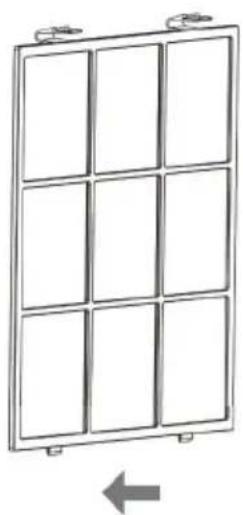
Diagram of a 3x4 grid panel with mounting tabs and an arrow indicating leftward movement (no text or symbols)Pre-Filter Cover
Every months
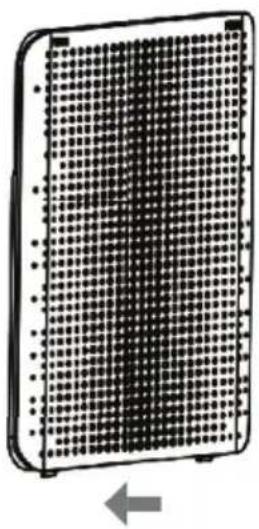
Vacuum the fi lter thoroughly with a vacuum cleaner or wash it under running water and let it dry.
natural_image
Diagram of a grid-patterned rectangular device with an arrow indicating leftward movement (no text or symbols)Every 2 weeks
If necessary, clean the cover with a damp cloth.
6 Troubleshooting
| Problem description Solution | |
| Device cannot be powered on. Plug in | the power cord. |
| Check if the front-cover is correctly installed. | |
| No reaction after pressing any button. | Check the filter change function and change the filter if necessary. |
| Check if the child-lock is active. | |
| The device spreads an unpleasant smell. | Check if the plastic wrap of the filters were removed. |
| Check that the filters have been inserted in the correct order. | |
| The air quality is not improving. Clean | or replace the filters and reset the filter warning. |
EN
7 Warranty / Disposal / Technical change
EN
Warranty
The Products are controlled just before delivery. If despite a lack of your product, try trustfully your seller. Please bring your receipt, as this is to be submitted for each warranty. The guarantee period is 24 months from date of purchase.
Disposal
The device must be disposed of properly. The device can be distributed free of charge for disposal at each dealer.
Technical changes
Reserving technical changes in technology and design
This appliance can be used by children aged from 8 years and above and persons with reduced physical, sensory or mental capabilities or lack of experience and knowledge if they have been given supervision or instruction concerning use of the appliance in a safe way and understand the hazards involved. Children shall not play with the appliance. Cleaning and user maintenance shall not be made by children without supervision. Please make sure to place the device on a suitable and waterproof surfaces, so that spilled liquids can not cause harm.
CE Declaration of Conformity
This device complies with the following standards
EMC EN 55014-1:2017
EN 55014-2:2019
EN 61000-3-2:2014
EN 61000-3-3:2013
LVD EN 60335-1:2012+A11:2014+A13:2017
EN 60335-2-65:2003+A1:2008+A11:2012
EN 62233:2008
LVD 2014/35/EU
EMC 2014/30/EU
RoHS 2015/863/EU
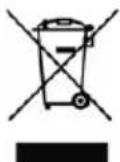
DISPOSAL INSTRUCTIONS FOR THE ELECTRICAL PART OF THE PRODUCT
In accordance with Article 26 of the Decree-Law of 31 March 2015 implementing Directive 2012/19/EC and the Law of 4 March 2014 implementing Directive 2015/863/EC on the reduction of the use of hazardous substances in electrical and electronic equipment and on waste management.
The crossed-out dustbin symbol on the machine or packaging indicates that the waste generated at the end of its useful life must be collected separately from other waste. The user must therefore take the device to the appropriate collection points at the end of its service life. Sort electronic and electrical waste or send the purchase of new, equivalent devices back to the dealer in a one-to-one process. L'adeguata separate collection for subsequent commissioning of the equipment to be recycled, treatment and environmentally sound disposal, helps to avoid possible adverse effects on the environment and health and promote the reuse and/or recycling of the materials to which they belong. composed the equipment. Misuse of this product by the user will result in the application of the administrative penalties provided for in the applicable legislation. Batteries contained in the device must be disposed of separately in the appropriate containers for the collection of used batteries.
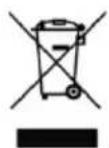
DISPOSAL OF BATTERIES AND ACCUMULATORS
In accordance with Legislative Decree 188 of 20 November 2008 implementing Directive 2006/66/EC on batteries, accumulators and related waste, the symbol of the crossed-out waste bin on the battery indicates that it is prohibited to dispose of used batteries in household waste.
Batteries and batteries contain substances that are highly polluting for the environment. The user is obliged to dispose of used batteries at collection points in the municipality or in appropriate containers. The service is free. In this way, legal requirements will be respected and the environment will be protected. The symbols identifying hazardous materials that may be present in batteries and accumulators are as follows: Hg= Mercury, Cd= Cadmium, Pb= Lead.
Company
Armin Schmid
Olensbachstrasse 9-15
CH-9631 Ulisbach
Tel. Int. +41 58 611 60 00
Tel. Nat. 0848870850
www.sonnenkoenig.ch
Company
Armin Schmid