
SLWTRCHLR90 - Air conditioner SereneLife - Free user manual and instructions
Find the device manual for free SLWTRCHLR90 SereneLife in PDF.

| Brand | SereneLife |
| Model | SLWTRCHLR90 |
| Product Type | Immersion Water Chiller |
| Applications | Aquariums, hydroponic systems, ice baths |
| Cooling Capacity | 600 W |
| Max Water Volume | 300 L (79.3 gal) |
| Minimum Temperature | 4–5 °C |
| Refrigerant | R134a |
| Motor Power | 280 W |
| Power Supply | 110 V~60 Hz or 220 V~50 Hz (depending on region) |
| Rated Current | 1.6 A |
| Compressor | 1/3 HP |
| Recommended Pump Flow Rate | 600–1000 L/h |
| Evaporator Material | Pure titanium coil (anti-corrosion) |
| Construction Material | Stainless steel |
| Fans | 2 built-in silent fans |
| Dimensions (L × W × H) | 29 × 29 × 32 cm (11.42 × 11.42 × 12.6 in) |
| Box Contents | Chiller, 720 L/h 24 V DC pump, 24 V–3 A AC adapter, hoses (2 m outlet, 1 m and 0.4 m inlet), filter, fittings, gaskets, Teflon tape |
| Maintenance | Clean every 2–3 months; vinegar bath (2 parts vinegar + 3 parts water) |
| Safety | Do not use outdoors; ventilate (clearance 30–40 cm); unplug before maintenance; do not immerse |
Frequently Asked Questions - SLWTRCHLR90 SereneLife
User questions about SLWTRCHLR90 SereneLife
0 question about this device. Answer the ones you know or ask your own.
Ask a new question about this device
Download the instructions for your Air conditioner in PDF format for free! Find your manual SLWTRCHLR90 - SereneLife and take your electronic device back in hand. On this page are published all the documents necessary for the use of your device. SLWTRCHLR90 by SereneLife.
USER MANUAL SLWTRCHLR90 SereneLife
natural_image
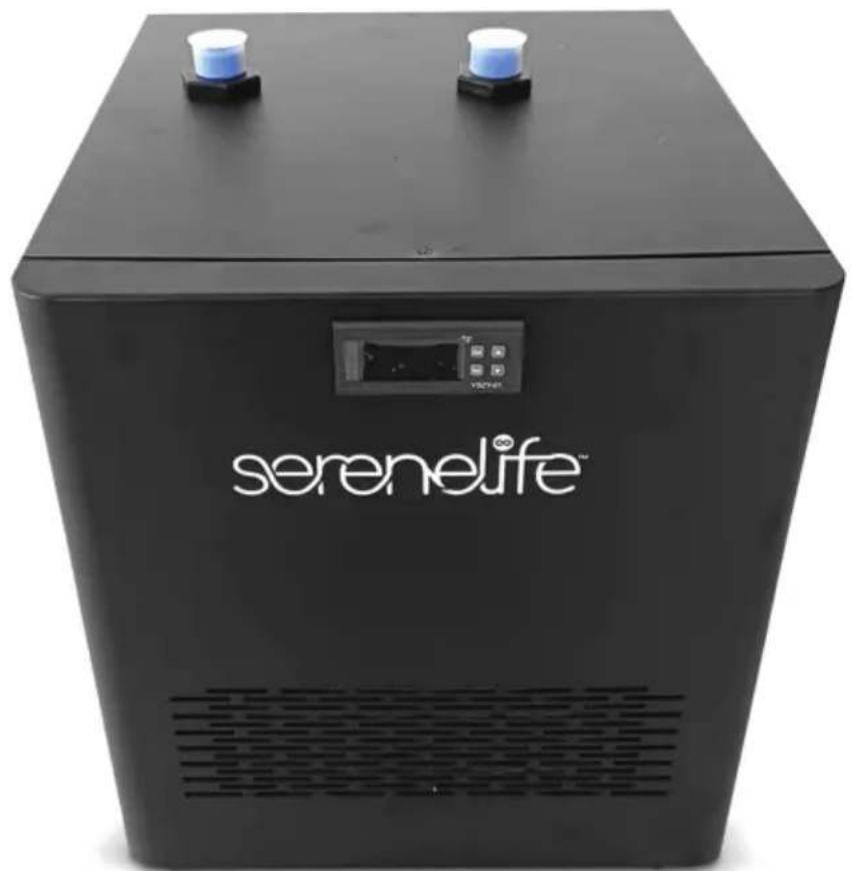
Exterior view of a Serenelife device with two blue water droplets on top (no visible text or symbols beyond branding)SLWTRCHLR90
Cold Plunge Water Chiller
79Gal. 1/3 HP Cooling System
USER GUIDE
IMPORTANT
Read all instructions carefully before using this product. Retain this owner's manual for future reference. The specifications of this product may vary from this photo and are subject to change without prior notice.
Stagnant water is not sanitary for the system.
Solidified bio-matter can form inside the pipes and requires a deep clean with hot water to fix. This can also appear if no sanitation is done. Please follow the maintenance protocol included in the manual.
DANGER
To avoid possible electric shock, special care should be taken since water is employed in the use of aquarium equipment. For each of the following situations, do not attempt repairs by yourself; return the appliance to an authorized service facility for service or discard the appliance.
IMPORTANT SAFETY INSTRUCTIONS
WARNING: To guard against injury, basic safety precautions should be observed, including the following:
- Please unplug the power when lightning strikes.
- DO NOT use wet hands to plug or unplug the power plug; otherwise, it may cause an electric shock or injury.
- Please use a separate socket. DO NOT share the same socket with other high-power electrical appliances at the same time, so as not to cause fire caused by excessive current.
- When not in use for an extended period, please unplug the power plug to prevent short circuits and spontaneous combustion caused by device aging.
- When inserting the plug into the socket, ensure it is firmly inserted to the bottom. Otherwise, poor contact may cause overheating and burning of the components, leading to the danger of short circuits or fires.
- DO NOT allow children to operate the unit alone to avoid electric shock or injury.
- Please use the designated family power supply. Do not use other
powersources. (Voltage varies in different countries and regions, so do not use it in.
- It is prohibited to place the unit in an unstable position, direct sunlight, high-temperature environments, areas with heavy smoke, insufficient ventilation, or sealed spaces with high moisture levels.
Do not install the chiller outdoors.
-
DO NOT block the air vents and avoid placing foreign objects near them. Install at least 12-16 inches (30-40 cm) away from walls in order to give thechiller adequate ventilated space.
-
It is strictly forbidden to insert metal scraps, wires, needles, or other foreign materials into the product or its gaps. DO NOT attempt to disassemble the machine yourself.
Please ensure these safety guidelines are followed at all times to prevent accidents and ensure safe operation of the water chiller.
Pay Attention
- Do not turn the chiller upside down or sideways when in use.

-
When unplugging the plug, be sure to hold the plug handle and avoid pulling the power cord, as doing so may vdamage the cord.
-
When handling the unit, please unplug the power cord and hold the bottom of the product with both hands to prevent it from falling.
-
Please do not share the same socket with any other electrical products.
-
Do not place the chiller in high-temperature environments (room temperature above 97^ F/ 36^ C, sealed areas, etc.), as it may result in slow refrigeration or failure.
Follow these instructions carefully to ensure safe and proper use of the chiller.
Aquarium Water Chiller Location
- For best results, place the chiller in a location best suited to support the totalweight of the chiller. Do not install the chiller outdoors
- Always place the chiller in a flat and level area.
- Keep chiller in a well ventilated area and away from a heating or cooling vent.
- Do not place near electronic components and systems (i.e. T.V, Stereo systems, etc.).
PARTS LIST
| Description Image QTY | |||
| A | 300L Chiller | 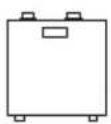 | 1 |
| B | Water Pump (720L-24V DC) | 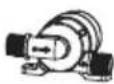 | 1 |
| C | AC Adapter (24V DC-3A pump) |  | 1 |
| D | OUT Water Hose (1216) -2m | 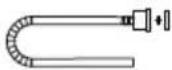 | 1 |
| E | IN Water Hose (1216) -1.0m | 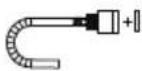 | 1 |
| F | Filter Assembly -16 – 1⁄2" | 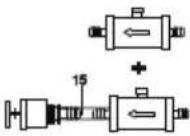 | 1 |
| G | IN Water Hose (1216) – 0.4m | 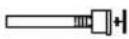 | 1 |
| H | 16-1/2" (M) Water Pipe Connection |  | 2 |
| I | 16-3/4" Water Pipe Connection |  | 2 |
| J | Sealing Ring | [0034] | 4 |
| K | Teflon Tape |  | 1 |
| L | Water Pipe clamp |  | 2 |
| M | Ribbon |  | 8 |
300L Chiller and Pump Installation Diagram
- Chiller: 110V\~60Hz or 220V\~50Hz
- Power: 1/3HP
• Refrigerant: R134a
• Water quantity of refrigeration: ≤ 300L - Circulating pump flow suitable range: 600\~1000L/h (Max pump head lift 5M)
WARNING: During the chiller installation process, pay special attention to sealing the water pipe connection at the inlet end. Ensure the pipeline is free from leaks or damage, and prevent the intake of air. The introduction of air at the inlet end can disrupt the water pump's ability to complete its pumping work.
Time Requirements for Chilling
Environment Temperature: 82.4°F/28°C
Water Volume: 66 gal/250L
| Time Water Temperature | |
| 8:25 22.6°C72.7°F | |
| 8:45 22.2°C72°F | |
| 9:00 21.7°C71.1°F | |
| 9:40 21°C69.8°F | |
| 10:10 20.3°C68.5°F | |
| 10:30 19.9°C67.8°F | |
| 11:00 19.3°C66.7°F | |
| 11:30 18.7°C65.7°F | |
| 12:30 17.7°C63.9°F | |
| 13:30 16.6°C61.9°F | |
| 14:00 16.3°C61.3°F | |
| 14:30 15.8°C60.4°F | |
| 15:00 15.5°C59.9°F | |
| 15:30 15.1°C59.2°F | |
| 16:00 14.8°C58.6°F | |
| 16:30 14.3°C57.7°F | |
| 17:00 14°C57.2°F | |
| 17:30 13.6°C56.5°F | |
HOW TO USE
- Connect all hoses and connectors with the chiller, ensuring everything is securely screwed to prevent water leakage.
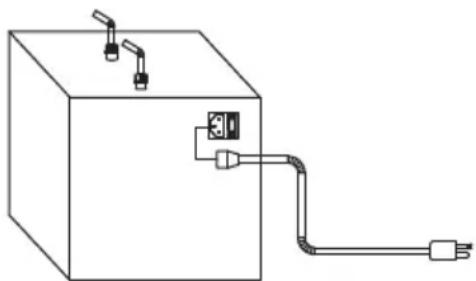
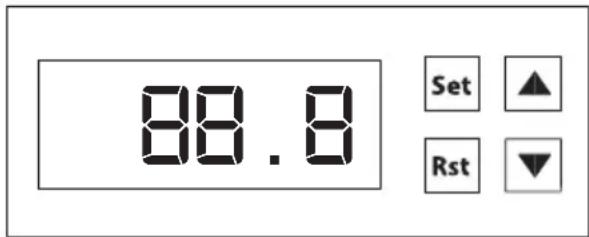
- Connect the chiller's power cord. After plugging in the power plug, switch on the power using the switch on the back of the chiller. The screen will display the water temperature in the tank.
natural_image
Simple line drawing of a rectangular box with three connectors and a terminal labeled '30' connected to its side by a cable (no text or symbols beyond basic labels)
natural_image
Close-up of a black computer monitor with a red LED indicator (no visible text or symbols)-
When the chiller is turned on, the display screen will start blinking (refrigeration is not displayed in standby state, and this is normal). After blinking for about 3 minutes, the refrigeration starts to run, and the display will stop blinking. Now, the chiller is ready to use.
-
It is not recommended to set the minimum cooling temperature below 42^ .
- Compressor delay is 3 minutes before each start.
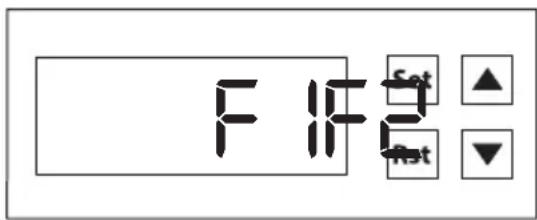
Temperature Setting
Press the "SET" key to set the temperature. "▲" for heating, and "▼" for cooling.
Adjust to your desired temperature. After setting, you can press the "RST" key for about 2 seconds to memorize the temperature and later return to it.
The next function (F1) is optional; you don't have to use it if you don't want to. The default setting for F1 is 5°F (1°C). For example, if you set the chiller temperature to 60°F (16°C), the chiller stops working. When the water becomes 65°F (17°C), the chiller will start working again to cool down to 60°F (16°C). This means that the default F1 (difference temperature setting) is 5°F (1°C).
ADJUSTING THE SET TEMPERATURE
Press and hold the "SET" key for 4 to 6 seconds. The F1 code will appear; press the "SET" key to display the temperature. Then, press "▲" for the heating button or "▼" for the cooling button, adjust to the desired difference temperature, and press the "RST" key to save.
The next function (F2) is optional; you do not have to use it if the real water temperature matches the LCD display.
For example:
The real water temperature in the tub is 60^ F ( 16^ C), but the LCD shows 55^ F ( 13^ C). The difference is 60^ F - 55^ F = 5^ F / 16^ C - 13^ C = 3^ C. Press and hold the "SET" key for 4 to 6 seconds. After F1 appears, set "▲" + button / "▼" - button to choose F2, then press the "SET" key, press "▲" + button, adjust to 5 (3), then press the "RST" key to save.
Notes: The operating instructions also apply to the chiller in degrees Celsius.
BEFORE STARTING THE OPERATION, PLEASE CHECK THE FOLLOWING:
- Check if the water level inside the aquarium is suitable for the continuous supply of water.
- Make sure that there are no water leaks from the hose and pipe connections.
- Insert the power plug fully into the power outlet so that the plug itself does not wobble.
- Double-check the circulating & filtration system, especially ensuring that the circulating tube is not clogged.
CLEANING & MAINTENANCE
- Before cleaning and maintenance, please confirm that the power plug has been unplugged.
- Please use a clean and soft cloth with good water absorptivity to wipe the topcover, shell, and other parts of the chiller to keep the appearance clean. (Note: Please do not use a wet cloth to wipe the operating panel, plug and power cord.)
- Do not use corrosive liquid medicine or hard objects to clean the product. (It is forbidden to use detergent, gasoline, banana water, hard brush, etc.)
- Water is strictly prohibited inside the chiller; please do not immerse the chillerin water for cleaning.
- Please clean the chiller regularly every 2-3 months to avoid affecting the cooling effect due to clogging of the chiller inside.
Methods of Cleaning the Chiller
- A 2:3 vinegar bath (2 parts 100% distilled vinegar to 3 parts water) is safe and effective at removing calcium deposits, salt creep, and other hard mineral that build up in the chiller over time.
- You can also circulate the vinegar mix, rather than a bath soak, with the feedpump using a 5-gallon bucket as the reservoir.
TROUBLESHOOTING
| MALFUNCTION POSSIBLE CAUSES SOLUTION | ||
| Not working at all | Not connected to the correct voltage socket | Connect the power plug to the correct voltage socket |
| The power supply voltage is connected correctly | The compressor has a 3-minute working time | |
| Water does not circulate | Adjust the set button up and down in a short time; the temperature circulation device stops working | Please confirm whether the circulation device is working properly |
| Air in the water pipe | There should be no air accumulation in the water pipe, especially in the water pump. Please keep all circuits full of water | |
| Twisted water pipe | Strongly twisted water pipes will cause no water flow; please pay attention to smooth adjustment | |
| Poor output effect | The height of the circulation device to the surface of the fish tank is too high | Please confirm the position and lift of the circulating device. Lift refers to the capacity of the circulating device |
| The water pipe is dirty and dirt blocks the water pipe | Please clean the water pipe regularly to keep it unblocked | |
| Twisted water pipe | Please confirm that all the water pipes of the circulation device are kept smooth | |
| Poor cooling effect or inability to cool | The ambient temperature is too high | The ambient temperature should be kept below 95°F with good ventilation |
| The chiller is placed in a closed cabinet | Place the chiller on the desktop or flat ground to ensure a good ventilation environment | |
| The huge water volume of the fish tank exceeds the cooling capacity | Reduce the water volume or replace with a more powerful chiller | |
| Bending of water pipes causes insufficient circulation | Be careful not to bend the water pipe | |
| Wet ground | Condensed water droplets flow out | Wipe the water droplets on the surface of the fish tank and the water pipe |
| Abnormal sound | There is air in the pipe | There should be no air accumulation in the water pipe, especially in the water pump, and keep all circuits full of water |
| Chiller prevents position tilt | Please put the chiller on a level surface | |
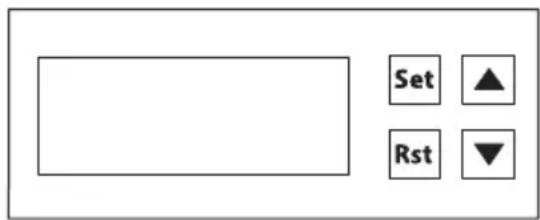
| Display error | — (Display 3 lines) water temperature probe is abnormal | Replace the temperature probe |
| The difference between the displayed temperature and the actual temperature is too large | Replace the temperature probe | |
| Water leakage | Incorrect connection; The pipe is too thick | 1. Check the flat gasket sealing ring2. Add some grease |
Features:
- Simple Operation, Simple Temperature Setting, and Convenient Use
• Universal for Fresh Water, Aquatic Plants, and Sea Water Tanks
- Rapid & Stable Compressor Cooling
• Built-in Fan, Rapid Cooling, Saving Power and Time
- Equip with a High-efficiency Energy-saving Compressor that Uses R134a Refrigerant
- Ideal for Hydroponics Bucket; Fish Tank, Ice Tub (Cold Plunge)
- Includes Two Built-in Quiet Fans and Multiple Vents to Effectively Dissipate Heat
• Helps Create a Favorable Environment for Healthy Root Development
- Anti-Corrosion Titanium Tube, Allows the Chiller to be Used in Both Freshwater and Saltwater Environments
- Quiet Compressor to Help Minimize Noise Level
- Widely Suitable for Home Fish Tanks, Aquariums, Hydroponic Systems, Water Weeds, Crystal Shrimp, Coral and Jellyfish, etc.
What's in the Box:
• 300L Chiller
• Water Pump (720L-24V DC)
• AC Adapter (24V DC-3A)
• OUT Water Hose (1216) -2m
• IN Water Hose (1216) -1.0m
- Filter Assembly -16 - 12 "
• IN Water Hose (1216) – 0.4m
• (2) 16-1/2" (M) Water Pipe Connection
• (2) 16-3/4" Water Pipe Connection
• (4) Sealing Ring
• Teflon Tape
Technical Specs:
- Construction Material: Stainless Steel
- Evaporator: Pure Titanium Coil (Corrosion Resistant)
• Minimum Temperature: 4-5°C
• Power Output: 220V/50HZ (OR); 110V/60HZ(US)
- Power: 1/3HP
• Motor Power Supply: 280W
• Refrigerating Capacity: 600W
• Refrigerating Medium: R134A
• Rated Cooling Current: 1.6A
• Max Cooling Water Volume: 79.3 Gal (300L)
• Hose Length: 78.7" -inches
- Product Dimensions (L x W x H): 11.42" x 11.42" x 12.6"-inches
serenelife™
Questions? Comments?
We are here to help!
(1) 718-535-1800
support@pyleusa.com
serenelife™
natural_image
Exterior view of a Serenelife brand water heater unit (no signage or text beyond branding)SLWTRCHLR90
natural_image
Simple line drawing of a cube with connectors and a connector pin (no text or symbols)
natural_image
Close-up of a computer monitor with a red LED indicator and cable connector (no visible text or symbols)natural_image
Exterior view of a Serenelife brand water heater unit (no signage or text beyond branding)SLWTRCHLR90
natural_image
Simple line drawing of a box with two handles and a display showing '83.8', plus a checkmark icon (no text or symbols on the box itself)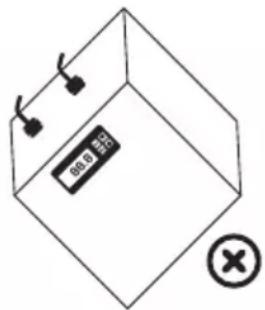
natural_image
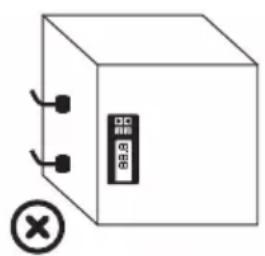
Simple line drawing of a box with a control panel and a cross symbol (no text or labels)natural_image
Simple line drawing of a rectangular box with three connectors and a terminal connector (no text or symbols)
natural_image
Close-up of a computer monitor with a red LED indicator on the right side (no visible text or symbols)Des questions? Commentaires?

- SLWTRCHLR90
- Cold Plunge Water Chiller
- IMPORTANT
- Stagnant water is not sanitary for the system.
- DANGER
- IMPORTANT SAFETY INSTRUCTIONS
- Please ensure these safety guidelines are followed at all times to prevent accidents and ensure safe operation of the water chiller.
- Pay Attention
- Aquarium Water Chiller Location
- 300L Chiller and Pump Installation Diagram
- Time Requirements for Chilling
- HOW TO USE
- Temperature Setting
- ADJUSTING THE SET TEMPERATURE
- For example:
- BEFORE STARTING THE OPERATION, PLEASE CHECK THE FOLLOWING:
- CLEANING & MAINTENANCE
- Methods of Cleaning the Chiller
- Features:
- What's in the Box:
- Technical Specs:
- serenelife™
Brand : SereneLife
Model : SLWTRCHLR90
Category : Air conditioner