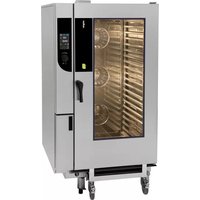
MC202G - Oven MBM - Free user manual and instructions
Find the device manual for free MC202G MBM in PDF.


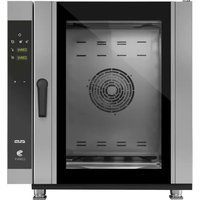
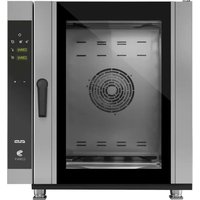
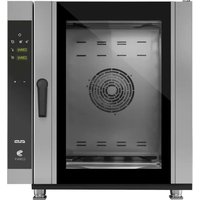
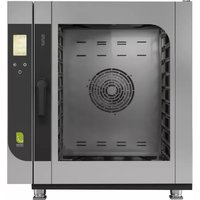
| Product type | Professional combi oven (steam) |
| Model | MC202G |
| Brand | MBM |
| Usage | Professional (collective kitchens, restaurants, canteens) |
| Power supply | Electric (voltage per nameplate) or gas (depending on model) |
| Cooking modes | Convection, Steam, Combination (0-100% humidity) |
| Preset programs | 17 programs (meats, fish, vegetables, pastries, etc.) |
| Program capacity | Up to 100 user programs (max 6 phases) |
| Temperature range | Ambient to 290°C (max) |
| Cooking probe | Core probe PT100 (optional) |
| Ventilation | Variable from 1% to 100% |
| Humidification | Manual (Oura button) and automatic in Combination/ABC mode |
| Screen | Color touch screen with rotary encoder |
| Preheating | Automatic or manual, adjustable |
| Cleaning | Manual, automatic (3 intensities), rinse, priming |
| Descaling | Manual with suitable product (phosphoric acid <50%) |
| Safety | Error messages (i31, i81, E46...), automatic shutdown on fault |
| Spare parts | List provided (solenoid valves, heating elements, probes, fans, etc.) |
| Standards | CE, RoHS, WEEE, low voltage and EMC directives |
Frequently Asked Questions - MC202G MBM
User questions about MC202G MBM
0 question about this device. Answer the ones you know or ask your own.
Ask a new question about this device
Download the instructions for your Oven in PDF format for free! Find your manual MC202G - MBM and take your electronic device back in hand. On this page are published all the documents necessary for the use of your device. MC202G by MBM.
USER MANUAL MC202G MBM
FOUR ELECTRONIQUE NUMERIQUE A ECRAN TACTILE MANUEL D'UTILISATION ET DE MAINTENANCE ORDINAIRE
FR
TOUCH DIGITAL ELECTRONIC OVEN USE AND ROUTINE MAINTENANCE MANUAL
EN
1 : Porte double vitrage (déverrouillage du double vitrage par l'intérieur) / Double glazed door (unlocked from the inside) / Gerätetür mit Doppelglasscheibe (Entriegelung der Doppel-glasscheibe von innen) / Puerta de doble cristal (desmontaje del doble cristal por el interior) / Portello a doppio vetro (sblocco dall'interno) / Porta de vidro duplo (destrancada a partir do interior)
2: Poignée de porte / Door handle / Türgriff / Empuñadura de la puerta / Maniglia del portello / Manípulo da porta
3 : Plaque signalétique (visible après ouverture de la porte) / Data plate (visible with the door open) / Typenschild (nur bei geöffneter Tür sichtbar) / Placa de identificación (visible tras la apertura de la puerta) / Targhetta identificativa (visibile a portello aperto) / Placa de dados (visível com a porta aberta)
4 : Goulotte de porte / Door channel / Türtropfwanne / Canal de la puerta / Canale del portello / Canal da porta
5 : Clapet Oura motorisé / Motorised vent valve / Motorisierte Wrasenklappe / Válvula oura motorizada / Valvola di sfiato motorizzata / Válvula de purga motorizada
7 : Joint de moufle / Cavity seal / Garraumdichtung / Junta de goma / Guarnizione camera / Selo do compartimento
8 : Panneau de commande / Control panel / Bedienblende / Panel de mandos / Pannello di comando / Painel de controlo
9 : Gaine fils ou tôle / Wire or sheet duct / Rückwandabdeckung Drahtgeflecht oder Blech / Conducto hilos o chapa / Canalina o condotto lamiera / Conduta de fios ou chapa
10 : Sonde à cœur / Prise Port USB (accessoire), USB port (accessory) / Core probe socket, Steckdose für USB-Port (Zubehör) / KT-Fühler-Steckdose, Puerto USB (accesorio)/toma sonda, Porta USB (accessoria) /Presa sonda al cuore, porta USB (acessório) /Tomada sonda de núcleo
11 : Portillon / Access door / Frontklappe / Puerta / Portello di accesso / Porta de accesso
12 : Pieds de l'appareil réglable en hauteur / Oven legs height adjustable / Gerätefüße höhenverstellbar / Pies de aparato de altura regulable / Piedi forno altezza regolabile / Pernas do forno altura regulável
CONSEILS PRATIQUES D'UTILISATION / PRACTICAL OPERATING ADVISE / PRAKTISCHE
THE PRESENT MANUAL IS PROPERTY OF THE MANUFACTURER. ANY REPRODUCTION, EVEN PARTIAL, IS PROHIBITED.
SOMMAIRE
FR
1 GENERALITES....2
2 MODE MANUEL....2
2.1 PRECHAUFFAGE 3
2.2 REGLAGE DU TAUX D'HUMIDITE EN MODE MIXTE 3
2.3 MENU PROGRAMMES 4
3 MODE ABC 5
4 MENU NETTOYAGE....6
4.1 NETTOYAGE MANUEL (SEMI-AUTOMATIQUE) 6
4.2 NETTOYAGE AUTOMATIQUE A DEPART MANUEL 7
4.3 NETTOYAGE AUTOMATIQUE A DEPART PROGRAMME 8
4.4 NETTOYAGE FORCE....8
4.5 ARRET D'UN CYCLE DE NETTOYAGE 9
4.6 RINCAGE RAPIDE 9
4.7 REMPLACEMENT DU BIDON DE PRODUIT (fonction Amorçage Nettoyant): 9
5 ENTRETIEN DU FOUR....10
5.1 PREAMBULE RELATIF AUX ACIERS INOXYDABLE 10
5.2 ENTRETIEN DES SURFACES EXTERIEURES 10
5.3 ENTRETIEN DES OUIES D'AERATION DU COMPARTIMENT ELECTRONIQUE....10
5.4 NETTOYAGE DU JOINT DE MOUFLE....10
5.5 ENTRETIEN DES SURFACES INTERIEURES....10
5.6 ENTRETIEN DE LA CHAUDIERE VAPEUR (Equajet Chaudière)....11
5.7 MATERIEL UTILISE POUR CUISSON DE PRODUITS CORROSIFS (Poissons de mer, choucroute) 11
6 MAINTENANCE PREVENTIVE 12
7 DEFAUTS DE FONCTIONNEMENT....12
8 PIECES RECOMMANDEES ET DE PREMIERE URGENCE....12
9 RECOMMANDATIONS....18
10 GARANTIE....15
TABLEAU NORMATIF DE REFERENCE
- GARANTIE -

natural_image
Exterior view of a laboratory oven with red X marks indicating prohibition (no text or symbols visible)4.1 NETTOYAGE MANUEL (SEMI-AUTOMATIQUE)


Attention! Danger! Prudence!
11 GENERAL 2
12 MANUAL MODE....2
12.1 PREHEATING 3
12.2 ADJUSTING THE HUMIDITY LEVEL IN COMBINATION MODE 3
12.3 PROGRAMMES MENU 4
13 ABC MODE 5
14 CLEANING MENU 6
14.1 MANUAL CLEANING MENU 6
14.2 AUTOMATIC CLEANING STARTED MANUALLY 7
14.3 AUTOMATIC CLEANING WITH A PROGRAMMED START 8
14.4 FORCED CLEANING FUNCTION....8
14.5 STOPPING THE CLEANING CYCLE 9
14.6 RAPID RINSING....9
14.7 REPLACEMENT OF THE CHEMICAL CONTAINER (Priming Cleaner function):....9
15 MAINTENANCE OF THE OVEN....10
15.1 INFORMATION ABOUT STAINLESS STEELS 10
15.2 MAINTENANCE OF EXTERNAL SURFACES 10
15.3 CLEANING THE ELECTRONIC COMPARTMENT VENTILATION OPENINGS....10
15.4 CLEANING THE CAVITY GASKET....10
15.5 MAINTENANCE OF INTERNAL SURFACES....10
15.6 MAINTENANCE OF THE STEAM BOILER (Equajet boiler)....11
15.7 MATERIAL USED FOR COOKING CORROSIVE PRODUCTS (Sea fish, sauerkraut)....11
16 PREVENTATIVE MAINTENANCE....12
17 ERROR MESSAGES....12
18 RECOMMENDED AND FRONT LINE SPARE PARTS....12
19 RECOMMENDATIONS....13
20 GUARANTEE 15
STANDARDS OF REFERENCE
- WARRANTY -
To ensure the guarantee on this equipment, you should comply with the MANUFACTURER'S INSTRUCTIONS in this manual.
However if you cannot undertake the required maintenance operations, our installation and service network is available to provide you with a personalized contract.
- WARNING -
- The product delivered to you complies with current standards. If any modifications are made the manufacturer cannot accept any responsibility whatsoever. The manufacturer cannot be held responsible in the event of inappropriate use of the equipment.
● This equipment is intended for use by suitably trained professionals.
- Read all the documentation before user.
- Keep your documents for future reference.
- Translation of the original manual
11 GENERAL
The toughened glass control panel on your oven consists of:
- a coder knob:
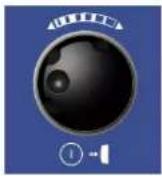
Switches on the oven and its display screen.
Power on: press for 1 second
Switch off: press for 3 seconds
Allows parameters to be changed rapidly (Temperature, time ...) and validated by simply pressing the knob.
- a touch screen:

The control panel is operated via a serigraphic touch screen using your fingers. We recommend the exclusive use of your fingers and no other items such as knives, forks or spoons etc.
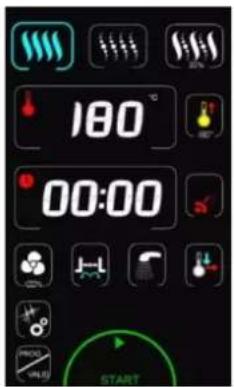
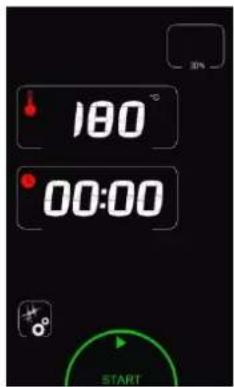
Simply touch the screen to access parameters and information.
Welcome menu: This screen appears every time the unit is started.
For stacked double cavity ovens the upper screen controls the upper oven...
12 MANUAL MODE
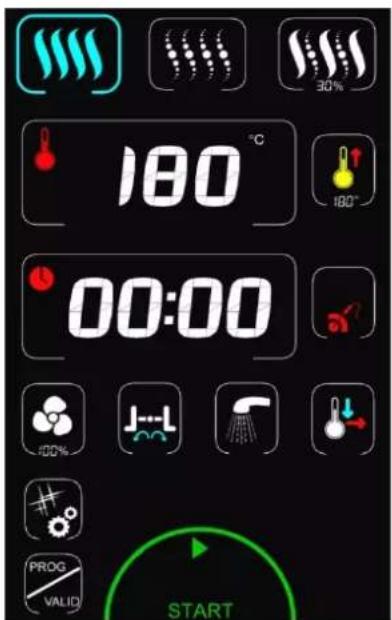
START / STOP cooking button.
3 cooking modes: Convection, Steam and Combined (from 0 to 100%)
→ Display of actual and set temperature
Preheat activation
→ Time / Core temperature display
Select Time / Probe temperature
→
Ventilation speed (1 to 100%)
Vent outlet
Manual humidification
Rapid cooling & Holding mode (hot cupboard)
→ Cleaning Programme, HACCP activation, Data exchange Modification and creation of programmes Installation parameters / operating / technical
→ Access and Validation of programmes
Temperature zone
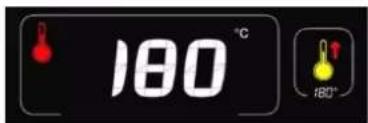
Displays the ambient and set temperatures The ambient temperature is adjustable by pressing the corresponding zone → The setting entered is validated after 5 seconds or by pressing on another zone/button Adjustment can be made using the coder or with the ▼/▲ buttons in 1° intervals
Timer zone
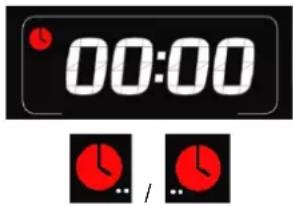
Displays the "running time" or "remaining time".
The time is adjustable by pressing the corresponding zone
The setting entered is validated after 5 seconds or by pressing on another zone/button Adjustment can be made using the coder or with the ▼/▲ buttons in 1 minute intervals
The location of the white dots at the side of the timer logo indicates what is displayed:
Dots on the left: remaining time
Dots on the right: running time


Core temperature button
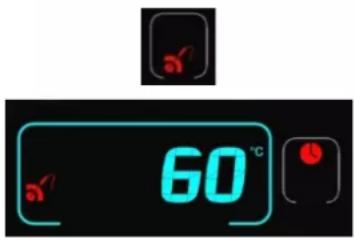

Pressing this touch button switches automatically from time control to core temperature control zone

The core temperature zone is adjusted by touching the corresponding zone The setting entered is validated after 5 seconds or by pressing on another zone/button Adjustment can be made using the coder or with the ▼/▲ buttons in 1° intervals To return to Timer mode (timer zone) touch the button again opposite the display
Fan button
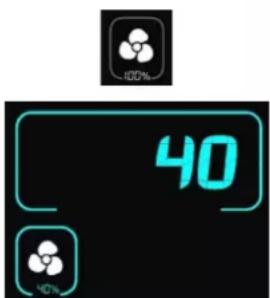

Pressing this button allows you to change the fan speed (default is 100%) moving to speed adjustment mode

Adjustments can be made using the coder in 10% steps or using the ▼/▲ buttons in 1% increments. The setting is validated after 5 seconds or by touching another zone/button
Vent button
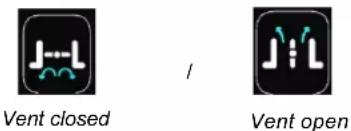

Touching this button controls the opening/closing of the vent The symbol changes to indicate whether the vent is open or closed This button only works when cooking in convection (dry) mode
12.1 PREHEATING
When the oven is switched on the oven preheat starts if the Automatic preheat function is activated in the Clients parameters. The preheat temperature is programmable and controllable (CHEF menu).
Preheating before cooking
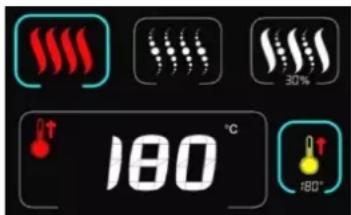

The first touch on the preheat button activates it. The button is active if its surrounding border is blue. Pressing a second time allows the set temperature to be changed A third press deactivates preheating before cooking
Adjustment can be done using the coder in 10% steps or using the ▼/▲ buttons in 1% steps. The setting is validated after 5 seconds or by touching another zone/button
The first press on the combination mode button selects it. A second press allows the humidity level to be adjusted

Adjustment can be done using the coder in 10% steps or using the ▼/▲ buttons in 1% increments. The setting is validated after 5 seconds or by touching another zone/button
12.3 PROGRAMMES MENU

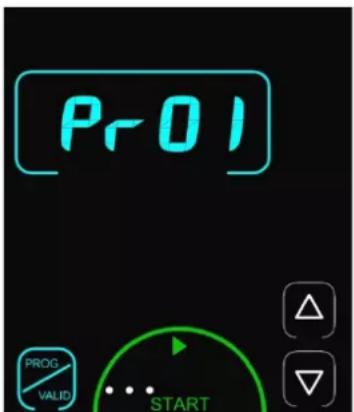
The first press on the PROG/VALID button gives access to saved programmes (recipes)
Display shows "Pr01" in the timer zone.
Moving the coder or the ▼/▲ buttons scrolls through the programmes (Programmes No 01 to 18).
Note: the programmes are pre-recorded.
Only programmes that are not empty are displayed
→ The dots (white) in the "Start" zone indicate the number of cooking phases in the programme (maximum 6 phases with preheat)
Pressing "Start" launches the programme.
Pressing the PROG/VALID button or any inactive zone exits this menu and returns to the previous screen.
List of pre-recorded programmes:
| Pr00 | Beef : Rare roast | Pr06 | Poultry : Chicken 1.2Kg | Pr12 | Sliced carrots from frozen |
| Pr01 | Meat in sauce short | Pr07 | Fish : steamed from fresh | Pr13 | Gratin dauphinois |
| Pr02 | Meat in sauce slow | Pr08 | Shellfish | Pr14 | Flaky pastry |
| Pr03 | Meat in sauce sous vide | Pr09 | Viennoise from frozen | Pr15 | Bread 80Gr from frozen |
| Pr04 | Pork : Roast | Pr10 | Choux pastry | Pr16 | Fondant |
| Pr05 | Pork : Ham slow cooking | Pr11 | Green vegetables | Pr17 | Crème brûlée |
12.3.1 DISPLAYING THE CONTENTS OF A MENU PROGRAMME

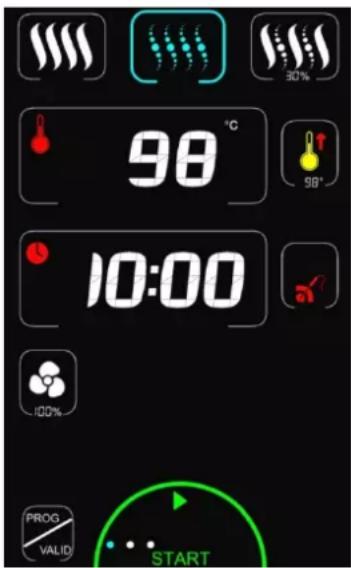
→ Pressing the display "Prxx" or the coder reveals the content of the programme selected (cooking mode, temperature, time ...)
Pressing PROG/VALID or the coder scrolls through the phases one at a time
The phase being displayed is indicated by the colour of the dots in the Start zone: 1^st dot is in cyan = 1^st phase (other dots are white)
2^nd dot is cyan = 2^nd phase (other dots are white)
After the last phase consulted the screen shows "Prxx" (the last programme displayed).
→ Pressing Start starts the programme (from phase 1).
The programmes can be modified if this is authorised (Edit in the Prog menu) but will not be saved permanently.
Changes continue to be available until another programme is used
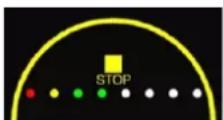
→ Green = phase not started Yellow = current phase Red = phase finished
→
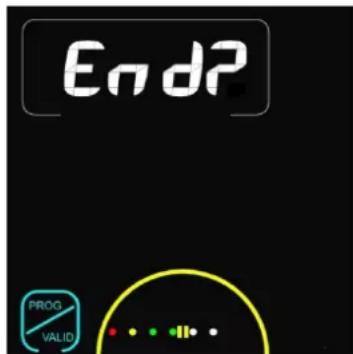
To stop a programme that is running press the "STOP" zone: The display shows the "Pause" logo "II". If the action is not validated the programme does not stop (It automatically restarts after a few seconds delay if the screen is not touched). Pressing the zone again restarts the current programme
Confirm the programme should stop validate by pressing the "End" zone: Programme stopped
13 ABC MODE
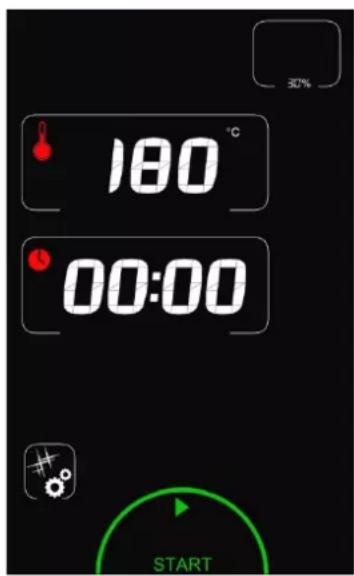
START / STOP cooking button.

Automatic display of humidity level as a function of the set temperature. Adjustable manually from 0 to 100% - 0% = Convection mode with Vent open
- 100% = Maximum humidity

Display of set temperature

Time display

Cleaning Programme (see paragraph « Cleaning menu »)
Temperature zone
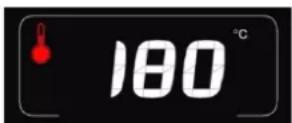
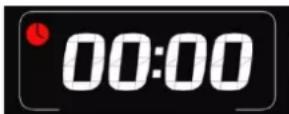
Timer zone


Humidity level zone


Displays the ambient and set temperatures
The ambient temperature is adjustable by pressing the corresponding zone
The setting entered is validated after 5 seconds or by pressing on another zone/button
Adjustment can be made using the coder or with the ▼ /▲ buttons in 1° intervals

Displays the "running time" or "remaining time".
The time is adjustable by pressing the corresponding zone
The setting entered is validated after 5 seconds or by pressing on another zone/button
Adjustment can be made using the coder or with the ▼ /▲ buttons in 1 minute intervals

The location of the white dots at the side of the timer logo indicates what is displayed:
Dots on the left: remaining time
Dots on the right: running time

A single touch on the zone selects it.

Adjustment can be done using the coder in 10% steps or using the ▼/▲ buttons in 1% increments.
The setting is validated after 5 seconds or by touching another zone/button
There are 4 options:
- Manual cleaning (semi-automatic)
- Automatic cleaning started manually (Automatic wash option)
- Automatic cleaning with a programmed start (Automatic wash option)
- Forced clean (Automatic wash option)

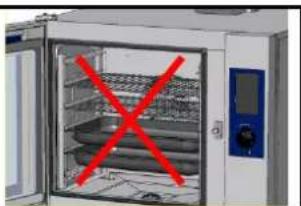
The cavity should never be cleaned with grills or containers in situ.
natural_image
Exterior view of a laboratory oven with red X-shaped mark (no text or symbols)14.1 MANUAL CLEANING MENU
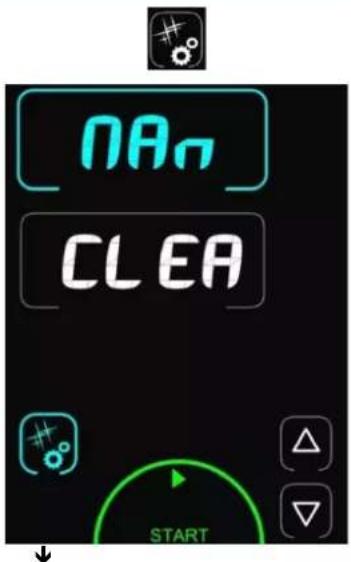
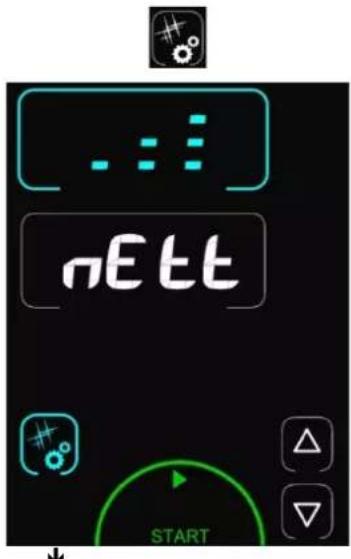
→ Pressing the Cleaning/Tools button gives access to the cleaning menu
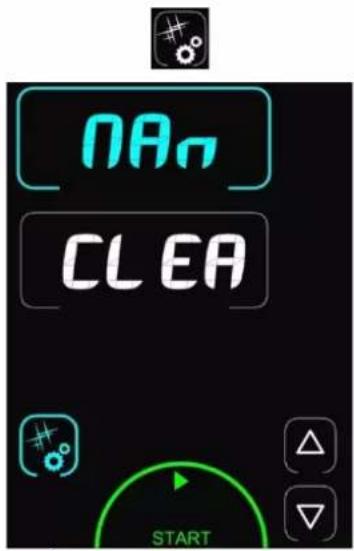
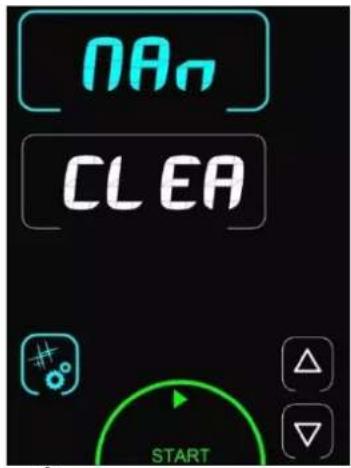
Display shows "CLEA" (cleaning) in the timer zone and the intensity in the temperature zone. By default the last cycle used is displayed.
| - | 17 min | |
| Rin | 2 min |
Pressing the "Start button" starts a wash cycle.
Pressing the Cleaning/Tools button or any inactive zone exits this menu and returns to the previous screen.
Procedure:
- Switch the oven on.
- Wait a few seconds until the start screen clears.
- Press the button:


"Cleaning mode"
- The manual wash screen appears:
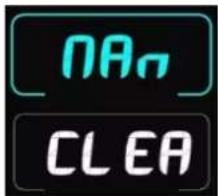

Semi-automatic cleaning mode
- Then press the "Start" button:


"Start" a cleaning cycle.
If the temperature is not appropriate for cleaning the temperature display will flash and the oven will heat up or cool down automatically to reach this temperature. Once this temperature is reached, the display indicates "ProD" and the oven will ring to warn you.
Always wait for the oven to ring before spraying on a cleaning agent.
After the alarm has sounded:
- Open the door (without switching the oven off).
-
Remove the right hand runners or the oven module (optional).
-
Unlock the ventilation duct and swing it open by pulling it towards you for 10 GN 2/1 and 20 level ovens. For other models leave the duct in place
- Spray detergent on all the exposed surfaces. Only use products specifically designed for cleaning professional stainless steel cooking cavities.
- Close the duct and lock it shut (10 GN 2/1 and 20 level ovens)
- Spray the cooking cavity and refit the runners or module
- Spray the runners or module and the inside or the door, then close the door.
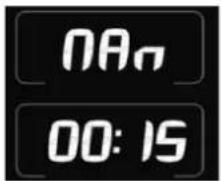

The cleaning cycle will start automatically and last 17 minutes. The display indicates time remaining.
- At the end of the cycle the display indicates « End ». The time display indicates « 00 00 » and the buzzer sounds ( 5 times).
14.2 AUTOMATIC CLEANING STARTED MANUALLY
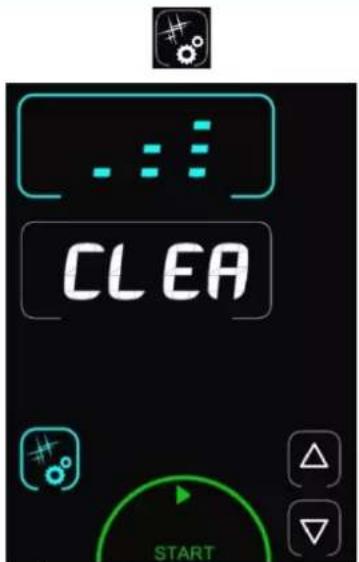

Pressing the Cleaning/Tools button gives access to the cleaning menu
Display shows "CLEA" (cleaning) in the timer zone and the intensity in the temperature zone. By default the last cycle used is displayed.
Possible selections:
- 3 cleaning intensities
- Rinse function
- Cleaning product priming function
| Intensity | Time | ||
| 6/10 lev | 20 lev | ||
| 1 | 17 min 2 | 6 min | |
| 2 | 26 min 3 | 6 min | |
| 3 | 36 min 3 | 7 min | |
| Rin | 2 min 2 | min | |
| Pri | 2 min 2 | min | |

The priming function allows the detergent delivery circuit to be refilled when the container is changed so that efficiency is maintained
A parameter in the CHEF menu allows you to program a daily automatic start time and the desired wash intensity
Pressing the "Start button" starts a wash cycle.
Pressing the Cleaning/Tools button or any inactive zone exits this menu and returns to the previous screen.
Procedure:
- Press the button:


"Cleaning mode"
- Select the required level of cleaning depending on how dirty the oven is.
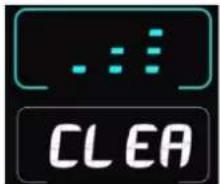

Select cleaning intensity of 1 to 3
- Check the pipe is connected to the chemical container and that the quantity is sufficient. If not refer to the paragraph "Replacing the chemical containers"
- Then press the "Start" button:


"Start" a cleaning cycle.
- It is still possible to change the intensity of the cleaning cycle whilst the zone is flashing (phase before detergent is injected). Whilst the timer is still displayed:
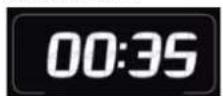

Time remaining before the end of the cycle.
- At the end of the cycle the display indicates "00 00".
14.3 AUTOMATIC CLEANING WITH A PROGRAMMED START
This function offers the possibility to program a daily automatic start time and the desired wash intensity.
NOTE: It is always possible to start an automatic cleaning cycle manually (see the paragraph 'Automatic cleaning started manually'), a rinse (see paragraph 'Rapid rinse') and/or priming (see paragraph on 'Replacing the detergent container')
This function is accessible via the client parameters in the "CHEF" menu (normal PIN code)
- Scroll through the various parameters to the parameter "setting the cleaning time"
- Set the cleaning time.
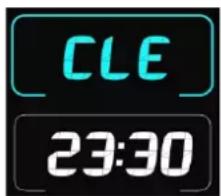

Select "the time" for starting the cleaning cycle
1st press = adjusts the hour;
2nd press = adjusts the minutes.
- Once adjusted to something other than --:--, the wash will start automatically at the set time (provided the oven is not in use). To cancel the automatic start reset the parameter to --:-- (set the hours to 00, then decrease the minutes to --:--).
- Then adjust the cleaning intensity by selecting the next parameter.
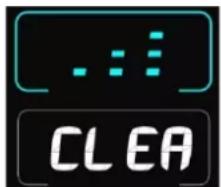

Select "cleaning intensity" of 1 to 3
- Validate and exit the menu.
14.4 FORCED CLEANING FUNCTION
The forced cleaning function makes the operators clean the oven regularly. If a cleaning cycle is not undertaken after a predetermined number of days the oven will cease to operate normally, only the cleaning cycle function will be accessible.
This function is inactive by default. The operator can't access this parameter (a service technician is needed)
If activated:
- 24 hours before a programmed cleaning cycle is require the display will flash after every cooking cycle and when the oven is switched on.
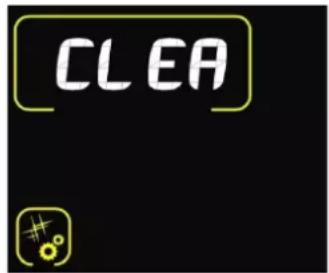

This screen alternates with one showing the number of days, inviting the operator to clean the oven and advising the number of days left before it locks down. Pressing the screen clears the message which will reappear the next time the oven is switched on if it is not cleaned.
NOTE: It is always possible to start an automatic cleaning cycle manually (see the paragraph 'Automatic cleaning started manually'), a rinse (see paragraph 'Rapid rinse') and/or priming (see paragraph on 'Replacing the detergent container')
- If the maximum time limit is reached without cleaning a blocked screen appears (Red) when switched on or after a cooking cycle this forces the user to clean the oven immediately.
ATTENTION: the oven locks down (cooking is not possible) if it has not been cleaned.
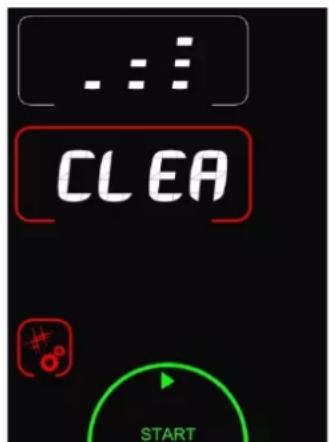

This screen indicates that the operator must clean the oven immediately. The appearance of this message starts a cleaning cycle (see the paragraph 'Automatic cleaning started manually'). Only a completed wash cycle will clear the message and unlock the oven.
14.5 STOPPING THE CLEANING CYCLE
To stop a cleaning cycle that is running:
- Press the stop button:


"STOP" stops the cycle.
If this action is not validated the cycle is paused but not stopped (It will restart after a few seconds if no further action is taken). Pressing the button for a second time will restart the cleaning cycle
- Confirm by validating using "End?".


"End?" Stops the cleaning cycle.
Depending on the progress of the cleaning cycle, it will stop immediately or go directly to rinsing before stopping.
Cycle in progress
Preheating
Prewash
Wash
Rinse
Action in the event the cycle stops
Stops immediately
Automatically switches to rinse mode then stops
Finishes rinsing then stop

Warning: If the message « i81 » appears during a washing cycle, check the water valve and pressure. It is imperative that the cavity is rinsed profusely before cooking.
14.6 RAPID RINSING
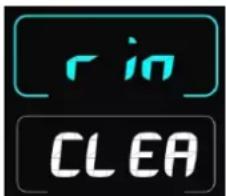

Rapid rinse function using only water (no chemical) for example between two different types of cooking
14.7 REPLACEMENT OF THE CHEMICAL CONTAINER (Priming Cleaner function):

Never use descaling product in the automatic cleaning system. This could seriously damage the ovens hydraulic circuits.
The cleaning chemical supply hose is labelled which corresponds to the container.


Note: Refer to the "Recommendations" chapter when handling or using these chemicals, if in any doubt refer to the products safety sheet
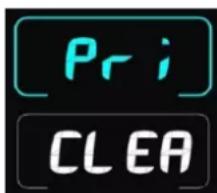

Changing the detergent containers
Use the « Priming Cleaner » function when changing the chemical container if the supply tube is empty.
For example when you start the unit for the first time.
The oven will prime the product then rinse for several minutes
WARNING: Regular and thorough cleaning will ensure prolonged service life
UNDER NO CIRCUMSTANCES SHOULD CLEANING CHEMICALS BE USED ON SURFACES THAT ARE OVER 60°C.
The result will be serious discolouration and damage to the surfaces.
◆ Jet washers and hoses, high or low pressure should never be used for cleaning.
The warranty will not cover resulting damage if the following guidance is ignored.
The appliance must be isolated electrically during cleaning or maintenance and when replacing parts.
15.1 INFORMATION ABOUT STAINLESS STEELS
- 3 main factors contributing to corrosion should be watched for:
- The chemical environment in general:
* Different brines (Salt concentration, Sauerkraut...)
* Chlorides contained in particular in:
- cleaning products
- bleach
- The temperature:
Any chemical environment is made considerably more aggressive to stainless steel as the temperature rises.
- The duration:
The longer the contact time between stainless steel and the chemicals, the more noticeable the consequences of corrosion will be.
The combination of these three factors may lead to the eventual destruction of parts of the equipment, even if they have been made in very high quality stainless steel.
Note that when stainless steel becomes corroded, it is extremely rare that this is generated by the steel itself. Generally, cleaning products, which are not appropriate or are improperly used, lack of maintenance or extreme conditions of use are often found to be the cause of the damage.
WARNING!
The manufacturer will not be held responsible for cases of corrosion resulting from these conditions and the warranty will not apply.
15.2 MAINTENANCE OF EXTERNAL SURFACES
It is necessary to clean the metal surface carefully so as to eliminate all dust, metal particles and deposits of any kind which could damage the protective layer mentioned above.
For this purpose, it is sufficient to wash these surfaces with soapy water or any other neutral and non abrasive cleaning product. RINSE CAREFULLY and wipe the surfaces.
Never scrub stainless steel with metal wool, but if necessary, only with a "Scotch Brite" type pad or a similar product, by following the direction of polishing of the stainless steel surface.
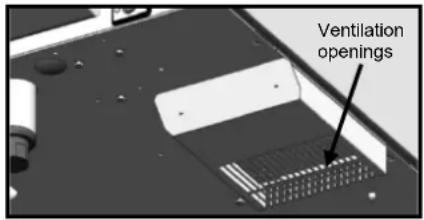
15.3 CLEANING THE ELECTRONIC COMPARTMENT VENTILATION OPENINGS
Cooling the electronic compartment is ensured by means of the ventilation apertures at the right front of the equipment (6 and 10 level). Once a week, check that the aeration grids are clean and not obstructed by dust by cleaning its surface with a dry cloth.
15.4 CLEANING THE CAVITY GASKET
In order to remove traces of grease or food scraps that can damage the gasket, regular and manual cleaning of the cavity gasket should be performed on the inner and outer faces. Before cleaning, use water with soap or neutral and non-abrasive detergent with a sponge or a soft cloth to remove the grease from the cavity gasket.
15.5 MAINTENANCE OF INTERNAL SURFACES
The general principle consists in not letting the following settle in certain places:
- Substances likely to become concentrated and so become corrosive.
- Settling of different minerals contained in water and likely to generate corrosion (walls) performance and life-duration (fan balancing, exchanger dissipation, ..) problems.
A trolley or preheating plate (optional) must be used for the automatic wash cycle on 20 level ovens.
CLEANING, DEGREASING: Once a day (See paragraph "Cleaning menu")
DESCALING: Every day if necessary.
If there are any mineral deposits (whitish specks) as a result of un-softened water in the cooking chamber this must be removed daily.

For maximum efficiency of the descaling product without damaging the material and components of the oven, you should use an appropriate descaler. The use of certain acids has an irreversible destructive effect that may cause significant damage. The descaling product must contain corrosion inhibitors to prevent metal attack. It must also comply with legal requirements, in particular for material intended to come into contact with foodstuffs. Chemical products containing nitric acid are strictly prohibited. Recommended composition:
- Phosphoric acid <50%
- Corrosion inhibitor
Procedure:
Before descaling the cooking cavity, a cleaning cycle is required (see paragraph « Cleaning menu ») to dissolve any accumulated grease. Manual descale:
- Run in steam mode at 60°C for 5 minutes
- Manually spray the surfaces to be treated with a descaling product specifically adapted for use on stainless steel thus the composition recommended is: phosphoric acid with a concentration of less than 50% + tensio-active corrosion inhibitors, diluted to a known level (conforming to the product label and its data sheet) and using suitable protective equipment (conforming to the product hazard sheet). Thoroughly spray the areas with limescale deposits (Fans, elements, panelling).
- Leave the product to act for several minutes depending on the level of scaling.
- Rinse using the automatic rinse cycle (see paragraph « Cleaning menu »).
- Undertake a cleaning cycle (see paragraph « Cleaning menu »)
The optional automatic cleaning system is designed to introduce degreasing detergent and nothing else. Never use a descaling solution. This could cause irreversible damage to your oven.
15.6 MAINTENANCE OF THE STEAM BOILER (Equajet boiler)
Boiler maintenance takes place out of hours during the oven cleaning. During this operation the generator will be rinsed to get rid of any steam and calcium deposits in suspension in the water prior to descaling. The drain pipe work will be cleaned of grease and cooking juices. It is normal for water to rise slightly into the bottom of the oven in order to clean the drain outlet.
15.7 MATERIAL USED FOR COOKING CORROSIVE PRODUCTS (Sea fish, sauerkraut)
The materials used intensively and regularly for cooking corrosive products, such as sea fish, sauerkraut, ..., should be cleaned carefully and systematically after each use.
16 PREVENTATIVE MAINTENANCE
The appliance must be isolated electrically during cleaning or maintenance and when replacing parts.
| Subject | Daily | Weekly | Monthly | Every year (Or every 3000 h) | Recommendations |
| Cleaning the external surfaces | x | Use the correct dose of cleaning product; Do not use abrasive products. | |||
| Cleaning the cavity seal (all models) and bottom door seal (20 levels) | x | Use the correct dose of cleaning product; Rinse thoroughly; Do not use abrasive products. | |||
| Visual inspection of cavity seal (all models) and bottom door seal (20 levels) | x | In case of damage, alert the after-sales service | |||
| Cleaning and descaling of internal surfaces | x | Respect cleaning product dosage; Rinse thoroughly; Alert the after-sales service if any rust points appear. | |||
| Checking the amount of cleaning agent in the container | x | Replace the container as often as necessary | |||
| Checking the condition of the hose and of the base valve in the cleaning agent container | Check when replacing the container / Clean the base valve | ||||
| Cleaning the electronic compartment ventilation openings | x | ||||
| Visual check of the presence of inner door stops | x | ||||
| Visual check of the condition of the lighting strip label | x | Clean if necessary with a non-aggressive and non-abrasive degreaser. Rinse thoroughly. In case of damage, alert the after-sales service | |||
| Visual inspection of the core probe (tip, cable, passage through the bulkhead) | x | In case of damage, alert the after-sales service | |||
| Periodic maintenance by the after-sales service | x |
17 ERROR MESSAGES
| Message on the screen | Consequences | What to do? |
| i31 : Electronics overheating: Temperature reduced to 180°C | Cooking continues automatically at a temperature below 180°C | Clean the lower and rear air intakes. If the problem persists, call a service technician. |
| i33 : Core probe non function or not plugged in | Cooking stops | To continue cooking connect a probe or switch to timer mode. |
| i81 : Water flow problem | Reduced functionality or Pause the cleaning | Check the valve and water pressure.If the message appears during a cleaning cycle it is possible to stop the cycle if the cleaning chemicals have not yet been injected, by pressing stop. Check that the water has not been switched off to recommence the cycle automatically. If this is not the case the cycle is blocked.To force an end to the cycle :- press on « Tools/Cleaning »- enter the PIN code « RSTC » to exit-manually undertake a thorough rinse of the cooking cavity to eliminate all chemical residues before cooking-call a service technician |
| i82 : Sticking solenoid | Reduced functionality | Switch off and call a service technician. |
| E46 : Electronic communication fault | Cooking stops | Possible to launch safe mode: convection mode at 175°C (see guidance and info about the control screen). |
| E53 : Ventilation non function | Cooking stops | Switch off and call a service technician. |
| E61 : Ambient probe short circuit | Cooking stops | Switch off and call a service technician. |
| E62 : Ambient probe non function | Cooking stops | Switch off and call a service technician. |
| E68 : Cavity at +290°C | Cooking stops | Switch off and call a service technician. |
| E72 : Electronics at over + 75°C | Cooking stops | Switch off and call a service technician. |
| E73 : Detergent pump faulty or on permanently | Drain the hydraulic circuit.Reduced functionality | Switch off and call a service technician. |
18 RECOMMENDED AND FRONT LINE SPARE PARTS
| Designation | Codes | Equajet | Equajet Boiler |
| 1 way 1 x 10 L/min solenoid valve | 144937 | x | x |
| Drive shaft gasket + wear ring | 145587 | x | x |
| Complete mounted sensor sub-assembly of oven generator | 147060 / 147061 | - | x |
| 2 way 2 x 10 L/min solenoid valve | 147152 | x | - |
| 3 way 3 x 10 L/min solenoid valve | 147723 | - | x |
| 3 way 2 x 10 L/min + 1 x 5 L/min solenoid valve | 147792 | x | - |
| Sub assembly - Gas valve without safety enclosure | 148222 | x | x |
| Starting electrode | 148223 | x | x |
| After sales kit 9kW element 340 dia + seal | 148752 | x | x |
| After sales kit 15kW element 500 dia + seal | 148753 | x | x |
| After sales kit 9kW element 430 dia + seal | 148754 | x | x |
| After sales kit 7.5kW immersion heater 380 long | 148756 | - | x |
| After sales kit 6kW immersion heater 380 long | 148757 | - | x |
| After sales kit 24kW immersion heater 570 long | 148758 | - | x |
| After sales kit 17.7kW immersion heater 570 long | 148759 | - | x |
| After sales kit 8kW immersion heater 380 long | 148760 | - | x |
| 4 way solenoid valve, 2 x 10 L/min + 2 x 5 L/min | 148770 | - | x |
| Reed switch | 300676 | x | x |
| Three-pole 25A 230V 50/60 Hz contactor | 300697 | x | x |
| Three-pole 32A 230V 50/60 Hz contactor | 300698 | x | x |
| Three-pole 40A 230V 50/60 Hz contactor | 300699 | x | - |
| Three-pole 50A 230V 50/60 Hz contactor | 300700 | x | x |
| Three-pole 80A 230V 50/60 Hz contactor | 300702 | x | - |
| Anti-interference relay | 300769 | x | x |
| Ultra fast fuse 0.2A 250V 5 x 20 | 300787 | x | x |
| 10amp 5 x 20 fuse | 300788 | x | x |
| PT100 sensor, diameter 4, 350 in length | 301456 | - | x |
| 2 points PT 100 regulating sensor | 301471 | x | x |
| Gas generator probe | 301479 | - | x |
| 1 point regulation probe, PT 100 | 301485 | x | x |
| Axial fan | 304194 | x | x |
| LN2 fixed centrifugal fan 7000rpm | 304276 | x | x |
| Motor | 304292 | x | x |
| Condenser 12.5μf | 304293 | x | x |
| Reducing gear with centre return spring, 85 degrees | 305108 | x | x |
| 3 phase 125A fuse holder | 307468 | x | x |
| 3 phase 50A fuse holder | 307469 | x | x |
| 14 x 51 32A GG fuse | 307471 | x | x |
| 22 x 58 63A GG fuse | 307472 | x | x |
| Switching regulator 15V 15W RS 15-15 | 308350 | x | x |
| Fuse 3.15 Amp | 309407 | x | x |
| Inter card cable | 309581 | x | x |
| FastPAD 2 max power assembly | 309635 | x | x |
| VISIOPAD screen card | 309636 | x | x |
| LED strip | 309638 | x | x |
| FastPAD 2 Mini relay connection | 309641 | x | - |
| VISIOPAD coder | 309644 | x | x |
| FastPAD 2 Max UL relay connection | 309663 | x | x |
| Safety box 577DBC | 310324 | x | x |
| Motorised valve 3/4 230V 50/60 Hz female | 314359 | - | x |
| Inlet/outlet 1 way solenoid valve, 10 L/min | 314362 | x | x |
| Pump kit | 314367 | x | x |
| CP2A pump | 314379 | x | x |
| FHKUC flow meter | 314381 | x | x |
| 10.2 x 15 diameter 2 mm thick metal-asbestos plastic gasket | 318033 | - | x |
| Heating element + immersion heater gasket | 366461 | x | x |
| Door stop | 366572 | x | x |
| Synthetic filter | 386087 | x | x |
19 RECOMMENDATIONS
◆ These appliances are for professional use, only appropriately trained personnel should use them.
These appliances are intended to be used for commercial applications, for example in kitchens of restaurants, canteens, hospitals and in commercial enterprises such as bakeries, butcheries, etc., but not for continuous mass production of food.
These appliances must be installed with sufficient ventilation to prevent the formation of an excessive concentration of substances harmful for health within the premises in which they are installed.
◆ The rate of new air required for combustion is 2m3/h per kW of heating power.
♦ Never block the condensate exhaust flue, because the pressure could rise in the appliance and pose a risk of explosion.
If an error message appears consult the list of error messages and follow the ADVICE given
- When cleaning high pressure jets or lances should never be used.
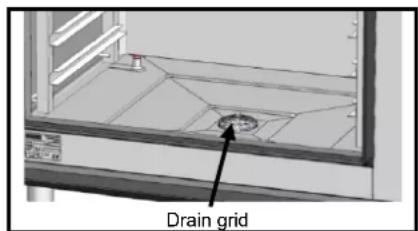
♦ NEVER start the oven WITHOUT HAVING POSITIONED AND LOCKED the ventilation duct.
Do not remove the ventilation duct and the drain grid located in the oven. If this grid is missing do not start the oven.
◆ Always use a qualified technician to install the equipment and if necessary change the oven from one gas to another.
IMPORTANT: Please be aware that when cooking dishes prepared with alcohol (coq au vin, pears in wine, etc....). Vapour saturated with alcohol may when heated cause an explosion in the oven and due to the sealed door, create a momentary overpressure which may cause an irreversible deformation of the panels. This risk is further increased when the user adds alcohol to the products near the end of the cooking cycle and closes the door to complete cooking.
The appliance must be isolated electrically during cleaning or maintenance and when replacing parts.
For long term reliability and safety it is advisable to have the unit serviced by suitably qualified technicians (Dismantling of burners, inspection and cleaning of venturis, cleaning jets, adjustment of air rings, cleaning vents, checking for possible leaks, checking control elements, regulating and safety accessories...).
The oven must be meticulously maintained on a DAILY basis (see the “Maintenance” chapter). In particular, the fans, heating elements and internal surfaces must be kept clean grease and mineral deposits must not be allowed to accumulate.
Preheating (20 level ovens): Whatever the cooking mode, these ovens are designed to be preheated with the trolley in place. See «practical use advice».
◆ Using a trolley or preheating plate (optional) is compulsory for automatic cleaning of 20 level ovens.
♦ Never place the probe behind the ventilation duct (the probe may deteriorate in proximity to the elements or gas exchange.
♦ NEVER APPLY ANY CLEANING PRODUCT WHEN THE OVEN IS HOT, AT ANYTHING OVER 60°C THE SURFACE WILL BE IRREPARABLY DAMAGED.
♦ Do not open the oven door during a cleaning cycle.
Combination ovens should be cleaned with specific products which can resist temperature of up to 70°C. An inappropriate cleaning or descaling product may have a slightly corrosive effect.
The detergent chemical risk should not exceed 3 in accordance with EN 1717 (Toxicological information FDS: LD50 > 200mg/kg).
We strongly recommend the use of cleaning products supplied by the manufacturer to ensure good results and optimize the service life of its components.
Except for the UK market: No detergent product is recommended or supplied. Any detergent used with this appliance must have been verified to represent no greater risk than Fluid Category 3. If the detergent used represents a Fluid Category risk greater than Fluid Category 3 alternative backflow protection to the double check valve supplied with the appliance will be required immediately upstream of the appliance. The backflow protection used must be appropriate to the risk posed by the detergent.
In order to ensure optimum cleaning results without the risk of chemical attack we recommend using our cleaning chemical BK101. Other products can be used. Generally cleaning products that are compatible with our ovens should:
- have a composition based on potassium hydroxide with a concentration < 25%, WITHOUT sodium hydroxide
- be suitable for use at a temperature of 60^ C.
- include anticorrosion agents
For maximum efficiency of the descaling product without damaging the material and components of the oven, you should use an appropriate descaler. The use of certain acids has an irreversible destructive effect that may cause significant damage. The descaling product must contain corrosion inhibitors to prevent metal attack. It must also comply with legal requirements, in particular for material intended to come into contact with foodstuffs.
Chemical products containing nitric acid are strictly prohibited. Recommended composition:
- Phosphoric acid <50%
- Corrosion inhibitor
The automatic cleaning system is exclusively designed to achieve an introduction of cleaning and degreasing chemical. Never use a descaling agent. This would damage the hydraulic system of the oven irreversibly.
Under no circumstances should the oven be cleaned with grills or containers in situ.
The core probe socket and USB port are fitted with silicone protective covers.
- Always put the protective cover in place (lowered to protect connections) whenever the socket is not in use.
- Never "clean" connections with a water hose or a sponge. (If the silicone cover is used and put back in place after use, no maintenance is necessary).
The manufacturer certifies that the packaging meets the provision 94/62/CE (relating to packaging and packaging waste of 20.12.94) and requests that the final installer (or user) observes the rules relating to the removal of the packaging (recycling or reuse).
« According to article 6 of the decree of 20 July 2005 a marking giving the identity of the manufacturer and the market release date must appear on equipment after 13 August 2005».
◆ « The Manufacturer has filled in the National Register. »
As per the legal provisions in force (article 21 & 22 of the decree 2005-829), the customer is responsible for the obligations relating to the elimination of electric and electronic waste, namely:
- he is to deal with selective treatment, reconditioning and destruction of residue arising from electric and electronic equipment, selectively collected in the installations meeting the technical requirements or in any other installation authorised for the purpose, in another member State of the European Union, or in another State so far the transfer of these residues out of France is made according to the provisions of the Regulation of 1st February 1993 indicated above.
- he must make sure that all fluids of electric and electronic equipment are drained according to the requirements of the provisions.
- he must make sure that the information relating to the removal and treatment of these residues is forwarded to any further acquirer.
- The warranty will not cover problems caused by failure to comply with these recommendations

Warning! Danger! Caution!
- Cooking appliances may reach 250°C. BE CAREFUL not to burn yourself when using or handling INNER ACCESSORIES (Plates, modules, filter, duct...).
The surface temperature of the door can exceed 60°C. BEWARE OF THE RISK OF BURNS. - Loading and unloading containers and ovenware: The height of the top shelf or runner can be 1.75 m. If unloading manually be careful. ATTENTION: splashes and spillages pose a risk of scalding.
When using the core probe be aware that it can be very hot, always use suitable protection to avoid burns
◆ Remember the dangers identified on the safety data sheet for detergent - Harmful if swallowed.
- Can result in serious burns.
- Irritates the eyes.
- Irritates the respiratory tracts.
- Risk of serious eye lesions.
◆ Danger of irritation to the skin and eyes or acid burns.
Detergents will cause irritation and possible burns if in direct contact with the skin or eyes.
- Do not inhale the mist or spray
- Avoid direct contact with these products
- Never open the oven door during the automatic cleaning cycle
- Wear protective clothing, gloves and hermetic protective goggles in accordance with the safety data sheet.
◆ Remember the safety advice provided by the safety data sheet for each detergent
- Do not each or drink when using these products.
- Do not inhale their vapours.
- If case of contact with eyes rinse immediately with plenty of water and seek medical advice.
- Wear appropriate protective clothing, gloves and face and eye protective gear.
- In the event of an accident or sickness seek immediate medical attention
- Dispose of the product and its container as hazardous waste.
PROFESSIONAL KITCHEN EQUIPMENT AT THE END OF THE LIFE CYCLE
Instructions for use
Dispose of this product in accordance with the national legislation or other regulations in force in your country for the treatment of used electrical and electronic equipment.
Note: To do this, contact an appropriate collection point for the recycling of electrical and electronic equipment for treatment, recovery and recycling in accordance with national legislation.
PLEASE NOTE THAT NO GUARANTEE IS UNCONDITIONAL
Our guarantee applies only for normal use. That is, with the strict observance of the recommendations given in our instructions for use and maintenance.
It will only be valid on condition that the periodical maintenance recommended has been carried out by factory trained engineers.
All appliances are, subject to the above limitations, normally guaranteed for a period of one year, from the date invoice. In the event of a breakdown due to a visible or hidden defect, our equipment will be repaired at our expense, including parts and labour costs.
To benefit from our guarantee, our appliances must not have been modified in any way or repaired using parts which are not genuine and approved for such use or where repairs have been undertaken by personnel who are not qualified or factory trained.
In case of breakdown or failure we should be informed in writing at the earliest opportunity of the nature of the problem. In no circumstances should the defect be remedied by the user or a third party.
Regular service inspections and maintenance by our engineers are an essential condition for correct and reliable operation of our equipment. Such service and maintenance operations can and must only be carried out by our technicians, who are not only fully qualified but also trained to do so. They have the right tooling, original spare parts and are given regular training updates on the appliances. Periodic servicing is essential; it is carried out at a cost but guarantees reliable operation of our appliances
The timing of service and maintenance is relative to the conditions of use. In the event of heavy use certain operations will need to be carried out more frequently.
WARNING! Damage caused by connecting our appliances to a power supply which does not comply with the data plate (voltage, reversal of phase/neutral conductors..) or where phase order cannot be checked (this is important for three-phase motors, fan direction, electric rams,...) will under no circumstances be covered by warranty.
For this reason we advise against connecting appliances until the electrical and gas supplies can be checked and compared with details on the data plate.

QUADRO NORMATIVO DI RIFERIMENTO - STANDARDS OF REFERENCE - TABLEAU NORMATIF DE REFERENCE - MARCO REGLAMENTARIO DE REFERENCIA - REFERENZNORMEN - QUADRO NORMATIVO DE REFERÊNCIA - RAMY REGULACYJNE ODNIESIENIA - TABEL MET NORMREFERENTIES - SZABVÁNYOK REFERENCIA
| Regolamento 2016/426/CE Regulation 2016/426 / EC Règlement 2016/426 / CE Reglamento 2016/426 / CE Verordnung 2016/426 / EG Regulamento 2016/426 / CE Verordening 2016/426 / EG Правило 2016/426 / EC Rozporządzenie 2016/426 / WE Förordning 2016/426 / EG Forordning 2016/426 / EF 2016/426 / EK rendelet | Direttiva Bassa Tensione 2014/35/EU Low Voltage Directive 2014/35/EU Directive Basse Tension 2014/35/EU Directiva de baja tensión 2014/35/EU Niederspannungs- richtlinie 2014/35/EU Diretiva baixa tensão 2014/35/EU Dyrektywa Niskonapięciowa 2014/35/EU Richtlijn lage Spanning 2014/35/EU Kisfeszültségű direktiva 2014/35 / EU | Direttiva EMC 2014/30/EU EMC Directive 2014/30/EU Directive EMC 2014/30/EU Directiva EMC 2014/30/EU EMV-Richtlinie 2014/30/EU Diretiva EMC 2014/30/EU Dyrektywa EMC 2014/30/EU EMC Richtlijn 2014/30/EU EMC irányelv 2014/30 / EU | Smaltimento Apparecchiature elettriche ed elettroniche Disposal of electric and electronic equipment Elimination des appareils électriques et électroniques Entsorgung elektrischer und elektronischer Altgeräte Verwijdering elektrische en elektronische apparatuur Eliminação dos Resíduos elétricos e eletrónicos-REEE Utylizacja Urządzeń elektrycznych i elektronicznych Elektromos és elektronikus készülékek ártalmatlanítása | |
| GAS-GÁS-GAS GAS-GAS-GÁS GAZOWY - GÁZ ELETTRICO ELECTRIC ELECTRIQUE ELEKTRO ELEKTRISCH ELÉTRICO ELEKTRYCZNY VILLAMOS | EN 437 EN 203-1 EN 203-2 EN 203-3 | EN 50366 EN 60335-1 EN 60335-2-42 EN 5633 EN 62233 | EN61000-3-11 EN61000-3-12 EN61000-6-2 EN61000-6-3 EN55014-1 EN55014-2 | DIRETTIVA 2011/65/EU (ROHS II) EN 50581 DIRETTIVA 2012/19/EU WEEE (RAEE II) RICHTLIJN 2011/65/EU (ROHS II) EN 50581 DYREKTYWA 2011/65/WE (ROHS II) EN 50581 IRÁNYELV 2011/65/EU |
INHALT
DE
21 ALLGEMEINES....2

natural_image
Exterior view of a laboratory incubator with red X marks indicating prohibition (no text or symbols visible)

→


- Javellauge (Chlorwasser)
→
natural_image
Exterior view of a laboratory oven with red X marks indicating prohibition (no text or symbols visible)34.1 LIMPIEZA MANUAL


→
natural_image
Exterior view of an oven with red X marks indicating a prohibition (no text or symbols present).1 MENU DI PULIZIA MANUALE



- FOUR ELECTRONIQUE NUMERIQUE A ECRAN TACTILE MANUEL D'UTILISATION ET DE MAINTENANCE ORDINAIRE
- CONSEILS PRATIQUES D'UTILISATION / PRACTICAL OPERATING ADVISE / PRAKTISCHE
- SOMMAIRE
- - GARANTIE -
- NETTOYAGE MANUEL (SEMI-AUTOMATIQUE)
- Attention! Danger! Prudence!
- - WARRANTY -
- - WARNING -
- GENERAL
- MANUAL MODE
- Timer zone
- Core temperature button
- Fan button
- Vent button
- PREHEATING
- PROGRAMMES MENU
- DISPLAYING THE CONTENTS OF A MENU PROGRAMME
- ABC MODE
- Temperature zone
- Humidity level zone
- There are 4 options:
- MANUAL CLEANING MENU
- Procedure:
- AUTOMATIC CLEANING STARTED MANUALLY
- AUTOMATIC CLEANING WITH A PROGRAMMED START
- FORCED CLEANING FUNCTION
- If activated:
- STOPPING THE CLEANING CYCLE
- Cycle in progress
- Action in the event the cycle stops
- RAPID RINSING
- REPLACEMENT OF THE CHEMICAL CONTAINER (Priming Cleaner function):
- Changing the detergent containers
- WARNING: Regular and thorough cleaning will ensure prolonged service life
- INFORMATION ABOUT STAINLESS STEELS
- WARNING!
- MAINTENANCE OF EXTERNAL SURFACES
- CLEANING THE ELECTRONIC COMPARTMENT VENTILATION OPENINGS
- CLEANING THE CAVITY GASKET
- MAINTENANCE OF INTERNAL SURFACES
- MAINTENANCE OF THE STEAM BOILER (Equajet boiler)
- MATERIAL USED FOR COOKING CORROSIVE PRODUCTS (Sea fish, sauerkraut)
- PREVENTATIVE MAINTENANCE
- RECOMMENDATIONS
- Warning! Danger! Caution!
- PROFESSIONAL KITCHEN EQUIPMENT AT THE END OF THE LIFE CYCLE
- Instructions for use
- PLEASE NOTE THAT NO GUARANTEE IS UNCONDITIONAL
- INHALT
- LIMPIEZA MANUAL
- .1 MENU DI PULIZIA MANUALE
Brand : MBM
Model : MC202G
Category : Oven