Harrison Smart - Towel warmers Blumfeldt - Free user manual and instructions
Find the device manual for free Harrison Smart Blumfeldt in PDF.

User questions about Harrison Smart Blumfeldt
0 question about this device. Answer the ones you know or ask your own.
Ask a new question about this device
Download the instructions for your Towel warmers in PDF format for free! Find your manual Harrison Smart - Blumfeldt and take your electronic device back in hand. On this page are published all the documents necessary for the use of your device. Harrison Smart by Blumfeldt.
USER MANUAL Harrison Smart Blumfeldt
Note: This product is only suitable for well insulated spaces or occasional use.
text_image
QR code image containing encoded data, no visible human-readable textINHALTSVERZEICHNIS
text_image
1 1.1 1.21×

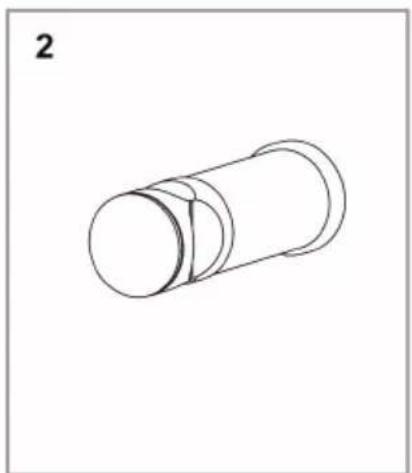
natural_image
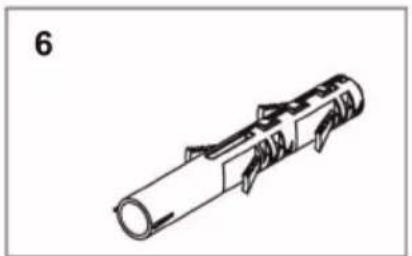
Simple line drawing of a cylindrical mechanical part with a flanged end (no text or symbols)4×

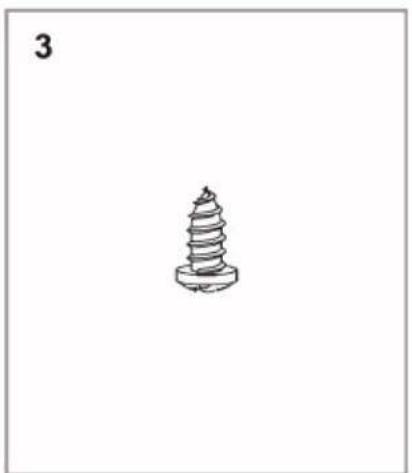
natural_image
Simple line drawing of a screw with a base, labeled with number 3 (no text or symbols on the screw itself)4×

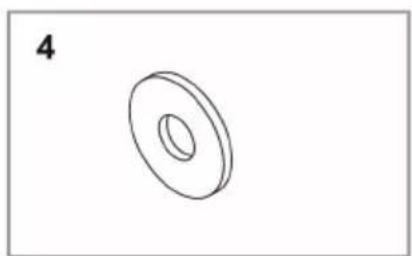
natural_image
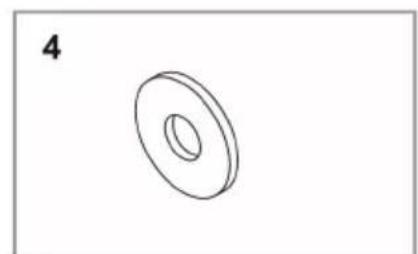
Simple line drawing of a ring with a central hole, labeled with number 4 (no text or symbols on the diagram itself)4×

natural_image
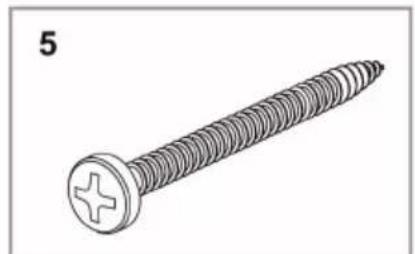
Illustration of a screw with a circular head and cross symbol (no text or labels)4×

natural_image
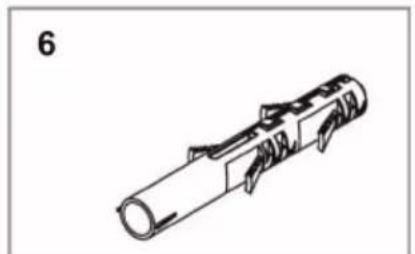
Technical line drawing of a cylindrical mechanical component with internal slots and mounting holes (no text or symbols)4×
text_image
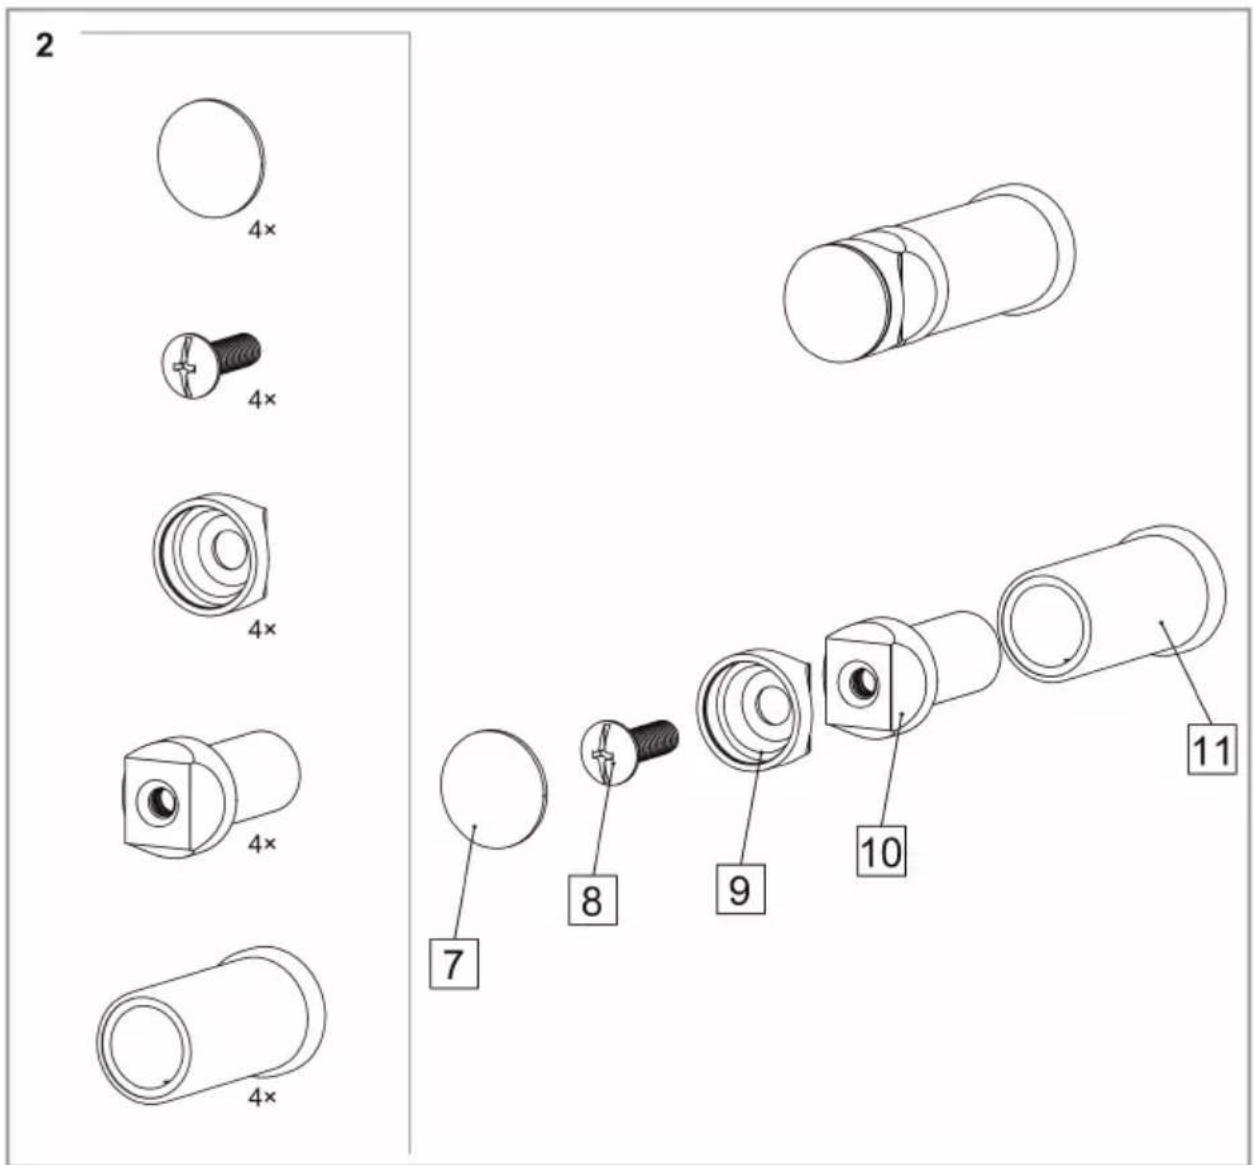
2 4× 4× 4× 4× 4× 7 8 9 10 11
text_image
Technical diagram of a ladder assembly with numbered components for identificationtext_image
Technical diagram of a radiator with numbered components and an inset close-up showing the assembly detail.
text_image
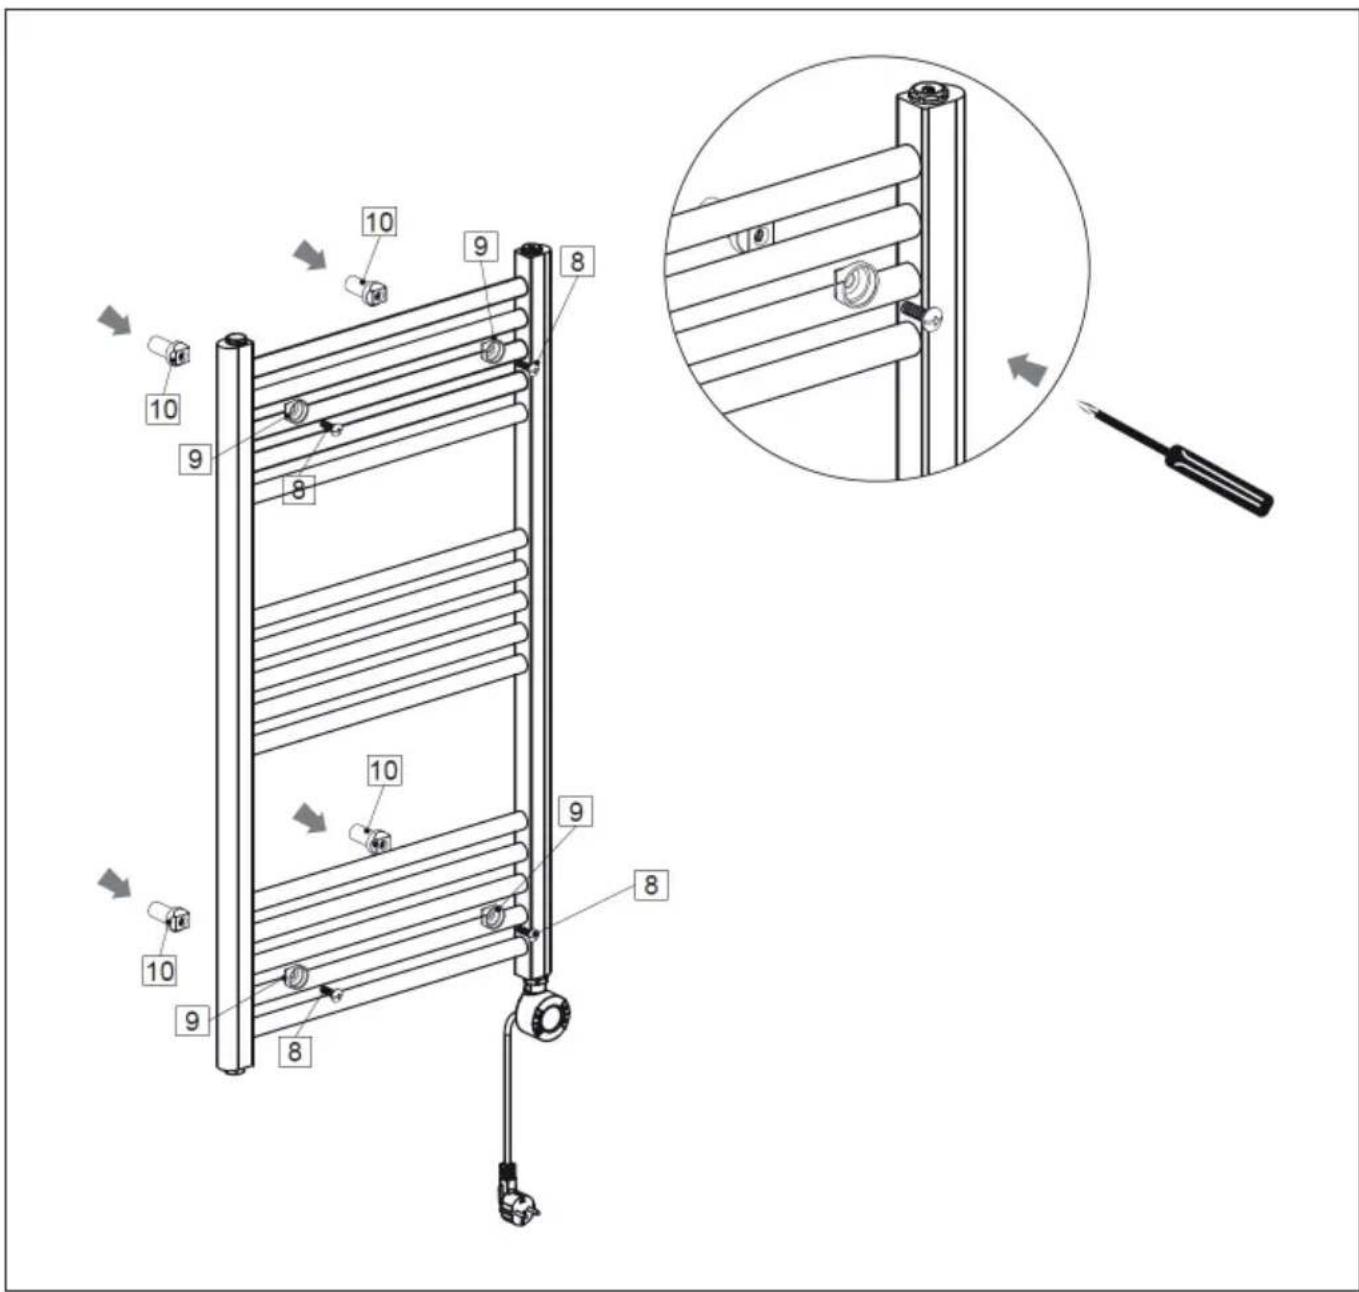
Technical diagram of a mechanical assembly with numbered components and directional arrows indicating motion or assembly steps.
text_image
Technical diagram of a radiator assembly with numbered components and directional arrows indicating motion or assembly steps.
natural_image
Diagram of a horizontal ladder connected to a vertical tube with a pressure gauge, showing hand placement and measurement setup (no text or symbols)BEDIENFELD UND TASTENFUNKTIONEN
text_image
21 3 18:00:00 15 12 8natural_image
Top-down diagram of concentric circular layers with a red arrow pointing to a rectangular structure inside (no text or symbols)natural_image
Circular diagram with segmented rectangular shapes and a small icon, no text or symbols presentWLAN aktivieren
natural_image
Symbol of a trash bin crossed with a diagonal line, no text or numbers presentBerlin Brands Group UK Limited
PO Box 42
272 Kensington High Street
London, W8 6ND
United Kingdom
Congratulations on your purchase. Please read the following instructions carefully and follow them to prevent potential damage. We accept no liability for damage caused by disregarding the instructions and improper use. Please scan the QR code to access the latest operating instructions and further information about the product.

text_image
QR code image containing encoded data, no visible human-readable textCONTENTS
Safety Instructions 28
Installation 29
Control panel and button functions 36
Operation 37
Device control via smartphone 42
Additional settings 44
Cleaning and Care 45
Troubleshooting 45
Disposal Considerations 46
Declaration of conformity 46
Product Data Sheet 47
TECHNICAL DATA
| Article number 10045584 10045585, 10045586 | |
| Power supply 220-240 V ~ 50/60 Hz | |
| Operating temperature 0-55 °C | |
| Adjustable temperature 30-70 °C | |
SAFETY INSTRUCTIONS
- Ensure that you only connect the device to sockets with the appropriate voltage.
- If the power cord is damaged, have it replaced by a trained professional.
- Do not mount the device directly under the mains socket.
- Ensure the appliance is kept one metre away from combustible materials such as curtains or similar.
- Use the device out of the reach of children. Children may only operate the device under supervision.
- The device is intended for use in the home and similar environments only. It is not intended for commercial use.
- Do not use the device if it malfunctions or has been damaged in any way.
• Repairs may only be carried out by trained specialists. - Incorrectly or independently performed repairs pose a risk of injury.
- Do not run the power cord under carpets or rugs.
- Make sure that the power cord does not come into contact with sharp edges or hot surfaces.
- Do not use the device in the immediate vicinity of a bathtub, shower or
- swimming pool.
- Do not use the device outdoors.
- Do not use the device with a damaged power cord.
- Before cleaning, unplug the device from the wall outlet and allow it to cool completely.
- Do not use abrasive cleaners for cleaning.
- Children, physically and physically impaired persons should only use the appliance if they have been familiarised in detail with the functions and safety precautions by a supervisor.
- Make sure that children do not play with the device.
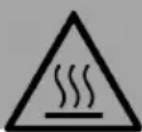
CAUTION
Risk of burns! Some parts of the device can become very hot. Be careful not to burn yourself or your children with it.
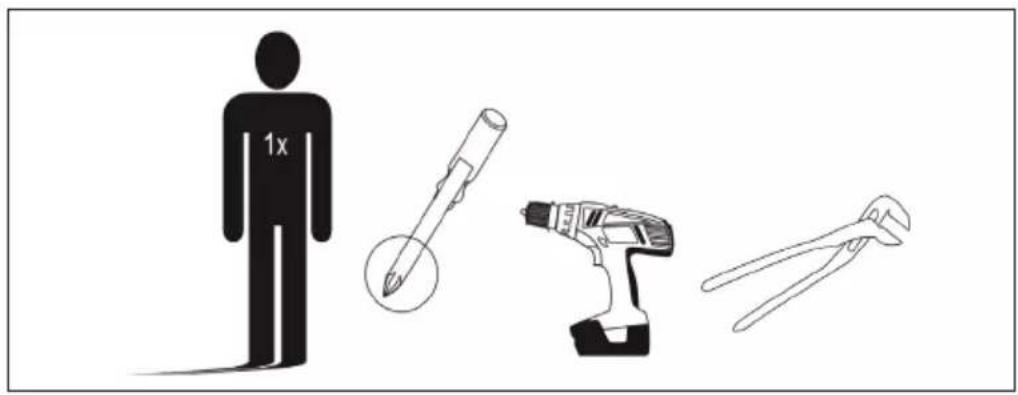
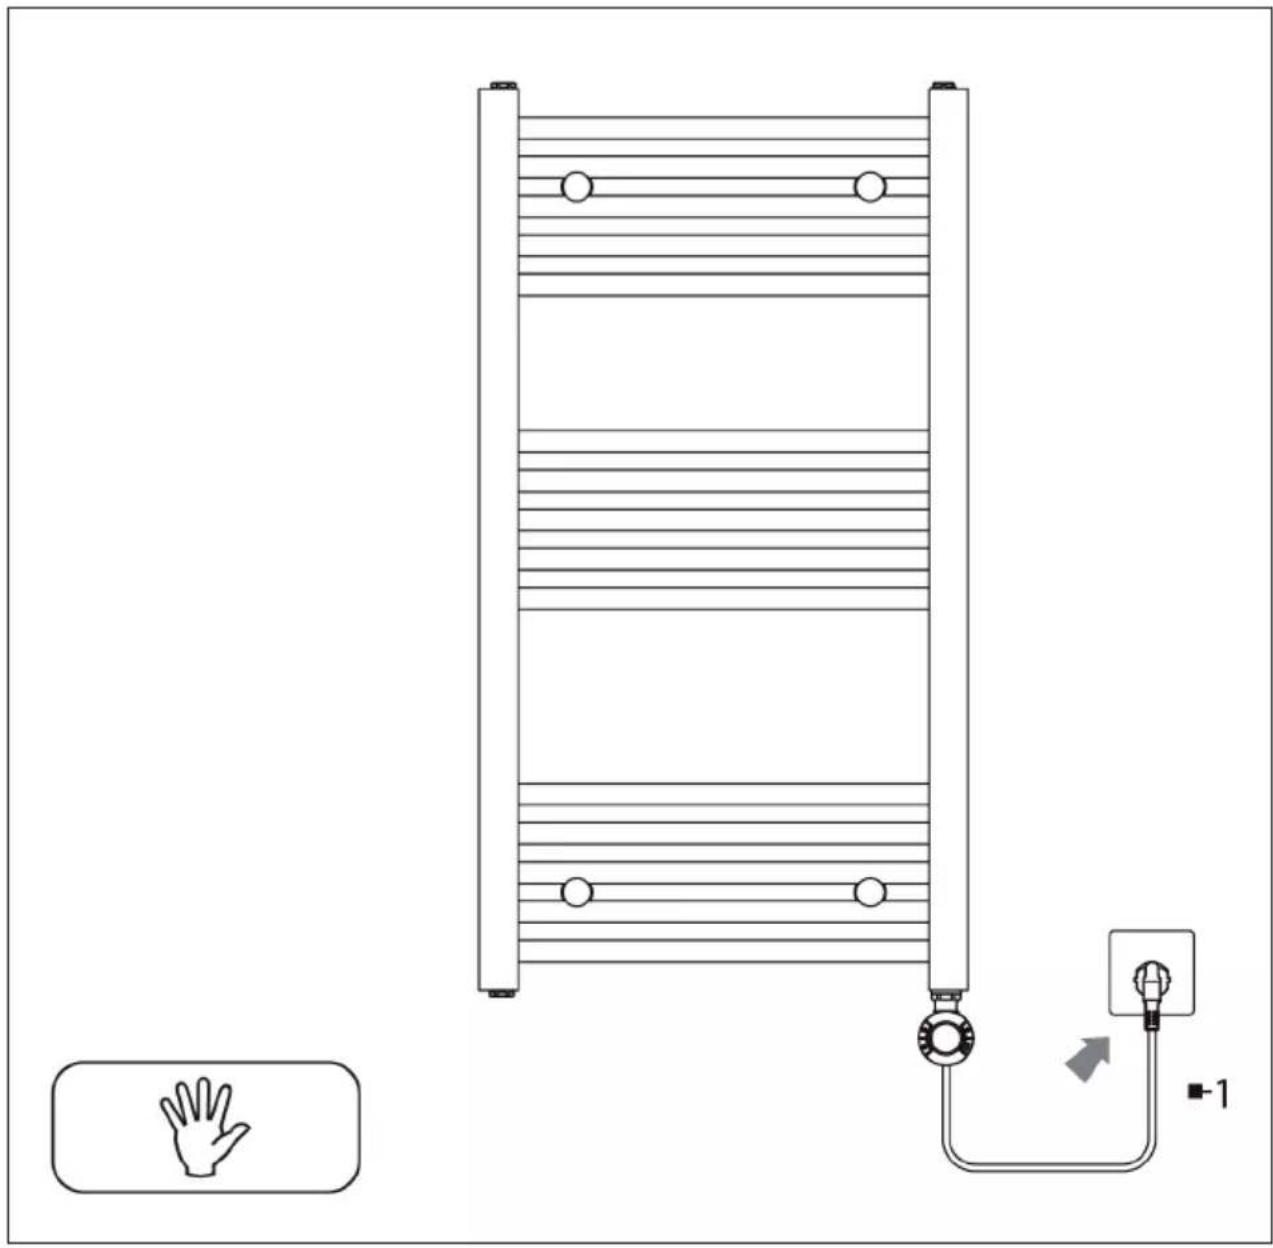
INSTALLATION
Tools and people required
text_image
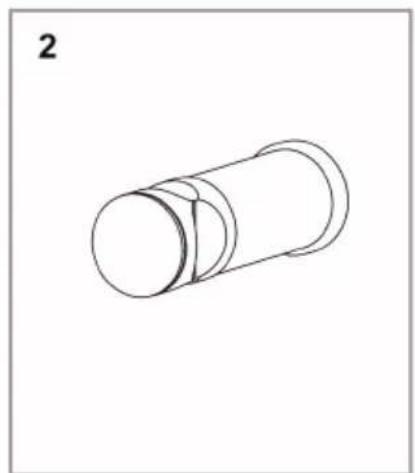
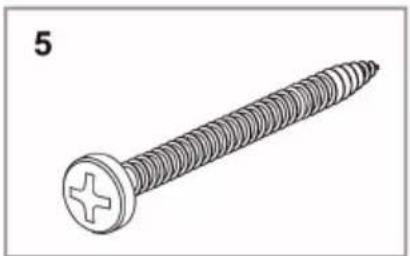
1xIndividual parts

text_image
1 1.1 1.21×
natural_image
Simple line drawing of a cylindrical mechanical part with a flanged end (no text or symbols)4×

natural_image
Simple line drawing of a screw with a base, labeled '3' in the top-left corner (no other text or symbols)4×

natural_image
Simple line drawing of a ring with a central hole, labeled with number 4 (no text or symbols on the diagram itself)4×

natural_image
Illustration of a screw with a circular head and cross symbol (no text or labels)4×
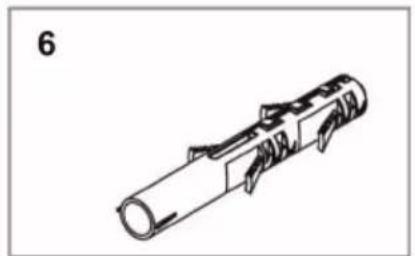
natural_image
Technical line drawing of a cylindrical mechanical component with internal slots and mounting holes (no text or symbols)4×

text_image
2 4× 4× 4× 4× 4× 7 8 9 10 11
text_image
Technical diagram of a mechanical assembly with numbered components for identificationFastening to the wall

text_image
Technical diagram of a radiator with numbered components and an inset close-up showing the assembly detail.
text_image
Technical diagram of a mechanical assembly with numbered components and directional arrows indicating motion or assembly steps.
text_image
Technical diagram of a radiator assembly with numbered components and directional arrows indicating motion or movement.
natural_image
Diagram of a horizontal ladder connected to a pressure outlet with a hand icon and labeled component (no text or symbols on the diagram itself)CONTROL PANEL AND BUTTON FUNCTIONS

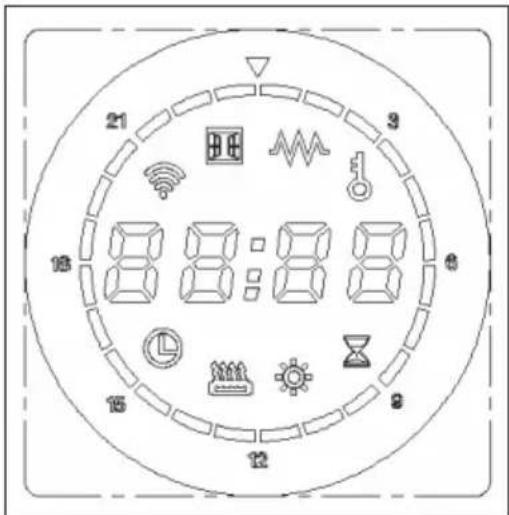
text_image
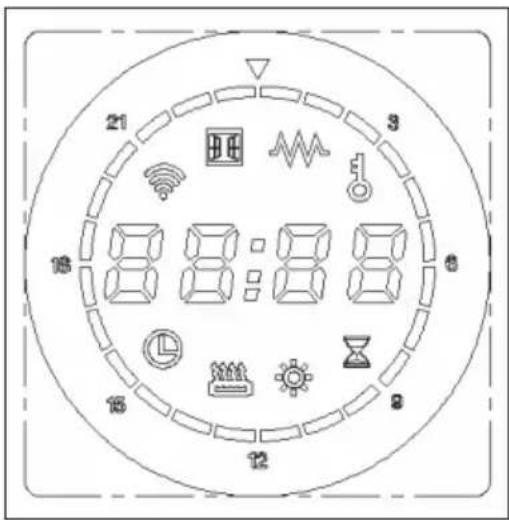
21 3 18:00:00 15 12 8| Free mode: The temperature can be set between 30-70 °C. | |
| Constant temperature mode: The temperature is 50 °C and cannot be adjusted. | |
| Timer mode: The temperature is 65 °C and cannot be adjusted. The drying time can be set between 30 minutes and 8 hours . | |
| Schedule mode: To set the weekly program | |
| Shows that the heating function is active. | |
| Shows that the child lock is active and all buttons (except the POWER button) are locked. |
| 88:88 | Display: Shows time and temperature. |
| Time bar: Shows the adjustable time from 00:00 - 23:00. |
| POWER button MENU button | ||
| UP button DOWN button |
OPERATION
text_image
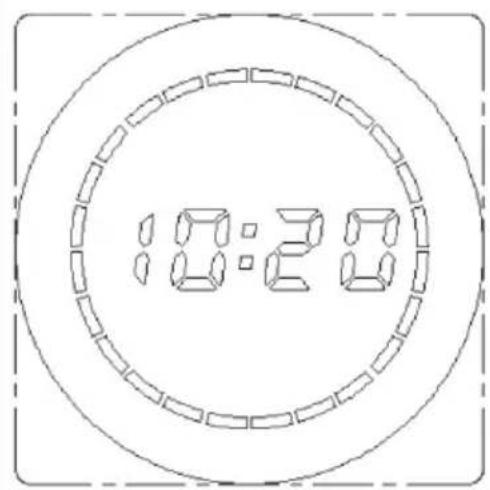
10:28Getting Started
To turn the device on, briefly press the POWER button. All other buttons are inactive when switched off. The display shows the current time.
text_image
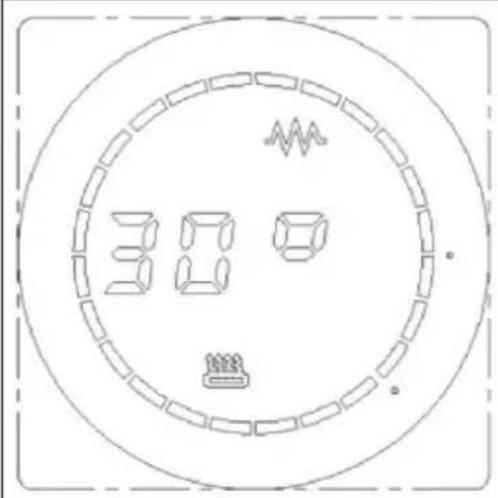
30°Free mode
Briefly press the UP or DOWN button to increase or decrease the temperature in increments of 1 °C. Press and hold the UP or DOWN button to adjust the temperature faster. If you press the MENU button in free mode, the thermostat will switch to timer mode.
text_image
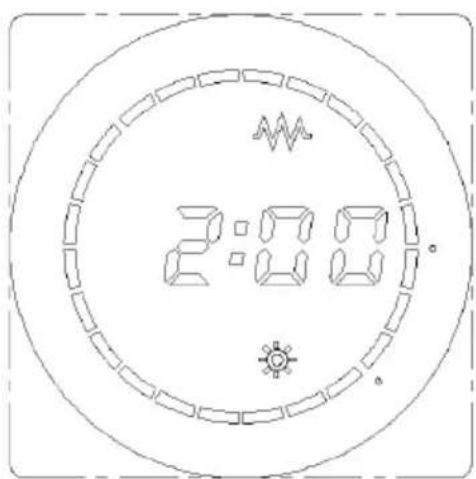
2:00Timer mode
The preset temperature is 65 °C, the drying time can be set between 30 minutes and 8 hours (2 hours are set in the example). Briefly press the UP or DOWN button to increase or decrease the time in 30 minute increments. Press and hold the UP or DOWN button to adjust the time faster. If you press the MENU button in timer mode, the thermostat will switch to constant temperature mode.
text_image
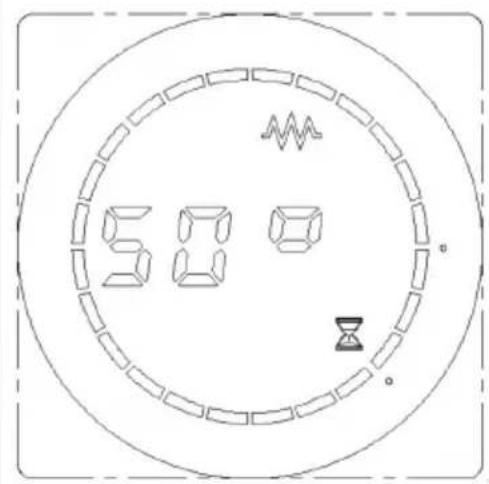
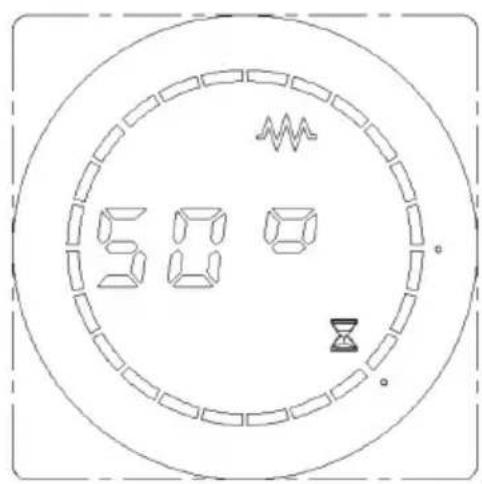
50°Constant temperature mode
The pre-set temperature is 50 °C. If you press the MENU button in constant temperature mode, the thermostat will switch to schedule mode.
text_image
50°Schedule mode
The schedule mode allows you to set the time, day of the week and weekly program. When using the device for the first time (or when it is switched off), you should first set the current time and day of the week. To set the time:
Press and hold the MENU button for 3 seconds to enter time setting mode.
text_image
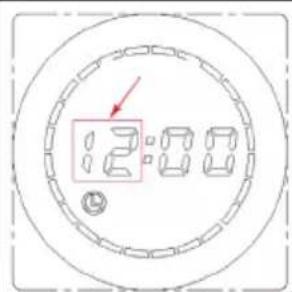
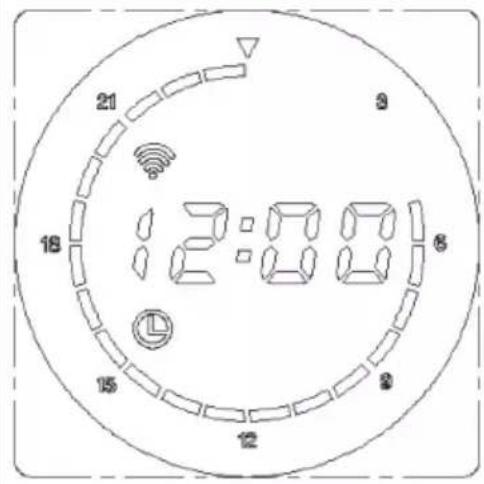
12:00The hour digits flash. Briefly press the UP or DOWN button to set the hour from 0:00-23:00 in 1-hour increments. Press and hold the UP or DOWN button to adjust the time faster. Then press the MENU button or wait 30 seconds without pressing any button to switch to minute setting.
text_image
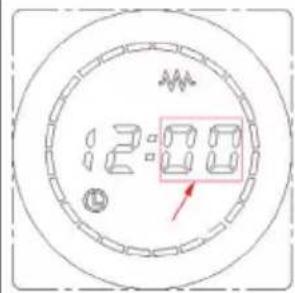
12:00The minute digit flashes. Briefly press the UP or DOWN button to set the minute from 0-59 in 1-minute increments. Press and hold the UP or DOWN button to adjust the time faster. Then press the MENU button or wait 30 seconds without pressing any button to switch to weekday setting.
flowchart
graph TD
    A[" "] --> B[" "]
    B --> C[" "]
    style A fill:#f9f,stroke:#333
    style C fill:#bbf,stroke:#333
The day of the week digit flashes. Briefly press the UP or DOWN button to set the day of the week from 1-7 in 1-day increments (Monday=1, Tuesday=2, Wednesday=3, Thursday = 4, Friday = 5, Saturday = 6, Sunday = 7). Press and hold the UP or DOWN button to adjust the weekday faster. Then press the MENU button or wait 30 seconds without pressing any button to switch to weekly program setting.
text_image
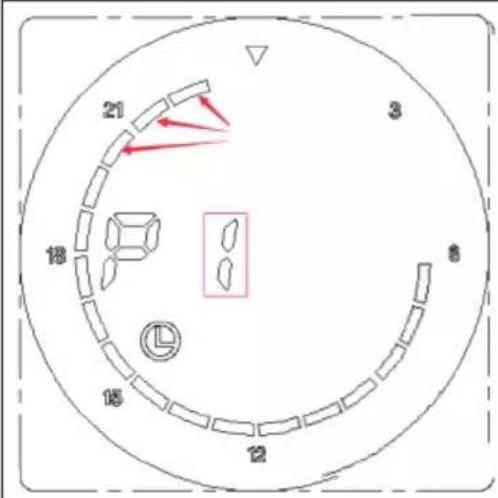
21 3 18 8 15 12Setting weekly program:
One segment in the timeline (see arrows) indicates that there is heating in this period. In periods in which no segment is visible, there is no heating. P1 stands for the weekday Monday.
text_image
21 18 15 12 12:00 9 8 7 6 5 4 3Example: The image on the left shows the current setting for the weekdays Monday-Friday in the period between 05:00 and 23:59. In the periods in which no segment is visible, there is no heating.
After setting Monday, briefly press MENU to set Tuesday to Sunday. Finally, press the MENU button or wait 30 seconds without pressing any button to start heating.
Modify weekly program
To make changes to the weekly program, do the following:
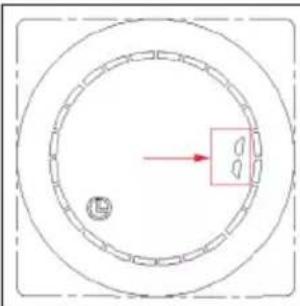
Press and hold the MENU button for 3 seconds to enter the weekly program modification mode. Briefly press the UP or DOWN button to adjust the weekly program settings. A brief press of the UP button activates the heater for the current segment. The display ■ flashes for 3 seconds and then remains blank for 1 second. A brief press of the DOWN button deactivates the heating for the current segment. The display ■ remains blank for 3 seconds and then flashes for 1 second. To increase the time by 1 hour, press the UP button. The time flashes during the setting process. When the time reaches 23:00, it jumps back to 00:00 for further adjustments.
text_image
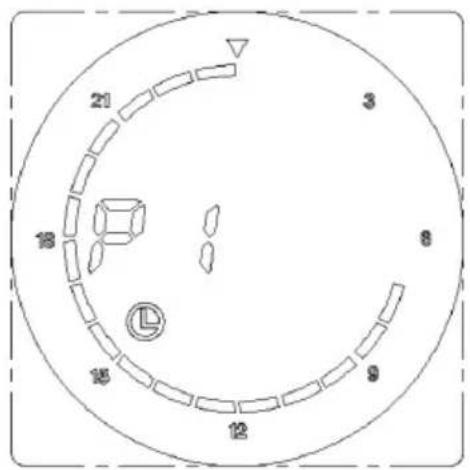
21 18 15 12 9 8 3 ▽Example (see image): You want to set the heating schedule for Monday from 07:00 to 23:00: Make sure the thermostat is set to the week program for Monday (P1).
Press and hold the MENU button for 3 seconds to enter change mode. Use the UP button to set the period from 07:00 to 23:00 and the DOWN button for the other periods. After modification, press the MENU button or wait 30 seconds without pressing any button to continue heating.
text_image
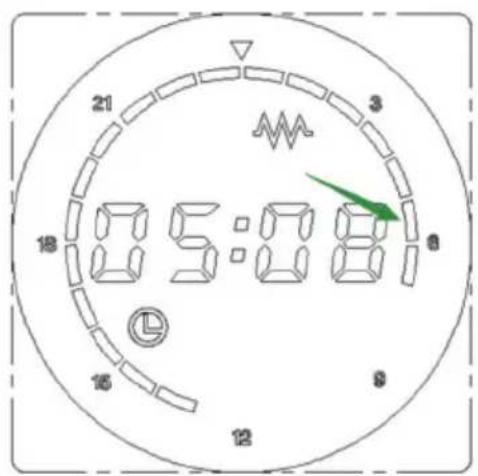
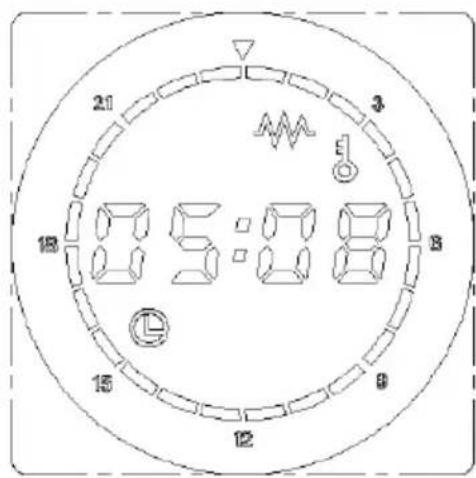
21 3 18 05:08 16 12 9Display of the current status
When the device is heating, the display ■ will be on for 3 seconds and off for 1 second. When the device is not heating, the display ■ will be on for 1 second and off for 3 seconds.
Example: In the image on the left, the current time is 05:08. Since there is heating at this point (see heating symbol and arrow), the segment is switched on for 3 seconds and switched off for 1 second.
text_image
21 18 05:08 15 12 3 8 1Child safety lock
Press the UP and DOWN buttons at the same time to activate the child lock. All buttons except the POWER button are inactive. Press the UP and DOWN buttons again at the same time to deactivate the child lock.
natural_image
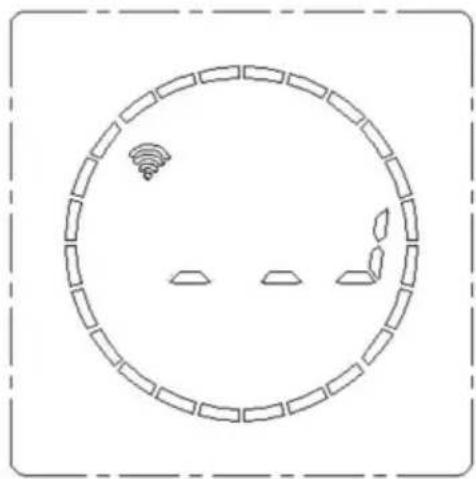
Circular diagram with segmented rectangular shapes and a small icon, no text or symbols presentActivate WiFi
To enter the network search state, press and hold the MENU button for 3 seconds to turn off the device. This will start a 100 second countdown. During this time, refer to the chart and follow the instructions in the associated app to successfully add the device to the network.
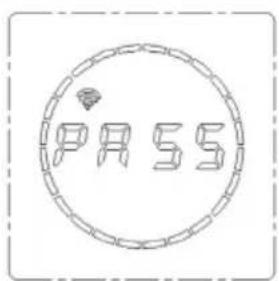
text_image
PASSIndicates that the network connection has been successfully established.
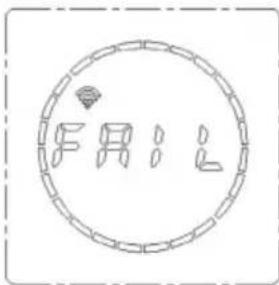
text_image
FAILIndicates that the network connection has not been established.
DEVICE CONTROL VIA SMARTPHONE
If you integrate your Klarstein appliance into your home WLAN, you can operate it conveniently via the associated Klarstein app. The app not only allows you to control the appliance remotely via your smartphone, but also gives you access to recipes and further information.
Follow these steps to connect your smartphone to your Klarstein appliance:
- First download the Klarstein app by scanning the QR code with your smartphone (see below) or download it directly from the App Store or Google Play.
- Make sure that your smartphone is connected to the same WiFi network that your Klarstein device is to be connected to.
- Open the Klarstein app.
- Log in with your account. If you don't have an account yet, register in the Klarstein app.
- Follow the instructions in the app.
App download
Use the scan function of your mobile phone to scan the QR code and save the app on your smartphone.
Note: Further instructions on how to use the app and help on how to connect to your device are provided by the app when you open it for the first time.
| iOS Android | |
 |  |
Troubleshooting connection problems
If your Klarstein device cannot be found in the WLAN, check the following:
- The device is not plugged in. Make sure that your unit is plugged into a power outlet.
- The unit is not in pairing mode. Make sure that the WiFi indicator (LED) on the control panel of the smart device is flashing as described in the "Reset WiFi settings" instruction of your smart device (instructions can usually be found under Device connection).
- The WiFi access point does not operate on 2.4 GHz. Make sure your access point is operating on the 2.4 GHz band and that you have your own SSID on the 2.4 GHz band. If you are unsure about the operating band of your access point, please contact your internet provider.
Important: Please note that if your WiFi router has a dual band - i.e. operates in both the 2.4 GHz and 5 GHz bands - you must separate the SSIDs for each band and use the 2.4 GHz SSID for the connection
-
Check the firewall settings of your WiFi network. The firewall setting of your WiFi network may not allow the Klarstein App to configure the WiFi settings on your smart device. Please ensure that you do not use a public WiFi network, e.g. airports, dormitories, companies, etc.
-
Different login data in the smartphone and in the app. Make sure that the WiFi login details entered in the Klarstein app match those to which your smartphone is connected.
If you have followed the above points and your smartphone still cannot connect to the app, please contact us by email for assistance: appsupport@go-bbg.com
ADDITIONAL SETTINGS
Internal parameter setting
In the switched-off state, press and hold the UP or DOWN button for 10 seconds to enter the internal parameter settings. Press the MENU button to access the following settings: Temperature compensation > exit settings.
text_image
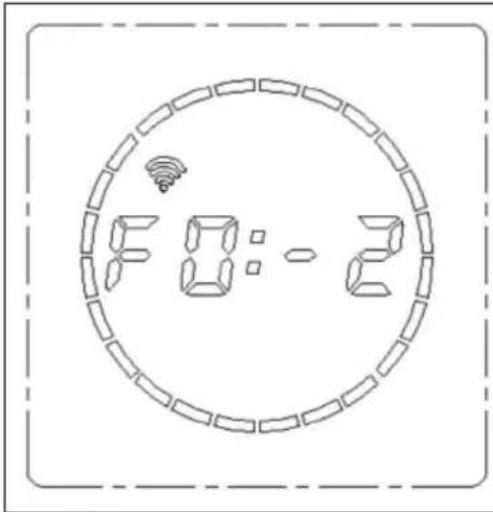
8:0:2Temperature compensation setting
Temperature compensation is set to -2 °C by default. The temperature compensation can be set by briefly pressing the UP or DOWN buttons. The temperature compensation range can be set in increments of 1 °C between 5 °C and -5 °C.
Factory reset
If the device is turned on and the POWER button is pressed and held for 10 seconds, the system will automatically reboot and restore the factory settings. The display will show the full screen for 3 seconds and then turn off. Then press the POWER button again.
In the factory setting, the normal mode temperature is 50 °C and the drying time is 2 hours. The time is displayed as 12:00. The day of the week is set to 1, the week program returns to the default value and the temperature compensation is -2 °C .
CLEANING AND CARE
- Switch off the device immediately and pull the plug out of the socket. Let the device cool down completely before cleaning.
- Do not immerse the power cord or the plug in water or other liquids. Do not pour water or other liquids over the device.
- Use a vacuum to remove dust and lint.
- Wipe the outside with a dry cloth.
- Remove stains with a damp cloth.
- Do not use detergents, abrasives or polishes as these can damage the surface.
TROUBLESHOOTING
If the device does not warm up or turn on, check the following:
- Check whether the power supply in the house or the main fuse is working or not.
- Check whether the power cord is plugged into an outlet or not.
- Check whether the unit is switched on or not.
If the device still is not working after this check, please contact the manufacturer's customer service. All repairs must be performed by authorised personnel. Manual changes to the device by unauthorised persons will void the warranty.
Error codes
| Code Possible cause Solution | |
| Er The temperature sensor is broken. | Have the sensor replaced by a specialist company. |
| Er The temperature sensor has been short-circuited. | Have the sensor replaced by a specialist company. |
DISPOSAL CONSIDERATIONS

natural_image
Symbol of a trash bin crossed with a diagonal line, no text or numbers presentIf there is a legal regulation in your country regarding the disposal of electrical and electronic equipment, this symbol on the product or on the packaging indicates that this product must not be disposed of with household waste. Instead, it must be taken to a collection point for the recycling of electrical and electronic equipment. By disposing of this product in accordance with the regulations, you protect the environment and the health of those around you from negative consequences. For information on recycling and disposal of this product, contact your local government or household waste disposal service.
DECLARATION OF CONFORMITY

text_image
CE UK CAManufacturer:
Chal-Tec GmbH, Wallstrasse 16, 10179 Berlin, Germany.
Importer for Great Britain:
Berlin Brands Group UK Limited PO Box 42 272 Kensington High Street London, W8 6ND United Kingdom
Chal-Tec GmbH hereby declares that the radio equipment type Harrison complies with Directive 2014/53/EU. The complete text of the EU declaration of conformity is available at the following internet address: use, berlin/10045584
For Great Britain: Hereby, Chal-Tec GmbH declares that the radio equipment type Harrison is in compliance with the relevant statutory requirements. The full text of the declaration of conformity is available at the following internet address: use.berlin/10045584
PRODUCT DATA SHEET
| Model identifier(s): 10045584 | 10045585, 10045586 | |||||
| Item Symbol Value Unit Item Unit | ||||||
| Heat output Type of heat input, for electric storage local space | heaters only | |||||
| Nominal heat output P | nom | 0.6 kW | manual heat | charge control, with integrated thermostat | N/A | |
| Minimum heat output (indicative) | Pmin | 0.6 kW | manual heat | charge control with room and/or outdoor temperature feedback | N/A | |
| Maximum continuous heat output | Pmax,c | 0.8 kW | electronic heat | charge control with room and/or outdoor temperature feedback | N/A | |
| Auxiliary electricity consumption fan assisted heat output N/A | ||||||
| At nominal heat output el | max | N/A kW | Type of heat | output/room temperature control | ||
| At minimum heat output el | min | N/A kW | single stage | heat output and no room temperature control | no | |
| In standby mode el | SB | 0.5 W | Two or more manual stages, no room temperature control | no | ||
| with mechanic thermostat room temperature control | no | |||||
| with electronic room temperature control | no | |||||
| electronic room temperature control plus day timer | no | |||||
| electronic room temperature control plus week timer | yes | |||||
| Other control options | ||||||
| room temperature control, with presence detection | no | |||||
| room temperature control, with open window detection | yes | |||||
| with distance control option | no | |||||
| with adaptive start control | no | |||||
| with working time limitation | no | |||||
| with black bulb sensor | no | |||||
| Contact details | Chal-Tec GmbH, Wallstraße 16, 10179, Berlin, Germany | |||||
Estimado cliente:
text_image
QR code image containing encoded data, no visible human-readable textÍNDICE
text_image
1 1.1 1.21×
natural_image
Simple line drawing of a cylindrical mechanical part with a flanged end (no text or symbols)4×
natural_image
Simple line drawing of a screw with a base, labeled with number 3 (no text or symbols on the screw itself)4×
natural_image
Simple line drawing of a ring with a central hole, labeled with number 4 (no text or symbols on the diagram itself)4×

natural_image
Illustration of a screw with a circular head and cross symbol (no text or labels)4×
natural_image
Technical line drawing of a cylindrical mechanical component with internal slots and mounting holes (no text or symbols)4×

text_image
2 4× 4× 4× 4× 4× 7 8 9 10 11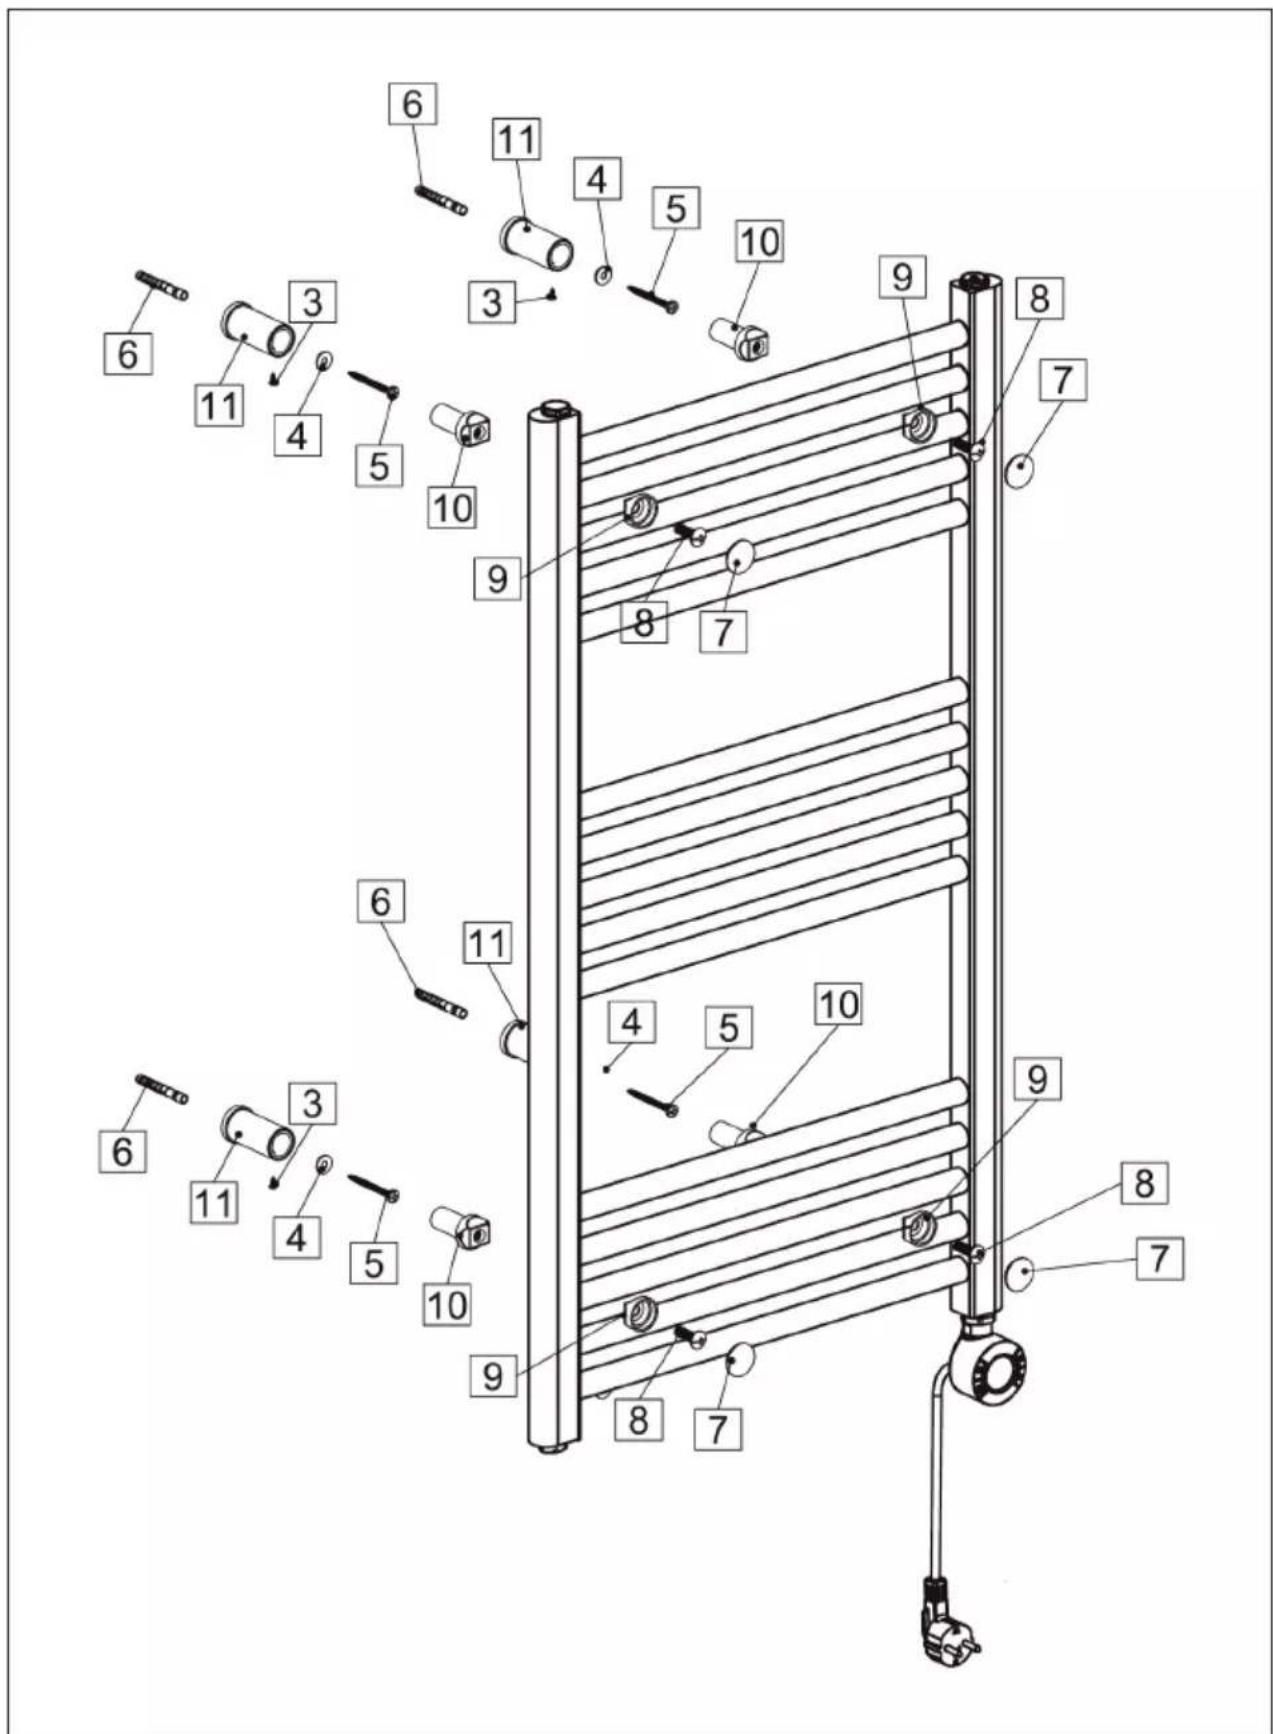
text_image
Technical diagram of a ladder assembly with numbered components for identificationMontaje en la pared
text_image
Technical diagram of a radiator with numbered components and an inset close-up showing the assembly detail.
text_image
Technical diagram of a mechanical assembly with numbered components and directional arrows indicating motion or assembly steps.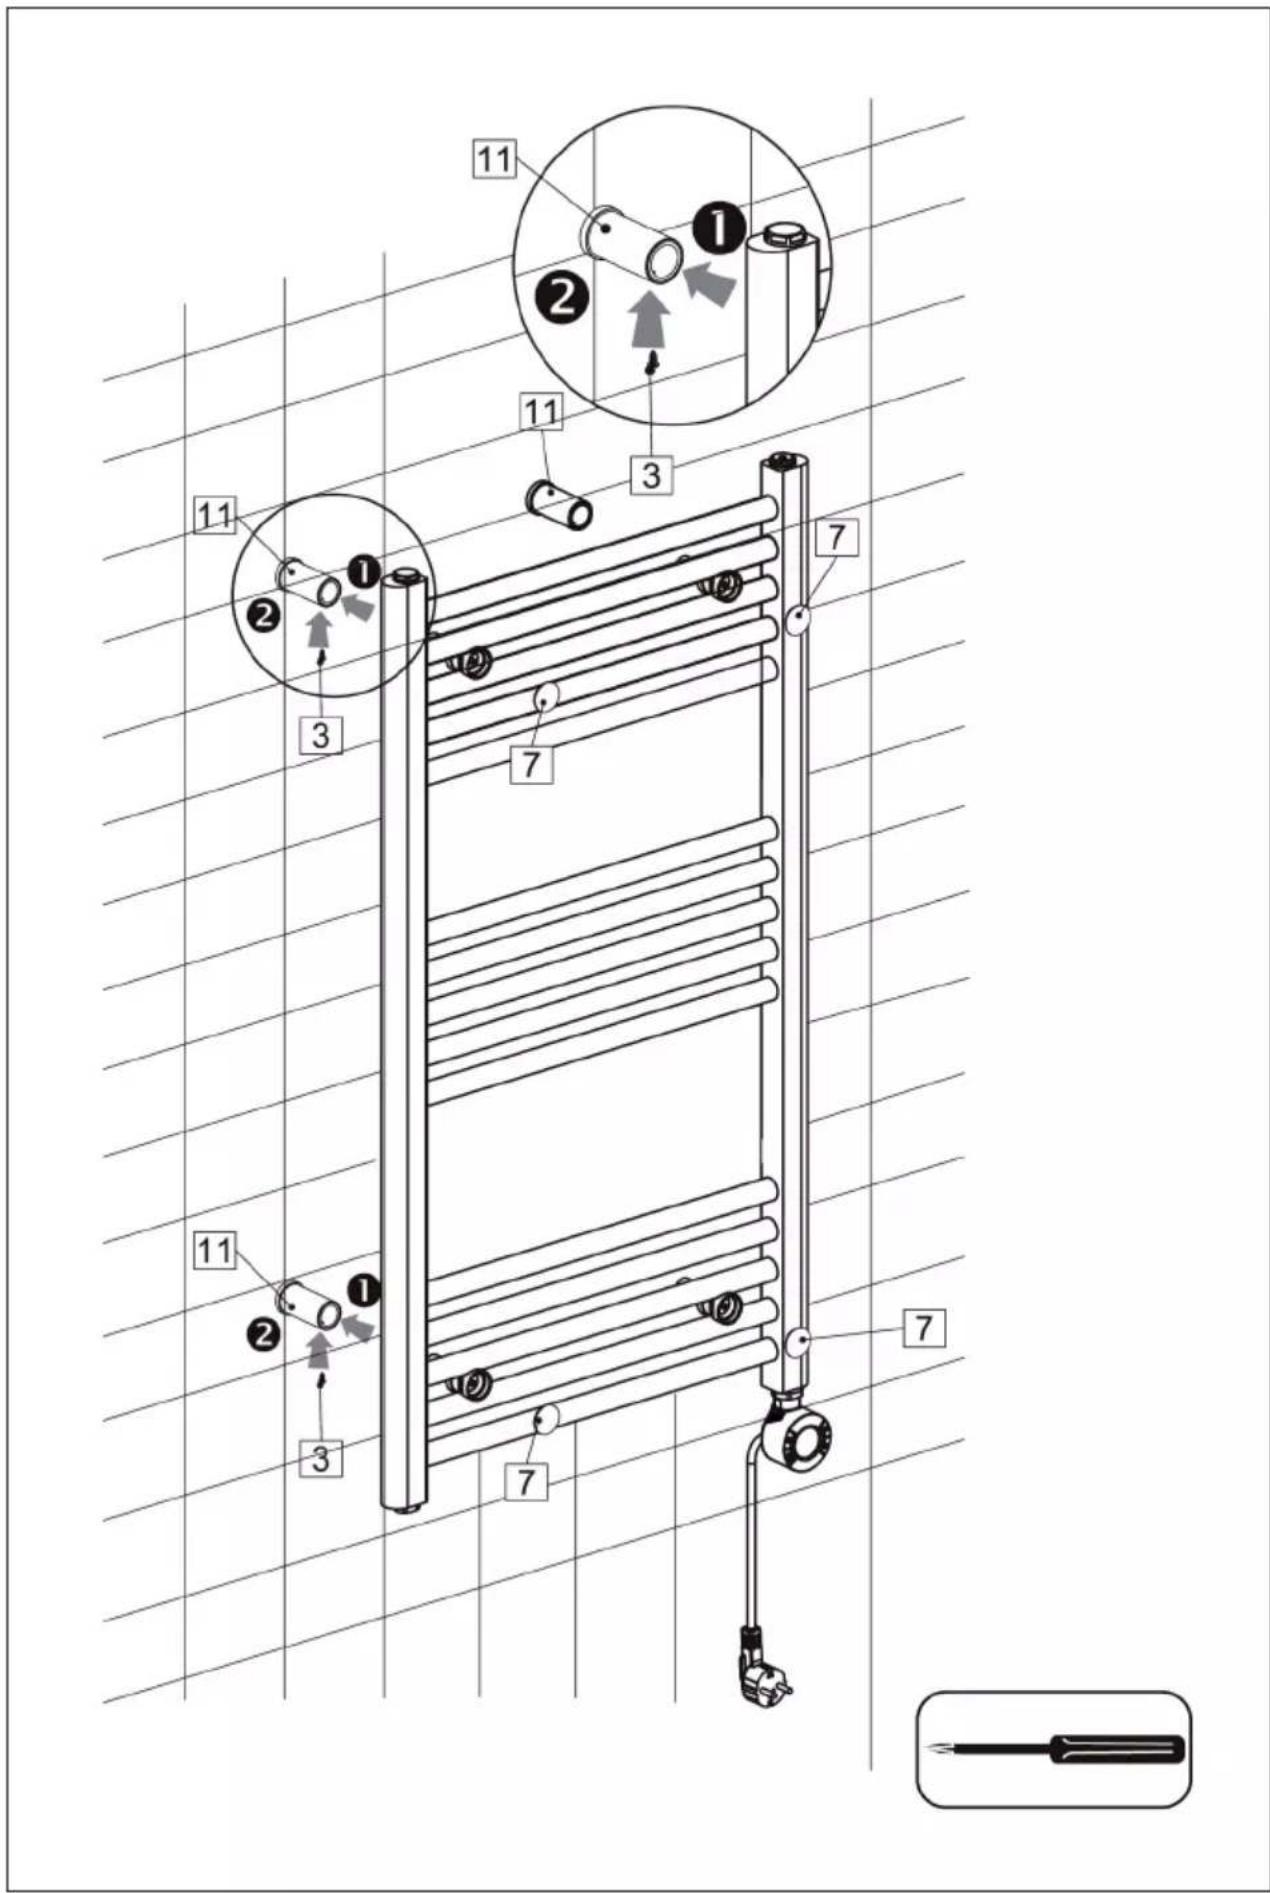
text_image
Technical diagram of a radiator assembly with numbered components and directional arrows indicating motion or movement.
natural_image
Diagram of a horizontal ladder connected to a pressure outlet with a hand icon and labeled component (no text or symbols on the diagram itself)natural_image
Simple circular diagram with concentric rings and a central rectangular box containing three small figures (no text or symbols)natural_image
Circular diagram with a central sensor icon and four rectangular elements, enclosed in a dashed border (no text or symbols)Activar WiFi
natural_image
Symbol of a trash bin crossed with a diagonal line, no text or numbers presentBerlin Brands Group UK Limited
PO Box 42
272 Kensington High Street
London, W8 6ND
Reino Unido
Cher client, chère cliente,
text_image
QR code image containing encoded data, no visible human-readable textSOMMAIRE
text_image
1 1.1 1.21×

natural_image
Simple line drawing of a cylindrical mechanical part with a flanged end (no text or symbols)4×

natural_image
Simple line drawing of a screw with a base, labeled '3' in the top-left corner (no other text or symbols)4×
natural_image
Simple line drawing of a ring with a central hole, labeled with the number 4 (no text or symbols on the diagram itself)4×
natural_image
Illustration of a screw with a circular head and cross symbol (no text or labels)4×
natural_image
Technical line drawing of a cylindrical mechanical component with internal slots and mounting holes (no text or symbols)4×

text_image
2 4× 4× 4× 4× 4× 7 8 9 10 11Aperçu

text_image
Technical diagram of a ladder assembly with numbered components for identificationFR
Fixation au mur

text_image
Technical diagram of a radiator with numbered components and an inset close-up showing the assembly detail.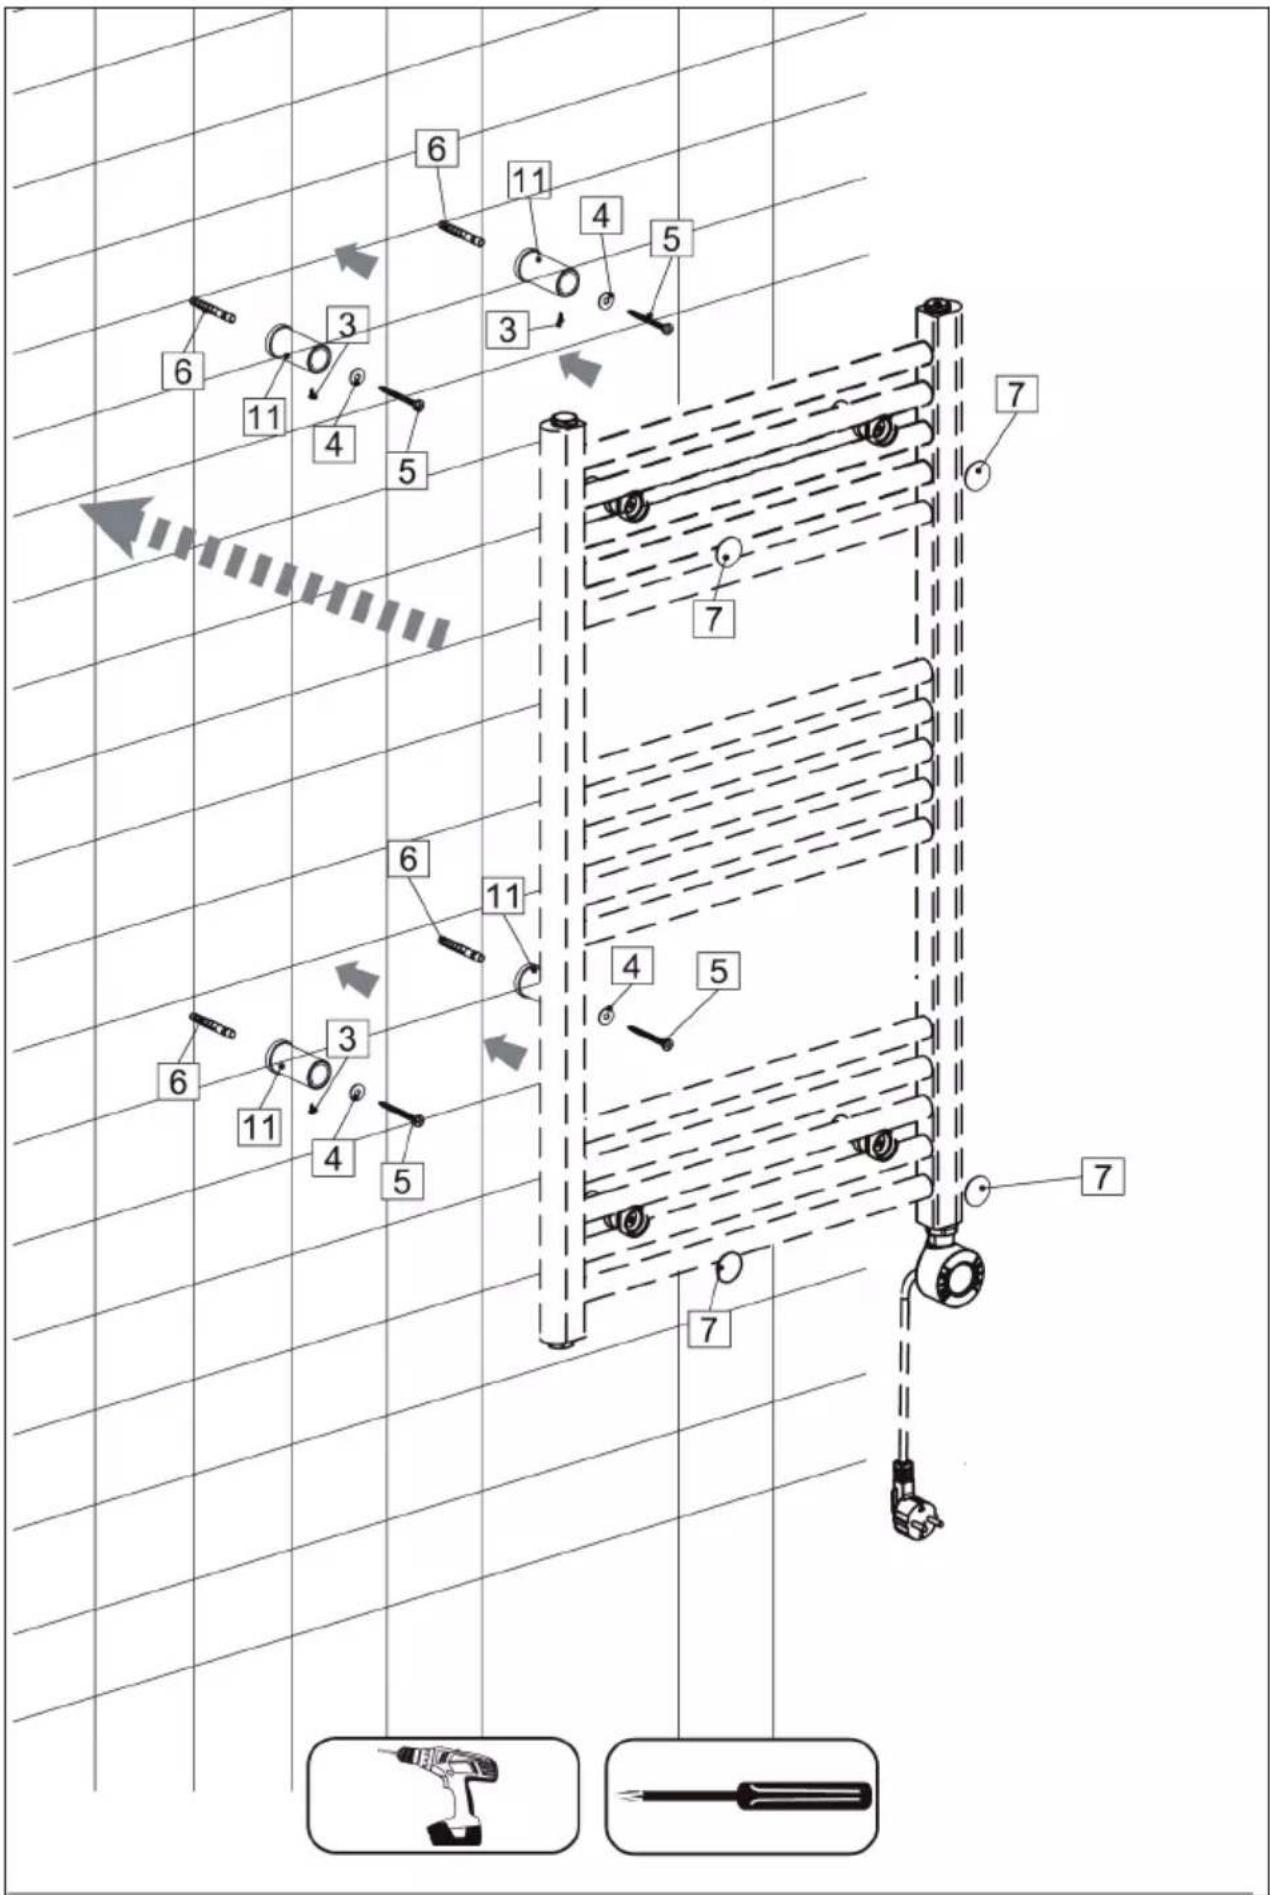
text_image
Technical diagram of a mechanical assembly with numbered components and directional arrows indicating motion or assembly.
text_image
Technical diagram of a radiator assembly with numbered components and directional arrows indicating motion or movement.
natural_image
Diagram of a horizontal ladder connected to a pressure outlet with a hand icon and labeled component (no text or symbols on the diagram itself)PANNEAU DE COMMANDE ET FONCTIONS DES TOUCHES
text_image
21 3 18:00:00 8:15 15 12 8flowchart
graph TD
    A[" "] --> B[" "]
    B --> C[" "]
    style A fill:#f9f,stroke:#333
    style C fill:#bbf,stroke:#333
natural_image
Circular diagram with segmented rectangular shapes and a small icon, no text or symbols presentActivation du WiFi
natural_image
Symbol of a trash bin crossed with a diagonal line, no text or numbers presentDÉCLARATION DE CONFORMITÉ

text_image
CE UK CAFabricant :
Chal-Tec GmbH, Wallstraße 16, 10179 Berlin, Allemagne.
Berlin Brands GOIup UK Ltd
PO Box 42
272 Kensington High Street
London, W8 6ND
United Kingdom
FICHE DE DONNÉES PRODUIT
text_image
QR code image containing encoded data, no visible human-readable textINDICE
text_image
1 1.1 1.21×

natural_image
Simple line drawing of a cylindrical mechanical part with a flanged end (no text or symbols)4×

natural_image
Simple line drawing of a screw with a base, labeled with number 3 (no text or symbols on the screw itself)4×

natural_image
Simple line drawing of a ring with a central hole, labeled with number 4 (no text or symbols on the diagram itself)4×
natural_image
Illustration of a screw with a circular head and cross symbol (no text or labels)4×

natural_image
Technical line drawing of a cylindrical mechanical component with internal slots and mounting holes (no text or symbols)4×

text_image
2 4× 4× 4× 4× 4× 7 8 9 10 11
text_image
Technical diagram of a mechanical assembly with numbered components for identificationtext_image
Technical diagram of a radiator with numbered components and an inset close-up showing the assembly detail.
text_image
Technical diagram of a mechanical assembly with numbered components and directional arrows indicating motion or assembly steps.
text_image
Technical diagram of a radiator assembly with numbered components and directional arrows indicating motion or movement.IT
natural_image
Diagram of a horizontal ladder connected to a pressure outlet with a hand icon and labeled component (no text or symbols on the diagram itself)natural_image
Simple circular diagram with concentric rings and a central rectangular box containing three small figures (no text or symbols)natural_image
Circular diagram with Wi-Fi signal icon and geometric shapes, enclosed in a dashed border (no text or symbols)natural_image
Symbol of a trash bin crossed with a diagonal line, no text or numbers presentBerlin Brands Group UK Limited PO Box 42
272 Kensington High Street
London, W8 6ND
United Kingdom
bar
| Category | Value | |---|---| | Category 1 | 100 | | Category 2 | 100 | | Category 3 | 100 | | Category 4 | 100 | | Category 5 | 100 | | Category 6 | 100 | | Category 7 | 100 | | Category 8 | 100 | | Category 9 | 100 | | Category 10 | 100 | | Category 11 | 100 | | Category 12 | 100 | | Category 13 | 100 | | Category 14 | 100 | | Category 15 | 100 | | Category 16 | 100 | | Category 17 | 100 | | Category 18 | 100 | | Category 19 | 100 | | Category 20 | 100 | | Category 21 | 100 | | Category 22 | 100 | | Category 23 | 100 | | Category 24 | 100 | | Category 25 | 100 | | Category 26 | 100 | | Category 27 | 100 | | Category 28 | 100 | | Category 29 | 100 | | Category 30 | 100 | | Category 31 | 100 | | Category 32 | 100 | | Category 33 | 100 | | Category 34 | 100 | | Category 35 | 100 | | Category 36 | 100 | | Category 37 | 100 | | Category 38 | 100 | | Category 39 | 100 | | Category 40 | 100 | | Category 41 | 100 | | Category 42 | 100 | | Category 43 | 100 | | Category 44 | 100 | | Category 45 | 100 | | Category 46 | 100 | | Category 47 | 100 | | Category 48 | 100 | | Category 49 | 100 | | Category 50 | 100 | | Category 51 | 100 | | Category 52 | 100 | | Category 53 | 100 | | Category 54 | 100 | | Category 55 | 100 | | Category 56 | 100 | | Category 57 | 100 | | Category 58 | 100 | | Category 59 | 100 | | Category 60 | 100 | | Category 61 | 100 | | Category 62 | 100 | | Category 63 | 100 | | Category 64 | 100 | | Category 65 | 100 | | Category 66 | 100 | | Category 67 | 100 | | Category 68 | 100 | | Category 69 | 100 | | Category 70 | 100 | | Category 71 | 100 | | Category 72 | 100 | | Category 73 | 100 | | Category 74 | 100 | | Category 75 | 100 | | Category 76 | 100 | | Category 77 | 100 | | Category 78 | 100 | | Category 79 | 100 | | Category 80 | 100 | | Category 81 | 100 | | Category 82 | 100 | | Category 83 | 100 | | Category 84 | 100 | | Category 85 | 100 | | Category 86 | 100 | | Category 87 | 100 | | Category 88 | 100 | | Category 89 | 100 | | Category 90 | 100 | | Category 91 | 100 | | Category 92 | 100 | | Category 93 | 100 | | Category 94 | 100 | | Category 95 | 100 | | Category 96 | 100 | | Category 97 | 100 | | Category 98 | 100 | | Category 99 | 100 | | Total (Total) = [sum of bars] / [values] * (sum of bars + bars) * (sum of bars + bars) * (sum of bars + bars) * (sum of bars + bars) * (sum of bars + bars) * (sum of bars + bars) * (sum of bars + bars) * (sum of bars + bars) * (sum of bars + bars) * (sum of bars + bars) * (sum of bars + bars) * (sum of bars + bars) * (sum of bars + bars) * (sum in brackets) * (sum in brackets) * (sum in brackets) * (sum in brackets) * (sum in brackets) * (sum in brackets) * (sum in brackets) * (sum in brackets) * (sum in brackets) * (sum in brackets) * (sum in brackets) * (sum in brackets) * (sum in brackets) * (sum in brackets) * (sum in brackets) * (sum in brackets) * (sum in brackets) * (total).* (sum in brackets) * (sum in brackets) * (sum in brackets) * (sum in brackets) * (sum in brackets) * (sum in brackets) * (sum in brackets) * (sum in brackets) * (sum in brackets) * (sum in brackets) * (sum in brackets) * (sum in brackets) * (total).* (sum in brackets) * (sum in brackets) * (sum in brackets) * (sum in brackets)