
MO-21BROOK - Microwave Oven SIGNATURE - Free user manual and instructions
Find the device manual for free MO-21BROOK SIGNATURE in PDF.
Pick your language and provide your email: we'll send you a specifically translated version.
| Brand | Signature |
| Model | MO-21BROOK |
| Product type | Microwave oven |
| Power supply | 230 V ~ |
| Input power (microwave) | 1150 W |
| Output power (microwave) | 700 W |
| Oven capacity | 20 L |
| Turntable diameter | 24.5 cm |
| Product dimensions (W x H x D) | 45.1 x 34.8 x 25.8 cm |
| Net weight | 10.2 kg |
| Main functions | Microwave cooking, defrosting, express cooking, auto cooking (8 menus), multi-stage cooking, delayed start |
| Microwave power levels | 5 levels: 100%, 80%, 60%, 40%, 20% |
| Maximum timer | 60 minutes |
| Display | Digital LED |
| Control type | Push buttons and rotary knob |
| Child lock | Yes |
| Clock | Yes, adjustable |
| Interior materials | Stainless steel (cavity) |
| Turntable | Glass, diameter 24.5 cm |
| Interior lighting | LED (< 60 lm) |
| Maintenance and cleaning | Clean with a soft damp cloth; do not use abrasive products or metal scrapers; the waveguide cover must not be removed |
| Safety | Secure door closure, automatic stop when opened, overheat protection |
| Spare parts and repairability | Turntable, rotating ring, rotating shaft available; repairs by authorized professional only |
| Legal warranty of conformity | 2 years |
| Intended use | Household use only |
Frequently Asked Questions - MO-21BROOK SIGNATURE
What is the power of the MO-21BROOK microwave oven?
The output power is 700 W, with an input power of 1150 W. You have 5 power levels: 100%, 80%, 60%, 40% and 20%.
How to clean the microwave?
Use a soft damp cloth for the exterior and interior. Never use abrasive detergents, gasoline, or metal brushes. The waveguide cover must not be removed. To eliminate odors, heat a few lemon slices or a cup of tea at high power for 2-3 minutes.
What utensils to use in this microwave?
Use heat-resistant ceramic containers (without metallic trim), heat-resistant glass, or microwave-safe plastic. Absolutely avoid metal containers, as they may cause sparks.
How to set the clock on the MO-21BROOK?
After plugging in the appliance, press the Preset/Clock button once. Use the rotary knob to set the hours, press again, then set the minutes. Confirm by pressing a third time or waiting 5 seconds.
How to defrost food?
Press the Defrost button to select the food type (d.1: meat, d.2: poultry, d.3: seafood). Use the rotary knob to enter the weight (from 0.1 to 3.0 kg depending on mode). Press Start. Halfway through, turn the food when the appliance beeps.
How to use the auto cook function?
Turn the auto cook knob to select a menu (A.1 to A.8) corresponding to the food (popcorn, pizza, drink, potatoes, fish, etc.). Press Start. The time and power are preset; follow the instructions in the manual.
How to lock the control panel for child safety?
Press and hold the Stop/Clear button for about 3 seconds. A lock will appear on the display. To deactivate, press and hold the same button again for 3 seconds.
What are the dimensions and weight of the microwave?
Dimensions: 45.1 cm width, 34.8 cm height, 25.8 cm depth. Net weight: 10.2 kg. Ensure compliance with ventilation spaces: at least 10 cm at the rear, 5 cm on the sides, and 20 cm above.
How to set a delayed start?
First set the clock. Then choose the power and cooking time. Press and hold Preset/Clock for 3 seconds to return to the clock. Set the desired start time and confirm. The oven will start automatically at that time.
What to do if the microwave does not heat?
Check that the socket is powered and the circuit breaker fuse is good. Place a cup of water (150 ml) and run for 1 minute: the light should turn on, the fan should run, the turntable should rotate, and the water should become hot. If not, contact customer service.
User questions about MO-21BROOK SIGNATURE
0 question about this device. Answer the ones you know or ask your own.
Ask a new question about this device
No questions yet. Be the first to ask one.
Download the instructions for your Microwave Oven in PDF format for free! Find your manual MO-21BROOK - SIGNATURE and take your electronic device back in hand. On this page are published all the documents necessary for the use of your device. MO-21BROOK by SIGNATURE.
USER MANUAL MO-21BROOK SIGNATURE
SIGN
FOUR À MICRO-ONDES
MO-21BROOK
TABLE DES MATIERES
1. CONSIGNE DE SECURITE -3-
2. INSTALLATION -15-
3. NETTOYAGE ET ENTRETIEN -16-
4.DESCRIPTION DU MICRO-ONDES -17-
5.DESCRIPTION DU PANNEAU DE CONTROLE -18-
6.GUIDESUSTENSILES -27-
7. CONSEILS DE CUISSON -28-
8. ENTRETIEN -30-
9. L'ENTRETIEN DES DISPOSITIFS DE PROTECTION -30 -


Séparez les éléments avant de trier

CET APPAREIL EST DESTINE A UN USAGE DOMESTIQUE UNIQUEMENT!
Veuillez dire attentivement toutes les instructions avant la première utilisation et conServez-les pour une reference ulterieure.
INSTRUCTIONS DE SECURITE IMPORTANTES LIRE AVEC ATTENTION ET A CONSERVER EN VUE DE REFERENCE FUTURE
L'utilisation d'un apparéil électrique doit toujours se faire dans le respect des règles de sécurité élémentaires suivantes :
1)Lisez l'ensemble des instructions avant utilisation.
2) Vérifiez que la tension des prises de votre domicile correspond à cette indiquée sur la
plaque signalétique de l'appareil, et que la prise est bien reliée à la terre.
3) Afin de réduire tout risque d'incendie à l'intérieur du four :
a) Ne faites pas trop cuire les aliments.
b) Retirez toutes les attaches métalliques des sacs en papier ou en plastique avant de lesmettre au four.
c) N'utilisez pas le four pour chauffer de l'huile ou de laGRAISSÉ à frIRE,car la température de l'huile ne peut pas être contrôlée.
d) Àprousutilisation, essuyez le boitier du guide à ondes à l'aide d'un chiffon humide, puis à l'aide d'un chiffon sec afin de retarder toute éclaboussure d'aliments ou de graisse. Toute accumulation de graisse est susceptible d'entrainer une surchauffe et une émission de fumée ou un début d'incendie.
e) Si des matériaux à l'intérieur du four fument ou prennant feu, maintenez la porte du four fermée, mettez le four hors tension et débranchez-le de l'alimentation électrique.
f) Pendant le chauffage de denrées alimentaires dans des recipiens en plastique
ou en papier, garder un oeil sur le four en raison de la possibilité d'inflammation.
4) Afin de réduire tout risque d'explosion ou d'ébullition soudaine :
a) MISE EN GARDE: Les liquides et autres denrées alimentaires ne doivent pas être chauffés dans des recipients fermés hermétiquement car ils risquent d'exploser. Les biberons fermés avec leur bouchon ou la tétine sont considérés comme des recipients fermés hermétiquement.
b) Afin d'éviter tout danger eventuel occasionné par un jaillissement brusque et différé de liquide en ébullition, utilisez un contenant à large ouverture pour faire chauffer du liquide, et ne retirez pas immédiatement le liquide chaud. Patientez quelques instants avant de le retarder.
c) Les pommes de terre, les saucisses et les châtaignes doivent être épluchées ou percées avant la cuisson. Il convient de ne pas chauffer les øefs dans leur coquille et les øefs durs entiers dans un four à micro-ondes, dans la mesure où ils peuvent exploser, même après la fin de cuisson.
d) Le contenu des biberons et des pots d'aliments pour bébé doit être remué ou agité et la température doit être vérifiée avant consommation, de façon à éviter les brûlures.
5) Si le cable d'alimentation est endommagé, il doit être remplace par le fabricant, son service après vente ou des personnes de qualification similaire afin d'éviter un danger.
6) ÀpRES la cuisson, le contenant est très chaud. Utilisez des gants pour retarder les aliments, et évitez tout risque de brûlures dues à la vapeur en dirigeant la vapeur loin de votre visage et de vos mains.
7) Soulevez doucement le bord le plus éloigné du couvercle des plats et des emballages en plastique allant au micro-ondes, et ouvrez avec précautions le pop-corn et les sacs de cuisson au four, à l'écart de votre visage.
8) Afin de prévenir tout risque de casse du plateau tournant :
a. laissez le plateau tournant refroidir avant de le nettoyer,
b. ne pas placer d'aliments ou d'ustensiles chauds sur le plateau tournant froid,
c. ne pas placer d'aliments ou d'ustensiles congelez sur le plateau tournant chaud.
9) Assurez-vous que les ustensiles ne risquent pas de toucher les parois interieures du four au cours de la cuisson.
10) Utiliser uniquement des ustensiles appropriés à l'usage dans les jours à micro-ondes.
11) N'utilisez pas le four pour ranger des aliments ou qu'elles autres objet que ce soit.
12) Ne faites jamais fonctionner le four à vide. Cela endommagerait le four.
13) Lorsque l'appareil est utilisé en mode combinaison, les enfants ne peuvent utiliser le four que sous la surveillance d'unadulte, en raison des températures générées.
14) Tout accessoire non recommendé par le fabricant est susceptible d'entrainer des blessures corporelles.
15) Ne pas utiliser le four à l'extérieur.
16) Conserve les prsentes instructions.
17) MISE EN GARDE: Si la porte ou les joints deporte sont endommages, le four ne doit pas'être mis en fonctionnement avant d'avoir eté réparé par une personne compétente.
18) MISE EN GARDE: Il est dangereux pour quiconque autre qu'une personne compétente d'effectuer des opérations de maintenance ou de réparation entraînant le retrait d'un couvercle qui protège de l'exposition à l'énergie micro-ondes.
19) Si de la fumée apparait, arrêtier ou débrancher le four et garder la porte fermée pour étouffer les flammes eventuelles.
20) Le chauffage des boissons par micro-ondes peut provoquer un jaillissement brusque et différé de liquide en ébullition. Pour cette raison, des précautions doivent être prises lors de la manipulation des recipients.
21) Ne pas utiliser de produits de nettoyage abrasifs ou de grattoirs métalliques durs pour nettoyer la porte en verre du four, car ils sont susceptibles de rayer la surface et d'entrainer l'éclatement du verre.
22) La lampe du four à micro-ondes ne convient pas pour d'autres usages.
23) Cet apparéil n'est pas destiné à être mis en fonctionnement au moyen d'une minutes extérieure ou par un système de commande à distance séparé.
24) Cet apparéil est destiné à être utilisé dans des applications domestiques et analogues telles que:
- des coins cuisines réservés au personnel dans des magasins, bureaux et autres environnementes professionnelles;
- des fermes;
- l'utilisation par les clients des hotels, motels et autres environnementés à caractère résidentiel;
- des environnementés du type chambres d'hotes.
25) Le four à micro-ondes est prévu pour chauffer des denrées alimentaires et des boissons. Le séchage de denrées alimentaires ou de linge et le chauffage de coussins chauffants, pantoufles, éponges, linge humide et autres articles similaires peuvent entrainer des risques de blessures, d'inflammation ou de feu.
26) Cet apparéil peut être utilisé par des enfants à partir de 8 ans et plus et par des personnes ayant des capacité physiques, sensorielles ou mentales réduites ou un manque d'expérience et de connaissances à condition qu'elles aient reçu une supervision ou des instructions concernant l'utilisation de l' apparéil en toute sécurité et
qu'elles comprehennent les dangers encourus. Les enfants ne doivent pas jouer avec l'appareil. Le nettoyage et l'entretien par l'usage ne doit pas etre effectués par des enfants, sauf sils ont plus de 8 ans et qu'ils sont surveillés. Maintenir l'appareil et son cordon hors de portée des enfants de moins de 8 ans.
27) L'appareil ne doit pas etre nettoyé à l'aide d'un nettoyeur vapeur.
28) La porte et la surface extérieure sont susceptibles de revenir chaudes pendant le fonctionnement de l'appareil.
29) AVERTISSEMENT : Les parties accessibles sont susceptibles de.devenir chaudes au cours de l'utilisation. Les jeunes enfants doivent etremaintenus à l'écart.
30)L'appareil devient chaud lors de son utilisation. Faites attention à ne pas toucher les éléments chauffants à l'intérieur du four.
31) Les surfaces sont susceptibles de devenir chaudes lors de l'utilisation.

: ATTENTION : SURFACE CHAude
32) Débranche l'appareil avant de le nettoyer.
33) Le boîtier du guide d'ondes ne doit pas être retirené.
34) En ce qui concerne les informations détaillées sur la manière de nettoyer les joints de
portes, les cavités et parties adjacentes, référez-
vous à la section "NETTOYAGE ET ENTRETIEN".
35) Afin d'assurer une aération suffisante, la distance entre l'arrière du micro-ondes et le mur doit être d'au moins 10 cm, la distance entre les côtés et le mur doit être d'au moins 5 cm, et l'espace libre au-dessus de la surface supérieure doit être d'au moins 20 cm.
36) Les recipients métalliques contenant des aliments ou des boissons ne sont pas adress pour la cuisson micro-ondes.
37) Il convient de nettoyer le four régulièrement et d'enlever tout dépôt alimentaire.
38) Si le four n'est pas maintainu dans un bon etat de propre, sa surface peut se dégrader, ce qui peut afferter défavorablement la durée de vie de l'appareil et eventuellesment conduire à une situation dangereuse.
39) Le four à micro-ondes ne peut être utilisé que de façon indépendante et ne doit pas être placé dans un placard.
40) Cet apparéil est destiné à un usage domestique uniquement!
41) Groupe 2 Appareil de classe B
Groupe 2 Équipements ISM : le groupe 2
compend tous les équipements ISM dans
lesquels de l'énergie radiofréquence est
intentionnellement généree et/ou utilisée
sous forme de rayonnement
électromagnétique pour le traitement de
matériaux, ainsi que les équipements
d'électroérosion et de soudage à l'arc.
Les équipements de classe B sont des
équipements adaptés à une utilisation dans
les établissements domestiques et dans les
établissements directement connectés à un
réseau d'alimentation électrique à basse
tension qui alimente des batiments utilisés à
des fins domestiques.
42) La source lumineuse interne de ce produit est une LED de < 60 lm.
43) " Pour être conforme à la norme EN 61000-3-11, le produit doit être connecté uniquement à une alimentation dont l'impédance correspond à celle du système : Zsys = 0,40089 ohms ou moins. Avant de connecter le produit au réseau électrique public, veuillez consulter votre fournisseur local d'électricité afin de vous assurer que le réseau électrique répond aux exigences ci-dessus."
44) Le four à micro-ondes est destiné à être installé librement.
45) l'appareil ne doit pas etre place dans un meuble.
Specifications
Modèle: MO-21BROOK Alimentation électrique: 230V~ Puisance absorbée(Micro-ondes): 1150W Puisance restituée(Micro-ondes): 700W Capacité du four: 20L Diamètre du plateau toucant: 24.5cm Dimensions du produit: 45.1*34.8*25.8cm Poids net: 10.2kg
INSTALLATION
1. Enlevez tous les emballages. S'il y a une pellicule sécuritaire au-dessus du four, arrachez-la avant de l'utiliser. Vérifiez soigneusement s'il n'y a pas de dommages. S'il y a lieu, avertir immédiatement le concessionnaire ou l'envoyer au centre de service du fabricant.
2. Les jours à micro-ondes doivent être placés dans un environnement sec et non corrosif, à l'abri de la chaleur et de l'humidité, comme un brûleur à gaz ou un réservoir d'eau.
3. Pour assurer une ventilation suffisante, la distance entre le dos du micro-onde et le mur doit être d'au moins 10 cm, le côté du mur doit être d'au moins 5 cm, la distance libre au-dessus de la surface supérieure d'au moins 20 cm. la distance entre le micro-ondes et le sol doit être d'au moins 85 cm.
4. L'emplacement du four doit etre tel qu'il soit eloiigné de la télévision, de la radio ou de l'antenne en tant que perturbation de I'image.
5. L'appareil doit être positionné de façon à ce que la fiche soit accessible, et doit assurer une bonne mise à la terre en cas de fuite, une boucle de terre peut être formée pour éviter les chocs électriques.
6. Le four à micro-ondes doit fonctionner avec la porte fermée.
7. Le four à micro-ondes ne doit pas être placé dans une armoire. Le four à micro-ondes est destiné à être utilisé seul.
8. Comme il y a des résidus de fabrication ou de l'huile est resté sur la cavité du four ou de l'élement de chaleur, il serait généralement l'odeur, même une légère fumée, il est normal et ne se produit pas après plusieurs fois l'utilisation, garder la porte ou la fenêtre ouverte pour assurer une bonne ventilation. Il est donc fortement recommandé de mettre le four en mode grill et de le faire fonctionner à sec plusieurs fois.

ATTENTION
Le four devrait être nettoyé régulièrement et tout dépôt de nourriture devrait être enlevé.

AVERTISSEMENT
1. Retirez le cordon d'alimentation de la prise murale avant le nettoyage. Ne pas immerger l'appareil dans l'eau ou d'autres liquides lors du nettoyage.
2. Le fait de ne pasmaintenir le four dans un état de propre pourrait entrainer une détérioration de la surface, ce qui pourrait nuire à la durée de vie de l'appareil et eventuèlement entrainer une situation dangereuse.
3. N'utilisez jamais de détergent dur, d'essence, de poudre abrasive ou de Brosse métallique pour nettoyer une partie quelconque de l'appareil.
4. N'enlevez pas le couvercle du guide d'ondes.
5. Lorsque le four à micro-ondes a été utilisé pendant une longue période, il peut y avoir des odeurs étranges dans le four, en suivant 3 méthodes peuvent s'en débarrasser :
a. Placer plusieurs tranches de citron dans une tasse, puis chauffer à puissance micro elevée pendant 2-3 min.
b. Placer une tasse de thé rouge dans le four, puis chauffer à puissance micro évée.
c. Mettre un peu d'écorce d'orange au four, puis les chauffer à puissance micro évée pendant 1 minute.
6. AVERTISSEMENT: Ne permettre aux enfants d'utiliser le four sans surveillance que lorsque des instructions adéquates ont ete都认为 aifen que I'enfant soit en mesure d'utiliser le four en toute sécurité et qu'il comprenne les dangers d'une utilisation incorrecte.
ASTUCES DE NETTOYAGE
Détails pour le nettoyage des joints de porte, de la cavité et des parties adjacentes :
Exterieur :
Essuyez l'extérieur avec un chiffon doux humide
Porte :
À l'aide d'un chiffon doux humidifié, nettoyez la porte et la fenêtre
Essuyez les joints de la porte et les parties adjacentes pour-retirer toute projection ou élaboussure
Essuyez le panneau de contrôle avec un chiffon doux légèrement humide
Murs intérieurs :
Nettoyer les surfaces interieures à l'aide d'un chiffon doux humidifié
Essuyez le couvercle du guide d'ondes pour retarder toute projection d'aliments
Plateau tournant / anneau rotatif / axe de rotation :
Lavez avec de l'eau savonneuse
Rincez à l'eau claire et laissez sécher complètement

1) Porto
La porte du four à micro-ondes doit être correctement fermée pour qu'elle puisse fonctionner.
2) Fenêtre de visualisation
Permet à l'utilisateur de voir l'etat de la cuisson.
3) Axe de rotation
La table tournante en verre repose sur l'axe; le moteur en dessous entraine la table tournante pour qu'elle tourne.
4) Bague tournante
La table tournante en verre repose sur ses roues; elle soutient la table tournante et l'aide à s'équilibrer lors de la rotation.
5) Plateau tournant
L'aliment est posé sur la table tournante, sa rotation pendant le fonctionnement permet de cuire les aliments uniformément.
ATTENTION:
- Placer la bague tournante en premier
- Monter la table tournante sur l'axe de rotation et s'assurer qu'elle est correctement positionnée.
6) Panneau de contrôle
Voir ci-dessous en détaill (le panneau de contrôle est sujet à changement sans préavis).
7) Couvercle du guide d'ondes
Il se trouve à l'intérieur du four à micro-ondes, à côté du mur du panneau de commande.
ATTENTION: Ne jamais-retirer le couvercle du guide d'ondes
DESCRIPTION DU PANNEAU DE CONTROL

1. Avant la cuisson
La LED clignote 3 fois lorsqu'elle est branchée sur l'alimentation. Puis il clignote " : ", et c'est l'état de voir par défaut.
2. TEMPS/POIDS/BOUTON DE CUISSON AUTOMATIQUE
Vous pouvez augmenter ou diminuier la cuisson pendant le fonctionnement en tournant le bouton TEMPS/POIDS/BOUTON DE CUISSON AUTOMATIQUE
3. STOP
Appuyez sur le bouton Stop/ Effacer pour annuler le réglage de l'alimentation ou programme de dégivrage. Lorsque vous cuisinez, appuyez une fois pour arrêtier, appuyez deux fois pour annuler le programme. Lorsque vous réinitialisez le programme de cuisson, appuyez sur cette touche pour annuler tous les programmes de réglage précédent.
4. Rappel automatique
Lorsque vous la cuisson préreglee est terminée, trois bips sonores sont émis pour vous avertir dePTRir les alimentes.
Si vous n'appuyez pas une fois sur le bouton Arrêt ou si vous n'ouvre pas la porte, le signal sonore retentira à chaque intervalle de 3 minutes.
5. Réglage de l'horloge
Le bouton d'horloge vous permet d'entrez l'houre actuelle ou prédéfinie lorsque":clignote sur l'affichage LED après avoir eté branché, ou essayez de l'ignoreer pour continuer si cela n'est pas nécessaire.
6. Cuisson au micro-ondes
Cette fonction est utilisée pour la cuisson et le chauffage des alimentés. En appuyant sur le bouton Micro-puissance, la LED affichera 100P - 80P - 60P - 60P - 40P - 20P.
Exemple: pour régler 12:30 Etapes Voyant 1 Après la mise sous tension, le « : » clignote 2 Appuyez une fois sur le boutonPrérégliages/Horloge 00:00 3 Tournez le bouton TEMPS/POIDS/BOUTONDE CUISSON AUTOMATIQUE pour réglerles heures exactes. 12:00 4 Appuyez sur le boutonPrérégliages/Horloge une fois de plus. 12:00 5 Appuyez sur le bouton Prérégliages/Horlogeune fois de plus ou attendez 5 secondes, etles chiffres iront régulièrement. 12:30 6 Press Preset. Clock button once again orwait for 5 seconds, and the numbers willgo steadily.
High power 100% puissance micro-ondes. Applicable pour une cuisson rapide et complète Medium
High power 80% de puissance micro-ondes. Applicable pour la cuisson express moyenne. Medium power 60% de puissance micro-ondes. Applicable pour les aliments cuits à la vapeur Medium
Low power 40% de puissance micro-ondes. Applicable pour la décongélation des aliments Low power 20% de puissance micro-ondes. Applicable pour garder au chaud
ATTENTION
a. La durée maximale pouvant être régée est de 60 minutes.
b. Ne jamais faire fonctionner le four à vide.
c. À la puissance maximale des micro-ondes, le four abaisse automatiquement la puissance après un certain temps de cuisson pour prolonger la durée de vie.
d.Si vous tournez les alimentents pendant le fonctionnement, appuyez une fois sur le bouton Départ immédiat et la procédure de cuisson pré réglée se poursuivra.
e. Si vous avez l'intention dePTRirer l'aliment avant I'heure preréglee, vous devez appuyer une fois sur le bouton Arrêt pour effacer la procédure preréglee afin d'eviter une utilisation involontaire de I'heure suivante.
Exemple : Pour cuire en mode 80P pendant 10 minutes. Etapes Affichage 1Après la mise sous tension, le signal clignote. : 2 Sélectionnez la puissance micro-ondes désirée en appuyant consécutivement sur le bouton Micro Power. 80P 3 Régler le temps de cuisson en tournant le bouton 10 : 00 4 Appuyez sur le bouton Départ immédiat pour démarrer et la LED compte à rebours pour indiquer le temps de fonctionnement.
7. Cuisson expresse
Appuyez sur le bouton Rapide. L'écran LED affichera 0:30, 1:00, 1:00, 1:30.
Cette fonction vous permettra deCHAuffer une tasse d'eau ou de boisson de façon pratique, en omettant les etapes de réglage du temps. Choiser le bon réglage en fonction de la boisson.
Exemple : Pour cuire en mode express pendant 1 minute.
Étapes Affichage 1Après la mise sous tension, deux points clignotent. : 2 Appuyez consécutivement sur le bouton Rapide pour sélectionner le menu désiré. 1:00 3 Commencez la cuisson en appuyant sur la toucheDépart immédiat.
8. Décongélation
Cette fonction est utilisé pour décongeler les aliments. Appuyez sur le bouton de dégivrage et l'écran LED affichera d.1-d.2-d.2-d.3.
d.1 Pour la décongeler de la viande dont le poids varie de 0,1 à 2,0 kg. d.2 Pour décongeler la volaille dont le poids varie de 0,2 à 3,0 kg. d.3 Pour la décongeler des fruits de mer dont le poids varie de 0,1 à 0,9 kg.
ATTENTION:
a. Il est nécessaire de returner la nourriture pendant la décongélation pour obtenir un effet uniforme.
b. Habituellesment, la décongélation prendra plus de temps que la cuisson des alimentés.
c. Si l'aliment peut être coupé au couteau, le processus de décongélation peut être considéré comme terminé.
d. Les micro-ondes pénétrent environ 4 cm dans la plupart des gliments.
e. Les alimentés décongelés devraient être consommés le plus tout possible, il n'est pas conseillé de les remettre au réfrigérateur et de les congeler à nouveau.
Exemple : Décongeler 0.4kg de volaille
Étapes Affichage 1Après la mise sous tension, les deux points clignotent. : 2 Appuyez sur le bouton de dégivrage pour régler le type de nourriture. d.2 3 Tournez le bouton Cuisson Auto/ Temps Poids pour régler le poids à décongeler. 0.4 4 Commencez la cuisson en appuyant sur Départ immédiat 5 A mi-parcours du dégivrage, 3 bips sonores seront entendus deux fois pour vous demander de returner les aliments. Ouvrez la porte et returnez la nourriture. Alors fermez la porte. Appuyez sur Instantané. Bouton de redémarrage pour continuer le dégivrage.
9. Cuisson automatique
Le four dispose d'un menu de cuisson par défaut pour une utilisation simple. Lorsque la LED clignote deux points, Tournez le bouton Temps/Poids/Témpérature/Cuisson Automatique, la LED s'allume automatiquement, cycle pour afficher A.1, A.2......
A.8
Choisissez le menu approprié en fonction du type et du poids de l'aliment et observez strictement les indications du tableau ci-dessous, sinon l'effet de cuisson sera largement influencé.
Affichage A Iments Méthode A.1 Popcorn A.2 Popcorn Identique à A.1 sauf 100g de poids A.3 Pizza A.4 Boisson A.5 Boisson A.6 Pommes de terre Cuire les lamelles de pommes de terre en 5 mm de largeur et de hauteur. Le poids total est d'environ 450g. Placez les lamelles sur un grand plat et couvre le plat avec un film mince pour éviter les pertes d'eau. A.7 Pommes de terre Identique à A.6 sauf que le poids des lamelles de pomme de terre est d'environ 650g A.8 Poisson
Attention :
a. La température des aliments avant la cuisson serait de 20 - 25^ . Une température plus élevée ou plus basse de l'aliment avant la cuisson nécessiterait une augmentation ou une diminution du temps de cuisson.
b. La température, le poids et la forme des alimentents auront une grande influence sur l'effet de cuisson. Si vous constatéz un écart par rapport au facteur indiqué dans le menu ci-dessus, vous pouvez ajuster le temps de cuisson pour obtenir le meilleur résultat.
Exemple: 0.45kg poisson à la vapeur.
Etapes Affichage 1 A près la mise sous tension, le symbole clignote : 2 Tournez le bouton Temps/Poids/Témpérature/Cuisson Automatique pour désirir le menu automatique. A.8 3 Commencez la cuisson en appuyant sur la touche Départ immédiat pour confirmer, et la LED comptera à rebours pour afficher le temps de fonctionnement.
10. DEMARRAGE AUTOMATIQUE (FONCTION RETARDEMENT)
Si vous ne foulez pas que le menu soit démarré immédiatement, vous pouvez pré régler le menu et l'heure de cuisson et le menu pré régle sera automatiquement démarré à l'heure programmée.
Le réglage se compose de 2 étapes :
- Réglage de l'horloge actuelle;
- Réglage du menu et de l'heure de cuisson.
Exemple : Il est 12:30, si vous espérez que le four à micro-ondes commencera automatiquement la cuisson avec 100P puissance micro-ondes pendant 9 minutes et 30 secondes à 14:20 : Etapes Affichage 1Après la mise sous tension, le symbole clignote 00:00 1.1 Appuyez et maintenez enforcé le bouton Préréglage du temps, l'heure commence à clignoter. : 1.2 Régler les heures en tournant le bouton de cuisson Temps/Poids/Cuisson Automatique 12 :00 1.3 Appuyez de nouveau sur la touche Préréglage du temps pour confirmer les heures. 12 :00 1.4 Réglez les minutes en tournant le bouton de cuisson Temps/Poids/Cuisson Automatique 12 :30 1.5 Appuyez une fois sur le bouton Préréglage du temps ou attendez 5 secondes, et les chiffres se stabiliseront. 12 :30 2 Régler le menu et l'heure de cuisson 2.1 Sélectionner la puissance de cuisson en appuyant sur le bouton Micro-puissance. 100P 2.2 Tournez le bouton de cuisson Temps/Poids/Cuisson Automatique pour régler le temps de cuisson. 9 :30 2.3 Appuyez sur le bouton Préréglage du temps et maintenez-le,enforcé pendant 3 secondes pour revenir à l'horloge actuelle. 3 Définissez l'heure à laquelle vous vous attendez à commencer. Répétez les étapes 1.2, 1.3, 1.4. 4 Appuyez sur la touche Préréglage du temps pour confirmer le menu retardé. Le programme est maintainant activé. Et le menu commencera à 14:20. 5 Vouss pouvez vérifier l'heure de départ préréglée en appuyant sur le bouton Préréglage du temps.
11. CUISSON MULTISEQUENCE
Pour obtenir le meilleur résultat de cuisson, certaines recettes nécessitant des modes et des temps de cuisson différents. Vous pouvez programmerer votre menu personnelisé comme suit :
Exemple : Vous foulez cuire les aliments au micro-ondes 100P pendant 3 minutes puis 20P pendant 9 minutes. Il s'agit de 2 régles de séquence. Etapes Affichage 1 100P micro-ondes pendant 3min. 1.1 Appuyez sur le bouton Micro-puissance pour sélectionner le niveau de puissance. 100P 1.2 Tournez le bouton de cuisson Temps/Poids/Cuisson Automatique pour régler le temps de cuisson. 3 :00 2 Tournez le bouton de cuisson Temps/Poids/Cuisson Automatique pour régler le temps de cuisson. 2.1 Appuyez sur le bouton Micro-puissance pour sélectionner le niveau de puissance désiré. 20P 2.2 Tournez le bouton de cuisson Temps/Poids/Cuisson Automatique pour régler le temps de cuisson. 9 :00 3 Commencer la cuisson en appuyant sur Départ immédiat.
Attention :
a. Lorsque la cuisson au micro-ondes 100 est terminée, le four a micro-ondes redémarre automatiquement.
b. Un maximum de 4 séquences peuvent être définies par temps, répétez les étapes.
12. FONCTION DE VERROUILAGE POUR LES ENFANTS
Utilisez cette fonction pour verrouiller le panneau de commande lorsqu vous nettoyez ou pour que les enfants ne puissant pas utiliser le four sans surveillance. Tous les boutons sont rendus inutilisables dans ce mode.
Régler le verrou pour enfants---Appuyez sur le bouton Stop pendant environ 3 secondes.
Annuler le verrou pour enfants---Appuyez sur le bouton Stop pendant environ 3 secondes.
GUIDE DES USTENSILES
Il est fortement recommandé d'utiliser des recipients appropriés et surs pour la cuisson au micro-ondes. En règle générale, les recipients en céramique, en verre ou en plastique résistant à la chaleur conviennent à la cuisson au micro-ondes. N'utilisez jamais les recipients métalliques pour la cuisson au micro-ondes et la cuisson combinée, car il est probable qu'il y ait des étincelles. Vous pouvez prendre les références du tableau ci-dessous.
Matériau du réseau Micro-ondes Remarques Céramique résistant à la chaleur Oui Ne jamais utiliser de céramique décorée d'un liséré métallique ou vernie Plastique résistant à la chaleur Oui Ne peut pas être utilisé pour une cuisson prolongée au micro-ondes Verre résistant à la chaleur Oui Grille de cuisson Non Film plastique Oui Ne doit pas être utilisé lors de la cuisson de viande ou de côtelettes, car la température trop élevé pourrait endommager le film.
CONSEILS DE CUISSON
Les facteurs suivants peuvent affecter le résultat de cuisson :
Arrangement des aliments
Placez les zones les plus épaisses vers l'extérieur du plat, la partie la plus fine vers le centre et étalez-la uniformément. Ne pas faire chevaucher si possible.
Durée de cuisson
Commencer la cuisson avec un réglage court, l'évaluer après le temps de cuisson et l'étendre en fonction des besoin réels. La surcuisson peut provoquer de la fumée et des brûlures.
Cuisson uniforme des aliments
Les aliments comme le poulet, le hamburger ou les steaks devraient être returnés une fois pendant la cuisson.
Selon le type d'aliment, s'il y a lieu, remuer de l'extérieur vers le centre du plat une ou deux fois pendant la cuisson.
Prévoir un temps d'attente après le temps de cuisson, laisser les aliments dans le four pendant une durée ajustate, ce qui lui permet de terminer son cycle de cuisson et de les refroidir progressivement.
Si la vande est cuite
La couleur et la durée des alimentés aident à déterminer si c'est fait, y compris :
La vapeur s'échappe de toutes les parties de l'aliment, pas seulement le bord.
Les articulations de la volaille peuvent etre déplacées facilement.
Le porc ou la volaille ne presente aucun signe de sang.
Le poisson est opaque et peut être tranché facilement à la fourchette.
Platà rissoler
Lorsque vous utilisez un plat brunissant ou un recipient autochauffant, placez toujours un isolant résistant à la chaleur, comme une plaque de porcelaine, afin d'eviter d'endommager le plateau tournant et l'anneau rotatif.
Enveloppe plastique résistante aux micro-ondes
Lors de la cuisson d'aliments à force teneur en matières grasses, ne laissez pas la pellicule plastique entre en contact avec les aliments, car elle pourrait fondre.
Batterie de cuisine en plastique résistante aux micro-ondes
Certainustensilesdecuissonenplastique sansdanger pourle micro-ondespeuventnepasconveniràla cuissond'alimentsriches en matieres grasses et en sucre.Deplus,le temps de prechauffage specifie dans le mode d'emploi ne doit pasetre dépassé.
ENTRETIEN
Veuillez vérifier les points suivants avant d'appeler les services.
1. Placez une tasse d'eau (environ 150 ml) dans une mesure en verre dans le four et fermez la porte en toute sécurité. La lampe du four devrait s'eteindre si la porte est correctement fermée. Laisser agir le four pendant 1 min.
2. La lampe du four s'allume-t-elle?
3. Le ventilateur de refroidissement fonctionne-t-il?
(Placez votre main sur les ouvertures de ventilation arriere.)
4. La platine tourne-t-elle?
(La table tournante peut tourner dans le sens des aiguilles d'une montre ou dans le sens inverse des aiguilles d'une montre. C'est tout à fait normal.
5. L'eau à l'intérieur du four est-elle chaude?
Si "NON" est la réponse à l'une des questions ci-dessus, veuillez vérifier votre prise murale et le fusible dans la boîte de votre compteur.
Si la prise murale et le fusible fonctionnent correctement, CONTACTEZ VOTRE CENTRE DE SERVICE LE PLUS PROCHE APPROVÉ.
L'ENTRETIEN DES DISPOSITIFS DE
Attention: RAYONNEMENT MICRO-ONDES
1. Le condensateur haut tension reste charge apres la déconnexion ; court-circuitez la borne négative du condensateur H. V vers le chassis du four (utilisez un tournevis) pour le décharger avant de le toucher.
2. Pendant l'entretien, les piècesénémérées ci-dessous sont susceptibles d'être enlevées et de donner accès à des potentiels supérieurs à 250V à la terre.
- Magnétron
- Transformateur haute tension
- Condensateur haute tension
- Diode haute tension
- Fusible haute tension
3. Les conditions suivantes peuvent cause une exposition indue aux micro-ondes pendant l'entretien.
Mauvais montage du magnétron;
Mauvaise adaptation de l'inter verrouillage de porte, de la charnière de porte et de la porte;
Montage incorrect du support d'interrupteur ;
La porte, le joint de porte ou le boîtier a été endommagé.
ENLEVEMENT DES APPAREILS MENAGERS USAGES

La directive europeenne 2012/19/UE sur les déchets d'équipements électriques et électroniques (DEEE) exige que les apparêls menagers usages ne soient pas jetés dans le flux normal des déchets municipaux.

Les apparèils usages doivent être collectés séparément afin d'optimiser le taux de valorisation et de recyclage des
matériaux qui les composent, et de réduire l'impact sur la santé humaine et sur l'environnement. Le symbole de la poubelle barrée est apposé sur tous les produits pour vous rappeler les obligations de collecte sélective.
Le fabriquant et le revendeur ne peuvent pas etre tenus responsable de tout accident ou dommage cause par une utilisation impropre de l'appareil, ou si les instructions données dans le present manuel n'ont pas ete respectees.
Conformément à l'Article L. 217 du code de la consommation, votre produit bénéficiaie d'une garantie légale de conformité de 2 ans.
Pour contacter notre Service ÀpRES-Vente, avant de vous déplacer à votre magasin BUT, appepelez le 09 78 97 97 97
Du lundi au vendredi de 09h00 à 19h00 et
le samedi de 09h00 à 18h00 (Prix d'un appel local).

SIGN
MICROWAVE OVEN
MO-21BROOK
TABLE OF CONTENTS
1.IMPORTANT SAFEGUARDS -34-
2. INSTALLATION -41-
3. CLEANING -42-
4.PRODUCTINSTRUCTION -44-
5. OPERATION OF CONTROL PANEL 45-
6. UTENSILS GUIDELINE - 54 -
7. COOKING TIPS - 55 -
8.MAINTENANCE -57-

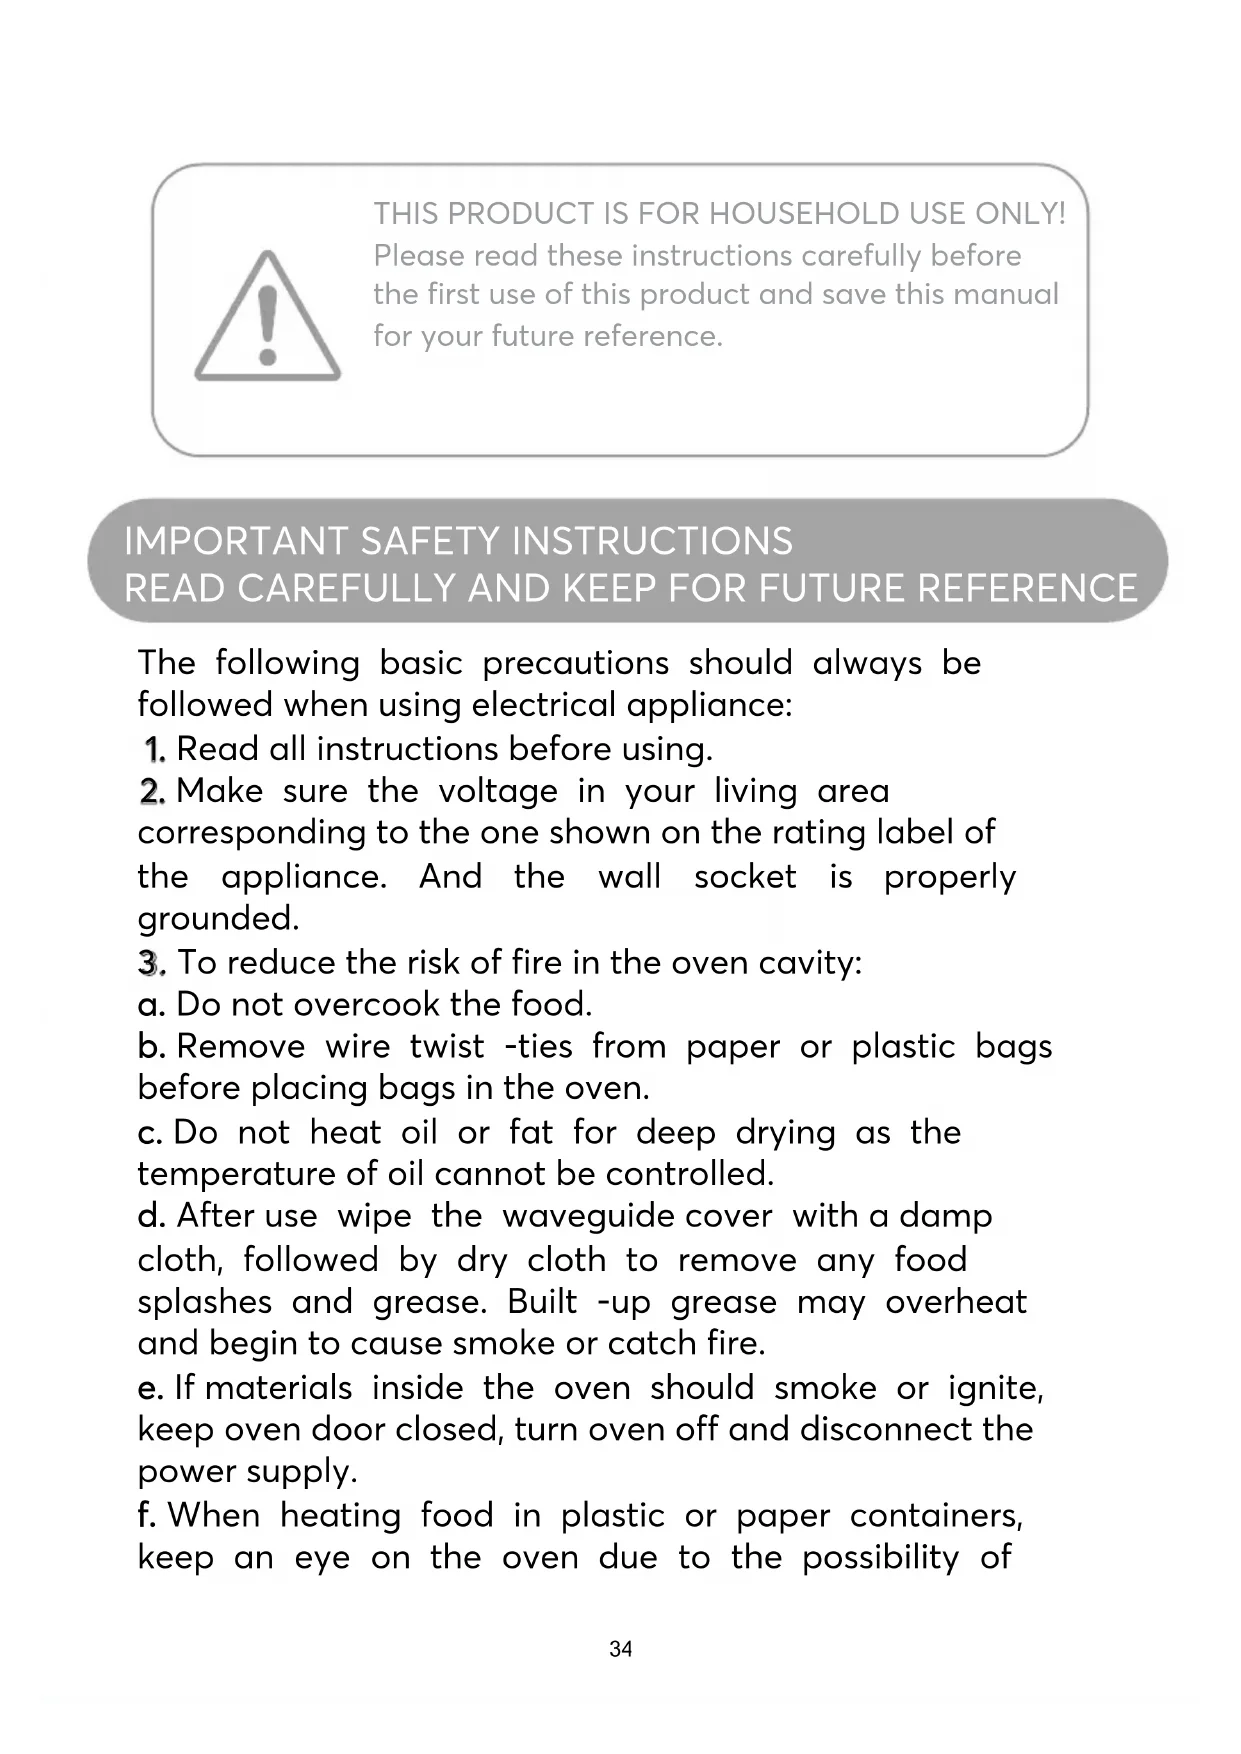
THIS PRODUCT IS FOR HOUSEHOLD USE ONLY!
Please read these instructions carefully before the first use of this product and save this manual for your future reference.
IMPORTANT SAFETY INSTRUCTIONS READ CAREFULLY AND KEEP FOR FUTURE REFERENCE
The following basic precautions should always be followed when using electrical appliance:
1. Read all instructions before using.
2. Make sure the voltage in your living area corresponding to the one shown on the rating label of the appliance. And the wall socket is properly grounded.
3. To reduce the risk of fire in the oven cavity:
a. Do not overcook the food.
b. Remove wire twist -ties from paper or plastic bags before placing bags in the oven.
c. Do not heat oil or fat for deep drying as the temperature of oil cannot be controlled.
d. After use wipe the waveguide cover with a damp cloth, followed by dry cloth to remove any food splashes and grease. Built -up grease may overheat and begin to cause smoke or catch fire.
e. If materials inside the oven should smoke or ignite, keep oven door closed, turn oven off and disconnect the power supply.
f. When heating food in plastic or paper containers, keep an eye on the oven due to the possibility of
ignition.
4. To reduce the risk of explosion and sudden boiling:
a. WARNING: Liquids and other foods must not be heated in sealed container since they are liable to explode; Baby bottles fitted with a screw cap or teat are considered to be sealed containers.
b. Use the wide -mouthed container to cook liquid, and the cooked liquid should not be removed out immediately. Several moments should be waited before removing. In order to avoid possible hazards caused by delayed eruptive boiling of liquids.
c. Potatoes, sausage and chestnut should be peeled or pierced before cooking. Eggs in their shell, whole hard -boiled eggs should not be heated in microwave ovens since they may explode, even after microwave heating has ended.
d. The contents of feeding bottles and baby food jars are to be stirred or shaken and the temperature is to be checked before consumption, in order to avoid burns.
5. If the supply cord is damaged, it must be replaced by the manufacturer or its service agent or a qualified technician in order to avoid a shock hazard.
6. After cooking, the container is very hot. Using gloves to take out the food and avoid steam burns by directing steam away from the face and hands.
7. Slowly lift the furthest edge of dishes cover and microwave plastic wrap and carefully open popcorn and oven cooking bags away from the face.
8. To prevent the turntable from breaking:
a. Let the turntable cool down before cleaning.
b. Do not place hot foods or utensils on the cold turntable.
c. Do not place frozen foods or utensils on the hot turntable.
9. Make sure the utensils do not touch the interior walls during cooking.
10. Only use utensils that are suitable for use in microwave ovens.
11. Do not store food or any other things inside the oven.
12. Do not operate the oven without any liquid or food inside the oven. This would do damage the oven.
13. When the appliance is operated in the combination mode, children should only use the oven under adult supervision due to the temperatures generated.
14. Any accessories not recommended by the manufacturer may cause injuries to persons.
15. Do not use outdoors.
16. Save these instructions.
17. WARNING: If the door or door seals are damaged or the oven is malfunctioned, the oven must not be operated until it has been repaired by a competent person;
18. WARNING: It is hazardous for anyone other than a competent person to carry out any service or repair operation that involves the removal of a cover which gives protection against exposure to microwave energy;
19. If smoke is observed, switch off or unplug the appliance and keep the door closed in order to stifle any flames;
20. Microwave heating of beverages can result in delayed eruptive boiling; therefore care must be taken when handling the container;
21. Do not use harsh abrasive cleaners or sharp metal scrapers to clean the oven door glass since they can scratch the surface, which may result in shattering of the glass.
22. The lamp of microwave oven is not intended for other purposes.
23. The appliances are not intended to be operated by means of an external timer or separate remote-control system.
24. This appliance is intended to be used in household and similar applications, such as:
- Staff kitchen areas in shops, offices and other working environments;
- Farm houses;
- By clients in hotels, motels and other residential environments;
- Bed and breakfast type environments.
25. The microwave oven is intended for heating food and beverages. Drying of food or clothing and heating of warming pads, slippers, sponges, damp cloth and similar may lead to risk of injury, ignition or fire.
26. This appliance can be used by children aged from 8 years and above and persons with reduced physical, sensory or mental capabilities or lack of experience and knowledge if they have been given supervision or instruction concerning use of the appliance in a safe way and understand the hazards involved. Children shall not play with the appliance. Cleaning and user maintenance shall not be made by children without supervision.
27. This appliance is not intended for use by persons (including children) with reduced physical, sensory or
mental capabilities, or lack of experience and knowledge, unless they have been given supervision or instruction concerning use of the appliance by a person responsible for their safety.
28. Children should be supervised to ensure that they do not play with the appliance.
29. The appliance shall not be cleaned with a steam cleaner.
30. The door or the outer surface may get hot when the appliance is operating.
31. WARNING: Accessible parts may become hot during use. Young children should be kept away.
32. During use the appliance becomes hot. Care should be taken to avoid touching heating elements inside the oven.
33. The surfaces are liable to get hot during use.

: CAUTION:HOT SURFACE
34. Unplug the appliance before cleaning.
35. The waveguide cover must not be removed.
36. For details about how to clean the door joints, the cavities and the adjacent parts, please refer to section "CLEANING AND MAINTENANCE".
37. This product is a Group 2 Class B ISM equipment. The definition of Group 2 which contains all ISM (Industrial, Scientific and Medical) equipment in which radio-frequency energy is intentionally generated and/or used in the form of electromagnetic radiation for the treatment of material, and spark erosion equipment. For Class B equipment is equipment suitable for use in domestic establishments and in
establishments directly connected to a low voltage power supply network which supplies buildings used for domestic purpose.
38. To ensure sufficient ventilation, the distance of the back of microwave to the wall should be at least 10cm , the side to the wall should be at least 5cm , the free distance above the top surface at least 20cm .
39. Metallic containers for food and beverages are not allowed during microwave cooking.
40. The oven should be cleaned regularly and any food deposits removed.
41. Failure to maintain the oven in a clean condition could lead to deterioration of the surface that could adversely affect the life of the appliance and possibly result in a hazardous situation.
42. The microwave oven is only used in freestanding, the microwave oven shall not be placed in a cabinet.
43. This product is for household use only!
Group 2 Class B appliance
Group 2 ISM equipment: group 2 contains all ISM equipment in which radio-frequency energy is intentionally generated and/or used in the form of electromagnetic radiation for the treatment of material, and EDM and arc welding equipment.
Class B equipment is equipment suitable for use in domestic establishments and in establishments directly connected to a low voltage power supply network which supplies buildings used for domestic purposes.
44. This product internal light source LED light on < 60lm .
45. "To be in compliance EN 61000-3-11, the product shall be connected only to a supply of the system impedance:
Zsys = 0.40089 ohms or less. Before connect the product to public power network, please consult your local power supply authority to ensure the power network meet above requirement."
Specifications
Model: MO-21BROOK Rated Voltage: 230V~ Rated Input Power(Microwave): 1150W Rated Output Power(Microwave): 700W Oven Capacity: 20L Turntable Diameter: 24.5cm External Dimensions: 45.1*34.8*25.8cm Net Weight: 10.2kg
INSTALLATION
1. Take out all the packing. If there is a safe film over the oven, tear it off before Use. Check carefully for damage. If any, immediately notify dealer or send to the manufacturer's service center.
2. Microwave ovens must be placed under dry and non-corrosiveness environments, kept away from heat and humidity, such as gas burner or water tank.
3. To ensure sufficient ventilation, the distance of the back of microwave to the wall should be at least 10 cm, the side to the wall should be at least 5 cm, the free distance above the top surface at least 20 cm. the distance of the microwave to the ground should be at least 85 cm.
4. The position of the oven shall be such that it is far from the TV, Radio or antenna as picture disturbance. The distance should be more than 5m
5. The appliance must be positioned so that the plug is accessible, and must ensure a good grounding in case leakage, ground loop can be formed to avoid electric shock.
6. The microwave oven must be operated with the door closed.
7. The microwave oven must not be placed in a cabinet. The microwave oven is intended to be used freestanding.
8. As there is manufacturing residue or oil remained on the oven cavity or heat element, it usually would smell the odor, even a slight smoke, It is normal case and would not occur after several times use, keep the door
or window open to ensure good ventilation. So it is strongly recommended to place a cup of water in the turntable, setting at high power and operate for several times.
CLEANING AND MAINTENANCE
CAUTION
The oven should be cleaned regularly and any food deposits removed.
WARNING
1. Remove the power cord from the wall outlet before cleaning. Don't immerse the appliance in water or other fluids when cleaning.
2. Failure to maintain the oven in a clean condition could lead to deterioration of the surface that could adversely affect the life of the appliance and possibly result in a hazardous situation
3. Never use hard detergent, gasoline, abrasive powder or metal brush to clean any part of the appliance
4. Do not remove the waveguide cover
5. When the microwave oven has been used for a long time, there may be some strange odors exist in oven, Following 3 methods can get rid of them:
a. Place several lemon slices in a cup, then heat with high Micro Power for 2-3 min.
b. Place a cup of black tea in oven, then heat with high
micro power.
c. Put some orange peel into oven, and then heat them with high Micro Power for 1 minute.
6. WARNING: Only allow children to use the oven without supervision when adequate instructions have been given so that the child is able to use the oven in a safe way and understands the hazards of improper use;
TIPS FOR CLEANING
Details for cleaning door seals, cavity and adjacent parts:
Exterior:
Wipe the enclosure with a dampened soft cloth
Door:
Using a dampened soft cloth, wipe clean the door and window
Wipe the door seals and adjacent parts to remove any spill or spatter
Wipe the control panel with a slightly dampened soft cloth
Interior walls:
Wipe clean the cavity with a dampened soft cloth
Wipe clean the waveguide cover to remove any food splashed
Turntable/ Rotation ring/ Rotation axis:
Wash with mild soap water
Rinse with clean water and allow drying thoroughly

1) Door lock
Microwave oven door must be properly closed in order for it to operate
2) Viewing window
Allow user to see the cooking status
3) Rotating axis
The glass turntable sits on the axis; the motor underneath it drives the turntable to rotate
4) Rotating ring
The glass turntable sits on its wheels; it supports the turntable and helps it to balance when rotating
5) Turntable
The food sits on the turntable, its rotation during operation helps to cook food evenly

CAUTION
- Place the rotating ring first
- Fit the turntable onto the rotating axis and make sure that it is geared in properly
6) Control panel
See below in details (the control panel is subject to
change without prior notice)
7) Waveguide cover
It is inside the microwave oven, next to the wall of control panel.

WARNING
Never remove the waveguide cover
OPERATION OF CONTROL PANEL

1. BEFORE COOKING
The LED flashes 3 times when plugged in power supply. Then it flashes :, prompting you to input the cooking menu and time.
2. AUTO COOKING/ TIME.WEIGHT KNOB
You can increase or decrease cooking time, weight or choose the auto cooking menu during operation by turning Auto cooking /Time.Weight knob.
3. STOP/CLEAR
At the initial or input stage: press once to cancel input programs and resume initial stage.
During cooking: press once to stop oven operation, press twice to cancel cooking programs.
4. AUTO REMINDER
When your preset cooking procedure have finished, the LED display will show End and three beeps sound will be heard to prompt you to take out food. If you do not press Stop.Clear button once or open the door, the beep will be sounded at an interval of 3 minutes.
5. CLOCK SETTING
Clock button make it available for you to input current or preset time when ".": flashes onto LED display after plugged in, or try to skip it over to continue if unnecessary.
Example: to set 12:30 Steps Display 1 After power-up, the colon flashes : 2 Press Preset. Clock button once 00:00 3 Turn Auto Cooking/ Time. Weight knob to set exact hours. 12:00 4 Press Preset. Clock button once again. 12:00 5 Turn Auto Cooking/ Time. Weight knob to set exact minutes. 12:30 6 Press Preset. Clock button once again or wait for 5 seconds, and the numbers will go steadily.
6. MICROWAVE COOKING
This function is used for cooking and heating food. Pressing Micro Power button, LED cycles to show 100P — 80P — 60P — 40P — 20P.
High power 100% microwave power. Applicable for quick and thorough cooking Medium
High power 80% microwave power. Applicable for medium express cooking Medium
power 60% microwave power. Applicable for steaming food Medium
Low power 40% microwave power. Applicable for defrosting food Low power 20% microwave power. Applicable for keeping warm

CAUTION
a. The max time which can be set is 60 minutes
b. Never operate the oven empty.
c. At the maximum microwave power, the oven will automatically lower the power after a certain time of cooking to lengthen the service life.
d. If you turn the food during operation, press the Instant.Start button once and the preset cooking procedure will continue.
e. If you intend to remove the food before the preset
time, you must press Stop.Clear button once to clear the preset procedure to avoid unintended operation of next time use.
Example: To cook at P80 for 10 minutes. Steps Display Display 1 After power-up, the colon flashes : 2 Select the desired microwave power by pressing Micro Power button consecutively 80P 3 Set cooking time by turning Auto Cooking/Time. Weight knob 10:00 4 Press Instant. Start button to start, and LED will count down to show running time.
7. EXPRESS
Press Express button LED Display will cycle to show 0:30, 1:00, 1:30.
This function will allow you to heat a cup of water or beverage conveniently, omitting the steps of setting time.
Choose the proper time depending on the beverage capacity.
Example: To cook with express for 1 minute Steps Display 1 After power-up, the colon flashes 2 Press Express button consecutively to select desired menu 1:00 3 Start cooking by pressing Instant/Start button
8. DEFROST
This function use for defrost food. Press the Defrost button and the LED display will cycle to show d.1-d.2-d.3.
d.1 For defrosting meat, the weight range from 0.1 to 2.0 kg. d.2 For defrosting poultry, the weight range from 0.2 to 3.0kg. d.3 For defrosting seafood, the weight range from 0.1 to 0.9kg.

CAUTION
a. It is necessary to turn over the food during operation to obtain uniform effect.
b. Usually defrosting will need longer time than that of cooking the food.
c. If the food can be cut by knife, the defrosting process can be considered completed.
d. Microwave penetrates around 4cm into most food
e. Defrosted food should be consumed as soon as possible, it is not advised to put back to fridge and freeze again.
Example: To defrost 0.4kg poultry Steps Display 1 After power-up, the colon flashes : 2 Press Defrost button to set the food kind. d.2 3 Turn Auto Cooking/ Time. Weight knob to set the defrost weight 0.4
4 Start cooking by pressing Instant. Start 5 In half way during defrosting 3 beep sound will be heard two times to prompt you turn over the food. Open the door and turn over the food. Then close the door. Press Instant. Start button again to continue defrosting
9. AUTO COOKING
The oven has default cooking menu for simple operation. When the LED flashes colon, turn the Auto Cooking knob and LED will cycle to show A.1, A.2 ....... A.8
Choose the appropriate menu according to the food type and weight and strictly observe the directions in below table, otherwise the cooking effect will be largely influenced.
Display Kind Method A.1 Popcorn Suitable for popping a bag of corn, which is available in the market, weighted 85g. Popcorn prior to completing, if the popping speed has been decreased to 1 time per 1-2 seconds you should press Stop. clear button to stop the popping process A.2 Popcorn Same as A.1 except 100g weight A.3 Pizza Warm a piece of chilled pizza of 150g A.4 Beverage Heating a cup of 250 ml liquid. The liquid temperature is about 5-10 °C. Use a big mouth cup and do not seal A.5 Beverage Heating a cup of 500 ml liquid. The liquid temperature is about 5-10 °C Use a big mouth cup and do not seal A.6 Potato Cooking the potato strips, cut into 5mm width and height, length. Total weight is about 450g. Place the strips on a large dish and cover the dish with a thin film to prevent water loss A.7 Potato Same as A.6 except the weight of potato strips is about 650g A.8 Fish Suitable for steaming a fish of 450g. After the fish washed and scales removed, make a slits on the skin of fish .Put the fish on a shallow dish of 22-27cm diameter sprinkle lightly with some ingredient and cover the dish with a thin film to prevent water loss. After cooking, stand for 2 minutes.

CAUTION
a. The temperature of food before cooking would be 20 - 25^ . Higher or lower temperature of the food before cooking would require increase or decrease of cooking time.
b. The temperature, weight and shape of food will largely influence the cooking effect. If any deviation has been found to the factor noted on above menu, you can adjust the cooking time for best result.
Example: Steam 0.45kg fish Steps Display 1 After power-up, the colon flashes : 2 Turn Auto Cooking/ Time. Weight knob to set the cooking menu A.8 3 Start cooking by pressing Instant. Start button, and LED will count down to show running time.
10. AUTOMATIC STARTING (DELAYED FUNCTION)
If you do not want the menu be started immediately, you can preset the cooking menu and time and the preset menu will be automatically started at your set time. The setting will consist of 2 steps:
Setting the current clock;
- Setting the cooking menu and time.
Example: Now it is 12:30 clock, if you hope that the microwave oven will automatically start cooking with 100P microwave power for 9 minutes and 30 seconds at 14:20 Steps Display 1 After power-up, the colon flashes : 1.1 Press Preset. Clock button 00:00 1.2 Set hours by turning Auto Cooking/ Time. Weight knob 12:00 1.3 Press Preset. Clock button again to confirm hours 12:00 1.4 Set minutes by turning Auto Cooking/ Time. Weight knob 12:30 1.5 Press Preset. Clock button once or waiting for 5 seconds, and the numbers will go steady. 12:30 2 Set the cooking menu and time 2.1 Select cooking power by pressing Micro Power button 100P 2.2 Turn Auto Cooking/ Time. Weight knob to set cooking time 9:30 2.3 Press and hold Preset. Clock button for 3 seconds to return to current clock. 3 Set the time you expect to start. Repeat the steps of 1.2, 1.3, 1.4 4 Press Preset. Clock button to confirm the delayed menu. Now the program has been activated. And the menu will be started at 14:20. 5 You may check the preset starting time by pressing Preset. Clock button.
11. MULTI-SEQUENCE COOKING
To obtain best cooking result, some recipes call for different cook mode and time. You may program your personalized menu as follow:
Example: You want cook food with 100P microwave for 3 minutes then 20P for 9 minutes. This is 2 sequence setting. Steps Display 1 100P microwave for 3min 1.1 Press Micro Power button to select power level. 100P 1.2 Turn Auto Cooking/ Time. Weight knob to set cooking time. 3:00 2 20P for 9min 2.1 Press Micro Power button to select desired menu 20P 2.2 Turn Auto Cooking/ Time. Weight knob to set cooking time. 9:00 3 Start cooking by pressing Instant. Start
CAUTION
a. When 100 microwave power cooking is finished, microwave oven will begin next operation automatically.
b. Max 4 sequences can be set per time, repeat the steps.
12. CHILD LOCK FUNCTION
Use this feature to lock the control panel when you are cleaning or so that children can not use the oven unsupervised. All the buttons are rendered inoperable in this mode.
Set child lock---Hold Stop/Clear button about 3 seconds.
Cancel child lock---Hold Stop/Clear button about 3 seconds.
UTENSILS GUIDELINE
It is strongly recommended to use the containers which are suitable and safe for microwave cooking. Generally speaking, the containers which are made of heat-resistant ceramic, glass or plastic are suitable for microwave cooking. Never use the metal containers for microwave cooking and combination cooking as spark is likely to occur. You can take the reference of below table.
Material of container Microwave Notes Heat-resistant Yes Never use the ceramics which are decorated with metal rim or glazed ceramic Heat-resistant plastic Yes Can not be used for long time microwave cooking Heat-resistant glass Yes Grill rack No Plastic film Yes It should not be us ed when cooking meat or chops as the over-temperature may do damage to the film
COOKING TIPS
The following factors may affect the cooking result:
Food arrangement
Place thicker areas towards outside of dish, the thinner part towards the centre and spread it evenly. Do not overlap if possible.
Cooking time length
Start cooking with a short time setting, evaluate it after it times out and extend it according to the actual need. Over cooking may result in smoke and burns.
Cooking food evenly
Food such as chicken, hamburger or steak should be turned once during cooking.
Depending on the type of food, if applicable, stir it from outside to centre of dish once or twice during cooking
Allow standing time
After cooking times out, leave the food in the oven for an adequate length of time, this allows it to complete its cooking cycle and cooling it down in a gradual manner
Whether the food is done
Color and hardness of food help to determine if it is done, these include:
- Steam coming out from all parts of food, not just the edge
- Joints of poultry can be moved easily
- Pork or poultry shows no signs of blood
- Fish is opaque and can be sliced easily with a fork
Browning dish
When using a browning dish or self-heating container, always place a heat-resistant insulator such as a porcelain plate under it to prevent damage to the turntable and rotating ring.
Microwave safe plastic wrap
When cooking food with high fat content, do not allow the plastic wrap come into contact with food as it may melt
Microwave safe plastic cookware
Some microwave safe plastic cookware might not be suitable for cooking foods with high fat and sugar
content. Also, the preheating time specified in the dish instruction manual must not be exceeded.
MAINTENANCE
Please check the following before calling for services.
1. Place one cup of water (approx. 150ml ) in a glass measure in the oven and close the door securely. Oven lamp should go off if the door is closed properly. Let the oven work for 1 min.
2.Does the oven lamp light?
3.Does the cooling fan work? (Put your hand over the rear ventilation openings.)
4.Does the turntable rotate? (The turntable can rotate clockwise or counter clockwise. This is quite normal.)
5.Is the water inside the oven hot?
If "NO" is the answer to any of the above questions, please check your wall socket and the fuse in your meter box.
If both the wall socket and the fuse are functioning properly, CONTACT YOUR NEAREST SERVICE CENTER APPROVED.
SEERRVVIICCIINNGG SSAAFFEEGGUUAARRDDSS
Caution: MICROWAVE RADIATION
1. The high voltage capacitor remains charge after disconnection; short the negative terminal of H.V capacitor to the oven chassis (use a screwdriver) to discharge before touching.
2. During servicing below listed parts are liable to be removed and give access to potentials above 250V to earth.
- Magnetron
High voltage transformer
- High voltage capacitor
High voltage diode
High voltage fuse
3. The following conditions may cause undue microwave exposure during servicing.
Improper fitting of magnetron;
Improper matching of door interlock, door hinge and door;
Improper fitting of switch support;
Door, door seal or enclosure has been damaged.
CORRECT DISPOSAL OF THIS PRODUCT European directive 2012/19/EU on Waste from Electrical and Electronic Equipment (WEEE), requires that used household appliances are not thrown into the normal municipal waste stream. Used appliances must be collected separately in order to optimize the rate of recovery and recycling of materials that compose them, and to reduce the impact on human health and on the environment. The crossed bin symbol is affixed to all the products to remind you of the obligations of separated collection.
We decline liability for any damage or accident derived from any use of this product which is not in conformity with the instructions contained in this booklet.
In accordance with Article L. 217 of the Consumer Code, your product benefits from a legal guarantee of conformity of 2 years.
To contact our After-Sales Service, before going to your BUT store, call 09 78 97 97 97
Monday to Friday from 9:00 am to 19:00 pm Saturday from 9:00 am to 18:00 pm (local call price).

LE TRI

FACILE


Séparez les éléments avant de trier
BUT INTERNATIONAL
1 Avenue Spinoza
77184 Emerainville, France
FOUR À MICRO-ONDES
MO-21BROOKTABLE DES MATIERES
1. CONSIGNE DE SECURITE -3- 2. INSTALLATION -15- 3. NETTOYAGE ET ENTRETIEN -16- 4.DESCRIPTION DU MICRO-ONDES -17- 5.DESCRIPTION DU PANNEAU DE CONTROLE -18- 6.GUIDESUSTENSILES -27- 7. CONSEILS DE CUISSON -28- 8. ENTRETIEN -30- 9. L'ENTRETIEN DES DISPOSITIFS DE PROTECTION -30 -   Séparez les éléments avant de trier  CET APPAREIL EST DESTINE A UN USAGE DOMESTIQUE UNIQUEMENT! Veuillez dire attentivement toutes les instructions avant la première utilisation et conServez-les pour une reference ulterieure.INSTRUCTIONS DE SECURITE IMPORTANTES LIRE AVEC ATTENTION ET A CONSERVER EN VUE DE REFERENCE FUTURE
L'utilisation d'un apparéil électrique doit toujours se faire dans le respect des règles de sécurité élémentaires suivantes : 1)Lisez l'ensemble des instructions avant utilisation. 2) Vérifiez que la tension des prises de votre domicile correspond à cette indiquée sur la plaque signalétique de l'appareil, et que la prise est bien reliée à la terre. 3) Afin de réduire tout risque d'incendie à l'intérieur du four : a) Ne faites pas trop cuire les aliments. b) Retirez toutes les attaches métalliques des sacs en papier ou en plastique avant de lesmettre au four. c) N'utilisez pas le four pour chauffer de l'huile ou de laGRAISSÉ à frIRE,car la température de l'huile ne peut pas être contrôlée. d) Àprousutilisation, essuyez le boitier du guide à ondes à l'aide d'un chiffon humide, puis à l'aide d'un chiffon sec afin de retarder toute éclaboussure d'aliments ou de graisse. Toute accumulation de graisse est susceptible d'entrainer une surchauffe et une émission de fumée ou un début d'incendie. e) Si des matériaux à l'intérieur du four fument ou prennant feu, maintenez la porte du four fermée, mettez le four hors tension et débranchez-le de l'alimentation électrique. f) Pendant le chauffage de denrées alimentaires dans des recipiens en plastique ou en papier, garder un oeil sur le four en raison de la possibilité d'inflammation. 4) Afin de réduire tout risque d'explosion ou d'ébullition soudaine : a) MISE EN GARDE: Les liquides et autres denrées alimentaires ne doivent pas être chauffés dans des recipients fermés hermétiquement car ils risquent d'exploser. Les biberons fermés avec leur bouchon ou la tétine sont considérés comme des recipients fermés hermétiquement. b) Afin d'éviter tout danger eventuel occasionné par un jaillissement brusque et différé de liquide en ébullition, utilisez un contenant à large ouverture pour faire chauffer du liquide, et ne retirez pas immédiatement le liquide chaud. Patientez quelques instants avant de le retarder. c) Les pommes de terre, les saucisses et les châtaignes doivent être épluchées ou percées avant la cuisson. Il convient de ne pas chauffer les øefs dans leur coquille et les øefs durs entiers dans un four à micro-ondes, dans la mesure où ils peuvent exploser, même après la fin de cuisson. d) Le contenu des biberons et des pots d'aliments pour bébé doit être remué ou agité et la température doit être vérifiée avant consommation, de façon à éviter les brûlures. 5) Si le cable d'alimentation est endommagé, il doit être remplace par le fabricant, son service après vente ou des personnes de qualification similaire afin d'éviter un danger. 6) ÀpRES la cuisson, le contenant est très chaud. Utilisez des gants pour retarder les aliments, et évitez tout risque de brûlures dues à la vapeur en dirigeant la vapeur loin de votre visage et de vos mains. 7) Soulevez doucement le bord le plus éloigné du couvercle des plats et des emballages en plastique allant au micro-ondes, et ouvrez avec précautions le pop-corn et les sacs de cuisson au four, à l'écart de votre visage. 8) Afin de prévenir tout risque de casse du plateau tournant : a. laissez le plateau tournant refroidir avant de le nettoyer, b. ne pas placer d'aliments ou d'ustensiles chauds sur le plateau tournant froid, c. ne pas placer d'aliments ou d'ustensiles congelez sur le plateau tournant chaud. 9) Assurez-vous que les ustensiles ne risquent pas de toucher les parois interieures du four au cours de la cuisson. 10) Utiliser uniquement des ustensiles appropriés à l'usage dans les jours à micro-ondes. 11) N'utilisez pas le four pour ranger des aliments ou qu'elles autres objet que ce soit. 12) Ne faites jamais fonctionner le four à vide. Cela endommagerait le four. 13) Lorsque l'appareil est utilisé en mode combinaison, les enfants ne peuvent utiliser le four que sous la surveillance d'unadulte, en raison des températures générées. 14) Tout accessoire non recommendé par le fabricant est susceptible d'entrainer des blessures corporelles. 15) Ne pas utiliser le four à l'extérieur. 16) Conserve les prsentes instructions. 17) MISE EN GARDE: Si la porte ou les joints deporte sont endommages, le four ne doit pas'être mis en fonctionnement avant d'avoir eté réparé par une personne compétente. 18) MISE EN GARDE: Il est dangereux pour quiconque autre qu'une personne compétente d'effectuer des opérations de maintenance ou de réparation entraînant le retrait d'un couvercle qui protège de l'exposition à l'énergie micro-ondes. 19) Si de la fumée apparait, arrêtier ou débrancher le four et garder la porte fermée pour étouffer les flammes eventuelles. 20) Le chauffage des boissons par micro-ondes peut provoquer un jaillissement brusque et différé de liquide en ébullition. Pour cette raison, des précautions doivent être prises lors de la manipulation des recipients. 21) Ne pas utiliser de produits de nettoyage abrasifs ou de grattoirs métalliques durs pour nettoyer la porte en verre du four, car ils sont susceptibles de rayer la surface et d'entrainer l'éclatement du verre. 22) La lampe du four à micro-ondes ne convient pas pour d'autres usages. 23) Cet apparéil n'est pas destiné à être mis en fonctionnement au moyen d'une minutes extérieure ou par un système de commande à distance séparé. 24) Cet apparéil est destiné à être utilisé dans des applications domestiques et analogues telles que: - des coins cuisines réservés au personnel dans des magasins, bureaux et autres environnementes professionnelles; - des fermes; - l'utilisation par les clients des hotels, motels et autres environnementés à caractère résidentiel; - des environnementés du type chambres d'hotes. 25) Le four à micro-ondes est prévu pour chauffer des denrées alimentaires et des boissons. Le séchage de denrées alimentaires ou de linge et le chauffage de coussins chauffants, pantoufles, éponges, linge humide et autres articles similaires peuvent entrainer des risques de blessures, d'inflammation ou de feu. 26) Cet apparéil peut être utilisé par des enfants à partir de 8 ans et plus et par des personnes ayant des capacité physiques, sensorielles ou mentales réduites ou un manque d'expérience et de connaissances à condition qu'elles aient reçu une supervision ou des instructions concernant l'utilisation de l' apparéil en toute sécurité et qu'elles comprehennent les dangers encourus. Les enfants ne doivent pas jouer avec l'appareil. Le nettoyage et l'entretien par l'usage ne doit pas etre effectués par des enfants, sauf sils ont plus de 8 ans et qu'ils sont surveillés. Maintenir l'appareil et son cordon hors de portée des enfants de moins de 8 ans. 27) L'appareil ne doit pas etre nettoyé à l'aide d'un nettoyeur vapeur. 28) La porte et la surface extérieure sont susceptibles de revenir chaudes pendant le fonctionnement de l'appareil. 29) AVERTISSEMENT : Les parties accessibles sont susceptibles de.devenir chaudes au cours de l'utilisation. Les jeunes enfants doivent etremaintenus à l'écart. 30)L'appareil devient chaud lors de son utilisation. Faites attention à ne pas toucher les éléments chauffants à l'intérieur du four. 31) Les surfaces sont susceptibles de devenir chaudes lors de l'utilisation.  : ATTENTION : SURFACE CHAude 32) Débranche l'appareil avant de le nettoyer. 33) Le boîtier du guide d'ondes ne doit pas être retirené. 34) En ce qui concerne les informations détaillées sur la manière de nettoyer les joints de portes, les cavités et parties adjacentes, référez- vous à la section "NETTOYAGE ET ENTRETIEN". 35) Afin d'assurer une aération suffisante, la distance entre l'arrière du micro-ondes et le mur doit être d'au moins 10 cm, la distance entre les côtés et le mur doit être d'au moins 5 cm, et l'espace libre au-dessus de la surface supérieure doit être d'au moins 20 cm. 36) Les recipients métalliques contenant des aliments ou des boissons ne sont pas adress pour la cuisson micro-ondes. 37) Il convient de nettoyer le four régulièrement et d'enlever tout dépôt alimentaire. 38) Si le four n'est pas maintainu dans un bon etat de propre, sa surface peut se dégrader, ce qui peut afferter défavorablement la durée de vie de l'appareil et eventuellesment conduire à une situation dangereuse. 39) Le four à micro-ondes ne peut être utilisé que de façon indépendante et ne doit pas être placé dans un placard. 40) Cet apparéil est destiné à un usage domestique uniquement! 41) Groupe 2 Appareil de classe B Groupe 2 Équipements ISM : le groupe 2 compend tous les équipements ISM dans lesquels de l'énergie radiofréquence est intentionnellement généree et/ou utilisée sous forme de rayonnement électromagnétique pour le traitement de matériaux, ainsi que les équipements d'électroérosion et de soudage à l'arc. Les équipements de classe B sont des équipements adaptés à une utilisation dans les établissements domestiques et dans les établissements directement connectés à un réseau d'alimentation électrique à basse tension qui alimente des batiments utilisés à des fins domestiques. 42) La source lumineuse interne de ce produit est une LED de < 60 lm. 43) " Pour être conforme à la norme EN 61000-3-11, le produit doit être connecté uniquement à une alimentation dont l'impédance correspond à celle du système : Zsys = 0,40089 ohms ou moins. Avant de connecter le produit au réseau électrique public, veuillez consulter votre fournisseur local d'électricité afin de vous assurer que le réseau électrique répond aux exigences ci-dessus." 44) Le four à micro-ondes est destiné à être installé librement. 45) l'appareil ne doit pas etre place dans un meuble. Specifications| Modèle: | MO-21BROOK |
| Alimentation électrique: | 230V~ |
| Puisance absorbée(Micro-ondes): | 1150W |
| Puisance restituée(Micro-ondes): | 700W |
| Capacité du four: | 20L |
| Diamètre du plateau toucant: | 24.5cm |
| Dimensions du produit: | 45.1*34.8*25.8cm |
| Poids net: | 10.2kg |
INSTALLATION
1. Enlevez tous les emballages. S'il y a une pellicule sécuritaire au-dessus du four, arrachez-la avant de l'utiliser. Vérifiez soigneusement s'il n'y a pas de dommages. S'il y a lieu, avertir immédiatement le concessionnaire ou l'envoyer au centre de service du fabricant. 2. Les jours à micro-ondes doivent être placés dans un environnement sec et non corrosif, à l'abri de la chaleur et de l'humidité, comme un brûleur à gaz ou un réservoir d'eau. 3. Pour assurer une ventilation suffisante, la distance entre le dos du micro-onde et le mur doit être d'au moins 10 cm, le côté du mur doit être d'au moins 5 cm, la distance libre au-dessus de la surface supérieure d'au moins 20 cm. la distance entre le micro-ondes et le sol doit être d'au moins 85 cm. 4. L'emplacement du four doit etre tel qu'il soit eloiigné de la télévision, de la radio ou de l'antenne en tant que perturbation de I'image. 5. L'appareil doit être positionné de façon à ce que la fiche soit accessible, et doit assurer une bonne mise à la terre en cas de fuite, une boucle de terre peut être formée pour éviter les chocs électriques. 6. Le four à micro-ondes doit fonctionner avec la porte fermée. 7. Le four à micro-ondes ne doit pas être placé dans une armoire. Le four à micro-ondes est destiné à être utilisé seul. 8. Comme il y a des résidus de fabrication ou de l'huile est resté sur la cavité du four ou de l'élement de chaleur, il serait généralement l'odeur, même une légère fumée, il est normal et ne se produit pas après plusieurs fois l'utilisation, garder la porte ou la fenêtre ouverte pour assurer une bonne ventilation. Il est donc fortement recommandé de mettre le four en mode grill et de le faire fonctionner à sec plusieurs fois. ATTENTION
Le four devrait être nettoyé régulièrement et tout dépôt de nourriture devrait être enlevé. AVERTISSEMENT
1. Retirez le cordon d'alimentation de la prise murale avant le nettoyage. Ne pas immerger l'appareil dans l'eau ou d'autres liquides lors du nettoyage. 2. Le fait de ne pasmaintenir le four dans un état de propre pourrait entrainer une détérioration de la surface, ce qui pourrait nuire à la durée de vie de l'appareil et eventuèlement entrainer une situation dangereuse. 3. N'utilisez jamais de détergent dur, d'essence, de poudre abrasive ou de Brosse métallique pour nettoyer une partie quelconque de l'appareil. 4. N'enlevez pas le couvercle du guide d'ondes. 5. Lorsque le four à micro-ondes a été utilisé pendant une longue période, il peut y avoir des odeurs étranges dans le four, en suivant 3 méthodes peuvent s'en débarrasser : a. Placer plusieurs tranches de citron dans une tasse, puis chauffer à puissance micro elevée pendant 2-3 min. b. Placer une tasse de thé rouge dans le four, puis chauffer à puissance micro évée. c. Mettre un peu d'écorce d'orange au four, puis les chauffer à puissance micro évée pendant 1 minute. 6. AVERTISSEMENT: Ne permettre aux enfants d'utiliser le four sans surveillance que lorsque des instructions adéquates ont ete都认为 aifen que I'enfant soit en mesure d'utiliser le four en toute sécurité et qu'il comprenne les dangers d'une utilisation incorrecte.ASTUCES DE NETTOYAGE
Détails pour le nettoyage des joints de porte, de la cavité et des parties adjacentes : Exterieur : Essuyez l'extérieur avec un chiffon doux humide Porte : À l'aide d'un chiffon doux humidifié, nettoyez la porte et la fenêtre Essuyez les joints de la porte et les parties adjacentes pour-retirer toute projection ou élaboussure Essuyez le panneau de contrôle avec un chiffon doux légèrement humide Murs intérieurs : Nettoyer les surfaces interieures à l'aide d'un chiffon doux humidifié Essuyez le couvercle du guide d'ondes pour retarder toute projection d'aliments Plateau tournant / anneau rotatif / axe de rotation : Lavez avec de l'eau savonneuse Rincez à l'eau claire et laissez sécher complètement  1) Porto La porte du four à micro-ondes doit être correctement fermée pour qu'elle puisse fonctionner. 2) Fenêtre de visualisation Permet à l'utilisateur de voir l'etat de la cuisson. 3) Axe de rotation La table tournante en verre repose sur l'axe; le moteur en dessous entraine la table tournante pour qu'elle tourne. 4) Bague tournante La table tournante en verre repose sur ses roues; elle soutient la table tournante et l'aide à s'équilibrer lors de la rotation. 5) Plateau tournant L'aliment est posé sur la table tournante, sa rotation pendant le fonctionnement permet de cuire les aliments uniformément. ATTENTION: - Placer la bague tournante en premier - Monter la table tournante sur l'axe de rotation et s'assurer qu'elle est correctement positionnée. 6) Panneau de contrôle Voir ci-dessous en détaill (le panneau de contrôle est sujet à changement sans préavis). 7) Couvercle du guide d'ondes Il se trouve à l'intérieur du four à micro-ondes, à côté du mur du panneau de commande. ATTENTION: Ne jamais-retirer le couvercle du guide d'ondesDESCRIPTION DU PANNEAU DE CONTROL
 1. Avant la cuisson La LED clignote 3 fois lorsqu'elle est branchée sur l'alimentation. Puis il clignote " : ", et c'est l'état de voir par défaut. 2. TEMPS/POIDS/BOUTON DE CUISSON AUTOMATIQUE Vous pouvez augmenter ou diminuier la cuisson pendant le fonctionnement en tournant le bouton TEMPS/POIDS/BOUTON DE CUISSON AUTOMATIQUE 3. STOP Appuyez sur le bouton Stop/ Effacer pour annuler le réglage de l'alimentation ou programme de dégivrage. Lorsque vous cuisinez, appuyez une fois pour arrêtier, appuyez deux fois pour annuler le programme. Lorsque vous réinitialisez le programme de cuisson, appuyez sur cette touche pour annuler tous les programmes de réglage précédent. 4. Rappel automatique Lorsque vous la cuisson préreglee est terminée, trois bips sonores sont émis pour vous avertir dePTRir les alimentes. Si vous n'appuyez pas une fois sur le bouton Arrêt ou si vous n'ouvre pas la porte, le signal sonore retentira à chaque intervalle de 3 minutes. 5. Réglage de l'horloge Le bouton d'horloge vous permet d'entrez l'houre actuelle ou prédéfinie lorsque":clignote sur l'affichage LED après avoir eté branché, ou essayez de l'ignoreer pour continuer si cela n'est pas nécessaire. 6. Cuisson au micro-ondes Cette fonction est utilisée pour la cuisson et le chauffage des alimentés. En appuyant sur le bouton Micro-puissance, la LED affichera 100P - 80P - 60P - 60P - 40P - 20P.| Exemple: pour régler 12:30 | ||
| Etapes Voyant | ||
| 1 | Après la mise sous tension, le « : » clignote | |
| 2 | Appuyez une fois sur le boutonPrérégliages/Horloge | 00:00 |
| 3 | Tournez le bouton TEMPS/POIDS/BOUTONDE CUISSON AUTOMATIQUE pour réglerles heures exactes. | 12:00 |
| 4 | Appuyez sur le boutonPrérégliages/Horloge une fois de plus. | 12:00 |
| 5 | Appuyez sur le bouton Prérégliages/Horlogeune fois de plus ou attendez 5 secondes, etles chiffres iront régulièrement. | 12:30 |
| 6 | Press Preset. Clock button once again orwait for 5 seconds, and the numbers willgo steadily. | |
| High power | 100% puissance micro-ondes. Applicable pour une cuisson rapide et complète |
| Medium High power | 80% de puissance micro-ondes. Applicable pour la cuisson express moyenne. |
| Medium power | 60% de puissance micro-ondes. Applicable pour les aliments cuits à la vapeur |
| Medium Low power | 40% de puissance micro-ondes. Applicable pour la décongélation des aliments |
| Low power | 20% de puissance micro-ondes. Applicable pour garder au chaud |
ATTENTION
a. La durée maximale pouvant être régée est de 60 minutes. b. Ne jamais faire fonctionner le four à vide. c. À la puissance maximale des micro-ondes, le four abaisse automatiquement la puissance après un certain temps de cuisson pour prolonger la durée de vie. d.Si vous tournez les alimentents pendant le fonctionnement, appuyez une fois sur le bouton Départ immédiat et la procédure de cuisson pré réglée se poursuivra. e. Si vous avez l'intention dePTRirer l'aliment avant I'heure preréglee, vous devez appuyer une fois sur le bouton Arrêt pour effacer la procédure preréglee afin d'eviter une utilisation involontaire de I'heure suivante.| Exemple : Pour cuire en mode 80P pendant 10 minutes. | ||
| Etapes Affichage | ||
| 1Après la mise sous tension, le signal clignote. : | ||
| 2 | Sélectionnez la puissance micro-ondes désirée en appuyant consécutivement sur le bouton Micro Power. | 80P |
| 3 | Régler le temps de cuisson en tournant le bouton 10 : 00 | |
| 4 | Appuyez sur le bouton Départ immédiat pour démarrer et la LED compte à rebours pour indiquer le temps de fonctionnement. | |
7. Cuisson expresse
Appuyez sur le bouton Rapide. L'écran LED affichera 0:30, 1:00, 1:00, 1:30. Cette fonction vous permettra deCHAuffer une tasse d'eau ou de boisson de façon pratique, en omettant les etapes de réglage du temps. Choiser le bon réglage en fonction de la boisson. Exemple : Pour cuire en mode express pendant 1 minute.| Étapes Affichage | ||
| 1Après la mise sous tension, deux points clignotent. : | ||
| 2 | Appuyez consécutivement sur le bouton Rapide pour sélectionner le menu désiré. | 1:00 |
| 3 | Commencez la cuisson en appuyant sur la toucheDépart immédiat. | |
8. Décongélation
Cette fonction est utilisé pour décongeler les aliments. Appuyez sur le bouton de dégivrage et l'écran LED affichera d.1-d.2-d.2-d.3.| d.1 Pour la décongeler de la viande dont le poids varie de 0,1 à 2,0 kg. |
| d.2 Pour décongeler la volaille dont le poids varie de 0,2 à 3,0 kg. |
| d.3 Pour la décongeler des fruits de mer dont le poids varie de 0,1 à 0,9 kg. |
ATTENTION:
a. Il est nécessaire de returner la nourriture pendant la décongélation pour obtenir un effet uniforme. b. Habituellesment, la décongélation prendra plus de temps que la cuisson des alimentés. c. Si l'aliment peut être coupé au couteau, le processus de décongélation peut être considéré comme terminé. d. Les micro-ondes pénétrent environ 4 cm dans la plupart des gliments. e. Les alimentés décongelés devraient être consommés le plus tout possible, il n'est pas conseillé de les remettre au réfrigérateur et de les congeler à nouveau. Exemple : Décongeler 0.4kg de volaille| Étapes Affichage | ||
| 1Après la mise sous tension, les deux points clignotent. : | ||
| 2 | Appuyez sur le bouton de dégivrage pour régler le type de nourriture. | d.2 |
| 3 | Tournez le bouton Cuisson Auto/ Temps Poids pour régler le poids à décongeler. | 0.4 |
| 4 | Commencez la cuisson en appuyant sur Départ immédiat | |
| 5 | A mi-parcours du dégivrage, 3 bips sonores seront entendus deux fois pour vous demander de returner les aliments. Ouvrez la porte et returnez la nourriture. Alors fermez la porte. Appuyez sur Instantané. Bouton de redémarrage pour continuer le dégivrage. | |
9. Cuisson automatique
Le four dispose d'un menu de cuisson par défaut pour une utilisation simple. Lorsque la LED clignote deux points, Tournez le bouton Temps/Poids/Témpérature/Cuisson Automatique, la LED s'allume automatiquement, cycle pour afficher A.1, A.2......A.8
Choisissez le menu approprié en fonction du type et du poids de l'aliment et observez strictement les indications du tableau ci-dessous, sinon l'effet de cuisson sera largement influencé.| Affichage A | Iments Méthode |
| A.1 Popcorn | |
| A.2 Popcorn | Identique à A.1 sauf 100g de poids |
| A.3 Pizza | |
| A.4 Boisson | |
| A.5 Boisson | |
| A.6 Pommes | de terre Cuire les lamelles de pommes de terre en 5 mm de largeur et de hauteur. Le poids total est d'environ 450g. Placez les lamelles sur un grand plat et couvre le plat avec un film mince pour éviter les pertes d'eau. |
| A.7 Pommes | de terre Identique à A.6 sauf que le poids des lamelles de pomme de terre est d'environ 650g |
| A.8 Poisson |
Attention :
a. La température des aliments avant la cuisson serait de 20 - 25^ . Une température plus élevée ou plus basse de l'aliment avant la cuisson nécessiterait une augmentation ou une diminution du temps de cuisson. b. La température, le poids et la forme des alimentents auront une grande influence sur l'effet de cuisson. Si vous constatéz un écart par rapport au facteur indiqué dans le menu ci-dessus, vous pouvez ajuster le temps de cuisson pour obtenir le meilleur résultat. Exemple: 0.45kg poisson à la vapeur.| Etapes Affichage | ||
| 1 A près la mise sous tension, le symbole clignote : | ||
| 2 | Tournez le bouton Temps/Poids/Témpérature/Cuisson Automatique pour désirir le menu automatique. | A.8 |
| 3 | Commencez la cuisson en appuyant sur la touche Départ immédiat pour confirmer, et la LED comptera à rebours pour afficher le temps de fonctionnement. | |
10. DEMARRAGE AUTOMATIQUE (FONCTION RETARDEMENT)
Si vous ne foulez pas que le menu soit démarré immédiatement, vous pouvez pré régler le menu et l'heure de cuisson et le menu pré régle sera automatiquement démarré à l'heure programmée. Le réglage se compose de 2 étapes : - Réglage de l'horloge actuelle; - Réglage du menu et de l'heure de cuisson.| Exemple : Il est 12:30, si vous espérez que le four à micro-ondes commencera automatiquement la cuisson avec 100P puissance micro-ondes pendant 9 minutes et 30 secondes à 14:20 : | ||
| Etapes Affichage | ||
| 1Après | la mise sous tension, le symbole clignote | 00:00 |
| 1.1 | Appuyez et maintenez enforcé le bouton Préréglage du temps, l'heure commence à clignoter. | : |
| 1.2 | Régler les heures en tournant le bouton de cuisson Temps/Poids/Cuisson Automatique | 12 :00 |
| 1.3 | Appuyez de nouveau sur la touche Préréglage du temps pour confirmer les heures. | 12 :00 |
| 1.4 | Réglez les minutes en tournant le bouton de cuisson Temps/Poids/Cuisson Automatique | 12 :30 |
| 1.5 | Appuyez une fois sur le bouton Préréglage du temps ou attendez 5 secondes, et les chiffres se stabiliseront. | 12 :30 |
| 2 Régler le menu et l'heure de cuisson | ||
| 2.1 | Sélectionner la puissance de cuisson en appuyant sur le bouton Micro-puissance. | 100P |
| 2.2 | Tournez le bouton de cuisson Temps/Poids/Cuisson Automatique pour régler le temps de cuisson. | 9 :30 |
| 2.3 | Appuyez sur le bouton Préréglage du temps et maintenez-le,enforcé pendant 3 secondes pour revenir à l'horloge actuelle. | |
| 3 | Définissez l'heure à laquelle vous vous attendez à commencer. Répétez les étapes 1.2, 1.3, 1.4. | |
| 4 | Appuyez sur la touche Préréglage du temps pour confirmer le menu retardé. Le programme est maintainant activé. Et le menu commencera à 14:20. | |
| 5 | Vouss pouvez vérifier l'heure de départ préréglée en appuyant sur le bouton Préréglage du temps. | |
11. CUISSON MULTISEQUENCE
Pour obtenir le meilleur résultat de cuisson, certaines recettes nécessitant des modes et des temps de cuisson différents. Vous pouvez programmerer votre menu personnelisé comme suit :| Exemple : Vous foulez cuire les aliments au micro-ondes 100P pendant 3 minutes puis 20P pendant 9 minutes. Il s'agit de 2 régles de séquence. | ||
| Etapes Affichage | ||
| 1 100P micro-ondes pendant 3min. | ||
| 1.1 | Appuyez sur le bouton Micro-puissance pour sélectionner le niveau de puissance. | 100P |
| 1.2 | Tournez le bouton de cuisson Temps/Poids/Cuisson Automatique pour régler le temps de cuisson. | 3 :00 |
| 2 | Tournez le bouton de cuisson Temps/Poids/Cuisson Automatique pour régler le temps de cuisson. | |
| 2.1 | Appuyez sur le bouton Micro-puissance pour sélectionner le niveau de puissance désiré. | 20P |
| 2.2 | Tournez le bouton de cuisson Temps/Poids/Cuisson Automatique pour régler le temps de cuisson. | 9 :00 |
| 3 | Commencer la cuisson en appuyant sur Départ immédiat. | |
Attention :
a. Lorsque la cuisson au micro-ondes 100 est terminée, le four a micro-ondes redémarre automatiquement. b. Un maximum de 4 séquences peuvent être définies par temps, répétez les étapes.12. FONCTION DE VERROUILAGE POUR LES ENFANTS
Utilisez cette fonction pour verrouiller le panneau de commande lorsqu vous nettoyez ou pour que les enfants ne puissant pas utiliser le four sans surveillance. Tous les boutons sont rendus inutilisables dans ce mode. Régler le verrou pour enfants---Appuyez sur le bouton Stop pendant environ 3 secondes. Annuler le verrou pour enfants---Appuyez sur le bouton Stop pendant environ 3 secondes.GUIDE DES USTENSILES
Il est fortement recommandé d'utiliser des recipients appropriés et surs pour la cuisson au micro-ondes. En règle générale, les recipients en céramique, en verre ou en plastique résistant à la chaleur conviennent à la cuisson au micro-ondes. N'utilisez jamais les recipients métalliques pour la cuisson au micro-ondes et la cuisson combinée, car il est probable qu'il y ait des étincelles. Vous pouvez prendre les références du tableau ci-dessous.| Matériau du réseau | Micro-ondes | Remarques |
| Céramique résistant à la chaleur | Oui | Ne jamais utiliser de céramique décorée d'un liséré métallique ou vernie |
| Plastique résistant à la chaleur | Oui | Ne peut pas être utilisé pour une cuisson prolongée au micro-ondes |
| Verre résistant à la chaleur | Oui | |
| Grille de cuisson Non | ||
| Film plastique | Oui | Ne doit pas être utilisé lors de la cuisson de viande ou de côtelettes, car la température trop élevé pourrait endommager le film. |
CONSEILS DE CUISSON
Les facteurs suivants peuvent affecter le résultat de cuisson :Arrangement des aliments
Placez les zones les plus épaisses vers l'extérieur du plat, la partie la plus fine vers le centre et étalez-la uniformément. Ne pas faire chevaucher si possible.Durée de cuisson
Commencer la cuisson avec un réglage court, l'évaluer après le temps de cuisson et l'étendre en fonction des besoin réels. La surcuisson peut provoquer de la fumée et des brûlures.Cuisson uniforme des aliments
Les aliments comme le poulet, le hamburger ou les steaks devraient être returnés une fois pendant la cuisson. Selon le type d'aliment, s'il y a lieu, remuer de l'extérieur vers le centre du plat une ou deux fois pendant la cuisson. Prévoir un temps d'attente après le temps de cuisson, laisser les aliments dans le four pendant une durée ajustate, ce qui lui permet de terminer son cycle de cuisson et de les refroidir progressivement.Si la vande est cuite
La couleur et la durée des alimentés aident à déterminer si c'est fait, y compris : La vapeur s'échappe de toutes les parties de l'aliment, pas seulement le bord. Les articulations de la volaille peuvent etre déplacées facilement. Le porc ou la volaille ne presente aucun signe de sang. Le poisson est opaque et peut être tranché facilement à la fourchette.Platà rissoler
Lorsque vous utilisez un plat brunissant ou un recipient autochauffant, placez toujours un isolant résistant à la chaleur, comme une plaque de porcelaine, afin d'eviter d'endommager le plateau tournant et l'anneau rotatif.Enveloppe plastique résistante aux micro-ondes
Lors de la cuisson d'aliments à force teneur en matières grasses, ne laissez pas la pellicule plastique entre en contact avec les aliments, car elle pourrait fondre.Batterie de cuisine en plastique résistante aux micro-ondes
Certainustensilesdecuissonenplastique sansdanger pourle micro-ondespeuventnepasconveniràla cuissond'alimentsriches en matieres grasses et en sucre.Deplus,le temps de prechauffage specifie dans le mode d'emploi ne doit pasetre dépassé.ENTRETIEN
Veuillez vérifier les points suivants avant d'appeler les services. 1. Placez une tasse d'eau (environ 150 ml) dans une mesure en verre dans le four et fermez la porte en toute sécurité. La lampe du four devrait s'eteindre si la porte est correctement fermée. Laisser agir le four pendant 1 min. 2. La lampe du four s'allume-t-elle? 3. Le ventilateur de refroidissement fonctionne-t-il? (Placez votre main sur les ouvertures de ventilation arriere.) 4. La platine tourne-t-elle? (La table tournante peut tourner dans le sens des aiguilles d'une montre ou dans le sens inverse des aiguilles d'une montre. C'est tout à fait normal. 5. L'eau à l'intérieur du four est-elle chaude? Si "NON" est la réponse à l'une des questions ci-dessus, veuillez vérifier votre prise murale et le fusible dans la boîte de votre compteur. Si la prise murale et le fusible fonctionnent correctement, CONTACTEZ VOTRE CENTRE DE SERVICE LE PLUS PROCHE APPROVÉ.L'ENTRETIEN DES DISPOSITIFS DE
Attention: RAYONNEMENT MICRO-ONDES 1. Le condensateur haut tension reste charge apres la déconnexion ; court-circuitez la borne négative du condensateur H. V vers le chassis du four (utilisez un tournevis) pour le décharger avant de le toucher. 2. Pendant l'entretien, les piècesénémérées ci-dessous sont susceptibles d'être enlevées et de donner accès à des potentiels supérieurs à 250V à la terre. - Magnétron - Transformateur haute tension - Condensateur haute tension - Diode haute tension - Fusible haute tension 3. Les conditions suivantes peuvent cause une exposition indue aux micro-ondes pendant l'entretien. Mauvais montage du magnétron; Mauvaise adaptation de l'inter verrouillage de porte, de la charnière de porte et de la porte; Montage incorrect du support d'interrupteur ; La porte, le joint de porte ou le boîtier a été endommagé.ENLEVEMENT DES APPAREILS MENAGERS USAGES
 La directive europeenne 2012/19/UE sur les déchets d'équipements électriques et électroniques (DEEE) exige que les apparêls menagers usages ne soient pas jetés dans le flux normal des déchets municipaux.  Les apparèils usages doivent être collectés séparément afin d'optimiser le taux de valorisation et de recyclage des matériaux qui les composent, et de réduire l'impact sur la santé humaine et sur l'environnement. Le symbole de la poubelle barrée est apposé sur tous les produits pour vous rappeler les obligations de collecte sélective. Le fabriquant et le revendeur ne peuvent pas etre tenus responsable de tout accident ou dommage cause par une utilisation impropre de l'appareil, ou si les instructions données dans le present manuel n'ont pas ete respectees. Conformément à l'Article L. 217 du code de la consommation, votre produit bénéficiaie d'une garantie légale de conformité de 2 ans. Pour contacter notre Service ÀpRES-Vente, avant de vous déplacer à votre magasin BUT, appepelez le 09 78 97 97 97 Du lundi au vendredi de 09h00 à 19h00 et le samedi de 09h00 à 18h00 (Prix d'un appel local). SIGN
MICROWAVE OVEN
MO-21BROOK
TABLE OF CONTENTS
1.IMPORTANT SAFEGUARDS -34-
2. INSTALLATION -41-
3. CLEANING -42-
4.PRODUCTINSTRUCTION -44-
5. OPERATION OF CONTROL PANEL 45-
6. UTENSILS GUIDELINE - 54 -
7. COOKING TIPS - 55 -
8.MAINTENANCE -57-

THIS PRODUCT IS FOR HOUSEHOLD USE ONLY!
Please read these instructions carefully before the first use of this product and save this manual for your future reference.
IMPORTANT SAFETY INSTRUCTIONS READ CAREFULLY AND KEEP FOR FUTURE REFERENCE
The following basic precautions should always be followed when using electrical appliance:
1. Read all instructions before using.
2. Make sure the voltage in your living area corresponding to the one shown on the rating label of the appliance. And the wall socket is properly grounded.
3. To reduce the risk of fire in the oven cavity:
a. Do not overcook the food.
b. Remove wire twist -ties from paper or plastic bags before placing bags in the oven.
c. Do not heat oil or fat for deep drying as the temperature of oil cannot be controlled.
d. After use wipe the waveguide cover with a damp cloth, followed by dry cloth to remove any food splashes and grease. Built -up grease may overheat and begin to cause smoke or catch fire.
e. If materials inside the oven should smoke or ignite, keep oven door closed, turn oven off and disconnect the power supply.
f. When heating food in plastic or paper containers, keep an eye on the oven due to the possibility of
ignition.
4. To reduce the risk of explosion and sudden boiling:
a. WARNING: Liquids and other foods must not be heated in sealed container since they are liable to explode; Baby bottles fitted with a screw cap or teat are considered to be sealed containers.
b. Use the wide -mouthed container to cook liquid, and the cooked liquid should not be removed out immediately. Several moments should be waited before removing. In order to avoid possible hazards caused by delayed eruptive boiling of liquids.
c. Potatoes, sausage and chestnut should be peeled or pierced before cooking. Eggs in their shell, whole hard -boiled eggs should not be heated in microwave ovens since they may explode, even after microwave heating has ended.
d. The contents of feeding bottles and baby food jars are to be stirred or shaken and the temperature is to be checked before consumption, in order to avoid burns.
5. If the supply cord is damaged, it must be replaced by the manufacturer or its service agent or a qualified technician in order to avoid a shock hazard.
6. After cooking, the container is very hot. Using gloves to take out the food and avoid steam burns by directing steam away from the face and hands.
7. Slowly lift the furthest edge of dishes cover and microwave plastic wrap and carefully open popcorn and oven cooking bags away from the face.
8. To prevent the turntable from breaking:
a. Let the turntable cool down before cleaning.
b. Do not place hot foods or utensils on the cold turntable.
c. Do not place frozen foods or utensils on the hot turntable.
9. Make sure the utensils do not touch the interior walls during cooking.
10. Only use utensils that are suitable for use in microwave ovens.
11. Do not store food or any other things inside the oven.
12. Do not operate the oven without any liquid or food inside the oven. This would do damage the oven.
13. When the appliance is operated in the combination mode, children should only use the oven under adult supervision due to the temperatures generated.
14. Any accessories not recommended by the manufacturer may cause injuries to persons.
15. Do not use outdoors.
16. Save these instructions.
17. WARNING: If the door or door seals are damaged or the oven is malfunctioned, the oven must not be operated until it has been repaired by a competent person;
18. WARNING: It is hazardous for anyone other than a competent person to carry out any service or repair operation that involves the removal of a cover which gives protection against exposure to microwave energy;
19. If smoke is observed, switch off or unplug the appliance and keep the door closed in order to stifle any flames;
20. Microwave heating of beverages can result in delayed eruptive boiling; therefore care must be taken when handling the container;
21. Do not use harsh abrasive cleaners or sharp metal scrapers to clean the oven door glass since they can scratch the surface, which may result in shattering of the glass.
22. The lamp of microwave oven is not intended for other purposes.
23. The appliances are not intended to be operated by means of an external timer or separate remote-control system.
24. This appliance is intended to be used in household and similar applications, such as:
- Staff kitchen areas in shops, offices and other working environments;
- Farm houses;
- By clients in hotels, motels and other residential environments;
- Bed and breakfast type environments.
25. The microwave oven is intended for heating food and beverages. Drying of food or clothing and heating of warming pads, slippers, sponges, damp cloth and similar may lead to risk of injury, ignition or fire.
26. This appliance can be used by children aged from 8 years and above and persons with reduced physical, sensory or mental capabilities or lack of experience and knowledge if they have been given supervision or instruction concerning use of the appliance in a safe way and understand the hazards involved. Children shall not play with the appliance. Cleaning and user maintenance shall not be made by children without supervision.
27. This appliance is not intended for use by persons (including children) with reduced physical, sensory or
mental capabilities, or lack of experience and knowledge, unless they have been given supervision or instruction concerning use of the appliance by a person responsible for their safety.
28. Children should be supervised to ensure that they do not play with the appliance.
29. The appliance shall not be cleaned with a steam cleaner.
30. The door or the outer surface may get hot when the appliance is operating.
31. WARNING: Accessible parts may become hot during use. Young children should be kept away.
32. During use the appliance becomes hot. Care should be taken to avoid touching heating elements inside the oven.
33. The surfaces are liable to get hot during use.

: CAUTION:HOT SURFACE
34. Unplug the appliance before cleaning.
35. The waveguide cover must not be removed.
36. For details about how to clean the door joints, the cavities and the adjacent parts, please refer to section "CLEANING AND MAINTENANCE".
37. This product is a Group 2 Class B ISM equipment. The definition of Group 2 which contains all ISM (Industrial, Scientific and Medical) equipment in which radio-frequency energy is intentionally generated and/or used in the form of electromagnetic radiation for the treatment of material, and spark erosion equipment. For Class B equipment is equipment suitable for use in domestic establishments and in
establishments directly connected to a low voltage power supply network which supplies buildings used for domestic purpose.
38. To ensure sufficient ventilation, the distance of the back of microwave to the wall should be at least 10cm , the side to the wall should be at least 5cm , the free distance above the top surface at least 20cm .
39. Metallic containers for food and beverages are not allowed during microwave cooking.
40. The oven should be cleaned regularly and any food deposits removed.
41. Failure to maintain the oven in a clean condition could lead to deterioration of the surface that could adversely affect the life of the appliance and possibly result in a hazardous situation.
42. The microwave oven is only used in freestanding, the microwave oven shall not be placed in a cabinet.
43. This product is for household use only!
Group 2 Class B appliance
Group 2 ISM equipment: group 2 contains all ISM equipment in which radio-frequency energy is intentionally generated and/or used in the form of electromagnetic radiation for the treatment of material, and EDM and arc welding equipment.
Class B equipment is equipment suitable for use in domestic establishments and in establishments directly connected to a low voltage power supply network which supplies buildings used for domestic purposes.
44. This product internal light source LED light on < 60lm .
45. "To be in compliance EN 61000-3-11, the product shall be connected only to a supply of the system impedance:
Zsys = 0.40089 ohms or less. Before connect the product to public power network, please consult your local power supply authority to ensure the power network meet above requirement."
Specifications
Model: MO-21BROOK Rated Voltage: 230V~ Rated Input Power(Microwave): 1150W Rated Output Power(Microwave): 700W Oven Capacity: 20L Turntable Diameter: 24.5cm External Dimensions: 45.1*34.8*25.8cm Net Weight: 10.2kg
INSTALLATION
1. Take out all the packing. If there is a safe film over the oven, tear it off before Use. Check carefully for damage. If any, immediately notify dealer or send to the manufacturer's service center.
2. Microwave ovens must be placed under dry and non-corrosiveness environments, kept away from heat and humidity, such as gas burner or water tank.
3. To ensure sufficient ventilation, the distance of the back of microwave to the wall should be at least 10 cm, the side to the wall should be at least 5 cm, the free distance above the top surface at least 20 cm. the distance of the microwave to the ground should be at least 85 cm.
4. The position of the oven shall be such that it is far from the TV, Radio or antenna as picture disturbance. The distance should be more than 5m
5. The appliance must be positioned so that the plug is accessible, and must ensure a good grounding in case leakage, ground loop can be formed to avoid electric shock.
6. The microwave oven must be operated with the door closed.
7. The microwave oven must not be placed in a cabinet. The microwave oven is intended to be used freestanding.
8. As there is manufacturing residue or oil remained on the oven cavity or heat element, it usually would smell the odor, even a slight smoke, It is normal case and would not occur after several times use, keep the door
or window open to ensure good ventilation. So it is strongly recommended to place a cup of water in the turntable, setting at high power and operate for several times.
CLEANING AND MAINTENANCE
CAUTION
The oven should be cleaned regularly and any food deposits removed.
WARNING
1. Remove the power cord from the wall outlet before cleaning. Don't immerse the appliance in water or other fluids when cleaning.
2. Failure to maintain the oven in a clean condition could lead to deterioration of the surface that could adversely affect the life of the appliance and possibly result in a hazardous situation
3. Never use hard detergent, gasoline, abrasive powder or metal brush to clean any part of the appliance
4. Do not remove the waveguide cover
5. When the microwave oven has been used for a long time, there may be some strange odors exist in oven, Following 3 methods can get rid of them:
a. Place several lemon slices in a cup, then heat with high Micro Power for 2-3 min.
b. Place a cup of black tea in oven, then heat with high
micro power.
c. Put some orange peel into oven, and then heat them with high Micro Power for 1 minute.
6. WARNING: Only allow children to use the oven without supervision when adequate instructions have been given so that the child is able to use the oven in a safe way and understands the hazards of improper use;
TIPS FOR CLEANING
Details for cleaning door seals, cavity and adjacent parts:
Exterior:
Wipe the enclosure with a dampened soft cloth
Door:
Using a dampened soft cloth, wipe clean the door and window
Wipe the door seals and adjacent parts to remove any spill or spatter
Wipe the control panel with a slightly dampened soft cloth
Interior walls:
Wipe clean the cavity with a dampened soft cloth
Wipe clean the waveguide cover to remove any food splashed
Turntable/ Rotation ring/ Rotation axis:
Wash with mild soap water
Rinse with clean water and allow drying thoroughly

1) Door lock
Microwave oven door must be properly closed in order for it to operate
2) Viewing window
Allow user to see the cooking status
3) Rotating axis
The glass turntable sits on the axis; the motor underneath it drives the turntable to rotate
4) Rotating ring
The glass turntable sits on its wheels; it supports the turntable and helps it to balance when rotating
5) Turntable
The food sits on the turntable, its rotation during operation helps to cook food evenly

CAUTION
- Place the rotating ring first
- Fit the turntable onto the rotating axis and make sure that it is geared in properly
6) Control panel
See below in details (the control panel is subject to
change without prior notice)
7) Waveguide cover
It is inside the microwave oven, next to the wall of control panel.

WARNING
Never remove the waveguide cover
OPERATION OF CONTROL PANEL

1. BEFORE COOKING
The LED flashes 3 times when plugged in power supply. Then it flashes :, prompting you to input the cooking menu and time.
2. AUTO COOKING/ TIME.WEIGHT KNOB
You can increase or decrease cooking time, weight or choose the auto cooking menu during operation by turning Auto cooking /Time.Weight knob.
3. STOP/CLEAR
At the initial or input stage: press once to cancel input programs and resume initial stage.
During cooking: press once to stop oven operation, press twice to cancel cooking programs.
4. AUTO REMINDER
When your preset cooking procedure have finished, the LED display will show End and three beeps sound will be heard to prompt you to take out food. If you do not press Stop.Clear button once or open the door, the beep will be sounded at an interval of 3 minutes.
5. CLOCK SETTING
Clock button make it available for you to input current or preset time when ".": flashes onto LED display after plugged in, or try to skip it over to continue if unnecessary.
Example: to set 12:30 Steps Display 1 After power-up, the colon flashes : 2 Press Preset. Clock button once 00:00 3 Turn Auto Cooking/ Time. Weight knob to set exact hours. 12:00 4 Press Preset. Clock button once again. 12:00 5 Turn Auto Cooking/ Time. Weight knob to set exact minutes. 12:30 6 Press Preset. Clock button once again or wait for 5 seconds, and the numbers will go steadily.
6. MICROWAVE COOKING
This function is used for cooking and heating food. Pressing Micro Power button, LED cycles to show 100P — 80P — 60P — 40P — 20P.
High power 100% microwave power. Applicable for quick and thorough cooking Medium
High power 80% microwave power. Applicable for medium express cooking Medium
power 60% microwave power. Applicable for steaming food Medium
Low power 40% microwave power. Applicable for defrosting food Low power 20% microwave power. Applicable for keeping warm

CAUTION
a. The max time which can be set is 60 minutes
b. Never operate the oven empty.
c. At the maximum microwave power, the oven will automatically lower the power after a certain time of cooking to lengthen the service life.
d. If you turn the food during operation, press the Instant.Start button once and the preset cooking procedure will continue.
e. If you intend to remove the food before the preset
time, you must press Stop.Clear button once to clear the preset procedure to avoid unintended operation of next time use.
Example: To cook at P80 for 10 minutes. Steps Display Display 1 After power-up, the colon flashes : 2 Select the desired microwave power by pressing Micro Power button consecutively 80P 3 Set cooking time by turning Auto Cooking/Time. Weight knob 10:00 4 Press Instant. Start button to start, and LED will count down to show running time.
7. EXPRESS
Press Express button LED Display will cycle to show 0:30, 1:00, 1:30.
This function will allow you to heat a cup of water or beverage conveniently, omitting the steps of setting time.
Choose the proper time depending on the beverage capacity.
Example: To cook with express for 1 minute Steps Display 1 After power-up, the colon flashes 2 Press Express button consecutively to select desired menu 1:00 3 Start cooking by pressing Instant/Start button
8. DEFROST
This function use for defrost food. Press the Defrost button and the LED display will cycle to show d.1-d.2-d.3.
d.1 For defrosting meat, the weight range from 0.1 to 2.0 kg. d.2 For defrosting poultry, the weight range from 0.2 to 3.0kg. d.3 For defrosting seafood, the weight range from 0.1 to 0.9kg.

CAUTION
a. It is necessary to turn over the food during operation to obtain uniform effect.
b. Usually defrosting will need longer time than that of cooking the food.
c. If the food can be cut by knife, the defrosting process can be considered completed.
d. Microwave penetrates around 4cm into most food
e. Defrosted food should be consumed as soon as possible, it is not advised to put back to fridge and freeze again.
Example: To defrost 0.4kg poultry Steps Display 1 After power-up, the colon flashes : 2 Press Defrost button to set the food kind. d.2 3 Turn Auto Cooking/ Time. Weight knob to set the defrost weight 0.4
4 Start cooking by pressing Instant. Start 5 In half way during defrosting 3 beep sound will be heard two times to prompt you turn over the food. Open the door and turn over the food. Then close the door. Press Instant. Start button again to continue defrosting
9. AUTO COOKING
The oven has default cooking menu for simple operation. When the LED flashes colon, turn the Auto Cooking knob and LED will cycle to show A.1, A.2 ....... A.8
Choose the appropriate menu according to the food type and weight and strictly observe the directions in below table, otherwise the cooking effect will be largely influenced.
Display Kind Method A.1 Popcorn Suitable for popping a bag of corn, which is available in the market, weighted 85g. Popcorn prior to completing, if the popping speed has been decreased to 1 time per 1-2 seconds you should press Stop. clear button to stop the popping process A.2 Popcorn Same as A.1 except 100g weight A.3 Pizza Warm a piece of chilled pizza of 150g A.4 Beverage Heating a cup of 250 ml liquid. The liquid temperature is about 5-10 °C. Use a big mouth cup and do not seal A.5 Beverage Heating a cup of 500 ml liquid. The liquid temperature is about 5-10 °C Use a big mouth cup and do not seal A.6 Potato Cooking the potato strips, cut into 5mm width and height, length. Total weight is about 450g. Place the strips on a large dish and cover the dish with a thin film to prevent water loss A.7 Potato Same as A.6 except the weight of potato strips is about 650g A.8 Fish Suitable for steaming a fish of 450g. After the fish washed and scales removed, make a slits on the skin of fish .Put the fish on a shallow dish of 22-27cm diameter sprinkle lightly with some ingredient and cover the dish with a thin film to prevent water loss. After cooking, stand for 2 minutes.

CAUTION
a. The temperature of food before cooking would be 20 - 25^ . Higher or lower temperature of the food before cooking would require increase or decrease of cooking time.
b. The temperature, weight and shape of food will largely influence the cooking effect. If any deviation has been found to the factor noted on above menu, you can adjust the cooking time for best result.
Example: Steam 0.45kg fish Steps Display 1 After power-up, the colon flashes : 2 Turn Auto Cooking/ Time. Weight knob to set the cooking menu A.8 3 Start cooking by pressing Instant. Start button, and LED will count down to show running time.
10. AUTOMATIC STARTING (DELAYED FUNCTION)
If you do not want the menu be started immediately, you can preset the cooking menu and time and the preset menu will be automatically started at your set time. The setting will consist of 2 steps:
Setting the current clock;
- Setting the cooking menu and time.
Example: Now it is 12:30 clock, if you hope that the microwave oven will automatically start cooking with 100P microwave power for 9 minutes and 30 seconds at 14:20 Steps Display 1 After power-up, the colon flashes : 1.1 Press Preset. Clock button 00:00 1.2 Set hours by turning Auto Cooking/ Time. Weight knob 12:00 1.3 Press Preset. Clock button again to confirm hours 12:00 1.4 Set minutes by turning Auto Cooking/ Time. Weight knob 12:30 1.5 Press Preset. Clock button once or waiting for 5 seconds, and the numbers will go steady. 12:30 2 Set the cooking menu and time 2.1 Select cooking power by pressing Micro Power button 100P 2.2 Turn Auto Cooking/ Time. Weight knob to set cooking time 9:30 2.3 Press and hold Preset. Clock button for 3 seconds to return to current clock. 3 Set the time you expect to start. Repeat the steps of 1.2, 1.3, 1.4 4 Press Preset. Clock button to confirm the delayed menu. Now the program has been activated. And the menu will be started at 14:20. 5 You may check the preset starting time by pressing Preset. Clock button.
11. MULTI-SEQUENCE COOKING
To obtain best cooking result, some recipes call for different cook mode and time. You may program your personalized menu as follow:
Example: You want cook food with 100P microwave for 3 minutes then 20P for 9 minutes. This is 2 sequence setting. Steps Display 1 100P microwave for 3min 1.1 Press Micro Power button to select power level. 100P 1.2 Turn Auto Cooking/ Time. Weight knob to set cooking time. 3:00 2 20P for 9min 2.1 Press Micro Power button to select desired menu 20P 2.2 Turn Auto Cooking/ Time. Weight knob to set cooking time. 9:00 3 Start cooking by pressing Instant. Start
CAUTION
a. When 100 microwave power cooking is finished, microwave oven will begin next operation automatically.
b. Max 4 sequences can be set per time, repeat the steps.
12. CHILD LOCK FUNCTION
Use this feature to lock the control panel when you are cleaning or so that children can not use the oven unsupervised. All the buttons are rendered inoperable in this mode.
Set child lock---Hold Stop/Clear button about 3 seconds.
Cancel child lock---Hold Stop/Clear button about 3 seconds.
UTENSILS GUIDELINE
It is strongly recommended to use the containers which are suitable and safe for microwave cooking. Generally speaking, the containers which are made of heat-resistant ceramic, glass or plastic are suitable for microwave cooking. Never use the metal containers for microwave cooking and combination cooking as spark is likely to occur. You can take the reference of below table.
Material of container Microwave Notes Heat-resistant Yes Never use the ceramics which are decorated with metal rim or glazed ceramic Heat-resistant plastic Yes Can not be used for long time microwave cooking Heat-resistant glass Yes Grill rack No Plastic film Yes It should not be us ed when cooking meat or chops as the over-temperature may do damage to the film
COOKING TIPS
The following factors may affect the cooking result:
Food arrangement
Place thicker areas towards outside of dish, the thinner part towards the centre and spread it evenly. Do not overlap if possible.
Cooking time length
Start cooking with a short time setting, evaluate it after it times out and extend it according to the actual need. Over cooking may result in smoke and burns.
Cooking food evenly
Food such as chicken, hamburger or steak should be turned once during cooking.
Depending on the type of food, if applicable, stir it from outside to centre of dish once or twice during cooking
Allow standing time
After cooking times out, leave the food in the oven for an adequate length of time, this allows it to complete its cooking cycle and cooling it down in a gradual manner
Whether the food is done
Color and hardness of food help to determine if it is done, these include:
- Steam coming out from all parts of food, not just the edge
- Joints of poultry can be moved easily
- Pork or poultry shows no signs of blood
- Fish is opaque and can be sliced easily with a fork
Browning dish
When using a browning dish or self-heating container, always place a heat-resistant insulator such as a porcelain plate under it to prevent damage to the turntable and rotating ring.
Microwave safe plastic wrap
When cooking food with high fat content, do not allow the plastic wrap come into contact with food as it may melt
Microwave safe plastic cookware
Some microwave safe plastic cookware might not be suitable for cooking foods with high fat and sugar
content. Also, the preheating time specified in the dish instruction manual must not be exceeded.
MAINTENANCE
Please check the following before calling for services.
1. Place one cup of water (approx. 150ml ) in a glass measure in the oven and close the door securely. Oven lamp should go off if the door is closed properly. Let the oven work for 1 min.
2.Does the oven lamp light?
3.Does the cooling fan work? (Put your hand over the rear ventilation openings.)
4.Does the turntable rotate? (The turntable can rotate clockwise or counter clockwise. This is quite normal.)
5.Is the water inside the oven hot?
If "NO" is the answer to any of the above questions, please check your wall socket and the fuse in your meter box.
If both the wall socket and the fuse are functioning properly, CONTACT YOUR NEAREST SERVICE CENTER APPROVED.
SEERRVVIICCIINNGG SSAAFFEEGGUUAARRDDSS
Caution: MICROWAVE RADIATION
1. The high voltage capacitor remains charge after disconnection; short the negative terminal of H.V capacitor to the oven chassis (use a screwdriver) to discharge before touching.
2. During servicing below listed parts are liable to be removed and give access to potentials above 250V to earth.
- Magnetron
High voltage transformer
- High voltage capacitor
High voltage diode
High voltage fuse
3. The following conditions may cause undue microwave exposure during servicing.
Improper fitting of magnetron;
Improper matching of door interlock, door hinge and door;
Improper fitting of switch support;
Door, door seal or enclosure has been damaged.
CORRECT DISPOSAL OF THIS PRODUCT European directive 2012/19/EU on Waste from Electrical and Electronic Equipment (WEEE), requires that used household appliances are not thrown into the normal municipal waste stream. Used appliances must be collected separately in order to optimize the rate of recovery and recycling of materials that compose them, and to reduce the impact on human health and on the environment. The crossed bin symbol is affixed to all the products to remind you of the obligations of separated collection.
We decline liability for any damage or accident derived from any use of this product which is not in conformity with the instructions contained in this booklet.
In accordance with Article L. 217 of the Consumer Code, your product benefits from a legal guarantee of conformity of 2 years.
To contact our After-Sales Service, before going to your BUT store, call 09 78 97 97 97
Monday to Friday from 9:00 am to 19:00 pm Saturday from 9:00 am to 18:00 pm (local call price).

LE TRI

FACILE


Séparez les éléments avant de trier
BUT INTERNATIONAL
1 Avenue Spinoza
77184 Emerainville, France
MICROWAVE OVEN
MO-21BROOKTABLE OF CONTENTS
1.IMPORTANT SAFEGUARDS -34- 2. INSTALLATION -41- 3. CLEANING -42- 4.PRODUCTINSTRUCTION -44- 5. OPERATION OF CONTROL PANEL 45- 6. UTENSILS GUIDELINE - 54 - 7. COOKING TIPS - 55 - 8.MAINTENANCE -57- THIS PRODUCT IS FOR HOUSEHOLD USE ONLY!
Please read these instructions carefully before the first use of this product and save this manual for your future reference.IMPORTANT SAFETY INSTRUCTIONS READ CAREFULLY AND KEEP FOR FUTURE REFERENCE
The following basic precautions should always be followed when using electrical appliance: 1. Read all instructions before using. 2. Make sure the voltage in your living area corresponding to the one shown on the rating label of the appliance. And the wall socket is properly grounded. 3. To reduce the risk of fire in the oven cavity: a. Do not overcook the food. b. Remove wire twist -ties from paper or plastic bags before placing bags in the oven. c. Do not heat oil or fat for deep drying as the temperature of oil cannot be controlled. d. After use wipe the waveguide cover with a damp cloth, followed by dry cloth to remove any food splashes and grease. Built -up grease may overheat and begin to cause smoke or catch fire. e. If materials inside the oven should smoke or ignite, keep oven door closed, turn oven off and disconnect the power supply. f. When heating food in plastic or paper containers, keep an eye on the oven due to the possibility of ignition. 4. To reduce the risk of explosion and sudden boiling: a. WARNING: Liquids and other foods must not be heated in sealed container since they are liable to explode; Baby bottles fitted with a screw cap or teat are considered to be sealed containers. b. Use the wide -mouthed container to cook liquid, and the cooked liquid should not be removed out immediately. Several moments should be waited before removing. In order to avoid possible hazards caused by delayed eruptive boiling of liquids. c. Potatoes, sausage and chestnut should be peeled or pierced before cooking. Eggs in their shell, whole hard -boiled eggs should not be heated in microwave ovens since they may explode, even after microwave heating has ended. d. The contents of feeding bottles and baby food jars are to be stirred or shaken and the temperature is to be checked before consumption, in order to avoid burns. 5. If the supply cord is damaged, it must be replaced by the manufacturer or its service agent or a qualified technician in order to avoid a shock hazard. 6. After cooking, the container is very hot. Using gloves to take out the food and avoid steam burns by directing steam away from the face and hands. 7. Slowly lift the furthest edge of dishes cover and microwave plastic wrap and carefully open popcorn and oven cooking bags away from the face. 8. To prevent the turntable from breaking: a. Let the turntable cool down before cleaning. b. Do not place hot foods or utensils on the cold turntable. c. Do not place frozen foods or utensils on the hot turntable. 9. Make sure the utensils do not touch the interior walls during cooking. 10. Only use utensils that are suitable for use in microwave ovens. 11. Do not store food or any other things inside the oven. 12. Do not operate the oven without any liquid or food inside the oven. This would do damage the oven. 13. When the appliance is operated in the combination mode, children should only use the oven under adult supervision due to the temperatures generated. 14. Any accessories not recommended by the manufacturer may cause injuries to persons. 15. Do not use outdoors. 16. Save these instructions. 17. WARNING: If the door or door seals are damaged or the oven is malfunctioned, the oven must not be operated until it has been repaired by a competent person; 18. WARNING: It is hazardous for anyone other than a competent person to carry out any service or repair operation that involves the removal of a cover which gives protection against exposure to microwave energy; 19. If smoke is observed, switch off or unplug the appliance and keep the door closed in order to stifle any flames; 20. Microwave heating of beverages can result in delayed eruptive boiling; therefore care must be taken when handling the container; 21. Do not use harsh abrasive cleaners or sharp metal scrapers to clean the oven door glass since they can scratch the surface, which may result in shattering of the glass. 22. The lamp of microwave oven is not intended for other purposes. 23. The appliances are not intended to be operated by means of an external timer or separate remote-control system. 24. This appliance is intended to be used in household and similar applications, such as: - Staff kitchen areas in shops, offices and other working environments; - Farm houses; - By clients in hotels, motels and other residential environments; - Bed and breakfast type environments. 25. The microwave oven is intended for heating food and beverages. Drying of food or clothing and heating of warming pads, slippers, sponges, damp cloth and similar may lead to risk of injury, ignition or fire. 26. This appliance can be used by children aged from 8 years and above and persons with reduced physical, sensory or mental capabilities or lack of experience and knowledge if they have been given supervision or instruction concerning use of the appliance in a safe way and understand the hazards involved. Children shall not play with the appliance. Cleaning and user maintenance shall not be made by children without supervision. 27. This appliance is not intended for use by persons (including children) with reduced physical, sensory or mental capabilities, or lack of experience and knowledge, unless they have been given supervision or instruction concerning use of the appliance by a person responsible for their safety. 28. Children should be supervised to ensure that they do not play with the appliance. 29. The appliance shall not be cleaned with a steam cleaner. 30. The door or the outer surface may get hot when the appliance is operating. 31. WARNING: Accessible parts may become hot during use. Young children should be kept away. 32. During use the appliance becomes hot. Care should be taken to avoid touching heating elements inside the oven. 33. The surfaces are liable to get hot during use. : CAUTION:HOT SURFACE
34. Unplug the appliance before cleaning. 35. The waveguide cover must not be removed. 36. For details about how to clean the door joints, the cavities and the adjacent parts, please refer to section "CLEANING AND MAINTENANCE". 37. This product is a Group 2 Class B ISM equipment. The definition of Group 2 which contains all ISM (Industrial, Scientific and Medical) equipment in which radio-frequency energy is intentionally generated and/or used in the form of electromagnetic radiation for the treatment of material, and spark erosion equipment. For Class B equipment is equipment suitable for use in domestic establishments and in establishments directly connected to a low voltage power supply network which supplies buildings used for domestic purpose. 38. To ensure sufficient ventilation, the distance of the back of microwave to the wall should be at least 10cm , the side to the wall should be at least 5cm , the free distance above the top surface at least 20cm . 39. Metallic containers for food and beverages are not allowed during microwave cooking. 40. The oven should be cleaned regularly and any food deposits removed. 41. Failure to maintain the oven in a clean condition could lead to deterioration of the surface that could adversely affect the life of the appliance and possibly result in a hazardous situation. 42. The microwave oven is only used in freestanding, the microwave oven shall not be placed in a cabinet. 43. This product is for household use only!Group 2 Class B appliance
Group 2 ISM equipment: group 2 contains all ISM equipment in which radio-frequency energy is intentionally generated and/or used in the form of electromagnetic radiation for the treatment of material, and EDM and arc welding equipment. Class B equipment is equipment suitable for use in domestic establishments and in establishments directly connected to a low voltage power supply network which supplies buildings used for domestic purposes. 44. This product internal light source LED light on < 60lm . 45. "To be in compliance EN 61000-3-11, the product shall be connected only to a supply of the system impedance: Zsys = 0.40089 ohms or less. Before connect the product to public power network, please consult your local power supply authority to ensure the power network meet above requirement." Specifications| Model: | MO-21BROOK |
| Rated Voltage: | 230V~ |
| Rated Input Power(Microwave): | 1150W |
| Rated Output Power(Microwave): | 700W |
| Oven Capacity: | 20L |
| Turntable Diameter: | 24.5cm |
| External Dimensions: | 45.1*34.8*25.8cm |
| Net Weight: | 10.2kg |
INSTALLATION
1. Take out all the packing. If there is a safe film over the oven, tear it off before Use. Check carefully for damage. If any, immediately notify dealer or send to the manufacturer's service center. 2. Microwave ovens must be placed under dry and non-corrosiveness environments, kept away from heat and humidity, such as gas burner or water tank. 3. To ensure sufficient ventilation, the distance of the back of microwave to the wall should be at least 10 cm, the side to the wall should be at least 5 cm, the free distance above the top surface at least 20 cm. the distance of the microwave to the ground should be at least 85 cm. 4. The position of the oven shall be such that it is far from the TV, Radio or antenna as picture disturbance. The distance should be more than 5m 5. The appliance must be positioned so that the plug is accessible, and must ensure a good grounding in case leakage, ground loop can be formed to avoid electric shock. 6. The microwave oven must be operated with the door closed. 7. The microwave oven must not be placed in a cabinet. The microwave oven is intended to be used freestanding. 8. As there is manufacturing residue or oil remained on the oven cavity or heat element, it usually would smell the odor, even a slight smoke, It is normal case and would not occur after several times use, keep the door or window open to ensure good ventilation. So it is strongly recommended to place a cup of water in the turntable, setting at high power and operate for several times.CLEANING AND MAINTENANCE
CAUTION
The oven should be cleaned regularly and any food deposits removed.WARNING
1. Remove the power cord from the wall outlet before cleaning. Don't immerse the appliance in water or other fluids when cleaning. 2. Failure to maintain the oven in a clean condition could lead to deterioration of the surface that could adversely affect the life of the appliance and possibly result in a hazardous situation 3. Never use hard detergent, gasoline, abrasive powder or metal brush to clean any part of the appliance 4. Do not remove the waveguide cover 5. When the microwave oven has been used for a long time, there may be some strange odors exist in oven, Following 3 methods can get rid of them: a. Place several lemon slices in a cup, then heat with high Micro Power for 2-3 min. b. Place a cup of black tea in oven, then heat with high micro power. c. Put some orange peel into oven, and then heat them with high Micro Power for 1 minute. 6. WARNING: Only allow children to use the oven without supervision when adequate instructions have been given so that the child is able to use the oven in a safe way and understands the hazards of improper use;TIPS FOR CLEANING
Details for cleaning door seals, cavity and adjacent parts: Exterior: Wipe the enclosure with a dampened soft cloth Door: Using a dampened soft cloth, wipe clean the door and window Wipe the door seals and adjacent parts to remove any spill or spatter Wipe the control panel with a slightly dampened soft cloth Interior walls: Wipe clean the cavity with a dampened soft cloth Wipe clean the waveguide cover to remove any food splashed Turntable/ Rotation ring/ Rotation axis: Wash with mild soap water Rinse with clean water and allow drying thoroughly  1) Door lock Microwave oven door must be properly closed in order for it to operate 2) Viewing window Allow user to see the cooking status 3) Rotating axis The glass turntable sits on the axis; the motor underneath it drives the turntable to rotate 4) Rotating ring The glass turntable sits on its wheels; it supports the turntable and helps it to balance when rotating 5) Turntable The food sits on the turntable, its rotation during operation helps to cook food evenly CAUTION
- Place the rotating ring first - Fit the turntable onto the rotating axis and make sure that it is geared in properly 6) Control panel See below in details (the control panel is subject to change without prior notice)7) Waveguide cover
It is inside the microwave oven, next to the wall of control panel. WARNING
Never remove the waveguide coverOPERATION OF CONTROL PANEL
1. BEFORE COOKING
The LED flashes 3 times when plugged in power supply. Then it flashes :, prompting you to input the cooking menu and time.2. AUTO COOKING/ TIME.WEIGHT KNOB
You can increase or decrease cooking time, weight or choose the auto cooking menu during operation by turning Auto cooking /Time.Weight knob.3. STOP/CLEAR
At the initial or input stage: press once to cancel input programs and resume initial stage. During cooking: press once to stop oven operation, press twice to cancel cooking programs.4. AUTO REMINDER
When your preset cooking procedure have finished, the LED display will show End and three beeps sound will be heard to prompt you to take out food. If you do not press Stop.Clear button once or open the door, the beep will be sounded at an interval of 3 minutes.5. CLOCK SETTING
Clock button make it available for you to input current or preset time when ".": flashes onto LED display after plugged in, or try to skip it over to continue if unnecessary.| Example: to set 12:30 | ||
| Steps Display | ||
| 1 After | power-up, the colon flashes | : |
| 2 | Press Preset. Clock button once | 00:00 |
| 3 | Turn Auto Cooking/ Time. Weight knob to set exact hours. | 12:00 |
| 4 | Press Preset. Clock button once again. | 12:00 |
| 5 | Turn Auto Cooking/ Time. Weight knob to set exact minutes. | 12:30 |
| 6 | Press Preset. Clock button once again or wait for 5 seconds, and the numbers will go steadily. | |
6. MICROWAVE COOKING
This function is used for cooking and heating food. Pressing Micro Power button, LED cycles to show 100P — 80P — 60P — 40P — 20P.| High power | 100% microwave power. Applicable for quick and thorough cooking |
| Medium High power | 80% microwave power. Applicable for medium express cooking |
| Medium power | 60% microwave power. Applicable for steaming food |
| Medium Low power | 40% microwave power. Applicable for defrosting food |
| Low power | 20% microwave power. Applicable for keeping warm |
CAUTION
a. The max time which can be set is 60 minutes b. Never operate the oven empty. c. At the maximum microwave power, the oven will automatically lower the power after a certain time of cooking to lengthen the service life. d. If you turn the food during operation, press the Instant.Start button once and the preset cooking procedure will continue. e. If you intend to remove the food before the preset time, you must press Stop.Clear button once to clear the preset procedure to avoid unintended operation of next time use.| Example: To cook at P80 for 10 minutes. | ||
| Steps Display | Display | |
| 1 After power-up, the colon flashes | : | |
| 2 | Select the desired microwave power by pressing Micro Power button consecutively | 80P |
| 3 | Set cooking time by turning Auto Cooking/Time. Weight knob | 10:00 |
| 4 | Press Instant. Start button to start, and LED will count down to show running time. | |
7. EXPRESS
Press Express button LED Display will cycle to show 0:30, 1:00, 1:30. This function will allow you to heat a cup of water or beverage conveniently, omitting the steps of setting time. Choose the proper time depending on the beverage capacity.| Example: To cook with express for 1 minute | ||
| Steps Display | ||
| 1 After power-up, the colon flashes | ||
| 2 | Press Express button consecutively to select desired menu | 1:00 |
| 3 | Start cooking by pressing Instant/Start button | |
8. DEFROST
This function use for defrost food. Press the Defrost button and the LED display will cycle to show d.1-d.2-d.3.| d.1 | For defrosting meat, the weight range from 0.1 to 2.0 kg. |
| d.2 | For defrosting poultry, the weight range from 0.2 to 3.0kg. |
| d.3 | For defrosting seafood, the weight range from 0.1 to 0.9kg. |
CAUTION
a. It is necessary to turn over the food during operation to obtain uniform effect. b. Usually defrosting will need longer time than that of cooking the food. c. If the food can be cut by knife, the defrosting process can be considered completed. d. Microwave penetrates around 4cm into most food e. Defrosted food should be consumed as soon as possible, it is not advised to put back to fridge and freeze again.| Example: To defrost 0.4kg poultry | ||
| Steps Display | ||
| 1 After | power-up, the colon flashes | : |
| 2 | Press Defrost button to set the food kind. | d.2 |
| 3 | Turn Auto Cooking/ Time. Weight knob to set the defrost weight | 0.4 |
| 4 Start cooking by pressing Instant. Start | |
| 5 | In half way during defrosting 3 beep sound will be heard two times to prompt you turn over the food. Open the door and turn over the food. Then close the door. Press Instant. Start button again to continue defrosting |
9. AUTO COOKING
The oven has default cooking menu for simple operation. When the LED flashes colon, turn the Auto Cooking knob and LED will cycle to show A.1, A.2 ....... A.8 Choose the appropriate menu according to the food type and weight and strictly observe the directions in below table, otherwise the cooking effect will be largely influenced.| Display Kind | Method | |
| A.1 Popcorn | Suitable for popping a bag of corn, which is available in the market, weighted 85g. Popcorn prior to completing, if the popping speed has been decreased to 1 time per 1-2 seconds you should press Stop. clear button to stop the popping process | |
| A.2 | Popcorn | Same as A.1 except 100g weight |
| A.3 | Pizza | Warm a piece of chilled pizza of 150g |
| A.4 | Beverage | Heating a cup of 250 ml liquid. The liquid temperature is about 5-10 °C. Use a big mouth cup and do not seal |
| A.5 Beverage | Heating a cup of 500 ml liquid. The liquid temperature is about 5-10 °C Use a big mouth cup and do not seal | |
| A.6 Potato | Cooking the potato strips, cut into 5mm width and height, length. Total weight is about 450g. Place the strips on a large dish and cover the dish with a thin film to prevent water loss | |
| A.7 Potato | Same as A.6 except the weight of potato strips is about 650g | |
| A.8 Fish | Suitable for steaming a fish of 450g. After the fish washed and scales removed, make a slits on the skin of fish .Put the fish on a shallow dish of 22-27cm diameter sprinkle lightly with some ingredient and cover the dish with a thin film to prevent water loss. After cooking, stand for 2 minutes. |
CAUTION
a. The temperature of food before cooking would be 20 - 25^ . Higher or lower temperature of the food before cooking would require increase or decrease of cooking time. b. The temperature, weight and shape of food will largely influence the cooking effect. If any deviation has been found to the factor noted on above menu, you can adjust the cooking time for best result.| Example: Steam 0.45kg fish | ||
| Steps | Display | |
| 1 | After power-up, the colon flashes | : |
| 2 | Turn Auto Cooking/ Time. Weight knob to set the cooking menu | A.8 |
| 3 | Start cooking by pressing Instant. Start button, and LED will count down to show running time. | |
10. AUTOMATIC STARTING (DELAYED FUNCTION)
If you do not want the menu be started immediately, you can preset the cooking menu and time and the preset menu will be automatically started at your set time. The setting will consist of 2 steps: Setting the current clock; - Setting the cooking menu and time.| Example: Now it is 12:30 clock, if you hope that the microwave oven will automatically start cooking with 100P microwave power for 9 minutes and 30 seconds at 14:20 | ||
| Steps Display | ||
| 1 After power-up, the colon flashes | : | |
| 1.1 | Press Preset. Clock button | 00:00 |
| 1.2 | Set hours by turning Auto Cooking/ Time. Weight knob | 12:00 |
| 1.3 | Press Preset. Clock button again to confirm hours | 12:00 |
| 1.4 | Set minutes by turning Auto Cooking/ Time. Weight knob | 12:30 |
| 1.5 | Press Preset. Clock button once or waiting for 5 seconds, and the numbers will go steady. | 12:30 |
| 2 | Set the cooking menu and time | |
| 2.1 | Select cooking power by pressing Micro Power button | 100P |
| 2.2 | Turn Auto Cooking/ Time. Weight knob to set cooking time | 9:30 |
| 2.3 | Press and hold Preset. Clock button for 3 seconds to return to current clock. | |
| 3 | Set the time you expect to start. Repeat the steps of 1.2, 1.3, 1.4 | |
| 4 | Press Preset. Clock button to confirm the delayed menu. Now the program has been activated. And the menu will be started at 14:20. | |
| 5 | You may check the preset starting time by pressing Preset. Clock button. | |
11. MULTI-SEQUENCE COOKING
To obtain best cooking result, some recipes call for different cook mode and time. You may program your personalized menu as follow:| Example: You want cook food with 100P microwave for 3 minutes then 20P for 9 minutes. This is 2 sequence setting. | ||
| Steps Display | ||
| 1 100P | microwave for 3min | |
| 1.1 | Press Micro Power button to select power level. | 100P |
| 1.2 | Turn Auto Cooking/ Time. Weight knob to set cooking time. | 3:00 |
| 2 20P for 9min | ||
| 2.1 | Press Micro Power button to select desired menu | 20P |
| 2.2 | Turn Auto Cooking/ Time. Weight knob to set cooking time. | 9:00 |
| 3 Start | cooking by pressing Instant. Start | |
CAUTION
a. When 100 microwave power cooking is finished, microwave oven will begin next operation automatically. b. Max 4 sequences can be set per time, repeat the steps.12. CHILD LOCK FUNCTION
Use this feature to lock the control panel when you are cleaning or so that children can not use the oven unsupervised. All the buttons are rendered inoperable in this mode. Set child lock---Hold Stop/Clear button about 3 seconds. Cancel child lock---Hold Stop/Clear button about 3 seconds.UTENSILS GUIDELINE
It is strongly recommended to use the containers which are suitable and safe for microwave cooking. Generally speaking, the containers which are made of heat-resistant ceramic, glass or plastic are suitable for microwave cooking. Never use the metal containers for microwave cooking and combination cooking as spark is likely to occur. You can take the reference of below table.| Material of container | Microwave | Notes |
| Heat-resistant | Yes | Never use the ceramics which are decorated with metal rim or glazed |
| ceramic Heat-resistant plastic | Yes | Can not be used for long time microwave cooking |
| Heat-resistant glass | Yes | |
| Grill rack | No | |
| Plastic film | Yes | It should not be us ed when cooking meat or chops as the over-temperature may do damage to the film |
COOKING TIPS
The following factors may affect the cooking result:Food arrangement
Place thicker areas towards outside of dish, the thinner part towards the centre and spread it evenly. Do not overlap if possible.Cooking time length
Start cooking with a short time setting, evaluate it after it times out and extend it according to the actual need. Over cooking may result in smoke and burns.Cooking food evenly
Food such as chicken, hamburger or steak should be turned once during cooking. Depending on the type of food, if applicable, stir it from outside to centre of dish once or twice during cookingAllow standing time
After cooking times out, leave the food in the oven for an adequate length of time, this allows it to complete its cooking cycle and cooling it down in a gradual mannerWhether the food is done
Color and hardness of food help to determine if it is done, these include: - Steam coming out from all parts of food, not just the edge - Joints of poultry can be moved easily - Pork or poultry shows no signs of blood - Fish is opaque and can be sliced easily with a forkBrowning dish
When using a browning dish or self-heating container, always place a heat-resistant insulator such as a porcelain plate under it to prevent damage to the turntable and rotating ring.Microwave safe plastic wrap
When cooking food with high fat content, do not allow the plastic wrap come into contact with food as it may meltMicrowave safe plastic cookware
Some microwave safe plastic cookware might not be suitable for cooking foods with high fat and sugar content. Also, the preheating time specified in the dish instruction manual must not be exceeded.MAINTENANCE
Please check the following before calling for services. 1. Place one cup of water (approx. 150ml ) in a glass measure in the oven and close the door securely. Oven lamp should go off if the door is closed properly. Let the oven work for 1 min. 2.Does the oven lamp light? 3.Does the cooling fan work? (Put your hand over the rear ventilation openings.) 4.Does the turntable rotate? (The turntable can rotate clockwise or counter clockwise. This is quite normal.) 5.Is the water inside the oven hot? If "NO" is the answer to any of the above questions, please check your wall socket and the fuse in your meter box. If both the wall socket and the fuse are functioning properly, CONTACT YOUR NEAREST SERVICE CENTER APPROVED.SEERRVVIICCIINNGG SSAAFFEEGGUUAARRDDSS
Caution: MICROWAVE RADIATION
1. The high voltage capacitor remains charge after disconnection; short the negative terminal of H.V capacitor to the oven chassis (use a screwdriver) to discharge before touching. 2. During servicing below listed parts are liable to be removed and give access to potentials above 250V to earth. - Magnetron High voltage transformer - High voltage capacitor High voltage diode High voltage fuse 3. The following conditions may cause undue microwave exposure during servicing. Improper fitting of magnetron; Improper matching of door interlock, door hinge and door; Improper fitting of switch support; Door, door seal or enclosure has been damaged.| CORRECT DISPOSAL OF THIS PRODUCT | |
| European directive 2012/19/EU on Waste from Electrical and Electronic Equipment (WEEE), requires that used household appliances are not thrown into the normal municipal waste stream. Used appliances must be collected separately in order to optimize the rate of recovery and recycling of materials that compose them, and to reduce the impact on human health and on the environment. The crossed bin symbol is affixed to all the products to remind you of the obligations of separated collection. | |
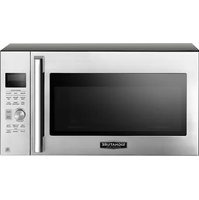
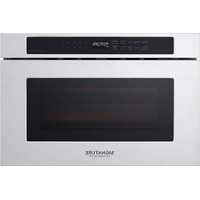

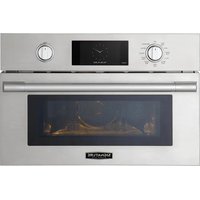
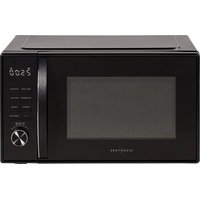
Table of contents
Click a title to access it
- SIGN FOUR À MICRO-ONDES
- TABLE DES MATIERES
- INSTRUCTIONS DE SECURITE IMPORTANTES LIRE AVEC ATTENTION ET A CONSERVER EN VUE DE REFERENCE FUTURE
- INSTALLATION
- ATTENTION
- AVERTISSEMENT
- ASTUCES DE NETTOYAGE
- DESCRIPTION DU PANNEAU DE CONTROL
- Cuisson expresse
- Décongélation
- ATTENTION:
- Cuisson automatique
- A.8
- Attention :
- DEMARRAGE AUTOMATIQUE (FONCTION RETARDEMENT)
- CUISSON MULTISEQUENCE
- FONCTION DE VERROUILAGE POUR LES ENFANTS
- GUIDE DES USTENSILES
- CONSEILS DE CUISSON
- Arrangement des aliments
- Durée de cuisson
- Cuisson uniforme des aliments
- Si la vande est cuite
- Platà rissoler
- Enveloppe plastique résistante aux micro-ondes
- Batterie de cuisine en plastique résistante aux micro-ondes
- ENTRETIEN
- L'ENTRETIEN DES DISPOSITIFS DE
- ENLEVEMENT DES APPAREILS MENAGERS USAGES
- SIGN MICROWAVE OVEN
- TABLE OF CONTENTS
- THIS PRODUCT IS FOR HOUSEHOLD USE ONLY!
- IMPORTANT SAFETY INSTRUCTIONS READ CAREFULLY AND KEEP FOR FUTURE REFERENCE
- : CAUTION:HOT SURFACE
- Group 2 Class B appliance
- CLEANING AND MAINTENANCE
- CAUTION
- WARNING
- TIPS FOR CLEANING
- 7) Waveguide cover
- OPERATION OF CONTROL PANEL
- BEFORE COOKING
- AUTO COOKING/ TIME.WEIGHT KNOB
- STOP/CLEAR
- AUTO REMINDER
- CLOCK SETTING
- MICROWAVE COOKING
- EXPRESS
- DEFROST
- AUTO COOKING
- AUTOMATIC STARTING (DELAYED FUNCTION)
- MULTI-SEQUENCE COOKING
- CHILD LOCK FUNCTION
- UTENSILS GUIDELINE
- COOKING TIPS
- Food arrangement
- Cooking time length
- Cooking food evenly
- Allow standing time
- Whether the food is done
- Browning dish
- Microwave safe plastic wrap
- Microwave safe plastic cookware
- MAINTENANCE
- SEERRVVIICCIINNGG SSAAFFEEGGUUAARRDDSS
- Caution: MICROWAVE RADIATION
Manual assistant
Powered by Anthropic
Waiting for your message
Product information
Brand : SIGNATURE
Model : MO-21BROOK
Category : Microwave Oven