BL92WH - Blender AYA - Free user manual and instructions
Find the device manual for free BL92WH AYA in PDF.
User questions about BL92WH AYA
0 question about this device. Answer the ones you know or ask your own.
Ask a new question about this device
Download the instructions for your Blender in PDF format for free! Find your manual BL92WH - AYA and take your electronic device back in hand. On this page are published all the documents necessary for the use of your device. BL92WH by AYA.
USER MANUAL BL92WH AYA
MANUEL D'UTILISATION BL92WH
FR
natural_image
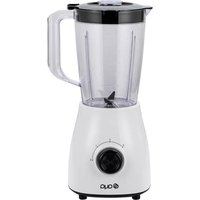
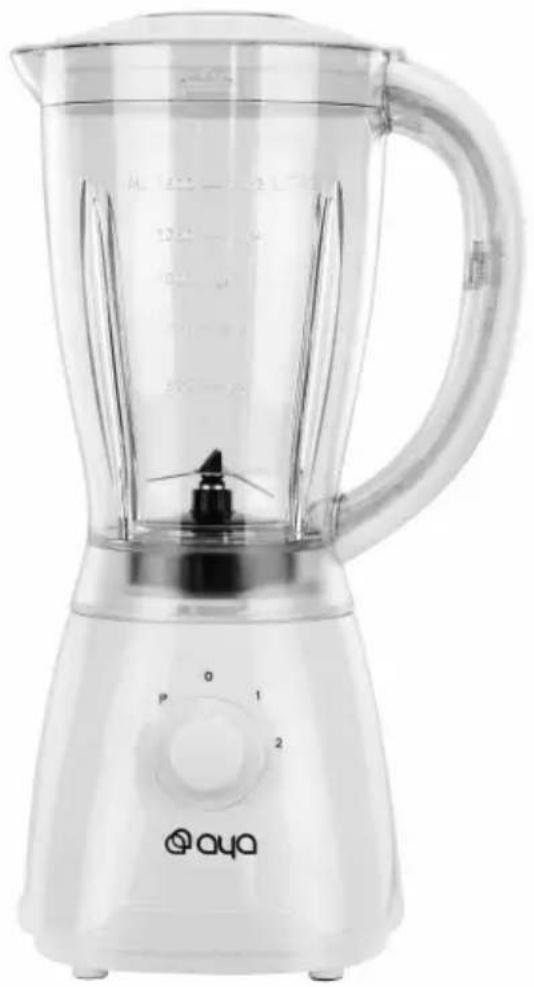
White plastic blender with black handle and control knob, no visible text or symbols on bodyTable des matières
CONSIGNES DE SECURITE - 2 -
DESCRIPTION DE VOTRE APPAREIL - 10 -
BOUTON DE VITESSE - 10 -
UTILISATION DE L'APPAREIL - 11 -
COMMENT UTILISER - 12 -
ENTRETIEN ET NETTOYAGE - 19 -
SPECIFICATIONS TECHNIQUES - 23 -
ENLEVEMENT DES APPAREILS MENAGERS USAGES - 24 -


text_image
LE TRI + FACILE BAC DE TRInatural_image
Line drawing of a kettle with a lid and arrow indicating rotation (no text or symbols)Schéma 3
natural_image
Line drawing of a blender with a lid and arrow indicating rotation (no text or symbols)Schéma 4
natural_image
Line drawing of a pitcher with handle and side blades (no text or symbols)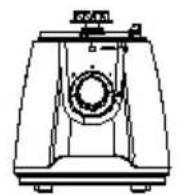

natural_image
Line drawing of a kettle with handle and spout (no text or symbols)Schéma 5

natural_image
Line drawing of a kettle and a small stand (no text or symbols)
COMMENT UTILISER
DIMENSION: Coupés en 15mm*15mm*15mmm
POIDS: Carotte: 600g, Eau: 900g
natural_image
Line drawings of a kitchen blender with internal components and a separate close-up of its base (no text or symbols)Schéma 8
natural_image
Symbol of a trash bin crossed with a diagonal line, no text or numbers presentnatural_image
White plastic blender with black handle and control knob, no visible text or symbols on bodyBLENDER
Table of content
IMPORTANT SAFEGUARDS - 26 -
KNOW YOUR Mixer -32 -
SPEED KNOB -32-
HOW TO USE -33-
IMPORTANT OPERATING TIPS -38-
CARE AND CLEANING -38-
TECHNICAL SPECIFICATION -41-
CORRECT DISPOSAL OF THIS PRODUCT -41-

THIS PRODUCT IS FOR HOUSEHOLD USE ONLY! PLEASE READ CAREFULLY THIS MANUEL BEFORE YOUR USE AND SAVE IT FOR FUTURE REFERENCE.
IMPORTANT SAFEGUARDS
When using this electrical appliance, basic safety precautions should always be followed, including the following:
-
Appliances can be used by persons with reduced physical, sensory or mental capabilities or lack of experience and knowledge if they have been given supervision or instruction concerning use of the appliance in a safe way and understand the hazards involved. Children shall not play with the appliance.
-
Before using check that the voltage indicated on the product corresponds with the voltage of your electrical outlet.
- Do not let cord hang on ho surface or over edge of table or counter.
- If the supply cord is damaged, it must be replaced by the manufacturer or its service agent or a similarly qualified person in order to avoid a hazard.
- Avoid contacting the moving parts.
- Keep hands and utensils out of container while blending to reduce the risk of severe injury to persons or damage to the mixer. A scraper may be used but must be used only when the mixer is not running.
- The use of attachments not
recommended or sold by manufacturer may cause fire, electric shock or injury.
-
Unplug from outlet when not in use, before putting on or taking off parts, and before cleaning. To disconnect, turn any control to “off”, then remove plug from wall outlet by grasping the plug, not the cord.
-
To reduce the risk of injury, never place blade assembly on motor unit without the jar properly attached.
-
Do not operate any appliance with a damaged cord or plug or after the appliance malfunction or has been damaged in any manner. Return the appliance to the nearest authorized service facility for examination, repair or adjustment.
-
Children should be supervised to ensure that they do not play with the appliance.
- Do not leave the machine on unattended.
- When removing the mixer from the motor unit, wait until the blades have completely stopped.
- Always operate mixer with cover in place.
- Always use the appliance on a secure, dry level surface
- Never place this appliance on or near a hot gas or an electric burner or where it could touch a heated appliance.
- Do not use outdoors.
- Do not use appliance for other than its intended use.
- It is recommended to check regularly the supply cord for any sign of possible
deterioration, and the appliance should not be used if the cable is damaged.
-
The appliance is not intended to be operated by means of an external timer or a separate remote-control system.
-
This appliance is intended to be used in household and similar applications such as:
- Staff kitchen areas in shops, offices and other working environments;
- Farm houses; - By clients in hotels, motels and other residential type environments;
- Bed and breakfast type environments.
-
Concerning speed setting and the operating time, thanks to refer to the section < How to use >
-
Concerning details on how
to clean surfaces in contact with food, thanks to refer to the section < CARE AND CLEANING >.
-
Risks of injuries if you don't use this appliance correctly. Care shall be taken when handling the sharp cutting blades, emptying the bowl and during cleaning.
-
Switch off the appliance and disconnect from supply before changing accessories or approaching parts that move in use.
-
Always disconnect the appliance from the supply if it is left unattended and before assembling, disassembling or cleaning.
-
This appliance shall not be used by children. Keep the appliance and its cord out of reach of children.

text_image
Measure cup Lid Jar Seal ring mode assembly Motor unit Speed knobSPEED KNOB
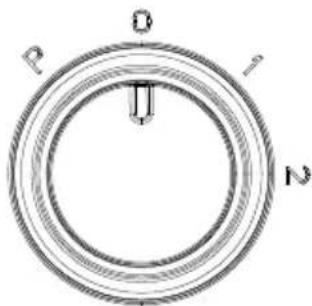
text_image
P O f NFig.2
Before initial use
- Before first use, unpack the appliance and place all parts on a horizontal surface.
-
The jar assembly (including the measure cup, lid, seal ring 1, jar, seal ring 2, blade assembly and jar base) has already been assembled into the motor unit. Disassemble to wash all detachable parts except the motor unit. Refer to the latter chapter CARE AND CLEANING.
-
Once all pieces have been cleaned and dry thoroughly, reassemble.
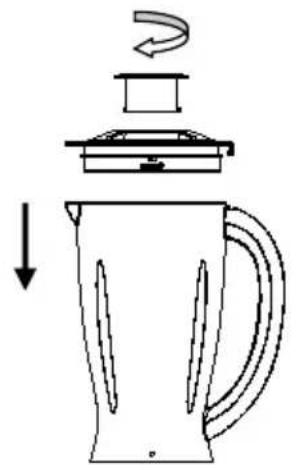
1) Invert the jar onto a level surface, holding the jar handle, put the the seal ring 2 and blade assembly onto the jar base bottle and secure the blade assembly by turning it anti-clockwise until tight (See Fig.3)
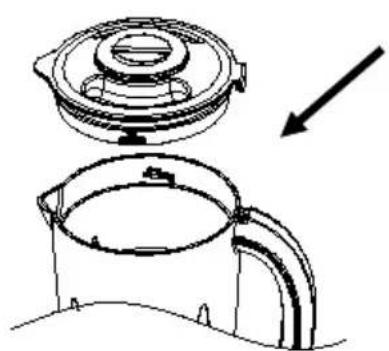
2) Reposition the jar assembly with its opening upwards. Wrap the seal ring 1 around the lid bottom and put the lid onto the jar assembly. Place the measure cup exactly into the lid by fitting the small projection on the both sides of the cup into the slots the lid and turning the cup clockwise until (See Fig.4)
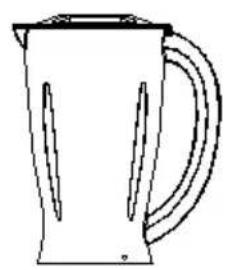
3) Finally, place the assembled jar onto the motor unit by aligning the strip on the assembled jar bottom. (See Fig.5
CAUSION: Jar and jar base is now secure. Do not try to twist the jar and jar base onto motor unit

natural_image
Line drawing of a kettle with a lid and arrow indicating rotation (no text or symbols)Fig.3
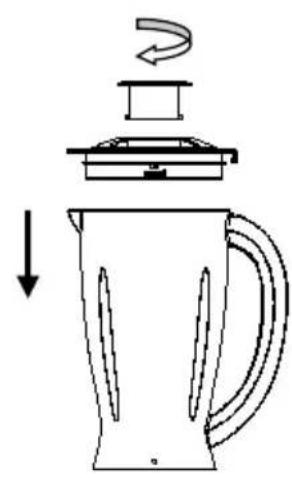
natural_image
Line drawing of a blender with a handle and lid, showing a curved arrow indicating rotation (no text or symbols)Fig.4

natural_image
Line drawing of a pitcher with handle and side blades (no text or symbols)

natural_image
Line drawing of a kettle with handle and spout (no text or symbols)
natural_image
Line drawing of a kettle with handle and spout (no text or symbols)
Fig.5
How to use
- Peeled or cored the fruit or vegetables and then cut it into small dices.
- Place the food to be blended into the jar (See Fig.6). Usually, certain amount of purified water has to be added to facilitate the smooth running of appliance.
The proportion of the food and water is 2:3. The amount of mixture should not exceed the max level as indicated on the jar.
RECIPE
FOOD TYPE: Carrot (apple, pear etc.)
SPEC: Cut into
15mm*15mm*15mmm
WEIGHT: Carrot: 600g, Water: 900g
SPEED: High speed
Note: never use boiling liquids or run the appliance empty.
- Put the lid on the jar. Be sure the measuring cup is in place
- Plug the power cord into a standard wall outlet.
- Turn the speed knob to the appropriate speed setting for
your task.
- For quick or delicate blending tasks, turn the speed knob to P position and hold for a few seconds and then release, the knob will reset to O position automatically.
Operate several times until the consistence you want is obtained
-
If you want to add ingredient while the mixer is working, remove the measuring cup and place through the lid opening. (See Fig.7)
-
When crushing ice or hard food, keep one hand firmly on the lid.
-
When the consistence you desire is obtained, turn the knob to O position.
Note: 1) For each use, the consecutive operation time should not exceed 3 minutes. at least 10 minutes rest time
must be maintained between two continuous cycles, let the unit cool to room temperature before performing next operation cycle.
2) If you want to stop the machine during operation, turn the knob to O position anytime.
Before blending, add food to be blended into the jar.
During blending, add the ingredient through the lid opening.
natural_image
Technical line drawing of a mechanical device with an arrow indicating assembly or transformation (no text or symbols present)Fig.6
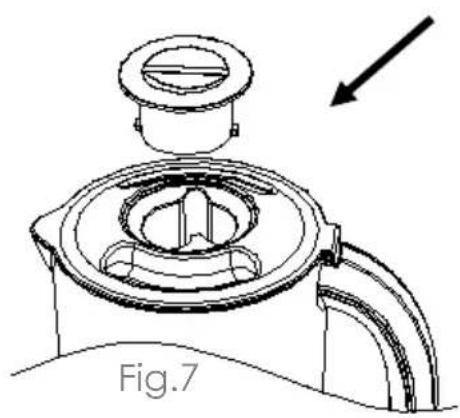
natural_image
Technical line drawing of a mechanical component with a downward arrow indicating direction (no text or symbols)IMPORTANT OPERATING TIPS
- For best circulation of food that are to be blended with some liquid, pour the liquid into the jar first, then add solids.
Some of the tasks that cannot be performed efficiently with a mixer are: beating egg whites, whipping cream, mashing potatoes, grinding meat, mixing dough, extracting juice from fruit and vegetable
The following items should never be placed in the unit as they may cause damage: bones, large pieces of solid, frozen food, c tough foods such as turnips.
To crush ice, add up to 6 ice cubes. If more ice is needed, remove the cup and add cubes one by one through the lid opening.
CARE AND CLEANING
This product contains no user serviceable parts. Refer service to qualified service personnel.
- Before cleaning, unplug the mixer.
- Always wash immediately after use for easier cleaning. Don't let food dry on the jar assembly as this will make cleaning difficult.
- Pour a little warm soapy wat
into the jar and turn the knob to P position for a few seconds. And then empty the jar.
- Dismantle all detachable parts. Lift the jar assembly off the motor unit, To detach the blade assembly by turning it clockwise from the jar base bottom, and remove the seal ring 2 and blade assembly (see fig.8). In addition, detach the jar cover seal ring 1 from the jar cover.

natural_image
Line drawings of a blender with internal components and a separate close-up of its base (no text or symbols)Fig.8
- Rinse the measure cup, lid,
seal ring 1, jar, seal ring 2 or blade assembly by hands or in a dishwasher and then dry. They are dishwasher safe components, but the temperature setting shall not exceed 70°C.
-
Brush the blade clean using warm soapy water, then rinse thoroughly under the tap. Don't touch the sharp blades, handle carefully. Don't immerse the blade assembly in water. Leave to dry upside down away from children.
-
Wipe the motor unit with a damp cloth and dry thoroughly. Remove the stubborn spots by rubbing with non-abrasive cleaner. If liquids spill into the motor unit; first unplug the unit, then wipe with a damp cloth and dry thoroughly.
CAUSION
1) Do not immerse the motor unit in liquid to prevent the risk of electric shock.
2) Do not use rough scouring pads or cleansers on parts or finish.
TECHNICAL SPECIFICATION
Voltage/Frequency: 220-240V\~50-60Hz
Power: 500W
We decline liability for any damage or accident derived from any use of this product which is not in conformity with the instructions contained in this booklet.
CORRECTDISPOSALOFTHISPRODUCT
natural_image
Symbol of a trash bin with crossed lines indicating no waste or restriction, and a solid black rectangle below (no text or labels)European directive 2012/19/EU on Waste from Electrical and Electronic Equipment (WEEE), requires that used household appliances are not thrown into the normal municipal waste stream. Used appliances must be collected separately in order to optimize the
rate of recovery and recycling of materials that compose them, and to reduce the impact on human health and on the environment. The crossed bin symbol is affixed to all the products to remind you of the obligations of separated collection.
In accordance with Article L. 217 of the Consumer Code, your product benefits from a legal guarantee of conformity of 2 years.
To contact our After-Sales Service, before going to your BUT store, call 09 78 97 97 97,
From Monday to Friday from 9:00 to 19:00, Saturday from 9:00 to 18:00 (local call price).