
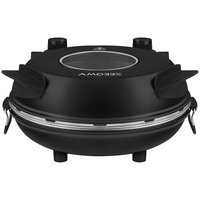
Aromi - Aroma diffuser Zeegma - Free user manual and instructions
Find the device manual for free Aromi Zeegma in PDF.
| Product Type | Ultrasonic aroma diffuser |
| Brand | Zeegma |
| Model | Aromi |
| Power supply | Input: 100-240 V ~ 50/60 Hz, Output: 24 V = 0.5 A, 12 W |
| Power | 12 W |
| Diffusion technology | Ultrasonic |
| Timer | Adjustable to 2, 4 or 6 hours |
| Auto shut-off | Yes, when water is absent or after timer |
| LED lighting | Yes, automatic color change or fixed color |
| Automatic oil refill function | Yes, low and high modes (automatic addition every 3 to 6 hours) |
| Usable oil type | Natural essential oils only, do not pour directly into water |
| Recommended cleaning | Every 72 hours with a vinegar/water solution (1:1) |
| Safety | Automatic shut-off when water level is low; do not immerse in water |
| Included accessories | Power adapter, dropper, oil tube |
| Usage | Indoor only, on a flat and stable surface |
| Recommended water temperature | Fresh water, not exceeding 40 °C |
| Water type | Demineralized or filtered water if water is hard |
Frequently Asked Questions - Aromi Zeegma
User questions about Aromi Zeegma
0 question about this device. Answer the ones you know or ask your own.
Ask a new question about this device
Download the instructions for your Aroma diffuser in PDF format for free! Find your manual Aromi - Zeegma and take your electronic device back in hand. On this page are published all the documents necessary for the use of your device. Aromi by Zeegma.
USER MANUAL Aromi Zeegma
natural_image
Two ZEEGMA water purifiers with control buttons and green-lit bases, no visible text or symbols on the devices themselves.ZEEGMA
A

natural_image
Line drawing of a square container with internal compartments and a central hole (no text or symbols)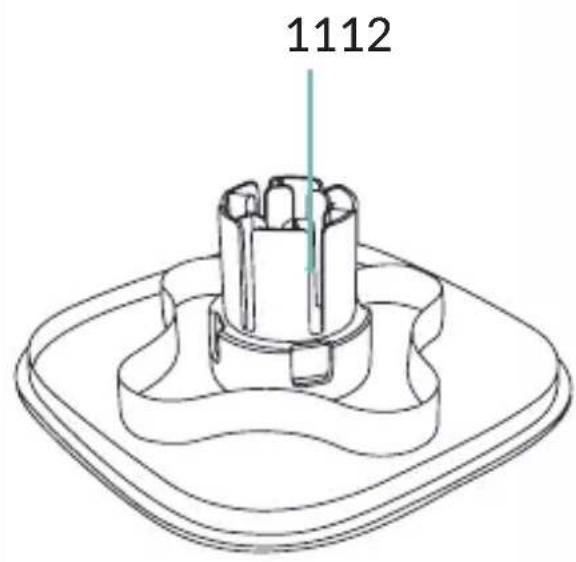
1

2
3

natural_image
Top-down schematic of a device casing with internal fan and adjustment lever (no text or symbols)4

5

natural_image
Line drawing of a ZEEGMA kitchen appliance with a downward arrow indicating a component (no text or symbols on the device itself)6

7

Introduction
Dear customer!
Thank you for placing trust in us and choosing Zeegma.
We provide you with a product perfect for everyday use thanks to the use of high-quality materials and modern solutions. We are convinced that the product will satisfy your requirements as it has been designed with utmost care.
Before you use the product, please read this manual carefully.
Should you have any remarks or questions concerning the product, please do not hesitate to contact us:
support@zeegma.com
WARNINGS
- Read the instruction manual before using the device.
- This device must not be used by children and persons with limited physical, sensory or mental abilities or without experience and knowledge, unless they have been supervised or instructed in the use of the device by a person responsible for their safety.
-
This device is not a toy. Children must not play with the device. Keep the device out of the reach of children.
-
Do not put your fingers or hands into the device.
-
Do not repair or modify the device. These operations may only be undertaken by an authorised service centre.
-
Do not use the device for purposes other than those for which it was designed.
-
Use only original or recommended by the manufacturer spare parts.
-
Use only the power supply unit included in the set.
-
The device uses a power supply with parameters: Input: 100-240 V \~ 50/60 Hz 0.4 A max, Output: 24.0 V=0.5 A 12.0 W.
-
Disconnect the device from the power source when filling and cleaning the device.
-
Do not immerse the device in water or other liquids.
-
Micro-organisms that may be present in the water or in the room where the device is used or stored can grow in the water tank and enter the air, causing very serious health risks if the water is not changed and the tank is not cleaned.
EN
-
Change the water and clean the tank every 72 hours to prevent the proliferation of micro-organisms in the water or the environment in which the device is used and/or stored.
-
Be aware that high humidity promotes the growth of biological organisms in the surroundings.
-
Do not start the device if you notice any damage. This applies to both the cable and the plug. Do not use the device if it starts to malfunction, has been dropped or has gotten wet.
-
If the device emits unnatural sounds or smells - switch it off immediately and then contact the manufacturer's service department.
-
If the device is not used for a long period of time, unplug it and pour the water out of the tank.
-
Empty and clean the device before storage. Clean the device before the next use.
-
The device is suitable for domestic use only. Do not use it outdoors.
-
Never leave the device connected to a power socket unattended.
-
Do not pull or carry the device by holding the cable. Do not put any objects on it. Do not pull the cable over sharp edges of walls and furniture and do not coil it too tightly after use.
-
After each use, disconnect the device from the power supply by pulling the plug, not the cord.
-
When the device is in use, do not touch the water inside or any component under water.
-
Do not use the device when the water tank is empty.
-
Do not fill the device with water while it is running.
-
Do not add detergents, alcohols, chemicals or fragrances to the water tank, otherwise this may damage the tank. Always use fresh cold water.
-
Use water at a temperature of no more than 40^ C.
-
In the case of hard running water, demineralised or filtered water should be used in the device.
-
Place the device on a flat, horizontal and stable surface. Avoid tilting.
-
Never pour oil directly into the water tank. Only natural essential oils should be used.
-
Use the device away from heat sources, high temperatures, hot surfaces, direct sunlight, sources of sparking, open flames.
-
To avoid the build-up of moisture and the multiplication of bacteria, keep the device away from household items such as carpets, tablecloths, curtains and furniture. If there is moisture in the vicinity of the device, reduce the selected humidification level.
- Do not use chemicals to clean the device.
- Do not use hard or metal objects to clean the device.
- Do not move or relocate the device when there is water in the tank or when the device is switched on. Do not carry the device by holding the top part of the device.
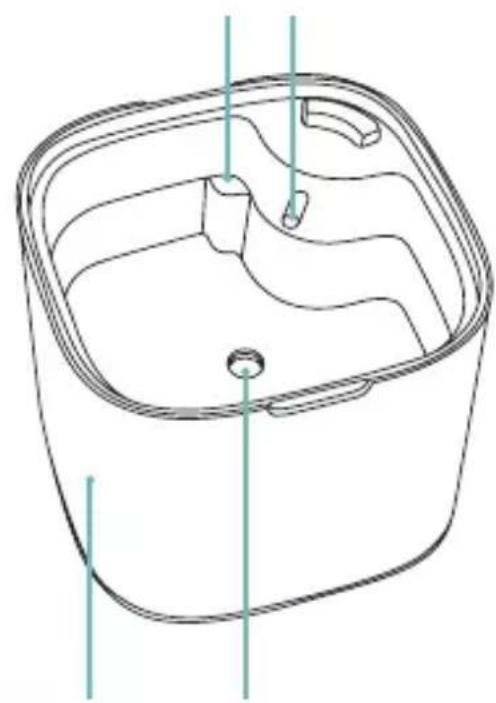
DESCRIPTION OF THE PARTS (FIG. A)
- Lid
- Atomizer
- Mist generation button
- Dropper
- Light button
- Noise reduction cover
- Weak mode
- Base
- Strong mode
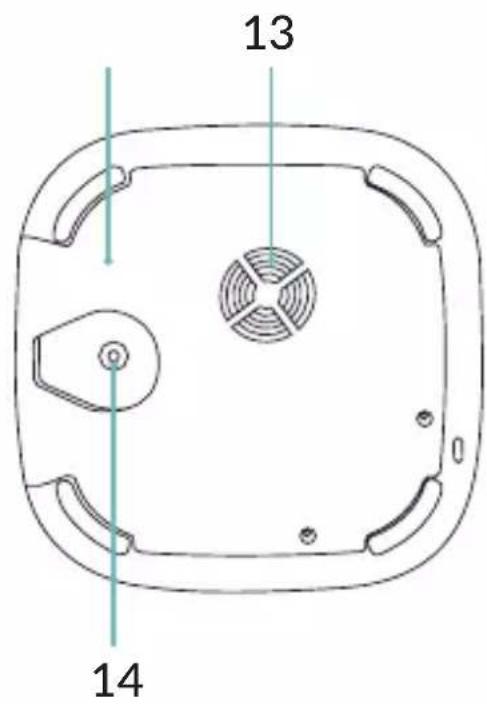
- Air inlet
- Air outlet
- DC socket
- Maximum water level line
- Oil tube
- Water tank
USE
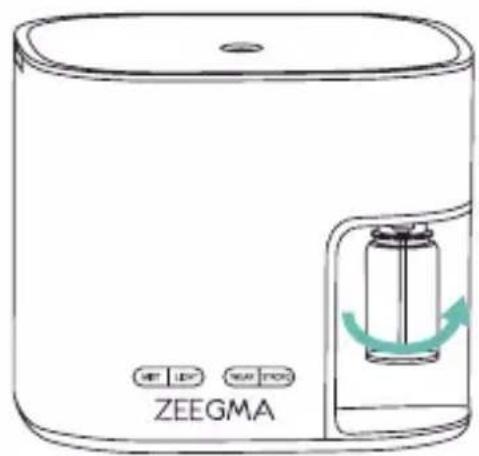
- Make sure the essential oil tube is tightly fitted (A, fig. 1).
- Fit the essential oil bottle onto the diffuser (fig. 2). Make sure the bottle is tightened tightly to prevent the oil from leaking out. The tube should be in the middle of the bottle.
- Make sure that the noise reduction cover (11, fig. A) is correctly fitted.
- Connect the device to the power source (fig. 3).
- Pour water into the device without exceeding the maximum water level line (fig. 4). Note! Do not let water get into the air outlet.
- Place the cover on the device (fig. 5).
- Switch on the device by pressing the mist generation button (fig. 6), then press again to set the desired operating time – 2, 4 or 6 hours. After the selected time has elapsed, the device will automatically switch off.
If there is no water in the tank, the opening in the lid will light up
red. When the water in the tank is exhausted, the light in the device will illuminate five times and the device will switch off automatically. The water tank should be cleaned at least every 72 hours or every time it is filled.
BUTTON FUNCTIONS
MIST Press to start the device. Press again to change the operating time of the device. Press and hold to switch off the device.
LIGHT Press to activate the lighting effect. The color will change automatically. Press again to keep the selected color. Press again to change the color. Press and hold to switch off the lighting effect.
WEAK Press to start the auto-refill function in low mode. The oil will be added automatically after 4 hours. Press again to deactivate the auto-refill function.
STRONG Press to start the auto-refill function in strong mode. The oil will be added automatically after 3 and 6 hours. Press again to deactivate the auto-refill function.
Pressing the WEAK or STRONG buttons repeatedly will add oil to the tank each time.
AUTO-REFILL FUNCTION
Using the auto-refill function after the first oil bottle installation, follow the steps below.
- Press the strong mode button (5, fig. A) and wait approximately 10 seconds. The oil will be added automatically to the tank.
- Press the strong mode button again to deactivate the auto-refill function.
- Select weak or strong mode by pressing the corresponding button (fig. 7). The oil will be added automatically.
When using the auto-refill function again, steps 1 and 2 are not necessary.
Follow all the steps above when the essential oil bottle has been replaced with a new one.
The auto-refill function will automatically switch off after approximately 9 hours.
CLEANING AND MAINTENANCE
- Clean the device regularly, a minimum of every 72 hours, to prevent the growth of bacteria in the tank and to ensure its long-term and efficient operation. Make sure the device is unplugged and cooled down before cleaning.
- Wipe the outside of the device with a soft, damp cloth. Leave to dry.
- When scale appears in the water tank, clean the tank using a 1:1 solution of vinegar and water. Fill the tank at least halfway and stir the solution to cover the entire interior. Rinse with water and leave to dry.
- Empty the water tank. Make sure all parts are completely dry. Store the device in a dry place.
The photos are for illustrative purposes only, the actual appearance of the products may differ from those shown in the images.
Einführung
EN: The product complies with requirements of EU directives.
Pursuant to the Directive 2012/19/EU, this product is subject to selective collection. The product must not be disposed of along with domestic waste as it may pose a threat to the environment and human health. The worn-out product must be handed over to the electrics and electronics recycling center.
Brand : Zeegma
Model : Aromi
Category : Aroma diffuser