Vinsider 89T - Wine cellar Klarstein - Free user manual and instructions
Find the device manual for free Vinsider 89T Klarstein in PDF.
Download the instructions for your Wine cellar in PDF format for free! Find your manual Vinsider 89T - Klarstein and take your electronic device back in hand. On this page are published all the documents necessary for the use of your device. Vinsider 89T by Klarstein.
USER MANUAL Vinsider 89T Klarstein
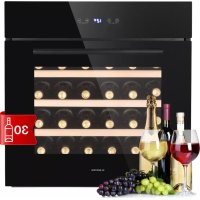
Safety Instructions 26 Installation 29 Product Overview 33 Usage 34 Filling the Wine Cabinet 36 Cleaning and Care 38 Troubleshooting 39 Product Data Sheet 40 Disposal Considerations 42 Manufacturer & Importer (UK) 42 Dear Customer, Congratulations on purchasing this device. Please read the following instructions carefully and follow them to prevent possible damages. We assume no liability for damage caused by disregard of the instructions and improper use. Scan the QR code to get access to the latest user manual and more product information. CONTENTS TECHNICAL DATA Item number 10040720 Power supply 220-240 V ~ 50/60 Hz Capacity 89 bottles Dimensions (B*T*H) (mm) 595 x 557 x 1788 Weight 106 kg Climate class Suitable ambient temperature N/ST 16-38 °C Installation type built-in26
- This appliance is not intended for use by persons (including children) with reduced physical, sensory or mental capabilities, or lack of experience and knowledge, unless they have been given supervision or instruction concerning use of the appliance by a person responsible for their safety.
- Children should be supervised to ensure that they do not play with the appliance.
- This appliance can be used by children aged from 8 years and above and persons with reduced physical, sensory or mental capabilities or lack of experience and knowledge if they have been given supervision or instruction concerning use of the appliance in a safe way and understand the hazards involved. Children shall not play with the appliance. Cleaning and user maintenance shall not be made by children without supervision.
- If the supply cord is damaged, it must be replaced by the manufacturer, its service agent or similarly qualied persons in order to avoid a hazard.
- To avoid a hazard due to instability of the appliance, it must be xed in accordance with the instructions.
- When positioning the appliance, ensure the supply cord is not trapped or damaged.
- Do not locate multiple portable socket-outlets or portable power supplies at the rear of the appliance.
- Keep ventilation openings, in the appliance enclosure or in the built-in structure, clear of obstruction.
- Do not use mechanical devices or other means to accelerate the defrosting process, other than those recommended by the manufacturer.
- Do not damage the refrigerant circuit.
- Do not use electrical appliances inside the drink storage compartments of the appliance, unless they are of the type recommended by the manufacturer.
- Do not store explosive substances such as aerosol cans with a ammable propellant in this appliance.
- This appliance is intended to be used in household and similar applications such as – staff kitchen areas in shops, oces and other working environments; – farm houses and by clients in hotels, motels and other residential type environments; – bed and breakfast type environments; – catering and similar non-retail applications.
- Children aged from 3 to 8 years are allowed to load and unload refrigerating appliances.27
To avoid contamination of drinks, please respect the following instructions:
- Opening the door for long periods can cause a signicant increase of the temperature in the compartments of the appliance.
- Clean regularly surfaces that can come in contact with drink and accessible drainage systems.
- If the refrigerating appliance is left empty for long periods, switch off, defrost, clean, dry, and leave the door open to prevent mould developing within the appliance. Note: This unit contains the refrigerant Isobutane (R600a), a natural gas that has high environmental compatibility, but is ammable. Although it is ammable, it does not damage the ozone layer or increase the greenhouse effect. The use of this refrigerant results in a slightly higher noise level of the unit. In addition to the compressor noise, you can hear the ow of refrigerant. This is unavoidable and has no negative effect on the performance of the device. Be careful during transport to avoid damage to the refrigerant circuit. Refrigerant leaks can irritate the eyes. WARNING When using, during maintenance and when disposing of the appliance, pay attention to the left symbol located on the back or on the compressor of the appliance. This symbol warns you of possible res. There are ammable substances in the refrigerant lines and in the compressor. Keep the appliance away from sources of re during use, maintenance and disposal.28
Special notes on correct use
- This device is intended exclusively for the storage of wine.
- This appliance is not suitable for freezing food.
- The racks were pre-set to allow the most ecient use of energy. Special notes on the shelves
- The shelves have been pre-set to allow the most ecient use of energy.
- Only use the shelves provided by the manufacturer.
- Never block the holes in the shelves or use any other types of shelves that have not been approved by the manufacturer, which may cause poor cooling or increase energy consumption.
- We recommend that you use the shelves as shown so that the energy is used as eciently as possible. Notes on ambient temperature Install this unit in a location where the ambient temperature corresponds to the climate class indicated on the unit‘s rating plate.
Extended temperate This cooling unit is intended for use at ambient temperatures of 10-32 °C. N Temperate This cooling unit is intended for use at ambient temperatures of 16-32 °C. ST Subtropical This cooling unit is intended for use at ambient temperatures of 16-38 °C. T Tropical This cooling unit is intended for use at ambient temperatures of 16-43 °C. The ambient temperature inuences the internal temperature of the wine refrigerator. For optimal operation of the wine refrigerator, we recommend an ambient temperature of 23 °C to 25 °C.29
INSTALLATION Before rst Use Allow 24 hours before switching on the wine cellar. During this time we recommend that you leave the door open to clear any residual odors. Note: All models without front venting (air opening) are strictly for free standing only. Location The location you have selected for your wine cellar should:
- be unencumbered and well ventilated;
- be well away from any heat source and direct sunlight;
- not be too damp (laundry, pantry, bathroom etc.);
- have a standard and reliable electricity supply
- have a surge protector tted to the electrical outlet;
- Away from the microwave oven. Certain microwave ovens do not have wave interference shield. When placed within 1 meter vicinity of the wine cabinet, they may affect the operation of the wine cabinet. Placing in cold or hot temperature conditions may cause cellar‘s temperatures uctuating, and it will not reach the ideal one. Installation
- Unpack and remove all of the protection and adhesive strips from the packaging around and inside the wine cellar.
- The wine cellar must be positioned such that the plug is accessible. Release the power cord. Move your wine cellar to its nal location. The wine cellar should be installed in a suitable place where the compressor will not be subject to physical contact.
- Wine cellar must be leveled before loading your wines. Your wine cellar is equipped with 4 adjustable feet to facilitate easy leveling. The cooler recommends that you tighten the back feet to the maximum and adjust the front feet to level the wine cellar.30
Built-in installation Below the built-in dimensions to use before installing in the best condition this appliance. After positioning the appliance, it is imperative to x the kitchen cabinet by screwing as shown below.31
Changing door opening side
1. Tilt the wine cabinet 45 degrees upwards and unscrew the lower right hinge
with a screwdriver. (Figure 1)
2. Lay the wine cabinet at, hold the door, and unscrew the hinge on the right
door with a screwdriver. Then take it out and place it carefully, and turn the door 180 degrees. (Figure 2, Figure 3, Figure 4)
3. Remove the limit bar B, unscrew the screw on the limit bar A with A
screwdriver, take out the limit bar A, move it to the right to the other set of corresponding screw holes on the shell, tighten the screw, install the upper limit bar B, and then install the door with the screw and adjust it. (Figure 5, Figure 6, Figure 7. Installing the Shelves
1. Open the door completely.
2. Line up the shelf notches with the rail posts on both the right and left sides.
3. Push the shelf down and then push it all the way inwards until the shelf fully
rests inside of the unit and you are able to close the door.
4. The shelf should glide smoothly back and forth. If it does not, you may need to
remove it and start over. Removing the Shelves
1. Open the door completely.
2. Remove all of the contents loaded on the shelf, if applicable.
3. Line up the shelf notches with the rail posts as indicated below. This will
require you to hold on to both rails as you move the shelf to line up the posts with the notches on both sides of the shelf.
4. Evenly life the shelf up and then pull the shelf out.32
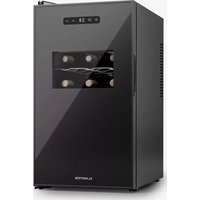
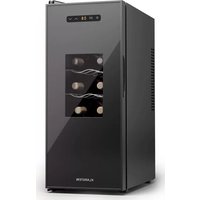
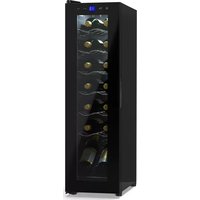
PRODUCT OVERVIEW 1 Light (LED) 2 Upper zone 3 Control Panel 4 Handle 5 Middle zone 6 Control Panel 7 Lower zone 8 Adjustable feet
USAGE Starting up the device Once the wine cabinet is properly installed, we advise that you clean the inside using warm water with a low concentration of dishwashing liquid. Do not use abrasives or scouring powder; they may scratch the surface nish.
- Your wine cabinet is ideally suitable for holding Bordeaux type bottles of 0.75 L capacity. It can contain larger bottles; however care must be taken that they do not prevent the door from closing properly.
- When closing the door ensure that it does not touch any of the bottles.
- If you load several bottles at a time, it will take longer before the cabinet reaches the desired temperature.
- In order to avoid damaging the door seal, ensure that the door is fully open before moving the racks along the compartment rails. Upper control panel Lower control panel 1 Start/Stop button 2 Light button 3 Compressor operation indicator 4 Digital display of the temperature in the upper zone 5 Digital display of the temperature in the middle zone 6 Setting button for the upper zone 7 Setting button for the middle zone 8 Display screen for lower zone 9 To increase temperature by 1 °C in lower zone 10 To decrease temperature by 1 °C in lower zone35
Starting the appliance Press the start/stop button for about 3 seconds Do the same to turn it off. Temperature control Press and hold the temperature setting button for three seconds to display the actual temperature, and press any button to return to display the set temperature. The internal temperature is regulated by the electronic thermostat controlled by the buttons inside the appliance. Each time the “upper zone” or “lower zone” key is pressed, the selected zone is incremented by one degree. To obtain a temperature lower than the one indicated, You can adjust the temperature degree by degree. After the temperature is selected, the display will ash for 5 seconds and display the set-point temperature. Control of the light To turn on or off the internal light, press the button. The (LED) light is suitable for the conservation of wine. In order to reduce energy consumption, the LED light goes off automatically after 10 minutes. However, we recommend turning off the light under normal use or after each use. However, if you wish to leave the light on, the procedure is as follows; press button 2 for at least 5 seconds; the display will then show “LP”. After a few seconds, the display comes back to the temperature indication and the light stays on continually. To return to the light turning off automatically after 10 minutes, press button 2 for at least 5 seconds; the display will then show “LF”. After a few seconds, the display comes back to the temperature indication and the light goes off automatically. Notes
- If the unit is unplugged, power lost, or turned off, you must wait 3 to 5 minutes before restarting the unit. If you attempt to restart before this time delay, the Wine cooler will not start.
- When you use the Wine cooler for the rst time or restart the Wine cooler after having been shut off for a long time, there could be a few degrees variance between the temperature you select and the one indicated on the LED readout. This is normal and it is due to the length of the activation time.
- Once the Wine cooler is running for a few hours everything will be back to normal.36
- The device is ideal for storing wine bottles of the size and shape of 0.75 litres of Bordeaux. It is possible to store larger wine bottles. However, care must be taken to ensure that the appliance door can be closed properly.
- Before closing the door, always make sure that it is not blocked by a wine bottle.
- If you place several wine bottles in the appliance at the same time, it will take longer for the individual wine bottles to cool down.
- The number of bottles that can be placed in the appliance varies depending on the size and shape of the wine bottles.
- The maximum number of wine bottles that can be stored is based on standard
- The most important thing when storing wine is that the storage temperature remains continuously stable.
- Vibrations, temperature variations, light exposure and humidity are factors that can cause wine to tip over. When stored correctly, not only is the quality of the wine maintained, but its aroma, taste and complexity are also improved during the maturing process.
- Wine that is stored at a higher temperature matures faster. Wines which are stored at more than 18 °C lose their avour and aroma.
- If wine is stored at too low a temperature, this can lead to the development of residues that are harmful to health. An air humidity of 60 % - 70 % is ideal to prevent corks from shrinking.
- After a wine bottle has been opened, the wine comes into contact with air. It is therefore recommended to store the rest of the wine upright in the bottle to minimise the surface area that comes into contact with air.
- Once a wine bottle has been opened, white wines can be drunk for another 2 days and red wines for another 3 days if the bottle has been closed. Make sure that the wine bottle has been tightly closed again.
- Special stoppers, which keep wine and champagne fresh, can be purchased in most wine shops.37
Loading for Max capacities
- The maximum lling capacity is based on Bordeaux bottles with 0.75 litre standard.
- 89 bottles is the maximum lling capacity. It is recommended to use the o diagram for daily use.
- For better preservation and to avoid food waste.
- In order not to spoil the wine, it is important that the temperature in the wine refrigerator remains stable.
- Avoid opening the door frequently and blocking the inside slots.
- To avoid mould growth, please avoid too much humidity in the wine refrigerator. C C
Normal shelves Display shelves38
Defrosting of your wine cabinet is fully automatic. It requires no action on your part. During operation, you may notice condensation drops forming on the rear inside wall of the cabinet. They will be eliminated during automatic defrosting. Cleaning Before any cleaning, unplug the device from the mains. Never use abrasives or a scraper sponge when cleaning the inside or the outside of your wine cabinet.
- Remove all accessories (racks, etc.). Wash them using lukewarm water to which has been added a gentle unscented detergent (dishwashing liquid for example); rinse with bleach water and carefully dry off.
- Wash the inside walls in the same way; pay particular attention to the rack supports
- Wash the door seal as well as under the seal.
- Plug the wine cabinet into the mains. From time to time, dust off the condenser behind the device; accumulated dust may reduce the eciency of your wine cabinet. In the event of a prolonged absence, empty and clean out the device; maintain the door slightly open during the period of non-use. Replacing the illuminating lamp The device uses light emitting diodes (LEDs). This type of diode cannot be changed by the user. The life cycle of the LEDs is long enough so that they do not need to be changed. If however, in spite of the care taken by the manufacturer, the LEDs do fail, please contact your Customer Care Service for any repair.39
TROUBLESHOOTING You can resolve many of the problems that may arise without having to call Customer Care Service. Please try the suggestions below.
PROBLEM POSSIBLE CAUSE
No operation - Check your installation's power supply. - Check your circuit breaker. - A fuse has blown. Not cold enough - Check the setting temperature. - Ambient temperature requires readjustment of the temperatures. - The door is open too often. - The door is not closed properly. - The door seal is not air-tight. - There is not enough space around the device. No interior light No display on the LED screen Contact your Customer Care Service. There appears to be a loud noise - Check the device levelling. - Verify that a piece of paper or part of the packaging has not remained stuck in the device. The door does not close properly - Check the device levelling. - The seal is in poor repair. - The feet have "moved". The light (LED) does not come
- The control panel is not working. - Printed circuit problem - Mains plug problem - Contact your Customer Care Service. LED display error -Poor display. - The temperature value is not shown. - Contact your Customer Care Service. The fans are not working Control Panel to be replaced by your Customer Care Service.40
Information according to Regulation (EU) No. 2019/2016 Supplier's name or trademark: Klarstein Supplier's address: Wallstraße 16, 10179 Berlin, Germany. Model identier: 10040720 Type of refrigerating appliance: Low-noise appliance: No Design type: built-in Wine storage appliance: Yes Other refrigerating appliance:
Annual energy consumption (kWh/a) 162 Climate class: temperate, subtropical Minimum ambient temperature (°C), for which the refrigerating appliance is suitable
Maximum ambient temperature (ºC), for which the refrigerating appliance is suitable
Light source parameters: Type of light source LED Energy eciency class G Minimum duration of the guarantee offered by the manufacturer: 24 months Additional information: Weblink to the manufacturer‘s website, where the information in point4(a) Annex of Commission Regulation (EU) 2019/2019 is found: www.klarstein.co.uk42
DISPOSAL CONSIDERATIONS If there is a legal regulation for the disposal of electrical and electronic devices in your country, this symbol on the product or on the packaging indicates that this product must not be disposed of with household waste. Instead, it must be taken to a collection point for the recycling of electrical and electronic equipment. By disposing of it in accordance with the rules, you are protecting the environment and the health of your fellow human beings from negative consequences. For information about the recycling and disposal of this product, please contact your local authority or your household waste disposal service. MANUFACTURER & IMPORTER (UK) Manufacturer: Chal-Tec GmbH, Wallstrasse 16, 10179 Berlin, Germany. Importer for Great Britain: Berlin Brands Group UK Limited PO Box 42 272 Kensington High Street London, W8 6ND United Kingdom43
FICHE DE DONNÉES PRODUIT
Rumore aereo (in dB(A) re 1 pW)