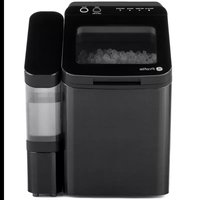
Profile Opal P4INSASBVTS - Ice machine GE - Free user manual and instructions
Find the device manual for free Profile Opal P4INSASBVTS GE in PDF.



| Product Type | Nugget Ice Maker |
| Brand | GE |
| Model | Profile Opal P4INSASBVTS |
| Power Supply | 115 V, 60 Hz, grounded outlet |
| Power Consumption | 15 A (min) on dedicated circuit recommended |
| Refrigerant | R600a (isobutane), flammable |
| Operating Temperature | 55 °F to 90 °F (12.8 °C to 32.2 °C) |
| Ice Bin Capacity | Approximately 1.3 kg (depending on use) |
| Production Rate | First ice in less than 10 minutes |
| Required Clearance | 7.6 cm (3 inches) at rear and sides |
| Main Functions | Ice production, cleaning cycle, automatic defrost, water need indicator |
| Maintenance | Descaling every 2-3 weeks with white vinegar or descaling agent; weekly disinfection with bleach |
| Water Filter | Optional, Opal-specific (sold separately) |
| Side Tank | Optional, increases water capacity |
| Weight | Approximately 11 kg (estimated) |
| Dimensions (W x D x H) | Approximately 43 x 38 x 38 cm (estimated) |
| Housing Material | Stainless steel and plastic |
| Safety | Grounding required, do not use extension cord, do not immerse, risk of flammable refrigerant |
| Repairability | Service by authorized personnel; manufacturer-approved replacement parts |
| Warranty | 1 year limited (parts and labor) |
Frequently Asked Questions - Profile Opal P4INSASBVTS GE
User questions about Profile Opal P4INSASBVTS GE
0 question about this device. Answer the ones you know or ask your own.
Ask a new question about this device
Download the instructions for your Ice machine in PDF format for free! Find your manual Profile Opal P4INSASBVTS - GE and take your electronic device back in hand. On this page are published all the documents necessary for the use of your device. Profile Opal P4INSASBVTS by GE.
USER MANUAL Profile Opal P4INSASBVTS GE
SAFETY INFORMATION....3
PARTS INCLUDED....5
HARD WATER IMPACT....6
MAKING ICE WITH OPAL....7
UNDERSTANDING THE DISPLAY....7
ICE SCOOP STORAGE 7
WATER FILTER....8
CARE AND CLEANING....9
SIDE TANK ACCESSORY SETUP....11
NORMAL OPERATING SOUNDS....12
TROUBLESHOOTING....12
LIMITED WARRANTY....13
CONSUMER SUPPORT ....14
OWNER'S MANUAL
P4INSASBVTS
ENGLISH/FRANÇAIS
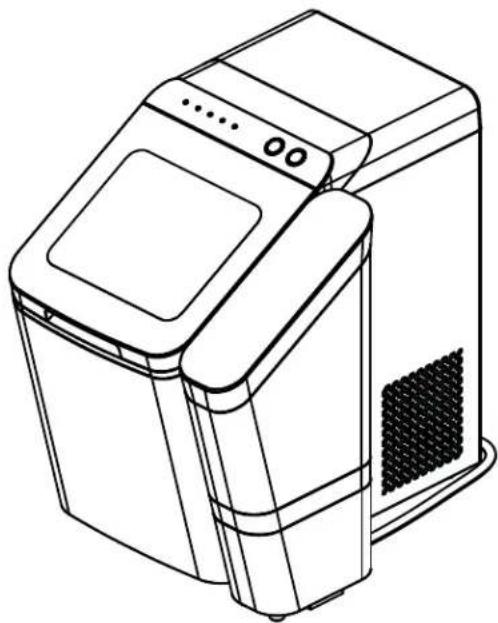
natural_image
Line drawing of a modern kitchen appliance with control panel and door (no text or symbols)Write the model and serial numbers here:
Model # ____
Serial # ____
Find these numbers on a label on the back of the unit.

Profile
THANK YOU FOR MAKING GE APPLIANCES A PART OF YOUR HOME.
Whether you grew up with GE Appliances, or this is your first, we're happy to have you in the family.
We take pride in the craftsmanship, innovation and design that goes into every GE Appliances product, and we think you will too. Among other things, registration of your appliance ensures that we can deliver important product information and warranty details when you need them.
IMPORTANT SAFETY INFORMATION READ ALL INSTRUCTIONS BEFORE USING THE APPLIANCE
WARNING
To reduce the risk of fire, explosion, electric shock or injury when using your Opal, follow these basic safety precautions.
- Do not, under any circumstances, alter or remove the third (ground) prong from the power cord. For personal safety, this product must be properly grounded.
- Do not exceed power outlet ratings. It is recommended that the ice maker is connected to its own circuit. Use only a 115 V, 60 Hz standard electrical supply that is properly grounded in accordance with the National Electric Code and local codes and ordinances.
Due to potential safety hazards under certain conditions, we strongly advise against the use of an extension cord. However, if you must use an extension cord, it is absolutely necessary that it is a UL-listed, 3-wire ground type appliance extension cord having a grounding type plug and that the electrical rating of the cord be 15 Amperes (minimum) and 120 Volts.
This product must be properly installed and located in accordance with the installation instructions before it is used. Product is for indoor household use only. Do not use outdoors.
■ Do not store or use flammable vapors or liquids near this product.
■ Do not allow children to climb, stand, or hang on the ice maker. They could seriously injure themselves.
■ Do not use with water that is micro-biologically unsafe or of unknown quality.
■ Place power cord in such a way it cannot be pulled on by
children or cause a tripping hazard.
■ Place power cord in such a way that it is not in contact with hot surfaces.
■ Do not operate if any component, including the cord or plug, is damaged.
■ Unplug the product before cleaning by hand and when not in use.
■ Do not immerse any part of the product in water.
■ Do not plug or unplug product with wet hands.
■ Do not attempt to disassemble, repair, modify, or replace any part of your product.
■ Use this product only for its intended purpose as described in this user manual.
■ Do not use any accessories not recommended by the manufacturer.
■ When handling, installing, and operating the appliance, care should be taken to avoid damage to the refrigerant tubing.
■ Servicing shall be performed by factory authorized service personnel and component parts shall be replaced with manufacturer authorized replacement components.
If the SUPPLY CORD is damaged, it must be replaced by the manufacturer, its service agent or similarly qualified persons in order to avoid a hazard.
■ Fill with potable water only.
CAUTION
To reduce the risk of injury when using your Opal, follow these basic safety precautions.
■ Do not remove any safety, warning, or product information labels from your ice maker.
■ Lifting Hazard: It is recommended to have two people move and install the ice maker in order to prevent injury.
REFRIGERANT AND FOAM DISPOSAL
Dispose of appliance in accordance with Federal and Local Regulations. Flammable refrigerant and insulation material used require special disposal procedures. Contact your local authorities for the environmentally safe disposal of your appliance.
PROPER DISPOSAL OF YOUR APPLIANCE
Dispose of or recycle your appliance in accordance with Federal and Local Regulations. Contact your local authorities for the environmentally safe disposal or recycling of your appliance.
WARNING

RE OR EXPLOSION HAZARD Flammable Refrigerant
This appliance contains isobutane refrigerant, also known as R600a, a natural gas with high environmental compatibility. Howber, it is also combustible. Adhere to the warnings below to reduce the risk of injury or property damage.
- When handling, installing, and operating the appliance, care should be taken to avoid damage to the refrigerant tubing.
- Service shall only be performed by authorized service personnel. Use only manufacturer-authorized service parts.
- Dispose of refrigerator in accordance with Federal and Local Regulations. The flammable refrigerant and insulation material used in this product require special disposal procedures. Contact your local authorities for the environmentally safe disposal of your refrigerator.
- Keep ventilation openings in the appliance enclosures or in the built-in structure clear of obstruction.
- To remove frost, scrape with a plastic or wood spatula or scraper. Do not use an ice pick or a metal or sharp-edged
instrument as it may punture the freezer liner and then the flammable refrigerant tubing behind it.
- Do not use electrical appliances inside the food storage compartments of the appliance, unless they are of the type recommended by the manufacturer.
- Do not use any electrical device to defrost your appliance.
- Do not use mechanical devices or other means to accelerate the defrosting process, other than those recommended by the manufacturer.
- Do not damage the refrigerant circuit. This warning is only applicable for appliances with refrigerating circuits which are accessible by the user.
READ AND SAVE THESE INSTRUCTIONS
CONSIGNES DE SÉCURITÉ IMPORTANTES LISEZ, SUIVRE, ET CONSERVER CES INSTRUCTIONS
AVERTISSEMENT
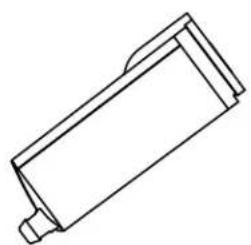
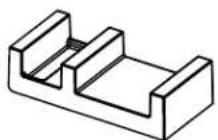
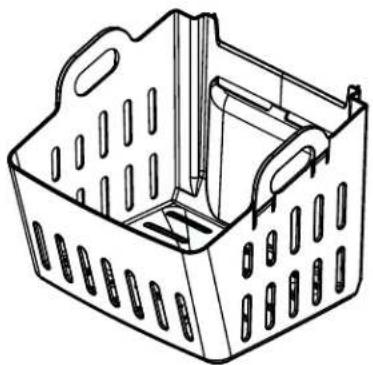
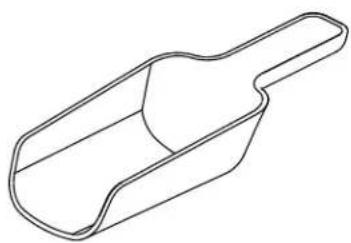
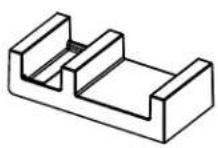
Ensure all components are present. If any item is missing, please contact 1.866.907.6718.
natural_image
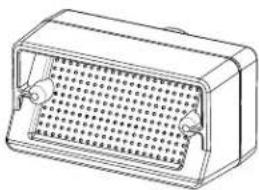
Simple line drawing of a rectangular mechanical component with a flanged end (no text or symbols)Water Filter (x1)
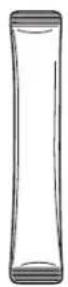
Descaling Powder (x1)
natural_image
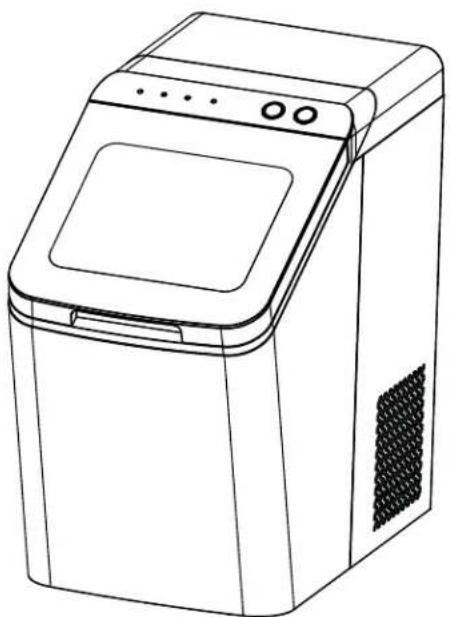
Line drawing of a modern kitchen appliance with control panel and door (no text or symbols)OPAL ICE MAKER
natural_image
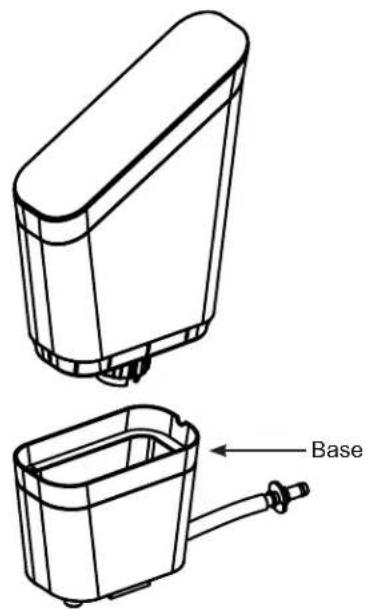
Technical line drawing of a device with two views: top shows a cylindrical housing, bottom shows a rectangular housing with a labeled 'Base' component (no text or symbols beyond label)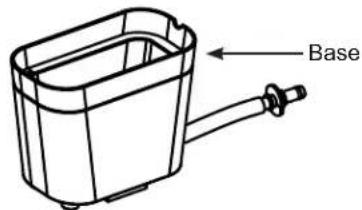
Side Tank ClipSide Tank
natural_image
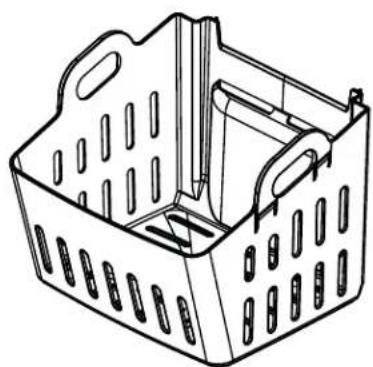
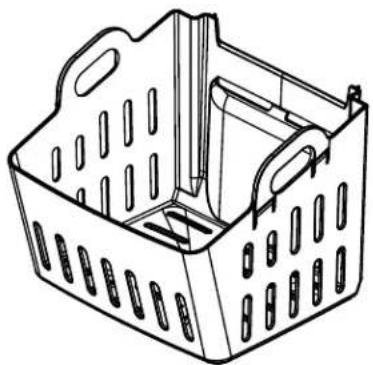
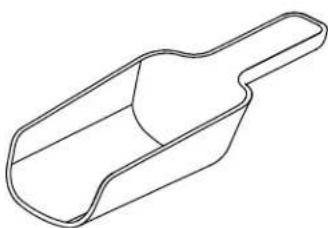
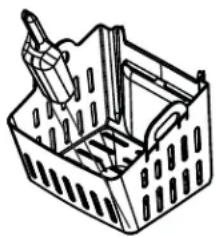
Line drawing of a plastic basket with cutouts and side handles (no text or symbols)ICE BIN ICE SCOOP Screen Filter Intake
natural_image
Line drawing of a mechanical part with a handle and central slot (no text or symbols)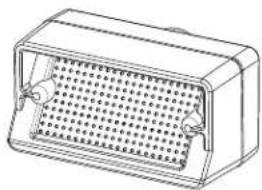
natural_image
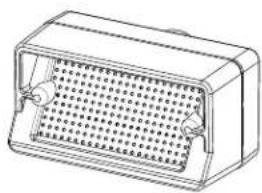
Line drawing of a rectangular electronic component with a grid-patterned body and mounting holes (no text or symbols)(pre-assembled in ice maker water reservoir)
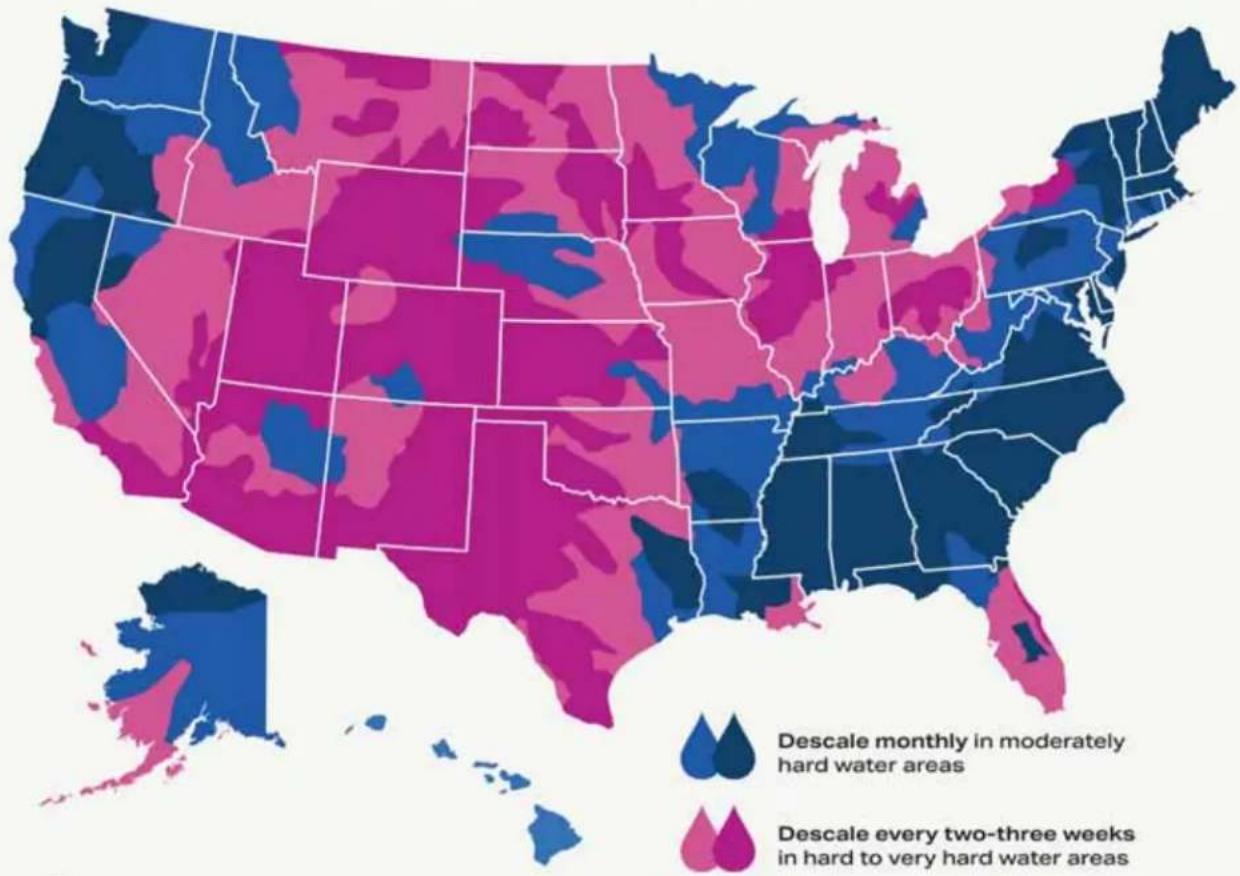
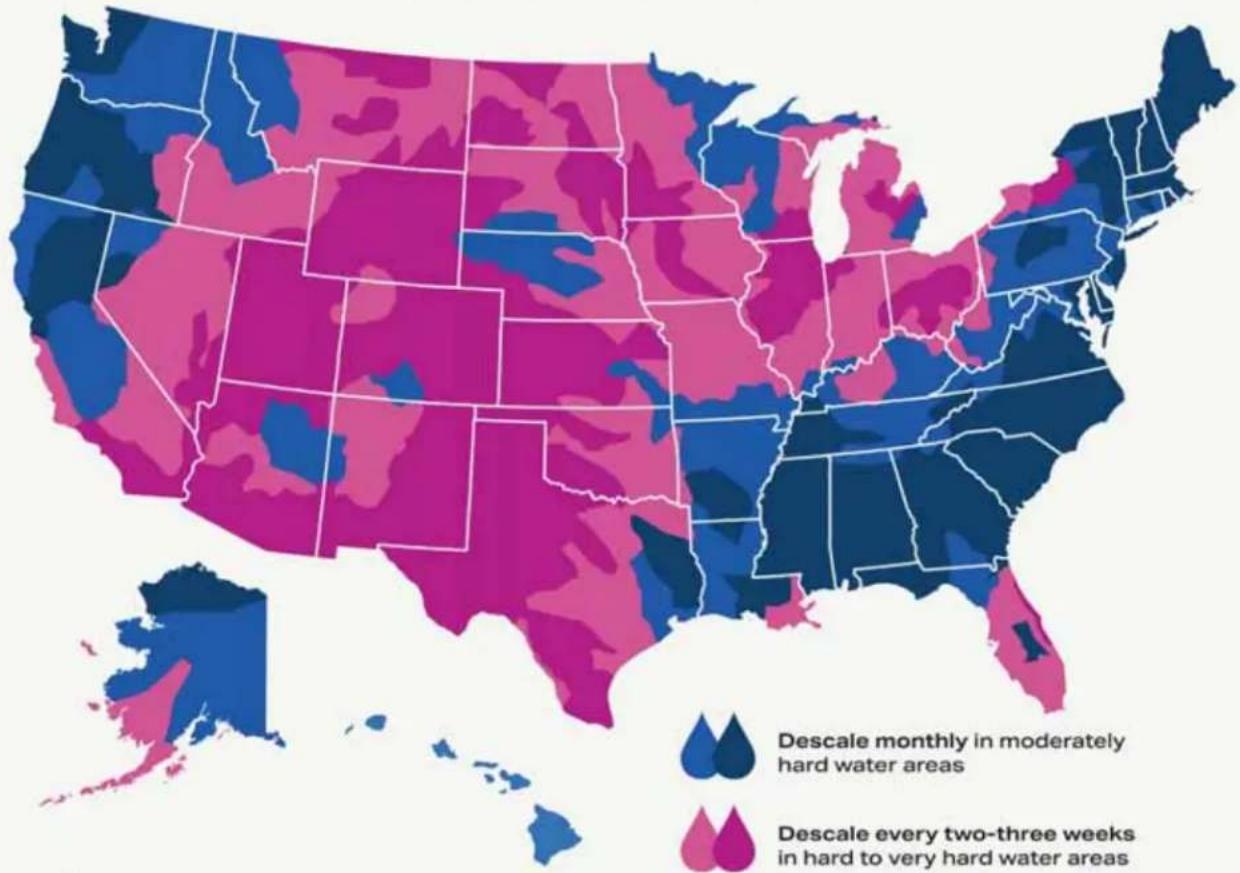
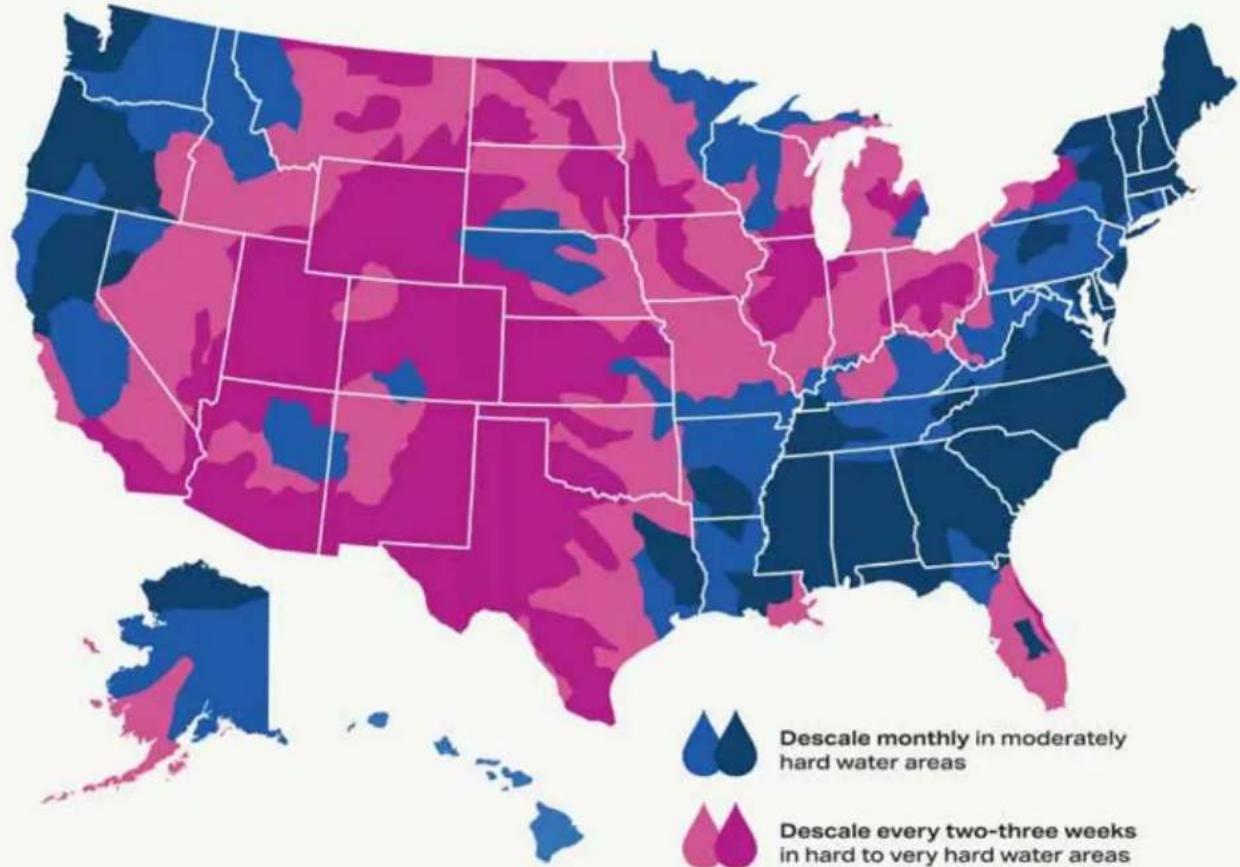
Hard Water Can Impact Your Ice Maker
Descale your Opal once a month or more frequently if you live in an area with hard water.
geo
| State | Descale monthly in moderately hard water areas | Descale every two-three weeks in hard to very hard water areas | |-------|-----------------------------------------------|----------------------------------------------------------| | Alabama | Dark Blue | Light Pink | | Alaska | Dark Blue | Light Pink | | Arizona | Dark Blue | Light Pink | | Arkansas | Dark Blue | Light Pink | | California | Dark Blue | Light Pink | | Colorado | Dark Blue | Light Pink | | Connecticut | Dark Blue | Light Pink | | Delaware | Dark Blue | Light Pink | | Florida | Dark Blue | Light Pink | | Georgia | Dark Blue | Light Pink | | Hawaii | Dark Blue | Light Pink | | Idaho | Dark Blue | Light Pink | | Illinois | Dark Blue | Light Pink | | Indiana | Dark Blue | Light Pink | | Iowa | Dark Blue | Light Pink | | Kansas | Dark Blue | Light Pink | | Kentucky | Dark Blue | Light Pink | | Louisiana | Dark Blue | Light Pink | | Maine | Dark Blue | Light Pink | | Maryland | Dark Blue | Light Pink | | Massachusetts | Dark Blue | Light Pink | | Michigan | Dark Blue | Light Pink | | Minnesota | Dark Blue | Light Pink | | Mississippi | Dark Blue | Light Pink | | Missouri | Dark Blue | Light Pink | | Montana | Dark Blue | Light Pink | | Nebraska | Dark Blue | Light Pink | | Nevada | Dark Blue | Light Pink | | New Hampshire | Dark Blue | Light Pink | | New Jersey | Dark Blue | Light Pink | | New Mexico | Dark Blue | Light Pink | | North Carolina | Dark Blue | Light Pink | | North Dakota | Dark Blue | Light Pink | | Ohio | Dark Blue | Light Pink | | Oklahoma | Dark Blue | Light Pink | | Oregon | Dark Blue | Light Pink | | Pennsylvania | Dark Blue | Light Pink | | Rhode Island | Dark Blue | Light Pink | | South Carolina | Dark Blue | Light Pink | | South Dakota | Dark Blue | Light Pink | | Tennessee | Dark Blue | Light Pink | | Texas | Dark Blue | Light Pink | | Utah | Dark Blue | Light Pink | | Vermont | Dark Blue | Light Pink | | Virginia | Dark Blue | Light Pink | | Washington | Dark Blue | Light Pink | | West Virginia | Dark Blue | Light Pink | | Wisconsin | Dark Blue | Light Pink | | Wyoming | Dark Blue | Light Pink | | Montana | Dark Blue | Light Pink | | Wyoming-Maurphyra | Dark Blue | Light Pink | | Kansas | Dark Blue | Light Pink | | Nebraska | Dark Blue | Light Pink | | Nevada | Dark Blue | Light Pink | | New Hampshire | Dark Blue | Light Pink | | New Jersey | Dark Blue | Light Pink | | New Mexico | Dark Blue | Light Pink | | New York | Dark Blue | Light Pink | | North Carolina | Dark Blue | Light Pink | | North Dakota | Dark Blue | Light Pink | | Ohio State | Dark Blue | Light Pink | | Oklahoma State | Dark Blue | Light Pink | | Oregon State | Dark Blue | Light Pink | | Pennsylvania State | Dark Blue | Light Pink | | Rhode Island State | Dark Blue | Light Pink | | South Carolina State | Dark Blue | Light Pink | | South Dakota State | Dark Blue | Light Pink | | Tennessee State | Dark Blue | Light Pink | | Texas State State 1200-2490.0000 Tennessee State 1200-2500.0000 Utah State 1200-2500.0000 Vermont State 1200-2500.0000 Washington State 1200-2500.0000 Wisconsin State 1200-2500.0000 Wisconsin State 2500-3500.0000 Utah State 2500-3500.0000 Union State 2500-3500.0000 Utah State 3500-4500.0000 Utah State 4500-5500.0000 Utah State 5500-6500.0000 Utah State 6500-7500.0000 Utah State 7500-8500.0000 Utah State 8500-9500.0000 Utah State 9500-10500.0000 Utah State 10500-11500.0000 Utah State 11500-12500.0000 Utah State 12500-13500.0000 Utah State 13500-14500.0000 Utah State 14500-15500.0000 Utah State 15500-16500.0000 Utah State 16500-17500.0000 Utah State 17500-18500.0000 Utah State 18500-19500.0000 Utah State 19500-24999.9999 Utah State 24999.9999 Utah State 25999.9999 Utah State 26999.9999 Utah State 27999.9999 Utah State 28999.9999 Utah State 29999.9999 Utah State 34999.9999 Utah State 35999.9999 Utah State 36999.9999 Utah State 37999.9999 Utah State 38999.9999 Utah State 39999.9999 Utah State 44999.9999 Utah State 45999.9999 Utah State 46999.9999 Utah State 47999.9999 Utah State 48999.9999 Utah State 49999.9999 Utah State 54888.48888. Utah State 54888. Utah State 54888. Utah State 54888. Utah State 54888. Utah State 54888. Utah State 54888. Utah State 54888. Utah State 54888. Utah State 54888. Utah State 54888. Utah State 57777. Utah State 57777. Utah State 57777. Utah State 57777. Utah State 57777. Utah State 57777. Utah State 57777. Utah State 57777. Utah State 57777. Utah State 57777. Utah State 5777
Profile ^TM

Descale monthly in moderately hard water areas

Descale every two-three weeks in hard to very hard water areas
Concentration of calcium carbonate in the water

0-60mg/L

120mg/L

180mg/L

250mg/L

(Soft)

(Structurally

(Hando)

(Verry Hands
To eliminate the need to descale it is recommended to use distilled water Data Source: https://www.usgs.gov/media/images/imap-water-hardness-united-states
The ideal operating environment of the Opal Ice Maker is between 55^ F - 90^ F, and the ice maker should be installed with a 3 inch clearance on the back and sides of the unit. Follow directions on Page 8 to sanitize and rinse the ice maker with clean water prior to first use.
- Open the lid to access the lower water reservoir.
-
Fill the reservoir with fresh, filtered, potable water up to the "Max Fill" line. Water hardness must be less than 205 mg/L. Do not fill the reservoir with any liquid except water. Using any liquid except potable water is misuse and will void your warranty. If using tap water, the unit will need to be descaled more often (every 2-3 weeks) to maintain proper function.
-
Touch the Power button to start the ice maker. The indicator on the left-hand side will light up 'Making Ice' to confirm that unit has begun to make ice.
-
Opal will begin to produce ice within 10 minutes. It will continue to make ice until the bin is full, or it runs out of water. To continue making ice, remove ice from the ice bin or add more water.
-
Plug the ice maker into a grounded outlet.
▲NOTICE
Some types of under-cabinet lamps can be hot enough to cause damage to your Opal top's appearance.
Understanding the Display
Making Ice Add Water


Cleaning

Defrosting

Clean
Hold 3 Sec
Power
Power
The Power button, when pressed, will activate the machine controls, and begin the ice making process. When the machine is active and ON, the Power button, when pressed, will turn the ice maker off.
Cleaning
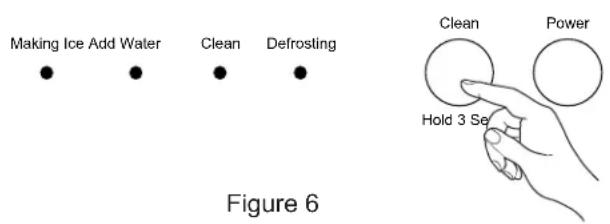
The cleaning cycle is initiated by pressing and holding the Clean button for 3 seconds. In order to exit the cleaning cycle, simply press and hold the Clean button again.
Cleaning Notification (Descale Alert)
After 100 hours of ice making, the Cleaning indicator will flash to alert the user that a descale cycle is needed. Flashing will stop once the cycle has been completed.
Defrosting
If the ice maker has detected a frozen auger and low ice production then the Defrosting indicator will light up. The unit will run a rinse cycle to defrost the ice maker and then start making ice again.
Indicator Lights
The four indicator lights on the left-hand side off the machine control show the current status of the Opal. If Add Water is highlighted, your unit needs more water before it can cycle to make ice or clean.
Ice Scoop Storage
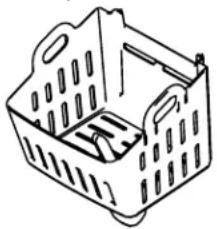
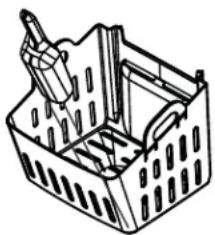
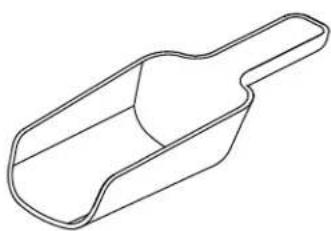
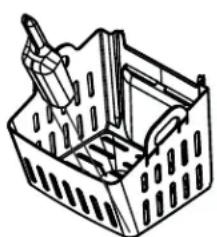
Easily store the Opal ice scoop inside the ice bin by sliding the scoop into one of the fitted slots.
natural_image
Isometric line drawing of a shopping basket with handle and side panels (no text or symbols)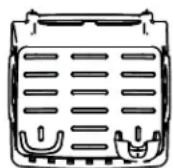
natural_image
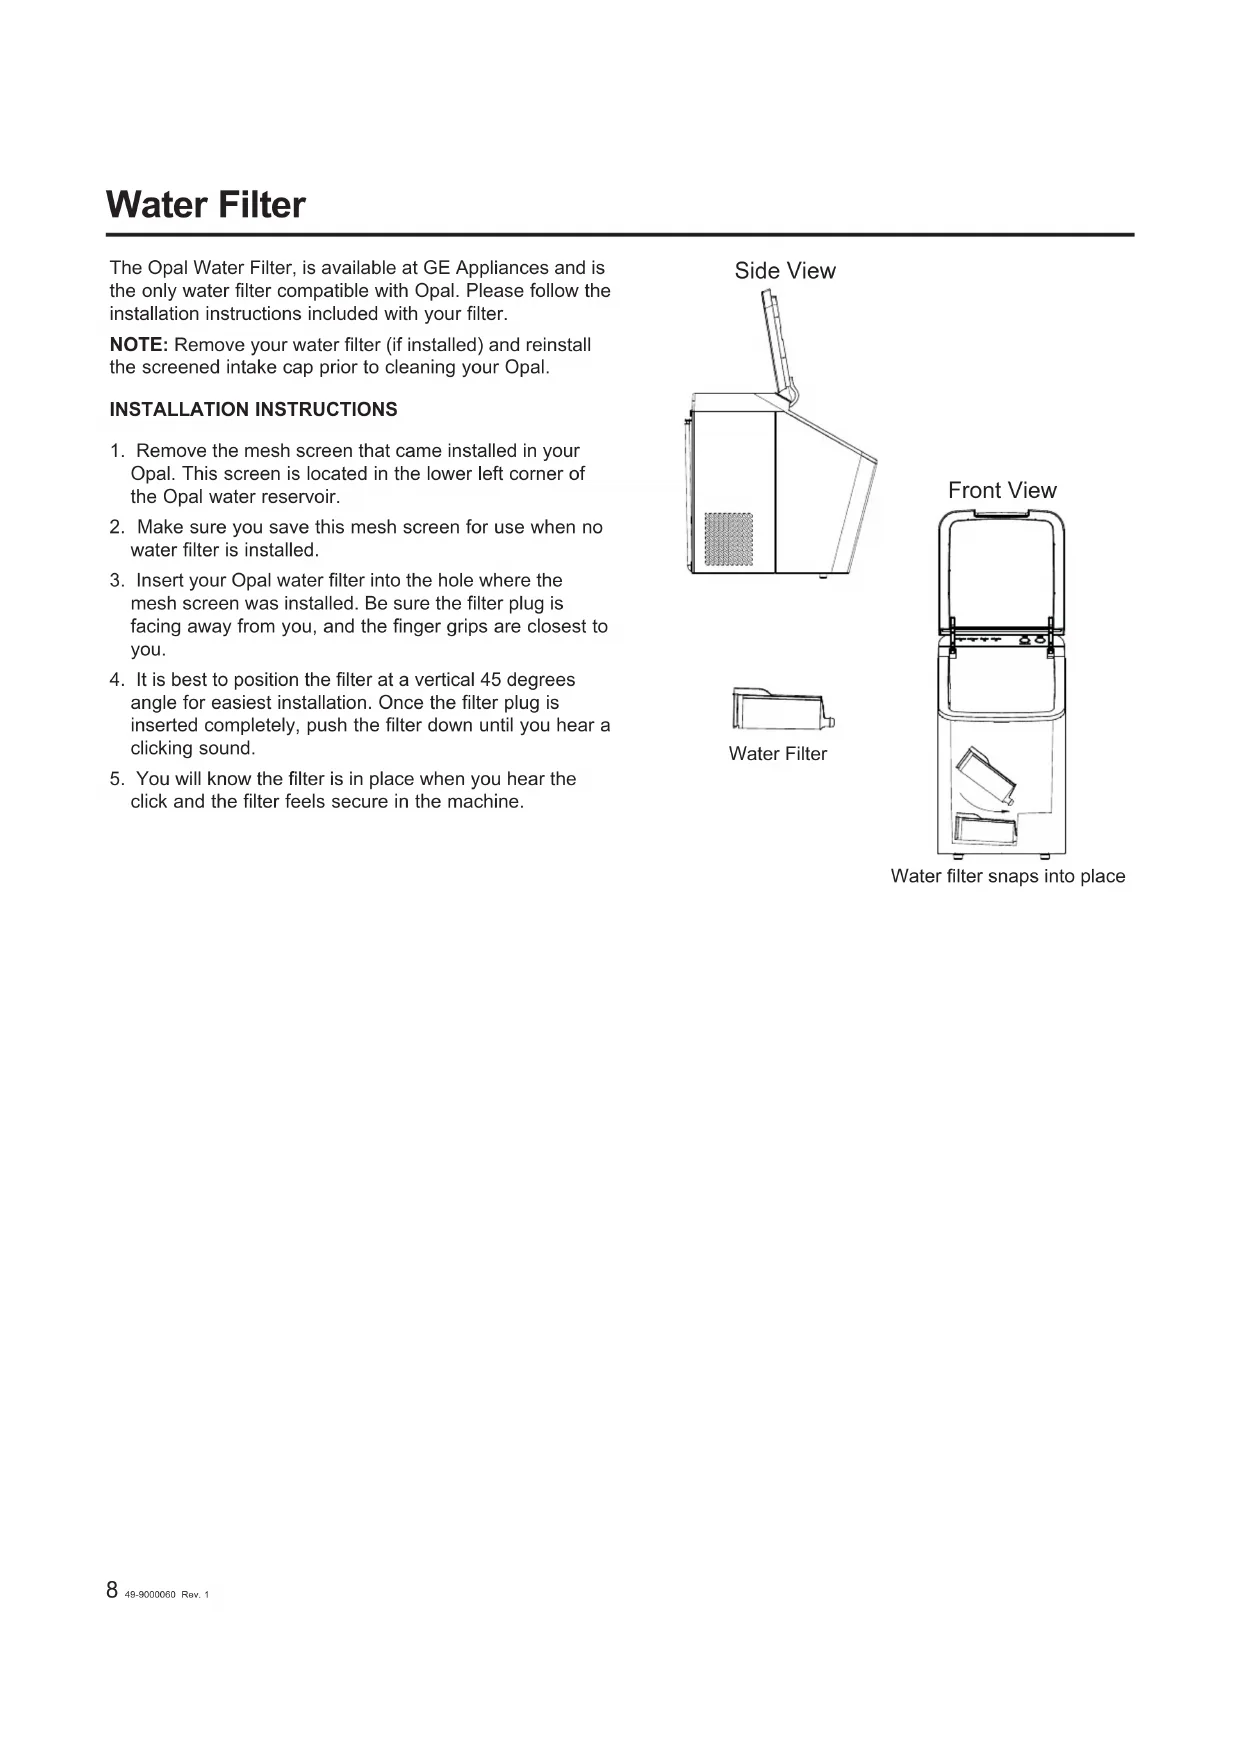
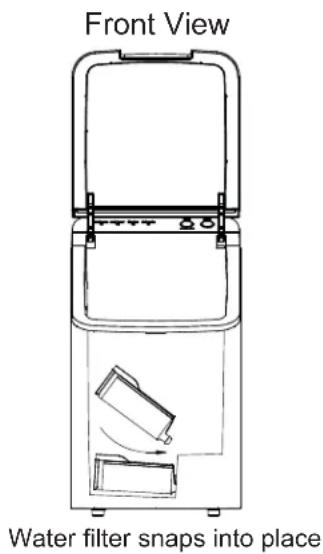
Line drawing of a plastic basket with internal compartments and a handle (no text or symbols)The Opal Water Filter, is available at GE Appliances and is the only water filter compatible with Opal. Please follow the installation instructions included with your filter.
NOTE: Remove your water filter (if installed) and reinstall the screened intake cap prior to cleaning your Opal.
INSTALLATION INSTRUCTIONS
- Remove the mesh screen that came installed in your Opal. This screen is located in the lower left corner of the Opal water reservoir.
- Make sure you save this mesh screen for use when no water filter is installed.
- Insert your Opal water filter into the hole where the mesh screen was installed. Be sure the filter plug is facing away from you, and the finger grips are closest to you.
- It is best to position the filter at a vertical 45 degrees angle for easiest installation. Once the filter plug is inserted completely, push the filter down until you hear a clicking sound.
- You will know the filter is in place when you hear the click and the filter feels secure in the machine.
natural_image
Side view diagram of a mechanical device with a handle and textured base (no text or symbols)
Water Filter
Care and Cleaning
To keep nugget ice tasting fresh and the ice maker performing properly, descaling and sanitizing is high recommended.
Sanitizing is recommended once per week to keep the unit hygienic and disinfected.
Descaling is recommended for removing hard mineral deposits and should be performed every 2-3 weeks depending on water hardness.
If using tap water, the cleaning schedule may need to be adjusted based on hardness of water. Harder water may require more frequent descaling or switching to distilled
water is suggested. To clean the exterior of the ice maker unplug the product, then use a soft cloth dampened with soapy water to gently clean the exterior surfaces. Dry with soft cloth. Do not use soap to clean the reservoir.
WARNING
Chemical Exposure Hazard, when
cleaning with bleach, use bleach in a well ventilated area
and avoid mixing bleach with other household cleaners.
WARNING
Unplug the product before cleaning by
hand, and when not in use.
System Descaling / Sanitizing Procedure
First Time Use: Before first use of the Opal Ice Maker, it is recommended to start by sanitizing the machine.
Cleaning Notification: After 100 hours of ice making, the Cleaning indicator will flash to alert the user that a descale cycle is needed. Flashing will stop once the cycle has been completed but will not prevent the machine from making ice in the meantime. This alert is hard water dependent. Please reference the hard water map on Page 6 for guidance.
To descale or sanitize the Opal's internal components, complete the following steps:
natural_image
Line drawing of a kitchen appliance with a front panel and control panel (no text or symbols)Figure 1
natural_image
Pure electrical circuit lines without any symbolsFigure 2
-
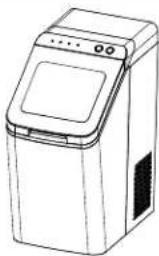
Remove the ice bin before starting the cleaning process and then unplug the Opal.
-
Remove the Opal water filter (if present), and replace it with the reservoir's screened intake cap. If a filter is not present, first remove the screen intake filter and rinse it with water to clean out any debris that may have accumulated during ice making over time. Replace the screen intake filter so it is in place during the descaling or sanitizing process.
-
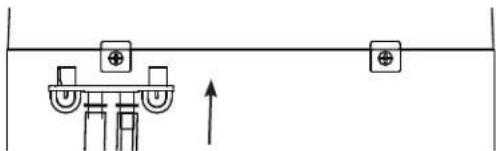
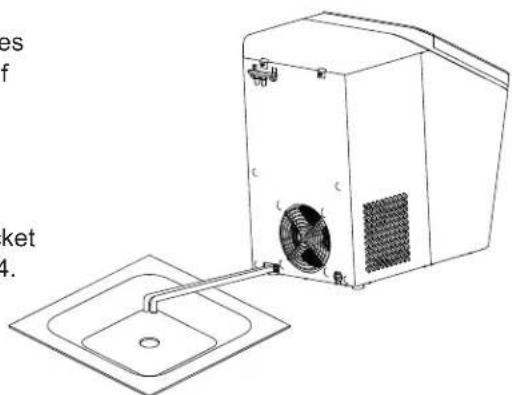
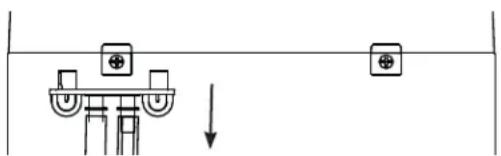
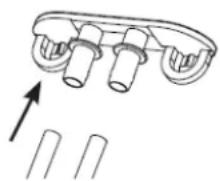
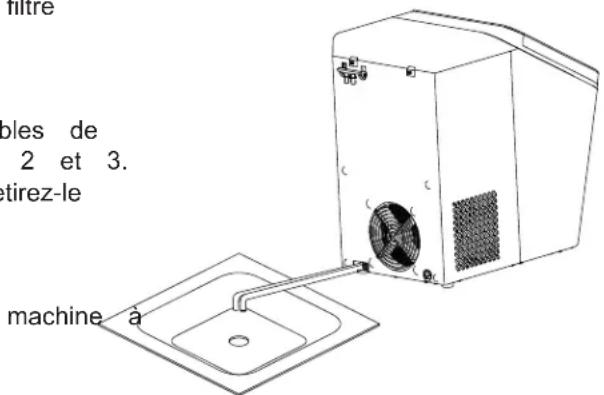
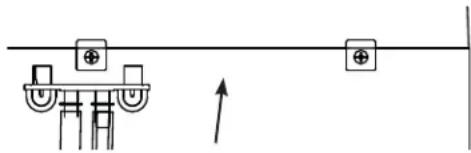
Drain the Opal by unhooking the top of the drain hoses at the back of the unit. See Figures 2 and 3. NOTE: If the side tank is present, remove the side tank from the side tank base and disconnect the side tank base before draining.
-
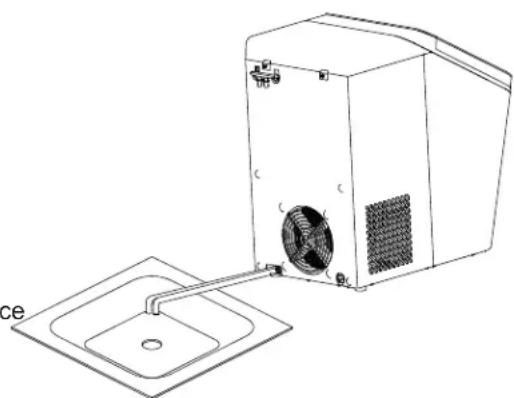
Next, lay the hoses down to drain into a sink or bucket that is below the level of the ice maker. See Figure 4.
-
Once water stops flowing, re-insert the drain plugs.
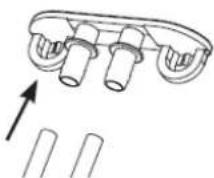
Figure 3
natural_image
Line drawing of a kitchen appliance with a drain and fan (no text or symbols)Figure 4
System Descaling / Sanitizing Procedure (continued)
6. Descaling:
Fill the reservoir with white vinegar up to the Max Fill Line or use the Opal Cleaning Kit and follow the instructions provided.
Sanitizing:
Create a solution by filling the water to the Max Fill Line and then adding one teaspoon of bleach.
- Plug in Opal and hold the Clean button for 3 seconds to initiate the cleaning process. See Figure 6.
NOTE: Water will begin circulating and the Cleaning indicator will light up on the left-hand side of the unit to confirm the unit is now in the cleaning process. After three minutes, the water will stop, the Cleaning indicator light will turn off, and the Clean button will begin to pulse. If the ice maker is not interacted with for 5 minutes, the pulsing will stop, the machine will exit Cleaning mode and enter an idle state.
- Descaling: run the clean cycle up to 3 times, with the descaling solution, and then let the unit sit for 18 hours and soak. While the unit is soaking, dip a cloth in the solution and wipe the inner walls. Use a cotton swab to clean any cracks. When you are done, rinse the cloth with clean water and wipe Opal again to remove any cleaning solution. Repeat the process for very heavy scale deposits.
Sanitizing: Once the Cleaning indicator turns off, promptly drain the Opal.
- Rinse by adding fresh water to the water reservoir and pressing the Clean button to initiate a second cleaning cycle. Once the cleaning cycle has completed, drain the unit of all water.
- Repeat step 9 two more times, adding fresh water to the reservoir each time (you may continue to repeat the rinse cycle, for as many times as you like). To exit cleaning mode at any time, press and hold the 'Clean' button for three seconds.
- Replace and reconnect the drain tubes to the back of the Opal.
- When complete, fill the reservoir with fresh water and press the 'Power' button to start making ice. See Figure 8.
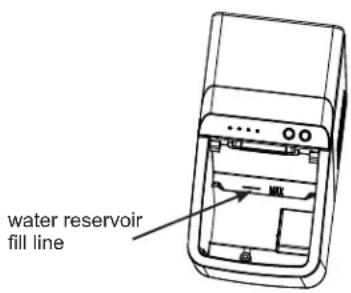
Figure 5
natural_image
Pure mechanical diagram showing a lever mechanism with weights and a downward arrow, no text or symbols present.Figure 7
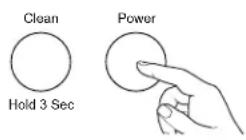
Figure 8
- Rinse and hand wash the Opal Side Tank with warm water and a mild dish soap. Rinse the cap, rubber valve, tank and the base well to remove any residual soap.
DO NOT WASH THE SIDE TANK IN THE DISHWASHER.
- Unplug the Opal Nugget Ice Maker. Unhook Opal's drain tubes and drain the water from the reservoir.
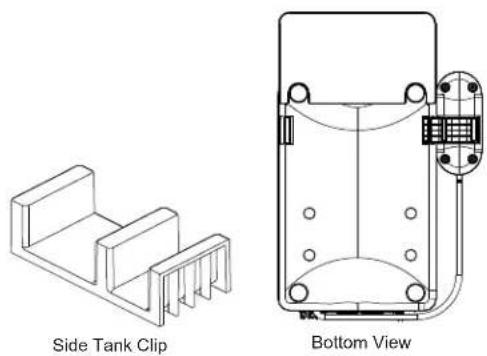
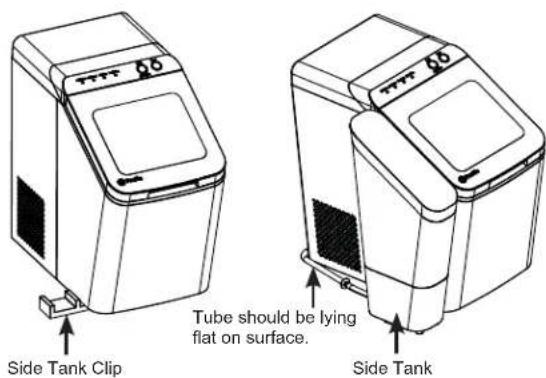
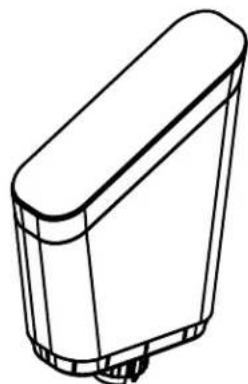
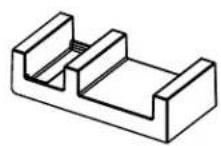
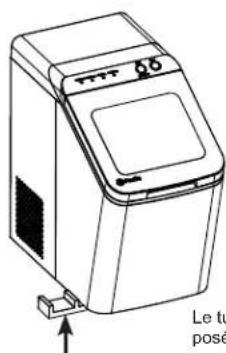
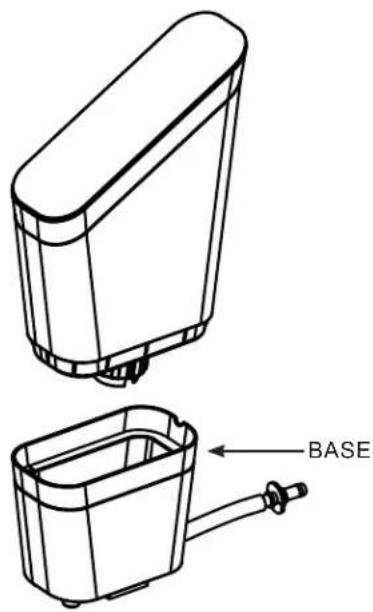
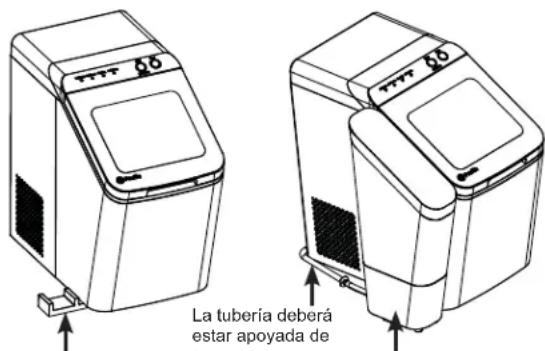
- Place Opal Side Tank on the right or left-hand side of the Opal Nugget Ice Maker. Using the side tank clip, slide the shorter side of the clip under the unit, near the front of the unit. The side tank clip will slide into a slot on the bottom of the unit. Once this is placed, the side tank base can slide onto the opposite side of the clip. See figures to the right for reference.
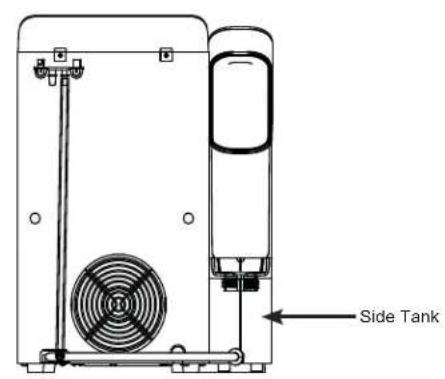
- Connect the drain tube, labeled Side Tank, to the back of Opal Side Tank's base. There is a short tube attached to the side tank base, with a barb fitting. Connect this barb fitting with the drain tube labeled Side Tank.
NOTE: Make sure the drain tube is laying flat on the counter-top for adequate water flow.
- Install the remaining drain tube and hanger onto the back of the Opal for storage, making sure the drain tube connecting to the Side Tank is resting flat on the counter-top.
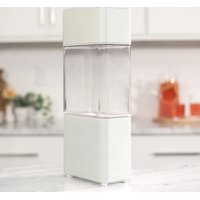
- Lift the side tank reservoir from the base, unscrew the cap and fill side tank with water. Replace cap after side tank reservoir is full.
- Carefully flip over Opal Side Tank's reservoir and place in the base. Water should start flowing into the Opal Nugget Ice Maker and bubbles in the Opal Side Tank will appear periodically during the time water is flowing to the ice maker.
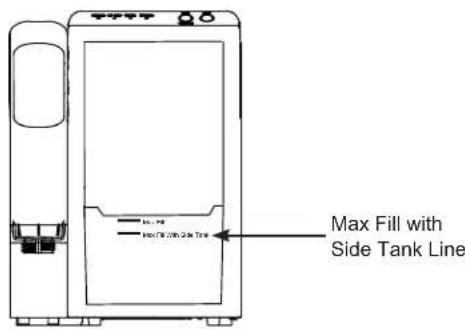
- Fill the Opal Nugget Ice Maker's lower water reservoir to the Max Fill with Side Tank line, if desired. Do not fill to the Max Fill line, otherwise there is risk of overflowing the side tank base. The water will flow from side tank but will have a slow start as it needs time to fill up the water reservoir before ice making can begin.
- Plug in the Opal Nugget Ice Maker, and begin making ice.
NOTE: If the water does not appear to flow into the ice maker, there may be bubbles in the side tank tube or the side tank tube is not lying flat. If either of these mentioned issues are present, adjust side tank tube to allow the water to flow.
Normal Operating Sounds
Your new ice maker may make sounds that are not familiar. Most of these sounds are normal. Hard surfaces like the floor, walls, and countertops can amplify these sounds. The following describes the sounds that may be new to you and what may be creating them.
| Operating Noise Reason | Consumer is Experiencing Operation Noise |
| Whir When Opal is first | turned on, you may notice the condenser fan spinning. |
| Buzz When the water | pump first turns on, it may be dry and slightly noisy. Once it is filled with water, the noise reduces significantly. |
| Rattle | "Rattling noises may be produced from the flow of the refrigerant. These noises should reduce significantly once the refrigerant system has stabilized." |
| Gurgle | When the refrigerant system shuts off, there may be a brief gurgle as the refrigerant stops flowing. |
| Hum The compressor | is a motor. It produces a low toned humming sound while it is running. |
| Click | As nugget ice is produced, it drops into the ice bin. The first nuggets produced are the loudest, as they impact the bottom of the ice bin. As the bin fills, this noise reduces significantly. |
| Squeak When Opal is | in need of defrosting, it may start to squeak as ice starts to build up around the mechanisms.The defrost cycle is automatic, and may take 10-20 minutes. During this time, the front button won't respond.More frequent squeaking usually requires white vinegar cleaning to remove internal mineral scale buildup. |
Troubleshooting
| Problem Solution | |
| Ice seems slushy and not freshly made | The ice maker is set up to save energy and wear and tear on components when not in use. If you do not interact with machine by opening/closing the lid for 8 hours, the machine will not run. After 8 hours the machine will start back up and produce ice again until it reaches the Ice Bin Full state. |
| Unit is showing Add Water status but there is plenty of water | Follow the descaling instructions starting on page 8. Soak the unit for 18 hours and then run a full rinse cycle. |
| Unit Keeps going into Defrost | If the ice maker is going into Defrost mode and there are no audible sounds indicating that the auger is frozen, it's highly likely that the air vents are blocked. Make sure that there is a minimum 3 inches clearance on the back and sides of the unit to ensure proper airflow. If airflow is constricted, the machine will not produce ice normally. |
| Ice production is Low | Make sure that there is a minimum 3 inches clearance on the back and sides of the unit to ensure proper airflow. If airflow is constricted, the machine will not produce ice normally. If vents are not obstructed, follow the descaling instructions on Page 8. Soak unit for 18 hours and run through full rinse cycle. |
GE Appliances Ice Maker Limited Warranty
GE Appliancesppliances.com
Please have your serial number and your model number available when calling for service. Call 1.866.907.6718 for service questions.
For the Period of: GE Appliances Covers
| One YearFrom the date of the original purchase | If the ice machine fails due to a defect in materials or workmanship, during the limited one-year warranty, GE Appliances will either repair the product, replace it with a new or manufactured product, or refund the purchase price of the product at GE Appliances' sole discretion. |
What GE Appliances Will Not Cover:
■ Service trips to your home.
■ Improper installation, delivery or maintenance.
■ Failure of the product if it is abused, misused, or used for other than the intended purpose or used commercially.
■ Replacement of house fuses or resetting of circuit breakers.
■ Damage caused after delivery.
■ Replacement of the light bulbs, if included.
■ Damage to the product caused by accident, fire, floods
or acts of God.
■ Incidental or consequential damage caused by possible defects with this appliance.
■ Software bugs that can be corrected with an update via the SmartHQ App
■ Labor and other charges to install and/or remove the product
EXCLUSION OF IMPLIED WARRANTIES
Your sole and exclusive remedies are product exchange or refund as provided in this Limited Warranty. Any implied warranties, including the implied warranties of merchantability or fitness for a particular purpose, are limited to one year or the shortest period allowed by law.
For sale in the 50 United States and the District of Columbia only: For US Customers: This limited warranty is extended to the original purchaser for products purchased for home use within the USA. In Alaska and Hawaii, the limited warranty does not include the costs of shipping units.
Some states do not allow the exclusion or limitation of incidental or consequential damages. This warranty gives you specific legal rights, and you may also have other rights which vary from state to state. To know what your legal rights are, consult your local or state consumer affairs office or your state's Attorney General.
Warrantor: GE Appliances, a Haier company Louisville, KY 40225
Service and Registration
Register your new appliance on-line at your convenience! Timely product registration will allow for enhanced communication and prompt service under the terms of your warranty, should the need arise.
Register your appliance at GE Appliancesppliances.com/register.
Contact Us
If you are not satisfied with the service you receive from GE Appliances, contact us on our Website with all the details including your phone number, or write to:
In the US: General Manager, Customer Relations | GE Appliances, Appliance Park | Louisville, KY 40225
GE Appliancesppliances.com/contact

Profile
The Good Ice™
MACHINE À GLAÇONS EN PÉPITES OPALTM
CONSIGNES
DE SÉCURITÉ IMPORTANTES....3
PIÈCES INCLUDES....4
IMPACT SUR L'EAU DURE....5
PRODUCTION
DE GLAÇONS AVEC L'OPAL....6
COMPRENDRE L'AFFICHAGE....6
RANGEMENT DE LA PELLE À GLAÇONS..6
FILTRE À EAU 7
ENTRETIEN ET NETTOYAGE....8
INSTALLATION DU RÉSERVOIR LATÉRAL. 10
SONS DE FONCTIONNEMENT NORMAUX.11
DÉPANNAGE....11
GARANTIE LIMITÉE....12
SOUTIEN AU CONSOMMATEUR....13
natural_image
Line drawing of a modern kitchen appliance with control panel and door (no text or symbols)
Profile
NOUS VOUS REMERCIONS D'INTÉGRER GE APPLIANCES À VOTRE DEMEURE.
natural_image
Line drawing of a rectangular mechanical component with a flanged end and rounded top (no text or symbols)Filtre à eau (x1)
natural_image
Line drawing of a microwave oven with control panel and ventilation slots (no text or symbols)MACHINE À GLAÇONS OPAL
natural_image
Line drawing of a rectangular electronic device with a rounded top and base (no text or symbols)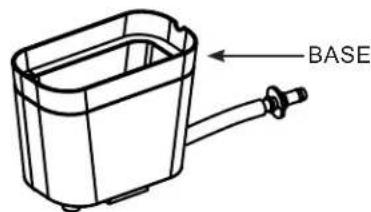
RÉSERVOIR LATÉRAL EN ACCESSOIRE
AGRAFE DU
RÉSERVOIR LATÉRAL
natural_image
Line drawing of a plastic shopping basket with cutouts and handle (no text or symbols)BAC À GLAÇONS
natural_image
Line drawing of a mechanical part or tool with a curved handle and central slot (no text or symbols)PELLE À GLAÇONS
natural_image
Line drawing of a rectangular electronic device with a grid-patterned panel (no text or symbols)Hard Water Can Impact Your Ice Maker
Descale your Opal once a month or more frequently if you live in an area with hard water.
geo
| State | Descale monthly in moderately hard water areas (blue) | Descale every two-three weeks in hard to very hard water areas (pink) | |-------|------------------------------------------------------|------------------------------------------------------------------| | Alabama | High density in northern U.S. states | Low density in southern states |
Profile
Concentration of calcium carbonate in the water

0-60mg/L

120mg/L

180mg/L

250mg/L

(moft)

(9) characterfly

(Mand)

Very Handt
To eliminate the need to descale it is recommended to use distilled water Data Source: https://www.cigs.gov/media/images/map-water-hardness-united-states
natural_image
Line drawing of a shopping basket with handle and side panel (no text or symbols)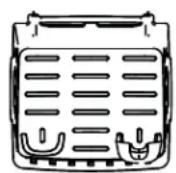
natural_image
Isometric line drawing of a plastic basket with internal compartments and a handle (no text or symbols)natural_image
Line drawing of a portable kitchen appliance with control panel and buttons (no text or symbols)Figure 1
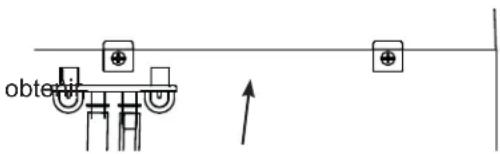
Figure 2
natural_image
Diagram of a mechanical component with three cylindrical parts and an upward arrow indicating motion (no text or symbols)Figure 3
natural_image
Pure mechanical diagram showing a lever system with weights and a downward arrow, no text or symbols presentFigure 7
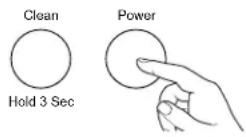
Figure 8
natural_image
Isometric line drawing of a mechanical or architectural component with two stacked blocks and a bracket (no text or symbols)natural_image
Technical line drawing of a mechanical or electronic component with no visible text, numbers, or symbols.Vue de dessous
Louisville, KY 40225
natural_image
Line drawing of a modern kitchen appliance with control panel and door (no text or symbols)
Profile
GRACIAS POR HACER QUE GE APPLIANCES SEA PARTE DE SU HOGAR.
natural_image
Line drawing of a rectangular mechanical component with a flanged end (no text or symbols)Filtro de Agua (x1)
natural_image
Line drawing of a modern kitchen appliance with control panel and door (no text or symbols)MÁQUINA DE HIELO OPAL ACCESORIO DEL TANQUE LATERAL
TANQUE LATERAL
natural_image
Line drawing of a plastic basket with cutouts and side handles (no text or symbols)RECIPIENTE DE HIELO
natural_image
Line drawing of a mechanical part or tool with a curved handle and central slot (no text or symbols)CUCHARA PARA HIELO
natural_image
Line drawing of a rectangular electronic component with a grid-patterned body and two side connectors (no text or symbols)Hard Water Can Impact Your Ice Maker
Descale your Opal once a month or more frequently if you live in an area with hard water.

Profile ^TM

Descale monthly in moderately hard water areas

Descale every two-three weeks in hard to very hard water areas
Concentration of calcium carbonate in the water

0-6

g/L

120

儿

180

八

。

0mg/L
To eliminate the need to descale it is recommended to use distilled water. Data Source: https://www.usgs.gov/media/images/map-water-handiness-united-states
natural_image
Isometric line drawing of a shopping basket with handle and side panels (no text or symbols)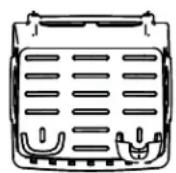
natural_image
Isometric line drawing of a shopping basket with handle and slot (no text or symbols)natural_image
Line drawing of a modern kitchen appliance with a front panel and control buttons (no text or symbols)Figure 1
natural_image
Pure electrical circuit lines without any symbolsFigure 2
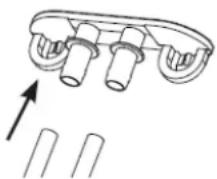
Figure 3
natural_image
Line drawing of a kitchen appliance with a drain and fan, no text or symbols presentFigure 4
natural_image
Pure mechanical diagram showing a lever system with weights and a downward arrow, no text or symbols presentFigure 7
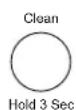
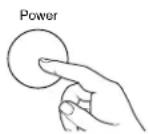
Figure 8
natural_image
Technical line drawing of a mechanical or electronic component with no visible text, numbers, or symbols.Vista Inferior
Garante: GE Appliances, a Haier company Louisville, KY 40225
Registre su Electrodoméstico
GEAppliances.com/contact
En Canada: Director, Consumer Relations, MC Commercial Inc. | Suite 310, 1 Factory Lane | Moncton, N.B. E1C 9M3
GEAppliances.ca/en/contact-us

Profile
The Good Ice™

- OWNER'S MANUAL
- Profile
- THANK YOU FOR MAKING GE APPLIANCES A PART OF YOUR HOME.
- IMPORTANT SAFETY INFORMATION READ ALL INSTRUCTIONS BEFORE USING THE APPLIANCE
- WARNING
- CAUTION
- REFRIGERANT AND FOAM DISPOSAL
- PROPER DISPOSAL OF YOUR APPLIANCE
- RE OR EXPLOSION HAZARD Flammable Refrigerant
- READ AND SAVE THESE INSTRUCTIONS
- CONSIGNES DE SÉCURITÉ IMPORTANTES LISEZ, SUIVRE, ET CONSERVER CES INSTRUCTIONS
- AVERTISSEMENT
- Hard Water Can Impact Your Ice Maker
- ▲NOTICE
- Understanding the Display
- Power
- Cleaning
- Cleaning Notification (Descale Alert)
- Defrosting
- Indicator Lights
- Ice Scoop Storage
- INSTALLATION INSTRUCTIONS
- Care and Cleaning
- System Descaling / Sanitizing Procedure
- System Descaling / Sanitizing Procedure (continued)
- Descaling:
- Sanitizing:
- DO NOT WASH THE SIDE TANK IN THE DISHWASHER.
- Normal Operating Sounds
- Troubleshooting
- GE Appliances Ice Maker Limited Warranty
- GE Appliancesppliances.com
- What GE Appliances Will Not Cover:
- EXCLUSION OF IMPLIED WARRANTIES
- Service and Registration
- Contact Us
- MACHINE À GLAÇONS EN PÉPITES OPALTM
- CONSIGNES
- PRODUCTION
- NOUS VOUS REMERCIONS D'INTÉGRER GE APPLIANCES À VOTRE DEMEURE.
- GRACIAS POR HACER QUE GE APPLIANCES SEA PARTE DE SU HOGAR.
- Registre su Electrodoméstico
Brand : GE
Model : Profile Opal P4INSASBVTS
Category : Ice machine