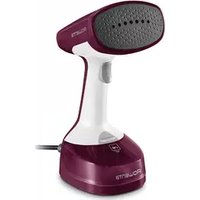
Ultra Steam DR5020 - Steam cleaner ROWENTA - Free user manual and instructions
Find the device manual for free Ultra Steam DR5020 ROWENTA in PDF.
| Brand | Rowenta |
| Model | Ultra Steam DR5020 |
| Category | Steam cleaner |
| Product type | Garment steamer |
| Power supply | Dual voltage 120V / 230V AC, 50-60 Hz |
| Heat-up time | Approximately 30 seconds |
| Water tank | Removable, capacity not specified |
| Steam flow adjustment | Yes, by rotary knob (MIN to MAX) |
| Main functions | Vertical steaming, lint removal |
| Accessories included | Lint brush, fabric brush |
| Safety | Dual voltage with selector, disconnect before filling, do not immerse, do not direct steam at people or animals |
| Maintenance | Empty tank after use, clean lint brush with an old cloth |
| Spare parts and repairability | Contact an authorized Rowenta service center, do not disassemble yourself |
| Recommended water type | Tap water, or a mixture 50% tap water / 50% demineralized water for very hard water |
| Usage | Household use only |
Frequently Asked Questions - Ultra Steam DR5020 ROWENTA
User questions about Ultra Steam DR5020 ROWENTA
0 question about this device. Answer the ones you know or ask your own.
Ask a new question about this device
Download the instructions for your Steam cleaner in PDF format for free! Find your manual Ultra Steam DR5020 - ROWENTA and take your electronic device back in hand. On this page are published all the documents necessary for the use of your device. Ultra Steam DR5020 by ROWENTA.
USER MANUAL Ultra Steam DR5020 ROWENTA
natural_image
Exterior view of a white RoBERTO medical device with attached grip and cable (no visible text or symbols)Groupe SEB Canada Inc, 455 Finchdene Square Scarborough, Ontario, MIX IB7
G.S.E.B Mexicana, S.A. de C.V. Goldsmith 38-401, Piso 4, Polanco Chapultepec, Miguel Hidalgo C.P. 11560 México D.F. Tel: 018001128325
www.rowenta.com
text_image
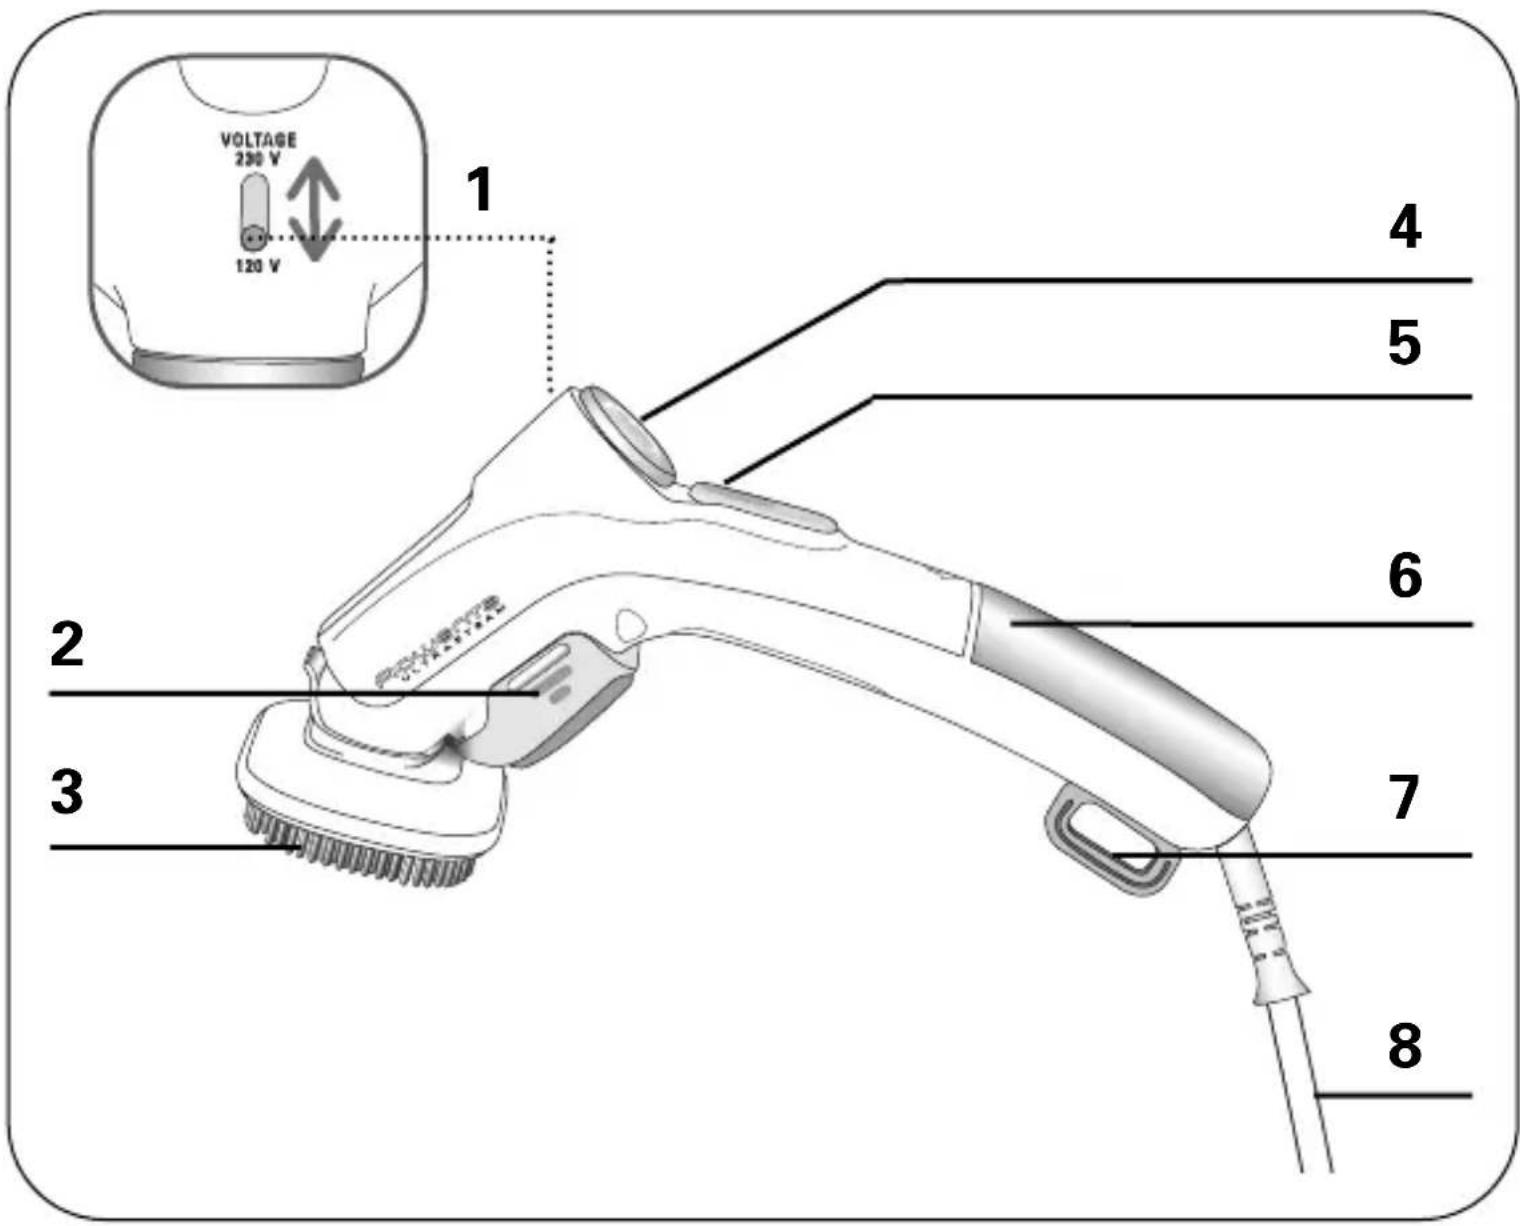
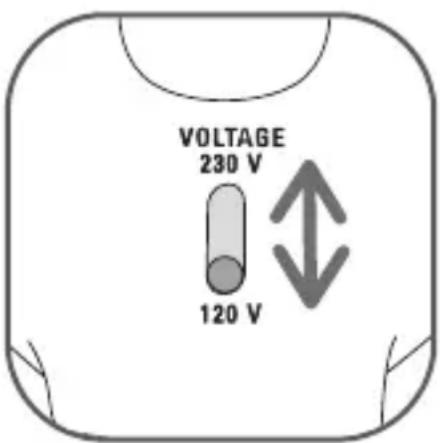
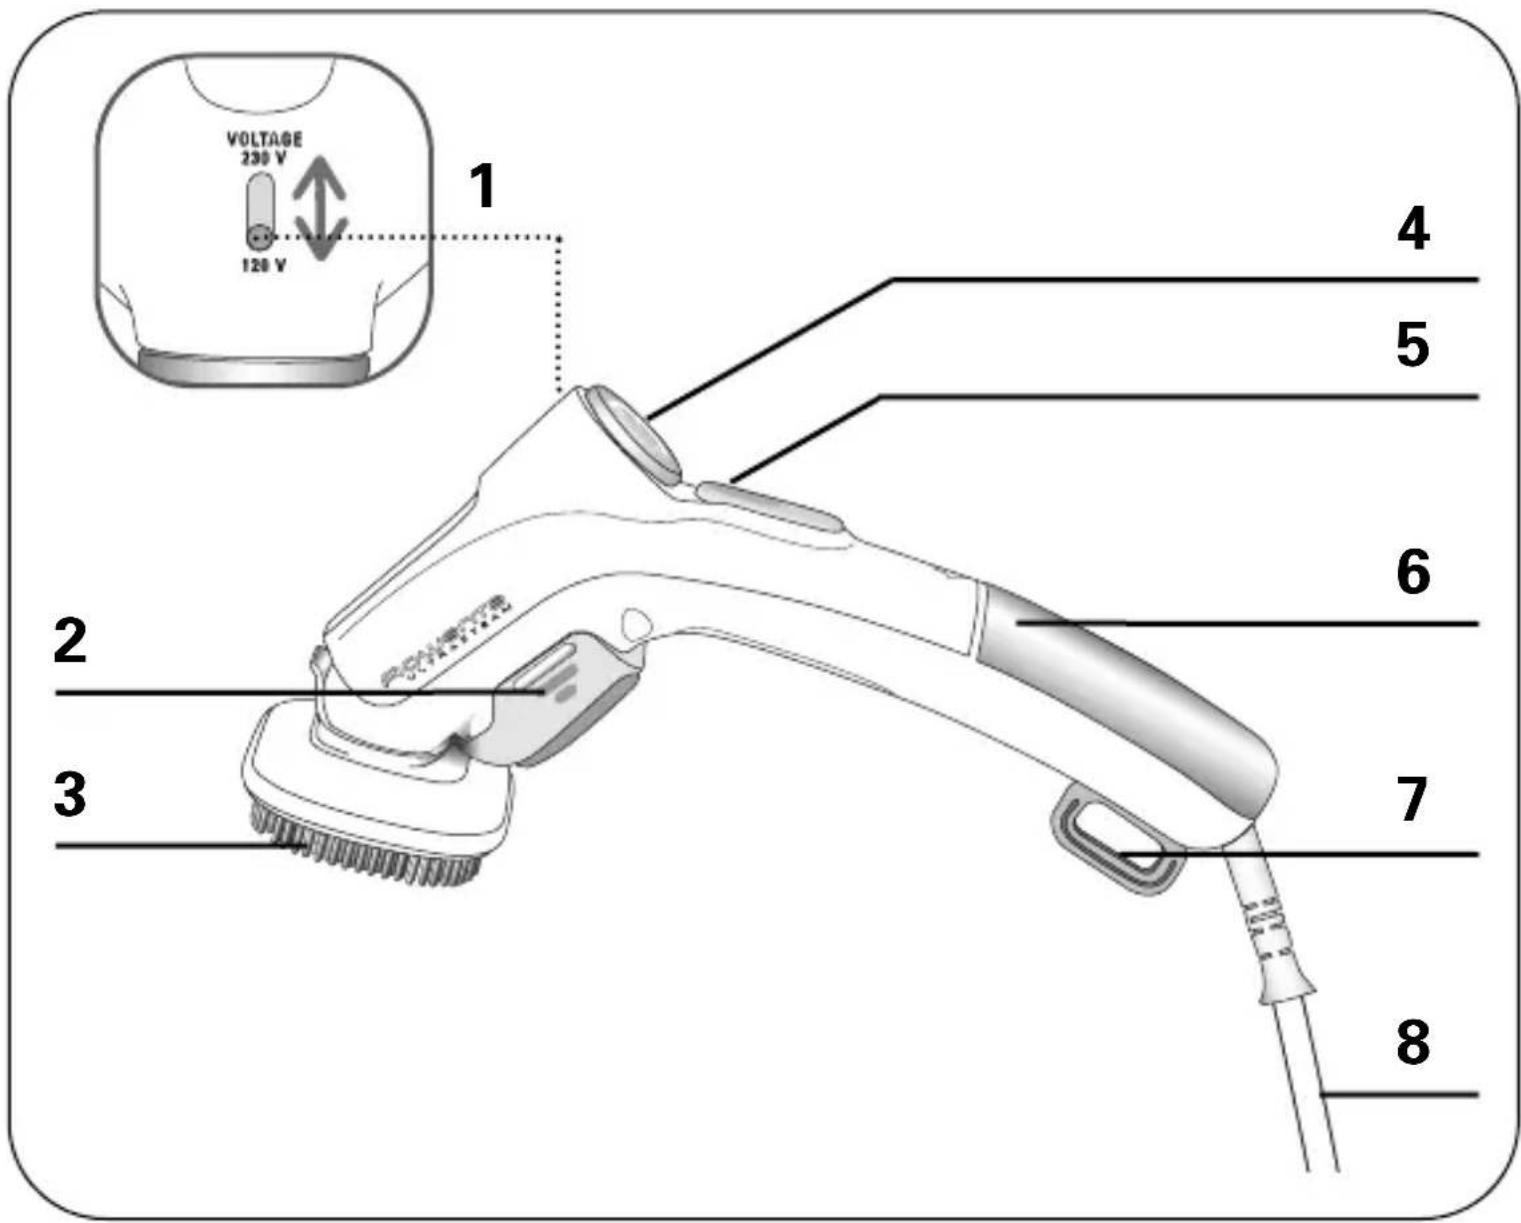
VOLTAGE 230 V 120 V 1 4 5 6 7 8 2 3 电位检测仪APPLIANCE DESCRIPTION
- Voltage selector (120/230V)
- Lint pad
- Fabric brush
-
Steam control dial
-
Steam indicator / Steam button
- Removable water tank
- Storage hook
- Electrical cord
IMPORTANT SAFETY INSTRUCTIONS
When using your appliance, basic precautions should always be followed, including the following:
- Read all instructions before using this product.
- To reduce the risk of contact with hot water emitting from steam vents, check appliance before each use by holding it away from body and operating steam button.
- Use appliance for its intended use only.
- To protect against a risk of electric shock, do not immerse the appliance in water or other liquids.
- For use in Canada, the voltage selector switch should be placed in the 120 volt position. For use in several other countries, the voltage selector switch may need to be placed in the 230 volt position. Confirm the voltage available at each location before using the appliance. For connection to a 230 volt supply, use a suitable attachment plug adapter of the proper configuration for the power supply receptacle.
- Do not direct steam at people or animals, or use steamer on garment while they are being worn.
- Always disconnect appliance from electrical outlet when filling with water, emptying or when not in use. Never yank the cord to disconnect from outlet, instead grasp plug and pull to disconnect.
- Do not operate appliance with a damaged cord or plug or after the appliance malfunctions, has been dropped or damaged in any manner. To avoid the risk of electric shock, do not disassemble or attempt to repair the appliance. Return appliance to the nearest authorized Rowenta approved service center for examination, repair or adjustments. Incorrect reassembly can cause a risk of fire, injury and electric shock to persons when the appliance is used.
- This appliance is not intended for use by children and other persons whose physical, sensory or mental capabilities or lack of experience and knowledge prevents them from using the appliance safely without supervision or instruction by a responsible person to ensure that they can use the appliance safely.
-
Close supervision is necessary when appliance is used near children. Do not leave the appliance unattended while connected to a power source or still hot.
-
Burns could occur from touching hot metal parts, hot water or steam. Use care when you empty a steam appliance, there may be hot water in the reservoir.
- The use of accessory attachments other than those provided by Rowenta is not recommended and may result in fire, electric shock or personal injury.
SPECIAL INSTRUCTIONS
- To avoid a circuit overload, do not operate a high wattage appliance on the same circuit.
- If an extension cord is absolutely necessary, the marked electrical rating should be at least as great as the electrical rating of the appliance. Cords rated for less amperage may overheat. Care should be taken to arrange the cord so that it cannot be pulled or tripped over.
- For dual voltage appliance:
a. Be sure dual voltage selector is in correct voltage position before operating.
b. Before plugging in, read the information about dual voltage operation contained in the instruction section of this manual.
c. This appliance was set at the factory to operate at 120 Volts. Refer to operating instructions section of this manual for conversion to 230 volts operation.
d. Incorrect setting of voltage can result in in damage of the appliance. - Your Rowenta appliance is intended for household use only.
SAVE THESE INSTRUCTIONS
Before use
Please read the instructions for use and Important Safeguards carefully.
natural_image
Illustration of a handheld device with a button and arrow indicating action (no text or symbols)- Remove any packaging from the appliance.
- Do not plug in or turn on until assembly is complete.
- Set the voltage to the correct position.
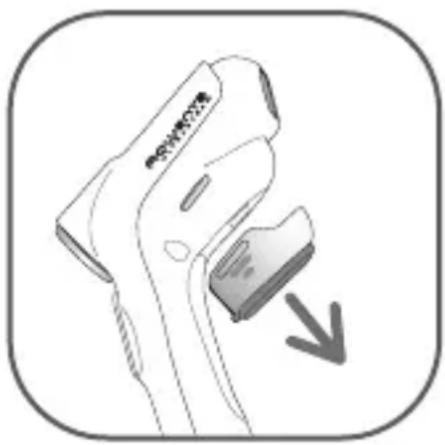
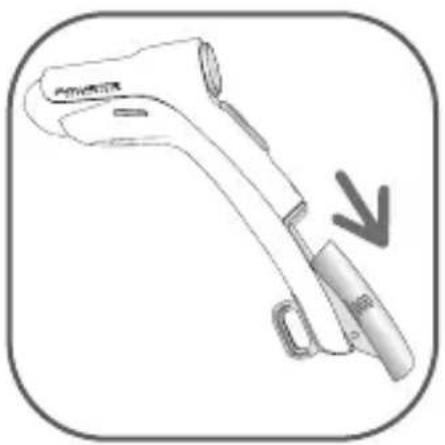
- Remove the lint pad by pulling it to the bottom.
Dual voltage (depending on model)
The appliance can work on both, 120V or 230V, AC systems. Be sure the dual voltage selector is in the correct voltage position before plugging in. To do this, switch the selector which is above the handle to the right position.
This is a 120V dual voltage appliance and may be used in North America without an electrical converter. An adapter plug may be necessary when using appliance in foreign countries.
text_image
VOLTAGE 230 V 120 VIf needed, plug the steambrush into the correct adapter plug for the specific country and plug assembly into electrical outlet.
Warning! Never switch selector while unit is plugged in.
Filling with water
- Your steam brush has been designed to operate using untreated tap water. If your water is very hard (check with your local water authority) it is possible to mix tap water with distilled water in the following proportions:
- 50% untreated tap water
- 50% distilled or demineralised water.
Warning ! Never use 100%, distilled or demineralised water as this can cause the appliance to spit and leak.
- Remove the water tank by pushing it backwards.
- Unplug the rubber stopper.
- Fill the watertank to the top with water and close it securely. Make sure that the buckler is properly pushed in place - as shown below.
natural_image
Line drawing of a handheld device with a curved handle and a small clip, no text or symbols present.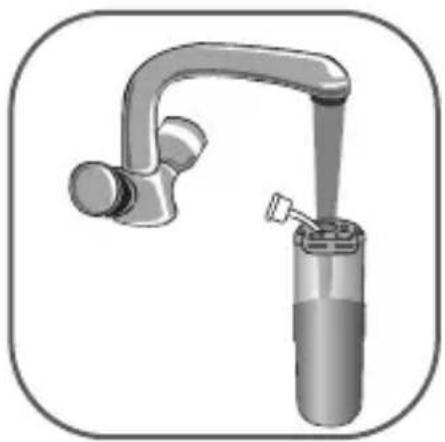
natural_image
Illustration of a stainless steel kitchen sink with a handle and bulb (no text or symbols)
natural_image
Pure mechanical component outline diagram without any text, numbers, or symbols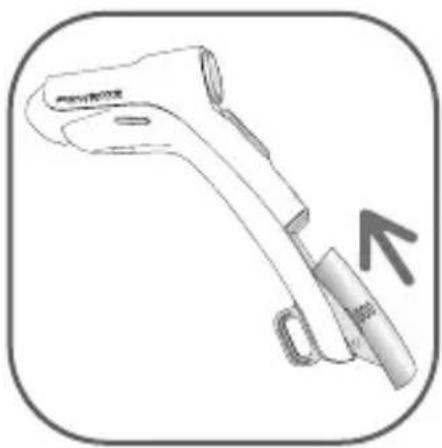
natural_image
Line drawing of a handheld device with a handle and lever, no text or symbols present- Put the tank into the handle until it snaps in.
• Completely unwind the power cord. - Plug in your steam brush.
Important: Heat concentrates the elements contained in water during evaporation. The types of water listed below may contain organic waste, mineral or chemical elements that can cause spitting, brown staining, or premature wear of the appliance: water from clothes dryers, scented or softened water, water from refrigerators, air conditioners, rain water, boiled, filtered or bottled water. Also use distilled or demineralised water only as advised above.
Use
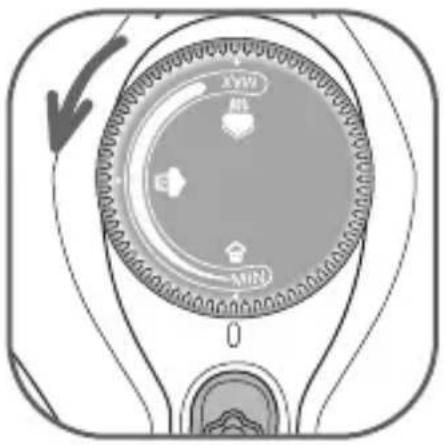
- Once the appliance is plugged in, the light will turn on. Set the steam control dial to the desired setting.
• After approximately 30 seconds, the light will turn off indicating the steambrush has reached working temperature.
text_image
AVM AVS MIN 0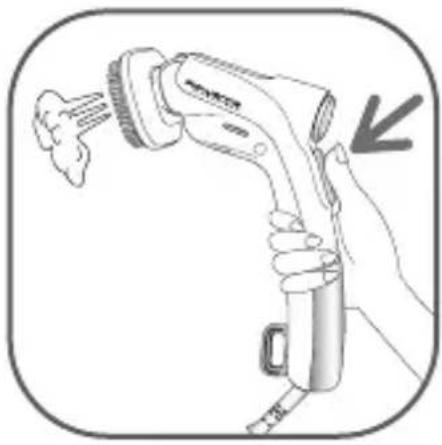
natural_image
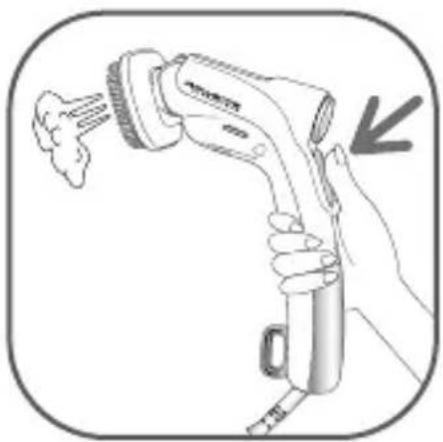
Line drawing of a hand holding a handheld electric shaver with a label and arrow indicating action (no text or symbols on the device itself)• To begin steaming, press the steam button with the steamer head facing away from you, in a vertical position.
Be sure to remove lint pad when steaming as excessive water or steam can cause lint pad color to run.
During use or while unit is heating or cooling, do not rest appliance on its head. Place product on its side on a firm, heat resistant, flat surface, as the head will be hot. As the appliance heats, the housing becomes warm. This is normal.
Steam setting
Set the brush steam output to the type of fabric to be ironed - see table below.
| Type of fabric | Setting steam |
| Cotton / Linen | max.  |
| Silk / Wool | |
| Synthetics | min.  |
Tips: Check the fabric's label for recommendations. We recommend that you test acrylic, nylon or other synthetic fabrics in an inconspicuous area to ensure these fabrics are not damaged by hot steam. Test fabric for color fastness in an unobtrusive part of the garment (inner seam). Do not touch silk or velvet with steam head. Some articles can be steamed better from inside. Heavier fabrics may require repeated steaming. Exercise caution at all times. For very delicate fabrics, you can remove the brush. To avoid damage to clothes, keep a distance of 1.5 inches between the steam head and the fabrics. We recommend that before the first use or after the appliance has been stored for some time to test the burst of steam.
Steaming clothes
It is normal for a small amount of smoke or steam to be produced the first time the appliance is used. This will quickly disappear.
natural_image
Illustration of a hand holding a tool with a ruler, no text or symbols presentThe Ultra Steam is equipped with a clothes brush.
- To attach the accessory, line it up with the steam head. It locks into position with an audible click.
- Simply pull on the top of the fabric brush to remove it. You can operate the unit with or without the accessory.
Before removing or attaching the steam brush, unplug your appliance and let it cool down.
- Hang the wrinkled article of clothing on a clothes hanger.
- Pull the clothing tight with one hand.
• Gently press the fabric brush against the clothing and move the steambrush down the fabric. Keep pressing the burst of steam button.
- The combination of steam and fabric brush will gently remove the wrinkles.
• After treatment, let the garment cool down on the hanger before wearing.

natural_image
Illustration of a hand using a tool to clean or store items, with no visible text or symbols.Do not allow steambrush to run dry.
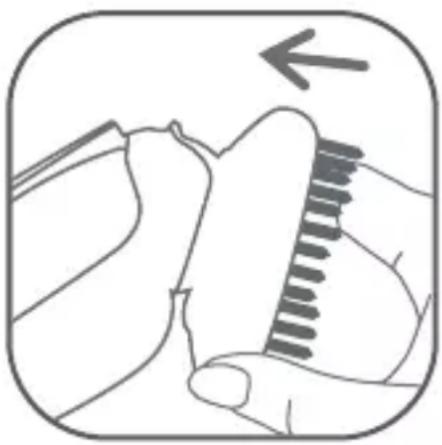
Lint pad
The lint pad must not be used when attached to appliance.
Threads, lint and hair can easily be removed with the lint pad by brushing the clothes slowly from left to right.
The pad can be cleaned by brushing in the opposite direction right to left on a scrap of old cloth.
Warning: Never touch the steam head until it cools completely.
- Remove the lint pad from the steam brush by grasping on both sides and pulling downwards. The lint pad should slide right off of the brush, and clamp back on after use.
- For storage, attach the lint pad to the steam brush by lining up the slots of the brush with the slots of the lint pad. Gently push the top of the lint pad into place until it snaps in.

text_image
"Click"After use
- Unplug the appliance. Empty the water remaining in the tank and leave unit on its side to cool. After the appliance has cooled down, it may be stored in the bag provided (depending on model).
Warning: never forget to unplug your device and empty the tank after your working session. While not in use, you can hang you steambrush by its hook.
Troubleshooting
| Issues | Possible causes | Solutions |
| There is no steam. The ste | seamer is not plugged in. | Check that your appliance is correctly plugged in. |
| The water level is too low. | Unplug your appliance and refill the tank. | |
| The steam button has not been primed. | Press the steam button 4 seconds to begin steaming. | |
| The appliance is being used for the first time. | When appliance is new, priming of the steam feature may be necessary. Once heated, press the steam button up to 15-20 times to start the steaming process. | |
| The water tank is not in place. | Be sure that the water tank snaps in when put into place. | |
| The appliance does not heat. | It is not plugged in. Plug in your appliance. | |
| Water leaks or spits. | The water tank is not in place. | Be sure that the water tank snaps when put into place. |
| Your appliance is not hot enough. | Allow your steam brush to heat for approximately 30 secondes before using. | |
| The dual voltage is not set correctly | Be sure that the dual voltage selector is in correct voltage position before operating. Unplug the appliance and switch the selector to the correct voltage. | |
| There is not enough power or too much. | The dual voltage is not set correctly. | Be sure that the dual voltage selector is in correct voltage position before operating. Unplug the appliance and switch the selector to the correct voltage. |
If you are unable to trace the cause of the fault, contact an official Rowenta Customer Service Centre. The addresses are shown in the enclosed service centre address list.
Further hints and tips are obtainable from our homepage: www.rowenta.ca.
text_image
VOLTAGE 230 V 120 V 1 4 5 6 2 3 7 8DESCRIPTION
natural_image
Illustration of a handheld device with a label and arrow indicating motion (no readable text or symbols)natural_image
Line drawing of a handheld device with a handle and lever, no text or symbols present
natural_image
Illustration of a stainless steel kitchen sink with handle and baseplate (no text or symbols)
natural_image
Pure mechanical component outline diagram without any text, numbers, or symbols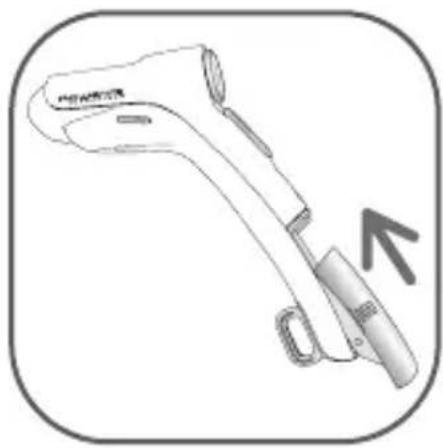
natural_image
Line drawing of a handheld device with a handle and lever, no text or symbols presentnatural_image
Illustration of a hand holding a handheld electric shaver with a smokestack emitting vapor (no text or symbols)natural_image
Illustration of a hand holding a tool with a ruler, showing mechanical components (no text or symbols)natural_image
Illustration of a hand inserting a plug into a device with a cloud-like substance (no text or symbols)natural_image
Illustration of a handheld device with a label and arrow pointing to its side (no readable text or symbols)natural_image
Line drawing of a handheld device with a handle and lever, no text or symbols present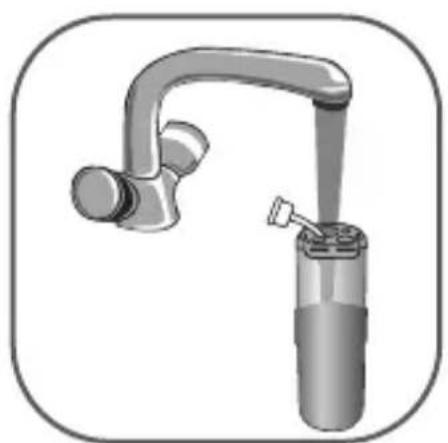
natural_image
Illustration of a medical or laboratory device with a curved handle and central shaft (no text or symbols)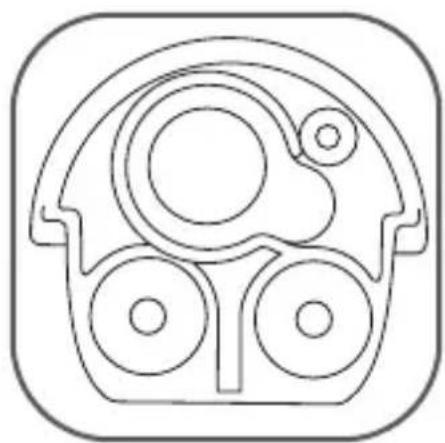
natural_image
Pure mechanical component outline diagram without any text, numbers, or symbols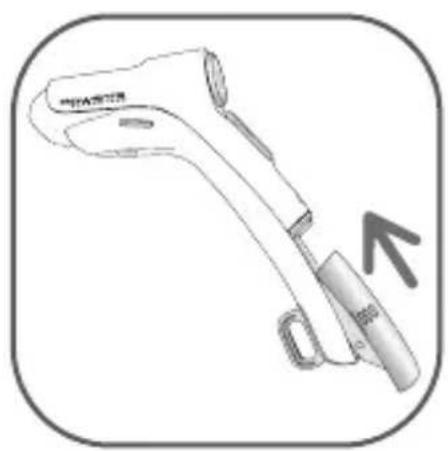
natural_image
Line drawing of a handheld device with a handle and lever, no text or symbols presentnatural_image
Diagram of a washing machine dial with labeled buttons (XWN, MIN) and a directional arrow, no readable text or symbols beyond basic design elements.