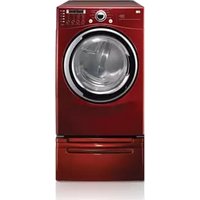
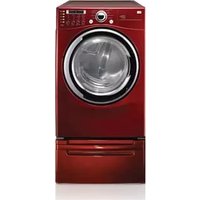
DLG2555W - Tumble drier LG - Free user manual and instructions
Find the device manual for free DLG2555W LG in PDF.
Download the instructions for your Tumble drier in PDF format for free! Find your manual DLG2555W - LG and take your electronic device back in hand. On this page are published all the documents necessary for the use of your device. DLG2555W by LG.
USER MANUAL DLG2555W LG
your home.The RLM Display Unitcanbe purchased separately forthis dryer. (DLE5944WM, DLG5955WM) What are Sensor Dry and Time Dry? Your dryer provides sensor drying andtime drying programs. Sensor Dry
Dryer senses electronically laundry humidity andit automatically determines operation timebasedonthe dryness oftheloadandtheselected program. Attimes, you canseesuddenincreaseordecreaseon operation time.It happens becauseasensor will detect laundry humidity withacertain period. Sudden change operation timeisnotamalfunction.Time Dry
Time Dry isthat you canset operation time manually complete drying.
useTime Dry tohave drying performance
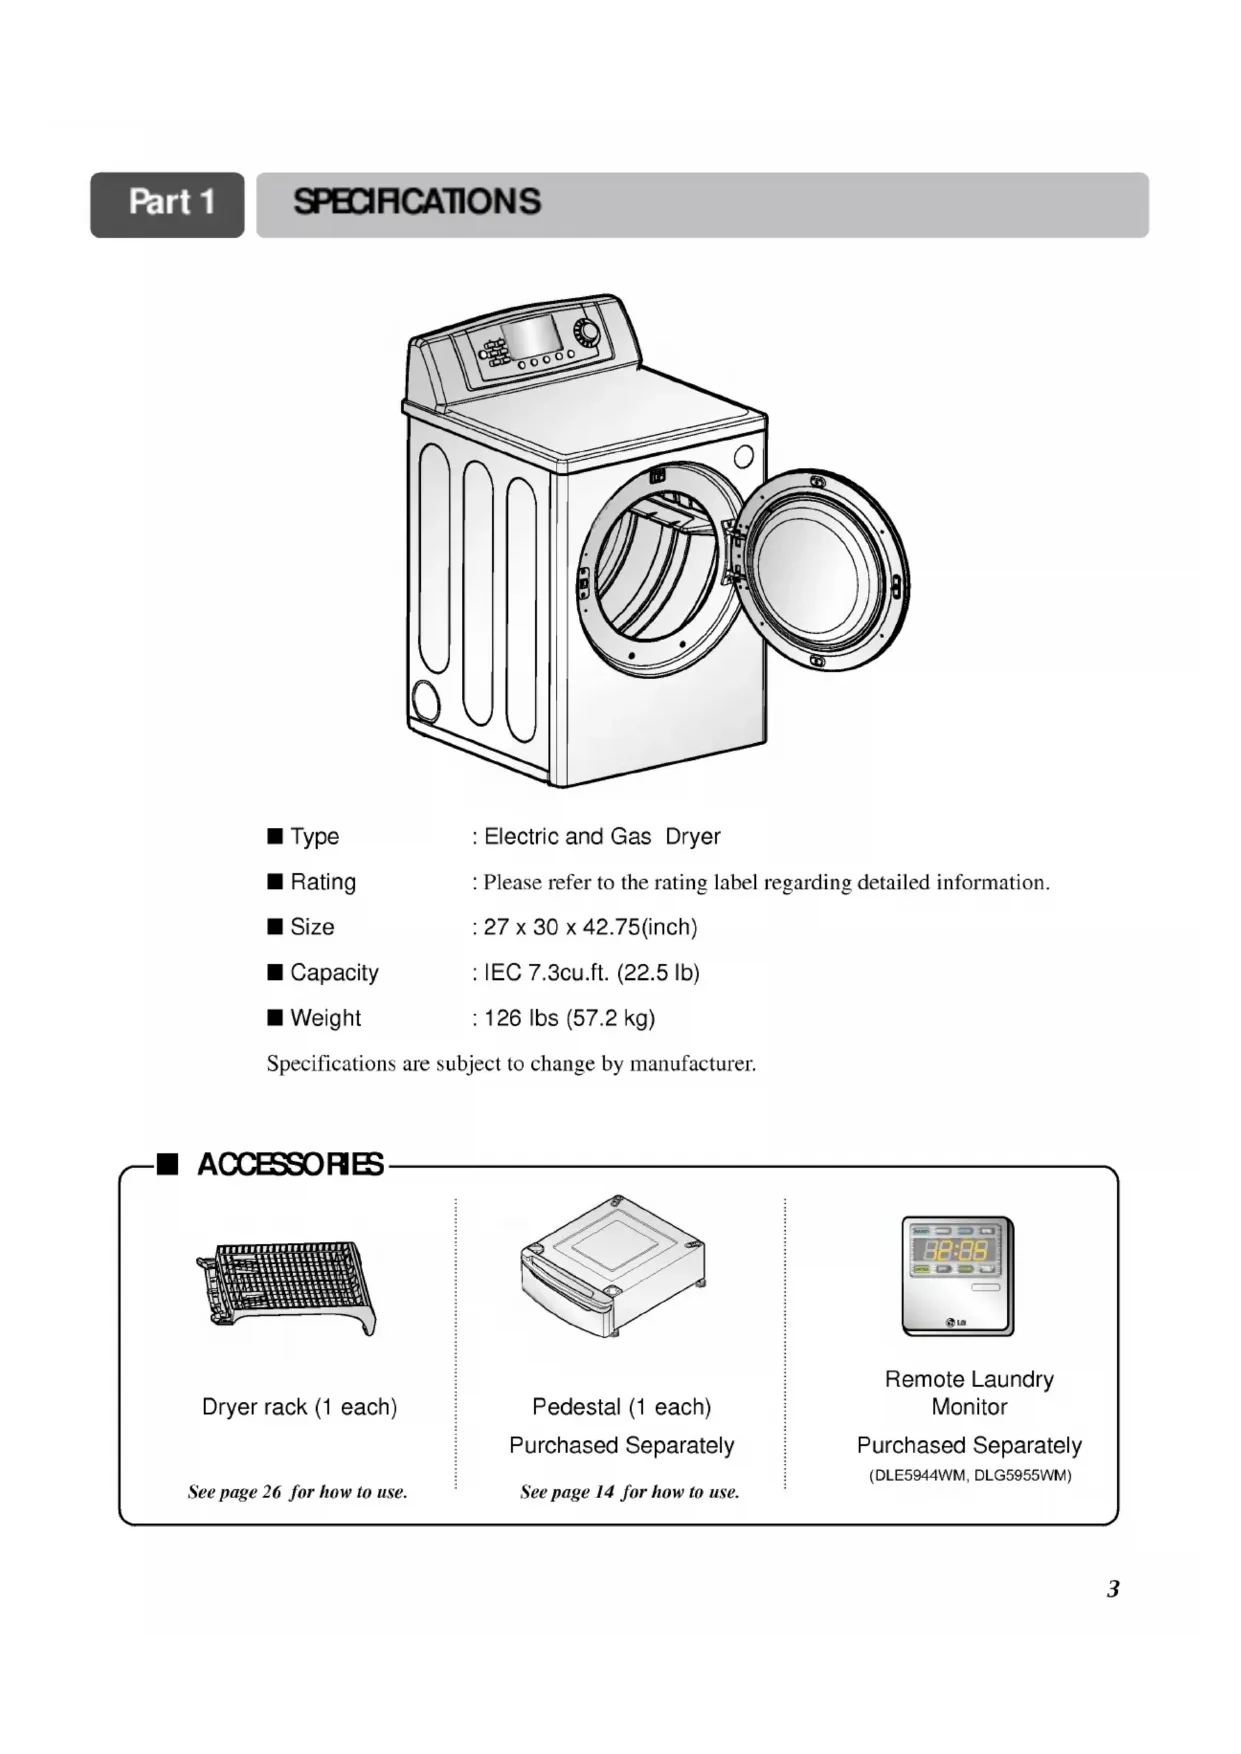
Ibs (57.2 kg) Specifications are subject change
manufacturer. ACCESSORIES Dryer rack
each) Purchased Separately Remote Laundry MonitorPurchased Separately (DLE5944WM, DLG5955WM)Part
IMPORTANT WARRANTY AND SAFETY INSTRUCTIONS SEEKING WARRANTY ASSISTANCE WARNING! Foryoursafety,therecommendations thismanual must befollowed.Toreducetheriskoffire explosion,electric shock,
prevent property damage,personalinjury, deathwhenusingyourappliance,followbasicprecautions,includingthefollowing. The Warranty for your Dryer
this manual. Warranty Service
contacting your nearest
installed and operated per this manual, will repair
workmanship throughout the Warranty period, beginning the Date
Purchase. Warranty Restriction: Ifthe dryer subjected
otherthan private family use, all warranty coverageiseffectivefor only days. You willneedthe complete ModelandSerialNumberwhen requesting Warranty Service.Proofof purchase dateis required. Usethespacebelow recordthemodelnumberandserialnumberofyour new dryer. ModelNo.SerialNo. Date ofPurchase Staple your receipt HERE. Part
IMPORTANT WARRANTY AND SAFETY INSTRUCTIONS 1)Readallinstructionsbeforeusingtheappliance.2)Do not dryarticlesthat have come into contact with gasoline,dry-cleaningsolvents, otherflammable explosivesubstances, theygiveoffvaporsthatcouldignite explode.3)Do not allow children play
intheappliance. Close supervisionofchildrenisnecessary when usingtheappliance.4)Beforetheapplianceis removed from service
discarded, remove thedoor thedrying compartment. 5)Do not reachintotheapplianceifthedrumismoving.6)Do not install
store thisappliance where will beexposed the weather. 7)Do not tamper with controls.8)Do not repair replaceany part oftheappliance
chemicalreactionthatcould cause
load catchfire.14)Do not use fabricsoftners products eliminatestaticunlessrecommendedbythemanufacturerofthefabricsoftner product. GROUNDING INSTRUCTIONS Thisappliance must begrounded.Inthe event ofmalfunction breakdown,grounding will reducetheriskofelectricshockbyproviding pathofleastresistanceforelectric current. Thisapplianceisequipped with
cordhaving equipment-groundingconductorand groundingplug.Theplug must bepluggedinto appropriateoutletthatisproperlyinstalledandgroundedinaccordance with alllocalcodesandordinances. WARNING
Improperconnectionoftheequipment-groundingconductor can resultin riskofelectricshock. Check with
qualifiedelectrician
service personifyou are indoubt
whether theapplianceisproperlygrounded.Do not modifytheplugprovided with theappliance:ifit will not fittheoutlet, have
properoutletinstalledby qualifiedelectrician.Thisappliance must beconnected
equipment-groundingconductor must run with thecircuitconductorsandconnected theequipment-groundingterminal lead theappliance. WARNING! help reduce any riskofelectric shock, fire,
property injury when using your dryer, please exercise care andfollowbasic safety precautions, including the following:
your building.? Clear the room, building
all occupants.?Immediately call your gas supplier from
neighbor'sphone. Follow the gas supplier's instructions carefully.?
you cannot reach your gas supplier, call the fire department.To reduce the risk
death when using this appliance,please follow all instructions and information, including those
this manual and instructions and information providedby your gas supplier,including the following:?Donotstore
the area surrounding this appliance.?Donotdryanything that has ever had anything flammable
it, even after washing.?
washer can completely remove oil. Donotdry any articles that have ever had any kind
them, includingcooking oil. Articles containing foam, rubber, rubber-like materials, plastic
similar materials should
air cycle.? Failure follow these instructions can result in fire, death
serious injury.? qualified service person
company mustperform installation and service
this appliance.CaliforniaSafe Drinking Water and Toxic Enforcement Act This actrequires the governor
California topublish
substances known the stateto cause cancer, birth defects
other reproductive harm and requires businesses warn customers potential exposure such substances. Gas appliances can cause minor exposure four
these substances, namely benzene, carbon monoxide, formaldehyde and soot, caused primarilyby the incomplete combustion
fuels. Properlyadjusteddryers will minimize combustion. Exposure these substances can
minimized further byproperly venting the dryerto the outdoors. WHAT TODO YOUSMELLGAS: WARNING!
Keep flammable materials and vapors, such
gasoline, away from dryer.
least inches above the floor for
garage installation.
can result indeath, explosion
INITIAL STEPS FOR INSTALLING YOUR DRYER The following instructionswill help guide you through theinitialstepsof setting upyour dryer foruse.Pleasenotethateverysectionofthismanual provides important information regarding the preparation and use ofyour dryer, anditis important thatyoureviewthisentiremanualbefore proceeding withanyinstallation use. More detailedinstructions concerning electrical connections, gas connections, andexhaust requirements are provided atotherpartsofthismanual. Choose
solid floor for your dryer. Place the dryer
least eighteen inches above the floor for
garage installation. After placing the dryer
the desired location, please make sure that
has the required clearances shown below, and sections
Exhaust and Maintenance requirements.
you are installing your dryer
mobile home, please refer
below for additional instructions. Certainminimumclearances are required above, behind, and thesidesofthe unit,
shownbelow. Those required minimum clearances are set forth
the picture below. Please also keep the following instructions
Consider allowing additional clearance for installation and servicing.
Wall, door and floor molding may force additional clearances.
Consider space needed for companion appliances.
For closet installations, the picture below shows the minimum required ventilation openings for the door.
louvered door with comparable ventilation openings
Most installations require
Positioning the Dryer. Leveling legs shouldbesecured. All four legs are stably placed
thesolidand even floor.
dryer not level, laundry may not tumble properly and sensor will not detectthe accurate humidity information.When adjusting leveling, please cautious not to haveserious injuries
your fingers and toes. Note8 Part
STEP Procedure for Reversing the Door Door and latch should
aligned the center when closed. Otherwise, door
improperly closed and opened. Note9 Part
Clean old ducts beforeinstalling this dryer Themaleendofeachsectionofexhaustductmustpointawayfromthedryer Useas few elbow jointsaspossible. Useduct tape onallductjoints Insulate ductwork thatrunsthroughunheatedareasinordertoreducecondensationandlintbuild-uponpipewalls;and
not usea plastic vent.
follow these instructions can result
Clean old ducts before installing this dryer ALTERNATE EXHAUST DIRECTIONS
screw and exhaust duct. 2-1. Detach and remove the knockout that matches the desired venting direction (Right side not available
work. 2-2. Reconnect the duct the blower housing and attach the duct the base.(Duct
SVC part) 3-1. Pre-assemble elbow with duct. Wrap duct tape around joint. 3-2. Insert elbow duct assembly first through the side opening and connect the elbow the internal duct. STEP
Connecting the Exhaust and Venting System. Vent end will face
the outside home and improper taping and unstable installation of vent will cause undesirable drying performance. Note10 Part
INITIAL STEPS FOR INSTALLING YOUR DRYER (Gasdryeronly).Inadditiontothefollowing,pleaserefertomanualsection
Gas RequirementsandInstructions. Confirmthatthe type gas availablein your laundry room appropriate forthedryer.Thedryeris prepared forNaturalGaswith 3/8" NPT gas connection.2.Removethe shipping capfromthe gas connection thebackofthedryer.Make sure that you don'tdamagethethreadsofthe gas connection pipe when you remove the shipping cap.3.Connectthedryer
your laundryroom's gas supply using
new flexiblestainlesssteel connector (asnoted below, only use
new stainlesssteelflexible connector ifallowedby your localcodes).4.Securelytightenallconnectionsbetweenthedryerand your laundryroom's gas supply. Turn
your laundryroom's gas supply andcheckall pipe connections (both internalandexternal)for gas leakswith non-corrosiveleakdetectionfluid.Refer to Part 7(page20)5. For
(Liquefied Petroleum) gas connection, refer thismanual'ssectionentitledGas Requirements andInstructions.
1/8" NPT Pipe Plug (for checking inlet gas pressure) Equipment Shut-OffValve-Installedwithin6'(1.8
Use 3/8" pipe. Longer than 20' (6.1
3/8" N.P.T. Gas Connection Following are severalwarningsandinstructionsconcerningmakingtheelectricalconnectionforelectricdryers. More detailedinformationconcerningtheelectricalconnectionis provided
themanualsectionentitledElectrical Requirements For Electric Dryer anditis important that you thoroughlyreviewthat section, andtheremainderofthis manual, beforetaking any steps
clothesdryer.2.Four-wirecordis required formanufactured (mobile) homeinstallationsand use andwherelocalcodesdo not allowgroundingofthis appliance throughneutral. ElectricalPlug Connections. For additionalinstruction connectingthedryer
electricalpowersource, please refer thismanual'ssection Electrical Requirements andElectric Dryer.
gauge solid copper wire. Use ULapprovedstrainrelief. Disconnect power beforemakingelectricalconnections.
Connect neutralwire(white
Ground wire(green barewire) must beconnected
green ground connector.
Securely tightenallelectricalconnections
See installationinstructionsforcompleteinstructions. Failure
Gas Supply Make sure the burner nozzle
gas you are provided with. For instance, using LPG with LNG nozzle will result
death, fire explosion.
using LNG with LPG nozzle will not ignite burner.
needed, nozzle conversion should
qualified service technician and mark put the label
located the elevation
10,000 feet. Adjusting burner input setting not needed this elevation because A.G.A certifies this dryer willnot have any problem with the B.T.U ratingat this altitude.
above 10,000 feet, you are required adjust
four percent(4%) reduction
the burner B.T.U rating indicated
Gas Dryers Closethedoortothedryerdrum/dryingcompartment and, aftercompletingallstepsinthismanualforproperinstallationofthisdryer,startthedryeronaheatsetting,asdescribedmorefullyintheoperatinginstructionsthataccompanythedryer.Afterthedryerstarts,theigniterwillglowredandthemainburnerwillignite.Warning:Ifallairisnotpurgedfromthegas line, thegasignitermaygooffbeforethegasandthemainburnerhaveignited.Ifthishappens,theigniterwillre-attemptgasignitionafterapproximately two minutes. Confirming Heat Source
Electric Dryers Closethedoortothedryerdrum/dryingcompartment and, aftercompletingallstepsinthismanualforproperinstallationofthisdryer,startthedryeronaheatsetting,asdescribedmorefullyintheoperatinginstructionsthataccompanythedryer.Theexhaustairortheexhaustpipeshouldbe warm afterthedryerhasbeenoperatingforthreeminutes. Measuring Static pressure 0.6inche(1.5cm) MAXIMUM STATIC PRESSURE
Dryer Airflow. STEP Confirming Heat Source Operation. Manometer Exhaust Duct12 Part
NOT connect exhaust ducts with metal screwsor fasteners that extend into the duct.
NOT vent the exhaust duct under the manufactured mobile home.
Additional Instructions for Installation
Shut off Gas Unplug Power Cord Disconnect Gas Line from Dryer4) Pull away and loosen vent clamp. Disconnect venting.14 Part
Instructions for Grounding
your Electric Dryer: Please note thatthewiringdiagramisprovidedInsidethedryercabinet. Thisdryer must beconnected agrounded metal, permanentwiringsystem;oranequipment-groundingconductor must berun with thecircuitconductorsandconnected theequipment-groundingterminalorleadonthedryer. Thedryerhasits own terminalblockthat must beconnected aseparate branch,
Hertz,singlephase circuit,
(alternating current) circuit, fused
Amperes (the circuit must befusedonbothsidesofthe line). ELECTRICAL SERVICE FOR THE DRYER SHOULD
VOLT CIRCUIT. Heatingelementsare available forfieldinstallationindryers which are beconnected electrical service ofdifferentvoltagethanthatlistedonnameplate. Ifbranchcircuit dryerisfifteenfeet (4.50
orlessinlength,useU.L. (Underwriters Laboratories) listedNo.
A.W.G. wire (copper wire only),orasrequiredbylocalcodes.If over fifteenfeet (4.50 m), useU.L. (Underwriters Laboratories) listedNo.
A.W.G. wire (copper wire only),orasrequiredbylocalcodes. Allow sufficientslackinwiringsodryercanbe moved fromitsnormallocation when necessary. Thepowercord(pigtail)connection between wall receptacleanddryerterminalblock
NOT supplied with dryer. Type ofpigtailandgaugeof wire must conform localcodesand with instructionsmentionedonthefollowingpages. Themethodofwiringthedryerisoptionalandsubject localcoderequirements.Refer exampleson next page.g) You must selectthemethodby which
wire yourdryeraccording localcodeandordinancerequirements.Samplemethodsareincludedinthefollowingpages. WARNING! Label all wires prior
disconnection when servicing the dryer, because wiring errors can cause serious injury
you and your dryer. !15 Part
ELECTRICAL REQUIREMENTS FOR GAS DRYERS 120Volt,60Hertz,with3-ProngGroundingPlugFollowingare additional instructions regarding electrical connections and requirements for gas dryers. Important
help prevent fire, electric shock, serious injuryordeath, the wiring and grounding must conform
the National Electrical Code, ANSI/NFPA 70,or the Canadian Electrical Code, CSA C22.1, and all applicable local regulations. Please contact aqualified electrician
check your home's wiring and fuses
ensure that your home has adequate electrical power
Please note that the wiringdiagram provided inside the dryer control hood. Label all wires prior
disconnection when servicing the dryer, because wiringerrorscancause serious injury
used ona separate branch,polarized,three-wire,effectivelygrounded, Volt,
Use separately fused circuits for washers and dryers, and
NOT operate washer and adryeron the same circuit.
The dryer has athree-prongplug helpguardagainst shock. The plug should
plugged directed into aproperlygroundedthree-prongreceptacle that
(alternating current)
properly and fullyeffective, must
plugged into aproperly installed outlet that
accordance with all local codes and ordinances.
electric shock,includinga malfunction breakdown.
your laundryroom does not meet the specificationsrequiredby this manual,or
you are uncertain whether not your laundryroom meets these specifications,please have aqualified service person company, for exampleaqualified electrician your local electric company, review your laundry room's electrical supply for any problems. WARNING! not overloadthecircuitbyoperatingotherappliances the same circuitwhenthisapplianceisoperating,byusing extensioncord
connect thedryer the power source,
byusing any adapter allowadditionalcords
Round Grounding Prong
proper outlet will need beinstalled
isalsoimportantthatyouusepipejointcompoundthatisinsolublein gas.6. reducethedangerofgasleaks,explosion,andfire,pleasefollowandobservethefollowing instructions and WARNINGS:
Connectthedryer the type ofgasshownonthenameplate; Use new flexiblestainlesssteelconnectors; UseTeflon tape andpipejointcompoundinsolublein gasonallpipethreads;
Purge gassupplyofairandsedimentbeforeconnectingthegassupply thedryer;inorder
CSA approved gas supply line.
Securely tighten all gas connections.
qualified person make sure gas pressure does not exceed
qualified person include licensed heating personnel, authorized gas company personnel, and authorized service personnel.
NOT attempt any disassembly
the dryer, any disassembly requires the attention and tools
authorized and qualified service person
NOT exhaustdryerairintoanenclosedand unventilated area, suchasan attic, wall, ceiling, crawl space,chimney,gas vent, orconcealedspaceofabuilding. reducetheriskof fire,
NOT exhaustthedryer with plasticorthinfoilducting. Exhaust Requirements and Instructions: 1.Ventingmaterialsare not provided with thedryerandyoushouldobtainthenecessaryventingmaterialslocally. For example,the outer endofexhaustpipe must have weather hood with hingeddampers preventback-draft when thedryeris not inuse.2.Theexhaustduct must befourinches (10.2 cm) indiameter with noobstructions.Theexhaustductshouldbekeptasshortaspossible.Makesure cleananyoldductsbeforeinstallingyour new dryer. Rigidmetalductisrecommended.
maximizeoperating results, please observe theductlengthlimitationsnotedinthe chart above.
feet (1.8m) for each additional elbow.
use more than 90° elbows. Use Only for Short Run Installations
feet (12.5 m)30 feet (9.1
(10.2cm) (10.2cm) 2-1/2" (6.35cm)18 Part
EXHAUST REQUIREMENTS AND MAINTENANCE ExhaustandDryerMaintenance1.Afteroneyearof use, theinteriorand complete exhaust system ofthe dryer shouldbeexaminedandcleanedifnecessary.2.Beforeoneyearof use, when drying performance hasbeen suddenly unsatisfiedinthe past several cases, please examineandcleantheexhaustductforbetter drying performance.
Check the weather hoods frequently
ensurethe dampers are moving freely, thatthe dampers are not pushed inandthat nothing hasbeen set against the dampers. 4.A qualified service personorcompanyshouldbeused
perform thismaintenance. AFlexibleMetalVentKit, available
extra cost, canbeused exhaustthe dryer when itis placed inhard reach places. ThisKitcomesin two pieces, oneof which isattached the dryer andtheotherisattached the wall exhaustoutlet. Following attachmentofthe two separate pieces
the dryer andthewall,the dryer maybereturned itsfinal position, after which the two pieces themselves canbeconnected.
Ordinarily, the dryer drum will neednocare. Wipe theexteriorofthe dryer required, and always immediately wipe theexteriorofthe dryer inthe event any detergent, bleach,orother washing products spilled onthe dryer, becausethese products maycause permanent damage
Clean thecontrol panel with damp clothasnecessary.
spray pre-wash products may damage thefinishofthecontrol panel.
Pleasecleanthelintfiltereitherbefore drying eachloadorafter drying eachload.
Always makesurethelintfilteriscleanbefore starting new load,becausea clogged lintfiltermayincrease drying times.11. Annually remove thelintfilterandattachit the vacuum duct. See item#2 above. 12.Please note thatthe wiring diagram provided insidethe dryer controlhood.Labelall wires prior
disconnection when servicing the dryer, because wiring errorscancauseserious injury
youandyour dryer. Cleaning theLint Screen Clean thelintfiltereitherbefore drying eachloadorafter drying eachload. Always makesurethelintfilteriscleanbefore starting new load,becausea clogged lintfiltermayincrease drying times.2. clean, pull thelintscreen straight upandrollanylintoffthescreen with your fingers.
remove. Pushthelintscreen firmly backinto place.
Always ensurethelintscreenis firmly securedbefore running the dryer. Running the dryer with alooselintscreenmaycause overheating and damage
the dryer andarticles being dried.4. Some articlesof clothing mayshedmorelintthanothers (towels for example), causing theLint Screen
the event lintfallsoffofthelintscreenandintothe dryer during removal, inspect theexhausthoodand remove anylint.
Laundry detergent andfabricsoftenerresiduecanbuilduponthelint screen, causing longer drying times.Thescreenis likely blockediflintfallsoffthescreen. order
prevent this type ofbuildup,and help ensureproper operation ofyour dryer, cleanthelintscreen with nylon brusheverysixmonths or, ifnecessary,more frequently. Thelintfiltercanalsobe washed follows:
After rolling thelintoffofthescreen with your fingers, wet bothsidesofthescreen with hotor warm water.
Weta nylon brush with hot water and liquid detergent andscrubthelintscreen with thebrush
remove the buildup detergent andfabricsoftener.
Repeat asnecessary. Aftertheresiduehasbeenremoved,rinsescreen with hot water.
After drying thelintscreen with acleantowel, firmly replace thelintscreeninyour dryer. WARNING! Disconnectthedryer'selectric power prior
any cleaning maintenance. !19 Part
reducetheriskoffire,electricshock,orinjurytoperson,readthisentiremanual,includingtheImportant Safety Instructions, beforeoperatingthisdryer. WARNING! Fire Hazard
washer can completely remove oil.
not dry anything that has ever had any type
(including cooking oils). Items containing foam, rubber, plastic must
dried on a clothesline
using Air Dry Cycle. Failure follow these instructions can result
WARNING! Explosion Hazard Keep flammable materials and vapors, such gasoline, away from dryer.
not dry anything that has ever had anything flammable
(even after washing). Failure follow these instructions can result
death, explosion, fire.
available only with Manual Dry, Time Dry and Rack Dry programs. Note
prevent thewrinkleonyour laundry. Whenyouselectthewrinklefree option, the dryer will periodically tumbleforup threehoursafterthe cycle has completed. Youcanusethis option incasethatyoucan not remove laundry after drying isdone.
Less Time This option reducesbacteriaunder high temperature during the cycle. This option can only beusedwiththe Heavy Duty, Cotton/TowelsandNormal cycles.
Damp Dry Beep Whenyouselectthe damp dry beep option, beep willalertyouwhenyourloadis approximately 80% dry. Thisnoticewillallowyou
remove lightweight itemsthatare dry orotheritemsthatyoumaywish iron. not use this cycle with delicate fabrics. Note Child Lock ChildLockcanbeused
use the RACK DRY 1.Open the door. Hold the dryer rack with both hands.
Put the dryer rack into the drum
Make sure Dryer RACK
evenly spaced right onto the drum inside and door rim.
Low2020/3050/305020Low/UltraLowAir Dry/ UltraLowAir Dry Air Dry
complete drying. Suggested Items for Rack Drying Temperature Setting Suggested Time* (Minutes) WashablewoolitemsStuffed toys with cotton polyester fiber filling Stuffed toys, foamrubberfilled.Foamrubber pillows Athleticshoes Don't use Rack for normal tumble drying. Rack Dry
Beeper On/OffUseTime Dry Option changeDryingTime your own. You can selectthedesiredoperationtimemanuallybypressingTime Dry buttonwhichrangesfrom20 60minutes.5 Drying TimeControl Part
drytheload.Asthecycleruns,thecontrol senses thedrynessoftheloadandadjuststhetimeautomaticallybased theselecteddrynesslevel.
dialingthe knob, selectthedesiredcyclebased laundrytypesand conditions.
LESS TIME. Speed Dry Useforsmallloads loadsthatneed shortdrying time. Freshen
Usethiscycleto remove wrinklesfrom items, such clothespackedin suitcase itemswrinkledfrombeingleftinthedryertoolong.Air Dry UsetheAir Dry Modifierforitemsthatrequiredryingwithoutheatsuch
rubber, plasticandheat-sensitive fabrics. Sensor Dry Cycles Load Type Temp. High Medium High Medium Low Low Ultra Low Time* (Minutes)
Wipe out the door opening. Otherwise, build-ups
dirty and foreign objects will damage sealing
Clean the transparent glass door keep inside view clear through the glass. Run the fingers across the filter 2.Clean the filter using one
cases. Vacuum the lint filter Wash the lint screen
warm, soapy water. Dry thoroughly and replace. Clean the door and its opening Maintenance25 Part
the circuit breaker tripped? Confirm that the dryer'splugissecurely and completelypushedinto the laundry room's power outlet Check your home's
laundry room's fuse box/circuit breaker box and replace the fuse
reset the circuit breaker. (IMPORTANT: electricdryers generally use two fuses
the circuit breaker tripped?
the circuit breaker tripped, the dryer might tumble but not heat. Check your home's
laundry room's fuse box
circuit breaker box and replace the fuse
reset the circuit breaker. (IMPORTANT: electricdryers generally use two fuses
breakers.) Confirm that the house gas shutoff and the dryer gas shutoff are both fully open. 3.Problem:There are Greasy Spots
Clothes Question What
Did you follow the instructions
your fabric softener product?
Are you drying clean and dirty clothes together?
Were your clothes entirely clean? Confirm and follow the instructions provided with your fabric softener product. Make sure use your dryertodry only clean items, because dirty items can soil clean clothes placedin the same load
later placedin the dryer drum. Stains
dried clothes are actuallystains that weren't cleansed during the washing process. Please review and confirm that you are following your washing instructions and that the clothes are being completely cleaned.26 Part
cleaning the lint filter, and please confirm that the lint filter
important that the lint filter
clean before each new load
laundry, sort lint producers (like
fuzzy white cotton towel) separately from clothes that might catch lint (such
clothes after drying. Divide your larger load into smaller loads. Sometimes
pants, and this paper, tissue,
similar material can cause excess lint
load of laundry. Confirm that the pockets
pants,shirts, and other articles
clothing are empty before washing and drying.
your lint filter full?
Did you properly sort your load
your clothes have excess static electricity?
Did you overload your dryer?
Did you place any paper, tissue,
other similar material
Did you use fabric softener?
Did you over dry the load of laundry?
Are you drying synthetic, permanent press and blends? Try using
reduce static electricity. Over-drying
static electricity. Try using
adjust your settings and use
shorter drying time. These materials can cause static
dried clothes. Try using
Are you using consistent heat settings and consistent load sizes? The drying time for
the heat setting, the type
the load, the type fabrics, the wetness
the clothes and the condition
the exhaust ducts and lint filer. WhattoDo27 Part
laundry? Are you drying large loads
heavy fabrics?? Are the dryer controls properly set??
the lintfilter clean before each new load
laundry? Are the exhaust ducts clear and properly configured?
the circuit breaker tripped? ?Did you overload your dryer? ?Did you under load your dryer? Separate heavy weight items from light weight itemswhen creating loads. Heavy fabrics take longer
dry because they tend to retain more moisture.
help reduce and maintain more consistent drying times for large and heavy fabrics, separate these itemsinto smaller loads
load you are drying. Please confirm that the lintfilteris clean prior
laundry. Confirm through review
the appropriate sections this manual that the exhaust venting ductworkis properly configured. Confirm that the venting free
obstructions. Confirm that the outsidewall dampers are moving freely, that the dampers are not pushed in, and that nothing has been set against the dampers. Check your home's
laundry room's fuse box/circuit breaker box and replace the fuse
reset the circuit breaker. (IMPORTANT: electric dryers generally use two fuses
breakers.) Divide your larger load into
handful of items, add
help ensure proper tumbling action. 8.Problem:My clothes are wrinkled Question WhattoDo? Are you over drying your laundry? Are you removing your laundry from the dryer soon after the drying cycle complete? Over drying
wrinkled clothes. Try
shorter drying time, and remove items while they stillretain
moisture.Remove your laundry from the dryer after the drying cycle ends and either hang
fold the items. 9.Problem:My clothes are shrinking Question WhattoDo? Are you following the care instructions for your garment? PLM problem
avoid shrinkage, please carefully follow the care and use instructions for your garment, because some fabrics will naturally shrinkwhenwashed. Other fabrics can
washed but will shrinkwhendriedin
dryer. See the Owner's Manual
controle temperature
(10.2cm) (10.2cm) 2-1/2" (6.35cm)18 PARTIE
temperature desiree figure.
temperature recommandee.