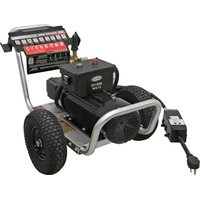
CM60976-S - Pressure washer Simpson - Free user manual and instructions
Find the device manual for free CM60976-S Simpson in PDF.
User questions about CM60976-S Simpson
0 question about this device. Answer the ones you know or ask your own.
Ask a new question about this device
Download the instructions for your Pressure washer in PDF format for free! Find your manual CM60976-S - Simpson and take your electronic device back in hand. On this page are published all the documents necessary for the use of your device. CM60976-S by Simpson.
USER MANUAL CM60976-S Simpson
natural_image
Line drawing of a power supply unit with hoses and wheels (no text or symbols)
READ THIS MANUAL CAREFULLY BEFORE OPERATION
Failure to follow the instructions and safety precautions in this manual can result in property damage, serious injury and/or death.
If your pressure washer is not working or if there are parts missing or broken, please DO NOT RETURN IT TO THE PLACE OF PURCHASE. Contact our Customer Service Department by calling 1-877-362-4271 or emailing cservice@fna-group.com
SAVE THIS MANUAL FOR FUTURE REFERENCE
NOTE: Photographs and line drawings used in this manual are for reference only and may not represent your specific model.
THIS PAGE WAS INTENTIONALLY LEFT BLANK
SAVE THIS MANUAL FOR FUTURE USE
Keep this manual for future reference. This manual should be considered a permanent part of the product and stay with it. This manual should be available to anyone operating the product(s) it covers. This manual should remain with the product(s) it covers if sold to a new owner. If the manual becomes damaged, lost, or otherwise unusable, you may download a new copy from the product pages at www.simpsoncleaning.com or contact customer support by calling 1-877-362-4271.
Write down the model number, serial number, and purchase date of this product in the spaces provided below then keep this manual with the purchase receipt(s) for future reference.
Model Number:
Serial Number:
Purchase Date:

OPERATOR SAFETY
Lifting the pressure washer by the plastic motor cover can result in damage to the machine and potential injury. To avoid damaging the pressure washer, be sure to lift the pressure washer by grasping the metal frame.
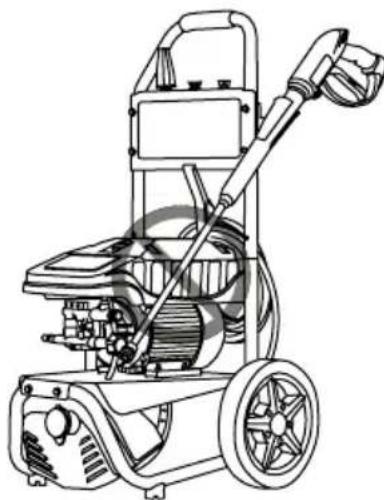
natural_image
Line drawing of a pressure washer with motor and hose (no text or symbols)DISCLAIMERS
- All information in this publication was based on the latest product information available at the time of printing. The FNA Group reserves the right to update, change, and/ improve the product and this document at any time, without notice, and without incurring any obligation.
- This manual may cover more than one machine. The pictures and figures in the manual should be used for reference only. There may be differences between your product and the pictures, drawings, and diagrams in this manual.
DISCLAIMERS | 1
SAFETY INSTRUCTIONS | 4
Read this Manual Before Operating | 4
Additional Instructions | 4
Hazard Alert Symbols | 4
PERSONAL PROTECTIVE EQUIPMENT | 6
UNPACKING 7
ASSEMBLY | 7
Install the Wheels | 7
Install Button-style Handle | 7
Assemble the Spray Gun | 8
Organize Accessories 8
COMPONENT LOCATION 9
CONNECTING HOSES 11
PURGING AIR FROM THE PUMP 12
NOZZLES | 13
Nozzle Selection | 13
Nozzle Installation | 13
OPERATING CHECKLIST | 14
Location | 14
Operating Conditions | 14
STARTING THE PRESSURE WASHER 15 SHUTTING OFF THE PRESSURE WASHER 17 USING CHEMICALS 18
OPERATION TIPS | 19
Terms | 19
Preparation | 19
Pressure Washing | 19
20TROUBLESHC
MAINTENANCE | 22
Maintenance | 22
Cleaning the Pressure Washer | 22
Connections | 22
Nozzle Cleaning | 23
Water Inlet Filter | 23
Pump Maintenance | 24
22
22
22
22
23
23
24
24STORING THE
25USING SIMPS
26WARRANTY
® PUMP GUARD
READ THIS MANUAL BEFORE OPERATING
This manual contains important safety information and instructions. Do not operate this product until you have read, and completely understand all safety, operation, and maintenance instructions listed in this manual. Failure to follow the information contained in this manual will result in property damage, injury, and/or death.
NOTE: The warnings and precautions discussed in this manual cannot cover all conditions and situations that may occur. The operator must understand awareness and caution are factors which cannot be built into this product and so must be exercised by the operator.
ADDITIONAL INSTRUCTIONS
Along with this manual, be sure to read any additional instructions provided both on and with the product, attached equipment, accessories, and the unit powering the product.
Pay careful attention to all additional safety rules and instructions on proper startup, operation, and shutdown procedures. Always use any recommended protective apparel that may be needed to operate the equipment safely.
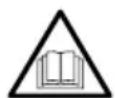
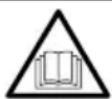
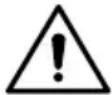
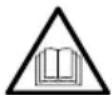
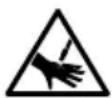
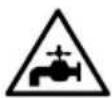
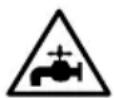
HAZARD ALERT SYMBOLS
Be sure to understand the safety symbols and definitions listed below. Each symbol contains one of four words: DANGER, WARNING, CAUTION, NOTICE, indicating different levels of hazard severity. These symbols are used throughout this manual and are followed by information about a specific hazard, the consequences of the hazard, and instructions on how to avoid the hazard. Failure to heed these symbols and follow the instructions provided with them will result in property damage, injury, and/or death.

Indicates an imminently dangerous situation, which if not avoided, will result in property damage, serious injury, and/or death.

Indicates a potentially hazardous situation, which if not avoided, could result in property damage, serious injury, and/or death.

Indicates a hazardous situation, which if not avoided, could result in property damage and/or minor to moderate injury.

Indicates information considered important, but not directly hazard related.
CALIFORNIA PROPOSITION 65 WARNING
This product and the engine exhaust can expose you to chemicals which are known to the state of California to cause cancer, birth defects, or other reproductive harm. For more information on California Proposition 65, go to www.P65Warnings.ca.gov.

OPERATOR SAFETY
Failure to read and follow the operator's manual and all of its instructions before using the product could result in DEATH or SERIOUS INJURY. Read this manual carefully and become failure with your electric pressure washer. Know its applications, its limitations and any hazards involved.

ELECTROCUTION HAZARD
Improper connection of the equipment grounding conductor can result in the risk of electrocution. Check with a qualified electrician if you are in doubt as to whether the receptacle is properly grounded. DO NOT modify the plug provided with this product. If it will not fit the receptacle, have a proper receptacle installed by a qualified electrician. DO NOT use any type of adapter with this product.

POWER SUPPLY
This pressure washer shall only be used with a dedicated receptacle/plug rated 120vAC, 60 Hz at 15-or-20 amperes. Any other appliances on the circuit should be turned off or unplugged when using the pressure washer. Never use the pressure washer with an adapter that may lead to higher voltage or excessive current. Excessive current may trip circuit breaker. Consult a qualified electrician if unsure of the desired power supply receptacle's ability to safely power this pressure washer.
IT IS NOT RECOMMENDED TO USE AN EXTENSION CORD. If, however, an extension cord is required, it must be an OUTDOOR RATED 3-PRONG CORD, that is no longer than 50 feet (15M) and has a minimum of 14 AWG (2.5mm ^2 ) conductors. Always uncoil the extension cord when in use. DO NOT use an extension cord that has its ground pin damaged or missing.
NOTICE
This appliance is not intended to be used by persons (including children) with reduced physical, sensory, or mental capabilities, or lack of experience and knowledge, unless they have been given supervision or instruction concerning use of the appliance by a person responsible for their safety.
Children should be supervised to ensure that they do not play with the appliance.
Ground Fault Circuit Interrupter Protection
This pressure washer is provided with a ground fault circuit interrupter (GFCI) built into the plug of the power supply cord. This device provides additional protection from the risk of electric shock.
Should replacement of the plug or cord becomes necessary, use only identical replacement parts that include GFCI protection.
Grounding Instructions
This pressure washer must be grounded. If it should malfunction or breakdown, grounding provides a path of least resistance for electric current to reduce the risk of electric shock. This product is equipped with a cord that contains an equipment grounding conductor and a grounding plug. The plug must be connected to an appropriate receptacle that is properly installed and grounded in accordance with all local codes and ordinances.
Motor Overload
The electric motor in this pressure washer is equipped with an thermal overload protection device. This device will automatically shut off the motor if the motor overheats or draws too excessive current. If the overload protection is tripped, turn the power off by turning the master ON/OFF switch to the OFF (0) position. Let the unit cool for thirty (30) minutes. After the unit has cooled, turn the master ON/OFF switch to the ON (I) position to resume operation.
Thermal Relief Valve
When the temperature inside the pump rises to a predetermined setting, this valve will open allowing the hot water to exit and cool water to enter, cooling the pump. The value will then close.
PERSONAL PROTECTIVE EQUIPMENT (PPE)
It is important to understand what personal protective equipment (PPE) should be utilized when using your pressure washer. Below is a list of PPE items that should be utilized at all times when using the pressure washer.
Hearing - Ear plugs or muffs to protect your hearing.
Vision - Safety glasses or goggles to protect your eyes.
Clothing - Long pants to protected your legs from flying debris.
Shoes - Shoes that fully cover your feet to protect against debris and over spray.
UNPACKING
Follow the steps outlined in this section to unpack and assemble your pressure washer. If you have any questions regarding the unpacking or assembly of your pressure washer, please have your model number and serial number ready, then contact customer support at 1-877-362-4271 or email cservice@fna-group.com.
- Place the shipping carton on a solid, flat surface.
- Carefully cut the top of the carton open.
- Carefully cut each corner of the carton from top to bottom.
- Lay each side of the carton flat on the ground.
- Remove everything from the carton.
ASSEMBLY
- Install the wheels.
Slide the axle pin through the wheel, formed washer, frame and other formed washer. Slide clip through the hole in the axle pin to secure the wheel in place. Repeats steps for the second wheel.
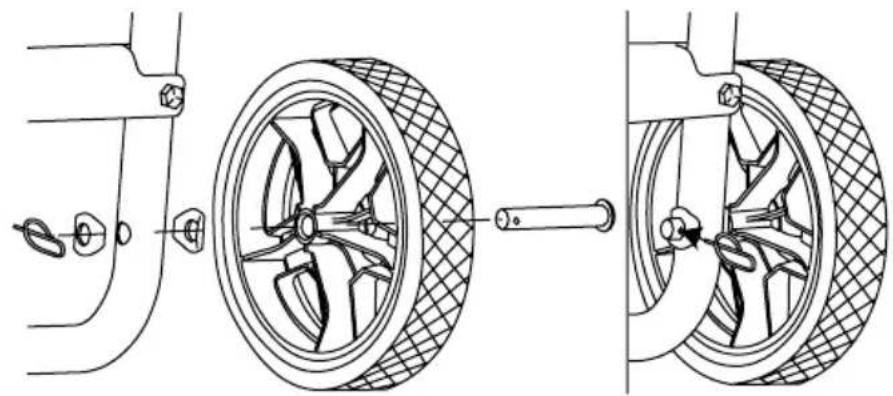
natural_image
Technical line drawing of a car wheel assembly showing three stages: front wheel, side wheel, and rear wheel (no text or labels)- Install the handle.
Place the handle onto the frame, depress the snap buttons and slide the handle assembly onto the frame until the snap buttons snap into place locking the handle to the frame.

natural_image
Illustration of two hands holding a tool, with arrows indicating downward motion (no text or symbols)Assemble the spray gun
natural_image
Diagram showing a connector being inserted into a socket (no text or symbols present)- Secure the lance to the gun by carefully turning the coupler on the spray gun until the coupler stops rotating. Do not over tighten. Most of the threads on the lance will not be visible if the lance and gun are properly assembled. Be careful not to cross-thread the gun and lance.
WARNING! The threads on the lance and gun coupler can be easily cross threaded resulting in an improper assembly. An improper assembly of the gun and lance can result in personal injury. Do not use if the threads on the gun coupler and or lance are cross threaded.
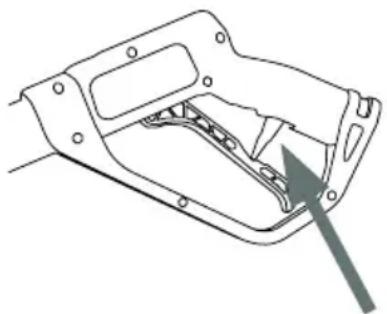
Organize accessories
-
Place the spray gun and lance assembly into the holder on the dashboard.
-
Push the nozzles into the rubber grommets on the dashboard. Note: the dashboard label indicates correct nozzle placement.
-
Hang the high-pressure hose with the strap holder.
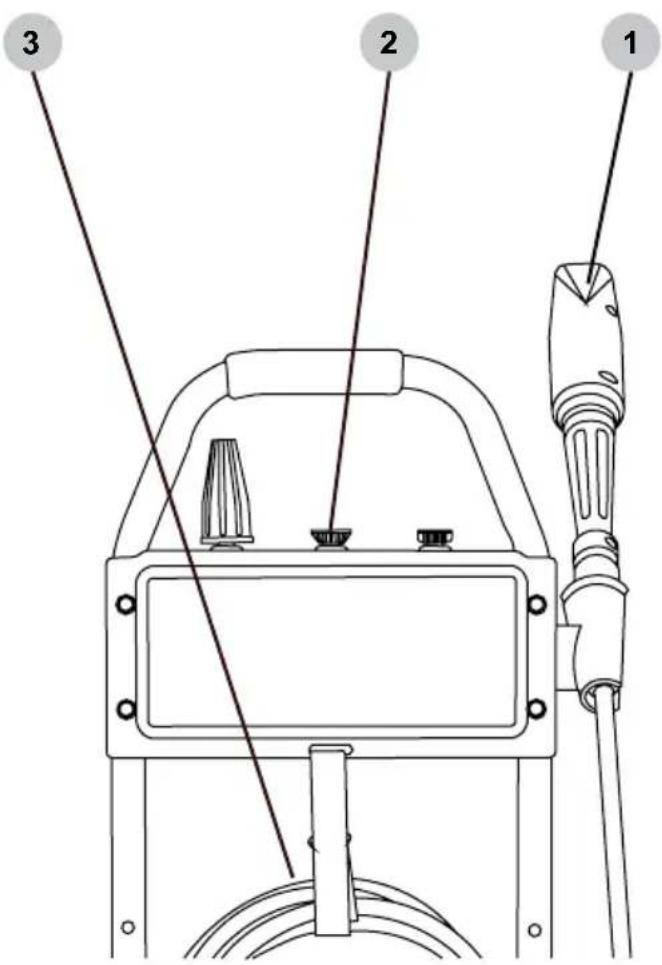
text_image
Technical diagram of a welding machine with labeled parts 1, 2, and 3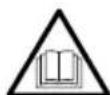

OPERATING CHECKLIST
Attempting to start or use the pressure washer incorrectly can result in motor and/or pressure washer damage, and may cause serious injury or death. To avoid these hazards, be sure to read, understand, and follow the steps outlined in the OPERATING CHECKLIST section of the owner's manual before beginning, and follow all the guidelines for proper use of the pressure washer.
text_image
Technical diagram of a water heater with labeled parts including handle, hose, and power supply- Handle
- Accessory storage
- Master ON/OFF switch
- Thermal relief valve
- Power supply cord with integrated GFCI
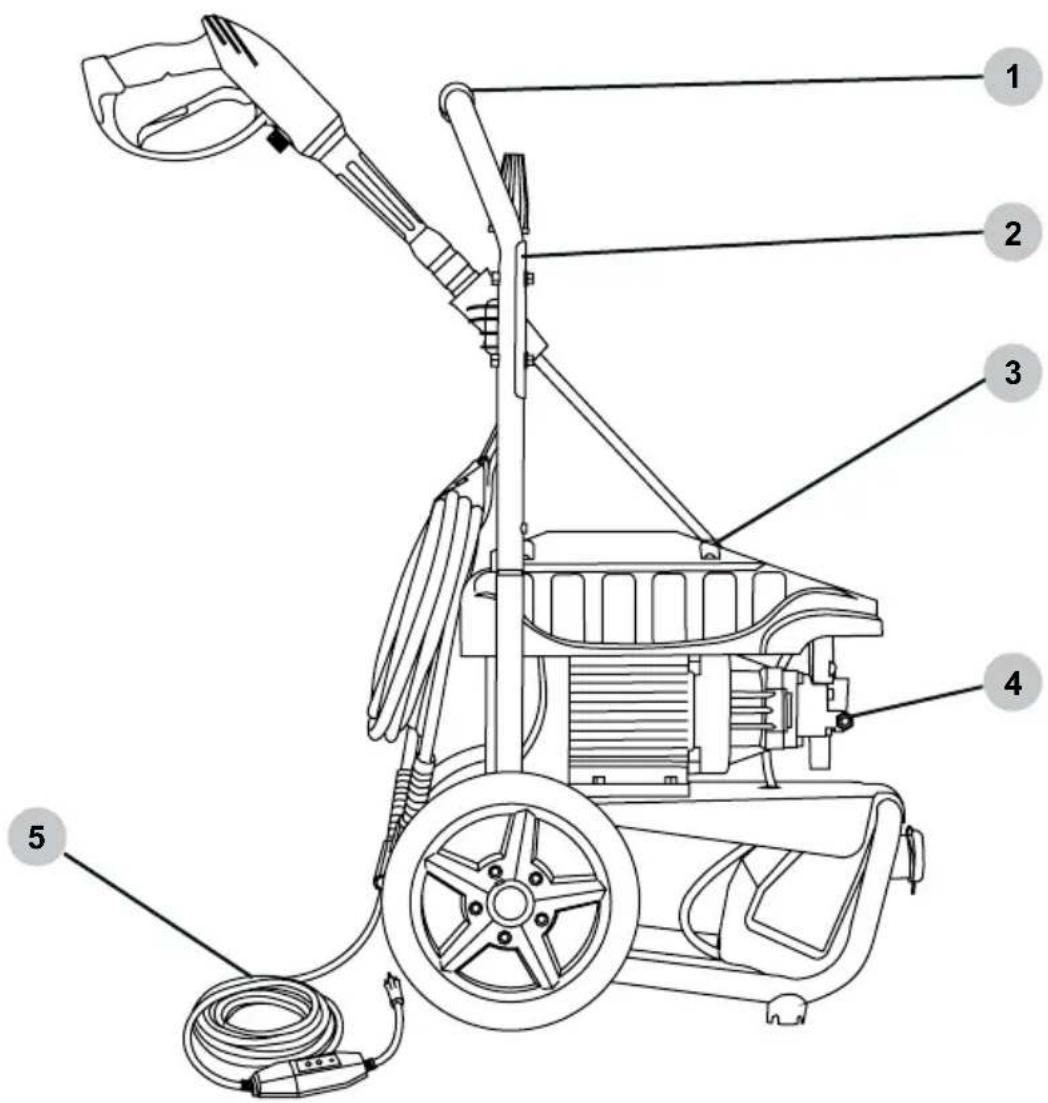
text_image
Technical diagram of a lawn mower with numbered parts labeled for identification.- Spray wand
- Spray wand quick connector
- High-pressure pump outlet
- Garden hose coupler & water inlet filter
- Detergent tank
- Spray gun trigger lock
- Spray gun trigger
- Spray gun
- High-pressure hose
CONNECTING HOSES
Before connecting a water supply hose, be sure the water supply is capable of providing an uninterrupted source of clean, cold water at a minimum rate of 5 gallons per minute (GPM) and 20 pounds per square inch (PSI) of pressure. Once a proper water supply is secured, follow the instructions below to connect both the water supply and high-pressure hoses to the pressure washer.
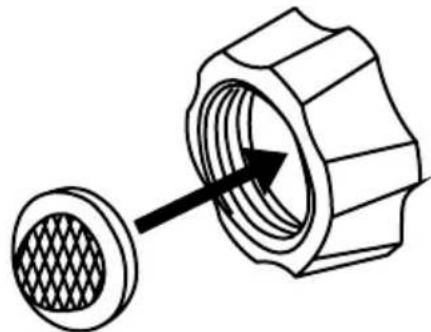
- Verify the inlet screen is free of any dirt or debris and is in place with the convex side facing out.
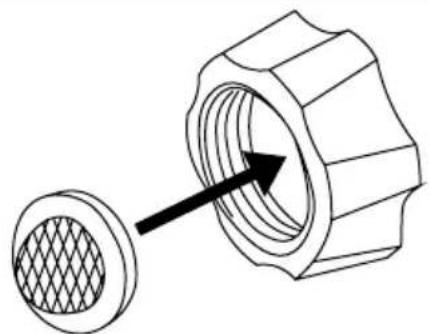
natural_image
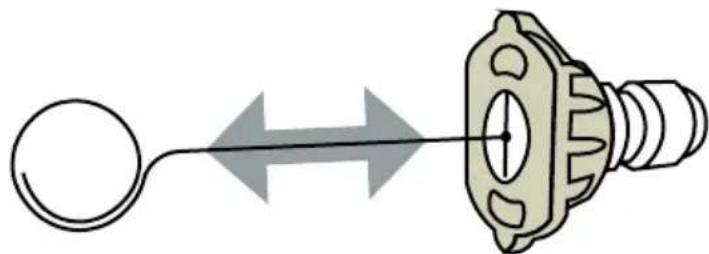
Technical line drawing of a mechanical component with a mesh circular inset and an arrow indicating direction (no text or symbols)- Turn on the water supply and run for 30 seconds to purge any debris from the supply hose. Then, turn off the water supply and thread the water supply hose into the pump inlet.
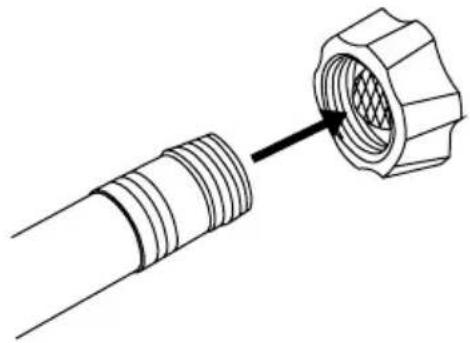
natural_image
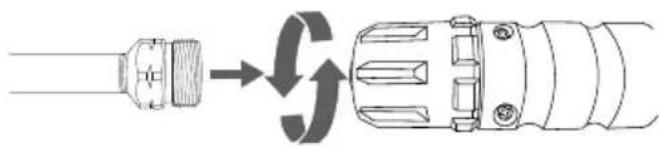
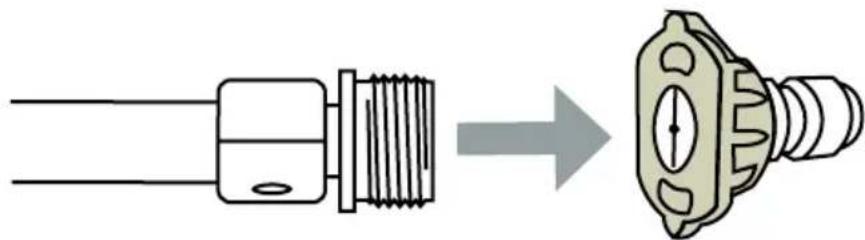
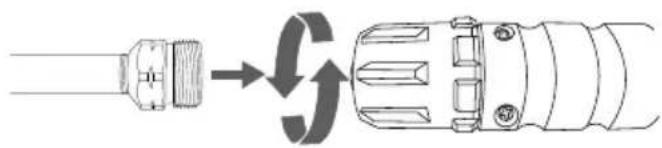
Diagram of a pipe fitting with threaded ends and a hexagonal nut inserted into a circular component (no text or symbols)- Thread the high-pressure hose connector onto the pump high-pressure outlet.
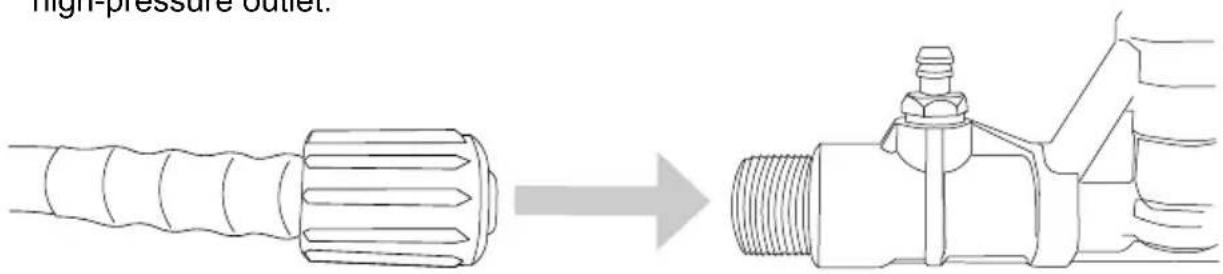
text_image
High-pressure outlet.- Thread the high-pressure hose connector onto the spray gun.
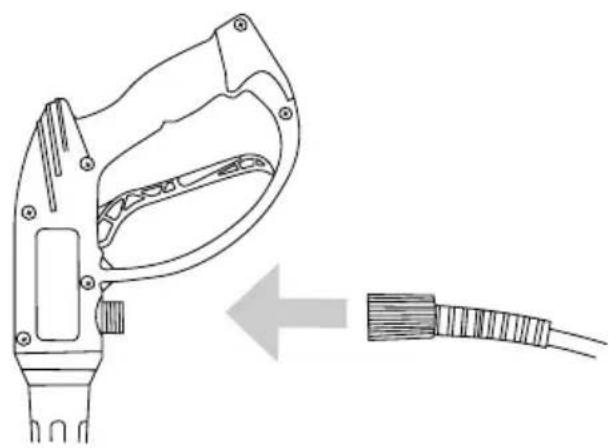
natural_image
Diagram of a mechanical device with a cable connector, showing internal components and an arrow indicating direction (no text or symbols present)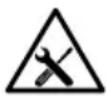
NOTICE
PUMP PURGING
Running a pressure washer pump without water will severely damage the pump seals and other internal components. To avoid this hazard, make sure your water supply is uninterrupted and at least 5 GPM at 20 PSI, and always purge the air your pressure washer pump before starting the engine.

INJECTION INJURY
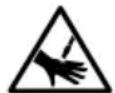
The high pressures created by a pressure washer can cause fluid injection injuries, severe lacerations, amputations, and / or death. To avoid these hazards, always aim the spray gun and lance in a safe direction when using the pressure washer and never attempt to touch a leak in a high-pressure hose or fitting.
A pressure washer pump is designed to operate with water flowing through it. Water lubricates and cools the internal components of the pump. Running a pressure washer pump without water will severely damage the pump seals and other internal components. Damage caused by running a pressure washer pump without water is not covered under warranty. Be sure to follow the instructions below to correctly purge the air from your pressure washer pump before starting the engine.
- Connect all the hoses by following the steps outlined in the CONNECTING HOSES section of this manual then turn on the cold water source.
- Aim the spray gun in a safe direction then squeeze and hold the trigger for at least 30 seconds or until the water runs steady and all the air is purged from the pump and hoses.
- Check hoses and connections for leaks. If leaks are found, turn off the machine, aim the spray gun in a safe direction and squeeze the trigger to relive any built up pressure in the system. Never attempt to touch a leak in a high-pressure hose or fitting. Never attempt to repair a high-pressure hose.
Engage the trigger lock.4.
natural_image
Technical line drawing of a mechanical component with a highlighted section (no text or symbols)Nozzle Selection
The nozzles supplied with the pressure washer have specific spray patterns designed to clean different surfaces. Using the incorrect nozzle can damage surfaces. Refer to the table below to select the correct nozzle before using the pressure washer. NOTE: The selection of nozzles included may vary with pressure washer models.
| Color | 5-N-1(if equipped) | Spray Pattern | SurfacesUses | |
| Red | 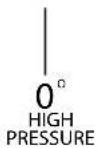 | 0° | Spot cleaning hard, unpainted surfaces and high-reach areas | Unpainted metal and concreteDO NOT use on wood. |
| Yellow |  | 15° | Intense cleaning of unpainted surfaces | Grills, driveways, concrete and brick walkways, unpainted brick and stucco |
| Green |  | 25° | Standard cleaning nozzle for most applications | Yard tools, sidewalks, lawn furniture, unpainted siding, stucco, gutters, eaves, concrete, and brick surfaces |
| White |  | 40° | Cleaning painted or delicate surfaces | Auto, truck, RV, marine, wood, painted brick, painted stucco, vinyl, and painted siding |
| Black Soap |  | Applies cleaning solutions | Safe on all surfaces. Always verify compatibility of cleaning solution(s) prior to use. |
NOTICE
SPRAY DAMAGE
High-pressure spray can damage plants and other surfaces. To avoid causing damage, cover plants before spraying near them, refer to the Nozzle Selection table in this manual for correct nozzle selection, and test surfaces before spraying to make sure they are strong enough to withstand high-pressure spray.
Nozzle Installation
Make sure the trigger lock is in the locked position before removing and installing nozzles.
To place a nozzle into the spray wand, pull the quick-connect coupler back, insert the nozzle, then release the coupler allowing it to snap back in place. Once installed, pull on the nozzle to make sure it secure.
natural_image
Illustration of two hands holding a small object with an arrow pointing to it (no text or symbols present)Location
IT IS NOT RECOMMENDED TO USE AN EXTENSION CORD. If, however, an extension cord is required, it must be an OUTDOOR RATED 3-PRONG CORD, that is no longer than 50 feet (15M) and has a minimum of 14 AWG (2.5mm²) conductors. Always uncoil the extension cord when in use. DO NOT use an extension cord that has its ground pin damaged or missing.
Operating Conditions
Before each use, check for loose or damaged parts, leaks, and/or any other condition that may affect proper operation. Repair or replace all damaged and/or defective parts immediately. Always keep all safety guards in place and in proper working order. For safety reasons, the manufacturer recommends all maintenance and repairs be performed by an authorized service center.
Before using the pressure washer, remove any excessive dirt and debris from the cooling vents of the motor. Always operate the pressure washer on a level surface and never move or tip the pressure washer while operating. Use the pressure washer only for its intended purpose. If you have questions about the proper use of your pressure washer, please contact customer support at 1-877-362-4271 or cservice@fna-group.com.

UNTRAINED OPERATION
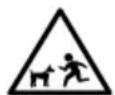
Untrained adults and children can be seriously injured or killed if allowed to incorrectly operate or play with running pressure washer. To avoid these hazards, be sure anyone operating the pressure washer receives proper instructions, understands safe operation, and has read the owner's manual before operating this product. Do not let children operate the pressure washer without parental supervision. Keep children and pets away from the pressure washer while it is running. Always turn off the pressure washer before leaving the area.

Failure to inspect this product before use could create a hazardous situation resulting in product damage, serious injury, and/or death. To avoid these hazards, inspect the pressure washer before each use. Check for loose or damaged parts, signs of oil leaks, missing guards, plugged cooling vents, or any other condition that may affect proper operation. Repair or replace all damaged or defective parts and keep all safety guards in place and in proper working order before using the pressure washer.

INJECTION INJURY
The high pressures created by a pressure washer can cause fluid injection injuries, severe lacerations, amputations, and / or death. To avoid these hazards, always aim the spray gun and lance in a safe direction when using the pressure washer and never attempt to touch a leak in a high-pressure hose or fitting.
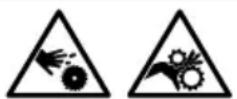

MOVING PARTS
This product has many parts that move at high speeds. Moving parts can cause crushing injuries, broken bones, severe lacerations, and/or traumatic amputations. To prevent injury, never place fingers, hands, feet, or other body parts near running engine. Never operate product with covers, shrouds, or other guards removed. Do not wear loose-fitting clothing, dangling drawstrings, or any other hanging items that could become entangled in moving parts while operating. Tie up long hair and remove jewelry before operating.
STARTING THE PRESSURE WASHER
- Connect the hoses as instructed on Page 11.
- Turn on the water and purge the system of air as instructed on Page 12.
- Insert the desired nozzle as instructed on Page 13.
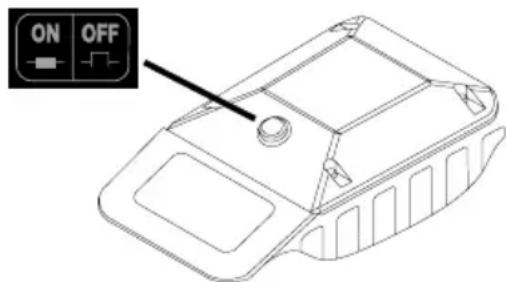
- Make sure the master ON/OFF switch is in the OFF (0) position.
text_image
ON OFF

POWER SUPPLY
This pressure washer shall only be used with a dedicated receptacle/plug rated 120vAC, 60 Hz at 15-or-20 amperes. Any other appliances on the circuit should be turned off or unplugged when using the pressure washer. Never use the pressure washer with an adapter that may lead to higher voltage or excessive current. Excessive current may trip circuit breaker. Consult a qualified electrician if unsure of the desired power supply receptacle's ability to safely power this pressure washer.
IT IS NOT RECOMMENDED TO USE AN EXTENSION CORD. If, however, an extension cord is required, it must be an OUTDOOR RATED 3-PRONG CORD, that is no longer than 50 feet (15M) and has a minimum of 14 AWG (2.5mm ^2 ) conductors. Always uncoil the extension cord when in use. DO NOT use an extension cord that has its ground pin damaged or missing.
- Plug the electrical power cord into a grounded receptacle rated for 120 volts AC at 15 amperes that was properly installed in accordance with all local codes and ordinances. The indicator light on the GFCI should be illuminated (ON).
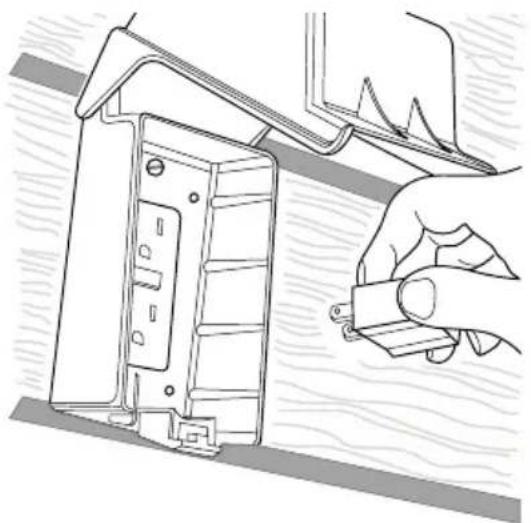
natural_image
Line drawing of a hand holding a small electronic component next to a wall-mounted device (no text or symbols)- Press the TEST button (A). The indicator light (B) should now be dark (OFF).
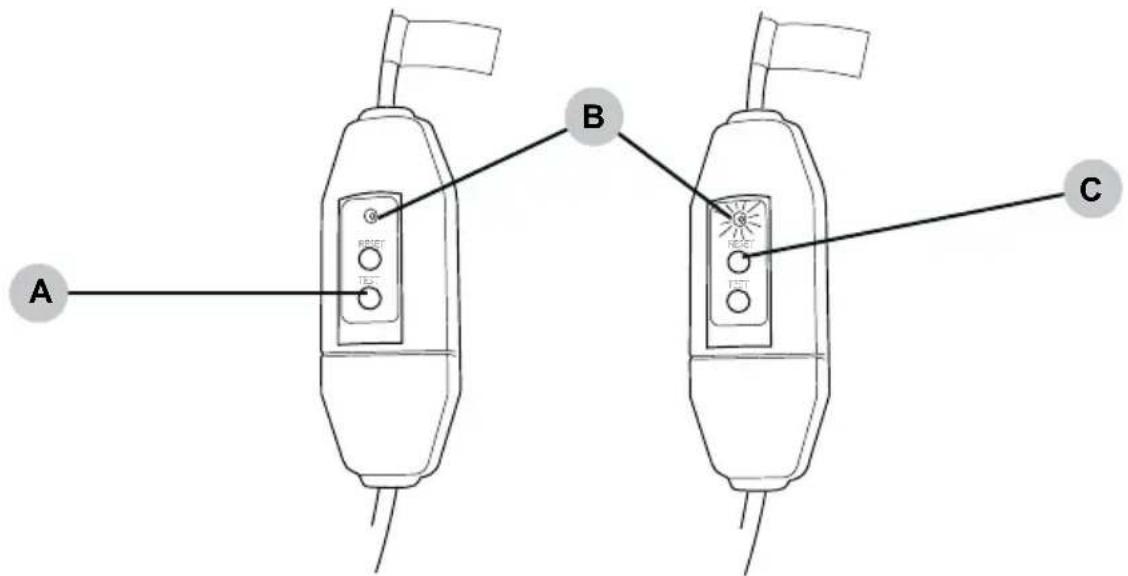
text_image
A B C- Press the RESET button (C). The indicator light (B) will now be illuminated (ON). NOTICE - DO NOT use the pressure washer if the above test fails.
- Press the master ON/OFF button on the pressure washer to the ON (I) position.
- Point the gun in a safe direction, open the trigger lock and squeeze the trigger. The electric pressure washer motor will start as the spray gun trigger is depressed and will continue to run even when released.
NOTICE
PUMP DAMAGE
Turning off the water supply to your pump with the motor running will damage the pump. Damage caused by running the pump without water is not covered under warranty. To avoid this hazard always turn off the motor before shutting off the water supply.
- Set the trigger lock on the spray gun.
- Press the master ON/OFF button on the pressure washer to the OFF (0) position.
- Turn off the water supply.
- Release the trigger lock then squeeze the spray gun trigger to relieve the pressure in the hose and pump.
- Allow the pressure washer to cool completely before handling and storage.
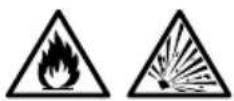
NOTICE
VOLATILE LIQUIDS
Pressure washing with volatile, flammable, or corrosive liquids could cause pressure washer damage, fire, or explosion resulting in severe injury and/or death. To avoid these hazards, use only approved soaps and chemicals, do not attempt to pressure wash with volatile, flammable, or corrosive liquids, and NEVER use bleach.
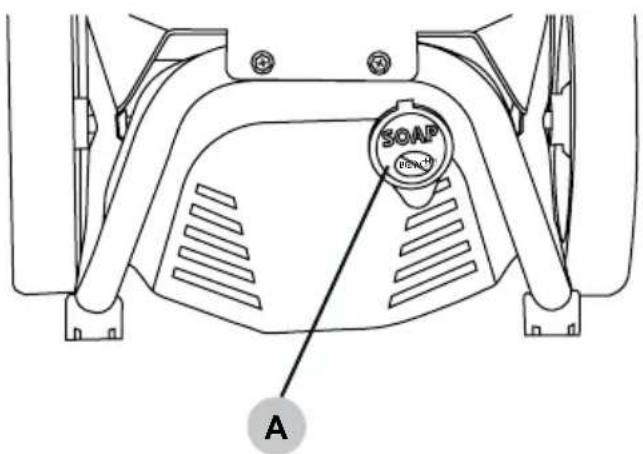
text_image
SOAP A
natural_image
Illustration of two hands holding a small object with an arrow pointing to it, labeled 'B' (no text or symbols on the objects themselves)- Fill the detergent tank (A) with a pressure washer safe cleaning detergent.
- Insert the black, soap nozzle (B) into the wand.
- Make sure all hoses are connected, the water source is turned on and the air has been purged from the system.
- Turn the pressure washer ON.
- Apply detergent to a dry surface, starting at the lowest portion of area to be washed and work upward using long, even, overlapping strokes.
- Allow detergent to sit on the surface for 3 - 5 minutes before washing and rinsing.
Reapply as needed to prevent the surface from drying. Do not allow the detergent to dry. - Once detergent has been applied to the surfaces, remove the soap nozzle.
- Using the proper high-pressure nozzle, rinse the surface starting at the top and make your way downward.
NOTE - You must flush the detergent system when you have completed your cleaning job. Fill the tank with fresh water, then using the soap nozzle, run the system for two minutes until all signs of soap and foam are no longer coming from the nozzle.
Failure to properly flush the detergent system may lead to a clogged detergent filter, detergent hose and even pump damage. A few minutes of time can save you much trouble the next time you use your pressure washer.
Terms
- PSI – Stands for pounds per square inch and measures the water pressure or stripping power produced by the pressure washer. The higher the PSI number, the greater the pressure and stripping power produced.
- GPM – Stands for gallons per minute and measures the flow rate of the water. The higher the GPM, the greater the flow or rinsing power produced.
- CU – stands for cleaning units. PSI x GPM = CU. Measures performance efficiency of the pressure washer. Generally, the higher the CU, the more powerful and efficient the machine is.
Preparation
- Read all warnings and instructions in this and all other manuals that came with the pressure washer.
- Remove all toys, bikes, lawn furniture, etc. from the work area if they should not be sprayed.
- Sweep any loose dirt and debris from the surface you will be pressure washing.
- Cover nearby plants to avoid damaging them with pressure washer spray.
- Lay tarps down to collect paint chips and other debris that get blown off by spray. Exterior surfaces of houses built before 1977 may produce lead paint chips that will have to be collected and properly disposed of at a hazardous waste facility.
- Cover or avoid spraying windows as high-pressure spray can break them.
Pressure Washing
- A wider spray equals faster cleaning, while tighter spray equals deeper cleaning.
- Do not aim the nozzle straight at a surface. Hold the wand at a 45-degree angle to the surface at a distance that cleans well without causing damage.
- Keep the nozzle about 4-feet away from siding to prevent damage to surfaces.
-
Start washing siding at the bottom and work your way up, then rinse from the top down.
-
Avoid driving water up behind siding.
- Use overlapping strokes for even cleaning.
- Work in smaller areas and do not let soap dry on surfaces.
| Possible Causelssue Solution | ||
| Pressure washer will not start or circuit breaker trips. | The power supply cord is not connected. | Plug the cord into a 120 volt, 15 ampere receptacle. |
| The house circuit breaker is tripped. | Reset the circuit breaker. | |
| The GFCI equipped receptacle (if applicable) is tripped. | Reset the GFCI by pushing the RESET button. | |
| The GFCI in the power supply cord is tripped. | Reset the GFCI by pushing the RESET button. | |
| The master ON/OFF switch is in the OFF position. | Move the switch to the ON position. | |
| The thermal switch within the electric motor has tripped due to overheating. | Turn the master ON/OFF switch to the OFF position. Allow the unit to cool for 30 minutes before trying the pressure washer once again. | |
| The pressure washer is connected to a receptacle/plug that is shared by other devices within the circuit. | Remove all other devices from the circuit. | |
| The pressure washer is connected to a circuit using an extension cord. | Remove the extension cord. Plug the power cord from the pressure washer directly into a 120 volt, 15 ampere receptacle.See POWER SUPPLY, page 5. | |
| The pressure washer creates low or no water spray pressure. | There is air in the hoses and/or pump. | Refer to the PRIMING THE PUMP section of this manual to remove air from pump and hoses. |
| The water supply is insufficient. | Make sure the water supply pressure is at least 5 gpm @ 20 PSI. | |
| The nozzle is clogged. | Clean nozzle per the MAINTENANCE section of this manual. | |
| The water inlet screen is clogged. | Clean the water inlet screen per the MAINTENANCE section of this manual. | |
| Detergent fails to mix with the spray. | Transparent tube is clogged or cracked. | Clean or replace the transparent tube. |
| Transparent tube is not attached to the pump. | Attach the transparent tube to the detergent connector on the pump. | |
| Incorrect nozzle used. | Install the black soap nozzle on the wand. | |
| Detergent too thick. | Add water to the detergent to make it the consistency of water. | |
For safety reasons, the manufacturer recommends all pressure washer service and repairs be performed by an authorized service center. All warranty replacements or repairs must be performed by an authorized distribution or service center. To find an authorized service center near you, make a warranty claim, or get authorized warranty repair, call 1-877-362-4271 or email cservice@fna-group.com.
It is the responsibility of the owner and/or operator to have all scheduled maintenance completed before operating the pressure washer. Be sure to follow the inspection and maintenance recommendations as listed in all the manuals that came with this unit.
Maintenance
Before each use, check pressure washer for leaks, loose or damaged parts, and any other condition that may affect proper operation. Be sure all safety guards are in place and in proper working order. Inspect all air vents and cooling slots to ensure they are clean and unobstructed. Repair or replace all damaged or defective parts immediately. For safety reasons, the manufacturer recommends all pressure washer service and repairs be performed by an authorized service center.
Cleaning the Pressure Washer
Always clean the pressure washer with the engine off and cool. To clean the pressure washer, first use an air compressor set at no more than 25 PSI to clear dirt and debris from the pressure washer surfaces, vents, and cooling slots. Then, wipe the exterior clean with a damp cloth.
NOTICE
CLEANING
Water can damage the pressure washer engine components if allowed to enter through cooling slots or other holes. Damage caused by water intrusion is not covered under warranty. To avoid engine water damage, do not use a pressure washer, garden hose, or any other sources of running water to clean the pressure washer engine, and never submerge the pressure washer engine in any liquids.
NOTICE
CHEMICAL CLEANERS
Using chemical cleaners and/or corrosive liquids can damage the pressure washer seals and internal components. Damage caused by chemical cleaners and corrosive liquids is not covered under warranty. To avoid these hazard, only used approved cleaning chemicals, never use bleach, and always run clean water through the pressure washer after using cleaning chemicals.
Connections
Hose, spray gun, and pump connections should be cleaned and lubricated with a thin film of lithium grease regularly to prevent o-ring damage and leaks.
Nozzle Cleaning
If a nozzle becomes clogged, the pump may pulsate and spray patterns could change. If the nozzle is not cleaned, excessive pressure may develop possibly damaging the pump, or other accessories. Inspect nozzles before using them and follow the instructions in this section for the proper nozzle cleaning procedure.
- Shut off the pressure washer.
- Turn off the water supply.
- Point the spray gun in a safe direction and squeeze the trigger to relieve water pressure.
- Set the trigger lock.
- Remove the nozzle from the lance quick connector.
- Clear any obstructions from the nozzle by inserting the nozzle cleaning tool provided.
natural_image
Diagram of a mechanical component with a circular end connected to a shaft, showing bidirectional arrow (no text or symbols)- Rinse any loose debris from the nozzle by directing a running garden hose into the output of the nozzle for at least 30 seconds.
natural_image
Diagram showing a connector being inserted into a socket, with no text or symbols present.Water Inlet Filter
Before each use, check the inlet filter and clean by following the steps below. Never operate the pressure washer without the inlet filter properly installed.
- Remove the filter from the garden hose coupler.
- Use a water from a running garden hose to clean both sides of the filter.
- Insert the cleaned filter into the pump inlet with the convex side facing out.
natural_image
Technical diagram of a mechanical component with a meshed circular inset and arrow indicating direction (no text or symbols)Pump Maintenance
The pump on this unit is a maintenance free design. The pump was filled with oil at the factory and has no oil drain or fill plugs. If there is a problem with the pump on this pressure washer call 1-877-362-4271 or email cservice@fna-group.com.
STORING THE PRESSURE WASHER
- Turn OFF the pressure washer and disconnect the electrical cord.
- Squeeze the trigger to release any stored pressure.
- Disconnect the high-pressure hose from the pump and the gun.
- Hold the spray gun in a vertical plane; squeeze trigger to remove trapped water.
- Remove trapped water from the high-pressure hose; coil for storage.
- Protect the pump by using SIMPSON ^® Pump Guard per the USING PUMP GUARD section of this manual.
- Store the pressure washer and its accessories in a cool, dry location out of direct sunlight.

NOTICE
PUMP DAMAGE
Leaving water inside the pump during freezing weather will cause severe damage to the pump. To avoid costly damage, always treat the pump with SIMPSON® Pump Guard to remove the trapped water and to fill the pump with a lubricating, antifreeze solution.
SIMPSON® Pump Guard (purchase separately) is formulated to protect your pump during long-term storage and from freezing damage. Pump Guard should be used throughout the season to keep the seals pliable and well lubricated. Before storing the unit for winter or for when there is a chance of freezing weather, use pump guard to remove all traces of water from the internal cavities while filling them with an antifreeze solution. Pump Guard is insurance for your investment, use it.
Simply use Pump Guard by following these easy steps:
- Screw the Pump Guard adapter into the garden hose input on the pump.
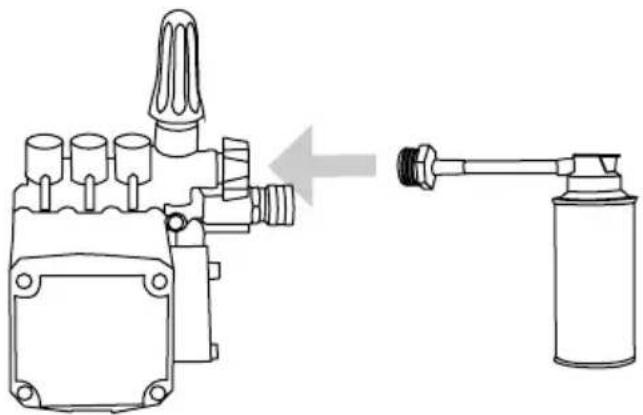
natural_image
Technical line drawing of a mechanical device with a gas cylinder connected to a hose (no text or symbols present)- Press and hold down on the button until all the water and the Pump Guard starts to come out of the high pressure port.
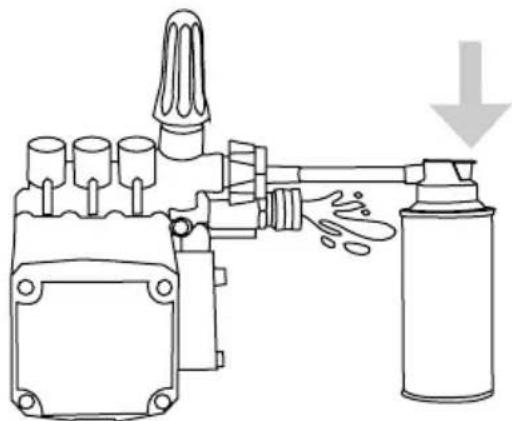
natural_image
Diagram of a mechanical device with a spray can and a downward arrow indicating motion (no text or symbols)- Unscrew the Pump Guard from the pump then prepare the pressure washer for storage as outlined in STORAGE AND TRANSPORTATION.
LIMITED WARRANTY
Consumer Products
WARRANTY COVERAGE TERMS:
The manufacturer of this product agrees to repair or replace designated parts that prove defective within the warranty period listed below at the manufacturers sole discretion. Specific limitations/extensions and exclusions apply.
This warranty covers defects in material and workmanship and not parts failure due to normal wear, depreciation, abuse, accidental damage, negligence, improper use, maintenance, water quality and storage. To make a claim under the terms of the warranty, all parts said to be defective must be retained and available for return upon request to a designated Warranty Service Center for warranty inspection. The judgments and decisions of the manufacturer concerning warranty claims are final.
There warranties pass through to the end user and are non-transferable. As a factory authorized and trained Warranty Service Center, the factory will honor the terms of all component warranties and satisfy claims of the appropriate warranty provisions.
Normal wear items included, but are not limited to, items such as valve and seals, which are not covered by this warranty.
This warranty replaces all warranties, express or implied, including without limitation any warranties of merchantability or fitness for a particular purpose and all such warranties are hereby disclaimed and excluded by the manufacturer. The manufacturer's warranty obligation is limited to repair and replacement of defective products as provided herein and the manufacturer shall not be liable for any further loss, damages, or expenses - including damages from shipping, accident, abuse, acts of God, misuse, or neglect. Neither is damage from repairs using parts not purchased from the manufacturer or alterations performed by non-factory authorized personnel. Failure to install and operate equipment according to the guidelines put forth in the instruction manual shall void warranty.
THIS WARRANTY DOES NOT COVER:
Merchandise sold as reconditioned, used as rental equipment, used for commercial or commercial applications, and units used as floor or display models, damage resulting from shipping (claims must be filed with freighter), accident, abuse, acts of God, misuse or neglect. This warranty also does not cover damage from repairs or alterations performed by non-factory authorized personnel or failure to install and operate equipment according to the guidelines put forth in the instruction manual. The manufacturer will not be liable to any persons for consequential damage, for personal injury or for commercial loss.
RESPONSIBILITY OF ORIGINAL PURCHASER (INITIAL USER):
To process a warranty claim on your SIMPSON® pressure washer, report the concern to 1-877-362-4271 or cservice@fnagroup.com for authorization and direction to the nearest authorized service center in your area.
Retain original cash register receipt as proof of purchase for warranty work.
Use reasonable care in the operation and maintenance of the product as described in the Owner's Manual.
WHAT THIS WARRANTY DOES NOT COVER:
- Freight damage
- Damage due to chemical deterioration, scale build up, rust, corrosion or thermal expansion
- Freeze damage
• Damage caused by parts or accessories not obtained from an authorized dealer or not approved by the manufacturer - Normal wear of moving parts or components affected by moving parts
WARRANTY COVERAGE PERIODS:
ELECTRIC MOTOR (DEFECTS IN MATERIAL AND WORKMANSHIP)
• ONE (1) year from date of purchase
HIGH PRESSURE PUMP (DEFECTS IN MATERIAL AND WORKMANSHIP)
• ONE (1) year from date of purchase
FRAME (DEFECTS IN MATERIAL AND WORKMANSHIP)
• ONE (1) year from date of purchase
ACCESSORIES (DEFECTS IN MATERIAL AND WORKMANSHIP)
- Nozzles, hoses, spray guns, wands, tires, rubber feet: Ninety (90) days from date of purchase
THIS PAGE WAS INTENTIONALLY LEFT BLANK
THIS PAGE WAS INTENTIONALLY LEFT BLANK

text_image
SIMPSON
READ THIS MANUAL CAREFULLY BEFORE OPERATION
Failure to follow the instructions and safety precautions in this manual can result in property damage, serious injury and/or death.
SAVE THIS MANUAL FOR FUTURE REFERENCE

text_image
SIMPSONLAVEUR SOUS PRESSION
GUIDE D'UTILISATION ET D'ENTRETIEN
natural_image
Line drawing of a pressure washer with attached hose and wheels (no text or symbols)
LIRE ATTENTIVEMENT CE GUIDE AVANT L'UTILISATION
natural_image
Line drawing of a pressure washer with handle and wheels (no text or symbols)CLAUSES DE NON-RESPONSABILITÉ
natural_image
Technical line drawing of a car wheel assembly showing three stages: mounting bracket, wheel rim, and wheel rim with connecting rod (no text or labels)natural_image
Illustration of two hands performing a finger manipulation technique (no text or symbols present)natural_image
Diagram of a mechanical component with a threaded end and a curved arrow indicating rotation (no text or symbols)text_image
Technical diagram of a welding machine with labeled parts 1, 2, and 3

LISTE DE CONTRÔLE DE FONCTIONNEMENT
text_image
Technical diagram of a power tool with numbered parts labeled 1 to 5text_image
Technical diagram of a lawn mower with numbered parts labeled for identification.natural_image
Technical illustration of a mechanical component with a meshed circular feature and an arrow indicating direction (no text or symbols)natural_image
Technical line drawing of a connector with threaded ends and a hexagonal nut (no text or symbols)natural_image
Line drawing of a handheld electric shaver with a cable connector, showing internal components and an arrow indicating assembly (no text or symbols present)
AVISAVI
PURGE DE LA POMPE
natural_image
Technical line drawing of a mechanical component with a highlighted section (no text or symbols)natural_image
Illustration of two hands holding a small object with an arrow pointing to it (no text or symbols)Emplacement
natural_image
Line drawing of a hand using a tool to adjust or install an electrical component, no text or symbols presentnatural_image
Illustration of hands connecting a small object to a terminal block, with a labeled point B (no text or symbols on the object itself)natural_image
Diagram of a mechanical component with a shaft and housing, showing bidirectional movement (no text or symbols)natural_image
Diagram showing a connector being inserted into a socket, with no text or symbols present.natural_image
Diagram of a mechanical component with a meshed circular base and a cylindrical housing, showing an arrow pointing to a hole (no text or symbols present)Entretien de la pompe
natural_image
Technical line drawing of a mechanical device with a gas cylinder connected to a hose and a valve assembly (no text or symbols)natural_image
Diagram of a mechanical device with a spray can and a downward arrow indicating motion (no text or symbols)natural_image
Line drawing of a power supply unit with hoses and wheels (no text or symbols)
natural_image
Line drawing of a pressure washer with motor and wheels (no text or symbols)text_image
PRECAUCION:natural_image
Technical line drawing of a car wheel assembly showing three stages: front wheel, side wheel, and rear wheel (no text or labels)natural_image
Illustration of two hands holding a tool, with arrows indicating downward motion (no text or symbols)Ensamble la pistola rociadora
natural_image
Diagram showing a connector being processed into a cylindrical device (no text or symbols present)text_image
Technical diagram of a welding machine with labeled parts 1, 2, and 3

text_image
Technical diagram of a power saw with numbered parts labeled for identificationtext_image
Technical diagram of a lawn mower with numbered parts labeled for identification.natural_image
Technical illustration of a mechanical component with a meshed circular feature and an arrow indicating direction (no text or symbols)natural_image
Diagram of a connector with threaded ends and a hexagonal nut inserted into it (no text or symbols)natural_image
Line drawing of a handheld device with a cable connector, showing internal components and an arrow indicating direction (no text or symbols)