Café Deco WCM50 - Coffee machine Waring Commercial - Free user manual and instructions
Find the device manual for free Café Deco WCM50 Waring Commercial in PDF.

| Brand | Waring Commercial |
| Model | Café Deco WCM50 |
| Product Type | Commercial Manual Fill Coffee Machine |
| Reservoir Capacity | 64 oz (1.9 L) |
| Power Supply | 120 V, 1800 W, 60 Hz |
| Housing Material | Stainless Steel |
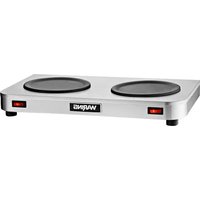
| Number of Warming Plates | 2 (upper and lower) |
| Controls | Independent switches for warming plates and brew cycle |
| Indicator Lights | Power (red) and Ready (green) |
| Filtration System | Filter basket with paper filter (not included) |
| Installation Type | Freestanding (no water connection required) |
| Usage | Commercial only |
| Maintenance | Regular cleaning of spray head and exterior surfaces |
| Safety Instructions | Grounding required, do not use outdoors, keep away from children |
| Warranty | 1 year against defects in material or workmanship |
| Country of Origin | Not specified (estimated: United States) |
Frequently Asked Questions - Café Deco WCM50 Waring Commercial
User questions about Café Deco WCM50 Waring Commercial
0 question about this device. Answer the ones you know or ask your own.
Ask a new question about this device
Download the instructions for your Coffee machine in PDF format for free! Find your manual Café Deco WCM50 - Waring Commercial and take your electronic device back in hand. On this page are published all the documents necessary for the use of your device. Café Deco WCM50 by Waring Commercial.
USER MANUAL Café Deco WCM50 Waring Commercial
natural_image
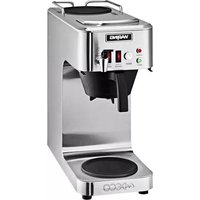
Modern glass coffee maker with a round-bottom flask and a digital coffee receiver (no visible text or symbols)WCM50 Series
For your safety and continued enjoyment of this product, always read the instruction book carefully before using.
Important Safeguards ....2
Introduction 4
Grounding Instructions....4
Short Cord Instructions ....5
Parts 6
Controls....7
Unpacking & Installation....7
Electrical Hookup 7
Installation....8
Coffee Brewing....8
Cleaning & Maintenance 9
Troubleshooting....10
Warranty 11
IMPORTANT SAFEGUARDS
When using electrical appliances, especially when children are present, basic safety precautions should always be taken, including the following:
-
READ ALL INSTRUCTIONS.
-
Always unplug from outlet prior to handling or cleaning.
-
Do not touch hot surfaces. Use handles or knobs.
-
Do not move hot water dispenser when it contains hot water. Completely drain and let the exterior surface cool before moving.
-
T his appliance is not intended for use by persons (including children) with reduced physical, sensory or mental capabilities, or lack of experience and knowledge, unless they are under supervision or have been given instruction concerning use of the appliance by a person responsible for their safety.
-
T o protect against fire, electrical hazards, and/or personal injury, do not immerse cord, plugs or base in water or other liquids.
-
C lose supervision is necessary when any appliance is used by or near children.
-
Do not operate any appliance with a damaged cord or plug or after the appliance malfunctions or has been dropped or damaged in any manner. Return appliance to the nearest Waring Repair Center for examination, repair, and electrical or mechanical adjustment.
-
The use of accessory attachments not recommended by Waring may cause injuries.
- This appliance is not intended for outdoor use.
- D o not let cord hang over edge of table or counter or touch hot surfaces.
- Do not place on or near a hot gas or electric burner, or in a heated oven.
- Do not use appliance for other than its intended use.
- S calding may occur if the lid is removed during the filling and heating process.
- This Pour-Over Coffee Brewer is equipped with a 3-prong grounding plug and must be plugged into a correctly polarized 3-prong grounding-type wall receptacle.
- To reduce risk of electric shock, do not remove or open cover. No user-serviceable parts inside. Repair should be done by authorized service personnel only.
- Do not clean with a water jet or use in an area where a water jet may be used.
- T o reduce risk of explosion or fire, do not use near combustibles.
- Do not use with an extension cord.
- F or safe and proper operation, the appliance must be placed in a stable, vertical position.
- T o reduce risk of serious burns or scalding, do not place hand or other body parts under dispenser or container while heating.
- Always unplug unit from power supply before servicing.
- Surfaces are hot and can cause burns.
SAVE THESE INSTRUCTIONS FOR COMMERCIAL USE ONLY
INTRODUCTION
Thank you for purchasing this Waring™ Commercial Pour-Over Coffee Brewer.
Features & Benefits
- 64-ounce portable coffeemaker – no plumbing required!
• High-end industrial design for professional environments - Solid stainless steel construction, durable and easy to clean
- Guardrails around upper warmer for safe placement of second decanter
- Separate switches for upper and lower warmers keep two decanters of coffee at ideal serving temperature
- Ready and Power lights positioned on front of unit for easy viewing
- Narrow footprint saves space on the counter
GROUNDING INSTRUCTIONS
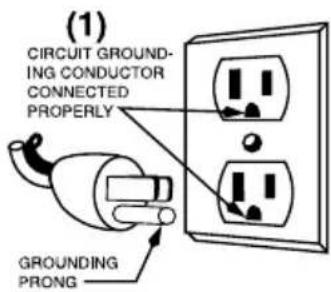
For your protection, the Waring™ Commercial Pour-Over Coffee Brewer is equipped with a 3-conductor cord set that has a molded 3-prong grounding-type plug, and should be used in combination with a properly connected grounding-type outlet, as shown in Figure 1. If a grounding-type outlet is not available, an adapter, shown in Figure 2, may be obtained so that a 2-slot wall outlet can be used with a 3-prong plug. Referring to Figure 3, the adapter must be grounded by attaching its grounding lug under the screw of the outlet cover plate.
text_image
(1) CIRCUIT GROUND- ING CONDUCTOR CONNECTED PROPERLY GROUNDING PRONG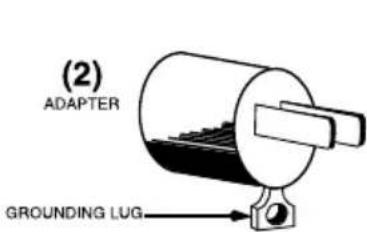
text_image
(2) ADAPTER GROUNDING LUG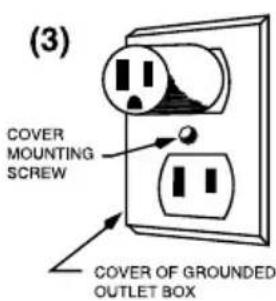
text_image
(3) COVER MOUNTING SCREW COVER OF GROUNDED OUTLET BOXCAUTION: Before using an adapter, it must be determined that the outlet cover plate screw is properly grounded. If in doubt, consult a licensed electrician. Never use an adapter unless you are sure it is properly grounded.
NOTE: Use of an adapter is not permitted in Canada.
SHORT CORD INSTRUCTIONS
A short power-supply cord is provided to reduce the risk resulting from becoming entangled in or tripping over a longer cord.
If a longer, detachable power-supply cord or extension cord is used, (1) the marked electrical rating of the extension cord should be at least as great as the electrical rating of the appliance, and (2) the longer cord should be arranged so that it will not drape over the countertop or tabletop where it can be pulled on by children or tripped over unintentionally.
text_image
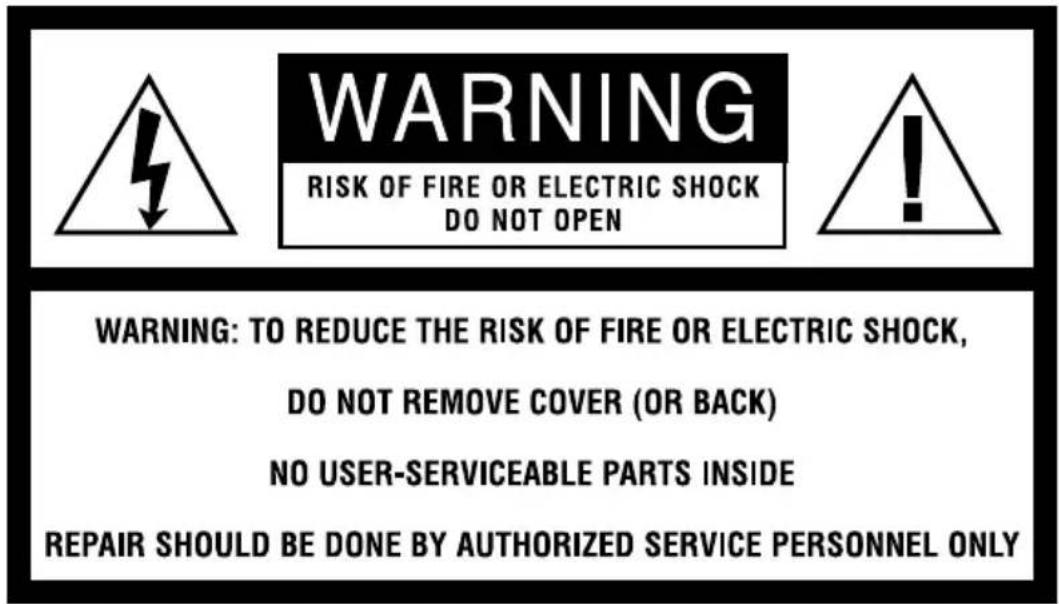
WARNING RISK OF FIRE OR ELECTRIC SHOCK DO NOT OPEN WARNING: TO REDUCE THE RISK OF FIRE OR ELECTRIC SHOCK, DO NOT REMOVE COVER (OR BACK) NO USER-SERVICEABLE PARTS INSIDE REPAIR SHOULD BE DONE BY AUTHORIZED SERVICE PERSONNEL ONLY
The lightning flash with arrowhead symbol within an equilateral triangle is intended to alert the user to the presence of uninsulated, dangerous voltage within the product's enclosure that may be of sufficient magnitude to constitute a risk of fire or electric shock to persons.

The exclamation point within an equilateral triangle is intended to alert the user to the presence of important operating and maintenance (servicing) instructions in the literature accompanying the appliance.
| Model Electrical Plug Approval | ||
| WCM50 120V, 1800W, 60Hz | 5-15P [IMAGE] | TUVus, NSF |
| WCM50C 120V, 1440W, 60Hz | 5-15P [IMAGE] | cTUVus, NSF |
PARTS
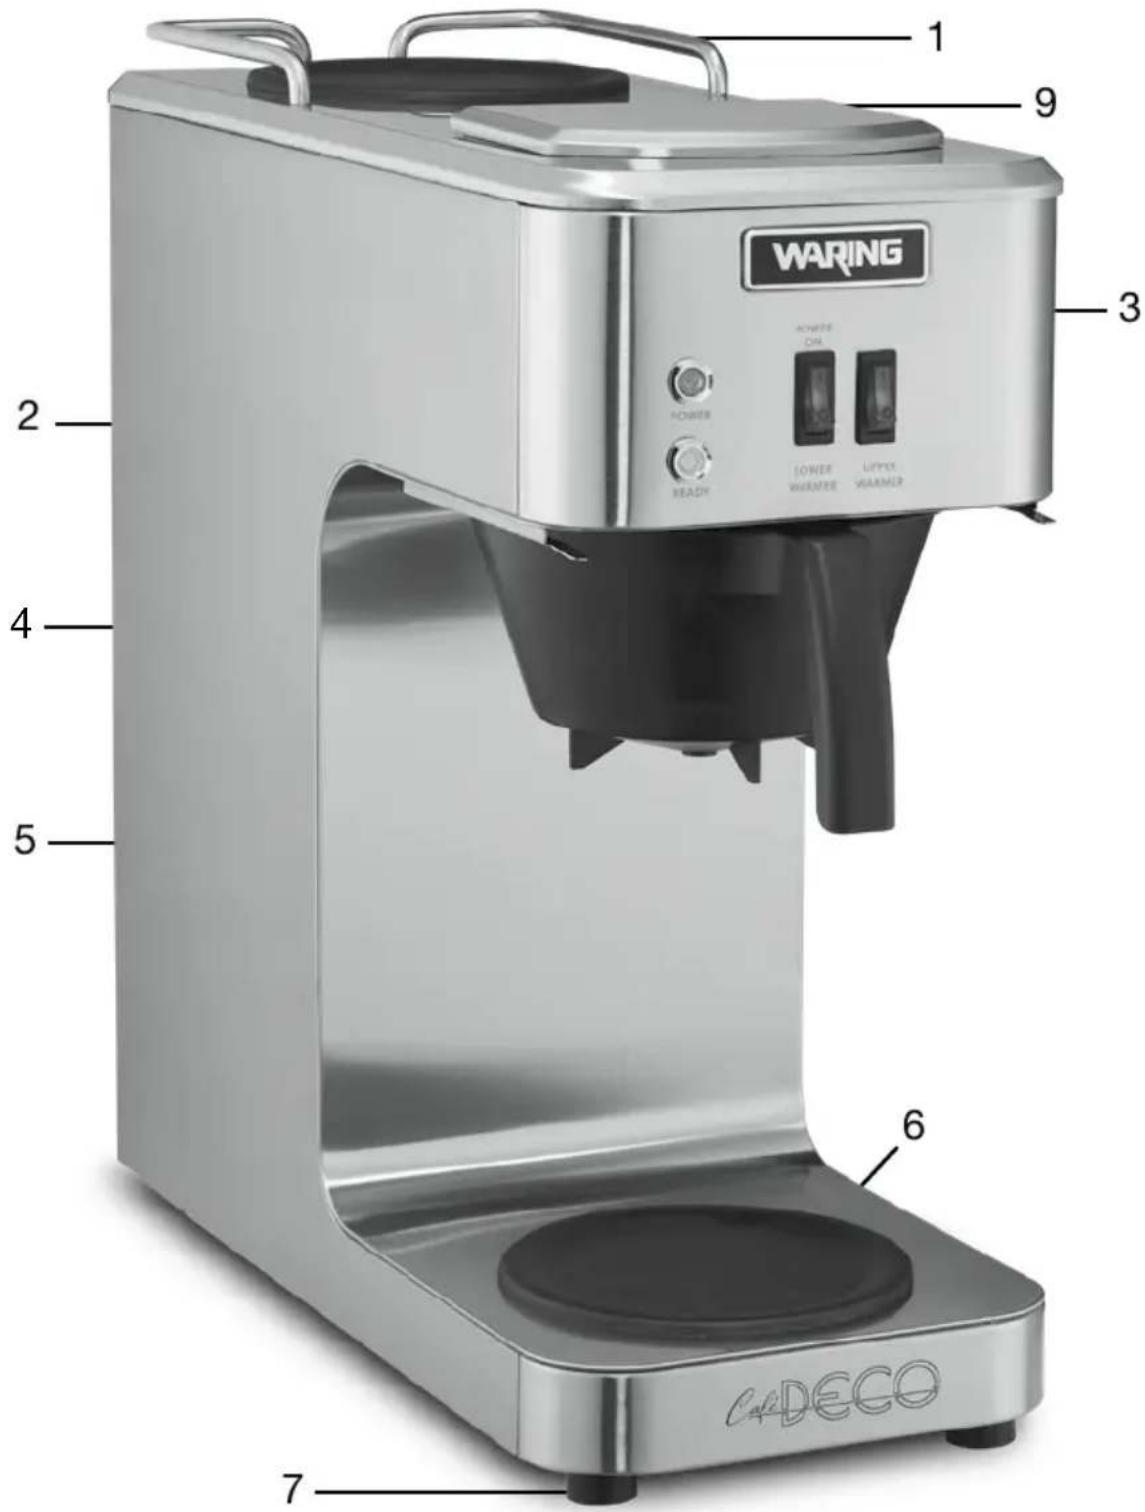
text_image
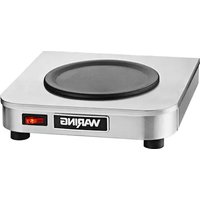
1 9 WARING ACWIWE CHI POWER LOWER WARMER LIPPEE WARMER 3 2 4 5 6 7 C#DECO- Upper warmer with guardrail 6. Lower warmer
- Ready and Power lights 7. Rubber anti-slip feet
- R ocker switches for upper 8. Power cord (not shown) and lower warmers
- Brew Basket
- Stainless steel housing
CONTROLS
Power Light
- indicates the unit is powered on
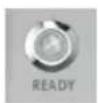
Ready Light
- illuminates when brewing is complete
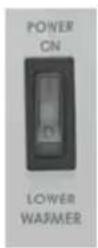
Power ON/Lower Warmer Switch
- starts brewing and heats lower warmer
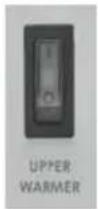
Upper Warmer Switch
- heats upper warmer
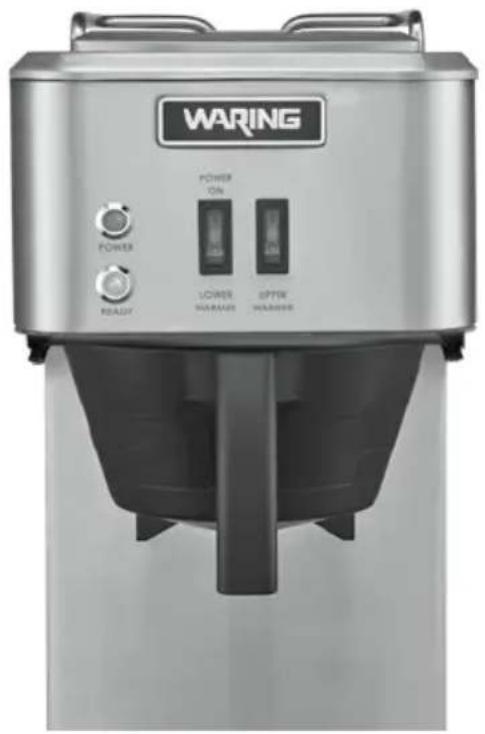
natural_image
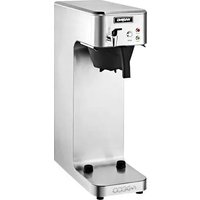
Exterior view of a Waring appliance with control buttons and power indicator (no readable text beyond branding)UNPACKING & INSTALLATION
CAUTION: This is a heavy piece of equipment. It is recommended that moving or lifting the unit be done by two people to avoid injury. Carefully unpack the machine and make sure there was no damage during shipping. Contact customer service if you notice any issues.
NOTE: The person installing the appliance is responsible for ensuring that electric and water connections meet the requirements of the national electric code, national plumbing code, and any local ordinances.
ELECTRICAL HOOKUP
NOTE: This equipment must be installed in compliance with applicable federal, state and/or local electrical codes having jurisdiction. Do not use extension cords. Make sure that the outlet is properly grounded.
-
C heck rating marking on coffeemaker nameplate to be sure electric lines match voltage, phase, and amperage requirements of coffeemaker. Select the proper cord and cord grip for electrical rating of the coffeemaker.
-
For U.S., 120V coffeemakers are provided with a 120V/15A grounding plug.
1. INSTALLATION
CAUTION: The brewer must be disconnected from the power source throughout the initial setup, except when specified in the instructions.
- Insert an empty brew basket into the rails.
- Place an empty decanter under the brew basket.
- Make sure the heater switch (left ROCKER SWITCH) is in the OFF position (down) and connect the brewer to the power source.
INITIAL START-UP BEFORE BREWING COFFEE
For initial start-up, or if the brewer has not been used for an extended period of time, please follow the steps below:
- Place an empty decanter under the brew basket.
- Make sure the left rocker switch is in the OFF position (down).
-
Pour one 64 oz. carafe of water into the screened pour-over opening. Make sure water does not pass max fill line. The water will cycle through the machine. Some water may flow into the carafe.
-
Turn power ON via the left rocker switch. This will brew out the water.
-
Once complete, discard water. Brewer is now ready for use in accordance with the coffee brewing instructions.
COFFEE BREWING
- Insert a filter paper into the brew basket.
- Place appropriate amount of ground coffee into the filter and level the bed of grounds by gently shaking.
- Slide the brew basket into the rails.
- Place an empty decanter beneath the brew basket.
- P our 64 ounces of tap water into the screened area of the pour-over opening on top of the brewer.
- Press the left rocker switch into the up position to activate the lower warmer and start the brew cycle. Allow 1 to 2 minutes for 64 ounces of water to heat up. NOTE: Red light in switch indicates when unit is turned on.
- Use the right rocker switch to activate the upper warmer if needed.
- Hot water will be delivered through the spray head. This distributes the hot water evenly over the coffee bed within the
brew basket. The brewed coffee will drain from the brew basket into the decanter below.
-
Once brewing is complete, the green Ready light will illuminate.
-
Simply discard the grounds and filter.
-
T URN OFF WARMERS WHEN NOT IN USE. NOTE: When switches are off, brewing is disabled.
CLEANING & MAINTENANCE
ALWAYS DISCONNECT OR UNPLUG THE COFFEE BREWER BEFORE CLEANING. Allow the brewer to cool completely before handling or before cleaning.
- T he use of a damp cloth rinsed in any mild, nonabrasive liquid detergent is recommended for cleaning all surfaces on Waring equipment.
a. DO NOT use any cleaning fluids that can be harmful to you, others around you, or to the environment.
b. DO NOT hose down, immerse or pressure wash any part of the coffee brewer.
c. N EVER use steel wool or abrasive materials to clean the coffee brewer.
NOTE: All sanitizing agents in the food zone must comply with U.S. Food & Drug Administration Code of Federal Regulations Title 21, Section 178.1010. Sanitize all food-dispensing units periodically. All parts to be sanitized must be cleaned first. Cleaning and sanitizing frequency must follow state and local health department regulations.
NOTE: Do not use cleansers, bleach liquids, powders, or any other substance containing chlorine. These products promote corrosion and will pit the stainless steel. USE OF THESE PRODUCTS WILL VOID THE WARRANTY.
-
Check and clean the spray head underneath the front panel. The spray-head holes must always remain open.
-
To remove the spray head from the brew head, follow the instructions below.
-
If brew basket is in place, remove it in order to access the spray head.
-
Once brew basket has been removed, reach under the brew head and grab spray head with hand. NOTE: Make sure unit is completely cooled.
-
Gently but firmly pull down on the spray head to unlatch it.
- W ipe inside of brew head and area around the brew head with a soft, clean cloth or sponge moistened with clean water.
- Wash the spray head in a sink using warm water and a mild detergent. A soft bristle brush may be used to clear clogged spray holes. Rinse the spray disk with clean water and allow to air-dry.
-
Once dry, reinstall the spray head under the brew head.
-
It's recommended to clean the spray head at the end of every service week.
-
Wash the brew basket in a sink using warm water and a mild detergent. A soft bristle brush may be used to clean the inside. Rinse with clean water and allow to air-dry.
NOTE: In hard-water areas, this may need to be done more frequently. It will help prevent liming problems in the brewer, and takes less than a minute to complete.
TROUBLESHOOTING
A troubleshooting guide is provided to suggest probable causes and remedies for the most likely problems encountered. If the problem remains after exhausting the troubleshooting steps, contact the Waring Technical Service Department.
If unit will not brew, check the following before calling for service:
- Is the unit plugged in?
- Was water poured into the unit?
- Is the lower warmer/brew switch in the ON position?
- Inspection, testing, and repair of electrical equipment should be performed only by qualified service personnel.
- Make certain that all electrical connections are tight and isolated.
If unit will not brew, check the following before calling customer service.
Water won't heat.
a. Brewer may be unplugged. Check power supply cord or check circuit breaker.
b. You may not have enough water or too little water added at start-up. Be sure to add sufficient water.
Coffee level low.
a. In this case, you may not have poured in enough water. Increase the amount of water.
b. There may be too many coffee grounds in brew basket. Adjust the amount of grounds.
Brew basket overflows.
a. Too many filter papers or wrong filter paper. Check to make sure you are using the correct filters.
b. Brew basket hole is plugged. Thoroughly clean the brew basket.
c. T oo much coffee or too fine a grind. Adjust the coffee amount and grind.
Water spraying from the brew head.
a. Spray head might be improperly installed. Reinstall spray head.
b. Spray head might be plugged. Clean spray head.
Poor coffee quality.
a. Keep brewer and decanters clean. Install a taste and odor filter in water supply, and replace cartridges regularly. Use a quality coffee with a consistent roast. Use proper grind and amount of coffee per brew.
LIMITED ONE-YEAR WARRANTY
(U.S. AND CANADA ONLY)
Waring warrants every new Waring™ Commercial Pour-Over Coffee Brewer to be free from defects in materials and workmanship for a period of one year from the date of purchase when used with foodstuffs, nonabrasive liquids (other than detergents) and nonabrasive semiliquids, providing it has not been subject to loads in excess of the indicated rating.
Under this warranty, Waring will repair or replace any part that, upon our examination, is defective in materials or workmanship, provided the product is delivered prepaid to the Waring Service Center at
314 Ella T. Grasso Ave., Torrington, CT 06790, or any Factory Approved Service Center.
This warranty does not: a) apply to any product that has become worn, defective, damaged or broken due to use or due to repairs or servicing by other than the Waring Service Center or a Factory Approved Service Center, or due to abuse, misuse, overloading or tampering; or b) cover incidental or consequential damages of any kind. This warranty is void if appliance is used on Direct Current (DC).
WARING COMMERCIAL
314 Ella T. Grasso Ave.
Torrington, CT 06790
ÍNDICE
natural_image
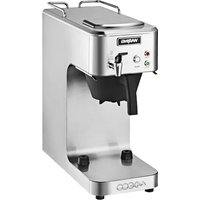
Exterior view of a Waring appliance with control buttons and a central fan (no visible text or symbols beyond branding)GARANTIE LIMITÉE D'UN AN
(VALABLE AUX É.-U. ET AU CANADA UNIQUEMENT)
©2020 Waring Commercial
314 Ella T. Grasso Avenue
Torrington, CT 06790
www.waringcommercialproducts.com
Printed in China
Impreso en China
Imprimé en Chine
WCM50 Series IB
20WC065284