Café Deco WCM60PT - Coffee machine Waring Commercial - Free user manual and instructions
Find the device manual for free Café Deco WCM60PT Waring Commercial in PDF.

| Product Type | Commercial Drip Coffee Machine |
| Brand | Waring Commercial |
| Model | Café Deco WCM60PT |
| Power Supply | 120 V, 1660 W, 60 Hz |
| Plug | 5-15P with ground |
| Certifications | TUVus, NSF |
| Carafe Capacity | 64 oz (1.9 L) |
| Filling Mode | Automatic (water connection) or manual (switchable) |
| Main Functions | Brew button, hot water faucet, power and preheat indicator lights |
| Construction | Stainless steel housing, protection bars on hot plate |
| Maintenance and Cleaning | Spray head cleaning, washable filter basket, regular descaling |
| Safety | Grounded plug, self-regulating heating elements, overheat protection |
| Spare Parts | Removable filter basket, standard paper filter, spray head |
| Repairability | No user-serviceable parts, repair by authorized technician |
| Warranty | 2 years parts, 1 year labor (USA and Canada) |
| General Information | Commercial use only, compact dimensions to save counter space |
Frequently Asked Questions - Café Deco WCM60PT Waring Commercial
User questions about Café Deco WCM60PT Waring Commercial
0 question about this device. Answer the ones you know or ask your own.
Ask a new question about this device
Download the instructions for your Coffee machine in PDF format for free! Find your manual Café Deco WCM60PT - Waring Commercial and take your electronic device back in hand. On this page are published all the documents necessary for the use of your device. Café Deco WCM60PT by Waring Commercial.
USER MANUAL Café Deco WCM60PT Waring Commercial
natural_image
Three modern Waring coffee machines with black branding and brand logos, displayed side by side (no visible text or symbols on the devices themselves)WCM50P/ WCM60PT/ WCM70PAP SERIES
For your safety and continued enjoyment of this product, always read the instruction book carefully before using.
Important Safeguards ....2
Introduction 4
Parts & Controls....6
Unpacking & Installation....9
Water & Electrical Hookup 9
Initial Start-Up Before Brewing Coffee – Automatic Fill (Plumbed)..10
Coffee Brewing – Automatic Fill (Plumbed).... 11
Initial Start-Up Before Brewing Coffee – Manual Fill (Pour over) – (Optional) 12
How to Switch Fill Mode to Manual 12
Coffee Brewing – MANUAL FILL (Pour over) 12
Temperature Adjustment 13
Cleaning & Maintenance 14
Troubleshooting 16
Warranty 17
IMPORTANT SAFEGUARDS
When using electrical appliances, especially when children are present, basic safety precautions should always be taken, including the following:
-
READ ALL INSTRUCTIONS.
-
Always unplug from outlet prior to handling or cleaning.
-
Do not touch hot surfaces. Use handles or knobs.
-
Do not move hot water dispenser when it contains hot water. Completely drain and let the exterior surface cool before moving.
-
This appliance is not intended for use by persons (including children) with reduced physical, sensory or mental capabilities, or lack of experience and knowledge, unless they are under supervision or have been given instruction concerning use of the appliance by a person responsible for their safety.
-
To protect against fire, electrical hazards, and/or personal injury, do not immerse cord, plugs or base in water or other liquids.
-
Close supervision is necessary when any appliance is used by or near children.
-
Do not operate any appliance with a damaged cord or plug or after the appliance malfunctions or has been dropped or damaged in any manner. Return appliance to the nearest Waring Repair Center for examination, repair, and electrical or mechanical adjustment.
- The use of accessory attachments not recommended by Waring may cause injuries.
- This appliance is not intended for outdoor use.
- Do not let cord hang over edge of table or counter or touch hot surfaces.
- Do not place on or near a hot gas or electric burner, or in a heated oven.
- Do not use appliance for other than its intended use.
- Scalding may occur if the lid is removed during the filling and heating process.
- This Coffee Brewer is equipped with a 3-prong grounding plug and must be plugged into a correctly polarized 3-prong grounding-type wall receptacle.
- To reduce risk of electric shock, do not remove or open cover. No user-serviceable parts inside. Repair should be done by authorized service personnel only.
- Do not clean with a water jet or use in an area where a water jet may be used.
- To reduce risk of explosion or fire, do not use near combustibles.
- Do not use extension cords.
- For safe and proper operation, the appliance must be placed in a stable, vertical position.
- To reduce risk of serious burns or scalding, do not place hand or other body parts under dispenser or container while heating.
- Always unplug unit from power supply before servicing.
- Surfaces are hot and can cause burns.
SAVE THESE INSTRUCTIONS FOR COMMERCIAL USE ONLY
INTRODUCTION
Thank you for purchasing this Waring™ Commercial Coffee Brewer.
Features & Benefits
• High-end industrial design
• Stainless steel construction
- Guard rails for warming surface (WCM50P, WCM60PT)
- Two separately controlled upper and lower warmers keep coffee at the ideal serving temperatures (WCM50P)
• Self-regulating warmers to prevent overheating (WCM50P)
- Ready & Power lights
• Built-in Pour-Over and Automatic refill features (WCM50P, WCM60PT)
- Hot water faucet
- Narrow footprint allows you to save on counter space!
- WCM70PAP designed for taller airports up to 3.0L.
GROUNDING INSTRUCTIONS
For your protection, the Waring™ Commercial Coffee Brewer is equipped with a 3-conductor cord set that has a molded 3-prong grounding-type plug, and should be used in combination with a properly connected grounding-type outlet, as shown in Figure 1. If a grounding-type outlet is not available, an adapter, shown in Figure 2, may be obtained so that a 2-slot wall outlet can be used with a 3-prong plug. Referring to Figure 3, the adapter must be grounded by attaching its grounding lug under the screw of the outlet cover plate.
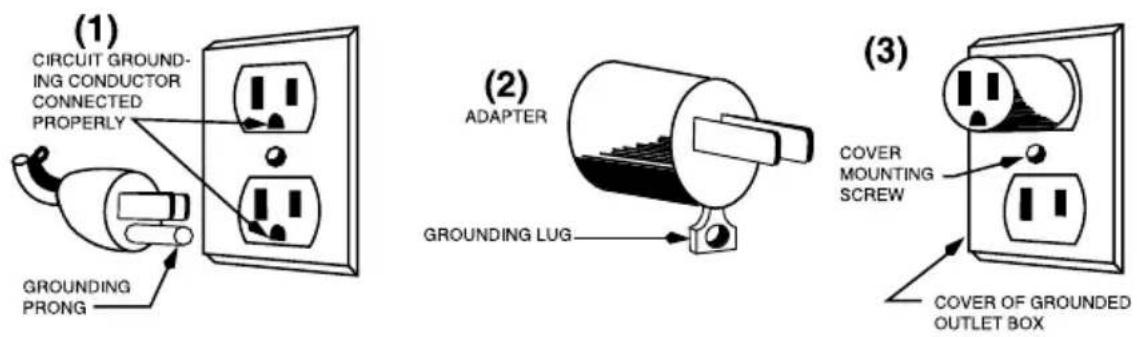
CAUTION: Before using an adapter, it must be determined that the outlet cover plate screw is properly grounded. If in doubt, consult a licensed electrician. Never use an adapter unless you are sure it is properly grounded.
NOTE: Use of an adapter is not permitted in Canada.
SHORT CORD INSTRUCTIONS
A short power-supply cord is provided to reduce the risk resulting from becoming entangled in or tripping over a longer cord.
If a longer detachable power-supply cord or extension cord is used, (1) the marked electrical rating of the extension cord should be at least as great as the electrical rating of the appliance, and (2) the longer cord should be arranged so that it will not drape over the countertop or tabletop where it can be pulled on by children or tripped over unintentionally.
text_image
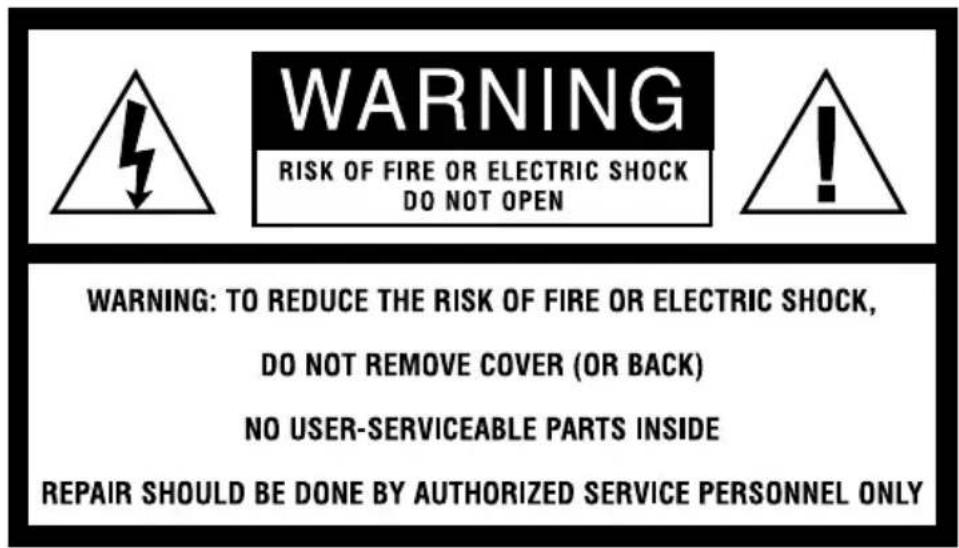
WARNING RISK OF FIRE OR ELECTRIC SHOCK DO NOT OPEN WARNING: TO REDUCE THE RISK OF FIRE OR ELECTRIC SHOCK, DO NOT REMOVE COVER (OR BACK) NO USER-SERVICEABLE PARTS INSIDE REPAIR SHOULD BE DONE BY AUTHORIZED SERVICE PERSONNEL ONLY
The lightning flash with arrowhead symbol within an equilateral triangle is intended to alert the user to the presence of uninsulated, dangerous voltage within the product's enclosure that may be of sufficient magnitude to constitute a risk of fire or electric shock to persons.

The exclamation point within an equilateral triangle is intended to alert the user to the presence of important operating and maintenance (servicing) instructions in the literature accompanying the appliance.
| Model Electrical Plug Approval | ||
| WCM50P 120V, 1800W, 60Hz | 5-15P 📋 | TUVus, NSF |
| WCM50PC 120V, 1440W, 60Hz | 5-15P 📋 | cTUVus, NSF |
| WCM60PT 120V, 1660W, 60Hz | 5-15P 📋 | TUVus, NSF |
| WCM60PTC 120V, 1300W, 60Hz | 5-15P 📋 | cTUVus, NSF |
| WCM70PAP 120V, 1660W, 60Hz | 5-15P 📋 | TUVus, NSF |
| WCM70PAPC 120V, 1300W, 60Hz | 5-15P 📋 | cTUVus, NSF |
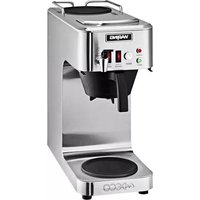
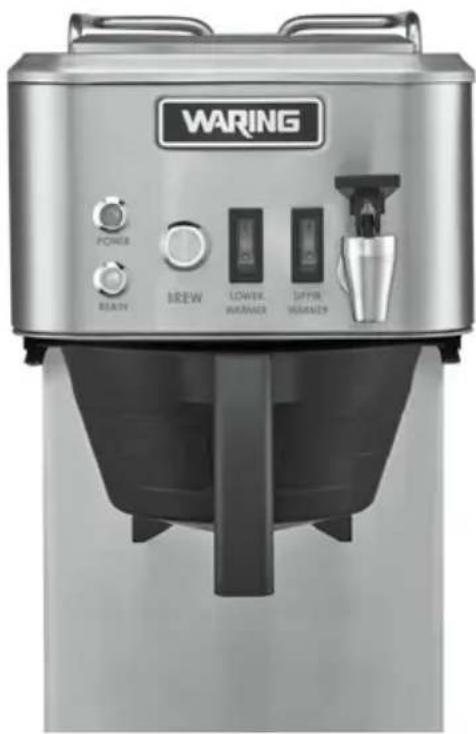
PARTS - WCM50P

text_image
1 11 4 5 6 3 2 7 8 9 WARING ADECOCONTROLS - WCM50P

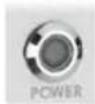
Power Light
– indicates the unit is plugged in and ready to use

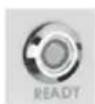
Ready Light
- illuminates when water is heated and ready for brewing
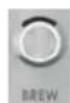
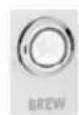
Brew Button
- starts brewing
Lower Warmer Switch
- heats lower warmer
Upper Warmer Switch
- heats upper warmer
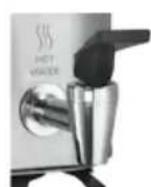
Hot Water Faucet
- hot water on demand
- U pper warmer with guardrail
- R eady and Power lights
3.Brewbutton
4.Rockerswitches for upper and lower warmers - Hot water faucet
- Brew basket
- Stainless steel housing
- Lowerwarmer
- Rubber anti-slip feet adjustable for leveling coffeemaker
- Power cord (not shown)
- Pour-over opening
- Rear access panel (not shown)
natural_image
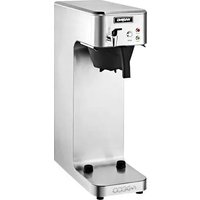
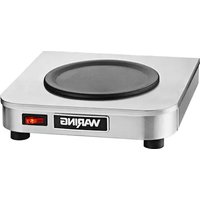
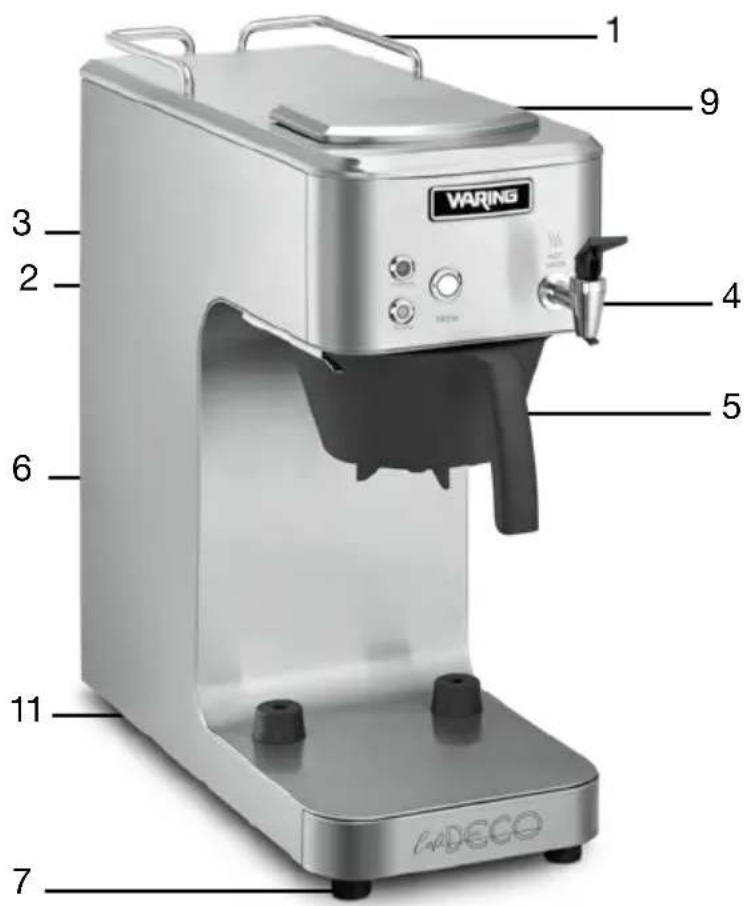
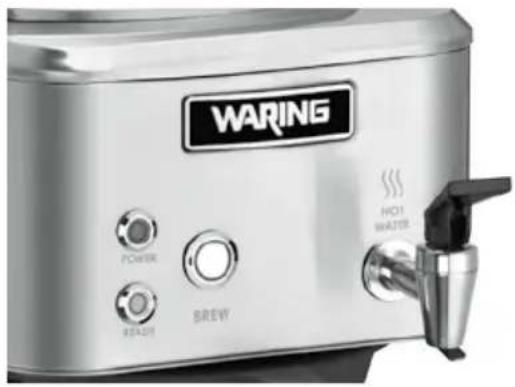
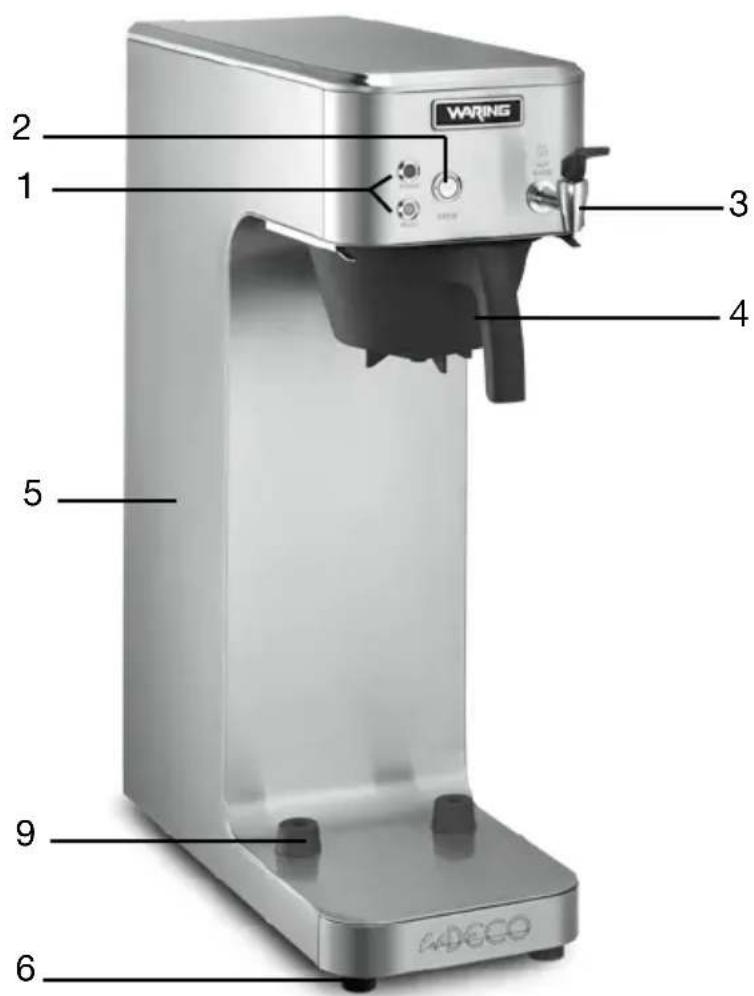
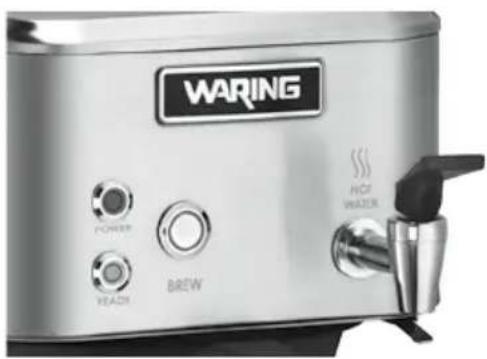
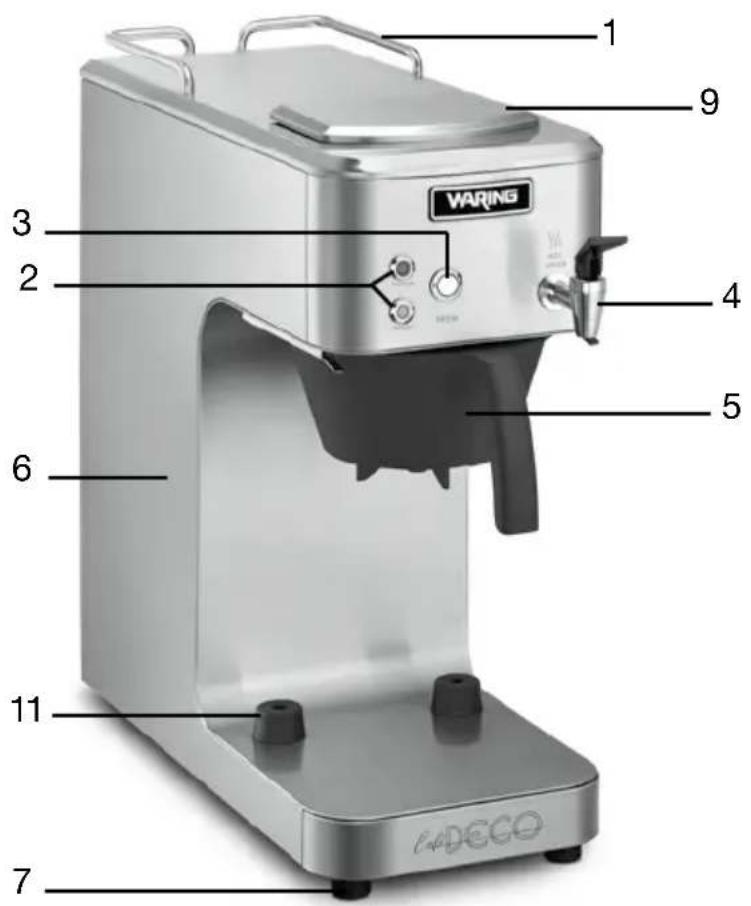
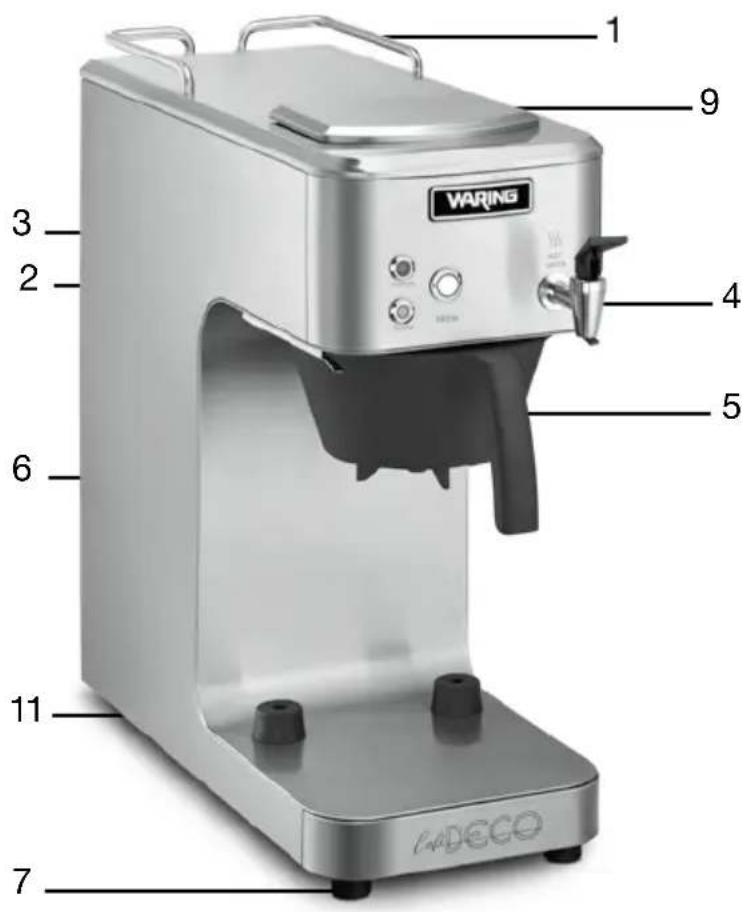
Exterior view of a Waring water heater with control knobs and a lever (no visible text or symbols beyond branding)PARTS - WCM60PT
text_image
1 9 VARING 3 2 4 5 6 11 7 CABCO- Guardrail
- Ready and Power lights
3.Brewbutton - Hot water faucet
- Brew basket
- Stainless steel housing
- Rubber anti-slip feet adjustable for leveling coffeemaker
- Power cord (not shown)
- Pour-over opening
- Rear access panel (not shown)
- Rubber stopper
CONTROLS - WCM60PT
Power Light
– indicates the unit is plugged in and ready to use
Ready Light
- illuminates when water is heated and ready for brewing

Brew Button
- starts brewing
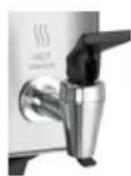
Hot Water Faucet
- hot water on demand
text_image
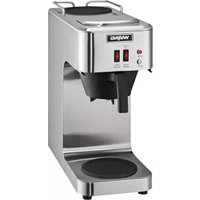
WARING POWER READY BREW HOT WASTESPARTS - WCM70PAP
text_image
2 1 3 4 5 9 6 WARING ADSCO- R eady and Power lights
2.Brewbutton - Hot water faucet
- Brew basket
5.Stainlesssteel housing
6.Rubberanti-slip feet adjustable for leveling coffeemaker - Power cord (not shown)
- Rear access panel (not shown)
- Rubber stopper
CONTROLS - WCM70PAP

Power Light
– indicates the unit is plugged in and ready to use

Ready Light
- illuminates when water is heated and ready for brewing
Brew Button
- starts brewing
Hot Water Faucet
- hot water on demand
text_image
WARING POWER YRAN BREW HOF WATERUNPACKING & INSTALLATION
CAUTION: This is a heavy piece of equipment. It is recommended that moving or lifting the unit be done by two people to avoid injury. Carefully unpack the machine and make sure there was no damage during shipping. Contact customer service if you notice any issues.
NOTE: The person installing the appliance is responsible for ensuring that electric and water connections meet the requirements of the national electric code, national plumbing code, and any local ordinances.
WATER HOOKUP
NOTE: The coffee brewer must be installed in compliance with applicable federal, state and/or local plumbing codes having jurisdiction. This product requires an approved backflow prevention water device, such as a double check valve, to be installed between the machine and the water supply. Incoming pressure should be greater than 30 psi and not more than 70 psi.
NOTE: Connecting the coffee brewer to a warm water supply will speed up heating and recovery times.
- The coffee brewer is equipped with a 3 14 GHT (garden hose thread) flare water inlet fitting, which is located on the back of the unit. A compression fitting adapter for 1 14 OD water line is also provided if needed.
- Provide shutoff valve and union in supply line near the coffee brewer.
- M inimum inlet pressure at coffee brewer should be 30 psi and maximum inlet pressure recommended at 70 psi.
- T urn on the water supply line and check for leaks.
NOTE: A filtering system is recommended to remove odors and inhibit lime and scale buildup in the unit.
NOTE: In areas with extremely hard water, a water softener must be installed in order to prevent mineral deposits that may cause malfunctioning of the equipment.
ELECTRICAL HOOKUP
NOTE: This equipment must be installed in compliance with applicable federal, state and/or local electrical codes having jurisdiction. Do not use extension cords. Make sure that the outlet is properly grounded.
-
Check rating marking on coffee brewer nameplate to be sure electric lines match voltage, phase, and amperage requirements of coffee brewer. Select the proper cord and cord grip for electrical rating of the coffee brewer.
-
For U.S., 120V coffee brewers are provided with a 120V/15A grounding plug.
DEFAULT SETTINGS
WCM50P
- Temperature – 200°F
• Water connection: Plumbed into water supply
• Volume: 64 oz.
WCM60PT
- Temperature – 200°F
• Water connection: Plumbed into water supply
• Volume: 64 oz.
WCM70PAP
- Temperature – 200°F
• Volume: 85 oz.
INITIAL START-UP BEFORE BREWING COFFEE - AUTOMATIC FILL (PLUMBED)
CAUTION: The brewer must be disconnected from the power source throughout the initial setup, except when specified in the instructions.
- Make sure the unit is in the OFF position (switch located on the near of the unit).
- Connect the water line to the water inlet fitting on the rear of the unit. Do not plug in the power cord at this time.
NOTE: WCM50P/WCM60PT is factory preset in AUTOMATIC MODE.
-
Insert an empty brew basket into the brew rails of the brewer.
-
To prime the new unit, place an empty decanter under the brew basket.
-
Connect the brewer to the power source. Once power has been supplied to the unit, flip the rocker switch to the ON position (switch located on the rear of the unit).
NOTE: Red POWER light will illuminate on front panel as well. Slight dripping from the brew basket is normal as the tank heats up.
-
When the coffee brewer is turned on, the water tank will automatically fill.
-
Once heated to brewing temperature, the green READY light will illuminate.
-
T he brewer is ready to operate when the green READY light illuminates.
COFFEE BREWING - AUTOMATIC FILL (PLUMBED)
-
Insert a filter into the funnel of the brew basket.
-
Place appropriate amount of ground coffee into the filter and level the bed of grounds by gently shaking.
-
Slide the funnel into the rails on the coffee brewer.
-
Press the left rocker switch to activate the lower warmer. Press the right rocker to activate the upper warmer.
-
Place an empty decanter beneath the brew basket prior to brewing.
-
After the green READY light has illuminated, press the BREW button to begin the brewing cycle.
-
Hot water will be delivered through the spray head. This distributes the hot water evenly over the coffee bed within the brew basket. The brewed coffee will drain from the brew basket into the decanter below.
-
Once the decanter is filled, simply discard the grounds and filter.
-
TURN OFF WARMERS WHEN NOT IN USE.
HOT WATER FAUCET - WCM50P/WCM60PT/WCM70PAP ONLY
1) The hot water faucet may be used to dispense a cup of hot water at any time. Not intended for filling carafes, pitchers, etc. Attempting to dispense more than 8-10 ounces will result in cool water. NOTE: Faucet will not work with the pour-in feature; brewer must be plumbed to a working water supply line.
INITIAL START-UP BEFORE BREWING COFFEE - MANUAL FILL (POUR OVER) - (OPTIONAL)
NOTE: WCM50P & WCM60PT are factory preset in Automatic mode. Never use manual pour-over mode if WCM50P & WCM60PT are in automatic mode. If manual operation is desired, brewer must be switched into manual mode through the rear access panel.
PREP FOR MANUAL MODE
- Open the rear access panel located on the back of the unit.
- Locate Automatic/Manual switch.
- P lace switch in down position to activate manual pour-over mode.
- B rewer is now set to manual pour-over mode – you can close rear access panel.
CAUTION: The brewer must be disconnected from the power source throughout the initial set-up, except when specified in the instructions. The brewer must be manually filled the first-time before start-up.
- Make sure the unit is in the OFF position (switch located on the near of the unit).
- Insert an empty brew basket into the brew rails of the brewer.
- Place an empty decanter under the brew basket.
- S lowly pour 3 pots or 192 oz./5.7 liters of water into the brew opening until the brewer is full, before plugging it in.
- Stop when a slight excess indicates that the tank is full. Always have an empty decanter under the brew head.
- Connect the brewer to the power source. Once power has been supplied to the unit, flip the rocker switch to the ON position (switch located on the rear of the unit). NOTE: Red POWER light will illuminate on front panel as well. Slight dripping from the brew basket is normal as the tank heats up.
- Always have an empty decanter under the brew basket.
- A llow the brewer to heat up to full temperature. Once complete, the green READY light will illuminate.
COFFEE BREWING - MANUAL FILL (POUR-OVER)
-
Insert a filter into the brew basket.
-
Place appropriate amount of ground coffee into the filter and level the bed of grounds by gently shaking.
- Slide the brew basket into the brew rails.
- Place an empty decanter beneath the brew basket.
- Pour 64 oz. of tap water into the screened area on top of the brewer. Allow 1-2 minutes for 64 oz. pour to heat up.
NOTE: GREEN ready light will indicate when water reaches brew temperature.
- Press the BREW button to activate brew cycle.
- Hot water will be delivered through the spray head. This distributes the hot water evenly over the coffee bed within the brew basket. The brewed coffee will drain from the brew basket into the carafe below.
- Once the carafe is filled, simply discard the grounds and filter.
- TURN OFF WARMERS WHEN NOT IN USE.
VOLUME ADJUSTMENT (WCM70PAP ONLY)
Firstly, identify the desired size of the airport in use. Once you know the volume of the airport, you have the ability to adjust the output volume to match the size of the airport. To adjust the volume output, locate the rear access panel on the rear of the unit. Find the dip switch section and identify the switch positions for desired volume.
NOTE: WCM70PAP is factory set to 85 oz.
FINE VOLUME ADJUSTMENT
When brewing, there may be a need to adjust the final brew volume based on the level of coffee in the carafe or airport. The selector switch behind the rear access panel marked “OZ” can be adjusted to either increase or decrease the level in the carafe or airport. The factory default setting is the zero position. To increase volume, turn switch clockwise; to decrease volume turn switch counterclockwise. In between brews, you can adjust the selector switch and run your next brew to confirm the new coffee level.
TEMPERATURE ADJUSTMENT
- To access the temperature adjustment feature, unplug the power cord and see the back of the unit.
-
Open the rear access panel.
-
Lo cate temperature adjustment dial. Adjust thermostat by turning the dial: counterclockwise to decrease temperature, and clockwise to increase temperature.
NOTE: WCM50P/WCM60PT/WCM70PAP is factory set at 202°F.
- C consult the table behind the rear access panel for a list of recommended temperatures.
- Refer to the table below for proper brewing temperature based on altitude.
- Once temperature is adjusted, close rear access panel.
| Feet | Meters | Suggested Setting (°F) | Boiling Point (°F) | Suggested Setting (°C) | Boiling Point (°C) |
| 0 | 0 | 202 | 212 | 96 | 100 |
| 500 | 152 | 202 | 211 | 96 | 99.5 |
| 1000 | 305 | 200 | 210 | 93 | 98.9 |
| 2000 | 610 | 200 | 208 | 93 | 97.8 |
| 2500 | 762 | 200 | 207 | 93 | 97.3 |
| 3000 | 914 | 200 | 206 | 93 | 96.8 |
| 3500 | 1067 | 195 | 205 | 92 | 96.3 |
| 4000 | 1219 | 195 | 204 | 91 | 95.7 |
| 4500 | 1372 | 195 | 203 | 90 | 95.2 |
| 5000 | 1524 | 195 | 202 | 90 | 94.7 |
| 5500 | 1676 | 190 | 201 | 89 | 94.2 |
| 6000 | 1829 | 190 | 201 | 89 | 93.6 |
| 6500 | 1981 | 190 | 199 | 88 | 93.1 |
| 7000 | 2134 | 190 | 198 | 87 | 92.6 |
| 7500 | 2286 | 190 | 198 | 86 | 92.1 |
| 8000 | 2438 | 185 | 197 | 86 | 91.6 |
| 8500 | 2591 | 185 | 196 | 85 | 91.1 |
CLEANING & MAINTENANCE
ALWAYS DISCONNECT OR UNPLUG THE COFFEE BREWER BEFORE CLEANING. Allow the brewer to cool completely before handling or before cleaning.
- The use of a damp cloth rinsed in any mild, nonabrasive liquid detergent is recommended for cleaning all surfaces on Waring equipment.
a. DO NOT use any cleaning fluids that can be harmful to you, others around you, or to the environment.
b. DO NOT hose down, immerse or pressure wash any part of the coffee brewer.
c. N EVER use steel wool or abrasive materials to clean the coffee brewer.
NOTE: All sanitizing agents in the food zone must comply with U.S. Food & Drug Administration Code of Federal Regulations Title 21, Section 178.1010. Sanitize all food-dispensing units periodically. All parts to be sanitized must be cleaned first. Cleaning and sanitizing frequency must follow state and local health department regulations.
NOTE: Do not use cleansers, bleach liquids, powders, or any other substance containing chlorine. These products promote corrosion and will pit the stainless steel. USE OF THESE PRODUCTS WILL VOID THE WARRANTY.
- C heck and clean the spray head underneath the front panel. The spray head holes must always remain open.
- To remove the spray head from the brew head, follow the instructions below.
- If brew basket is in place, remove in order to access the spray head.
- Once brew basket has been removed, reach under the brew head and grab spray head with hand. NOTE: Make sure unit is completely cooled.
- Gently but firmly pull down on the spray head to unlatch it.
- Wipe inside of brew head and area around the brew head with a soft clean cloth or sponge moistened with clean water.
- Wash the spray head in a sink using warm water and a mild detergent. A bristle brush may be used to clear clogged spray holes. Rinse the spray disk with clean water and allow to air-dry.
- Once dry, reinstall the spray head under the brew head.
-
I t's recommended to clean the spray head at the end of every service week.
-
Wash the brew basket in a sink using warm water and a mild detergent. A bristle brush may be used to clean the inside. Rinse with clean water and allow to air-dry.
NOTE: In hard-water areas, this may need to be done more frequently. It will help prevent liming problems in the brewer and takes less than a minute to complete.
TROUBLESHOOTING
A troubleshooting guide is provided to suggest probable causes and remedies for the most likely problems encountered. If the problem remains after exhausting the troubleshooting steps, contact the Waring Technical Service Department.
- Inspection, testing, and repair of electrical equipment should be performed only by qualified service personnel.
- The use of two wrenches is recommended whenever plumbing fittings are tightened or loosened. This will help to avoid twists and kinks in the tubing.
- Make certain that all plumbing connections are sealed and electrical connections are tight and isolated.
- This brewer is heated at all times. Keep away from combustibles.
WARNING
• Exercise extreme caution when servicing electrical equipment.
- Unplug the brewer when servicing.
| Problem Probable Cause | Cause Remedy | |
| Brew cycle will not start 1. Brew | crew button not pressed (1.) Press brew button.2. No power (2.A) Turn on main power switch.3. No water (2.B) Check that the power cord is securely plugged into outlet.(2.C) Check circuit breakers or fuses.(3.A) Water lines and valves to the brewer must be open.(3.B) Check for plugged water filter. | |
| Inconsistent beverage level 1. | Lime buildup (1.) Clean spray head.2. Water pressure fluctuating | head.(2.) Have a pressure regulator installed. |
| Spitting or excessive steaming | Lime buildup (1.) Clean spray head | |
| Weak beverage 1. Filters (1.) | Make sure you are using proper2. Coffee grinds coffee filters.3. Spray head (2.) A fine or drip grind must be used4. Brew basket loading for proper extraction.(3.) A clean spray head must be used for proper extraction.(4.) Proper filter must be centered in the brew basket and the bed of grounds leveled by a gentle shake. | |
| Dry coffee grounds remain in the brew basket 2. Spray h | Brew basket loading (1.) Proper filter must be centeredhead in the brew basket and the bed ofgrounds leveled by gently shaking.(2.) A clean spray head must be used for proper extraction. |
WARRANTY – 2 YEARS PARTS AND 1 YEAR LABOR (U.S. AND CANADA ONLY)
Waring warrants every new Waring™ Commercial Automatic/Pour-Over Coffee Brewer to be free from defects in materials for a two-year period, and workmanship for a period of one year from the date of purchase when used with foodstuffs, nonabrasive liquids (other than detergents) and nonabrasive semiliquids, providing it has not been subject to loads in excess of the indicated rating.
These warranty periods run from the date of installation. Waring warrants that the equipment manufactured by it will be commercially free of defects in material and workmanship existing at the time of manufacture and appearing within the applicable warranty period. This warranty does not apply to any equipment, component or part that was not existing at the time of purchase or that, in Waring's judgment, has been affected by misuse, neglect, alteration, improper installation or operation, improper maintenance or repair, non-periodic cleaning and descaling, equipment failures related to poor water quality, damage or casualty including, but not limited to, excessive lime and chlorine. In addition, the warranty does not apply to replacement of items subject to normal use, including but not limited to user replaceable parts such as seals and gaskets.
Under this warranty, Waring will repair or replace any part that, upon our examination, is defective in materials or workmanship, provided the product is delivered prepaid to the Waring Service Center at 314 Ella T. Grasso Ave., Torrington, CT 06790, or any Factory Approved Service Center.
ÍNDICE
natural_image
Exterior view of a Waring water heater with control knobs and indicator lights (no text or symbols on the device itself)PIEZAS - WCM60PT
text_image
1 9 VARING 3 2 4 5 6 11 7 Capecotext_image
WARING POWER READY BREW HOT WATER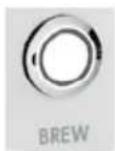
Botón BREW
text_image
2 1 3 4 5 9 6 WARING ADSCOnatural_image
Close-up of a Waring water heater with control buttons and a tap (no visible text or symbols beyond branding)natural_image
Exterior view of a Waring water heater with control knobs and speaker (no visible text or symbols beyond branding)PIÈCES - WCM60PT
text_image
1 9 VARING 4 5 3 2 6 11 7 CADECOnatural_image
Exterior view of a Waring water heater with control buttons and a beer tap (no text or symbols on the device itself)text_image
2 1 3 4 5 9 6 WARING ADSCOnatural_image
Close-up of a Waring water heater with control buttons and a handle (no visible text or symbols beyond branding)DÉBALLAGE ET INSTALLATION
©2020 Waring Commercial
314 Ella T. Grasso Ave.
Torrington, CT 06790
www.waringcommercialproducts.com
Printed in China
Impreso en China
Imprimé en Chine
WCM50P/WCM60PT/WCM70PAP IB
20WC071835