
Primo - Breast Pump Neno - Free user manual and instructions
Find the device manual for free Primo Neno in PDF.
| Product type | Electric breast pump |
| Brand | Neno |
| Model | Primo |
| Dimensions (pump) | 84 x 64 x 63 mm |
| Weight | 357 g |
| Power supply | Input: 5V/1A, Output: 110-240V 50-60Hz via USB adapter |
| Battery type | Lithium-ion 3.7 V / 1400 mAh |
| Charging time | Approximately 2 hours |
| Operating modes | Stimulation (L1 to L5) and Expression (L1 to L9) |
| Suction levels (stimulation) | L1: 5 kPa, L2: 12 kPa, L3: 17 kPa, L4: 21 kPa, L5: 25 kPa (±5 kPa) |
| Suction levels (expression) | L1: 21 kPa to L9: 45 kPa (±5 kPa) |
| Auto shut-off | After 30 minutes of use |
| Included parts | 24mm breast shield, connector, suction cup, valve (x2), bottle, bottle holder, nipple, charging cable, cap |
| Materials of parts in contact with milk | Silicone, BPA-free plastic (according to standards) |
| Cleaning | Wash with warm soapy water before first use and after each use; sterilize in boiling water for 10 minutes once a day |
| Authorized cleaning products | Mild soap, drinking water; no abrasive products |
| Consumable lifespan | Membrane: 8 weeks (use 1-3x/day) or 3-4 weeks (>3x/day); valve: 2-3 months (1-3x/day) or 4 weeks (>3x/day); breast shield: 6 months (>3x/day) |
| Warranty | 24 months |
| Certifications | Compliant with European safety standards |
| Usage | For expressing breast milk after childbirth; do not use during pregnancy |
Frequently Asked Questions - Primo Neno
User questions about Primo Neno
0 question about this device. Answer the ones you know or ask your own.
Ask a new question about this device
Download the instructions for your Breast Pump in PDF format for free! Find your manual Primo - Neno and take your electronic device back in hand. On this page are published all the documents necessary for the use of your device. Primo by Neno.
USER MANUAL Primo Neno
natural_image
Illustration of a baby infant with a transparent device and a white foam cup, featuring a neon model (no text or symbols on the device itself)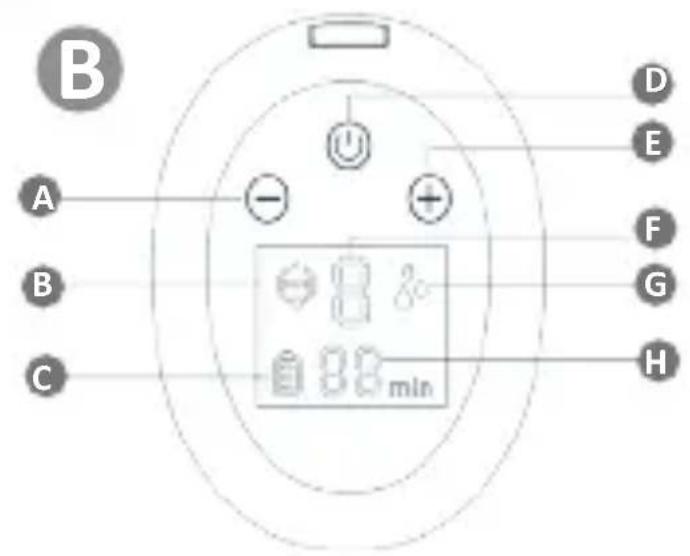

D
natural_image
Pure technical line drawing of a symmetrical mechanical component without any text or symbols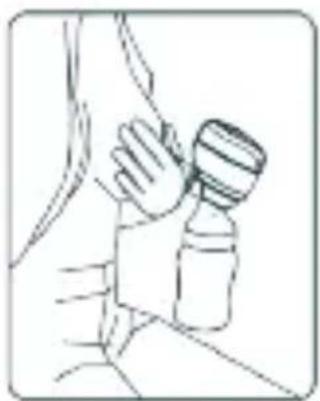
natural_image
Line drawing of a hand holding a small object, possibly a device or tool, against a plain background (no text or symbols)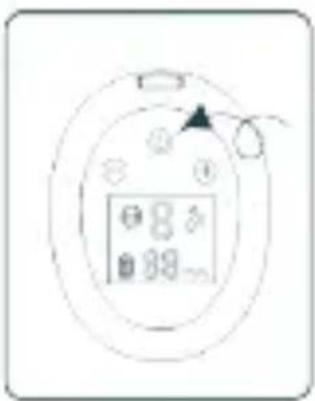
natural_image
Line drawing of a spray gun with a funnel and cap (no text or symbols)E
F
natural_image
Illustration of a cooking pot with ingredients inside, accompanied by a stopwatch showing 10 o'clock (no text or symbols on the pot itself)G
natural_image
Illustration of a medical device with a screen displaying icons and a close-up of a folded garment (no text or symbols)INSTRUKCJA OBSŁUGI
Szanowny Kliencie,
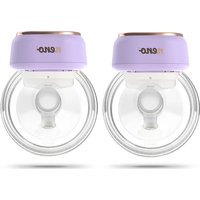
the device Neno Primo you received is an electronic breast pump. It is used to express breast milk after childbirth.
Please read the instructions before using the device.
01. SAFETY MEASURES
-
Do not use the breast pump during pregnancy – this can cause early delivery.
-
Do not use the device if you suffer from chronic diseases or oversensitivity that would make using the device painful to you.
-
Before each use of the device, make sure that no component is damaged. Do not use a breast pump if any of its components are clearly damaged.
-
Keep the device away from children and animals.
-
For hygienic reasons, only one person should use the breast pump.
-
Keep the pumping part of the device away from water.
-
Avoid exposing the device to mechanical damage caused by, for example, dropping it.
-
Store the silicon parts of the breast pump away from hot surfaces to avoid distorting them.
-
Store only milk that has been drained using a clean and disinfected breast pump.
-
Do not clean parts of the device with abrasives.
-
Do not try to repair the breast pump yourself – this will void the warranty.
-
If the use of the device causes pain or severe discomfort, turn it off and move the breast pump away from your breast.
-
Do not clean the tube too often and make sure it is dry before use. A wet tube can damage the device.
-
Do not charge the device with a voltage higher than specified in the technical specification.
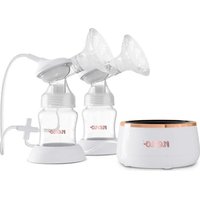
02. ELEMENTS
SEE FIG. A
A. Cap
B. Breast shield 24 mm
C. Connector
D. Pumping device
E. Suction bowl
F. Valve x2
G. Milk bottle
H. Bottle holder
I. Bottle teat
J. Charging cable
K. Bottle cap
03. DESCRIPTION OF MODES
Stimulation mode:
L1 - 5 kPa; L2 - 12 kPa; L3 - 17 kPa; L4 - 21 kPa ; L5 - 25 kPa ;
Expression mode:
L1 - 21 kPa; L2 - 24 kPa; L3 - 27 kPa; L4 - 31 kPa ; L5 - 37 kPa ; L6 - 40 kPa ; L7 - 42
kPa; L8 - 43 kPa; L9 - 45 kPa;
Allowable difference is ± 5 kpa
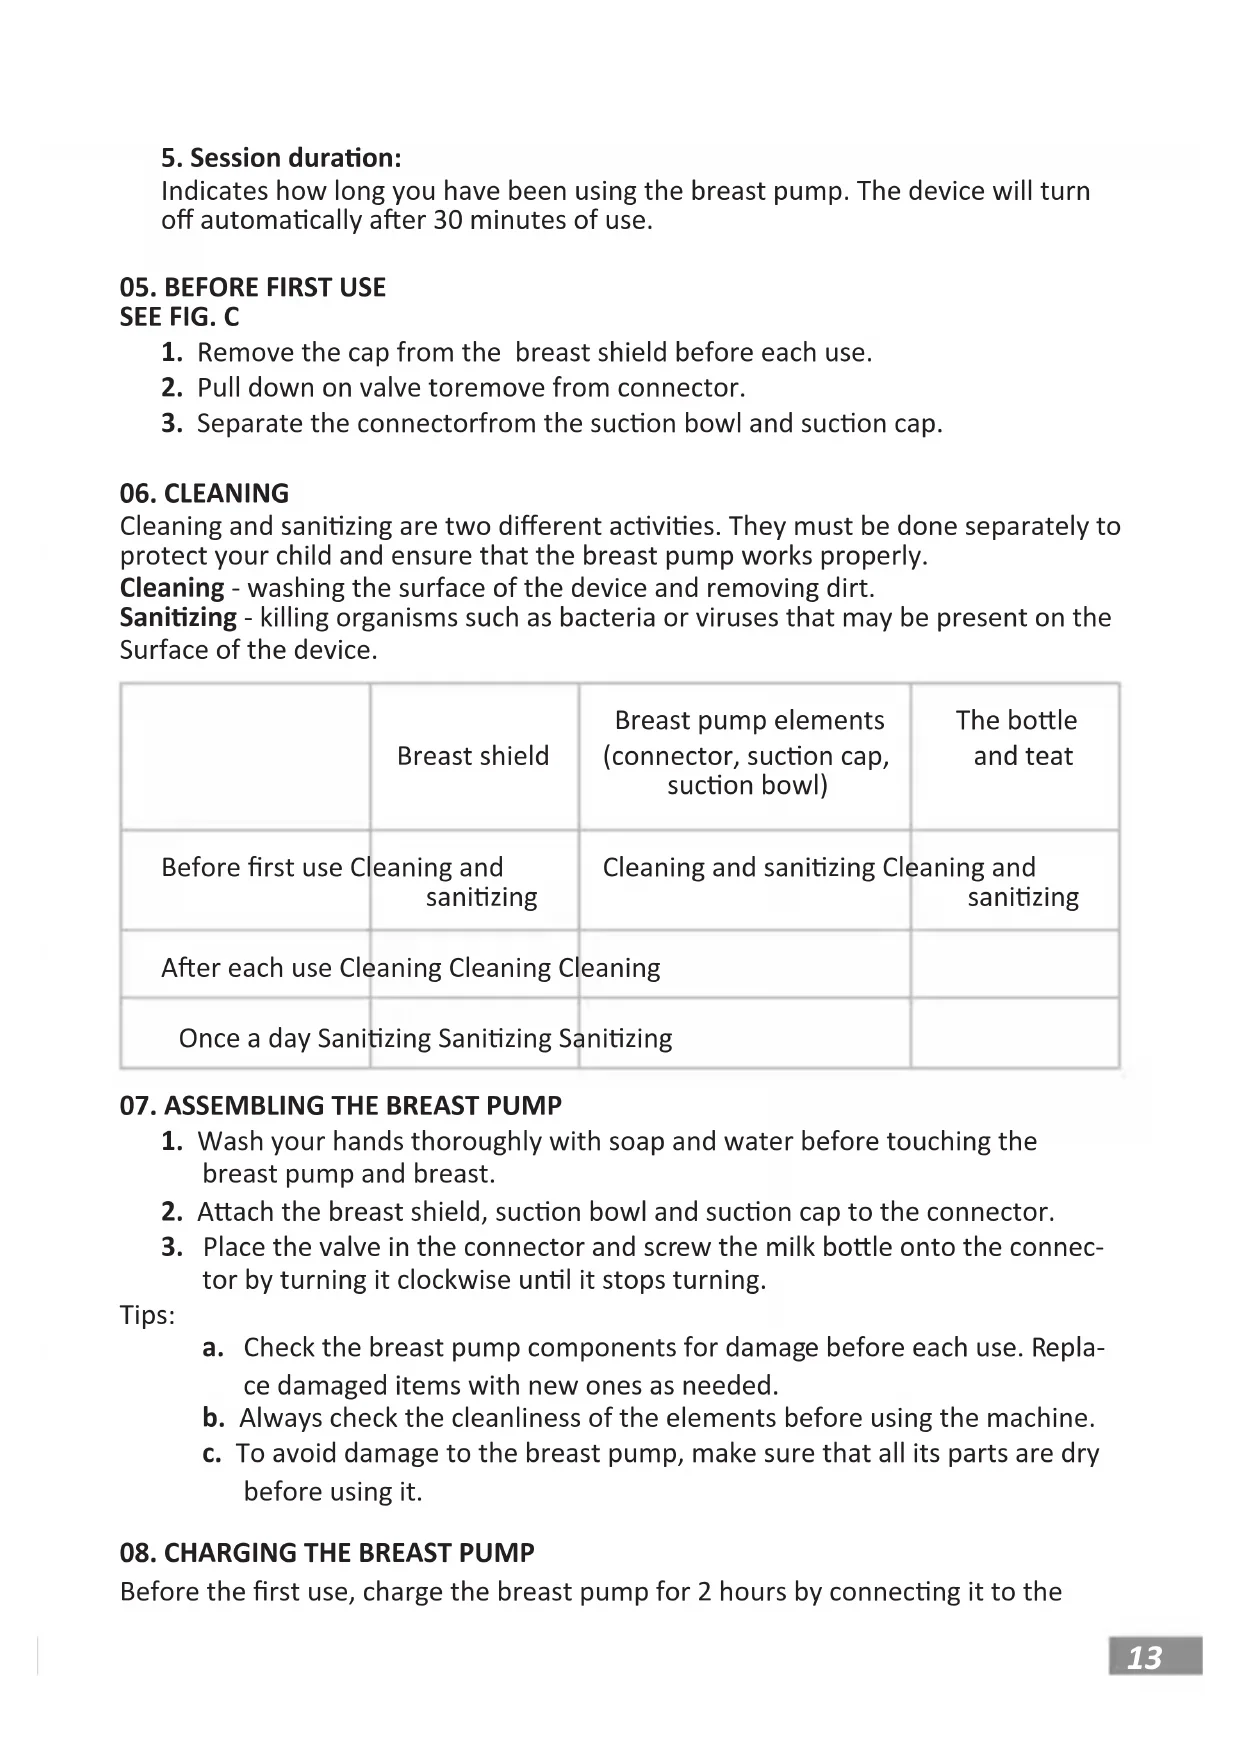
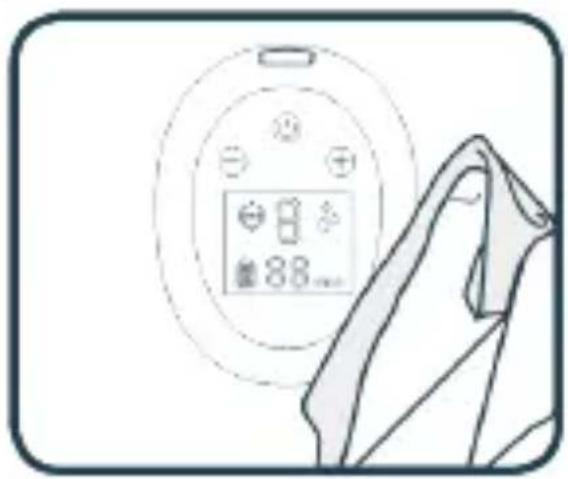
04. DESCRIPTION OF ICONS AND BUTTONS
SEE FIG. B
A. Suction decrease
B. Stimulation mode
C. Battery Percent
Hold for 2 seconds to turn the breast pump on or off.
2. Mode change:
Press the button to change the mode. The device will automatically switch from stimulation to expression mode after 2 minutes. The device can save settings and has a time counter. When you
turn on the device, the settings from the previous use of the device are automatically turned on. The breast pump will automatically turn off after 30 minutes of use.
3. Suction power:
+ increases suction power; - reduction of suction power (stimulation mode: L1-L5; expression mode: L1-L9).
4. Battery status:
Indicates the amount of battery power remaining. Charge the breast pump if the battery is low.
5. Session duration:
Indicates how long you have been using the breast pump. The device will turn off automatically after 30 minutes of use.
05. BEFORE FIRST USE
SEE FIG. C
- Remove the cap from the breast shield before each use.
- Pull down on valve to remove from connector.
- Separate the connector from the suction bowl and suction cap.
06. CLEANING
Cleaning and sanitizing are two different activities. They must be done separately to protect your child and ensure that the breast pump works properly.
Cleaning - washing the surface of the device and removing dirt.
Sanitizing - killing organisms such as bacteria or viruses that may be present on the Surface of the device.
| Breast shield | Breast pump elements (connector, suction cap, suction bowl) | The bottle and teat | |
| Before first use Cleaning and sanitizing | Cleaning and sanitizing | Cleaning and sanitizing | |
| After each use Cleaning Cleaning | Cleaning | ||
| Once a day Sanitizing Sanitizing Sanitizing | |||
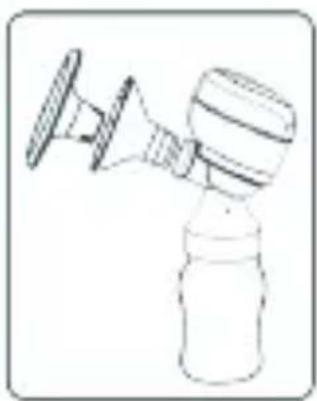
07. ASSEMBLING THE BREAST PUMP
- Wash your hands thoroughly with soap and water before touching the breast pump and breast.
- Attach the breast shield, suction bowl and suction cap to the connector.
- Place the valve in the connector and screw the milk bottle onto the connector by turning it clockwise until it stops turning.
Tips:
a. Check the breast pump components for damage before each use. Replace damaged items with new ones as needed.
b. Always check the cleanliness of the elements before using the machine.
c. To avoid damage to the breast pump, make sure that all its parts are dry before using it.
08. CHARGING THE BREAST PUMP
Before the first use, charge the breast pump for 2 hours by connecting it to the
power supply using the USB cable. The battery icon on the display will be full when charging is complete.
09. REPLACEMENT OF CONSUMABLE PARTS
Consumable parts are subject to natural wear and tear during use of the breast-pump and are therefore not covered by the manufacturer's warranty.
Worn parts of the breastpump that come into contact with milk should be replaced. A worn part has a crack, is deformed, or you notice discolouration or a marked change in colour.
a. Replace the membrane every 8 weeks (if you use the breastpump 1-3 times a day) or every 3-4 weeks (if you use the breastpump more than 3 times a day).
b. Replace the valve every 2-3 months (if you use the breastpump 1-3 times a day) or every 4 weeks (if you use it more than 3 times a day).
c. The breastshield should be replaced every 6 months if you use the breastpump more than 3 times a day.
d. Replace the tube only if moisture gets into the tube or if it is damaged.
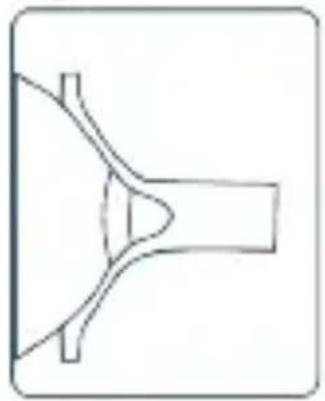
10. USING THE BREAST PUMP
SEE FIG. D
- Place the breast shield on the breast so that the nipple is inside the drainage channel.
- Press the breast shield and the connector to your breast, using your thumb and forefinger. Support your chest with the palm of your hand.
- Turn on the breast pump by pressing the power button and select the mode of operation that suits you.
- Press the power button to turn off the breast pump after use and place the lid on the breast shield to protect the machine from dust.
a. The breast pump starts work in the stimulation mode. Set the suction power to a level that is comfortable for you using the +/- buttons Stimulation mode - fast pumping that mimics the natural sucking of breast milk by a baby, stimulating milk flow.
a. After 2 minutes, the breast pump will automatically activate the expression mode. Adjust the level of suction using the +/- buttons to find the highest level of suction that is comfortable for you. If milk begins to flow out of your breast before two minutes pass, press the mode button to manually switch to the expression mode.
Expression mode - slower pumping which gently and efficiently sucks breast milk.
b. In the expression mode, increase the suction power until you feel slight discomfort (not pain) and reduce the suction power by one degree.
11. FAQ
-
The machine does not start: ensure that the breast pump is connected to a working electrical outlet. If the breast pump has no power source, its display will not turn on and no error message will appear.
-
No/ poor suction: make sure all parts of the breast pump are correctly positioned. Disassemble the breast pump and make sure that all parts are clean and undamaged. Assemble the breast pump again according to the instructions in section „Assembling the breast pump”.
-
More milk has flowed out of the breast than the bottle can hold: switch off the breast pump and unplug it. Use a damp (not wet) cloth to wipe the breast pump. When all parts of the device are dry, reassemble them.
12. LONG-TERM STORAGE
-
The breast pump has a built-in battery. To protect against damage, the device goes into storage mode after a long period of inactivity. To turn off storage mode, connect the device to power and charge it for 2 hours.
-
Before putting the breast pump away for a longer period of time, make sure that:
a. All parts of the breast pump are clean.
b. You have cleaned the pumping device.
c. The device's battery is fully charged.
13. CLEANING INSTRUCTIONS
Prepare: mild soap or other cleaning agent, clean dish towel, drinking-quality water. Parts that need to be washed or disinfected:
- Breast shield,
- Milk bottle,
- Connector,
- Valve,
- Suction cup,
- Suction bowl,
- Breast shield dust cap.
WARNING:
- Wash all parts that have had direct contact with breast milk immediately after use. This helps you will avoid residue and the growth of bacteria in the device.
- Use only drinking-quality water (tap or bottled) to clean the appliance.
- When cleaning valves, do not use small instruments such as brushes. Be careful not to pierce the part.
- Disassemble, wash and rinse all parts of the device that have come into direct contact with breast milk (except for the pump).
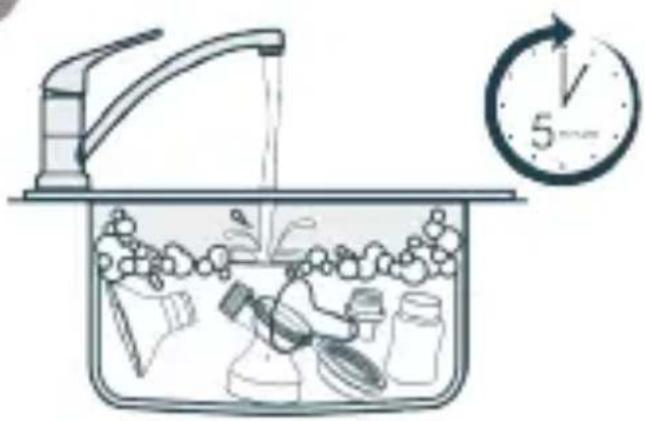
1. Cleaning the breast pump components (Before first use and after each use): SEE FIG. E
Step 1 - Disassemble the device and rinse all parts that have come into contact with the breast and milk in cold water to get rid of the remains of milk and any residue.
Step 2 - Soak in warm, soapy water for 5 minutes, then wash and rinse
Step 3 - Let the parts air dry. Store dry device parts in a cool and dry place when you're not using them.
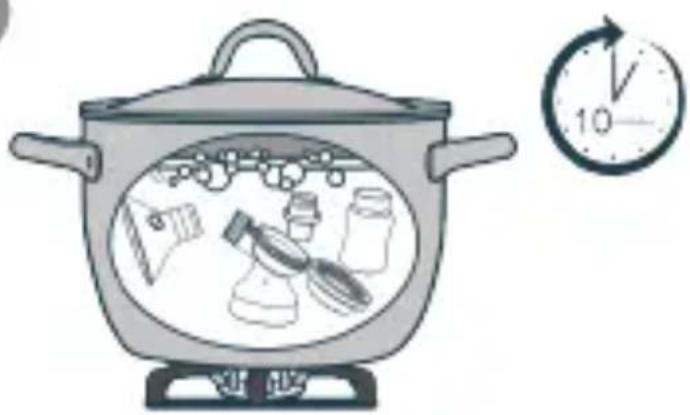
2. Sterilization of the breast pump components (before first use and after use): SEE FIG. F
Step 1 - Fill the pot with enough water to cover all parts of the disassembled appliance. Bring the water to a boil before you put the unfolded breast pump inside.
Step 2 - Place the parts of the device in boiling water for 10 minutes.
Step 3 - Let the parts air dry. Store dry device parts in a cool and dry place when you're not using them.
3. Cleaning the pumping device:
SSEE FIG. G
Prepare:
-mild soap or other cleaning agent,
-clean dish towel.
Parts that need to be cleaned:
-pumping device.
WARNING:
- Do not submerge the pumping device in water.
- Do not rinse the pumping device with water.
- When cleaning the display of the pumping device, use only a damp, soft cloth with a mild soap or cleaner. Stronger cleaning products or abrasive materials can destroy the display.
14. SPECIFICATION
Output power: 110-240V 50-60Hz | Input power: 5V 1A | Weight: 357 g | Dimen-
sions: 84x64x63 mm | Battery capacity and type: 3.7V 1400 mAh Li-Ion
15. WARRANTY CARD/ COMPLAINTS
The product is covered by a 24-month warranty.
The terms of the guarantee can be found at: https://neno.pl/gwarancja
Details, contact and website address can be found at: https://neno.pl/kontakt
Specifications and contents of the kit are subject to change without notice. We apologise for any inconvenience.
DE
BEDIENUNGSANLEITUNG
B. Breast shield 24 mm
C. Conector
KGK TREND sp. z o.o.
Ujastek 5B,
31-752 Kraków, Polska
Wyprodukowano w PRC
Manufacturer:
KGK TREND sp. z o.o.
Ujastek 5B,
31-752 Cracow, Poland
Made in PRC
CE
- INSTRUKCJA OBSŁUGI
- SAFETY MEASURES
- ELEMENTS
- SEE FIG. A
- DESCRIPTION OF MODES
- Stimulation mode:
- Expression mode:
- DESCRIPTION OF ICONS AND BUTTONS
- SEE FIG. B
- Mode change:
- Suction power:
- Battery status:
- Session duration:
- BEFORE FIRST USE
- SEE FIG. C
- CLEANING
- ASSEMBLING THE BREAST PUMP
- CHARGING THE BREAST PUMP
- REPLACEMENT OF CONSUMABLE PARTS
- USING THE BREAST PUMP
- SEE FIG. D
- FAQ
- LONG-TERM STORAGE
- CLEANING INSTRUCTIONS
- WARNING:
- Cleaning the breast pump components (Before first use and after each use): SEE FIG. E
- Sterilization of the breast pump components (before first use and after use): SEE FIG. F
- Cleaning the pumping device:
- SSEE FIG. G
- Prepare:
- Parts that need to be cleaned:
- SPECIFICATION
- WARRANTY CARD/ COMPLAINTS
- DE
- BEDIENUNGSANLEITUNG
Brand : Neno
Model : Primo
Category : Breast Pump