
C440Q - Sewing machine SINGER - Free user manual and instructions
Find the device manual for free C440Q SINGER in PDF.
| Product Type | Domestic Sewing Machine |
| Brand | Singer |
| Model | C440Q |
| Dimensions (L x W x H) | 241 x 512 x 310 mm |
| Net Weight | 8.4 kg |
| Power Supply | 100-240 V, 50/60 Hz |
| Rated Power Consumption | 55 W |
| Lighting | LED (non-replaceable) |
| Maximum Sewing Speed | 800 stitches per minute |
| Rheostat | Model C-9001 (15 V DC, max 3 mA) |
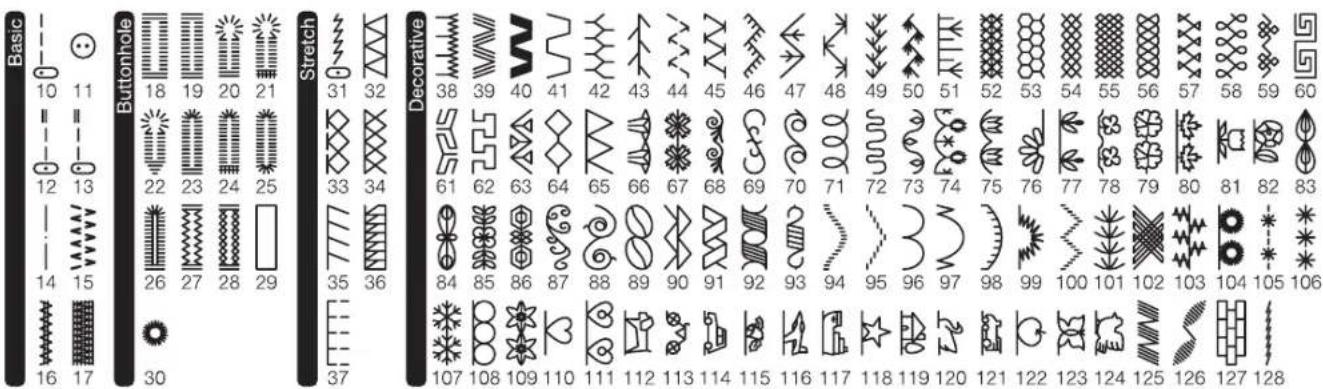
| Number of Stitches | More than 199 stitches, including straight, zigzag, stretch, decorative, buttonholes, eyelets, etc. |
| Buttonhole Types | 12 types (reinforced, keyhole, round end, decorative, stretch, traditional, bound) |
| Main Functions | Automatic stop stitch, high/low needle position, speed control, thread cutter, reverse, stitch sequence, twin needle, automatic needle threader, free arm |
| Display | LCD touch screen with pattern selection |
| Included Presser Feet | All-purpose, darning, overlock, invisible hem, zipper, buttonhole, straight stitch/patchwork, button, open |
| Included Accessories | 5 bobbins, needles, seam ripper, brush, screwdriver, spool holder, rheostat, power cord, thread net |
| Maintenance | Regular cleaning of hook and feed dogs; no lubrication required |
| Safety | Double insulation, automatic shutdown in case of overload, safety precautions (do not use outdoors, etc.) |
| Repairability | Service by authorized representative; genuine parts required |
| Standards | IEC/EN 60335-2-28 and UL1594 |
Frequently Asked Questions - C440Q SINGER
User questions about C440Q SINGER
0 question about this device. Answer the ones you know or ask your own.
Ask a new question about this device
Download the instructions for your Sewing machine in PDF format for free! Find your manual C440Q - SINGER and take your electronic device back in hand. On this page are published all the documents necessary for the use of your device. C440Q by SINGER.
USER MANUAL C440Q SINGER
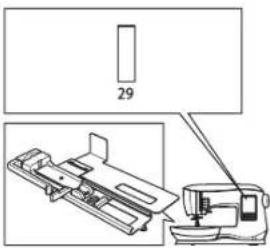
natural_image
Line drawing of a sewing machine with control panel and buttons (no text or symbols)
SINGER®
This household sewing machine is designed to comply with IEC/EN 60335-2-28 and UL 1594.
IMPORTANT SAFETY INSTRUCTIONS
When using an electrical appliance, basic safety precautions should always be followed, including the following:
Read all instructions before using this household sewing machine. Keep these instructions conveniently near the machine. Make sure to hand them over if the machine is given to a third party.
DANGER
To reduce the risk of electric shock:
A sewing machine should never be left unattended when plugged in. Always unplug this sewing machine from the electric outlet immediately after using and before cleaning, removing covers or when making any other user servicing adjustments mentioned in the instruction manual.
WARNING
To reduce the risk of burns, fire, electric shock, or injury to persons:
- Do not allow to be used as a toy. Close attention is necessary when this sewing machine is used by or near children.
- Use this sewing machine only for its intended use as described in this manual. Use only attachments recommended by the manufacturer as contained in this manual.
- Never operate this sewing machine if it has a damaged cord or plug, if it is not working properly, if it has been dropped or damaged, or dropped into water. Return the sewing machine to the nearest authorized service center for examination, repair, electrical or mechanical adjustment.
- Never operate the sewing machine with any air openings blocked. Keep ventilation openings of the sewing machine free from the accumulation of lint, dust, and loose fabric.
- Keep fingers away from all moving parts. Special care is required around the sewing machine needle.
• Always use the proper needle plate. The wrong plate can cause the needle to break.
- Do not use bent needles.
- Do not pull or push fabric while stitching. It may deflect the needle causing it to break.
- Wear safety glasses.
- Switch the sewing machine off ("0") when making any adjustment in the needle area, such as threading needle, changing needle, threading bobbin, changing presser foot, etc.
- Never drop or insert any object into any opening.
- Do not use outdoors.
- Do not operate where aerosol (spray) products are being used or where oxygen is being administered.
- To disconnect, turn all controls to the off ("0") position, then remove plug from outlet.
- Do not unplug by pulling on cord. To unplug, grasp the plug, not the cord.
- The foot control is used to operate the machine. Avoid placing other objects on the foot control.
- Do not use the machine if it is wet.
- If the LED lamp is damaged or broken, it must be replaced by the manufacturer or its service agent or a similarly qualified person, in order to avoid a hazard.
- If the supply cord connected with the foot control is damaged, it must be replaced by the manufacturer or its service agent or a similarly qualified person, in order to avoid a hazard.
- This sewing machine is provided with double insulation. Use only identical replacement parts. See instructions for Servicing of Double-Insulated Appliances.
SAVE THESE INSTRUCTIONS
FOR EUROPE ONLY:
This appliance can be used by children aged from 8 years and above and persons with reduced physical, sensory or mental capabilities or lack of experience and knowledge if they have been given supervision or instruction concerning use of the appliance in a safe way and understand the hazards involved. Children shall not play with the appliance. Cleaning and user maintenance shall not be made by children without supervision.
The noise level under normal operating conditions is less than 70db.
The machine must only be used with foot control of type C-9001 manufactured by CHIEN HUNG TAIWAN Ltd.
FOR OUTSIDE EUROPE:
This sewing machine is not intended for use by persons (including children) with reduced physical, sensory or mental capabilities, or lack of experience and knowledge, unless they have been given supervision or instruction concerning use of the sewing machine by a person responsible for their safety. Children should be supervised to ensure that they do not play with the sewing machine.
The noise level under normal operating conditions is less than 70db.
The machine must only be used with foot control of type C-9001 manufactured by CHIEN HUNG TAIWAN Ltd.
SERVICING OF DOUBLE INSULATED PRODUCTS
In a double-insulated product, two systems of insulation are provided instead of grounding. No ground means is provided on a double-insulated product, nor should a means for grounding be added to the product. Servicing of a double-insulated product requires extreme care and knowledge of the system and should be done only by qualified service personnel. Replacement parts for a double-insulated product must be identical to those parts in the product. A double-insulated product is marked with the words 'DOUBLE INSULATION' or 'DOUBLE INSULATED'.
Servicing should be performed by an authorized service representative.
WELCOME
Welcome to the SINGER® family and CONGRATULATIONS on purchasing a brand new SINGER® sewing machine!
The SINGER® brand has stood for quality in sewing for over 160 years. We design our machines for sewists of all skill levels so that the joy of sewing, creating, do-it-yourself, crafting and more can be enjoyed by all. It is important to us that you have the easiest and most successful sewing experience. We have provided an instruction manual with easy-to-understand graphics and step-by-step instructions. Additional assistance, by region, may be found on the web at www.singer.com.
We're ready to help and hope that you enjoy your SINGER® sewing machine. Happy Sewing!
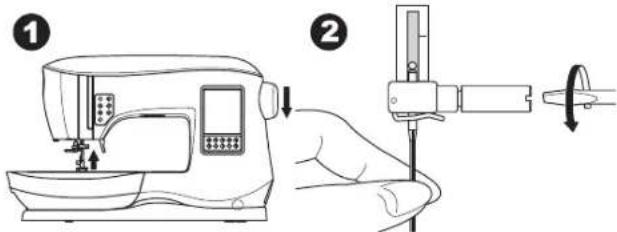
SETTING UP THE MACHINE
Main Parts 6
Accessories 7
Removable Storage Compartment 8
To Open the Accessory Tray....8 To Remove/Attach the Removable Storage Compartment 8
Changing the Presser Foot .... 8 Removing the Presser Foot Holder .... 8
Needles....9
Removing and Inserting the Needle 9
Fabric, Thread and Needle Chart....9
Setting Up the Machine....10
Unpacking....10
Electrical Connection.... 10
Foot Control....10
Packing Away After Sewing....11
Machine Control Functions....11
Tack Button with LED Indicator....11
Needle Stop Position Up/Down Button with LED Indicator... 11
Speed Control Button 11
Thread Cutter Button with LED Indicator....11
Start/Stop Button 11
Reverse Button....11
Presser Foot Lifter 12
Thread Cutter....12
Presser Foot Pressure Dial....12
Lid 12
Handwheel....12
Raise/Lower Feed Teeth 12
Mounting Machine in Sewing Cabinet 12
Sewing Preparation 13
Touch Panel LCD....13
Home Screen....13
Home Button....13
Sewing Mode 13
Stitch Information....13
Selecting a Stitch 14
Stitch Pattern Options.... 14
Stitch Width/Needle Position 14
Stitch Length/Density 14
Width Mirroring 14
Length Mirroring....14
Elongation....14
Machine Settings....15
Setting Button 15
Thread Tension 15
Twin Needle 16
Audible Beep 16
Screen Contrast....16
Calibrate Screen....16
Software Version....16
Threading the Machine 17
Preparing the Bobbin....17
Bobbin Winding....17
Inserting the Bobbin....18
Threading the Needle....19
Preparing to Thread Machine 19
Setting Spool of Thread on Spool Pin.... 19
Threading the Upper Thread.... 19
Threading the Needle Eye 20
Drawing Up the Bobbin Thread.... 20
SEWING
Starting to Sew 21
Where to Use Each Stitch....21
Starting to Sew 22
Start and End of Seam 22
Reverse Stitching....22
Tack Stitch 23
Turning Corners 23
Sewing Heavy Fabric....23
Sewing Overlapped Areas 23
Width of Seam Allowance 23
Sewing 24
Straight Stitch Sewing 24
Straight Stitch 24
Straight Stitch with Auto-lock Stitch 24
Zigzag Stitch Sewing.... 24
Satin Stitching....25
Blind Hem Stitching 25
Overcasting-Overlocking.... 26
Using the Overcasting Foot 26
Using the All-Purpose Foot/Satin Stitch Foot....26
Crazy Patch 27
Stretch Stitch Sewing 27
Multi-Stitch Zigzag.... 27
Basting 28
Sewing on Buttons....28
Inserting Zippers 30
Centered Insertion 30
Lapped Insertion 30
To Stitch around the Zipper Tab 31
Quilting 31
Joining the Pieces of Fabric....31
Quilting....31
Hand Look Quilting Stitch 32
Automatic Bar-Tack and Darning....32
Buttonhole Sewing 33
Bound Buttonhole 35
Eyelet 36
Continuous Decorative Pattern....37
Applique 37
Free Arm Sewing 37
Twin Needle Sewing 38
SEQUENCING
Sequencing 39
Sequence Sewing 39
Selecting Stitch Patterns....39
Selecting Letter Stitches 39
Shifting the Cursor (Highlight)....40
Checking Selected Patterns and Letters 40
Inserting Pattern or Letter 40
Deleting Pattern or Letter....40
Adjusting Each Pattern or Letter in a Sequence....41
How to Edit a Letter in a Sequence 41
Saving Sequence....41
Sew the Sequence....42
Single Sequence Mode 42
Sewing Sequence from the Beginning....42
POP-UP MESSAGES
Pop-up Messages....43
MAINTENANCE
Maintenance....44
Cleaning 44
Bobbin Holder 44
Hook Race and Feed Teeth 44
Helpful Hints 45
Technical Specification....46

Main Parts
-
Face plate
-
Presser foot pressure dial
-
Lid
-
Thread take-up lever (inside)
-
Presser foot lifter
-
Touch panel LCD
-
Handwheel
-
Removable storage compartment
-
LED lights
-
Direct selection buttons
-
Tack button with LED indicator
-
Needle stop position up/down button with LED indicator
13.Speed - button
-
Speed + button
-
Thread cutter button with LED indicator
-
Start/stop button
-
Reverse button
-
Power switch
-
Connector for power cord
-
Connector for foot control
-
Thread cutter
-
Buttonhole lever
-
Thread guide
-
Needle threader lever
-
Presser foot release lever
-
Presser foot screw
-
Presser foot holder
-
Presser foot
-
Feed teeth
-
Needle clamp screw
-
Needle thread guide
-
Needle
-
Needle plate
-
Bobbin cover
-
Bobbin cover latch
-
Hole for auxiliary spool pin
-
Stitch pattern chart
-
Thread guide
-
Thread guide
-
Bobbin winding tension disk
-
Spool pin
-
Bobbin winder spindle
-
Bobbin winder thread cutter
-
Bobbin winder stop
-
Handle
-
Feed teeth lever


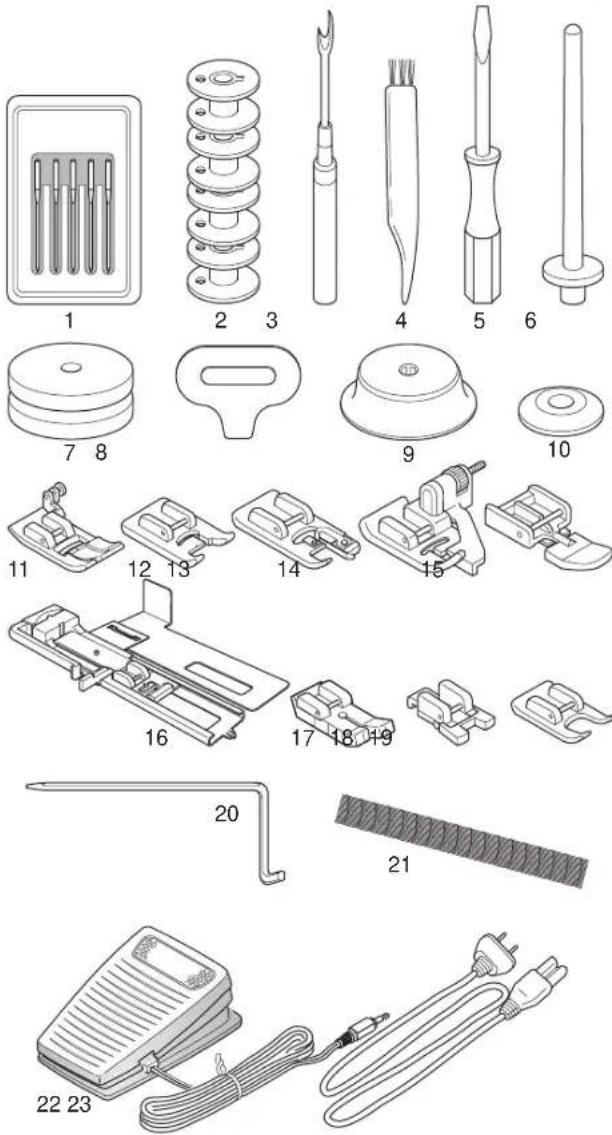
Accessories are stored in the removable storage compartment.
- Needle pack
- 5 SINGER ^® Class 15 Bobbins (transparent)
(one in the machine when delivered) - Seam ripper
- Brush
- Screwdriver
- Auxiliary spool pin
- Felt pads
- Screwdriver for needle plate
- Spool cap, large
- Spool cap, small
- All-Purpose Foot (A) (on the machine when delivered)
- Satin Foot (B)
- Overcasting Foot (C)
- Blind Hem Foot (D)
- Zipper Foot (E)
- Buttonhole Foot (F) and Underplate
- Straight Stitch / Patchwork Foot (G)
- Button Sewing Foot (M)
- Open Toe Foot (N)
- Edge/quilting guide
- Thread net
- Foot control
- Power cord
REMOVABLE STORAGE COMPARTMENT
To Open the Accessory Tray
The accessories are stored in the tray of the removable storage compartment. To open the tray, reach under the removable storage compartment, then pull the lever located under the removable storage compartment, while resting your thumb on the top edge.
To Remove/Attach the Removable Storage Compartment
Hold left side of the removable storage compartment and pull to the left (DO NOT pull the lever for the accessory tray).
To attach, slide the removable storage compartment to the right.
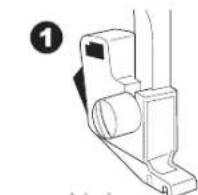
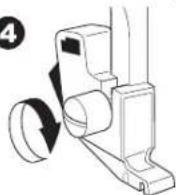
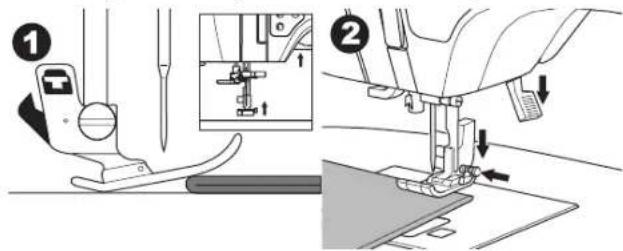
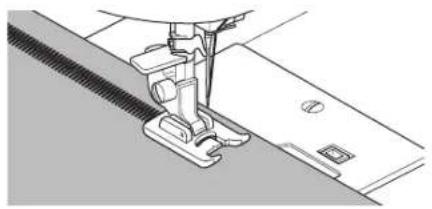
CHANGING THE PRESSER FOOT
For safety, turn off the power switch before changing the presser foot.
The presser foot must be changed according to the stitch or technique you sew. Information on sewing and sewing techniques begins on page 21.
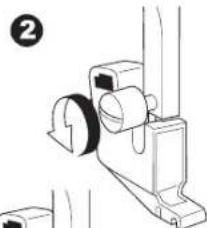
-
Turn the handwheel toward you until the needle is at its highest position.
-
Raise the presser foot lifter.
-
Remove the presser foot by pushing the presser foot release lever toward you.
-
Place desired foot with its pin directly under the slot in presser foot holder.
-
Lower the presser foot lifter and the presser foot will snap into place.
Removing the Presser Foot Holder
When attaching presser feet that have their own shank, or when cleaning the machine, you should remove the presser foot holder.
- Remove the presser foot.
- Loosen the presser foot screw and remove the presser foot holder.
- To replace the holder, pull up the holder as far as it will go from bottom of presser bar.
- Tighten the presser foot screw securely using the screwdriver.
NOTE: This sewing machine is a low shank model. When shopping for optional SINGER ^® presser feet and accessories, make sure they are designed for low shank models.
natural_image
Technical line drawing of a boat hull showing top and side views with directional arrows indicating movement (no text or symbols)
natural_image
Line drawing of a sewing machine with control panel and buttons (no text or symbols)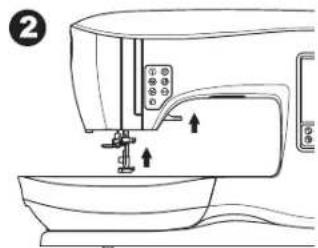
natural_image
Diagram of a sewing machine needle and fabric (no text or symbols)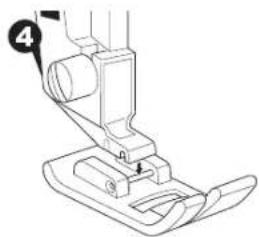
natural_image
Line drawing of a sewing machine needle and foot (no text or symbols)
natural_image
Line drawing of a sewing machine with a sewing machine needle inserted into the base (no text or symbols)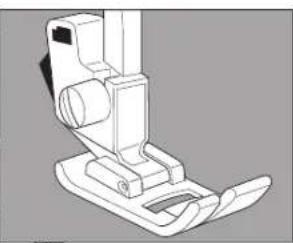
natural_image
Technical line drawing of a mechanical device with no visible text or symbols3
4
natural_image
Technical line drawing of a mechanical assembly with no visible text or symbols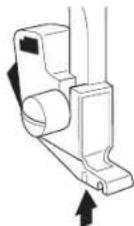
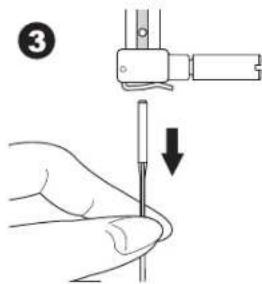
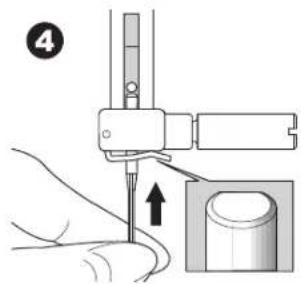
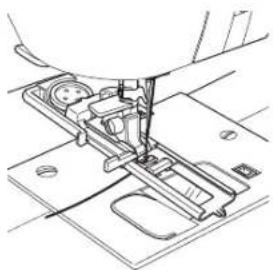
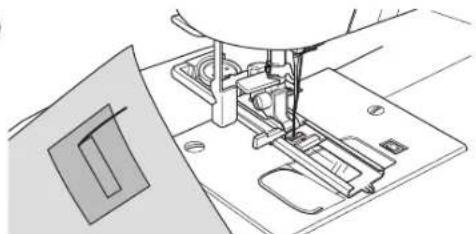
REMOVING AND INSERTING THE
NEEDLE
Select a needle of the appropriate style and size for the fabric to be sewn.

For safety, turn off the power switch before changing the needle
- Turn the handwheel toward you until the needle is at its highest position.
-
Loosen the needle clamp screw.
-
Remove the needle.
-
Insert new needle into needle clamp with the flat side to the back and push it up as far as it will go.
-
Tighten the needle clamp screw.
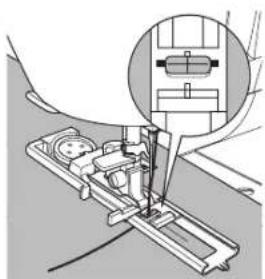
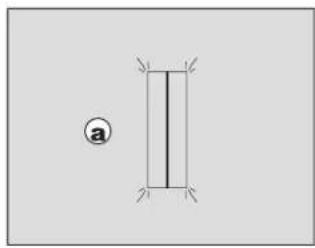
NOTE: Do not use a bent or blunt needle (a). Place needle on a flat surface to check its straightness.

FABRIC, THREAD AND NEEDLE CHART
Select size of thread and needle in accordance with fabric to be sewn. SINGER ^® brand needles are recommended for this machine.
| Type of Fabric Thread | Size Needle Type Needle | Size | |
| Light weight - thin georgette, organdy, voile, taffeta, silk, etc. | All-purpose polyester, fine cotton, silk | SINGER® Style 2000 or 2020 9/70-11/80 | |
| Medium weight - gingham, pique, linen, cotton, satin, thin corduroy, velvet | All-purpose polyester, fine cotton, machine quilting | SINGER® Style 2000 or 2020 | 11/80-14/90 |
| Heavy weight - gabardine, tweed, denim, corduroy | All-purpose polyester, heavy duty, topstitching thread | SINGER® Style 2000 or 2020 | 14/90-16/100 |
| Stretch - double knit, tricot, spandex, jersey | All-purpose polyester | SINGER® Style 2001 or 2045 | 11/80-14/90Needle for knit or stretch fabrics |
| Sweatshirt, Swim-wear, Double knit, Sweater knit | All-purpose polyester | SINGER® Style 2001 or 2045 | 14/90Needle for knit or stretch fabrics |
| Lightweight Leather | All-purpose polyester, heavy duty, topstitching thread | SINGER® 2032 Leather 14/90 - 16/100 |
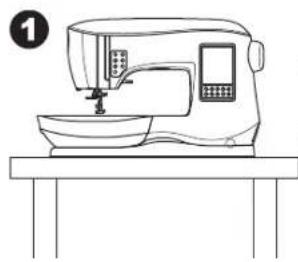
UNPACKING
- Place the box on a steady, flat surface. Lift your machine out of the box and remove the outer packaging.
- Remove all other packing material and the plastic bag.
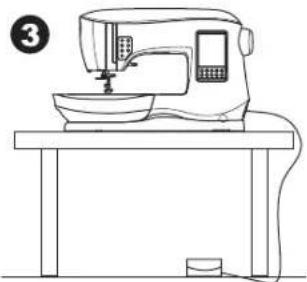
ELECTRICAL CONNECTION
- Place machine on stable surface.
-
Connect the power line cord to the machine by inserting the 2-hole plug into the power cord connector.
-
Connect the power line plug to the electric outlet.
-
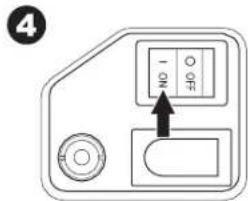
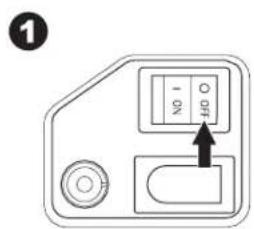
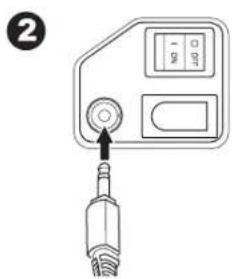
Turn on the power switch.
-
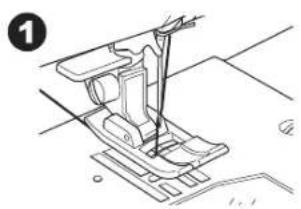
The LED lights will light up when the switch is turned on (symbol I).
- To disconnect, turn the power switch to the off position (symbol O), then remove plug from outlet.
natural_image
Line drawing of a sewing machine on a table (no text or symbols)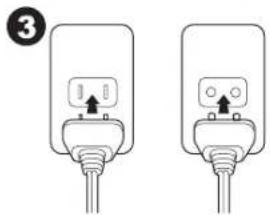
natural_image
Two identical electrical plug connectors with wires, no text or symbols visible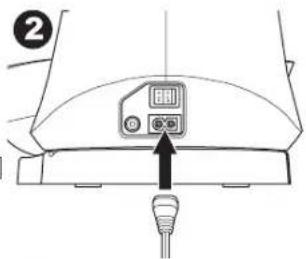

natural_image
Line drawing of a sewing machine with control panel and buttons (no text or symbols)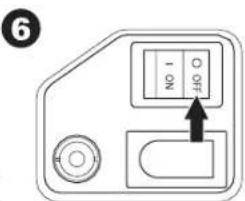
FOR UNITED STATES AND CANADA USERS: POLARIZED PLUG INFORMATION
This sewing machine has a polarized plug (one blade wider than the other). To reduce the risk of electric shock, this plug is intended to fit in a polarized outlet only one way. If the plug does not fit fully in the outlet, reverse the plug. If it still does not fit, contact a qualified electrician to install the proper outlet. Do not modify the plug in any way.
FOOT CONTROL
Use only foot control provided with this machine. (type C-9001 manufactured by CHIEN HUNG TAIWAN Ltd)
The foot control is operated by your foot. The foot control permits the starting and stopping of the machine, as well as sewing speed.
- Turn off the power switch. (symbol O)
- Push foot control plug into the connector on machine.
- Place foot control at your feet.
- Turn on the power switch.
natural_image
Line drawing of a sewing machine on a table (no text or symbols)
Setting Up the Machine
- The LED lights will light up when switch is turned on.
- The harder you press the foot control, the faster the machine will sew. The machine will stop when foot control is released.
PACK AWAY AFTER SEWING
- Switch the main switch off.
- Unplug the cord from the wall socket and then from the machine.
- Unplug the foot control cord from the machine. Wind the cord around the foot control for easy storage.
- Place all accessories in the accessory tray. Slide the tray on to the machine around the free arm.
- Place the foot control in the space above the free arm.
MACHINE CONTROL FUNCTIONS
Tack Button with LED Indicator (A)
Press the tack button while sewing and your machine sews a few tack stitches and stops automatically. When pressed while not sewing, machine will sew a tack and stop automatically at the beginning of next sewing. The LED indicator will be lit until tack stitch has completed.
Needle Stop Position Up/Down Button with LED Indicator (B)
Press this button to move the needle up or down. The setting of the needle stop position is changed at the same time. When needle position is set to down, the LED indicator will be lit. You can also tap the foot control to raise or lower the needle.
Speed Control Button (C, D)
The speed control buttons allow you to incrementally increase or decrease the sewing speed. When either button (C or D) is pressed, a pop-up message appears showing the range of speed settings available.
NOTE: When the foot control is connected, these buttons decrease and increase the speed limit.
Thread Cutter Button with LED Indicator(E)
Press this button after sewing to cut the upper and bobbin threads.
The LED will turn on and cut both threads automatically. To cut before the needle moves to the start position of the next stitch, press the thread cutter button while sewing. The LEDs (A & E) will be lit and the machine will cut the threads after the stitch or sequence has completed.

- Do not press this button when there is no fabric under the presser foot or no need to cut the threads. The thread may tangle, resulting in damage.
- Do not use this button when cutting thread thicker than #30, nylon thread or other speciality threads. In this case, use the thread cutter (I).
- Do not use the thread cutter button when sewing with a twin needle or a hemstitching (wing) needle.
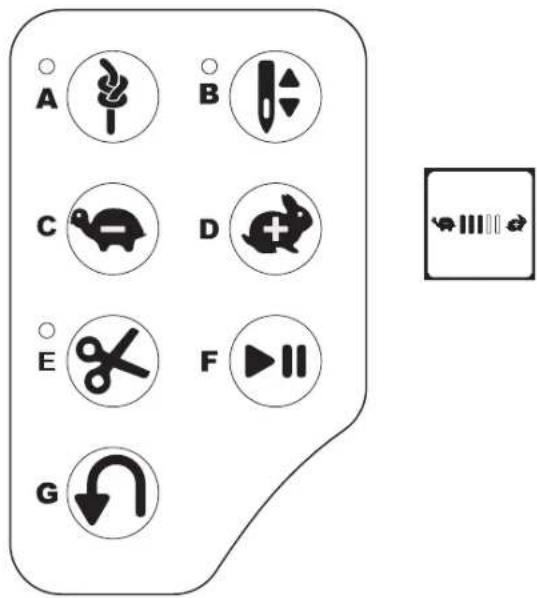
Start/Stop Button (F)
The machine will start running when start/stop button is pressed and will stop when pressed the second time. The machine will rotate slowly at start of sewing.
Reverse Button (G)
The machine will sew in reverse while this button is pressed. When released, machine will sew forward.
Presser Foot Lifter (H)
The presser foot is lowered or raised with the presser foot lifter. If you are sewing on thick fabric or several layers of fabric, the presser foot can be raised higher to make it easier to place the fabric underneath the presser foot.
NOTE: Machine will not start when the presser foot is raised (except for bobbin winding).
Thread Cutter (I)
Use this cutter if the thread cutter button is not used.
- Raise the presser foot and bring fabric and threads backward after sewing.
- Hook the threads to the thread cutter from back to front.
- Pull the thread tails to cut the threads.
Presser Foot Pressure Dial (J)
The correct presser foot pressure allows fabrics to feed properly while sewing. The setting of the presser foot pressure is determined mainly by the type and weight of the fabric being sewn. For lightweight fabrics such as sheers, batiste, voile, etc, the pressure is decreased. For heavyweight fabrics like denim or canvas, the pressure is increased.
To increase the pressure, turn dial to 4 or 5.
To decrease the pressure, turn dial to 1 or 2.
For most fabrics, turn dial to N.
Lid (K)
To open the lid, lift up the front right side of the cover.
Handwheel (L)
By turning the handwheel, the needle will raise or lower. You should always turn the handwheel toward you.
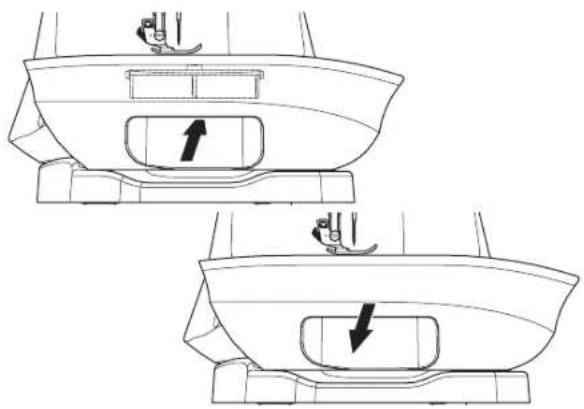
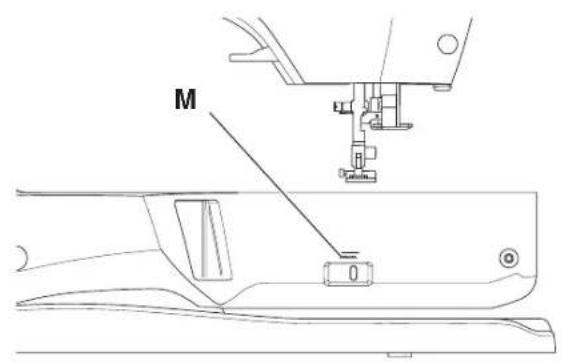
Raise/Lower Feed Teeth (M)
The feed teeth are located under the needle plate, directly below the presser foot. Their function is to move the fabric forward when sewing. The feed teeth lever is located on the back of the sewing machine at the base of the free arm.
Slide the lever (M) to the right to raise the feed teeth for ordinary sewing. The feed teeth will then raise when you begin to sew or turn the handwheel towards you one full revolution.
Slide the lever to the left to lower the feed teeth for sewing on buttons or free motion sewing.
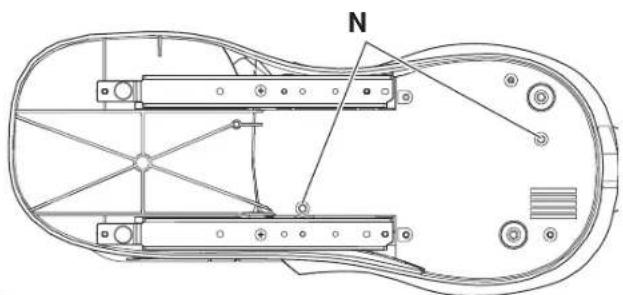
Mounting Machine in Sewing Cabinet (N)
There are two holes on the underside of the machine designed for mounting the machine into a sewing cabinet. Align the holes (indicated in the picture) with the corresponding holes in the cabinet base. Attach the machine with screws. (Screws not included)

natural_image
Technical line drawing of a mechanical assembly with labeled component 'N' (no text or symbols beyond label)TOUCH PANEL LCD
When you turn on the power, the touch panel LCD will display the Home Screen.
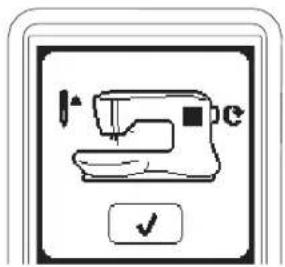
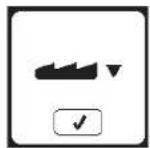
NOTE: If the message shown here appears, this means the needle is not in correct position. Turn the handwheel toward you to raise the needle to its highest position. Then press the "√" button.

Do not press the screen too hard and do not use sharp objects to touch it. Doing so can damage the screen. Touch the screen with your finger only.
Home Screen (A)
When you turn on the power, machine will display the Home Screen (see below). Home Screen will display two buttons:
a. Sewing Mode Button
By pressing this button, you can select stitch patterns to sew continuously. You can also select buttonholes.
b. Sequence Mode Button
By pressing this button, you can combine stitch patterns and letters easily by selecting each pattern or letter. Note: For sequence mode, see page 39.
Home Button (B)
You can return to the Home Screen from any other view by pressing the Home Button.

SEWING MODE
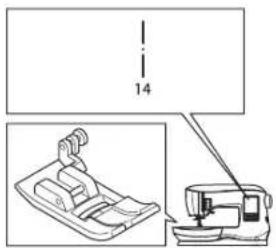
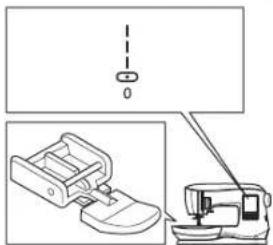
At the Home Screen, by pressing the Sewing Mode button, machine will select straight stitch first. You can select and sew all stitch patterns indicated in the Direct Selection buttons and the pattern chart located inside of the top cover.
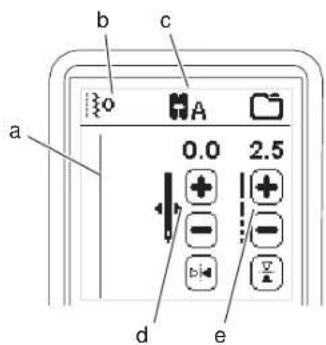
Stitch Information
a. Stitch pattern
The shape of stitch pattern will change according to the setting of stitch length, width, mirror/reverse and elongation.
b. Pattern number
c. Recommended presser foot
The presser foot shown in the illustration is recommended for normal sewing. The presser foot recommendation may change, depending on the stitch selected. Use of included presser feet is described in this manual.
d. Stitch width/needle position
e. Stitch length/density
SELECTING A STITCH
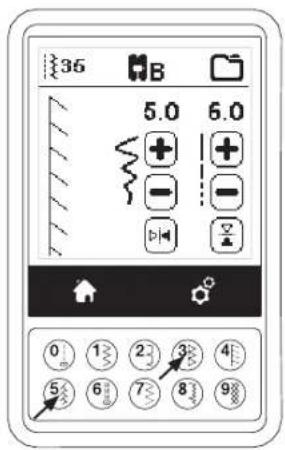
By pressing one of the Direct Selection buttons (0-9), you can select that stitch number immediately.
Press two or three digits in quick succession to select a stitch from 10 and up. If the stitch number does not exist, you will hear a beep and the last entered stitch number will remain selected.
STITCH PATTERN OPTIONS
Your machine will automatically select optimum settings for each stitch. You can make adjustments to every stitch as desired. Adjusted settings only affect the selected stitch and will be reset to default when another stitch is selected. Adjusted settings are not automatically saved when the machine is turned off.
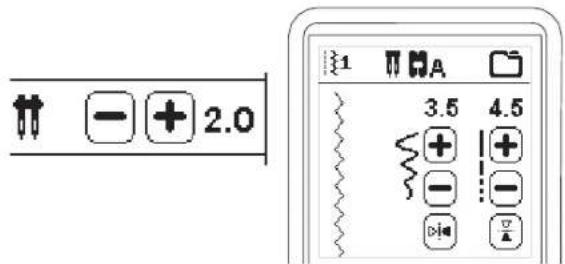
a. Stitch Width/Needle Position
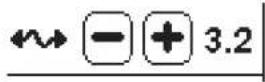
Increase or decrease the stitch width using + and - buttons. For straight stitches, use + and - to move the stitch position left or right.
Default settings are shown as in the illustration. When a setting is changed, the numbers will be highlighted. When trying to exceed minimum or maximum settings, a warning sound will be heard.
b. Stitch Length/Density
Increase or decrease the stitch length using + and - buttons.
When sewing stitches from the Buttonhole or Elongation category (stitches 16-29, 142-159), use the + and - buttons to increase or decrease stitch density. This may be necessary depending on the type of thread being used.
When such a stitch is selected, the icon changes to show that stitch density is active instead of stitch length.
c. Width Mirroring
By pressing the Width Mirror button, stitch will flip from left to right.
d. Length Mirroring
By pressing the Length Mirror button, stitch will flip from top to bottom.
When mirroring is active, the button will be highlighted. If mirroring is not available, a warning sound will be heard.
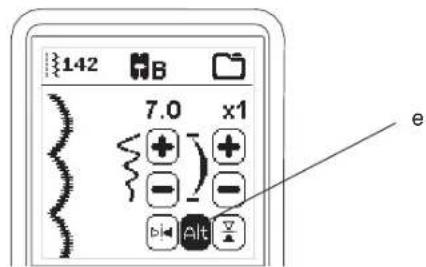
e. Elongation
Stitches in the Elongation category (stitches 142-159) can be elongated. The entire stitch will be longer but the density will remain the same. Press the Alt button to show the elongation setting instead of density for satin stitches. The density changes to show an elongation symbol. Increase or decrease the elongation of the satin stitch using the + and - buttons.
MACHINE SETTINGS
Setting Button (A)
Before or during the sewing process, you can adjust the settings by pressing the Setting button.
The Setting Screen will appear.
This screen is scrolled by pressing the right side arrow buttons. Pressing the Setting button again, machine will return to previous screen.
NOTE: All settings except for thread tension will remain until you change them. Thread tension will return to pre-set when you change the pattern. Default settings will differ depending on the stitch selected.
Thread Tension (B)
For the best stitch appearance and durability make sure the threads meet evenly between the two fabric layers. This machine sets the thread tension automatically when a pattern is selected. However, you can change the thread tension as follows.
To increase the upper thread tension, press the + button. To decrease the upper thread tension, press the - button. If you change from pre-set, number will be highlighted.
You can start sewing while in this mode and change tension while sewing. To return to previous screen, stop sewing and press the Setting button again. When another stitch pattern is selected, thread tension will return to pre-set.
Preset Thread Tension
Upper and bobbin thread will lock approximately in the middle of fabric.
Upper Thread Tension Too Tight
If the bobbin thread is visible on the top side of the fabric, the thread tension is too tight. Reduce the thread tension.
Upper Thread Tension Too Loose
If the upper thread is visible on the underside of the fabric, the thread tension is too loose. Increase the thread tension.
Thread Tension for Decorative Stitching
Thread tension should be set to a slightly looser tension than that for straight stitch.
The upper thread should appear slightly on the bottom side of your fabric, for example, when doing decorative sewing.
Helpful Hints
- If your sewing appears as shown in the illustration (stitches on the top side of the fabric are good, but the bottom side looks very loopy), it is most likely that the upper thread is not threaded correctly. Refer to page 19 for correct threading.
- If after checking the top thread and the bobbin thread is still showing on the top side, check the bobbin to see if it is set correctly. Refer to page 18 for information on correct bobbin setting.
natural_image
Technical line drawings of a structural joint with spring and anchor elements, showing different connection types (no text or symbols)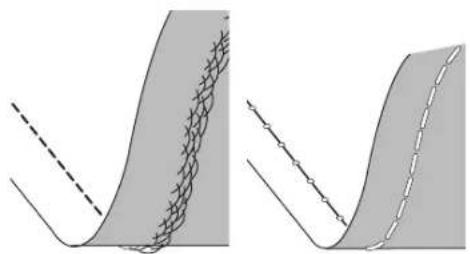
natural_image
Two abstract diagrams showing curved surfaces with grid patterns and dashed lines, no text or symbols present.Twin Needle
Activate the twin needle program by pressing - or + buttons to set the twin needle width. When a twin needle width is selected, the width of all stitches is limited to prevent needle breakage.
To deactivate, press - button until number of twin needle width will disappear.
In sewing mode, the twin needle icon will be shown. The setting is kept until you deactivate it.
See page 38 for more information about twin needle sewing.
POP-UP MESSAGES ABOUT TWIN NEEDLE
This pop-up message will appear when twin needle program is activated.
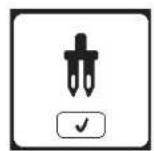
Check the needle and press the "√" button to continue.
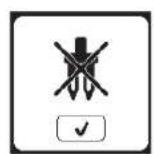
This message will appear when a stitch that cannot be used with twin needle, is selected. Press the "√" button and select another pattern or deactivate the twin needle program.
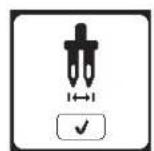
This message will appear when stitch width is adjusted to the limit. Press the "√" button to continue.
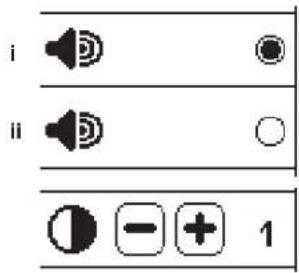
Audible Beep
You can turn off the audible beep by pressing this button.
i. Audible beep is on.
ii. Audible beep is off.
Screen Contrast
You can adjust the screen contrast. By pressing "+" or "-" button, contrast will increase or decrease.
Calibrate Screen
If the icons on the screen, in relationship to where you touch the screen, seem misaligned, the screen may need calibrating, as follows:
-
Scroll down the Setting Screen, then press the calibrate screen button.
-
Press the each "O" mark indicated on the screen 5 positions. (4 corners and center)
When calibration is completed, Setting Screen will appear again.

NOTE: If calibration has not completed correctly, a pop-up message will appear. Press the "√" button and retry the calibration.
Software Version
Software version of this sewing machine will be indicated at the bottom of this screen.
(example)
Threading the Machine
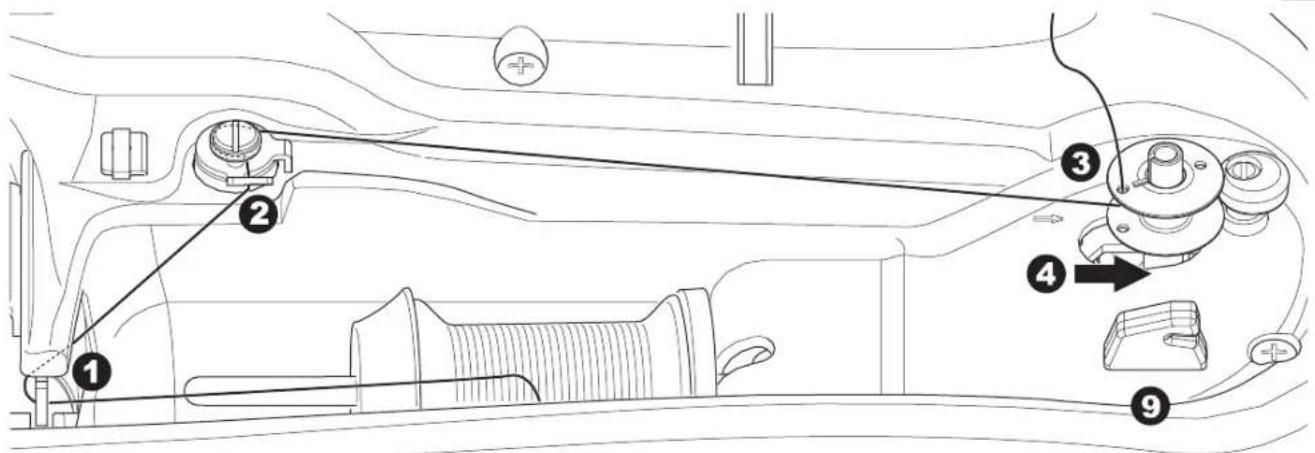
PREPARING THE BOBBIN
Be sure to use only SINGER ^® Class 15 bobbins (transparent) in this machine.
- Pull the bobbin cover latch to the right and remove the bobbin cover.
- Lift up the bobbin from the machine.
SETTING UP THE MACHINE
Setting Spool of Thread on Spool Pin
See page 19.
Bobbin Winding
- Hold thread in both hands and hook thread to the guide from front opening.
- Bring thread to the right and pass it through the thread guide from the back side. Pass thread under the bobbin winding tension disk in a clockwise direction, making sure it is placed snuggly under the disk.
-
Insert thread through hole in bobbin and place the bobbin on bobbin winder spindle.
-
Hold the end of the thread and push bobbin and spindle to the right. The bobbin winding screen will appear.
-
Press the start/stop button to start winding.
-
After the bobbin winds a few turns, stop the machine by pressing the start/stop button. Cut the thread next to the hole on top of the bobbin. None of the thread end should be left showing above the hole.
-
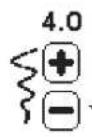
Start the machine again by pressing the start/stop button. You can adjust winding speed by pressing "+" (faster) or "-" (slower) button.
- The bobbin winding will stop when the bobbin is wound fully. Press the start/stop button to stop the machine. Push the bobbin and spindle to the left.
- Remove the bobbin from the spindle and cut thread with the thread cutter.
flowchart
graph TD
    A["7: Fast-forward"] --> B["8: Slow-forward"]
    B --> C["9: Quick-fashion assembly with directional arrows"]
Inserting the Bobbin
-
Place bobbin into bobbin case, making sure the bobbin turns in a counter-clockwise direction.
-
Draw thread into notch (a) while holding the bobbin lightly with your finger.
-
Pull thread along the groove, up and around the top, to the left, then down. Pull thread to the right to cut the thread.
-
Replace the bobbin cover. Set the left tabs into the holes in needle plate and push the right side of bobbin cover down until it clicks into place.
NOTE: This machine can start to sew without drawing up the bobbin thread. If you want to draw up the bobbin thread, see page 20. Be sure to use only SINGER® Class 15 bobbins (transparent) in this machine.

Threading the Machine
Setting Spool of Thread on Spool Pin
- Pull up the left end of spool pin and set the felt pad and the spool of thread on spool pin so that the thread unrolls from the front of the spool.
- Set the spool cap on spool pin as far as it will go.
a. Reverse spool cap direction according to the size of spool.
b. Use the small spool cap when using smaller thread spools.
c. Set the thread net over the spool if thread unrolls too easily or if the thread becomes caught or twisted in the thread guide.
NOTE: Thread spools come in a variety of styles and sizes. The thread spool cap should allow the thread to feed freely, yet hold the spool securely on the spool pin. Different thread spools can give different results, depending on the spool cap you place in front of the thread. If the thread is not feeding freely or it is getting caught behind the spool pin or in the threading guides, try different sizes of spool cap to find the one that best suits the thread spool being used.
SETTING UP THE MACHINE
THREADING THE NEEDLE
Preparing to Thread Machine
- Raise the presser foot lifter.
- Raise the needle to highest position by turning the handwheel toward you.
(Keep this position for threading the eye of the needle.)
NOTE: It is very important to raise the presser foot lifter before you thread the machine. Not doing so will likely result in poor stitch quality, or excessive thread loops on the underside of the fabric. Always raise the presser foot lifter before you begin threading the machine.

Threading the Upper Thread
- Hold thread in both hands and pass thread into the guide from front opening.
- Bring thread backward and pass through the slit from right to left.
- Bring thread to the left and pull thread down toward you along the slit.
- Pull the thread around the U-turn, then bring it back up.
- To thread the take-up lever, draw thread up and bring thread back down again from right to left along the slit.
- Pull thread downward along the slit.
- Draw thread through thread guide from right side opening.
- Place the thread through needle eye from front to back. Refer to next page for instructions on how to use needle threader.
Threading the Needle Eye

Do not lower the threader lever while machine is operating.
NOTE: The needle threader is used for needle sizes 11/80, 14/90, and 16/100.
- Lower the presser foot.
- Check that the needle is raised to its highest position. If it is not, raise needle by turning the handwheel toward you.
- Lower the threader slowly and draw thread through thread guide (a) and pull toward the right.
- Push the lever as far as it will go. The threader will turn and the hook pin will go through the needle eye.
-
Draw the thread into the guide, making sure it is under the hook pin.
-
Hold thread loosely and swing back the lever. As the threader rotates back, the hook pin will pass through the needle eye, forming a loop of thread.
-
Pull thread out about 10 cm (4 inches) through the needle eye.
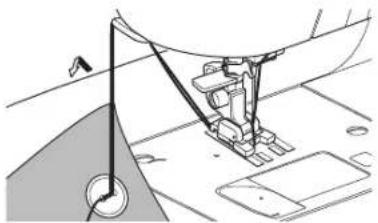
Drawing Up the Bobbin Thread
This machine can start to sew without drawing up the bobbin thread. If you want to start sewing with longer bobbin thread, draw up the bobbin thread as follows.
-
Insert the bobbin into the bobbin holder as shown on page 18, but do not cut thread.
-
Raise the presser foot.
-
Hold upper thread loosely and turn handwheel toward you one complete revolution.
-
Pull upper thread lightly. Bobbin thread will come up in a loop.
-
Place both the upper thread and the bobbin thread about 10 cm (4 inches) toward the back of presser foot.
-
Replace the bobbin cover. (See page 18)
WHERE TO USE EACH STITCH
Direct (0-9)
- Straight stitch center needle position
- For top stitching, for basic sewing, zipper sewing, etc.
- Zigzag stitch
-
For overcasting, applique, etc.
-
Blind Hem
-
Overcasting
-
Overcasting of stretch fabric, decorative stitch
-
Feather stitch
-
Straight stretch stitch
• Reinforcement straight stitch
- Multiple stitch zigzag
- For overcasting knit fabrics, elastic sewing, mending
-
Elastic blind hem
-
Honeycomb stitch
Basic (10-17)
- Straight stitch left needle position
- For top stitching, for basic sewing, etc.
- Button sewing
- Straight stitch with auto-reverse stitch center needle position
- Straight stitch with auto-reverse stitch left needle position
- Basting
- Double zigzag stitch
- Bar-tack
- Darning
Buttonhole (18-30)
- Bar-tack buttonhole (wide)
- Bar-tack buttonhole (narrow)
- Keyhole buttonhole
- Keyhole buttonhole with cross bar
- Tapered keyhole buttonhole
- Round ended buttonhole (narrow)
- Round ended buttonhole with cross bar
- Round ended buttonhole (both ends rounded)
- Decorative buttonhole
- Stretch buttonhole
- Heirloom buttonhole
- Bound buttonhole
- Eyelet
Stretch (31-37)
- Stem stitch for stretch fabrics
32.-37. Overcasting of stretch fabric, decorative stitch
Decorative (38-128)
-
Ric rac stitch
-
Double ric rac stitch
-
Thorn stitch
Satin (129-141)
Elongation (142-159)
Quilt (160-176)
- Hand-look quilting stitch
Heirloom (177-199)
Letter Stitch Patterns
Sequence sewing (See page 39)
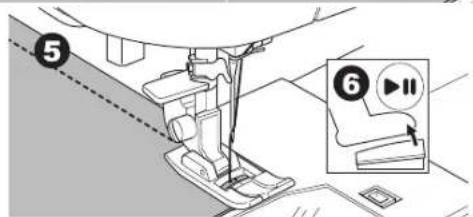
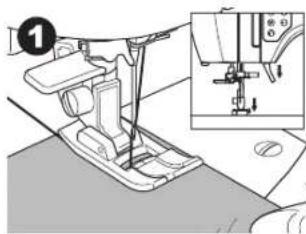
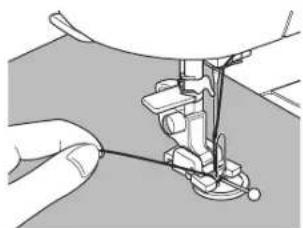
STARTING TO SEW
Select the straight stitch center needle position. (No. 0)
Start and End of Seam
-
Check the presser foot (All-Purpose Foot). Refer to page 8 for changing the presser foot.
-
Place the fabric under the presser foot and lower the presser foot.
-
Hold the threads at the back. Press the Start/Stop button or step on the foot control pedal to start sewing. Continue to hold the thread tails for the first few stitches, then release them.
Lightly guide the fabric while sewing.
You can regulate the sewing speed by pressing the Speed Control buttons or the foot control. The buttons are used to set the speed when using Start/Stop button and also sets the top speed when using foot control.
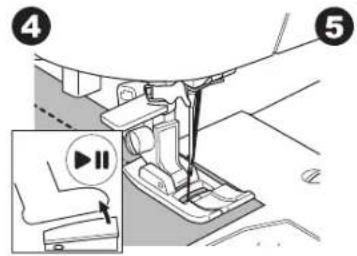
- When you reach end of seam, press the Start/Stop button to stop sewing or release the foot control pedal.
- Press the Thread Cutter button.
- Raise the presser foot lifter and remove the fabric.

- Do not press the Thread Cutter button when there is no fabric under the presser foot or no need to cut the threads. The thread may tangle, resulting in damage.
- Do not use the Thread Cutter button when cutting thread thicker than #30, nylon thread or other specialty threads. In this case, use the thread cutter located on the left side of the machine. (See page 12)
- Do not use the Thread Cutter button when sewing with a twin needle or a hemstitching (wing) needle.
Reverse Stitching
Reverse stitching is used for reinforcing the ends of the seams.
- Start sewing 4-5 stitches.
-
Press and hold the Reverse button to sew reverse stitch until start point.
-
Release the Reverse button and sew forward until reach the end of seam.
-
Press and hold Reverse button and sew 4-5 reverse stitches.
-
Release Reverse button and sew until end of seam.
- Stop sewing.
NOTE: Stitch patterns No. 12 and No. 13 have a built-in reverse stitch. See page 24 for information on how to sew these stitches.
natural_image
Technical line drawing of a sewing machine component (no text or symbols)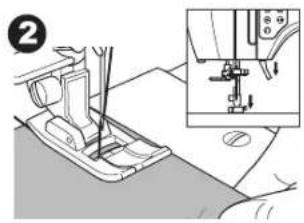
natural_image
Mechanical sewing machine in progress, showing stitching and assembly steps (no text or symbols)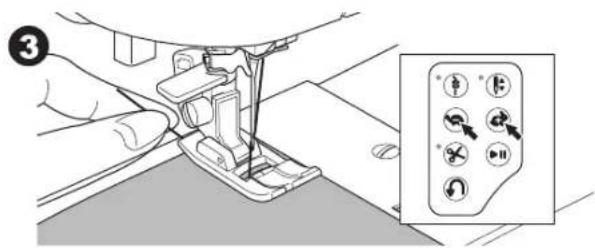

natural_image
Line drawing of a sewing machine needle and fabric (no text or symbols)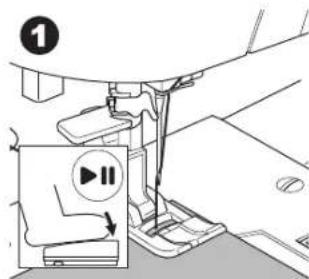

natural_image
Technical line drawing of a sewing machine needle and foot (no text or symbols)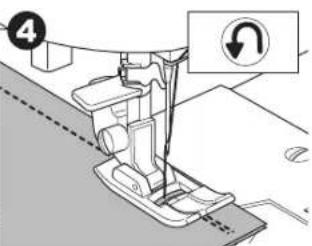
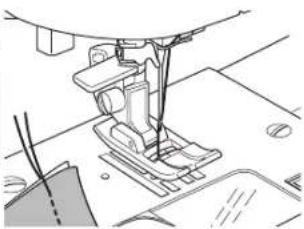
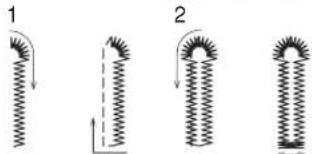
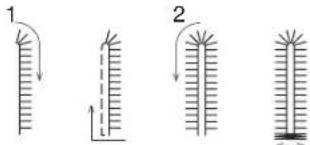
Tack Stitch
You may sew tack stitches at the beginning and end of the stitch.
- Press the Tack button. LED light will be turned on.
- Start to sew.
Machine will sew tacking stitches and stop automatically.
1
natural_image
Simple diagram with a play button and a curved arrow on a gray background (no text or symbols)- Start sewing again and sew the selected pattern.
- When you reach the end of seam, press the Tack button. Machine will sew tacking stitches and stop automatically.
natural_image
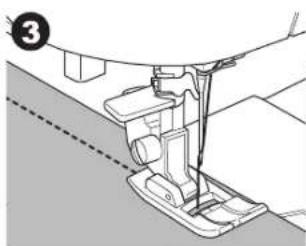
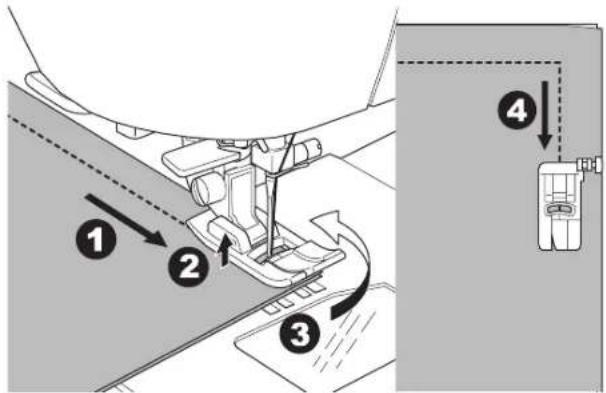
Simple diagram with a dashed vertical line and a circular symbol (no text or labels)Turning Corners
- Stop the machine when you reach a corner.
- Turn the handwheel toward you to insert the needle into fabric.
NOTE: You can change the needle stop position by pressing the needle stop up/down button. When needle position is set to down, the LED will turn on. You can also tap the foot control to raise or lower the needle.
- Raise the presser foot.
- Use the needle as a pivot and turn fabric.
- Lower the presser foot and resume sewing.
Sewing Heavy Fabric
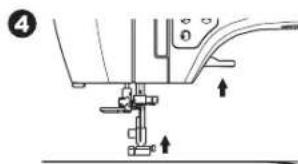
When sewing heavy or thick fabrics, the toe end of the presser foot tends to lift up when it comes to seams or other bulky areas. To sew these heavy or thick fabrics:
- When the toe of the presser foot begins to tilt up, lower the needle into the fabric and then raise the presser foot lifter.
- Push the stabilizer pin (located on the right side of the All-Purpose Foot) and at the same time lower the presser foot lifter. The presser foot should now be level on the thick fabric. Once the presser foot lifter has been lowered, it is no longer necessary to hold in the stabilizer pin.
- Start sewing. After a few stitches, the stabilizer pin will release.
a. The presser bar lifter can be raised one step higher for placing heavy materials under the presser foot easily.

Sewing Overlapped Areas
Guide the fabric with both hands when sewing over overlapped areas.
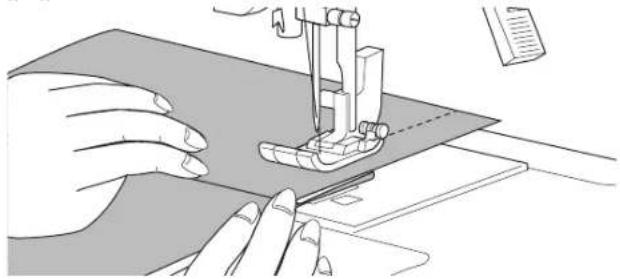
natural_image
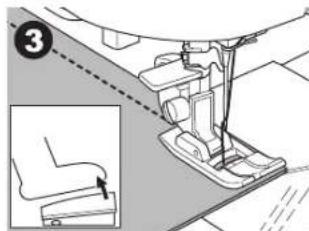
Illustration of hands operating a sewing machine on a fabric (no text or symbols visible)Width of Seam Allowance
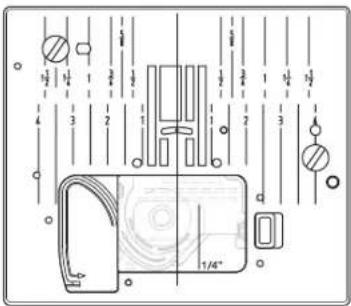
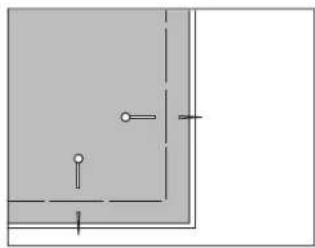
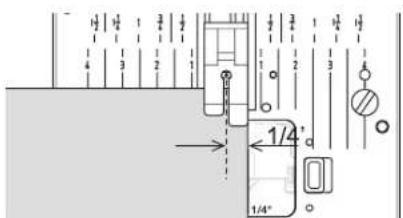
Guide lines on the needle plate indicate the distance from the center needle position. To keep a consistent seam allowance, guide the fabric along the desired guide line on the needle plate.
STRAIGHT STITCH SEWING
Straight stitch patterns should be selected to suit the type of fabric being sewn. Left needle position (No.10, 13) is most suited for sewing light weight fabrics.
No. 0. Center needle position
No. 10. Left needle position
No. 12. Center needle with built-in reverse stitch
No. 13. Left needle with built-in reverse stitch
All-Purpose Foot (A)
Straight Stitch
- Position the fabric under the presser foot, then lower the presser foot.
- Hold the threads behind the foot gently with your left hand as you start sewing. Guide the fabric gently with your right hand as you sew.
- When you reach the end of seam, stop sewing.
- Press the Thread Cutter button.
Straight Stitch with Auto-lock Stitch (Pattern No. 12, 13)
- Position the fabric under the presser foot and lower it.
- Hold the upper thread loosely and start sewing.
Machine will sew 4-5 stitches forward and sew 4-5 stitches backward and continue sewing forward. - When you reach the end of seam, press the Reverse button. Machine will sew a few stitches backward and sew a few stitches forward and stop automatically.
- Press the Thread Cutter button.
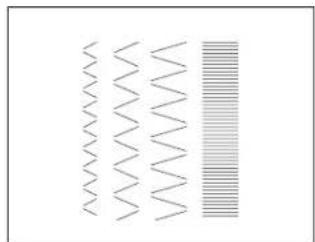
ZIGZAG STITCH SEWING
Your machine can sew zigzag stitches of various widths and lengths by changing the settings of the stitch width and stitch length.
No. 1 Zigzag Stitch
All-Purpose Foot (A) or Satin Foot (B)
Zigzag stitches are often used for applique and decorative sewing.
natural_image
Mechanical sewing machine diagram showing needle insertion and base assembly (no text or labels)


natural_image
Abstract pattern of wavy lines and horizontal stripes, no text or symbols present
natural_image
Technical line drawing of a sewing machine needle stitching fabric (no text or symbols)Satin Stitching
To sew a satin stitch, shorten the stitch length and attach the Satin Foot. (B)
Refer to next page for using the zigzag to overcast.
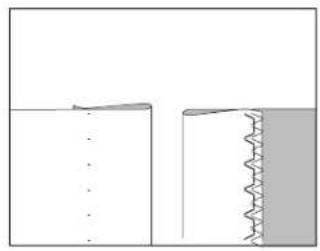
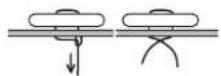
BLIND HEM STITCHING
The hem is sewn without stitches showing on right side of fabric.
The illustration to the right shows an example of a finished blind hem. The right side of the fabric is shown in white, the wrong side is shown in gray.
No. 2 Blind hem for non-stretch fabric
No. 8 Blind hem for stretch fabric Blind Hem Foot (D)
- Fold the fabric as shown in the illustration.
a. Medium, heavy weight fabric
b. Light weight fabric
c. Wrong side of fabric
d. Overcasting
natural_image
Technical line drawing of a sewing machine needle stitching fabric (no text or symbols)
natural_image
Pure diagram of two mechanical joint configurations without any text, numbers, or symbols
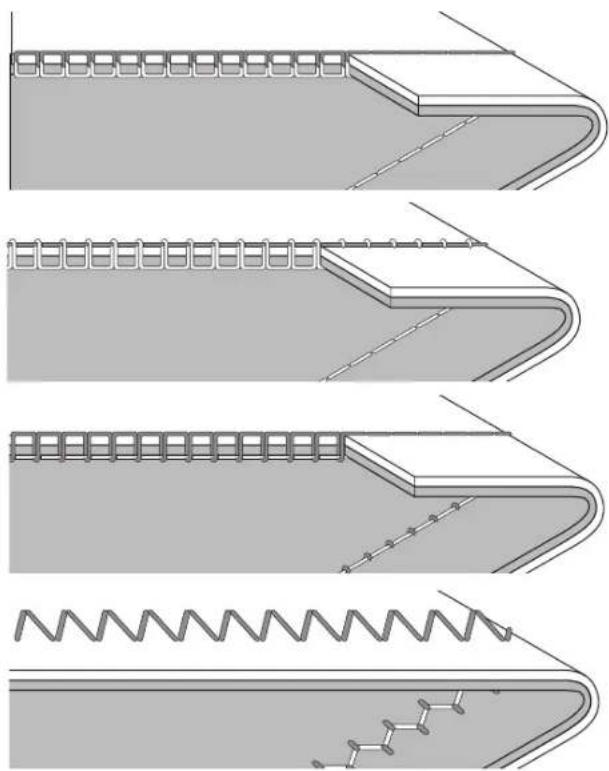
- The guide (e) on the Blind Hem Foot helps ensure that the fabric fold is guided evenly when blind hem stitching. The guide (e) is adjusted by turning the adjusting screw (f).
- Place fabric so that the straight stitches (or small zigzag stitches) are on the protruding hem edge and the large zigzag stitches just catch one thread of the folded edge (g). If necessary, turn the screw (f) to adjust the foot so that the needle slightly touches the folded edge of the fabric.
- Lower the presser foot and sew hem, guiding fabric evenly along the guide.
- Turn the fabric over when you have completed sewing.
c. Wrong side of fabric
h. Right side of fabric
NOTE: Test on a scrap piece of fabric similar to your project so you can determine the best placement of the foot's guide. You can also adjust the width and length settings to set the stitch as needed for the fabric being sewn

natural_image
Technical line drawing of a sewing machine needle and base (no text or symbols)
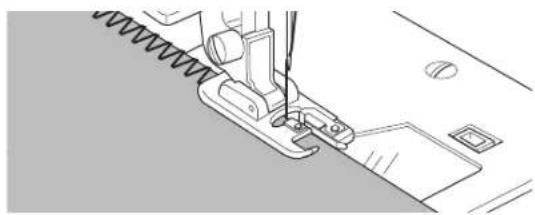
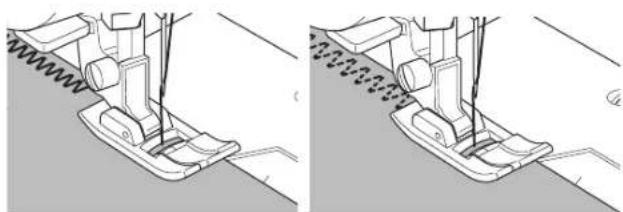
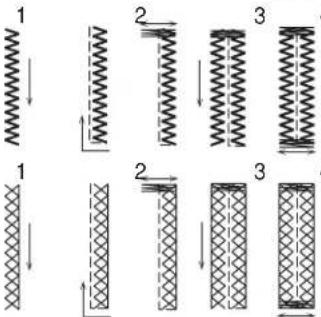
OVERCASTING-OVERLOCKING
Using the Overcasting Foot
No. 1 (stitch width 5.0)
No. 3, 32, 34, 35, 36 (stitch width 5.0 - 7.0)
Overcasting Foot (C)
NOTE: The illustration to the right shows the look of the stitches when sewn on the fabric edge.
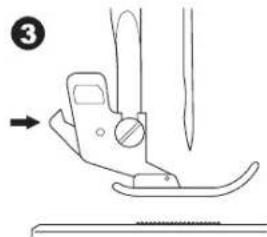
Line up the fabric against the guide plate of the overcasting foot so that the needle falls near the edge of the fabric.
No. 1 (width=5.0) is used to help prevent raveling of fabrics.
No. 3, 32, 34, 35, 36 are designed to sew the seam and seam finish at the same time.
natural_image
Line drawing of a sewing machine needle stitching fabric (no text or symbols)
natural_image
Three-step line drawing of a sewing machine's base and side views (no text or symbols)To prevent accidents, the Overcasting Foot should be used for sewing patterns 1, 3, 34, 35, 36 only. Do not change the stitch settings. It is possible that the needle could hit the presser foot and break when sewing other patterns and settings.
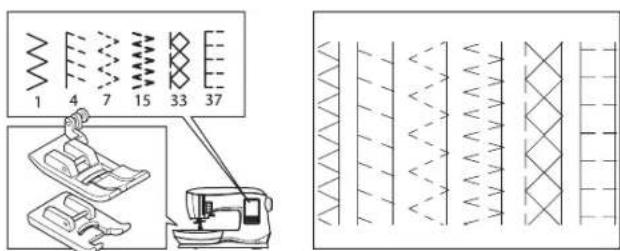
Using the All-Purpose Foot/Satin Stitch Foot
No. 1, 4, 7, 37
All-Purpose Foot (A)
No. 15, 33 Satin Stitch Foot (B)
Place fabric so that the needle falls near the edge of the fabric when using the All-Purpose Foot/Satin Stitch Foot.
NOTE: The illustration to the right shows the look of the stitches when sewn on the fabric edge.
No. 1 For narrower zigzag width (width=2.0-4.5).
No. 4, 7, 15, 33, 37 when sewing easy to ravel or stretch fabrics.
natural_image
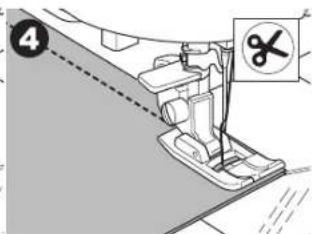
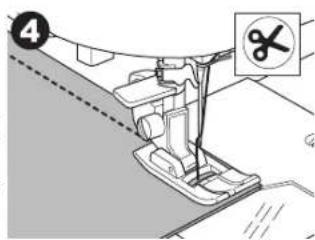
Technical illustration of a sewing machine needle and foot, showing mechanical components without any text or symbolsNOTE: If desired, trim the excess fabric after stitching is complete. Be careful not to cut the threads while trimming.
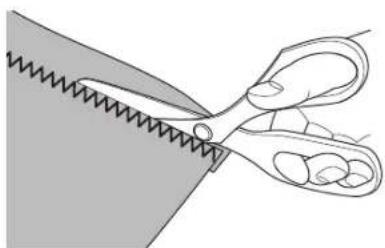
natural_image
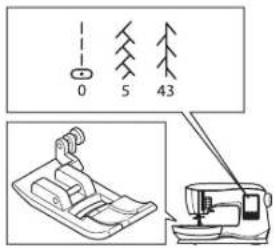
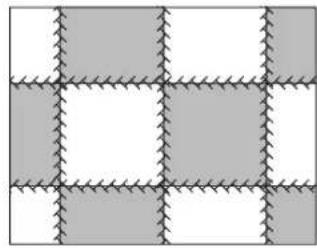
Illustration of a pair of scissors cutting a piece of material (no text or symbols)CRAZY PATCH
Create interesting surface embellishment by sewing decorative stitches over the seams. Try mixing several types of fabrics for even more variety.
No. 0
All-Purpose Foot (A)
- Place two pieces of fabric right sides together and sew a long straight stitch.
- Press the seam open.
No. 5, 43
- With the right side of the fabric facing up, sew the decorative stitch, making sure the stitches fall on both sides of the seam.
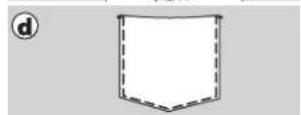
STRETCH STITCH SEWING
Stretch stitches are strong and flexible and will give with the fabric without breaking. Good for knit fabrics as well as durable fabrics like denim or twill.
No. 6 Straight stretch stitch
No. 31 Stem stitch for stretch fabrics
No. 39 Ric-rac stitch
All-Purpose Foot (A)
We recommend that you use a needle for knit and synthetic fabrics to prevent skipping stitches and thread breakages. See page 9 for needle recommendations.
a. Jacket b. Trousers
c. Bag d. Pocket
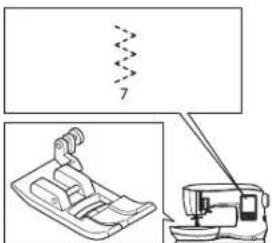
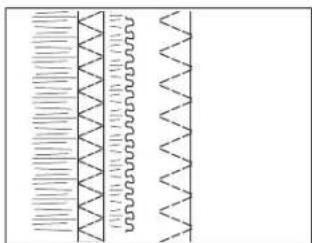
MULTI-STITCH ZIGZAG
Used for sewing on elastic and overcast stitching.
No. 7 Multi-stitch zigzag
All-Purpose Foot (A)
NOTE: The illustration to the right shows the look of the stitches when sewn on the fabric edge.
A. Elastic sewing
Pull elastic in front and back of needle while sewing.
B. Overcast stitching
Used for easy to ravel and knit fabrics.
Refer to previous page for overcasting.
natural_image
Grid pattern with alternating shaded and unshaded squares (no text or symbols)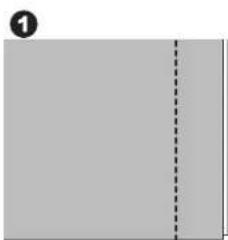
natural_image
Blank gray document page with a dashed line indicating a vertical line (no text or symbols)
natural_image
Simple diagram of two vertical bars with a central vertical line and a horizontal line, no text or symbols present.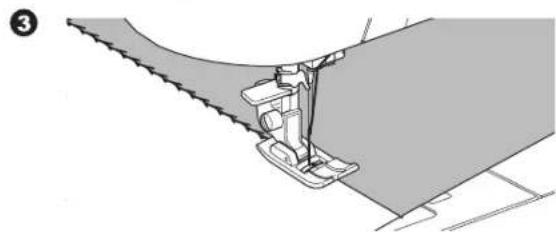
natural_image
Technical illustration of a sewing machine needle stitching fabric (no text or symbols)

natural_image
Pure diagram of mechanical components without any text, numbers, or symbols
natural_image
Diagram of a circular ring with dashed lines and a small protrusion, no text or symbols present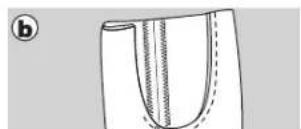

natural_image
Pure diagram of zigzag lines and wavy segments without any text, numbers, or symbols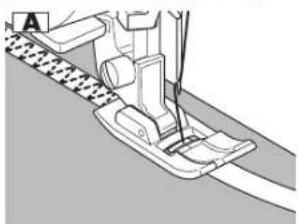
natural_image
Mechanical sewing machine diagram showing needle and base components (no text or labels)
natural_image
Technical line drawing of a sewing machine needle and foot (no text or symbols)BASTING
Basting is temporary stitching, used for fitting garments, and for gathering and marking fabric.
No. 14 Basting stitch All-Purpose Foot (A)
-
Draw up the bobbin thread for good result. (See page 20) Lower the feed teeth by moving the feed teeth lever to the left. (A pop up message appears when selecting stitch no. 14, press the "√" button.)
-
Place the fabric under the presser foot and then lower the presser foot lifter.
-
Hold upper and bobbin thread loosely and start to sew. Machine will make two stitches only.
-
Raise the presser foot lifter.
-
Holding the upper thread, pull the required amount of fabric to the rear and lower the presser foot lifter.
-
Start to sew. Machine will sew two stitches.
-
Repeat them as many times as you need to finish the row of basting stitches.
NOTE: To prevent the fabric layers from shifting, insert dress pins crosswise to the basting direction. Pull the bobbin thread to remove the stitching.
- After sewing, raise the feed teeth by moving the feed teeth lever to the right.

To prevent accidents, be sure the needle does not hit pins while sewing.
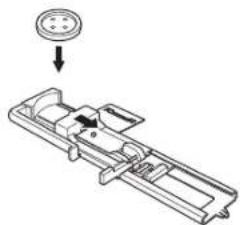
SEWING ON BUTTONS
No. 11
Button Sewing Foot (M)
-
Lower the feed teeth by moving the feed teeth lever to the left. (A pop up message appears when selecting stitch no. 11, press the "√" button.)
-
Attach the Button Sewing Foot. Align two holes of the button with slot of presser foot and lower foot to hold the button securely.
natural_image
Pure electrical circuit lines without any symbols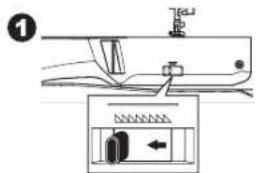


natural_image
Mechanical assembly diagram showing a foot pushpin and base mechanism (no text or labels)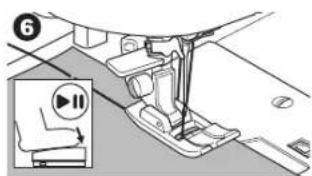

natural_image
Mechanical assembly diagram showing a lever mechanism with no visible text or symbols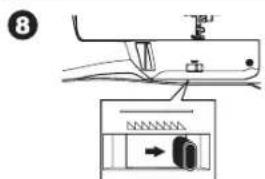


natural_image
Three circular icons with internal symbols: two circles with a horizontal line and three circles with crossed lines, arranged in a triangular pattern (no text or labels)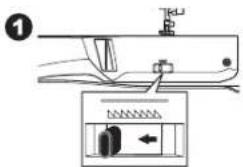


Sewing
- Adjust the stitch width so that the needle enters the left hole of button.
-
Check the left and right swing of the needle by turning the handwheel toward you very slowly, making sure the needle does not hit the button.
-
Set the number of stitches to sew on the button by pressing the + and - buttons. Eight stitches is standard.
-
Start to sew at slow speed. The machine will sew the number of stitches set on the display and then tie off and stop.

To prevent accidents, make sure that the needle does not hit the button during sewing, otherwise needle may break.
-
Raise the foot and cut the threads remaining about 10 cm (4") long.
-
Pull the thread ends to the wrong side of the fabric with a hand sewing needle. Tie the threads together to secure.
-
After sewing, move the feed teeth lever to the right. Be sure to turn the handwheel toward you one full revolution to re-engage the feed teeth for regular sewing.
NOTE: To sew a 4-hole button, follow the procedure above for the first two holes. Then lift presser foot slightly and move fabric to permit stitching the other two holes, either parallel or criss-cross.
Thread Shank
Buttons on coats and jackets often have a thread shank to make them stand away from the fabric. Insert a straight pin or sewing machine needle under the center slit of the foot from the front, to add space for making the shank. Sew over the pin or needle. To create a thread shank, pull thread to the back side of the button and wind the thread around the stitches. Tie the thread ends securely.
3
4
natural_image
Pure electrical circuit lines without any symbols5

6

natural_image
Close-up of a sewing machine needle stitching fabric (no text or symbols visible)7
natural_image
Technical line drawing of a sewing machine needle and fabric (no text or symbols)8
9

natural_image
Illustration of hands operating a sewing machine needle (no text or symbols visible)
INSERTING ZIPPERS
Centered Insertion
No. 0 Straight stitch (center needle position) Zipper Foot (E)
Changing needle position in the wrong direction when the Zipper Foot is attached could cause the needle to hit the presser foot, which could break the needle or damage the machine. If adjusting the needle position make sure the needle moves away from the center of the Zipper Foot. Before sewing, turn the handwheel toward you very slowly, making sure the needle does not hit the Zipper Foot.
- Baste the zipper opening to the seam line.
a: Straight stitch
b: End of opening
c: Basting
d: Wrong side of fabric
- Press open the seam allowance.
Place the open zipper face down on the seam allowance with the teeth against the seam line.
Baste the zipper tape.
- Attach the Zipper Foot.
Attach the left side of the presser foot pin to the presser foot holder when sewing the right side of the zipper, and right side of the presser foot pin to the holder when sewing the left side of the zipper.
-
Sewing on the right side of the fabric, stitch the left side of the zipper from bottom to top.
-
Stitch across the lower end and right side of zipper. Remove the basting and press.
Lapped Insertion
No. 0 Straight stitch (center needle position) Zipper Foot (E)
Changing needle position in the wrong direction when the Zipper Foot is attached could cause the needle to hit the presser foot, which could break the needle or damage the machine. If adjusting the needle position make sure the needle moves away from the center of the Zipper Foot. Before sewing, turn the handwheel toward you very slowly, making sure the needle does not hit the Zipper Foot.
- Baste the zipper opening to the seam line.
a: Straight stitch
b: End of opening
c: Basting
d: Wrong side of fabric
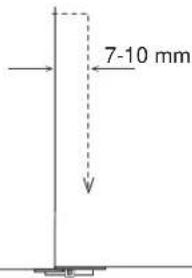
- Fold back to the left seam allowance.
Turn under the right seam allowance to form 3 mm (1/8") fold.
natural_image
Technical line drawing of a sewing machine with a vertical dashed line and base mount (no text or symbols)
natural_image
Pure diagram of a vertical structure with dashed lines indicating hidden edges (no text or symbols)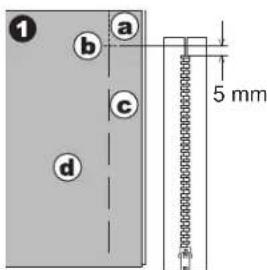

natural_image
Pure diagram of a vertical structure with a horizontal bar and circular elements, no text or symbols present.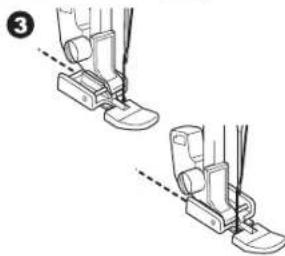
natural_image
Illustration of two identical foot push-ups with guide legs and feet, showing alignment lines (no text or symbols)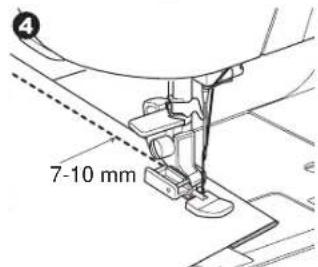

natural_image
Technical line drawing showing a sewing machine with a foot and a vertical dashed line above it (no text or symbols)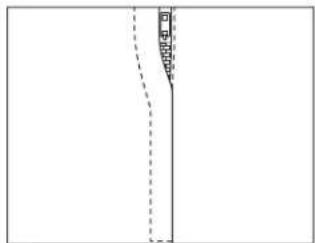
natural_image
Pure diagram of a vertical line with dashed lines and a small shaded region, no text or symbols present.

natural_image
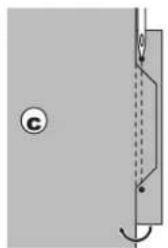
Simple line drawing of a door with a vertical guide bar and label number 2 (no text or symbols on the door itself)Sewing

- Attach the Zipper Foot.
Attach the left side of the presser foot pin to the presser foot holder when sewing the right side of the zipper, and right side of the presser foot pin to the holder when sewing the left side of the zipper.
-
Stitch the left side of zipper from bottom to top.
-
Turn the fabric right side out. Stitch across the lower end and right side of the zipper.
-
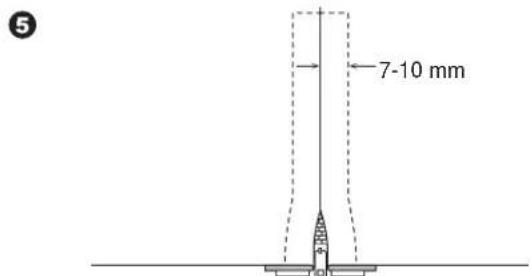
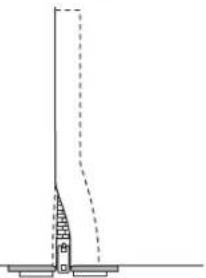
Stop stitching with the needle down in the fabric when the Zipper Foot reaches the zipper tab, about 5 cm (2") from the top of the zipper.
To Stitch around the Zipper Tab:
- Stop stitching before you reach the zipper tab.
- Lower the needle into fabric.
- Raise the presser foot and slide the zipper tab backwards to clear the Zipper Foot.
- Lower the presser foot and continue stitching.
- Remove the basting stitches.
a. Zipper tab
③

natural_image
Two diagrams showing foot positioning with measurement lines, no text or symbols present
natural_image
Mechanical sewing machine needle stitching a fabric (no text or symbols visible)5
6
natural_image
Simple line drawing of a vertical structure with a dashed line indicating a height measurement (no text or symbols)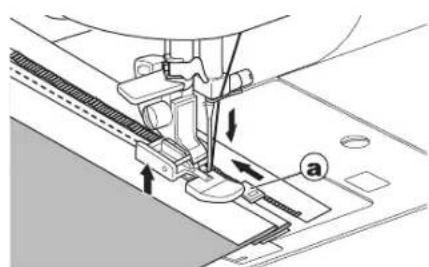
natural_image
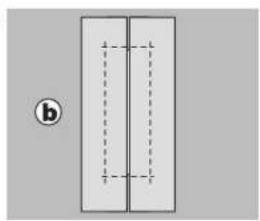
Technical line drawing of a sewing machine needle stitching fabric, showing mechanical components and tool path (no text or symbols)QUILTING
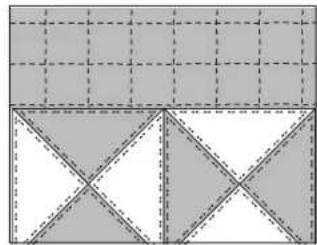
A quilt consists of three layers:
The topper, batting, and backing fabric. The top layer is formed by shaped pieces of fabrics joined together, creating the quilt topper.
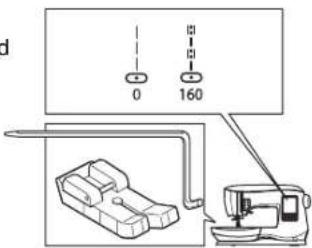
No. 0 Straight stitch (center needle position)
No. 160 Hand look quilting stitch
Straight stitch / Patchwork Quilting Foot
Quilting guide
natural_image
Geometric pattern composed of shaded squares and triangles with dashed grid lines (no text or symbols)
To prevent accidents, do not change the needle position. Changing needle position could cause the needle hit
the presser foot, which could break the needle or damage the machine.
Joining the Pieces of Fabric
Join the pieces of fabric using pattern No. 0 with a seam allowance of 1/4 inch (6.3 mm).
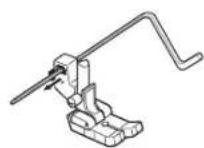
Quilting
Sew three layers of material (topper, batting, backing). Use quilting guide to sew successive rows. Insert quilting guide into the hole of presser foot holder and set the spacing as desired.
natural_image
Technical line drawing of a sewing machine on a textured fabric floor (no text or symbols)Hand Look Quilting Stitch (No. 160)
Use invisible nylon sewing thread or very lightweight thread that matches or blends well with the fabric on top. Place thread that contrasts to the color of the fabric on the bobbin. Set the upper tension to maximum or near maximum. When you sew, bobbin thread will pull to the top and give the appearance of a traditional hand quilting stitch. Adjust the thread tension and stitch length as desired for the look you want to achieve for your project.
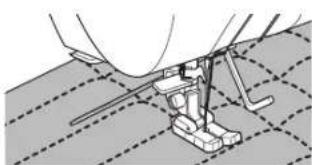
AUTOMATIC BAR-TACK AND DARNING
You can sew automatic bar-tack and darning using the Buttonhole Foot.
No. 16 Bar-tack, to reinforce areas that will be subject to strain, such as pocket corners.
No.17 Darning, mending and other applications.
Buttonhole Foot
- Adjust slide on base of Buttonhole Foot according to the length of the bar-tack or darning to be sewn.
a= Length of bar-tack or darning -
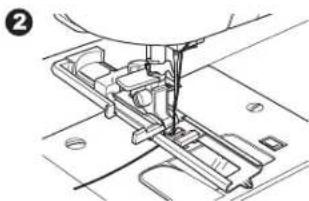
Pass upper thread through the hole of Buttonhole Foot and bring upper thread to the left.
-
Position fabric under presser foot so that the starting point is on the thick area.
Lower the foot.
b. When sewing the bar-tack on the edge of thick fabric, such as a pocket, place a cardboard or fabric piece of the same thickness beside the fabric to help keep the foot level as you sew.
- Lower the Buttonhole Lever completely.
NOTE: Machine will not start to sew if Buttonhole Lever is not lowered properly or Buttonhole Foot is not positioned correctly.
-
Hold upper thread lightly and start the machine.
-
Machine will sew bar-tack or darning stitch, as shown. Machine will stop automatically when the pattern is finished.
-
Raise the presser foot to remove the fabric.

natural_image
Blank image with a vertical line of small black dots on the left side (no text or symbols)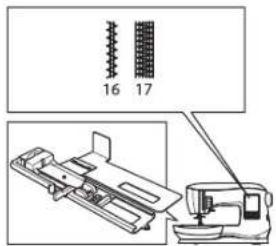

natural_image
Two abstract geometric shapes: a gray rectangular block and a wireframe grid pattern, both without any text or symbols.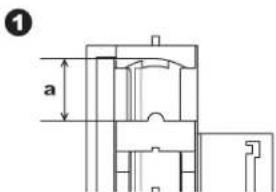
natural_image
Mechanical assembly diagram showing a sewing machine needle inserted into a component (no text or symbols visible)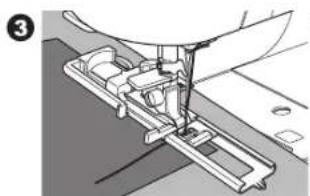
natural_image
Mechanical assembly diagram showing a sewing machine needle inserted into a workpiece (no text or symbols visible)
natural_image
Pure mechanical assembly diagram showing a base and shaft with no text or symbols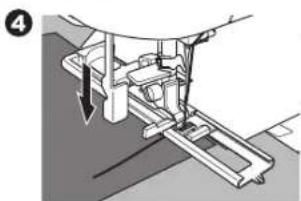
natural_image
Mechanical assembly diagram showing a lever mechanism with a downward arrow indicating motion (no text or symbols present)
natural_image
Mechanical assembly diagram showing a cutting tool interacting with a bracket (no text or symbols visible)
natural_image
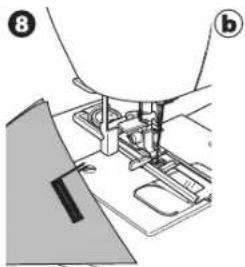
Technical line drawing of a sewing machine with base plate and clasp mechanism (no text or symbols)BUTTONHOLE SEWING
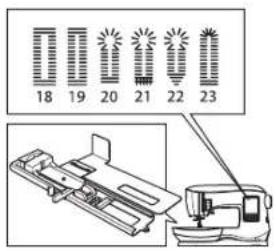
Select the buttonhole style you want to sew.
This machine can sew 12 types of buttonholes.
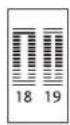
- Bar-tack buttonhole (wide)
- Bar-tack buttonhole (narrow)
- Keyhole buttonhole
- Keyhole buttonhole with cross bar
- Tapered keyhole buttonhole
- Round ended buttonhole (narrow)
- Round ended buttonhole with cross bar
- Round end buttonhole (both ends rounded)
- Decorative buttonhole
- Stretch buttonhole
- Heirloom buttonhole
- Bound buttonhole
NOTE: Density of the sides of the buttonhole may be adjusted with stitch length control.
- Mark position and length of buttonhole on fabric.
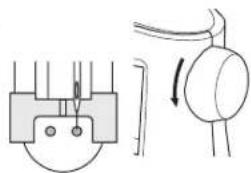
- Open the slider on the foot. Set the button on the base of the foot.
Adjust the slider to the diameter of the button, so the button fits snuggly in the foot.
For buttons with an irregular shape that do not fit snuggly in the Buttonhole Foot, remove the button from the base of the foot. Adjust the slide on the base to the diameter of the button, plus the thickness of the button.
a = Length of button + thickness
- Pass upper thread through the hole of Buttonhole Foot and bring upper thread to the left.
- Position fabric under presser foot so that the center line mark is in the center of the Buttonhole Foot.
Lower the foot while pulling the frame of the Buttonhole Foot towards you.
NOTE: It is suggested that you use interfacing on the backside of the fabric.
- Lower the buttonhole lever completely.
NOTE: Machine will not start to sew if buttonhole lever is not lowered properly or frame of Buttonhole Foot is not positioned all the way forward. - Hold upper thread lightly and start the machine.
1
natural_image
Simple cross symbol on a plain gray background (no text or labels)2
natural_image
Mechanical assembly diagram showing a component with a circular pin and arrow indicator (no text or symbols)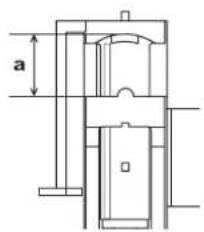
3
natural_image
Technical line drawing of a sewing machine needle stitching a wooden base (no text or symbols)4
natural_image
Mechanical assembly diagram showing a sewing machine needle inserted into a slot, with an inset close-up of the needle (no text or symbols visible)5
natural_image
Mechanical assembly diagram showing a sewing machine needle inserted into a component (no text or symbols visible)6
natural_image
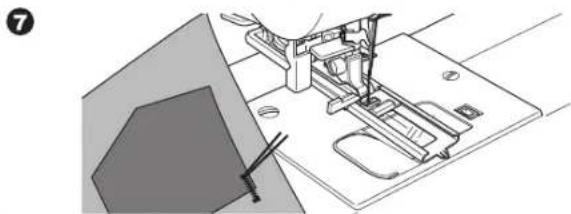
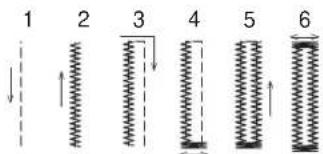
Mechanical assembly diagram showing a sewing machine needle inserted into a base plate (no text or symbols visible)- Machine will sew the buttonhole in the order as shown and stop automatically after sewing.
7
3
4
natural_image
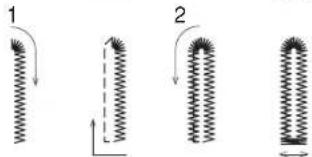
Four diagrams showing spring-like structures with arrows indicating direction, no text or symbols present;
[Non-Text]

natural_image
Three diagrams showing coiled spring-like structures with arrows indicating direction (no text or symbols)[Non-Text]
4
4
4
3
[Non-Text]


natural_image
Four diagrams showing a coiled spring with arrows indicating direction, labeled 1 and 2 (no text or symbols present)
- Raise the presser foot to remove the fabric.
- Use a seam ripper to cut open the center of the buttonhole, being careful not to cut into the ends of the buttonhole. It is helpful to place a pin at the end of the buttonhole to serve as a stopper while cutting.
NOTE: For sewing buttonholes on projects such as hard-to-sew fabrics or along the edge of multi-layered garments, install the underplate. Place the fabric between the underplate and Buttonhole Foot.
natural_image
Diagram of a sewing machine needle stitching fabric, showing tool path and base plate (no text or symbols)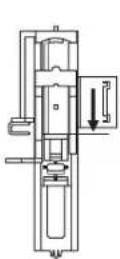
9

natural_image
Illustration of a medical procedure showing a tool tip interacting with a patient's finger (no text or symbols present)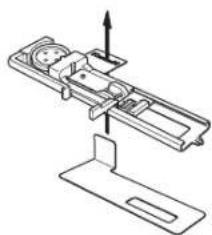
natural_image
Technical line drawing of a mechanical assembly with no visible text or symbols
natural_image
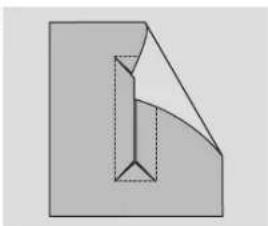
Pure mechanical assembly diagram without any text, numbers, or symbolsBOUND BUTTONHOLE
A bound buttonhole provides a professional touch to tailored garments like suits, coats and jackets.
-
Bound buttonhole Buttonhole Foot
-
Cut a patch of fabric 2.5 cm (1") wide, 1 cm (1/3") longer than the finished buttonhole.
Baste a patch so that the center line of patch will align with the center line mark of buttonhole.
a. Right side of fabric
b. Wrong side of patch
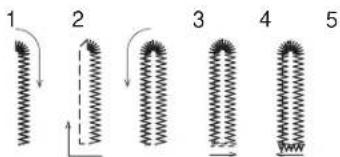
- Lower the Buttonhole Lever and sew buttonhole. (See previous pages)
Machine will sew the buttonhole in the order as shown and stop automatically after sewing.
-
Raise the presser foot to remove the fabric.
-
Carefully cut through the center of buttonhole to within 3mm of each end. Cut diagonally to each corner as shown. Remove the basting.
-
Draw the patch through the opening to the underside.
-
Turn the fabric and pull the patch through the buttonhole rectangle.
Press the patch.
c. Wrong side of fabric
d. Right side of patch
-
Turn the patch and press the side seam allowance.
-
Fold each side of the patch to form pleats that meet at the center of the buttonhole and cover the opening. Press the patch.
-
Turn the fabric to the right side and baste along the center of each fold.
a. Right side of fabric
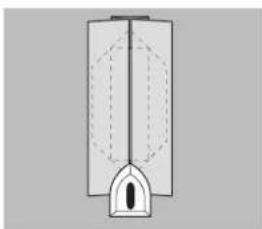
natural_image
Simple diagram with a vertical rectangle and a circle, no text or symbols present1
②
3
natural_image
Line drawing of a sewing machine needle stitching a metal sheet (no text or symbols)4

natural_image
Simple geometric diagram of a vertical rectangle with dashed internal lines, no text or symbols present.5
natural_image
Abstract geometric diagram showing a folded paper or sheet with internal lines (no text or symbols)6
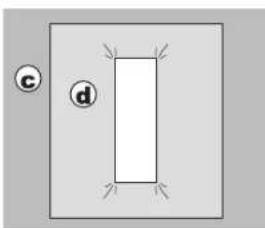
natural_image
Simple diagram with a rectangle and two labeled circles (c and d) on a gray background, no text or symbols present.7

natural_image
Pure diagram of a mechanical or architectural component without any text, numbers, or symbols8
natural_image
Pure diagram of a vertical structure with internal dashed lines and an arch, no text or symbols present.9

natural_image
Pure electrical circuit lines without any symbols
Sewing
- Fold the fabric and stitch along the seams on each side, just a needle width from the original stitching line. Remove the basting.
c. Wrong side of fabric
-
Fold the fabric along the buttonhole end and stitch triangular ends on the original stitching line.
-
Press and trim the patch to within 5 mm (3/16") of the stitching.
a. Right side of fabric
b. Wrong side of fabric
NOTE: When sewing lighter weight fabric, reinforce buttonhole area. Cut a patch of fusible interfacing 3 cm (1 1/4") wider and 2 cm (3/4") longer than the buttonhole. Fuse to wrong side over each buttonhole marking.
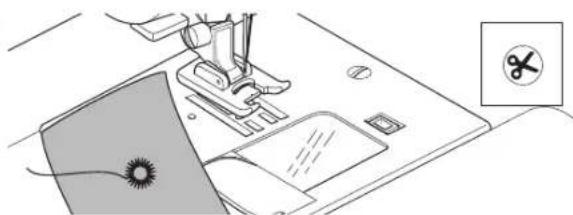
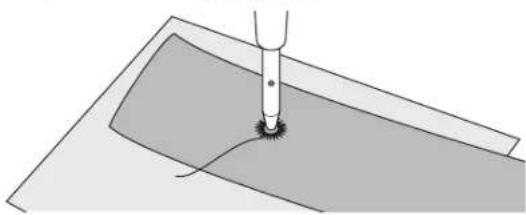
EYELET
This stitch pattern is used for making belt holes and other similar applications.
30 Eyelet
Satin Foot (B)
- Place the fabric under the presser foot and lower the presser foot. Start the machine. Machine will sew the eyelet and stop automatically.
- Press the Thread Cutter button and raise the presser foot.
- Make a hole in the center of the eyelet.
NOTE: Eyelet punch is not provided with this machine.
10
natural_image
Pure diagram of a mechanical or electrical component with no visible text, numbers, or symbols11

natural_image
Simple diagram showing a container with a triangular shape above a surface and a curved arrow indicating rotation (no text or symbols)12
natural_image
Simple diagram of two vertical rectangles with dashed internal lines, no text or symbols present
natural_image
Simple geometric diagram with two vertical lines and a circled number ①, no text or symbols present.
natural_image
Simple cross symbol inside a rounded rectangle, no text or labels present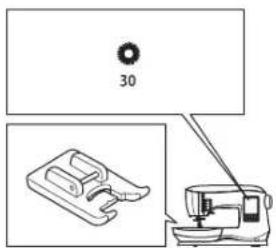

natural_image
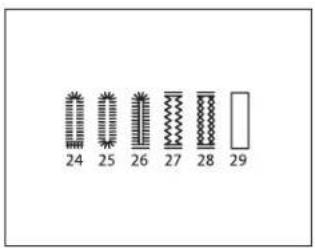
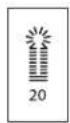
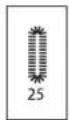
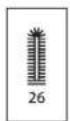
Three identical abstract starburst patterns arranged vertically (no text or symbols)1

2
natural_image
Line drawing of a sewing machine with a sewing machine and a sewing machine icon (no text or symbols)3
natural_image
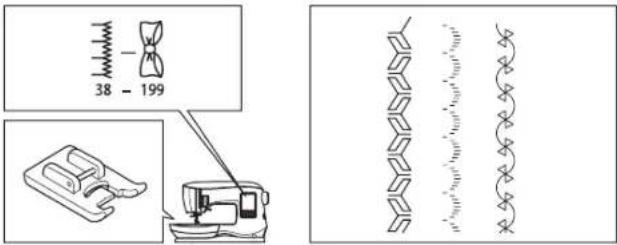
Diagram of a mechanical tool interacting with a surface, showing a circular feature and a base plate (no text or symbols)CONTINUOUS DECORATIVE PATTERN
Use the Satin Foot for continuous decorative stitch patterns. This foot has a groove on the underside to allow satin stitches (or other closely spaced stitches) to feed freely under the foot. No. 38-199 Satin Foot (B)
NOTE: The illustration to the right shows the look of the stitches when sewn continuously on the fabric.
To customize the continuous decorative stitch pattern, you may adjust the length and width of pattern. Experiment with fabric scraps until you achieve the desired length and width.
It is suggested that you use stabilizer on the backside of the fabric. This can help prevent stitches from puckering the fabric.
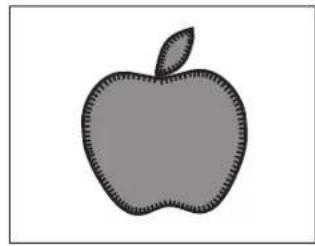
APPLIQUE
No. 162, 163, 164 Open Toe Foot

To prevent accidents, do not change the stitch width to wider than 5.0. Otherwise, needle could hit the presser foot and break.
-
Set the applique in place on the base fabric with temporary fabric spray adhesive or by using fusible web.
-
Sew with the right side of the stitch following the right edge of the applique as closely as possible.
When sewing sharp angles or curves, bring the needle to its lowest position and raise the presser foot. With the needle down in the fabric, turn the fabric.
NOTE: Applique can also be done with a satin stitch using the Satin Foot (page 24). It may be helpful to place a fabric stabilizer underneath your work, which may help prevent any fabric puckering.
FREE ARM SEWING
By simply taking off the removable storage compartment, you can access the free arm, making it easier to stitch hard-to-reach areas like pant hems, sleeve cuffs and children's clothing.
NOTE: Refer to page 8 for taking off the removable storage compartment.
natural_image
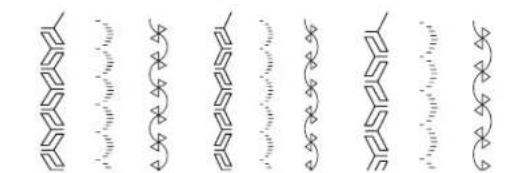
Repeating decorative line patterns with no text or symbols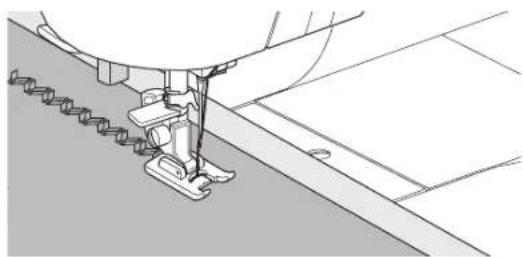
natural_image
Technical line drawing of a sewing machine needle stitching fabric (no text or symbols)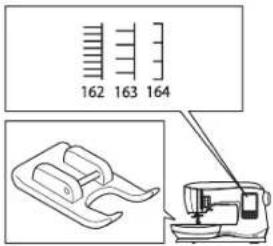
natural_image
Simple gray silhouette of an apple with a leaf, no text or symbols present.

natural_image
Line drawing of a sewing machine needle stitching fabric (no text or symbols)TWIN NEEDLE SEWING
Interesting effects can be produced by sewing decorative stitches using a twin needle. Try using two different colors of thread for even more variety. Always make a test sample first to help you determine the best settings for the stitch you are sewing.
NOTE: The illustration to the right shows an example of the look of the stitches when sewn with twin needle.
A twin needle is not provided with this machine.
All patterns except No. 11, 16-30 may be sewn with a twin needle.
All-Purpose Foot (A) or Satin Foot (B)
- Remove the single needle and insert twin needle.
- Thread the first thread as usual, following threading route.
- Thread the left needle eye by hand from front to back.
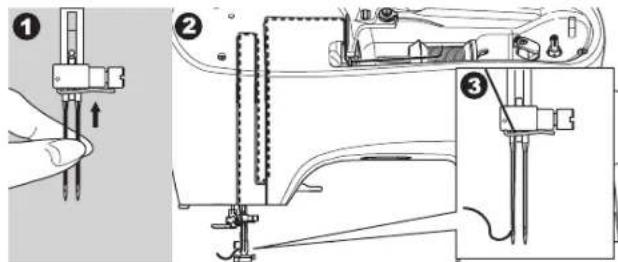
- Push the auxiliary spool pin with felt pad into the hole.
4
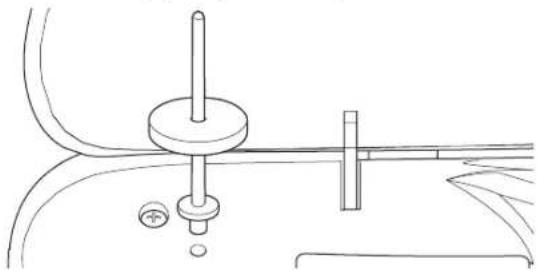
natural_image
Technical line drawing of a mechanical assembly with no visible text or symbols- Place second spool of thread.
- Hook second thread to the hook from rear opening.
- Thread the second thread same as first.
- For better sewing results, do not place the thread into the needle bar thread guide.
- Thread right needle eye by hand from front to back.
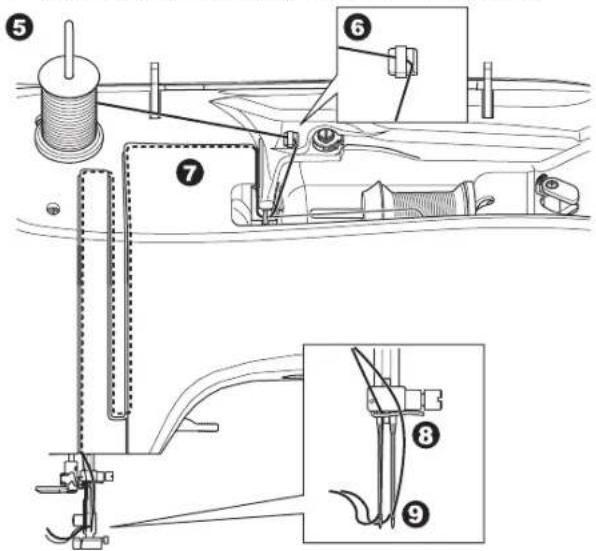
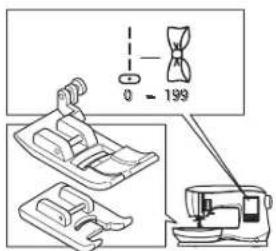
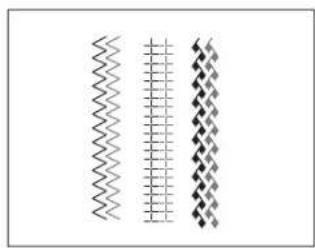
natural_image
Three vertical wavy line patterns in grayscale, no text or symbols present
To prevent accidents:
a. Use only SINGERbranded twin needles for this machine. Other needles may break.
b. The needle threader cannot be used. Thread each needle eye manually.
-
Press the Setting button.
-
Set the twin needle width to be used by pressing the + or - button.

Make sure to set the twin needle width correctly, or the needle may hit the needle plate and break.
- Press the Setting button again and select the pattern you desire.
Twin needle icon will appear on screen and the stitch width will be reduced automatically. - Always test the selected stitch by first turning the handwheel toward you slowly, to ensure that the swing of the needle does not hit the sides of the foot.
10
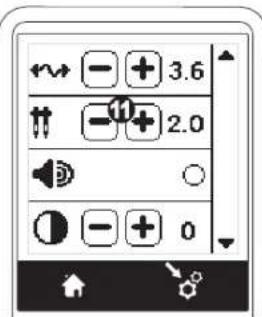
12

- Sew the stitches.
Twin needle mode will remain until you change the setting to “-.”. When the twin needle mode has been set back to “-.”, the twin needle icon will disappear from the main screen.
NOTE: Twin needle sewing may be also used with sequencing by setting to twin needle mode.
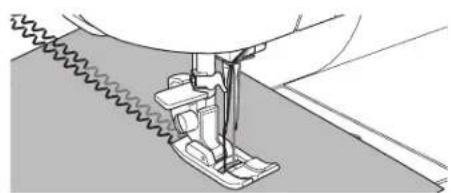
natural_image
Technical line drawing of a sewing machine needle stitching fabric (no text or symbols)SEQUENCE SEWING
You can combine stitch patterns and letter stitches into a sequence. There are 2 memories for storing stitch sequences. Each stitch sequence can contain up to 40 characters.
To enter the sequence mode, press the Sequence button at the home screen.
LCD will show the Sequence Screen.
Selecting Stitch Patterns
- Select the desired stitch patterns in the same manner as that used for normal sewing. (See page 14 for information on selecting stitch patterns)
The selected patterns will display at the top left side of the LCD screen.
- After selecting a pattern, use the same procedure to select the next stitch pattern. The selected pattern will be added, and it will display on the left side of the LCD screen below the previously selected pattern.
NOTE: Some patterns may not be combined into the sequence. If you select a pattern that cannot be combined, a message will appear on screen to alert you of this. Press the "√" button.
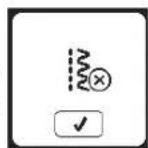
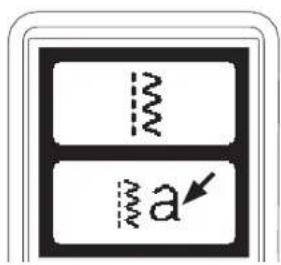
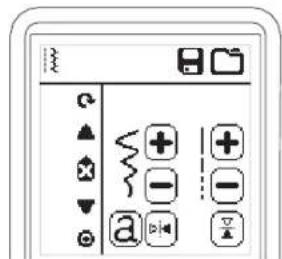
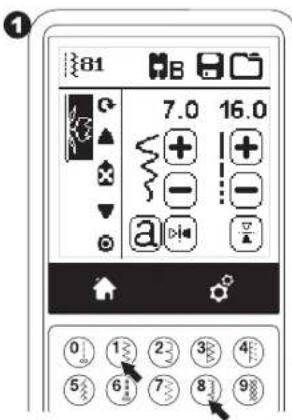
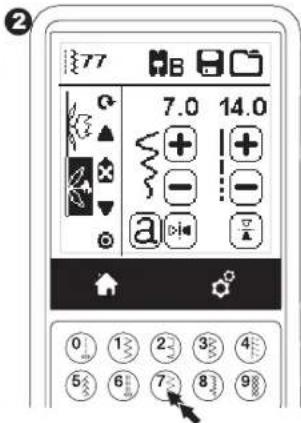
Selecting Letter Stitches
- To enter a letter stitch into the sequence, press the letter button on the LCD screen, which is indicated by a lower case 'a', as shown below.
The letter style selecting screen will appear. - Press the left button for the Block font, press the right button for the Cyrillic font. Selected button will be highlighted.
- Press the "√" button. Uppercase letter of selected style will appear.
- Press the desired letter directly. Press the character tabs (located at the bottom of the LCD screen) to change lower case, numbers, etc.
a. Uppercase letters
b. Lowercase letters
c. Numeric letters and special letters
-
Selected letters will appear on the top line of the LCD screen.
-
The Arrow buttons on top line will move the cursor.
- To insert the letter, move the cursor to the inserting point and select letter.
To delete the letter, move the cursor to the right side of the letter to be deleted, then press the Delete button (d).
To change the letter style, press the Style button (e).
- When sequencing of letters is completed, press the "√" button.
The Sequence Screen will appear again.

![8 Singer[ ] a b c d e f g g h i j k l m n o p q r s s t u ü v w x y z g ä ü , . _ A a 1 a ✓](/content/2026/04/640270/images/9f41c70db824176e103baa125b6476ae99938dc68dbcd9177c17f7013a5aced4.jpg)

Sequencing
When you return to the Sequence Screen, the last entered letter will be shown on the left side of the LCD screen.
NOTE:
-
If a letter is selected, which has a different base line (like "j" or "g"), the width and length of other letters will be adjusted to proportion automatically.
-
The sequence can contain a maximum of 40 patterns and letters. Message will appear when you reach the limit. Press the “√” button.
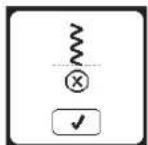
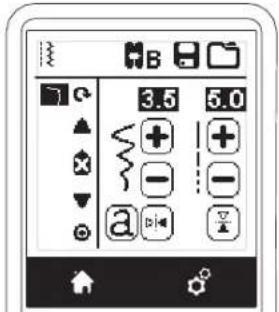
Shifting the Cursor (Highlight)
The cursor position is the highlighted pattern or letter. By pressing the Cursor buttons (a, b), cursor will shift up or down.
The cursor is used to check selected patterns, insert patterns, delete patterns or edit each pattern as described below. NOTE: When the cursor is shifted to the top of sequence, it will disappear. (c)
Checking Selected Patterns and Letters
As the length of the sequence increases, patterns and letters will disappear from view on screen.
You can check patterns and letters by moving the cursor upward or downward using the cursor buttons.
Inserting Pattern or Letter
Machine will insert a pattern or letter after the highlighted pattern or letter. Shift the cursor to highlight the pattern just before the desired position.
To insert a pattern, select pattern number. To insert a letter, press the Letter button and select or edit letter as described on the previous page.
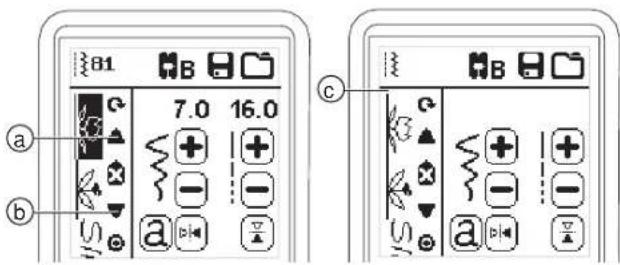
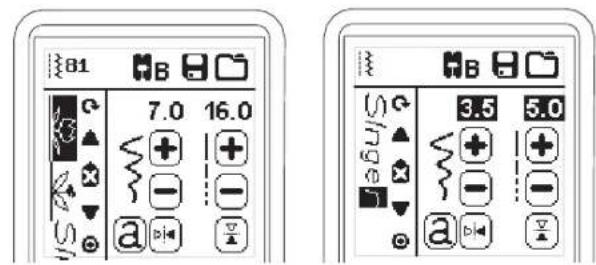
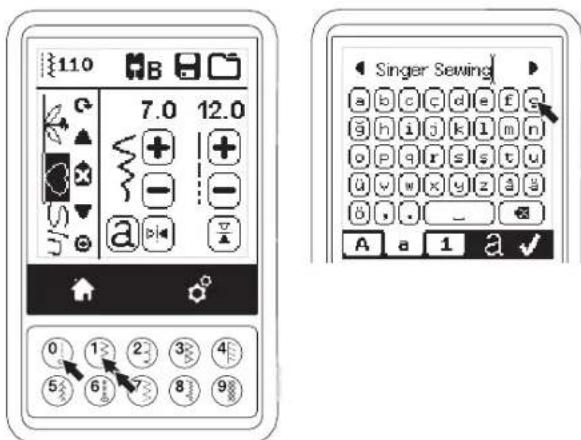
Deleting Pattern or Letter
- Shift the cursor to the pattern or letter you want to delete.
- Press the Delete button (d) quickly (less than 0.5 sec.). Machine will delete the pattern or letter and cursor will shift to next pattern or letter. (If it was last pattern or letter, cursor will shift to previous pattern or letter.)
- If you want to delete all patterns and letters, press and hold the Delete button 0.5 sec. or shift the cursor to the top of sequence and press the Delete button.
When deleting all patterns, a pop up will appear, press the "√" button. Machine will delete all selected patterns and letters. To cancel, press the "X" button.
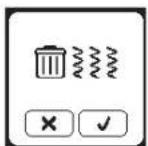
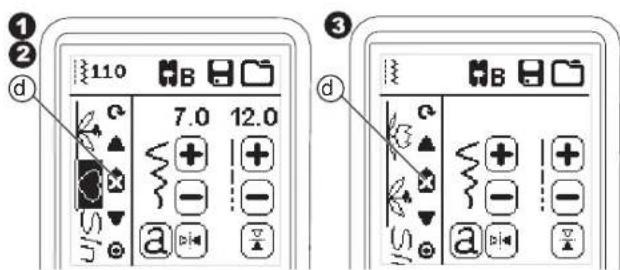
How to Edit a Letter in a Sequence
- Shift the cursor to the letter you want to edit.
- Press the Letter button.
The Letter Style Selecting Screen will appear. -
Select letter style and press the "√" button.
The Letter Sequence Screen will appear. -
Edit the letter as described on the previous page.
Adjusting Each Pattern or Letter in a Sequence
You can change the settings (stitch width/length, mirror/reverse) of each stitch pattern.
- Shift the cursor to the pattern you want to edit.
- Change the setting as normal setting. (Page 14)
Saving Sequence
You can save stitch sequences into memory. There are two separate memory folders for saving stitch sequences. Memorized sequences remain in the memory if you turn off the machine.
To Memorize or Save a Sequence
- Press the Memory button after you have selected patterns or letters.
- Select one of the two memories by pressing directly. (To cancel, press "X" button)
NOTE: If the selected folder already has a memorized sequence in it, a message will appear asking to overwrite the previous sequence or not. To overwrite (deleting previous sequence), press the "√". To cancel (exit), press the "X". The message will disappear.
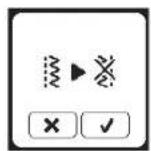
1
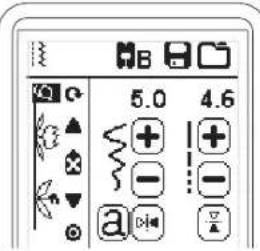
2
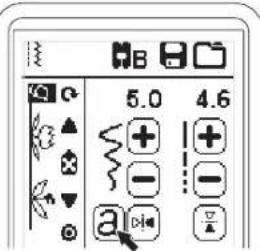
3
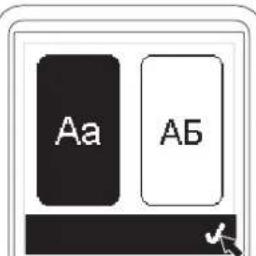
4
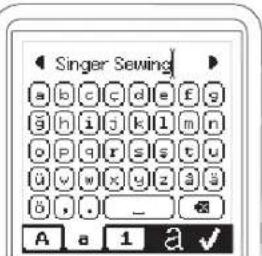
1

2
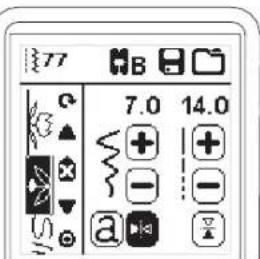
1

2

3

natural_image
Simple line drawing of a vertical structure with two labeled parts (1 and 2), no text or symbols present.4
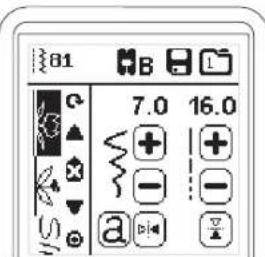

Sequencing
To Recall Memorized Sequence
- Press the Load button on the Sequence Screen.
-
The memories are indicated by numbers. Press the desired sequence/memory.
-
When the selected file number is highlighted, press the "√" button.
- Recalled sequence is shown on the left side of LCD. You can now sew the recalled sequence.
NOTE: If another sequence has been created or loaded before loading from memory, the loaded sequence will be added at the cursor position.
1
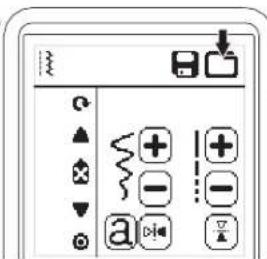
2
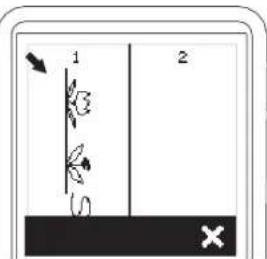
3

4

Sew the Sequence
After selecting stitches for a sequence, the sequence will sew repeatedly.
- Attach the Satin Foot when sewing decorative & letter stitches.
- Lower the presser foot and start sewing. Machine will start sewing from first entered pattern, and sew the sequence repeatedly.
1
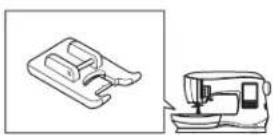
2
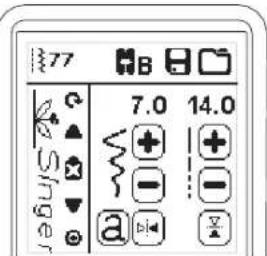
NOTE: By pressing the Thread Cutter button while sewing, machine will stop at the end of sequence and cut threads.
Single Sequence Mode
By pressing the Single Sequence button, the icon will change to a circle and activate the single sequence mode. This mode has two functions.
- Adjustments as one stitch pattern: The value of stitch length and width are now common for all stitch patterns in the sequence. You can change the length/width and mirror/reverse of all stitches as one stitch pattern.
- Sewing one single time: The stitch sequence will sew one time and then stop at the end of the sequence.
NOTE: In this mode, the Delete button is not activated. Press the Single Sequence button again to activate.
1

Sewing Sequence from the Beginning
Whenever pressing the Restart button, machine will start sewing sequence from beginning.

Pop-up Messages
Raise the Needle
If the needle is in lowered position and need to be raised before function can be executed, this pop-up message is shown. Raise the needle and press the √ button to close the pop-up message.
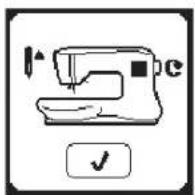
Machine Set for Twin Needle
This pop-up message will appear when Twin Needle program is activated. Check the needle and press the "√" button to continue.
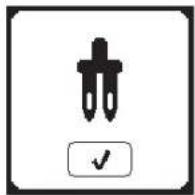
Raise the Presser Foot
This pop-up will appear when the function has chosen that the presser foot must be up position. Press the "√" button and raise the presser foot lifter.
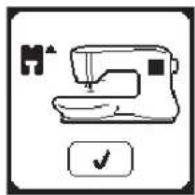
This Stitch Cannot Be Sewn with Twin Needle
This message will appear when a stitch that cannot be used with twin needle, is selected. Press the "√" button and select another pattern or reset the twin needle program.
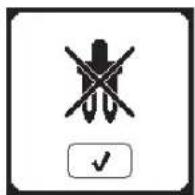
Lower the Presser Foot
This pop-up will appear when you start the sewing without lowering the presser foot. Press the "√" button and lower the presser foot lifter to start to sew.
Stitch Width Limited for Twin Needle
This message will appear when stitch width is adjusted to the limit. Press the “√” button to continue.

Calibration Failed
If calibration has not completed correctly, pop-up message will appear. Press the "√" button and retry the calibration.

Lower the Feed Teeth Lever
When sewing on a button, this pop-up will appear. Lower the feed teeth lever and press the "√" button to continue.
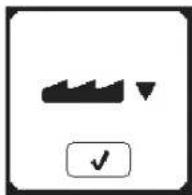
Thread Jam
If upper or bobbin thread is jammed under the needle plate, machine will stop and pop-up this message. Remove the needle plate (see page 45) Remove the thread jam and reset needle plate. Press the "√" button.
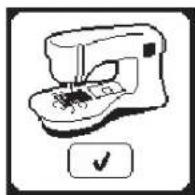
This Stitch Cannot be Combined
Some patterns may not be combined into the sequence. If you select a pattern that cannot be combined, a message will appear on screen to alert you of this. Press the “√” button.
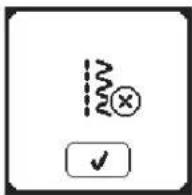
Main Motor Overload
If you are sewing on very heavy fabric or if the machine is blocked when sewing, the main motor can get overloaded and the machine will stop sewing. The pop-up message will close when the main motor and power supply are secure.
Program Too Long to Add More Stitches
The sequence can contain a maximum of 40 patterns and letters. Message will appear when you come to the limit. Press the "√" button.
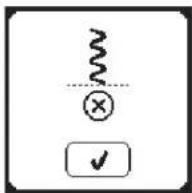
Delete Program
When deleting all patterns, a pop up will appear, press the "√" button. Machine will delete all selected patterns and letters. To cancel, press the "X" button.
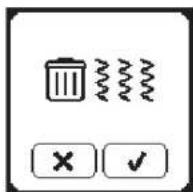
Overwrite
If the selected folder already has a memorized sequence in it, a message will appear asking to overwrite the previous sequence or not. To overwrite (deleting previous sequence), press the "√". To cancel (exit), press the "X". The message will disappear.
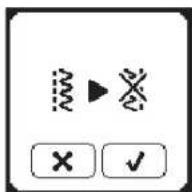

To reduce the risk of electric shock, disconnect the power line plug from the electric outlet before carrying out any maintenance.
CLEANING
If lint and bits of thread accumulate in the hook, this will interfere with the smooth operation of the machine. Check regularly and clean the stitching mechanism as needed.
NOTE:
* An LED lamp is used to illuminate the stitching area. It does not require replacement. In the unlikely event it does not light up, go to www.singer.com for more information about machine service.
* There is no need to lubricate this machine.
Bobbin Holder
Remove the bobbin cover and bobbin. Clean the bobbin holder with a brush.
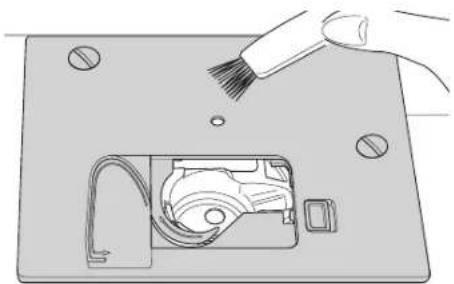
natural_image
Illustration of a hand using a brush to clean or store electronic components on a base (no text or symbols visible)Hook Race and Feed Teeth
- Remove the needle, presser foot and holder. Remove the bobbin cover and bobbin. Remove the screws holding the needle plate.
- Remove the needle plate by lifting up the right side of the plate.
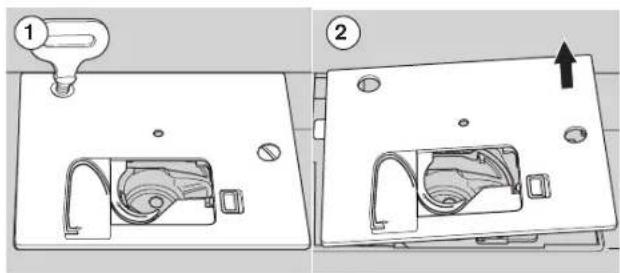
- Lift up the bobbin holder and remove it.

To prevent accidents, do not touch the thread cutter unit (a).
- Clean the hook race, feed teeth and bobbin holder with a brush. Also clean them, using a soft, dry cloth.
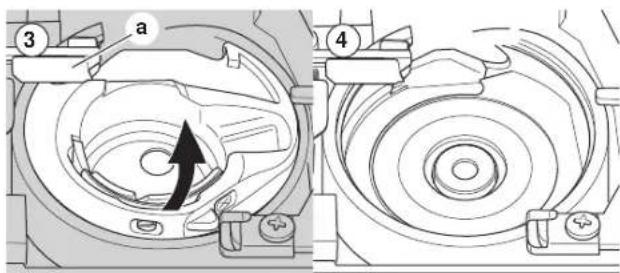
-
Replace the bobbin holder into the hook race so that the tip (b) fits to the stopper (c) as shown.
-
Replace the needle plate inserting the hook into the machine.
Replace the screws and tighten.

| PROBLEM | CAUSE | CORRECTION | Page |
| Upper thread breaks | Machine not properly threaded.Thread entwined around bobbin.Needle inserted incorrectly.Thread tension too tight.Thread of incorrect size or poor quality. | Re-thread machine.Remove entwined thread and re-thread bobbin.Re-insert needle.Readjust thread tension.Choose correct thread. | 19189159 |
| Lower thread breaks | Bobbin threaded incorrectly.Bobbin wound unevenly or too full.Dirt or lint in the bobbin holder. | Re-thread the bobbin.Rewind the bobbin.Clean the holder. | 181745 |
| Machine skips stitches | Needle inserted incorrectly.Bent or blunt needle.Incorrect size of needle.(on stretch fabric) | Re-insert needle.Insert new needle.Choose correct size needle for fabric.(use stretch needle) | 999 |
| Fabric puckers | Machine not properly threaded.Bobbin threaded incorrectly.Blunt needle.Thread tension too tight. | Re-thread machine.Re-thread the bobbin.Insert new needle.Readjust thread tension. | 1918915 |
| Machine makes loose stitches or loops | Bobbin threaded incorrectly.Machine not properly threaded.Tension not adjusted properly. | Re-thread the bobbin.Re-thread machine.Readjust thread tension. | 181915 |
| Stitch pattern is distorted | Presser foot is not suited for the pattern.Thread tension is not balanced. | Attach correct foot.Adjust the thread tension. | 815 |
| Threader does not thread through needle eye | Needle is not raised to highest position.Needle inserted incorrectly.Bent needle. | Raise the needle.Re-insert needle.Insert new needle. | 2099 |
| Machine does not feed properly | Feed teeth are lowered.Stitch length not suitable for fabric.Lint and dust accumulated around feed dog. | Raise the feed teeth.Adjust stitch length.Clean the feed dog area. | 121445 |
| Needle breaks | Fabric pulled while sewing.Needle is hitting the presser foot.Needle inserted incorrectly.Incorrect size needle or thread for fabric being sewn. | Do not pull fabric.Select correct foot and pattern.Re-insert needle.Choose correct size needle and thread. | 2124-99 |
| Machine runs with difficulty | Dirt or lint accumulated in the hook race and feed dog. | Remove the needle plate and bobbin holder and clean the hook race. | 45 |
| Machine will not run | Cord not plugged into electrical outlet.Power switch is not turned on.Presser foot is not lowered. | Insert plug fully into outlet.Turn on the switch.Lower the foot. | 101012 |
| Rated voltage 100-240V ~50Hz | |
| Nominal consumption 55W | |
| Light LED | |
| Sewing speed 800 rpm maximum | |
| Machine dimensionsLength (mm) | 241 |
| Width (mm) | 512 |
| Height (mm) | 310 |
| Net weight (kg) | 8.4 |
| Foot ControlModel | C-9001 |
| Rated voltage | DC 15V, max. 3mA |
- The technical specifications and this Instruction manual can be changed without prior notice.
natural_image
Line drawing of a sewing machine with control panel and buttons (no text or symbols)
SINGER®


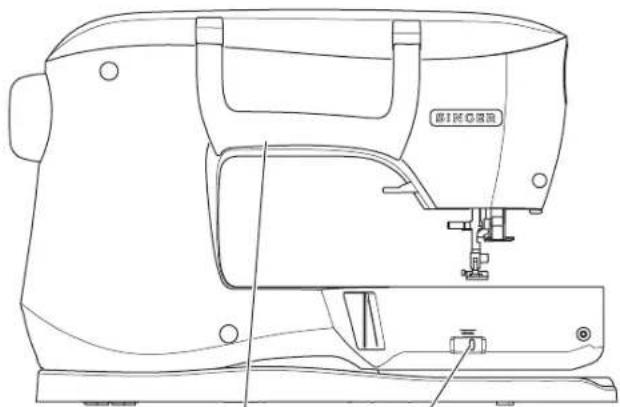
natural_image
Line drawing of a sewing machine with no visible text or symbols45 46
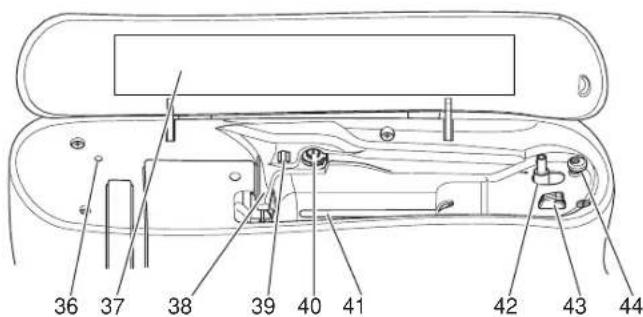
Partes Principales
AJUSTANDO LA MÁQUINA
natural_image
Technical line drawing of a boat hull showing top and side views with directional arrows indicating movement (no text or symbols)CAMBIANDO EL PRENSATELAS
natural_image
Line drawing of a sewing machine with control panel and buttons (no text or symbols)
natural_image
Diagram of a sewing machine needle and foot, showing blade and handle components (no text or labels)
natural_image
Line drawing of a sewing machine needle and base (no text or symbols)
natural_image
Line drawing of a sewing machine with a sewing machine needle inserted into the base (no text or symbols)
natural_image
Technical line drawing of a mechanical device with no visible text or symbols3
natural_image
Technical line drawing of a mechanical component with no visible text or symbols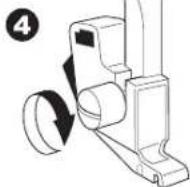
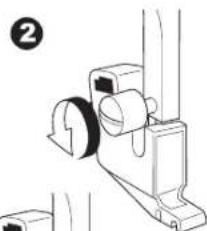
natural_image
Technical line drawing of a mechanical assembly with no visible text or symbols


TABLA DE HILO, TELA Y AGUJA
natural_image
Line drawing of a sewing machine on a table (no text or symbols)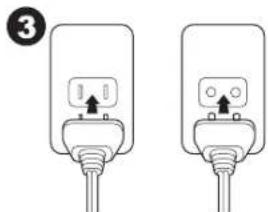
natural_image
Two identical electrical plug connectors with wires, no text or symbols visible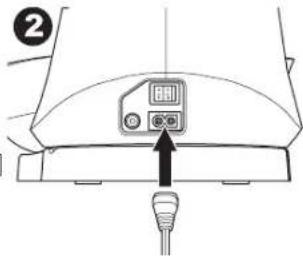

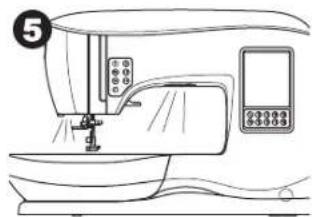
natural_image
Line drawing of a sewing machine with control panel and buttons (no text or symbols)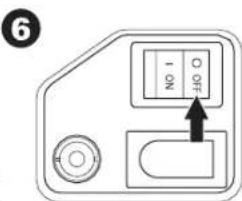
natural_image
Line drawing of a sewing machine on a workbench (no text or symbols)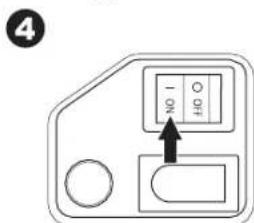
Ajustando la Máquina
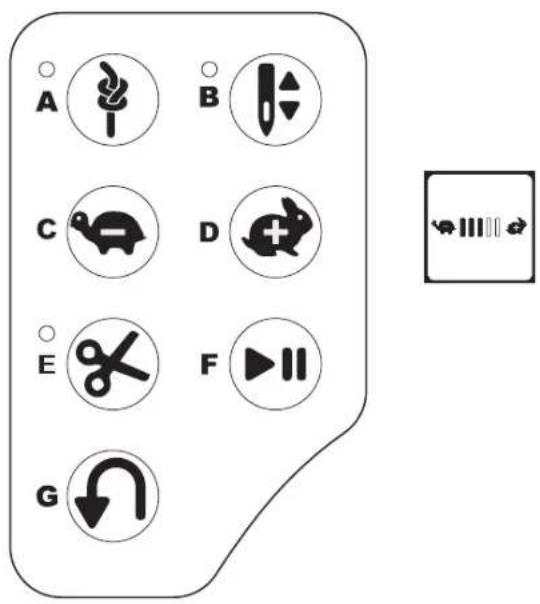
natural_image
Technical line drawing of a sewing machine needle with control panel and base (no text or symbols)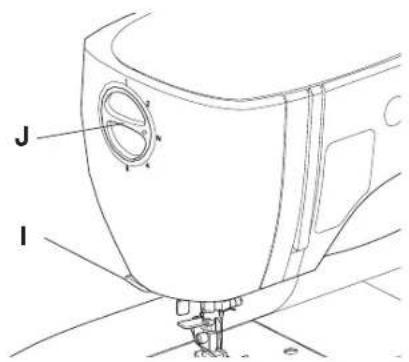
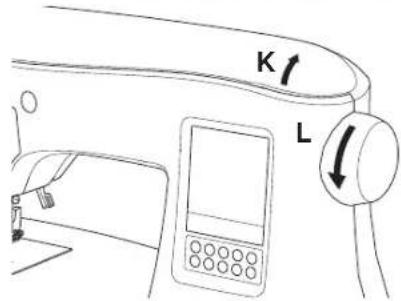
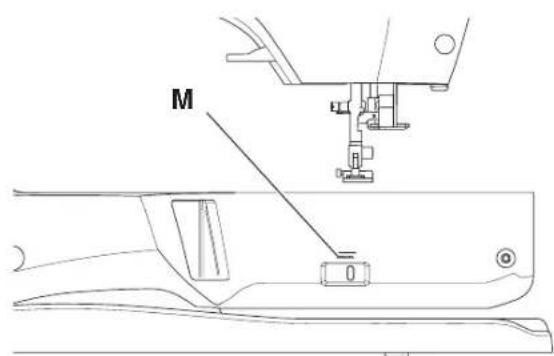
natural_image
Technical line drawing of a mechanical assembly with labeled component 'N' (no text or symbols beyond label)PANTALLA TOUCH
Pantalla Inicial (A)
natural_image
Technical line drawings of a structural joint with spring and anchor elements, showing different connection types (no text or symbols)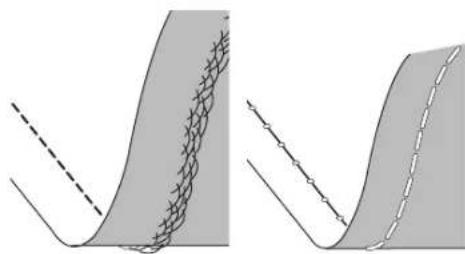
natural_image
Two diagrams showing a curved surface with a meshed pattern and dashed lines, no text or symbols present.Aguja Doble
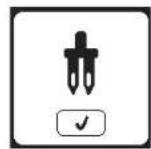
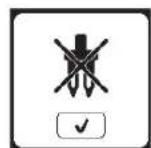
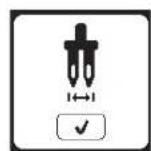


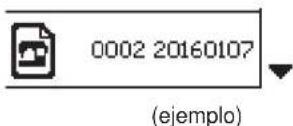
AJUSTANDO LA MÁQUINA
Insertando la Bobina
AJUSTANDO LA MÁQUINA

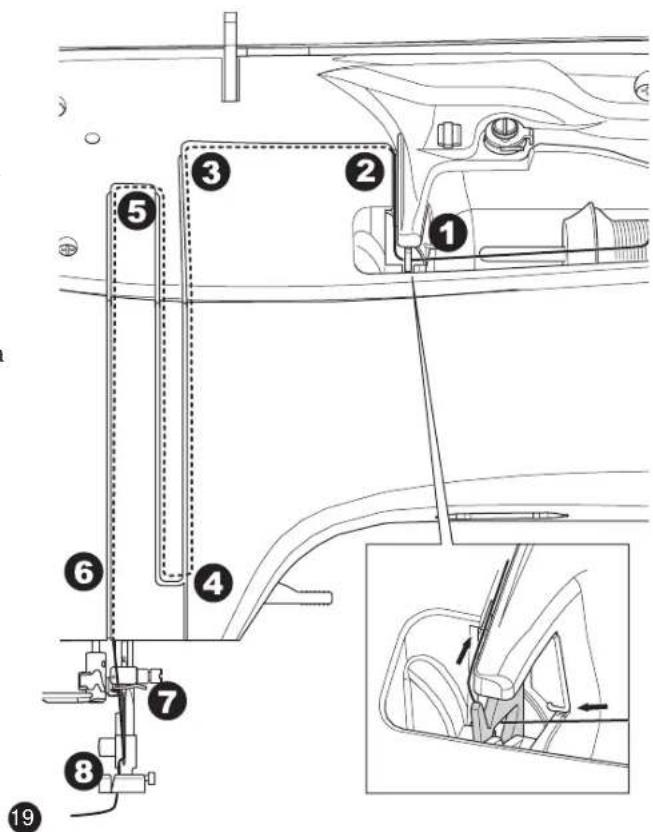

natural_image
Mechanical diagram showing a lever mechanism with arrows indicating motion (no text or symbols)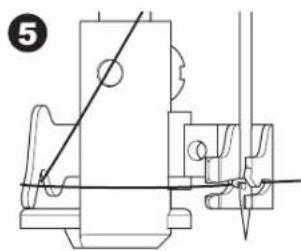
natural_image
Technical line drawing of a mechanical assembly with no visible text or symbols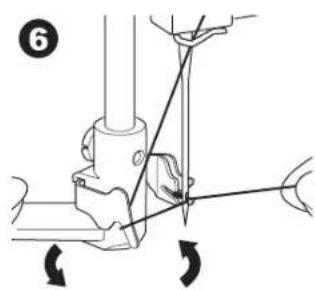

natural_image
Line drawing of a sewing machine needle and base (no text or symbols)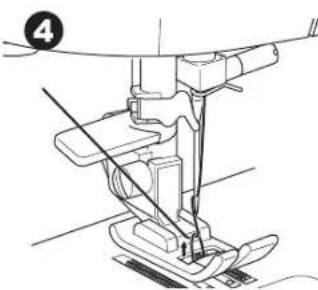
natural_image
Technical line drawing of a sewing machine needle and foot (no text or symbols)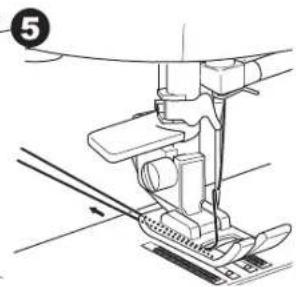
natural_image
Technical line drawing of a sewing machine needle and base (no text or symbols)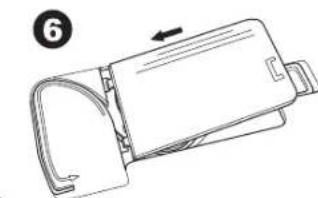
natural_image
Line drawing of a mechanical device with an arrow indicating direction (no text or symbols)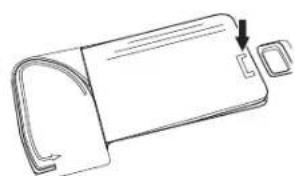
natural_image
Line drawing of a rectangular device with a curved handle and two small square buttons, one pointing downward (no text or symbols)natural_image
Simple diagram with a play button and a curved arrow on a gray background (no text or symbols)natural_image
Simple diagram with a dashed vertical line and a circular symbol (no text or labels)Girando en Esquinas
natural_image
Line drawing of hands operating a sewing machine on a fabric (no text or symbols)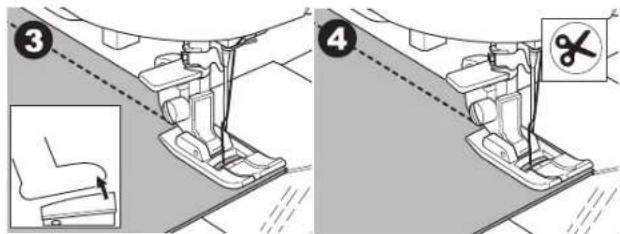
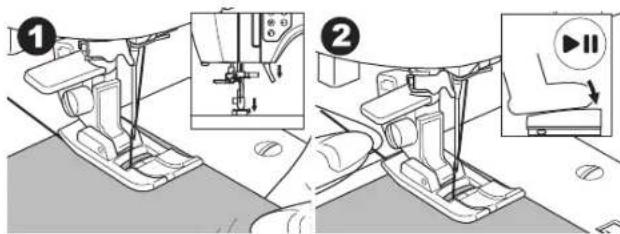
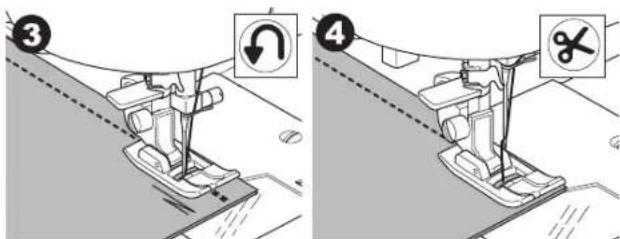
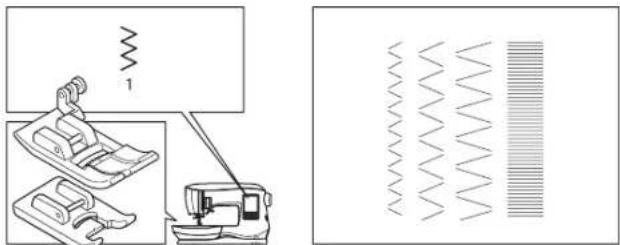
natural_image
Diagram showing a sewing machine and a corresponding waveform pattern (no text or symbols)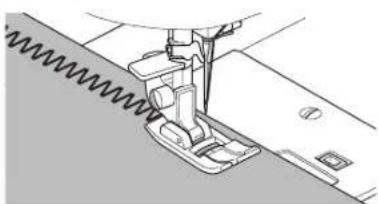
natural_image
Technical line drawing of a sewing machine needle stitching fabric (no text or symbols)Puntada Satín
natural_image
Technical line drawing of a sewing machine needle stitching fabric (no text or symbols)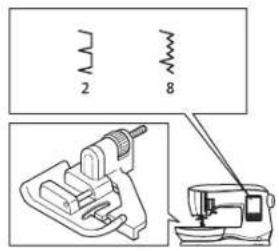

natural_image
Pure diagram of two mechanical joint configurations without any text, numbers, or symbols


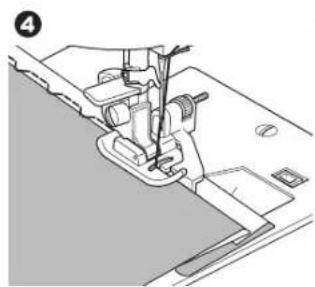
natural_image
Technical line drawing of a sewing machine needle and base (no text or symbols)
RIBETEADO Y SOBREHILADO
natural_image
Line drawing of a sewing machine needle stitching fabric (no text or symbols)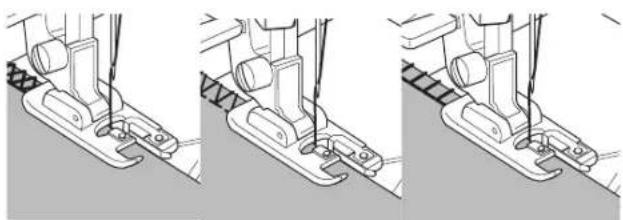
natural_image
Three-step line drawing of a sewing machine's base and side, showing thread positioning and mounting details (no text or symbols)natural_image
Technical illustration of a sewing machine needle and foot, showing mechanical components without any text or symbols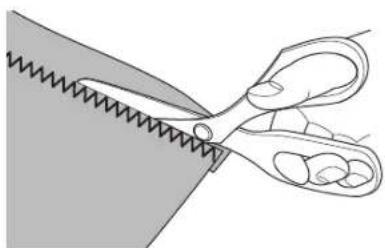
natural_image
Illustration of a pair of scissors cutting a piece of material (no text or symbols)PARCHES
natural_image
Grid pattern with alternating shaded and unshaded squares (no text or symbols)
natural_image
Blank gray document with a dashed vertical line on the right side (no text or symbols)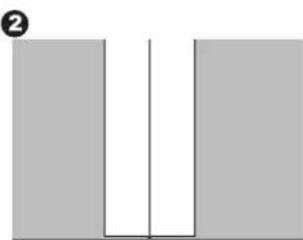
natural_image
Simple diagram of two vertical bars with a central vertical line and a horizontal line, no text or symbols present.
natural_image
Technical illustration of a sewing machine needle stitching fabric (no text or symbols)
natural_image
Pure diagram of mechanical or electrical components without any text, numbers, or symbols
natural_image
Diagram of a ring-shaped object with dashed internal lines, no text or symbols present
natural_image
Diagram of a U-shaped object with internal vertical seam and dashed line, no text or symbols present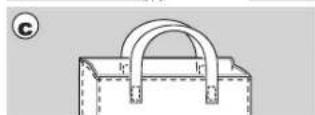


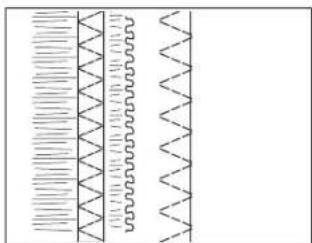
natural_image
Pure diagram of parallel wavy lines with horizontal hatching, no text or symbols present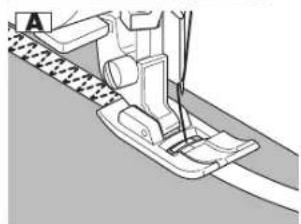
natural_image
Mechanical sewing machine diagram showing needle and base components (no text or labels)
natural_image
Technical line drawing of a sewing machine needle and foot (no text or symbols)HILVANADO
natural_image
Pure geometric diagram with lines and dots, no text or symbols present


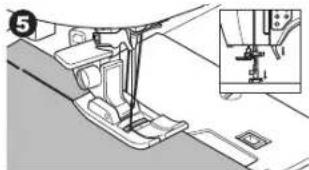
natural_image
Mechanical assembly diagram showing a foot pushpin and base plate assembly (no text or symbols)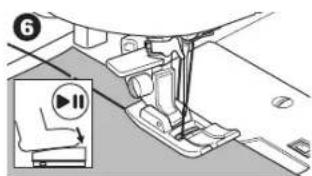
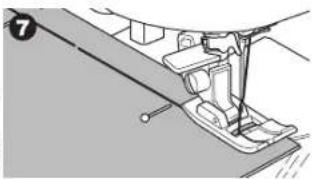
natural_image
Mechanical assembly diagram showing a lever mechanism with no visible text or symbols

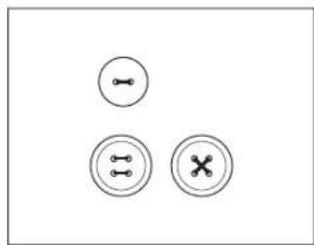
natural_image
Three circular icons with internal symbols: two connected dots and a cross, arranged in a triangular pattern (no text or labels)


Cosiendo
natural_image
Pure mechanical diagram showing a bracket and a circular component with a curved arrow indicating rotation (no text or symbols)5

6

natural_image
Mechanical sewing machine needle stitching a fabric (no text or symbols visible)7

natural_image
Technical line drawing of a sewing machine needle and fabric (no text or symbols)8

9
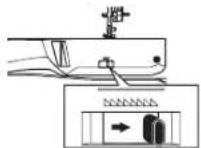

natural_image
Close-up of hands operating a sewing machine needle (no text or symbols visible)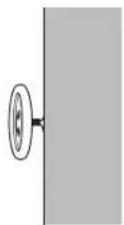
PEGANDO CIERRES
Inserción Centrada
natural_image
Technical diagram showing a sewing machine with a vertical dashed line and a separate mechanical component (no text or symbols)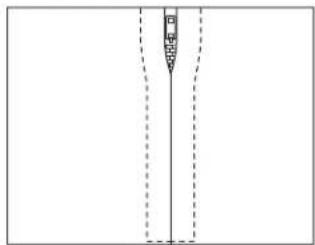
natural_image
Pure diagram of a vertical structure with dashed lines indicating hidden edges (no text or symbols)
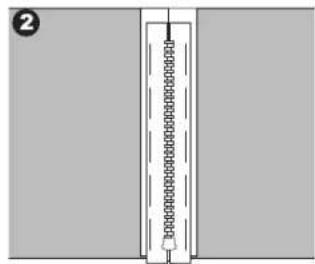
natural_image
Pure diagram of a vertical structure with internal components, no text or symbols present
natural_image
Illustration of two foot push-ups with guide legs and feet, showing alignment lines (no text or symbols)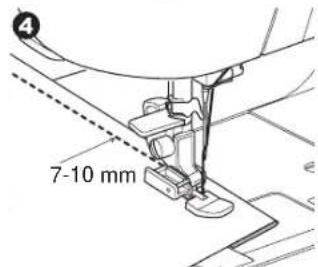
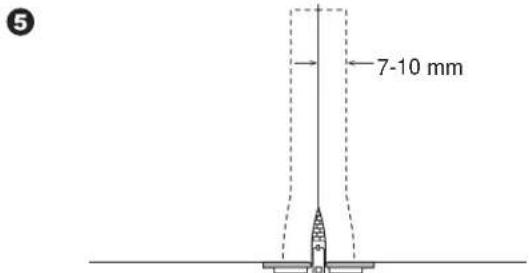

natural_image
Technical line drawing showing a sewing machine and its foot assembly (no text or symbols)
natural_image
Pure diagram of a vertical line with dashed lines and a small shaded region, no text or symbols present.Inserción Traslapada
natural_image
Simple diagram showing a vertical line with a chain of chains and a small object on the right side (no text or symbols)Cosiendo

natural_image
Two-step diagram showing a sewing machine's base and side view, with no text or symbols present.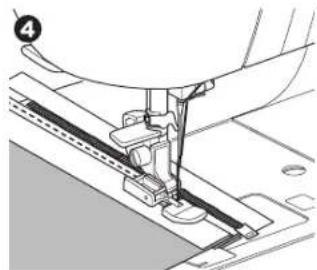
natural_image
Mechanical sewing machine needle stitching a fabric (no text or symbols visible)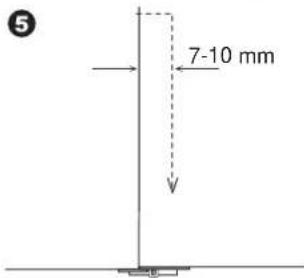
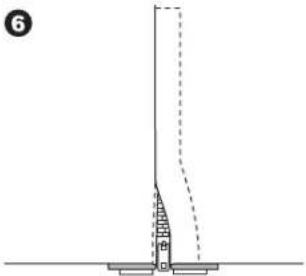
natural_image
Pure technical diagram showing a vertical structure with a base and dashed line, no text or symbols presentnatural_image
Technical line drawing of a sewing machine needle stitching fabric (no text or symbols)ACOLCHADO
natural_image
Geometric pattern composed of shaded squares and triangles with dashed lines, no text or symbols presentnatural_image
Technical diagram of a mechanical assembly with no visible text or symbolsPuntada Acolchado Apariencia Manual (No. 160)
natural_image
Blank image with a vertical line of small black dots on the left side (no text or symbols)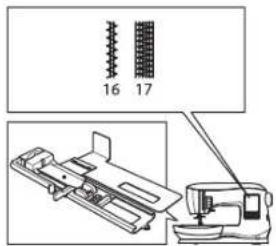
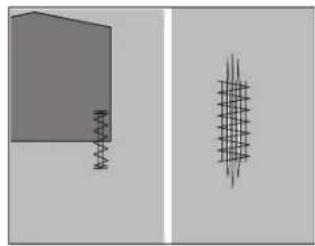
natural_image
Two abstract geometric shapes: a gray rectangular block and a vertical line with a grid-like pattern on the right (no text or symbols)
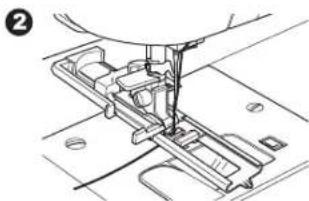
natural_image
Mechanical assembly diagram showing a sewing machine needle inserted into a component (no text or symbols visible)
natural_image
Mechanical assembly diagram showing a sewing machine needle inserted into a component (no text or symbols visible)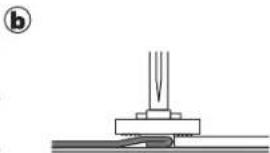
natural_image
Pure mechanical assembly diagram showing a base with a spring and a pointed tip, no text or symbols present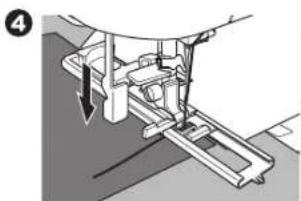
natural_image
Mechanical assembly diagram showing a lever mechanism with arrows indicating motion (no text or symbols present)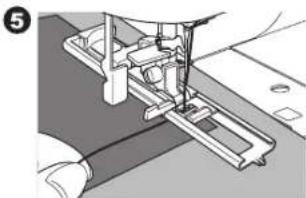
natural_image
Mechanical assembly diagram showing a sewing machine needle inserted into a base (no text or symbols visible)
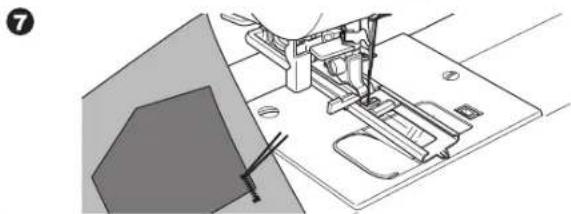
natural_image
Technical line drawing of a sewing machine with base plate and clasp mechanism (no text or symbols)PEGADO DE BOTONES
natural_image
Mechanical assembly diagram showing a component with a circular pin and arrow indicator (no text or symbols)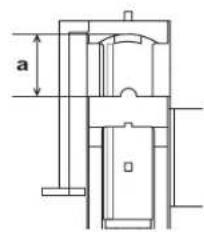
3

natural_image
Technical line drawing of a sewing machine needle and base plate (no text or symbols)4

natural_image
Technical illustration of a sewing machine needle insertion operation, showing mechanical components and tool path (no text or symbols)5
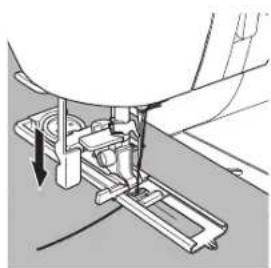
natural_image
Mechanical assembly diagram showing a sewing machine needle inserted into a base plate (no text or symbols visible)6

natural_image
Mechanical assembly diagram showing a sewing machine needle inserted into a base plate (no text or symbols visible)natural_image
Four diagrams showing spring-like structures with arrows indicating direction, no text or symbols present;
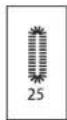
[Non-Text]
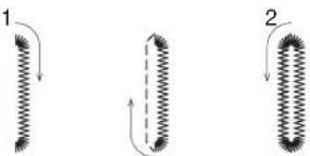
natural_image
Three diagrams showing coiled spring-like structures with arrows indicating direction (no text or symbols)
4

4
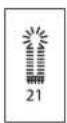

natural_image
Four diagrams showing spring-like structures with arrows indicating direction, no text or symbols present3
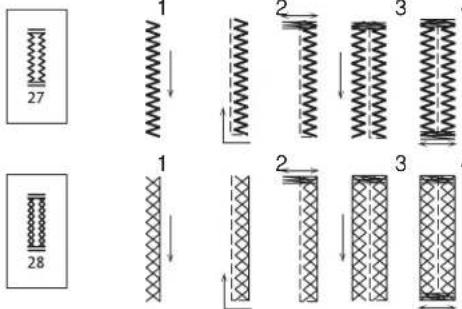
[Non-Text]

3
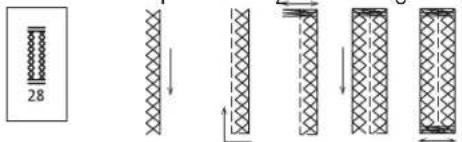
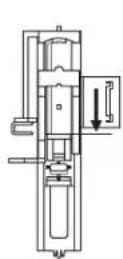
9

natural_image
Illustration of a medical procedure showing a tool tip interacting with a patient's hand (no text or symbols present)natural_image
Technical line drawing of a mechanical device with an upward arrow indicating motion or force (no text or symbols)
natural_image
Pure mechanical assembly diagram without any text, numbers, or symbolsOJAL ATADO
natural_image
Simple diagram with a vertical rectangle and a circle, no text or symbols present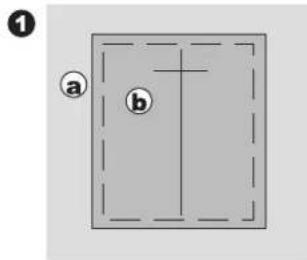
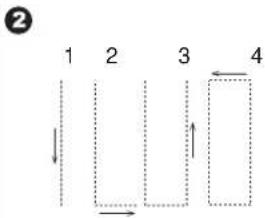
flowchart
graph TD
    A["1"] --> B["2"]
    B --> C["3"]
    C --> D["4"]
    style A fill:#f9f,stroke:#333
    style B fill:#ccf,stroke:#333
    style C fill:#cfc,stroke:#333
    style D fill:#fcc,stroke:#333
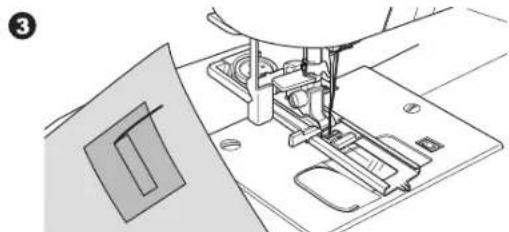
natural_image
Line drawing of a sewing machine needle stitching on a base (no text or symbols)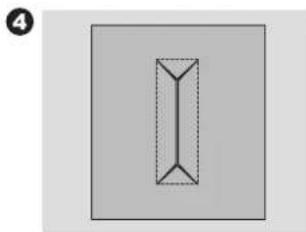
natural_image
Simple geometric diagram of a vertical rectangle with dashed internal lines, no text or symbols present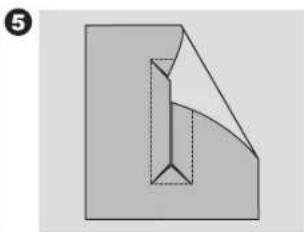
natural_image
Abstract geometric diagram with a folded paper-like shape and dashed internal lines (no text or symbols)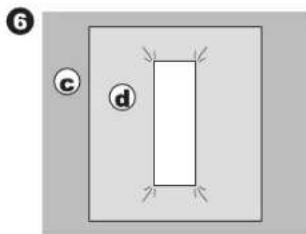
natural_image
Simple diagram with a rectangle and labeled circles (c and d) on a gray background, no text or symbols present.
natural_image
Pure mechanical diagram showing a bracket and hanging part without any text or symbols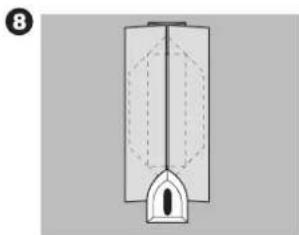
natural_image
Diagram of a vertical cylindrical structure with internal dashed lines and a small protruding part, no text or symbols present.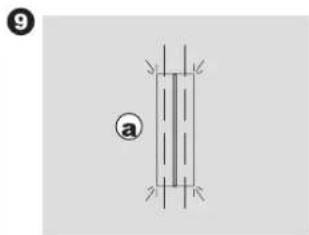
natural_image
Pure diagram of a vertical structure with internal lines and corner markers, no text or symbols present
Cosiendo
natural_image
Pure diagram of a mechanical or electrical component with no visible text, numbers, or symbols11

natural_image
Simple diagram showing a container with a curved arrow and a small object above it, no text or symbols present.12

natural_image
Simple diagram of two vertical rectangles with dashed internal lines, no text or symbols present
natural_image
Simple geometric diagram with two vertical lines and corner markers, no text or symbols present
natural_image
Simple geometric diagram with a vertical dashed line and cross, no text or symbols present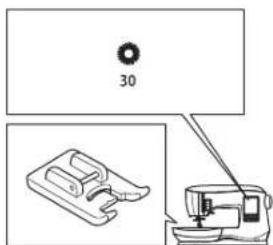

natural_image
Three identical starburst patterns arranged vertically (no text or symbols)1

2
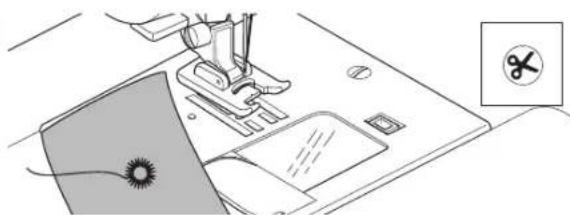
natural_image
Illustration of a sewing machine with a sewing machine and a sewing machine base, showing no text or symbols.3
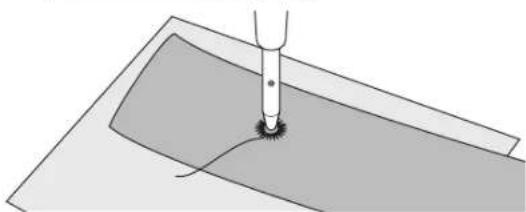
natural_image
Diagram of a mechanical component with a base and central hub, showing no text or symbolsPATRÓN DECORATIVO CONTÍNUO
natural_image
Abstract decorative pattern with repeating zigzag motifs (no text or symbols)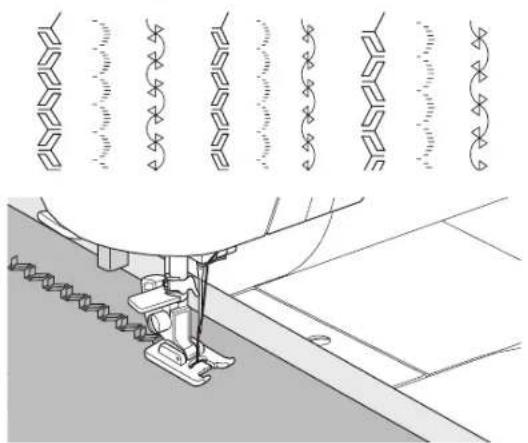
natural_image
Technical line drawing of a sewing machine needle stitching fabric, with decorative patterned lines above (no text or symbols)
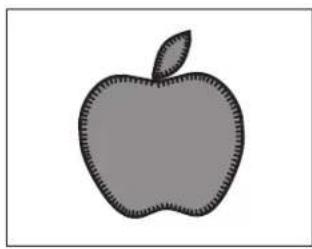
natural_image
Simple gray silhouette of an apple with a leaf, no text or symbols present.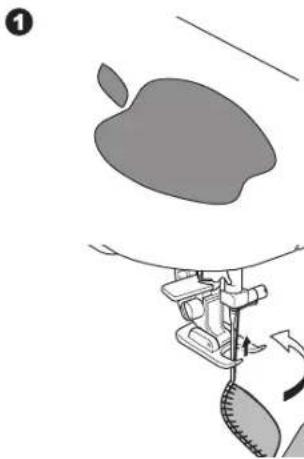
natural_image
Illustration of a sewing machine needle stitching a fabric, with no visible text or symbols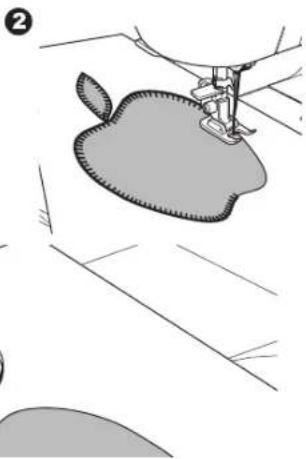
natural_image
Illustration of a sewing machine needle stitching an apple-shaped fabric (no text or symbols)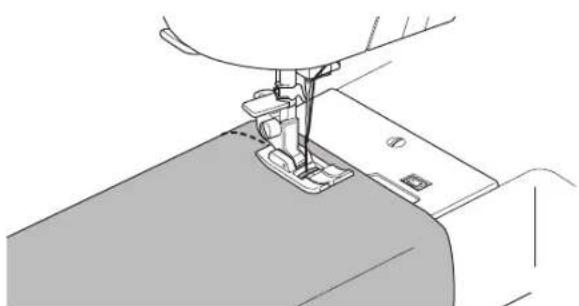
natural_image
Line drawing of a sewing machine needle stitching fabric (no text or symbols)COSTURA CON AGUJA DOBLE
natural_image
Technical line drawing of a mechanical assembly with no visible text or symbols
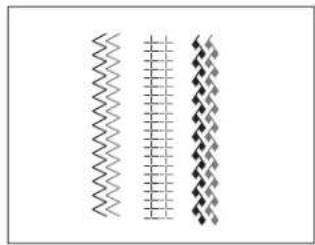
natural_image
Three vertical wavy lines with diamond patterns, no text or symbols present
Para evitar accidentes:
- Cosa las puntadas.
natural_image
Technical line drawing of a sewing machine needle stitching fabric (no text or symbols)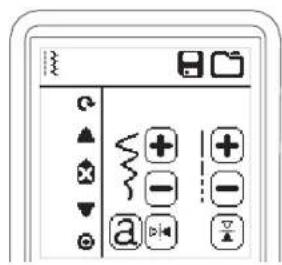

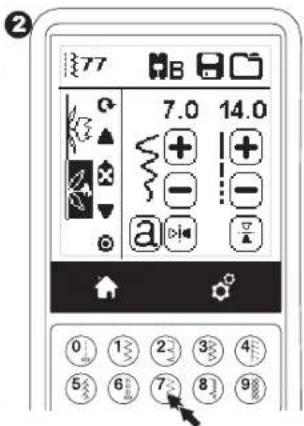
2
3
natural_image
Simple line drawing of a vertical structure with two labeled points (1 and 2), no text or symbols present.4

Secuenciado
2
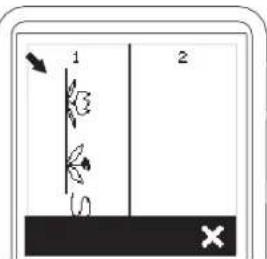
3
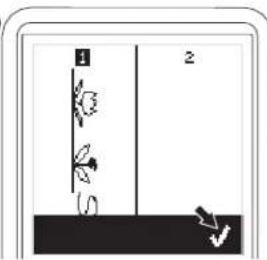
4

Coser la Secuencia
natural_image
Illustration of a hand using a brush to clean or install an electronic device with visible wiring and components (no text or symbols)Caja Bobina e Impelente
MANUEL D'INSTRUCTIONS
C440
C440Q
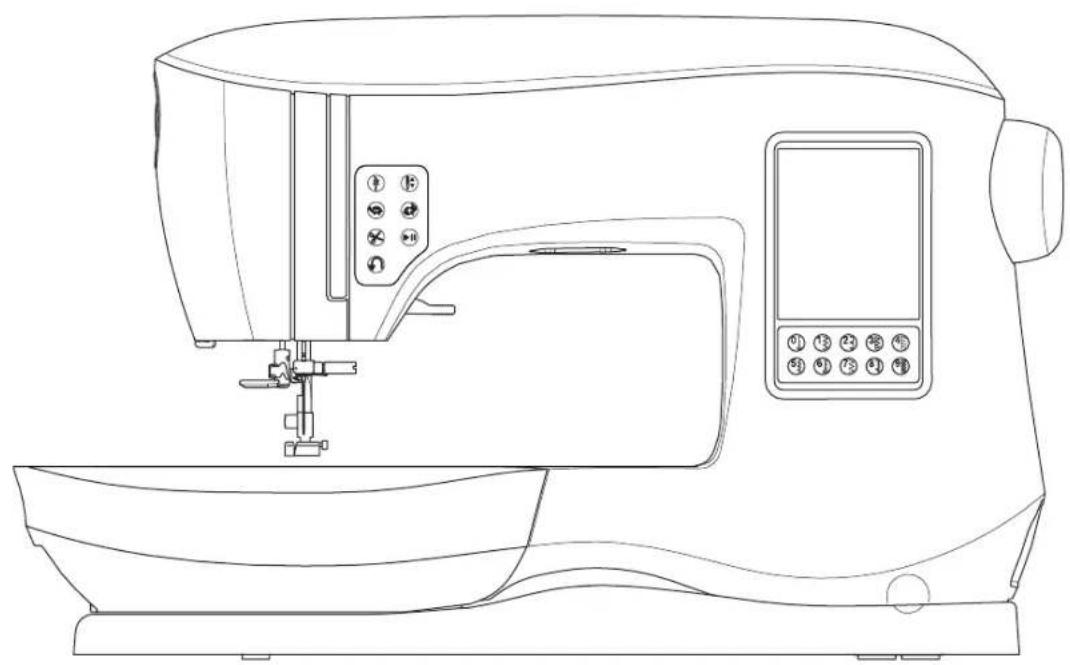
natural_image
Line drawing of a sewing machine with control panel and buttons (no text or symbols)
SINGER®

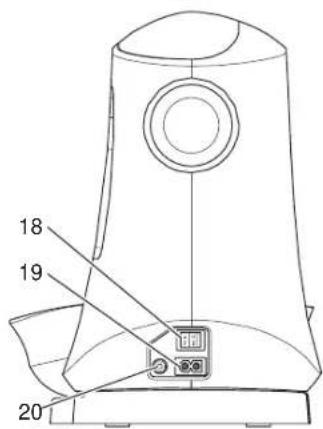

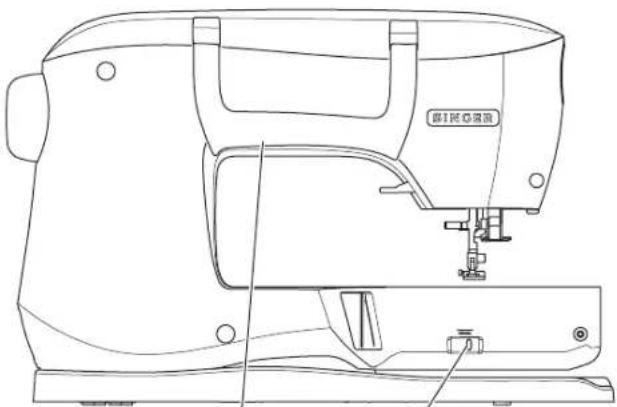
natural_image
Line drawing of a sewing machine with no visible text or symbols45 46

COMPARTIMENT DE RANGEMENT AMOVIBLE
natural_image
Technical line drawing of a boat hull showing top and side views with directional arrows indicating movement (no text or symbols)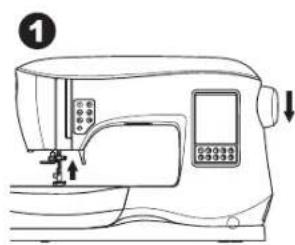
natural_image
Line drawing of a sewing machine with control panel and buttons (no text or symbols)

natural_image
Diagram of a sewing machine needle and blade assembly (no text or symbols)
natural_image
Line drawing of a sewing machine needle and foot (no text or symbols)
natural_image
Line drawing of a sewing machine with a sewing machine needle inserted into the base (no text or symbols)
natural_image
Technical line drawing of a mechanical device with no visible text or symbols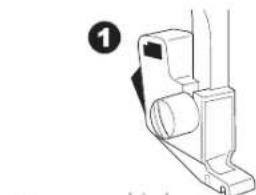
natural_image
Technical line drawing of a mechanical component with no visible text or symbols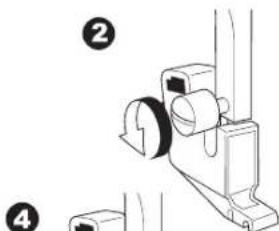
natural_image
Technical line drawing of a mechanical assembly with numbered callouts (no text or symbols)
natural_image
Technical line drawing of a mechanical bracket with directional arrows indicating movement (no text or symbols)
ENLEVER & INSÉRER UNE AIGUILLE
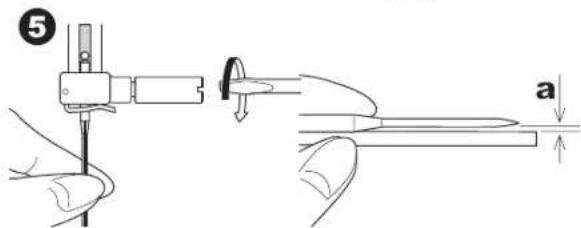
natural_image
Line drawing of a sewing machine on a table (no text or symbols)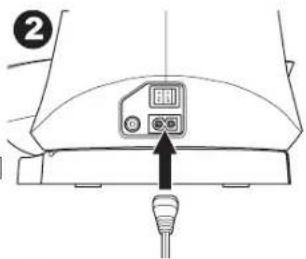

natural_image
Two identical electrical plug connectors with wires, no text or symbols visible

natural_image
Line drawing of a sewing machine with control panel and buttons (no text or symbols)
RHÉOSTAT

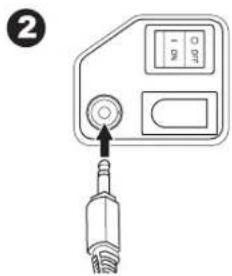

natural_image
Line drawing of a sewing machine on a table (no text or symbols)
Réglage de la Machine
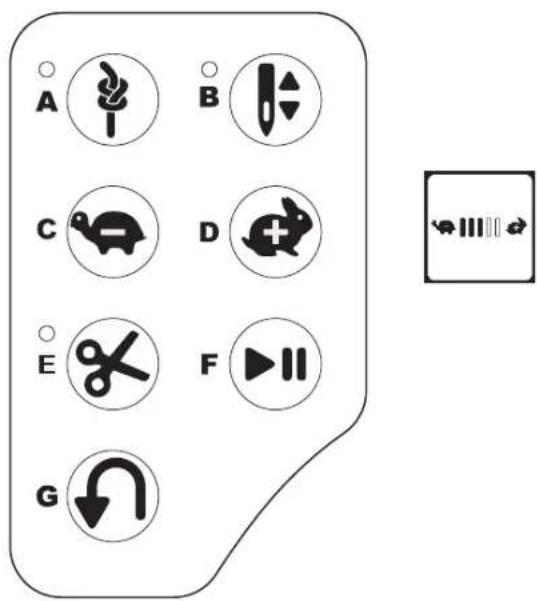


natural_image
Technical line drawing of a mechanical assembly with labeled component 'N' (no text or symbols beyond label)ÉCRAN TACTILE LCD
natural_image
Simple line drawing of a sewing machine with a checkmark below (no text or symbols on the machine itself)
SÉLECTION D'UN MOTIF
natural_image
Architectural cross-section diagram of a building facade with structural elements (no text or symbols)
natural_image
Diagram of a structural connection with helical elements and curved supports (no text or symbols)
natural_image
Pure architectural or structural diagram showing a curved channel with grid-like elements and diagonal lines, no text or symbols present.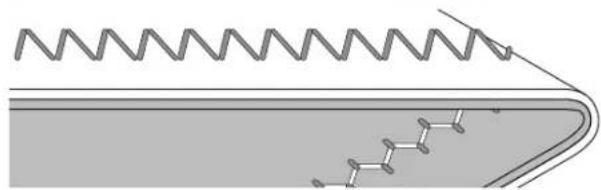
natural_image
Diagram of a mechanical or electrical component with zigzag spring and chain-like structures, no text or symbols present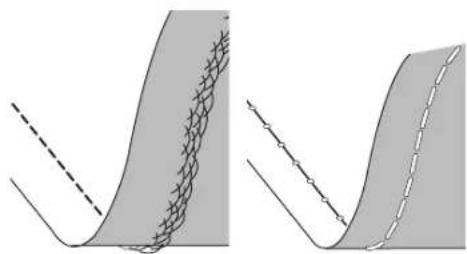
natural_image
Two abstract diagrams showing curved surfaces with grid patterns and dashed lines, no text or symbols present.L'Aiguille Double
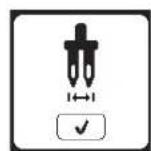
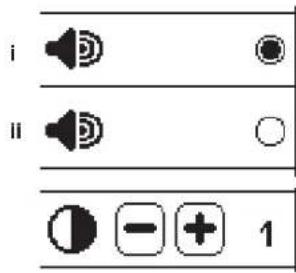
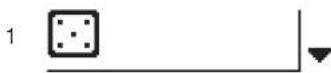
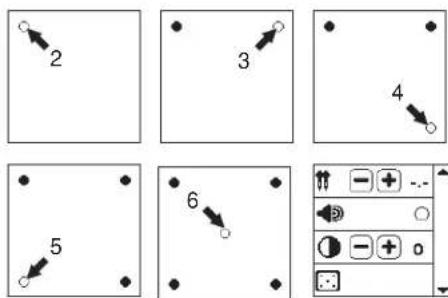

(exemple)
PRÉPARATION DE LA CANETTE
RÉGLAGE DE LA MACHINE

Insérer la Canette
RÉGLAGE DE LA MACHINE
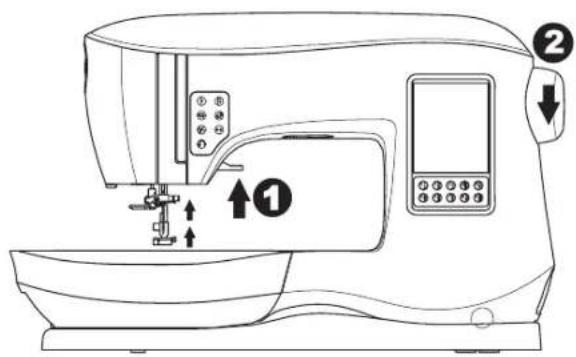


Enfilage de la Machine
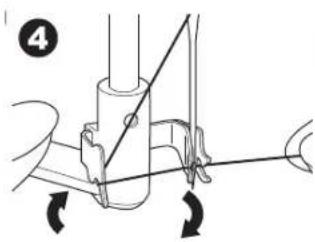
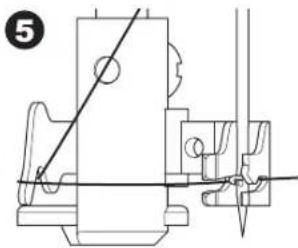
natural_image
Technical line drawing of a mechanical assembly with no visible text or symbols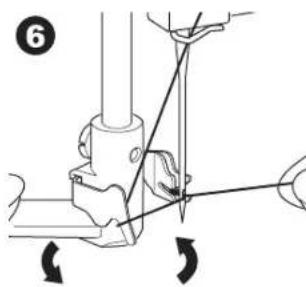
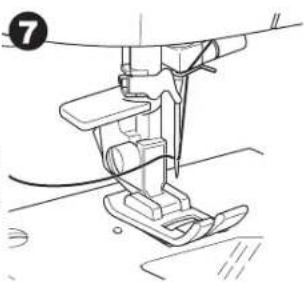
natural_image
Line drawing of a sewing machine needle and foot (no text or symbols)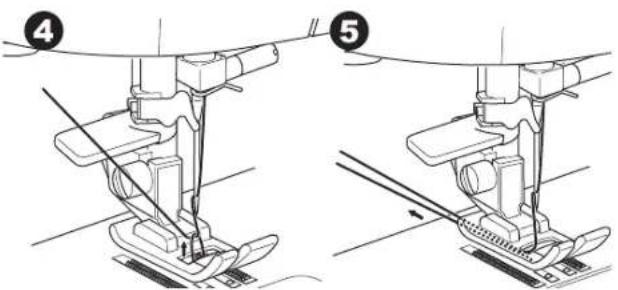
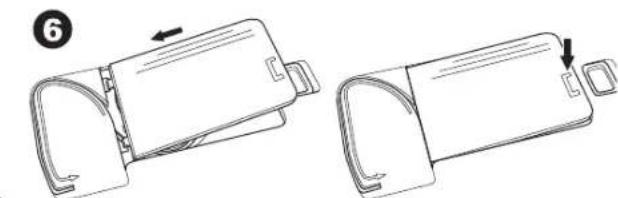
natural_image
Technical line drawing of two mechanical components with arrows indicating movement (no text or symbols)OÙ UTILISER CHAQUE POINT
natural_image
Technical line drawing of a sewing machine needle and base (no text or symbols)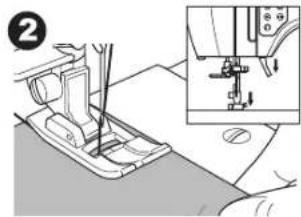
natural_image
Mechanical sewing machine diagram showing foot and side view with no visible text or symbols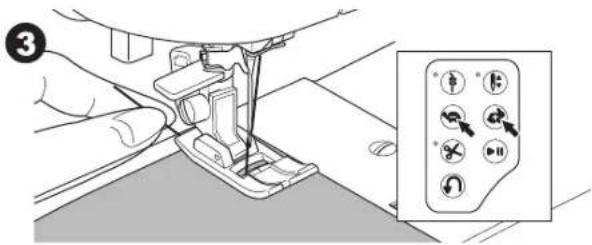
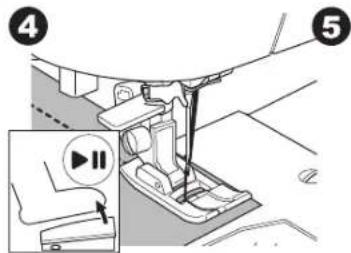
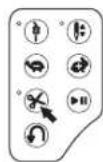
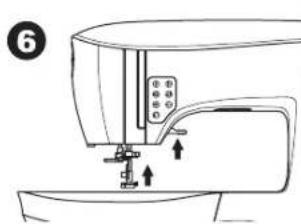
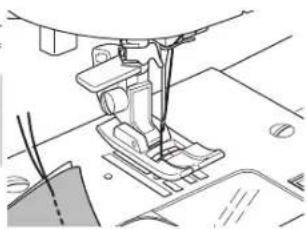
natural_image
Line drawing of a sewing machine needle stitching fabric (no text or symbols)
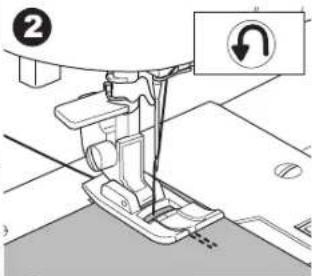

natural_image
Technical line drawing of a sewing machine needle and foot (no text or symbols)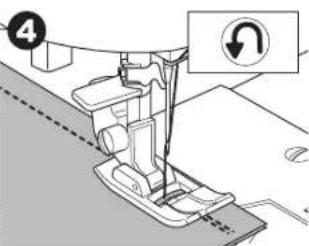

Point d'Arrêt
natural_image
Simple diagram with a play button and arrow, no text or symbols presentnatural_image
Simple diagram with a play button and dashed line, no text or symbols present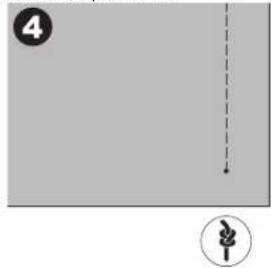
natural_image
Simple diagram with a dashed arrow and a numbered circle, no text or symbols presentTourner les Coins
natural_image
Line drawing of a sewing machine needle stitching fabric, with hands operating the process (no text or symbols)COUTURE AU POINT DROIT
LA COUTURE AU POINT ZIGZAG
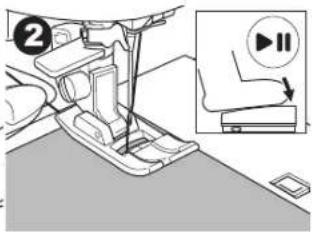
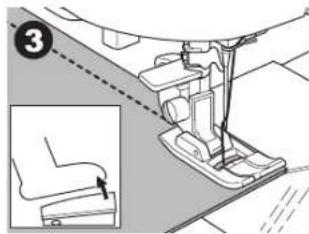


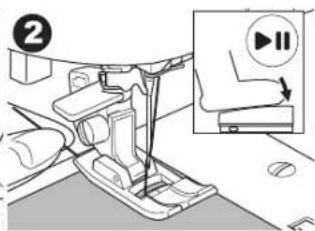
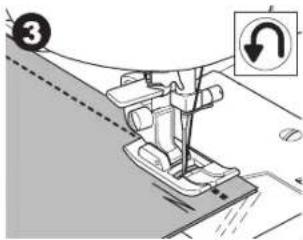

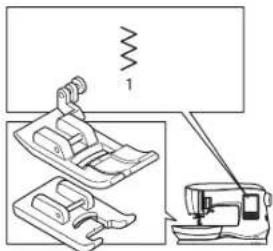
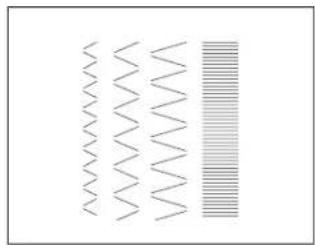
natural_image
Abstract pattern of wavy lines and a vertical striped bar (no text or symbols)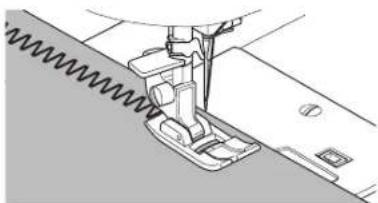
natural_image
Technical line drawing of a sewing machine needle stitching fabric (no text or symbols)Point Bourdon
Pied Ourlet Invisible (D)
natural_image
Technical line drawing of a sewing machine needle stitching fabric (no text or symbols)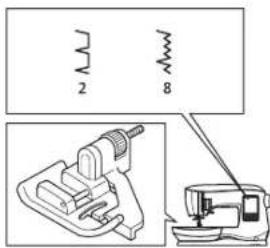
natural_image
Pure diagram of two vertical surfaces with a wavy edge, no text or symbols present
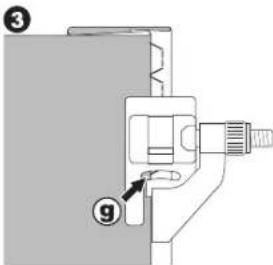
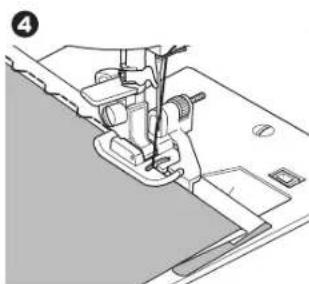
natural_image
Technical line drawing of a sewing machine needle and base (no text or symbols)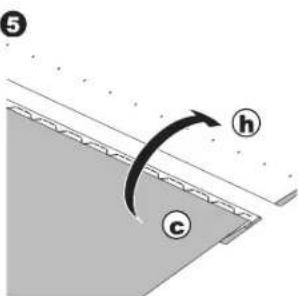
natural_image
Line drawing of a sewing machine needle stitching fabric (no text or symbols)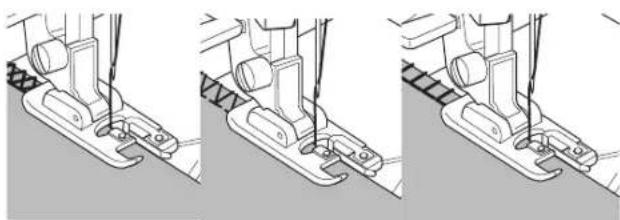
natural_image
Three-step line drawing of a sewing machine needle and base, showing thread positioning and mounting details (no text or symbols)No. 15, 33 Pied Point Bourdon (B)
natural_image
Technical illustration of a sewing machine needle and foot, showing mechanical components without any text or symbols
natural_image
Illustration of a pair of scissors cutting through a material (no text or symbols)RAPIÉCAGE EN FOLIE
COUTURE POINT EXTENSIBLE
No. 39 Point Ric Rac
Pied tout-usage (A)
No. 7 Zigzag Multi-Point
Pied Tout-Usage (A)
natural_image
Grid pattern with alternating shaded and dashed lines forming a symmetrical design (no text or symbols)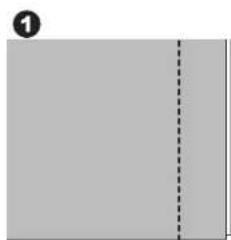
natural_image
Blank gray document page with a dashed line indicating a vertical line (no text or symbols)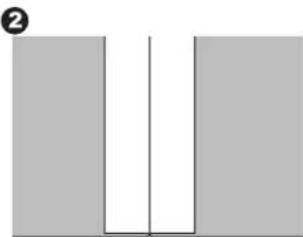
natural_image
Simple diagram of two vertical bars with a central vertical line and a horizontal line, no text or symbols present.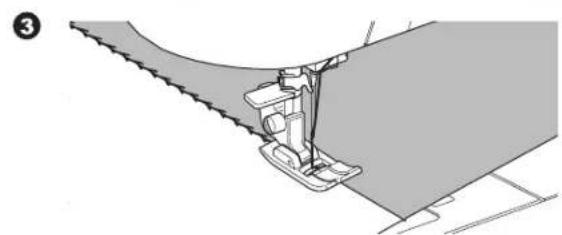
natural_image
Technical illustration of a sewing machine needle stitching fabric (no text or symbols)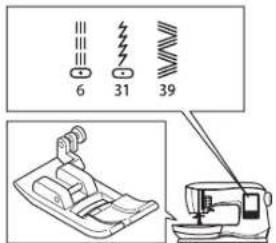

natural_image
Pure diagram of mechanical components without any text, numbers, or symbols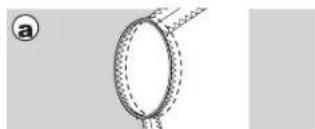
natural_image
Diagram of a ring with dashed texture and a labeled point 'a' (no text or symbols on the diagram itself)

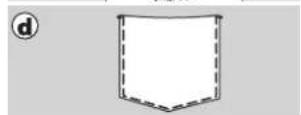
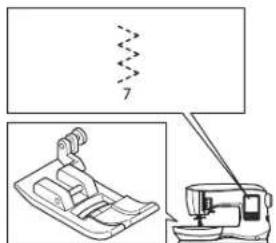
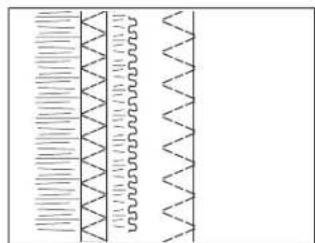
natural_image
Pure diagram of waveforms or signal patterns without any text, numbers, or symbols
natural_image
Mechanical sewing machine diagram showing needle and base components (no text or labels)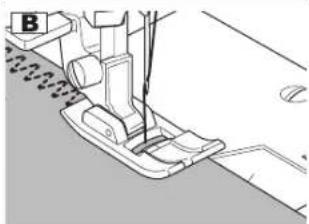
natural_image
Technical line drawing of a sewing machine needle and foot (no text or symbols)FAUFILAGE
natural_image
Pure electrical circuit lines without any symbols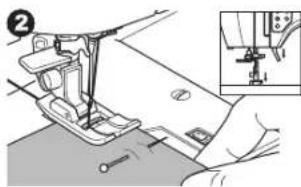
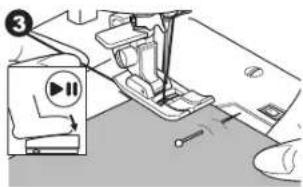


natural_image
Mechanical assembly diagram showing a foot pushpin and base plate assembly (no text or symbols)

natural_image
Mechanical assembly diagram showing a lever mechanism with no visible text or symbols
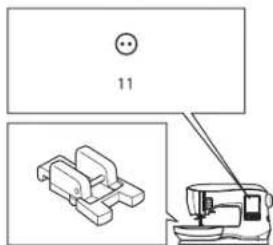
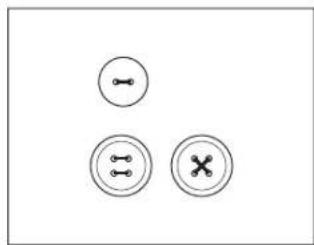
natural_image
Three circular icons with internal symbols: two circles with a horizontal line and three circles with a cross and a vertical line, arranged in a triangular pattern (no text or labels)
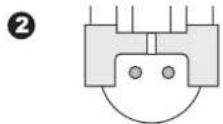
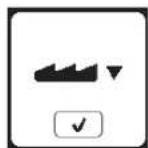
Couture
natural_image
Pure mechanical diagram showing a component with pins and a rotating knob (no text or symbols)5
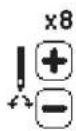
6

natural_image
Close-up of a sewing machine needle stitching fabric (no text or symbols visible)7

natural_image
Technical line drawing of a sewing machine needle and fabric (no text or symbols)8

9


natural_image
Close-up of hands operating a sewing machine needle (no text or symbols visible)
natural_image
Technical line drawing of a sewing machine with a vertical dashed line and base mount (no text or symbols)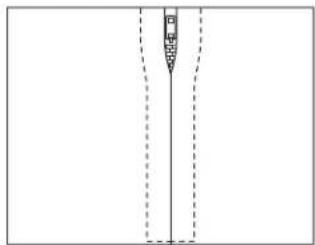
natural_image
Pure diagram of a vertical structure with dashed lines indicating hidden edges (no text or symbols)
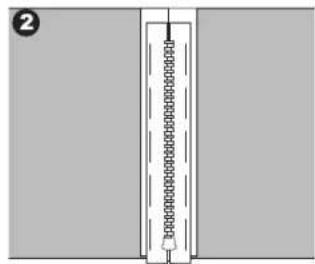
natural_image
Simple line drawing of a vertical structure with a horizontal bar and circular elements, no text or symbols present.
natural_image
Illustration of two foot push-ups in a seatbelt, showing alignment and movement (no text or symbols)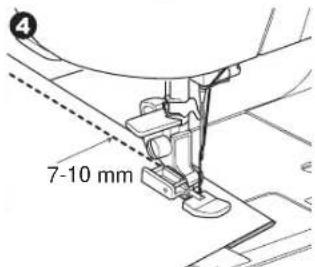

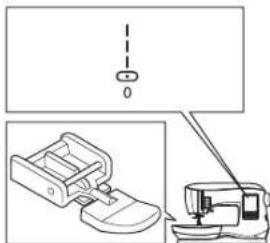
natural_image
Technical diagram showing a sewing machine with a foot and a vertical line above it, alongside an inset photo of the same device (no text or symbols present)
natural_image
Pure diagram of a vertical line with dashed segments and a small shaded region, no text or symbols present.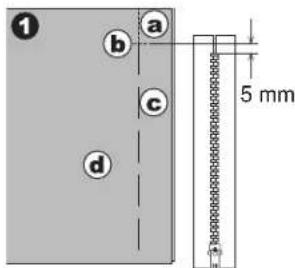
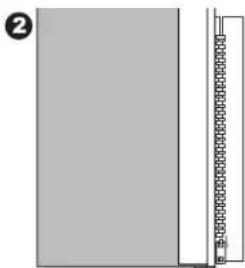
natural_image
Simple diagram showing a vertical line with a small rectangular object on the right side, no text or symbols present.Couture

natural_image
Two identical line drawings of a sewing machine footset with base and clasp, showing no text or symbols.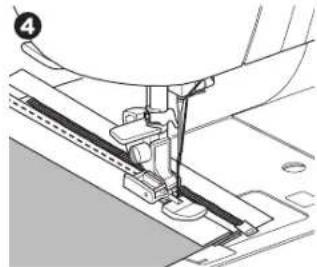
natural_image
Mechanical sewing machine needle stitching a fabric (no text or symbols visible)5
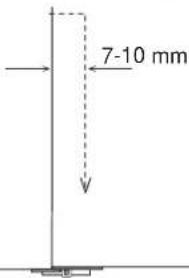
6

natural_image
Simple line drawing of a vertical structure with a dashed line indicating a height or dimension (no text or symbols)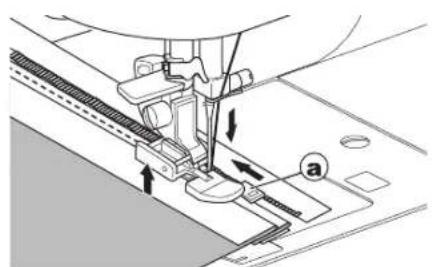
natural_image
Technical line drawing of a sewing machine needle stitching fabric (no text or symbols)MATELASSAGE
Pied point droit / Pied Patchwork
Guide de piquage
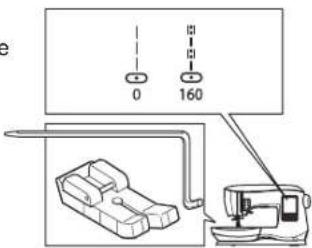
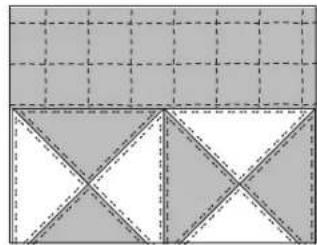
natural_image
Geometric pattern composed of shaded squares and triangles with dashed lines, no text or symbols presentnatural_image
Mechanical assembly diagram showing a foot pressing a component on a textured surface (no text or symbols)natural_image
Blank image with a vertical line of small black dots on the left edge, no text or symbols present.POINT DE RENFORT À ARRÊT AUTOMATIQUE ET REPRISAGE
natural_image
Two abstract geometric shapes: a gray rectangular block with diagonal lines and a vertical line, and a patterned grid-like structure on a gray background (no text or symbols)

natural_image
Mechanical assembly diagram showing a sewing machine needle inserted into a component (no text or symbols visible)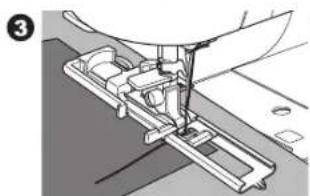
natural_image
Mechanical sewing machine diagram showing needle and base components (no text or labels)
natural_image
Pure mechanical assembly diagram showing a base with a spring and a pointed tip, no text or symbols present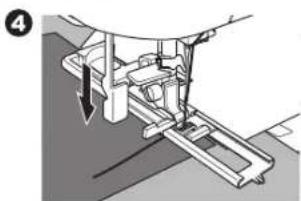
natural_image
Mechanical assembly diagram showing a lever mechanism with arrows indicating motion (no text or symbols)
natural_image
Mechanical assembly diagram showing a sewing machine needle inserted into a base (no text or symbols visible)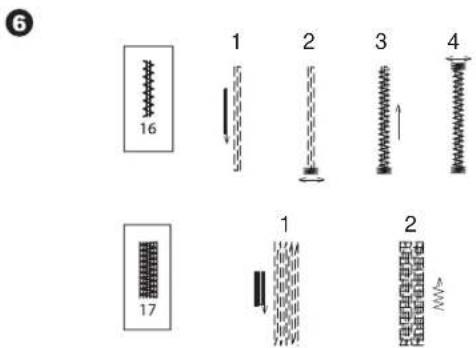
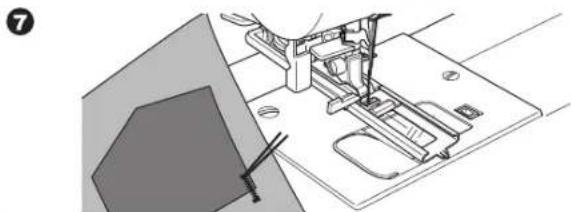
natural_image
Technical line drawing of a sewing machine with no visible text or symbolsCONFECTION D'UNE BOUTONNIÈRE
natural_image
Mechanical assembly diagram showing a component with a circular pin and arrow indicator (no text or symbols)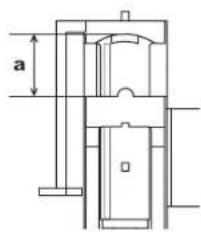
3
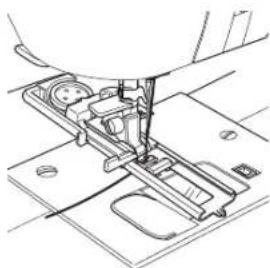
natural_image
Technical line drawing of a sewing machine needle and base (no text or symbols)4

natural_image
Technical illustration of a sewing machine needle insertion operation, showing mechanical components and a magnified inset (no text or symbols)5

natural_image
Mechanical assembly diagram showing a sewing machine needle inserted into a base plate (no text or symbols visible)6

natural_image
Mechanical assembly diagram showing a sewing machine needle inserted into a base plate (no text or symbols visible)natural_image
Four diagrams showing spring-like structures with arrows indicating direction, no text or symbols present;

[Non-Text]
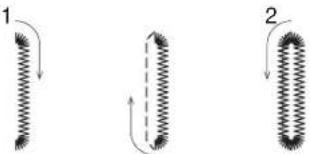
natural_image
Three diagrams showing coiled spring-like structures with arrows indicating direction (no text or symbols)
4

4

3
[Non-Text]

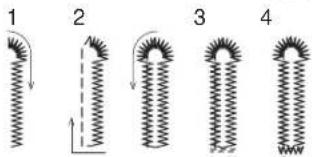

natural_image
Four diagrams showing spring-like structures with arrows indicating direction, no text or symbols present

natural_image
Diagram of a sewing machine needle stitching fabric, showing tool path and base plate (no text or symbols)
9
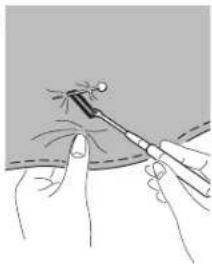
natural_image
Illustration of a medical procedure showing a tool tip interacting with a patient's finger (no text or symbols present)natural_image
Technical line drawing of a mechanical device with an upward arrow indicating motion or force (no text or symbols)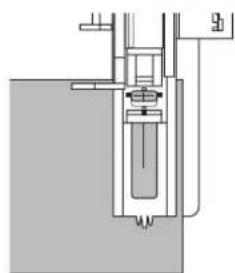
natural_image
Pure mechanical assembly diagram without any text, numbers, or symbolsBOUTONNIÈRE À BORNE
natural_image
Simple diagram with a vertical rectangle and a circle, no text or symbols present1
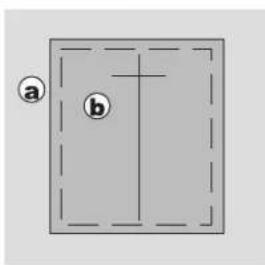
②
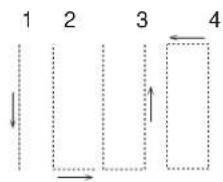
flowchart
graph TD
    A["1"] --> B["2"]
    B --> C["3"]
    C --> D["4"]
    style A fill:#f9f,stroke:#333
    style B fill:#ccf,stroke:#333
    style C fill:#cfc,stroke:#333
    style D fill:#fcc,stroke:#333
3
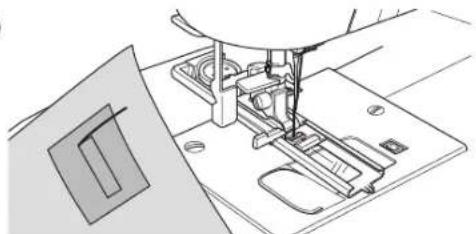
natural_image
Line drawing of a sewing machine needle stitching a component (no text or symbols)4
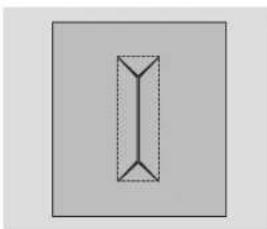
natural_image
Simple geometric diagram of a vertical rectangle with dashed internal lines, no text or symbols present.5
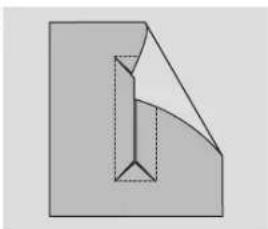
natural_image
Abstract geometric diagram showing a folded paper or sheet with internal lines and shading (no text or symbols)6
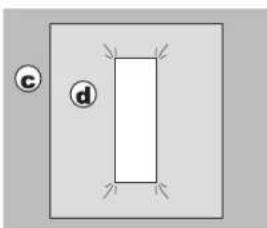
natural_image
Simple diagram with a rectangle and two labeled circles (c and d) on a gray background, no text or symbols present.7
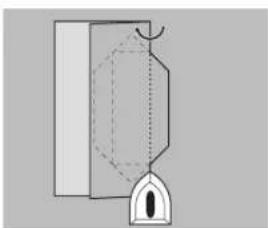
natural_image
Pure diagram of a mechanical or architectural component without any text, numbers, or symbols8
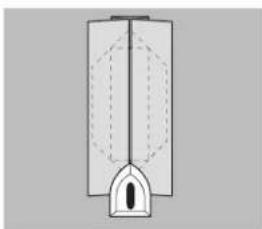
natural_image
Pure diagram of a vertical structure with internal dashed lines and an arch, no text or symbols present9
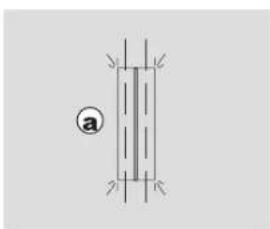
natural_image
Pure electrical circuit lines without any symbols
Couture
natural_image
Pure diagram of a mechanical or electrical component with no visible text, numbers, or symbols11

natural_image
Simple diagram showing a container with a curved arrow and label 'O' (no text or symbols present)12
natural_image
Simple diagram of two vertical rectangles with dashed internal lines, no text or symbols present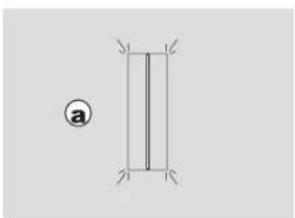
natural_image
Pure geometric diagram of a vertical rectangle with corner marks, no text or symbols presentPied point Bourdon (B)
natural_image
Simple geometric diagram with a vertical dashed line and cross mark inside a rounded rectangle (no text or symbols)
natural_image
Three identical black starburst patterns arranged vertically on a white background (no text or symbols)1

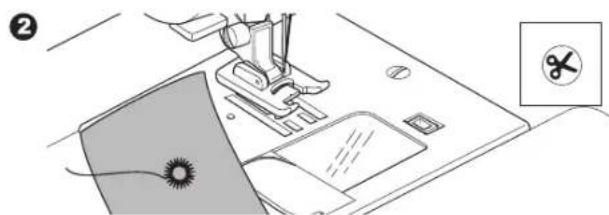
natural_image
Line drawing of a sewing machine with a sewing machine and a sewing machine base, showing no text or symbols.3
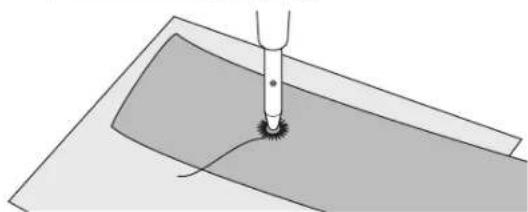
natural_image
Diagram of a mechanical tool interacting with a curved surface (no text or symbols)COUTURE EN CONTINUE DE MOTIF DÉCORATIF
natural_image
Repeating decorative line patterns with no text or symbols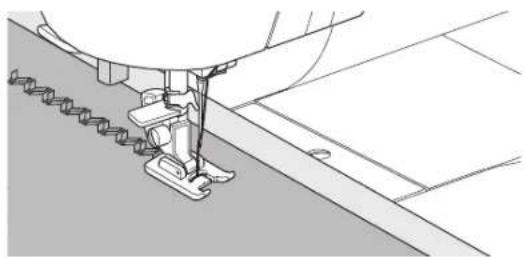
natural_image
Technical line drawing of a sewing machine needle stitching fabric (no text or symbols)

natural_image
Simple gray silhouette of an apple with a leaf, no text or symbols present.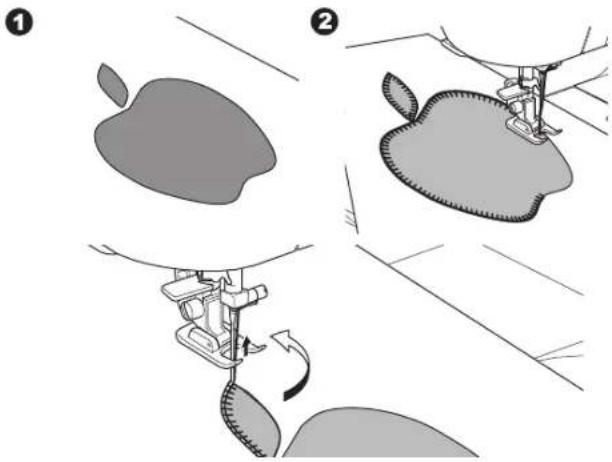
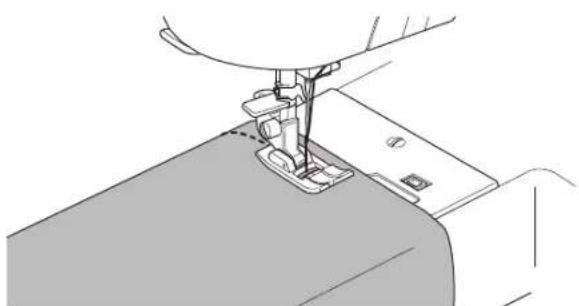
natural_image
Line drawing of a sewing machine needle stitching fabric (no text or symbols)COUTURE AVEC UNE AIGUILLE DOUBLE
natural_image
Technical line drawing of a mechanical assembly with no visible text or symbols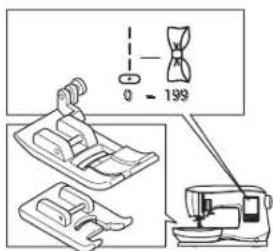

natural_image
Three vertical wavy lines with diamond patterns, no text or symbols presentnatural_image
Technical line drawing of a sewing machine needle stitching fabric (no text or symbols)COUDRE UNE SÉQUENCE

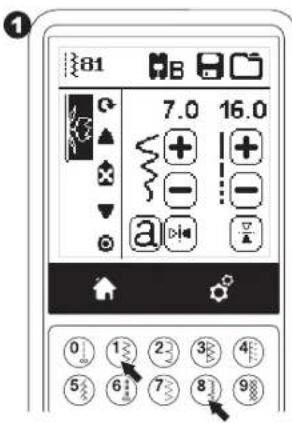


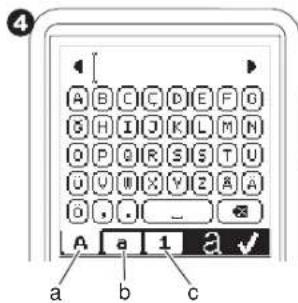
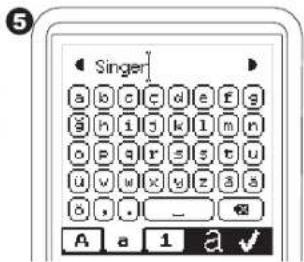
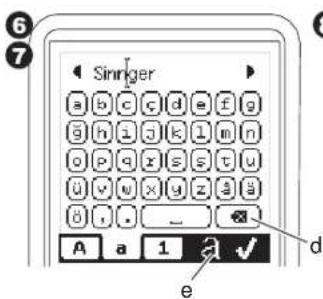
![8 Singer[ ] a b c d e f g g h i j k l m n o p q r s t u ü v w x y z g ä ü f . _ A a 1 a ✓](/content/2026/04/640270/images/12cd766e426f6e35c9ed3a7af56de9d78a94ece910c87aa1969af0eda2778bce.jpg)

Créer une Séquence
2
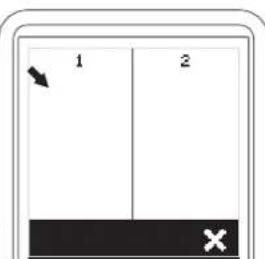
3

natural_image
Simple line drawing of a vertical structure with two labeled parts (1 and 2), no text or symbols present.4


Créer une Séquence
2
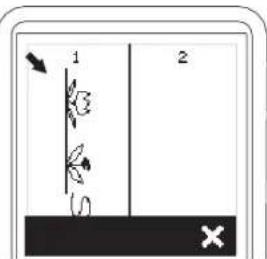
③

4
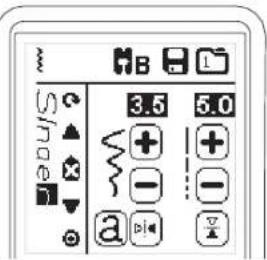
natural_image
Illustration of a hand using a brush to clean or store electronic components on a base (no text or symbols visible)
Please note that on disposal, this product must be safely recycled in accordance with relevant National legislation relating to electrical/electronic products. Do not dispose of electrical appliances as unsorted municipal waste, use separate collection facilities. Contact your local government for information regarding the collection systems available.
When replacing old appliances with new ones, the retailer may be legally obligated to take back your old appliance for disposal free of charge.
If electrical appliances are disposed of in landfills or dumps, hazardous substances can leak into the groundwater and get into the food chain, damaging your health and well-being.
CE – Authorised Representative
VSM GROUP AB, SVP Worldwide
SINGER is the exclusive trademark of The Singer Company Limited S.à.r.l. or its Affiliates. ©2016 The Singer Company Limited S.à.r.l. or its Affiliates. All rights reserved.

VSM GROUP AB, SVP Worldwide
VSM GROUP AB, SVP Worldwide
471 02-47-47C • English / Spanish / French • House • © 2016 The Singer Company Limited S.A.R.L. or its Affiliates • All Rights reserved • Printed in Taiwan on environmentally friendly paper.