TH178EBI - Fridge THOMSON - Free user manual and instructions
Find the device manual for free TH178EBI THOMSON in PDF.
| Product type | Refrigerator-freezer integrated |
| Dimensions (H x W x D) | 1780 x 540 x 540 mm |
| Net weight | 55 kg |
| Power supply | 220-240 V ~ 50 Hz |
| Rated current | 0.75 A |
| Input power | 115 W |
| Energy efficiency class | E |
| Total volume | 249 L (refrigerator: 179 L, freezer: 70 L) |
| Refrigerant | R600a (62 g) |
| Insulating gas | Cyclopentane |
| Climate class | Temperate/Subtropical (16 °C to 38 °C) |
| Refrigerator defrost | Automatic |
| Freezer defrost | Manual |
| Freezing capacity | 3.2 kg/24 h |
| Main functions | Smart Mode, Super Mode, Open door alarm, Coldest zone temperature indicator |
| Lighting | LED (class G, replaceable by a professional) |
| Door reversal | Possible (recommended by a technician) |
| Noise level | 39 dB(A) (class C) |
| Maintenance and cleaning | Soft cloth, warm water and mild detergent; no solvent or abrasive |
| Safety | Grounding mandatory; do not damage refrigeration circuit; child supervision |
| Spare parts and repairability | LED lamp not user-replaceable; parts available within 15 working days after order |
| Warranty | 2 years |
Frequently Asked Questions - TH178EBI THOMSON
User questions about TH178EBI THOMSON
0 question about this device. Answer the ones you know or ask your own.
Ask a new question about this device
Download the instructions for your Fridge in PDF format for free! Find your manual TH178EBI - THOMSON and take your electronic device back in hand. On this page are published all the documents necessary for the use of your device. TH178EBI by THOMSON.
USER MANUAL TH178EBI THOMSON
natural_image
Interior view of a white refrigerator with open doors and shelves (no visible text or symbols)Table des matières
AVERTISSEMENTS 2
CONSIGNES DE SÉCURITÉ IMPORTANTES....8
DESCRIPTION....9
INVERSION DU SENS D'OUVERTURE DES PORTES 10
AVANT D'INSTALLER L'APPAREIL....12
INSTRUCTIONS D'INSTALLATION 13
TEMPÉRATURE AMBIANTE ....19
AVANT DE PLACER DES ALIMENTS DANS L'APPAREIL 19
PANNE DE COURANT 20
CONTRÔLE DE TEMPÉRATURE....20
DÉPLACER L'APPAREIL....21
CONGELER ET STOCKER DES ALIMENTS DANS LE COMPARTIMENT DE CONGÉLATION....21
STOCKER DES ALIMENTS DANS LE RÉFRIGÉRATEUR....21
DÉGIVRAGE 29
CONSEILS D'ÉCONOMIE D'ÉNERGIE ....30
BRUITS DE FONCTIONNEMENT ....30
NETTOYAGE ET ENTRETIEN....31
DÉPANNAGE....31
SPÉCIFICATIONS 32
FICHE D'INFORMATION SUR LE PRODUIT....33
SERVICE DE RÉPARATION ET PIÈCES DE RECHANGE.... 35
MISE AU REBUT.... 36
AVERTISSEMENTS
natural_image
Close-up of a metallic frame with mounting holes and a dark interior (no visible text or symbols)natural_image
Simple line drawing of a rectangular object with a vertical arrow indicating rotation (no text or symbols)natural_image
Technical line drawing of a mechanical clamp or bracket assembly with a screwdriver (no text or symbols)natural_image
Technical line drawing of a mechanical assembly with a side view showing a bolted component (no text or symbols present)natural_image
Diagram showing a mechanical assembly with an arrow indicating direction (no text or symbols present)natural_image
Technical line drawing of a screwdriver clamping a vertical bar (no text or symbols)natural_image
Technical line drawing of a mechanical bracket assembly showing four sequential steps with bolt holes and a central nut (no text or symbols)natural_image
Simple line drawing of a rotating mechanical setup with a vertical rod and base, no text or symbols present.AVANT D'INSTALLER L'APPAREIL
text_image
Diagram showing two people interacting with an open electrical cabinet, with a warning sign and cable diagram highlighting the interior.1
natural_image
Technical line drawings of two structural frame components with mounting brackets and a curved component (no text or symbols)natural_image
Line drawing of a cabinet with a door handle inserted into a wall (no text or symbols)5
natural_image
Technical line drawing of a structural bracket with an attached panel detail (no text or symbols)Retirez le guide.
natural_image
Line drawing of a handheld electric drill with tip and base, no text or symbols present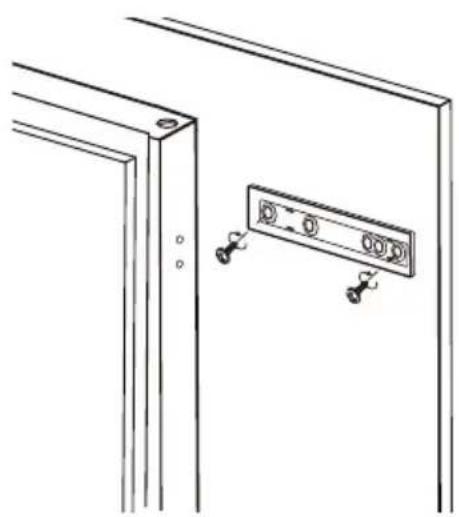
natural_image
Technical line drawing of a structural frame with mounting holes and a bracket (no text or symbols)6
natural_image
Diagram showing two components: a battery pack and a multi-pin device with three buttons, connected by an arrow (no text or symbols present)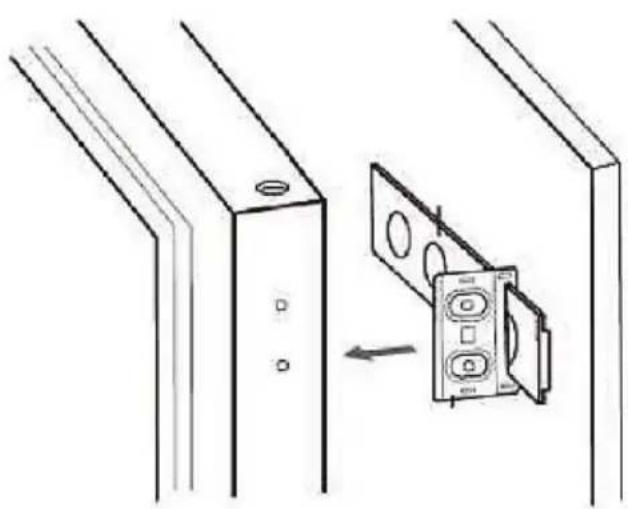
natural_image
Diagram showing a door panel being inserted into a wall-mounted device (no text or symbols present)7
natural_image
Diagram of a mechanical assembly with two circular components and an arrow indicating direction (no text or symbols)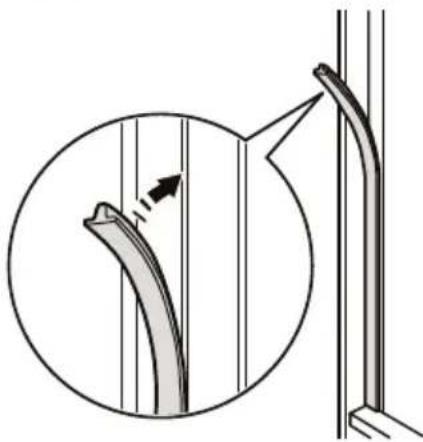
natural_image
Diagram showing a curved pipe or duct with an arrow indicating direction, alongside a magnified inset (no text or symbols)8
natural_image
Illustration of a milk carton, glass bowl, and plate of food (no text or symbols)
natural_image
Simple line drawing of a bone structure (no text or labels)Volaille
natural_image
Line drawing of a roasted chicken with legs and decorative base (no text or symbols)natural_image
Illustration of a fish with decorative elements (no text or symbols)natural_image
Illustration of fresh vegetables including carrots, mushrooms, and a pomegranate (no text or symbols)natural_image
Technical line drawing of a structural component with an inset showing a hand holding a circular component (no text or symbols present)https://eprel.ec.europa.eu/screen/product/refrigeratingappliances2019/334089
SERVICE DE RÉPARATION ET PIÈCES DE RECHANGE
natural_image
Warning symbol with exclamation mark inside a shield shape (no text or numbers)text_image
Diagram showing a refrigerator interior with a hand holding a small object and a numbered step labeled ① pointing to the door.VERIFICATION DE LA TEMPERATURE DANS LA ZONE LA PLUS FROIDE
IMPORTANT SAFETY INSTRUCTIONS ....7
NAMES OF PARTS....8
DOOR CONVERSION 9
BEFORE INSTALLING THE APPLIANCE 12
INSTALLATION INSTRUCTIONS....12
AMBIENT TEMPERATURE....18
BEFORE PLACING FOOD IN THE APPLIANCE....18
POWER FAILURE....18
TEMPERATURE CONTROL....19
MOVING YOUR APPLIANCE 19
FREEZING AND STORING FOOD IN THE FREEZER COMPARTMENT 20
OPERATING NOISES 25
CLEANING AND MAINTENANCE 25
TROUBLESHOOTING 25
SPECIFICATIONS 26
PRODUCT INFORMATION SHEET....27
REPAIR AND SPARE PARTS SERVICE....29
DISPOSAL 30
WARNINGS
This appliance is intended to be used in household and similar applications such as
– staff kitchen areas in shops, offices and other working environments;
– farm houses and by clients in hotels, motels and other residential type environments;
- bed and breakfast type environments;
– catering and similar non-retail applications.
If the supply cord is damaged, it must be replaced by the manufacturer, its service agent or similarly qualified persons in order to avoid a hazard.
This appliance can be used by children aged from 8 years and above and persons with reduced physical, sensory or mental capabilities or lack of experience and knowledge if they have been given supervision or instruction concerning use of the appliance in a safe way and understand the hazards involved. Children shall not play with the appliance. Cleaning and
user maintenance shall not be made by children without supervision.
For the details concerning the method of cleaning, please see section “Cleaning and maintenance” on page EN-25.
The appliance shall not be exposed to rain.
WARNING: Keep ventilation openings, in the appliance enclosure or in the built-in structure, clear of obstruction.
WARNING: Do not use mechanical devices or other means to accelerate the defrosting process, other than those recommended by the manufacturer.
WARNING: Do not damage the refrigerant circuit.
WARNING: Do not use electrical appliances inside the food storage compartments of the
appliance, unless they are of the type recommended by the manufacturer.
Do not store explosive substances such as aerosol cans with a flammable propellant in this appliance.
CAUTION: The cooling system is under high pressure. Do not touch it. Contact qualified maintenance services before disposal.
INSTALLATION: DO NOT INSTALL THIS APPLIANCE IN AREAS THAT ARE TOO HUMID OR TOO COLD, SUCH AS THE OUTBUILDINGS, GARAGES OR WINE CELLARS.
For disposal of the appliance:
To prevent possible harm to the environment or human health from uncontrolled waste disposal, recycle it responsibly to promote the sustainable reuse of material resources and the flammable insulation blowing gases. And the disposal should only be done through public
collection points.
For installation, servicing:
Appliance should be placed on a horizontal floor and keep the ventilation freely. Don’t try to replace or repair any components by yourself, ask the service agency for help if necessary.
For handling:
Always handle the appliance to avoid any damage.
WARNING: For making ice (ice cubes), use potable water only.
Never freeze defrosted food except if they have been cooked before, in order to eliminate harmful bacteria. Never refreeze seafood that has been defrosted.
WARNING: To avoid a hazard due to instability of the appliance, it must be fixed in accordance with the instructions.
Regarding the instructions for the method of fixing and the correct dimensions, refer to the section "INSTALLATION".
The plug must be remained easily accessible after installation of the appliance.
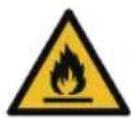
Warning; Risk of fire / flammable materials
- WARNING: When positioning the appliance, ensure the supply cord is not trapped or damaged.
- WARNING: Do not locate multiple portable socket-outlets or portable power supplies at the rear of the appliance.
- Children aged from 3 to 8 years are allowed to load and unload refrigerating appliances.
-
To avoid contamination of food, please respect the following instructions:
-
Opening the door for long periods can cause a significant increase of the temperature in the compartments of the appliance.
- Clean regularly surfaces that can come in contact with food and accessible drainage systems.
- Clean water tanks if they have not been used for 48 h; flush the water system connected to a water supply if water has not been drawn for 5 days.
- Store raw meat and fish in suitable containers in the refrigerator, so that it is not in contact with or drip onto other food.
- Two-star frozen-food compartments are suitable for storing pre-frozen food, storing or making ice cream and making ice cubes.
- One-, two- and three-star compartments are not suitable for the freezing of fresh food.
- If the refrigerating appliance is left empty for long periods, switch off, defrost, clean, dry, and leave the door open to prevent mould developing within the appliance.
IMPORTANT SAFETY INSTRUCTIONS
- If you are discarding an old fridge freezer with a lock / catch fitted to the door, ensure that it is left in a disabled condition to prevent the entrapment of young children when playing.
- Unplug the appliance from the mains socket when not in operation and before cleaning. Remove food before cleaning the appliance.
- Do not insert oversized food as this could cause incorrect operation.
- Extreme caution must be used when moving the appliance.
- Do not give children ice-cream and water ices direct from the freezer compartment as the low temperature may cause 'freezer burns' on the lips.
- Do not stand or support yourself on the base or door, etc.
Dispose of your old appliance
Fridge freezers contain refrigerant and gases in the insulation.
Refrigerant and blowing gases must be disposed of professionally. Ensure that tubing of the refrigerant circuit is not damaged prior to proper disposal.
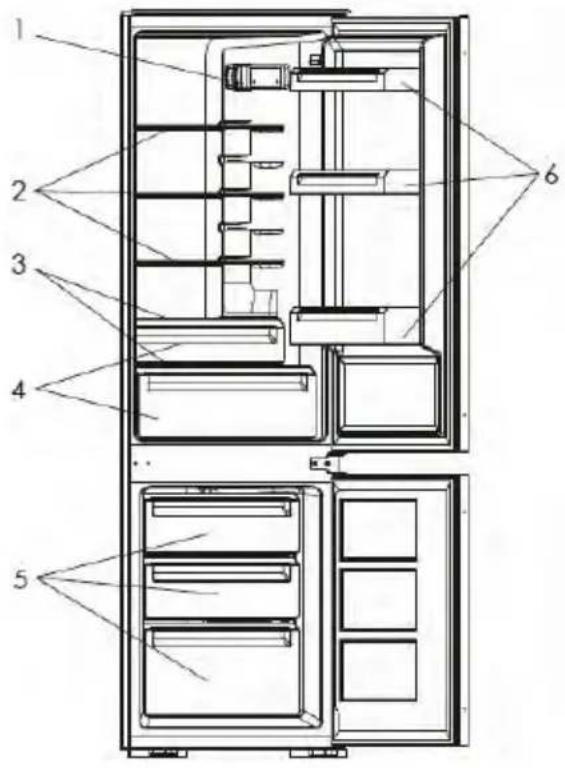
NAMES OF PARTS
text_image
1 2 3 4 5 6- Control panel with light assembly
- Glass shelves
- Vegetable container covers
- Vegetable containers
- Freezer drawers
- Door shelves
Installation accessories
Guide x 4

Guide cover x 4
Slider x 4

Slider cover x 4

Short screw x 27

Long screw x 2
Rubber seal x 1
Middle bracket cover x 2
Recommended food arrangement
Refrigerator compartment (4°C)
Cold air sinks so the bottom part is the coldest.
Store your food in the optimal space to enjoy the fresh taste.
| Top section: | canned food, bread, cake... |
| Middle section: | dairy products, readymade food, desserts... |
| Bottom section: | meat, meat products, delicatessen ... |
| Container: | fresh fruit, vegetables, salads... |
Freezer compartment (-18°C)
| Freezer drawers: | Freezing, storage of frozen food |
Refrigerator door shelves (2°C \~ 8°C)
| Top section: | eggs, butter, cheese... |
| Middle section: | beverages, cans, bottles... |
| Bottom section: | beverages, cans, bottles... |
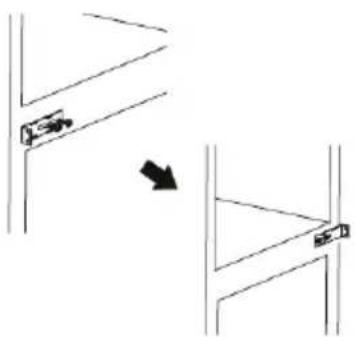
DOOR CONVERSION
If you need to hinge the doors on the opposite sides it is recommended that you call your local authorised service agent to make this conversion or ask a technician.
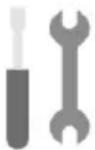
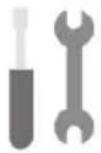
Before you reverse the doors, you should ensure the appliance is unplugged and empty. It is recommended to use a crosshead screwdriver and a spanner (both not supplied).
- Remove the upper support plate by removing the screws from the top of the appliance.
natural_image
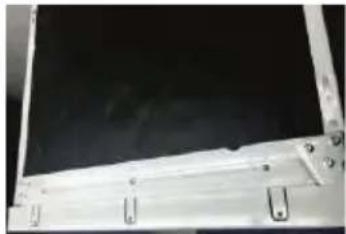
Close-up of a metallic mechanical bracket with mounting holes and a dark background (no visible text or symbols)- Unscrew the three screws and then remove the top hinge.
natural_image
Simple line drawing of a box with a pointer and curved arrow indicating rotation (no text or symbols)-
Lift he refrigerator door off the appliance and then place it on a padded surface to avoid scratching.
-
Unscrew the two screws and remove the central hinge.
natural_image
Technical line drawing of a mechanical clamp or bracket assembly with a screwdriver (no text or symbols)-
Lift the freezer door off the bottom hinge.
-
Remove the bottom hinge and refit it on the opposite side.
natural_image
Technical line drawing of a mechanical bracket with a close-up inset showing a bolt assembly (no text or symbols)- Remove and fit the central bracket on the opposite side.
natural_image
Diagram showing a mechanical assembly with an arrow indicating direction (no text or symbols present)- Refit the central hinge on the opposite side and then refit the freezer door.
- Ensure the freezer door is aligned horizontally and vertically so that the seals are closed on all sides before finally tightening the central hinge.
natural_image
Technical line drawing of a screwdriver clamping a mechanical component (no text or symbols)- Unscrew top hinge pin from the top hinge. Turn over the top hinge and fit the top hinge pin.

natural_image
Technical line drawing of a mechanical bracket assembly showing four sequential steps with no text or symbols- Refit the refrigerator door and secure the top hinge with three screws. Refit the upper support plate.
- Ensure that the door is aligned horizontally and vertically so that the seals are closed on all sides before finally tightening the screws.
natural_image
Simple line drawing of a rotating mechanical setup with a vertical rod and base, no text or symbols present.BEFORE INSTALLING THE APPLIANCE
Before connecting your appliance to the power supply, check that the voltage stated on the rating label of your appliance corresponds to the voltage in your home. A different voltage could damage the appliance.
The plug is the only way to unplug the appliance and should therefore be accessible at all times. To turn off main power to the appliance, turn it off and then detach the plug from the outlet.
The appliance must be grounded. The manufacturer is not responsible for damages that may occur as a result of usage without grounding.
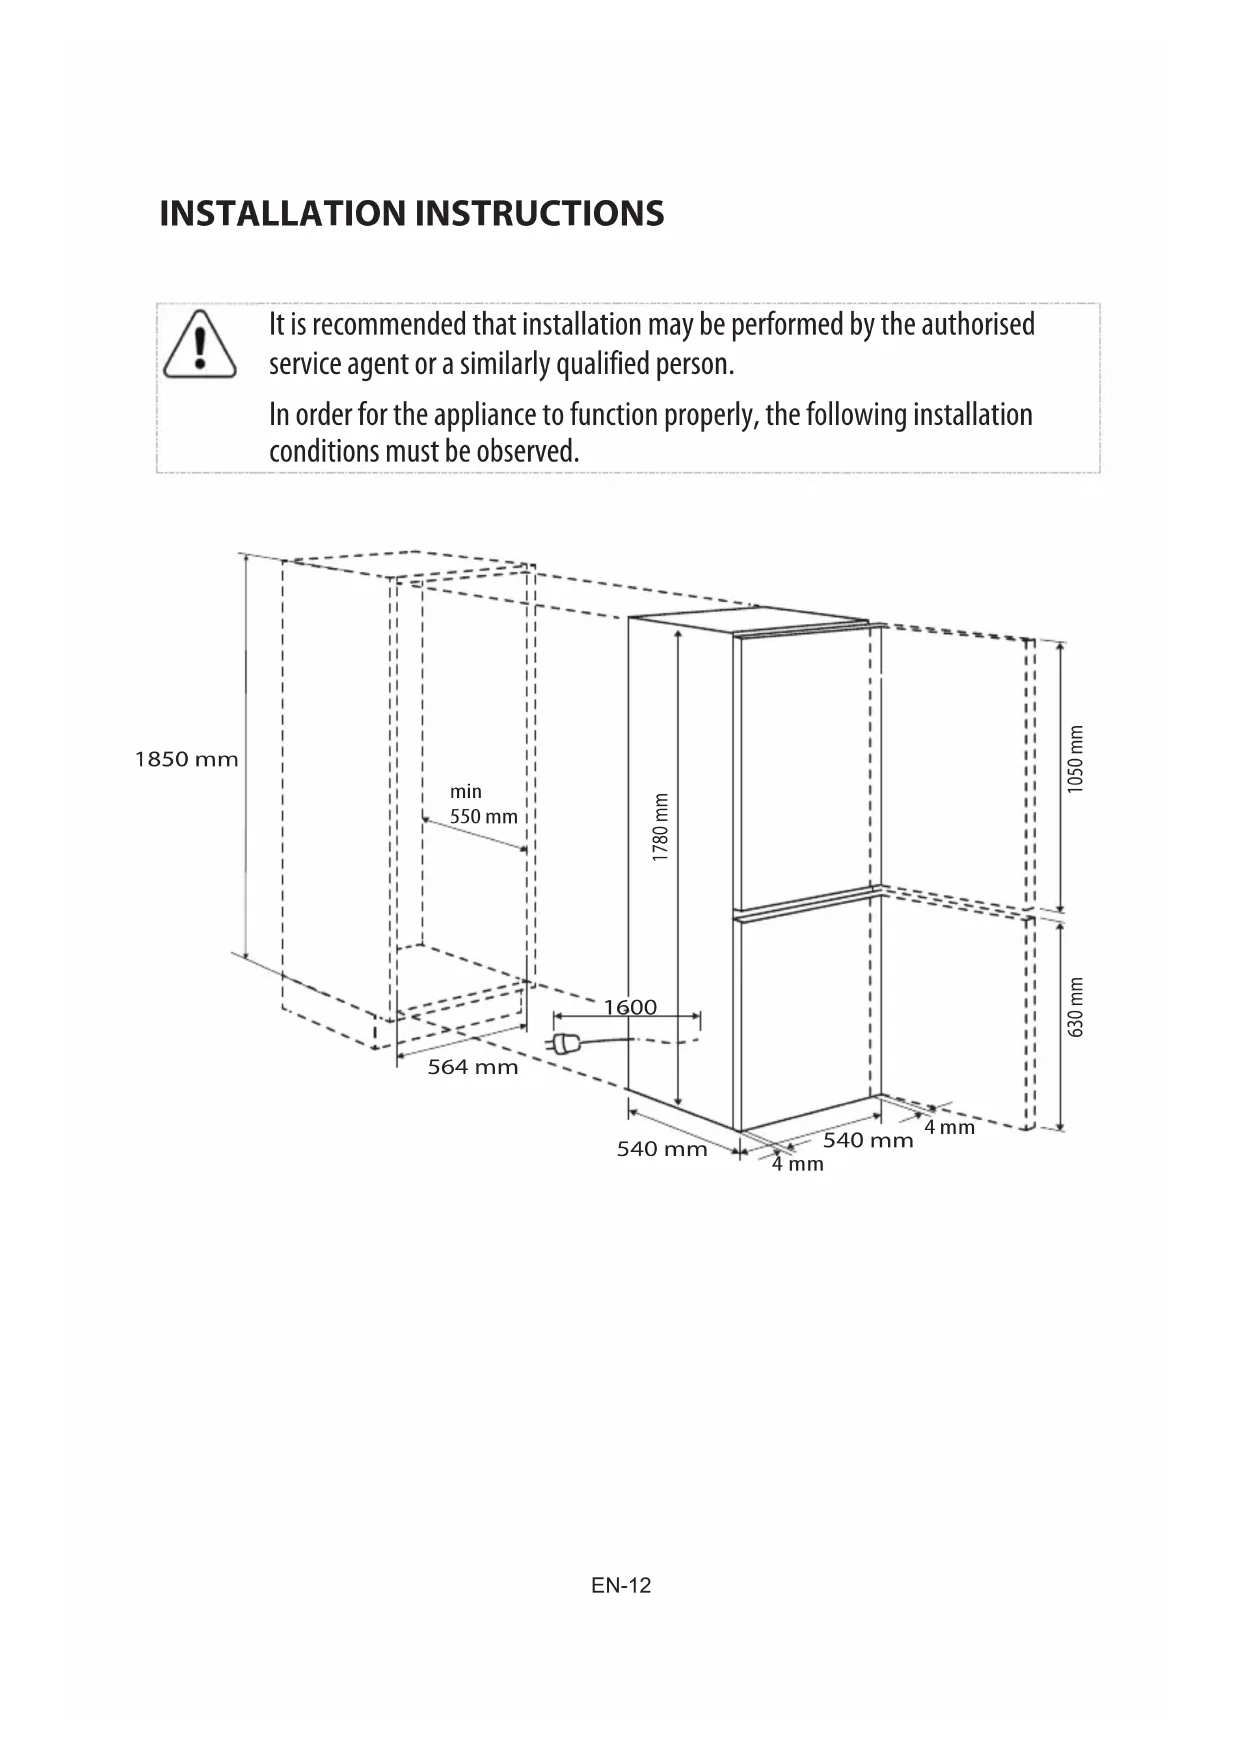
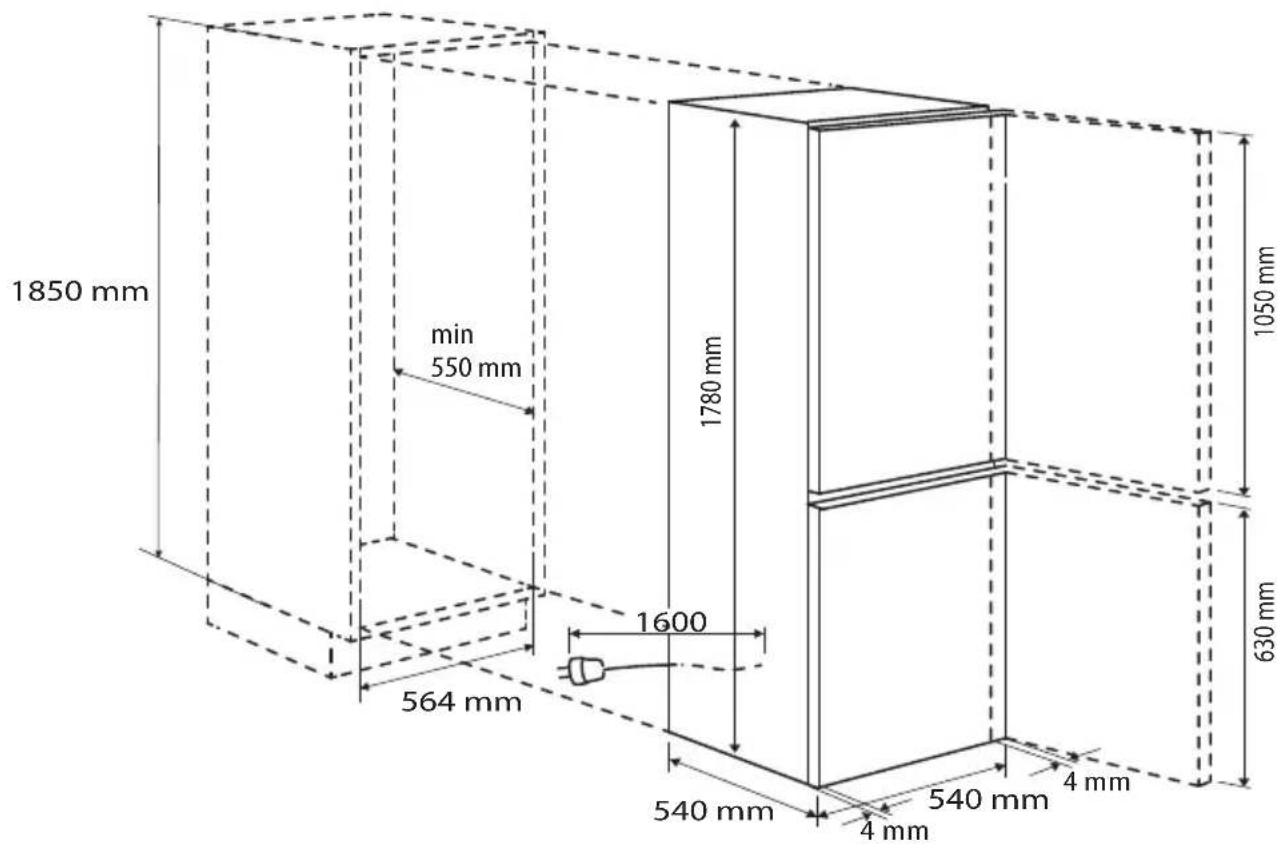
INSTALLATION INSTRUCTIONS

It is recommended that installation may be performed by the authorised service agent or a similarly qualified person.
In order for the appliance to function properly, the following installation conditions must be observed.
text_image
1850 mm min 550 mm 1780 mm 1050 mm 630 mm 1600 564 mm 540 mm 540 mm 4 mm 4 mmInstall the appliance in a dry, well ventilated room. Keep your appliance away from heat sources, humid places and direct sunlight.
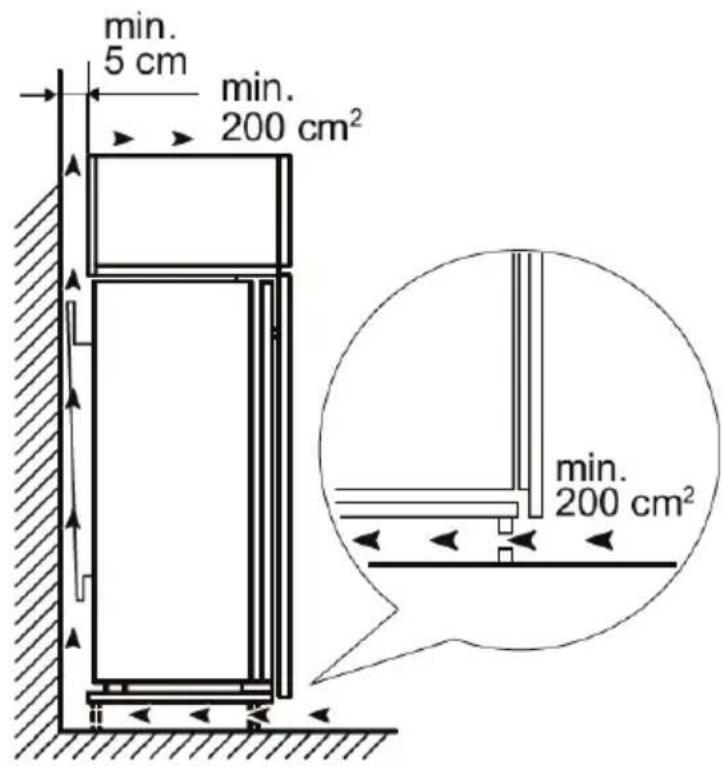
There must be appropriate air ventilation around the appliance in order to achieve an efficient operation.
text_image
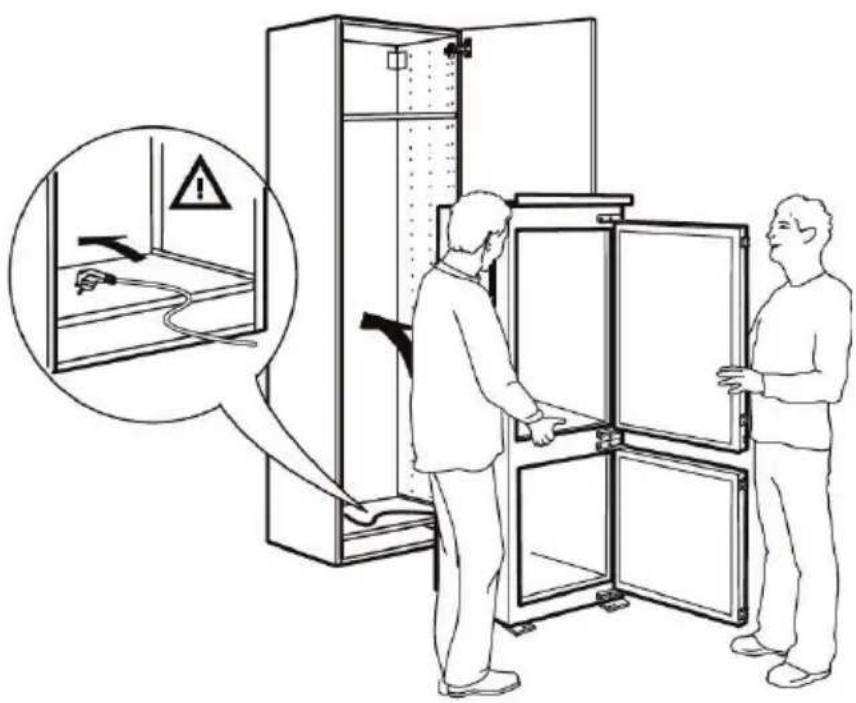
Diagram illustrating safety warning about electrical equipment installation, showing two workers exchanging doors with a warning symbol and an inset image of wiring.1
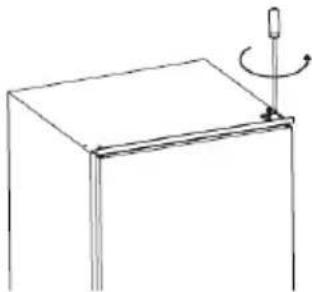
Raise the appliance and slide into the cabinet.
Make sure that the mains plug is accessible after the installation of the appliance.
Make sure that the clearance between the appliance and cabinet is 4 mm.
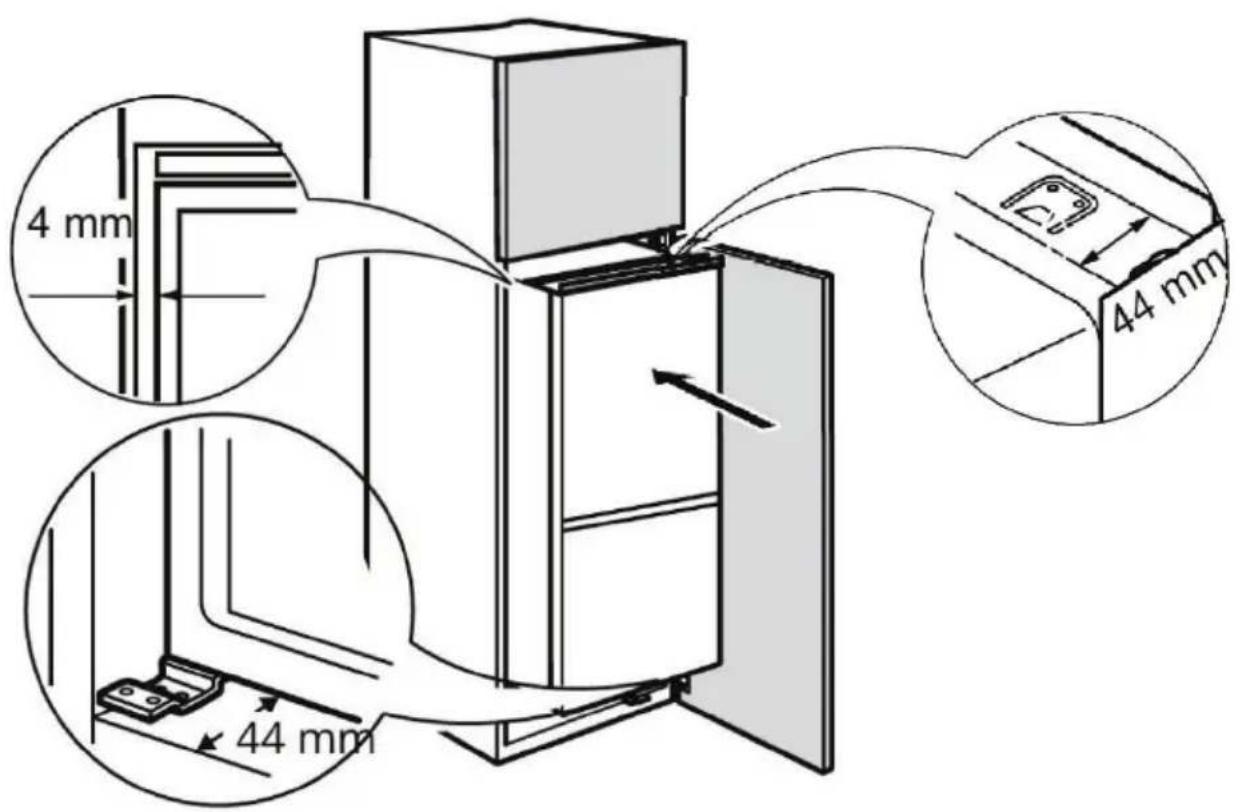
text_image
4 mm 44 mm 44 mm2 Adjust the appliance in the cabinet.
For a correct alignment make sure that the distance between the appliance and the cabinet front-edge is of 44 mm.
natural_image
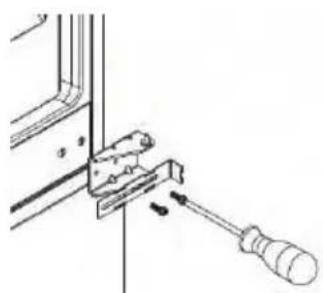
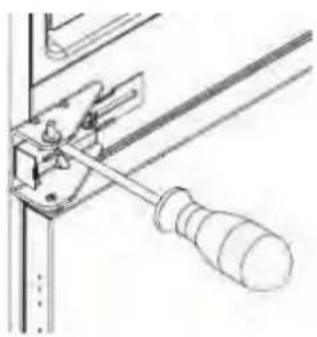
Technical line drawing of two mechanical frame assemblies with mounting brackets and a curved component (no text or symbols)3 Attach the appliance to the cabinet using the supplied screws.
text_image
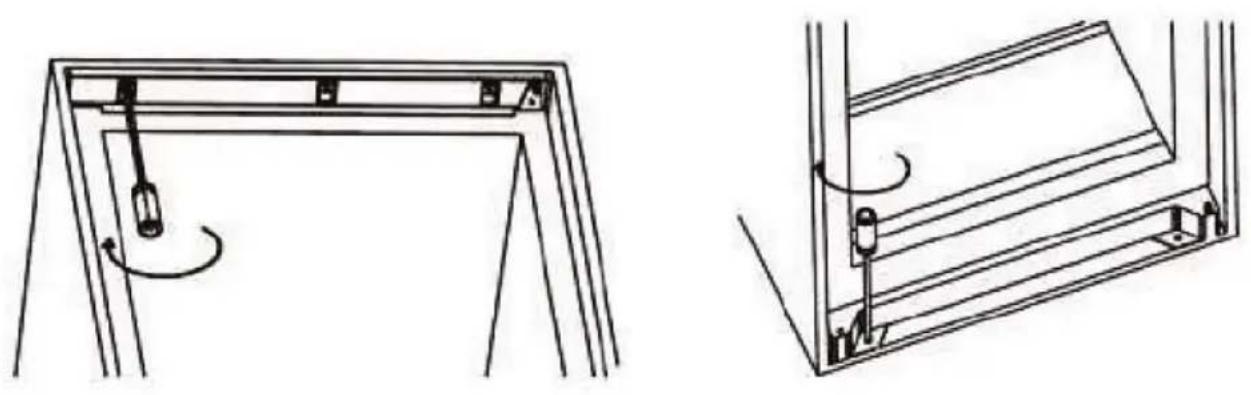
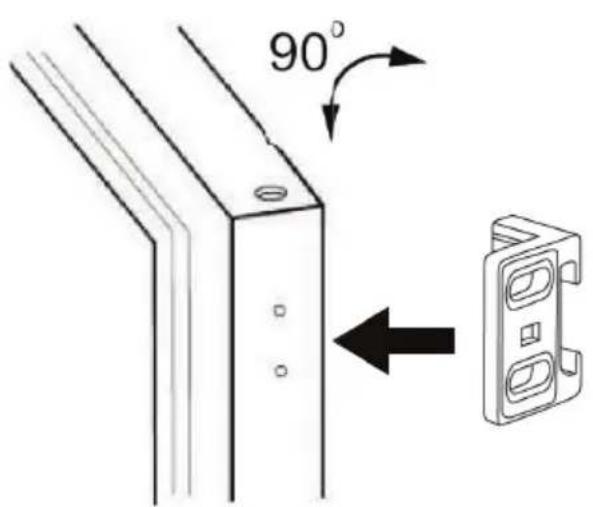
90°Align the holes in the side of the appliance door with the guide holes.
4
Open the appliance door and the cabinet door at an angle of 90^ . Place the supplied guide on the side of the appliance door.
natural_image
Line drawing of a cabinet or latch mounted on a wall, showing mounting brackets and a close-up view (no text or symbols)5
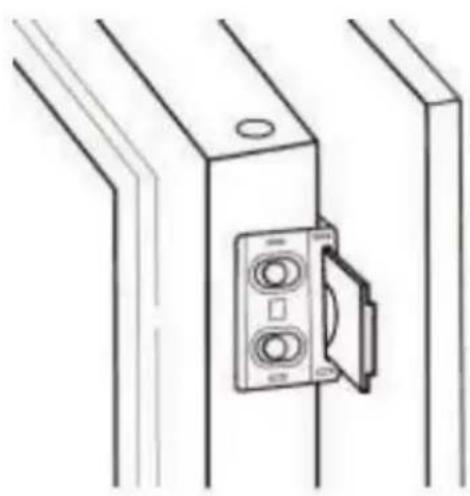
Insert the supplied slider into the slot of the guide.
Put together the appliance door and the cabinet door.
natural_image
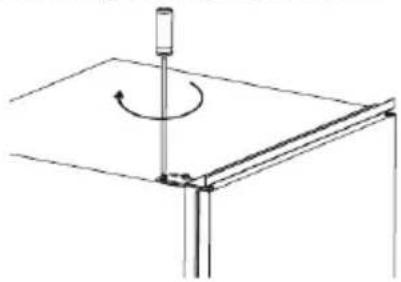
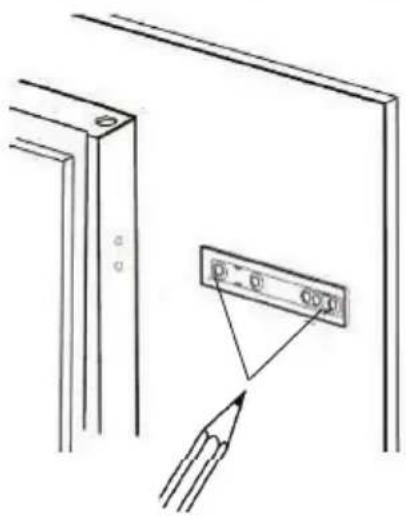
Technical line drawing showing a bracket with mounting holes and a close-up of a component detail (no text or symbols)Remove the guide.
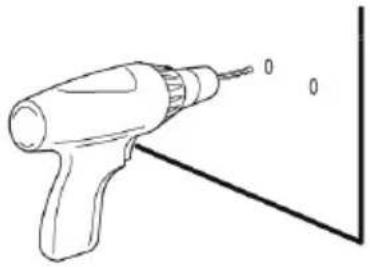
Mark the position of the slider holes and then drill the holes.
natural_image
Line drawing of a handheld electric drill with tip and base, no text or symbols present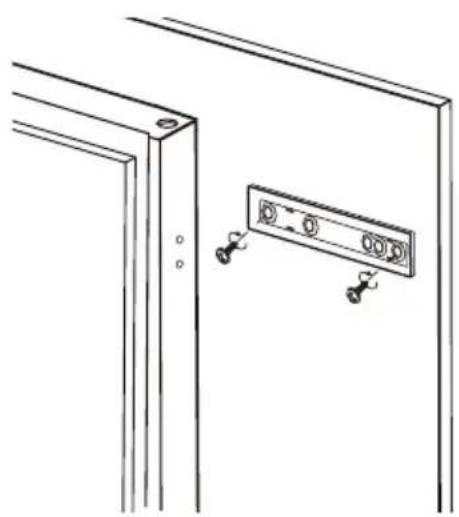
natural_image
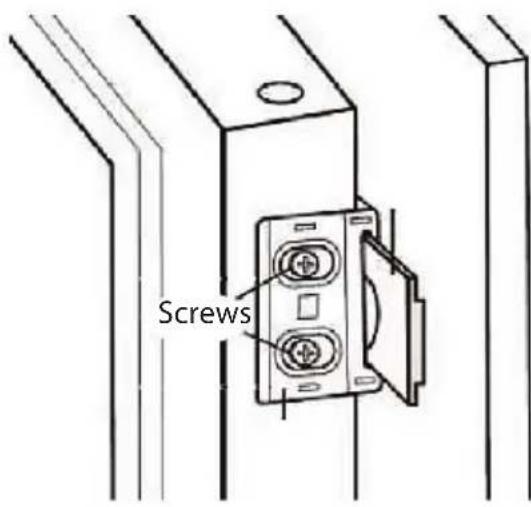
Technical line drawing of a door frame with mounting holes and a mounted bracket (no text or symbols)6
Fix the slider on the cabinet door with the supplied screws.
Attach the supplied slider cover onto the slider until it clicks into place.
natural_image
Diagram showing two components with circular elements, one pointing to a rectangular panel (no text or symbols)
natural_image
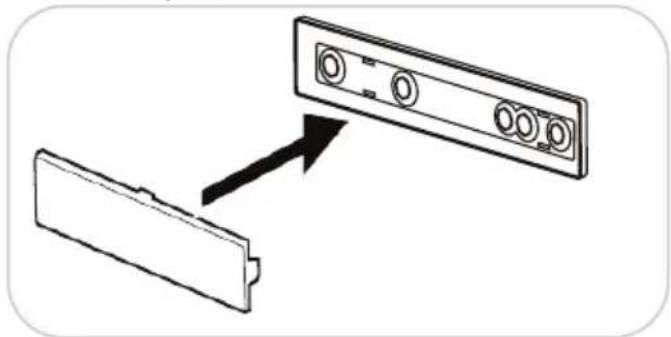
Diagram showing a door panel being inserted into a device, with no visible text or symbols7
Insert the slider into the slot of the guide. Fix the guide on the appliance door with the supplied screws.
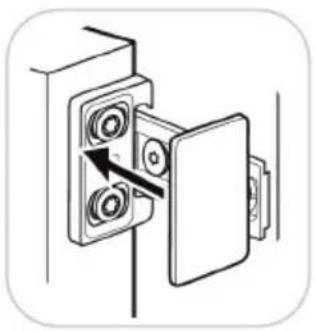
text_image
ScrewsAttach the supplied guide cover onto the guide until it clicks into place.
natural_image
Diagram of a mechanical assembly with two circular components inserted into a housing (no text or symbols)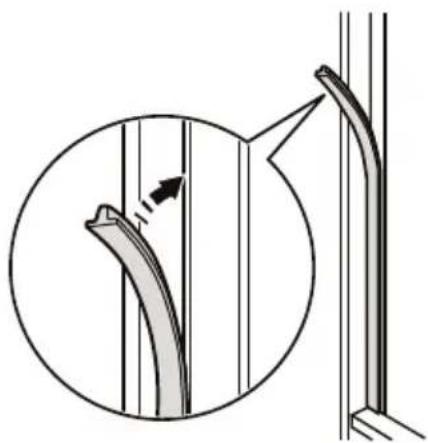
natural_image
Diagram showing a curved pipe or duct with an arrow indicating direction, alongside a magnified inset (no text or symbols)8
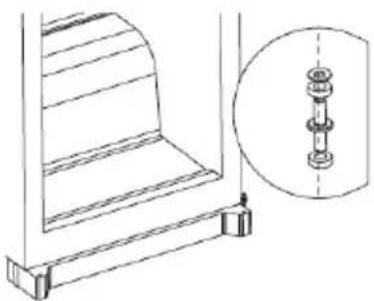
Fit the supplied rubber seal to the non-hinge side of the appliance.
Do a final check to make sure that :
■ All screws are tightened.
■The rubber seal is attached tightly to the cabinet.
■The appliance door opens and closes correctly.
AMBIENT TEMPERATURE
This appliance is designed to operate in ambient temperature between 16°C and 38°C. If these temperatures are exceeded, i.e. colder or warmer, the appliance will not operate correctly. If the ambient temperatures are exceeded for long periods, the temperature in the freezer compartment will rise above -18°C and food spoilage may occur.
BEFORE PLACING FOOD IN THE APPLIANCE
- Remove all packaging.
- Allow the appliance to run empty for 2 – 3 hours so the compartments can cool to the appropriate temperature.
- Clean the inside of the appliance with warm water and a little liquid detergent to remove manufacturing and transportation dust.
POWER FAILURE
If there is a power failure, do not open the door. Frozen food should not be affected if the power failure lasts for less than 10 hours.
Do not refreeze frozen foods that have thawed completely. The food may be dangerous to eat.
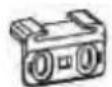
TEMPERATURE CONTROL
This appliance is equipped with a control panel inside the refrigerator compartment.
THOMSON
ELECTRONIC
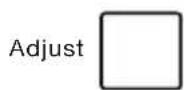


You can regulate the temperature by repeatedly pressing Adjust. The corresponding temperature indicator light (1 to 5) will illuminate.
- 1 is cold setting
5 is coldest setting
The running time and temperature are affected by where the appliance is located, how often the door is opened and the temperature of the room the appliance is located in.
When you use the appliance for the first time or after defrosting, adjust the temperature to the coldest setting for at least 2 hours before introducing food to be stored, and then readjust to the middle setting.
To turn off the appliance, press and hold Adjust for about 5 seconds. To turn it on, press and hold Adjust for about 5 seconds again.
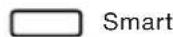
Smart mode
To activate this mode, repeatedly press Mode until the Smart indicator light illuminates.
The temperature inside the fridge freezer will be automatically adjusted to the best refrigerating and freezing conditions according to ambient temperature.
Super mode
This mode will help food to freeze quickly and retain its nutrients, vitamins, flavours and appearance.
To activate this mode, repeatedly press Mode until the Super indicator light illuminate.
This mode will be automatically deactivated after 54 hours of operation and the appliance will restore to the original temperature setting.
Door open alarm
When the fridge door is left open or not closed completely for about 1 minute, the appliance will sound the alarm.
Close the fridge door then the alarm will stop.
Warning, check the correct closing of the freezer door which is not equipped with this door open alarm.
MOVING YOUR APPLIANCE
If the appliance is turned off for any reason, wait for 10 minutes before turning it back on. This will allow the refrigeration system pressures to equalise before restarting.
- Turn off the appliance and unplug it from the mains socket. Remove all food. Also remove all mobile parts (shelves, accessories, etc.) or fix them into the appliance to avoid any shock.
- Relocate and install. If the appliance has been left on its side for any length of time, leave it standing upright for at least 10 minutes before turning on.
Your appliance uses isobutane (R600a) as a refrigerant. Although R600a is an environmentally friendly and natural gas, it is explosive. Therefore you should be careful during shipment and installation to prevent your appliance's cooler elements from being damaged. In the event of a leak caused by damage to the cooler elements, move your appliance from open flame or heat sources and ventilate the room where the appliance is located for a few minutes.
FREEZING AND STORING FOOD IN THE FREEZER COMPARTMENT
Use the freezer compartment
● To store deep - frozen food.
- To make ice cubes.
- To freeze food.
Note: Ensure that the freezer compartment door has been closed properly.
Purchasing frozen food
● Packaging must not be damaged.
- Use by the 'use by /best before/best by/' date.
- If possible, transport deep frozen food in an insulated bag and place quickly in the freezer compartment.
Storing frozen food
Store at -18°C or colder. Avoid opening the freezer door unnecessarily.
Freezing fresh food
Freeze fresh and undamaged food only.
To retain the best possible nutritional value, flavour and colour, vegetables should be blanched before freezing. Aubergines, peppers, zucchini and asparagus do not require blanching.
Note: Keep food to be frozen away from food which is already frozen.
- Ensure that food is well wrapped or covered before it is stored. This will prevent food from dehydrating, deteriorating in colour or losing taste and will help maintain freshness. It will also prevent odour transfer.
- Make sure that strong smelling foods are wrapped or covered and stored away from foods such as
- butter, milk and cream which can be tainted by strong odours. Cool hot foods down before placing them in the fridge compartment.
Dairy foods and eggs
- Most pre-packed dairy foods have a recommended ‘use by /best before/best by/’ date stamped on them. Store them in the fridge compartment and use within the recommended time.
- Butter can become tainted by strong smelling food so it is best stored in asealed container.
- Eggs can be stored in the fridge compartment.

natural_image
Illustration of a milk carton with eggs and a milk bottle (no text or symbols)Red meat
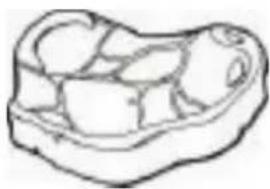
- Place fresh red meat on a plate and loosely cover with waxed paper, plastic wrap or foil.
- Store cooked and raw meat on separate plates. This will prevent any juice lost from the raw meat from contaminating the cooked product.
natural_image
Simple line drawing of a bone structure (no text or labels)Poultry
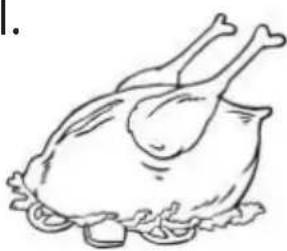
- Fresh whole birds should be rinsed inside and out with cold running water, dried and placed on a plate. Cover loosely with plastic wrap or foil.
- Poultry pieces should also be stored this way. Whole poultry should never be stuffed until just before cooking, otherwise food poisoning may result.
natural_image
Simple line drawing of a roasted chicken with legs and sauce (no text or symbols)- Cool and refrigerate cooked poultry quickly. Remove stuffing from poultry and store separately.
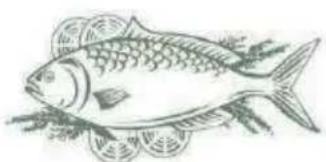
Fish and seafood
- Whole fish and fillets should be used on the day of purchase. Until required, refrigerate on a plate loosely covered with plastic wrap, waxed paper or foil.
- If storing overnight or longer, take particular care to select very fresh fish. Whole fish should be rinsed in cold water to remove loose scales and dirt and then patted dry with paper towels.
natural_image
Line drawing of a fish with scales and decorative elements (no text or symbols)- Place whole fish or fillets in a sealed plastic bag. Keep shellfish chilled at all times. Use within 1 – 2 days.
Precooked foods and leftovers
• These should be stored in suitable covered containers so that the food will not dry out.
- Keep for only 1 – 2 days.
- Reheat leftovers only once and until steaming hot.
Vegetable and fresh fruit
- The vegetable container is the optimum storage
location for fresh fruit and vegetables. Take care not to store the following at
• temperatures of less than 7^ C for long periods:
Citrus fruit, melons, aubergines, pineapple, papaya, courgettes, passion fruit, cucumber, peppers, tomatoes
- Undesirable changes will occur at low temperatures such as softening of the flesh, browning and/or accelerated decaying.
- Do not refrigerate avocados (until they are ripe), bananas, and mangoes.

natural_image
Illustration of assorted vegetables including carrots, mushrooms, and a pomegranate (no text or symbols)Recommended Food Arrangement
Cold air sinks so the bottom part is the coldest. Store your food in the optimal space to enjoy the fresh taste.
Refrigerator compartment:
Top section: canned food, bread, cake...
Middle section: dairy products, readymade food, desserts...
Bottom section: meat, meat products, delicatessen ...
Containers: fresh fruit, vegetables, salads...
Refrigerator door shelves:
Top/middle section: eggs, butter, cheese...
beverages, cans, bottles... Bottom section:
Freezer compartment:
Freezing, storage of frozen food
- Open the appliance as briefly as possible.
- Ensure that the doors are always closed properly.
OPERATING NOISES
Normal noises
- UMotors are running.
- URefrigerant is flowing through the tubing.
CLEANING AND MAINTENANCE

Do not use abrasive cleaning agents or solvents.
- UUnplug it from the mains socket.
- Take out the food and store in a cool location.
- Clean the appliance with a soft cloth, warm water and detergent.
- Wipe the door seal with clear water only and then wipe dry thoroughly.
- After cleaning, reconnect and adjust the temperature as desired.
- Put the food back into the appliance.
The LED lights in the fridge compartment cannot be replaced by the user. If the LED lights stop working, please contact the local authorised service agent.
Cleaning Tips
- Remove all shelves, door shelves and drawers from the appliance. Wash them in warm soapy water with a soft sponge. Rinse and dry thoroughly.
- Wipe the interior parts (including door switch and lamp cover) with a damp cloth soaked in a mixture of warm water and dishwashing liquid. For stubborn stains, use baking soda.
- Wipe down the doors, including edges, with a microfiber cloth dampened with a mild dishwashing liquid and water. Use a wet sponge and soft brush (such as toothbrush) to remove any stuck-on food.
TROUBLESHOOTING
If there is a problem with your appliance, please check the following points before contacting customer service.
| Problem | Possible causes | Possible solution |
| Appliance does not operate. Uand p | No electricity at power outlet. Power switched on. | Check that the plug is correctly connected |
| Appliance is noisy. | Cabinet not stable or level. | See “Installation” section. |
| Appliance not cool | Temperature setting not correct. | See “Temperatures Control” section. |
| Frequent door openings. Large amount of food recently added. | Minimise door openings to allow temperatures to stabilise. |
SPECIFICATIONS
| Electric shock protection class | I |
| Rated voltage and frequency | 220-240V~ 50Hz |
| Rated current | 0.75A |
| Rated power input | 115W |
| Maximum lamp power | 1,5W |
| Refrigerant/Amount | R600a/ 62g |
| Net weight | 55kg |
| Insulation blowing gas | Cyclopentane |
| Temperature rise time | 10 hours |
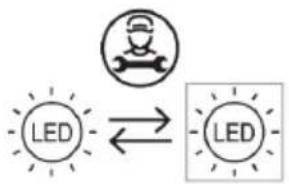
flowchart
graph LR
    A["LED"] <--> B["LED"]
Replaceable (LED only) light source by a professional
This product contains a light source of energy efficiency class G.
| Product Information SheetCOMMISSION DELEGATED REGULATION (EU) 2019/2016 with regard to energy labelling of refrigerating appliances | |||||
| Supplier's name or trade mark: Etablissements Darty & fils © | THOMSON | |||||
| Supplier's address: 9 Rue des Bateaux-Lavoirs, 94200 Ivry-sur-Seine, France | |||||
| Model identifier: COMBI TH178EBI A++ | |||||
| Type of refrigerating appliance: | |||||
| Low-noise appliance: no | Design | type: | built-in | ||
| Wine storage appliance: | no | Other refrigerating appliance: | yes | ||
| General product parameters: | |||||
| Parameter | Value | Parameter | |||
| Overall dimensions (millimeter) | Height | 1780 | Total volume (dm3 or l) 249 Width 540 | ||
| Depth 540 | |||||
| EEI | 100 | Energy efficiency class | F | ||
| Airborne acoustical noise emissions (dB(A) re 1 pW) | 39 | Airborne acoustical noise emission class | C | ||
| Annual energy consumption (kWh/a) | 217 | Climate class: | temperate/subtropical | ||
| Minimum ambient temperature (°C), for which the refrigerating appliance is suitable | 16 | Maximum ambient temperature (°C), for which the refrigerating appliance is suitable | 38 | ||
| Winter setting | no | ||||
| Compartment Parameters: | |||||
| Compartment type | Compartment parameters and values | ||||
| Compartment Volume (dm3 or l) | Recommended temperature setting for optimised food storage (°C) | Freezing capacity (kg/24 h) | Defrosting type (auto-defrost = A, manual defrost = M) | ||
| Pantry | no | — | — | — | — |
| Wine storage | no | — | — | — | — |
| Cellar | no | — | — | — | — |
| Fresh food | yes | 179,0 | 4 | — | A |
| Chill | no | — | — | — | — |
Value
| 0-star or ice-making | no — | — — — | |||
| 1-star no — — | — — | ||||
| 2-star no — — | — — | ||||
| 3-star no — — | — — | ||||
| 4-star | yes | 70,0 | -18 | 3,2 | M |
| 2-star section no | — — — — | ||||
| Variable temperature compartment | no | — — | — | — | |
| For 4-star compartments | |||||
| Fast freeze facility | yes | ||||
| For wine storage appliances | |||||
| Number of standard wine bottles — | |||||
| Light source parameters (a): | |||||
| Type of light source | LED | ||||
| Energy efficiency class | G | ||||
| Minimum duration of the guarantee offered by the manufacturer : 24 months | |||||
| Additional information: | |||||
| Weblink to the supplier's website, where the information in point 4 of Annex II of Commission Regulation (EU)2019/2019 is found : www.darty.com | |||||
^3 as determined in accordance with Commission Delegated Regulation (EU) 2019/2015.
Climate class:
- Temperate: 'this refrigerating appliance is intended to be used at ambient temperatures ranging from 16 °C to 32 °C'.
- Subtropical: 'this refrigerating appliance is intended to be used at ambient temperatures ranging from 16 °C to 38 °C'.
To find the model information in the product database :
Click the link
https://eprel.ec.europa.eu/screen/product/refrigeratingappliances2019/334089
REPAIR AND SPARE PARTS SERVICE
Do not disassemble or repair the appliance by yourself. Failure to do so may result in an electric shock or personal injury.
To access to professional repair and order spare parts, please get the support from FNAC DARTY after-sales service.
Spare parts for your appliances will be delivered within 15 working days after having received the order.
Please Note!
All appliances have a 2-year warranty.
Warranty does not cover damages caused due to improper installation, unauthorized modification, self-repair or non-professional repair.
Contact us at :
 www.darty.com www.darty.com 0978 970 97024 Hours7 Days a week 0978 970 97024 Hours7 Days a week | Vanden Borrein alle vertrouwenwww.vandenborre.be 02 334 00 008 AM – 6 PMMon to Sat 02 334 00 008 AM – 6 PMMon to Sat |
| [sen-2]9 Rue des Bateaux-Lavoirs,94200 Ivry-sur-Seine,France | [SIGN]Slesbroekstraat 1011600 Sint-Pieters-LeeuwBelgium |
DISPOSAL
As a responsible retailer we care about the environment.
As such we urge you to follow the correct disposal procedure for the appliance and packaging materials. This will help conserve natural resources and ensure that it is recycled in a manner that protects health and the environment.
You must dispose of this appliance and its packaging according to local laws and regulations. Because this appliance contains electronic components, the appliance and its accessories must be disposed of separately from household waste when the appliance reaches its end of life.
Contact your local authority to learn about disposal and recycling.
The appliance should be taken to your local collection point for recycling. Some collection points accept appliance free of charge.
We apologise for any inconvenience caused by minor inconsistencies in these instructions, which may occur as a result of product improvement and development.
natural_image
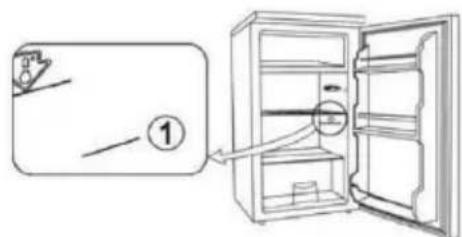
Warning symbol with exclamation mark and circular dot (no text or numbers)The symbol indicates the location of the coldest part of your refrigerator. This area is in between the vegetable compartment at the bottom and the symbol at the top, or the shelf at the same height. In order to maintain the temperature in this area, make sure not to change the position of this shelf.
In pulsed air refrigerators (equipped with a fan) or No Frost models, the coldest area symbol is not shown because the temperature is uniform throughout the interior.
INSTALLING THE TEMPERATURE INDICATOR
To help you adjust your refrigerator correctly, it is equipped with a temperature indicator that you can use to control the average temperature in the coldest area.
WARNING: This indicator is only intended for use in your refrigerator. Do not use it in another refrigerator (as the coldest area will not be the same) or for any other purpose.
TEMPERATURE INDICATOR: THE COLDEST PART OF YOUR REFRIGERATOR
text_image
Diagram showing refrigerator door with open refrigerator and labeled component, including a magnified view of the door's interior.CHECKING THE TEMPERATURE IN THE COLDEST AREA
• Using the temperature indicator, you should regularly check that the temperature is correct in the coldest part of your refrigerator. The temperature inside your refrigerator depends on a number of factors, such as the outside room temperature, how full your refrigerator is, and how often you open the door. Take these factors into consideration when adjusting your appliance.
When the indicator shows "OK", it means your thermostat is set properly and the temperature inside your refrigerator is correct.
If the indicator is white it means the temperature is too high, so you should
increase the thermostat and wait for 12 hours before checking the indicator
again.
After loading the refrigerator or opening the door, the indicator may turn white for a few seconds.

Correct setting
Temperature too high – adjust the thermostat
Inhoudsopgave
WAARSCHUWINGEN....2
BELANGRIJKE VEILIGHEIDSINSTRUCTIES 7
BESCHRIJVING VAN DE ONDERDELEN 8
UW APPARAAT VERPLAATSEN 20
LEVENSMIDDELEN IN DE VRIESKAST INVRIEZEN EN BEWAREN 20
LEVENSMIDDELEN IN DE KOELKAST BEWAREN 24
ONTDOOIEN....28
ENERGIEBESPARINGSTIPS 28
WERKINGSGELUIDEN....28
REINIGING EN ONDERHOUD 29
PROBLEEMOPLOSSING 29
PRODUCTINFORMATIEBLAD....31
SERVICE VOOR REPARATIES EN RESERVEONDERDELEN....33
VERWIJDERING....34
WAARSCHUWINGEN
natural_image
Close-up of a white metal frame with black edges and mounting holes (no visible text or symbols)natural_image
Simple line drawing of a box with a pointer and curved arrow indicating rotation (no text or symbols)natural_image
Technical line drawing of a mechanical clamp or bracket assembly with a screwdriver (no text or symbols)natural_image
Technical line drawing of a mechanical bracket and a separate inset showing a bolt assembly (no text or symbols)text_image
Diagram showing a mechanical or structural change with an arrow indicating direction, possibly illustrating a process or assembly.natural_image
Technical line drawing of a screwdriver inserted into a bracket (no text or symbols)natural_image
Technical line drawing of four mechanical bracket components with bolt holes, shown in sequential steps from top to bottom (no text or symbols)natural_image
Simple line drawing of a rotating mechanical component with a pointer and curved arrow (no text or symbols)VOOR INSTALLATIE VAN HET APPARAAT
text_image
Diagram illustrating safety warning about electrical equipment installation, showing two people exchanging doors with a warning symbol and an inset image of a device inside.1
natural_image
Line drawing of a cabinet or latch mounted on a wall, showing mounting holes and a close-up view (no text or symbols)5
natural_image
Technical line drawing showing a bracket with mounting holes and a close-up of a component detail (no text or symbols)natural_image
Line drawing of a handheld electric drill with tip and base, no text or symbols present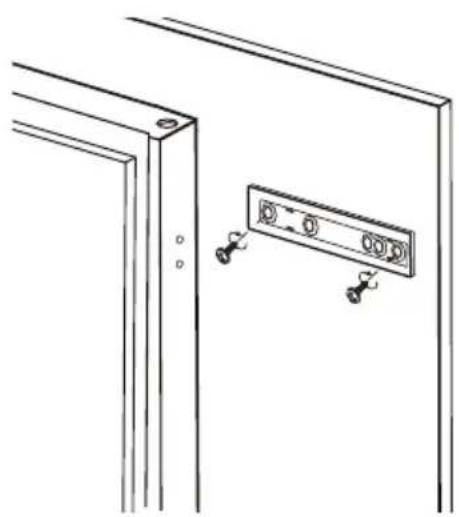
natural_image
Technical line drawing of a structural frame with mounting holes and a mounted panel (no text or symbols)6
natural_image
Diagram showing two components: a battery pack and a multi-pin display panel (no text or symbols)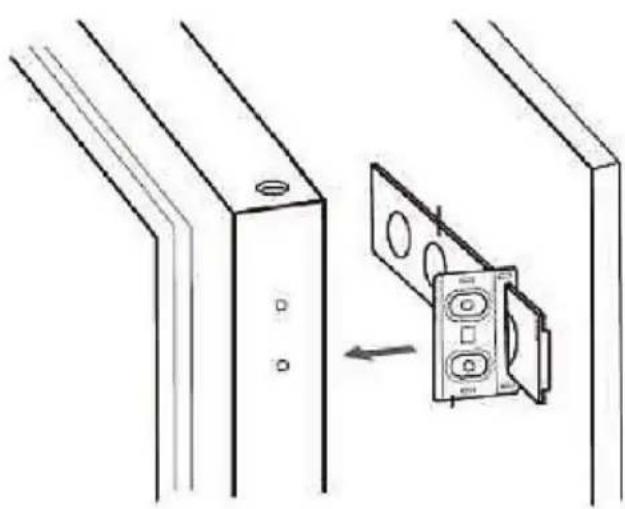
natural_image
Diagram showing a wall-mounted device connected to a panel with two circular components, no text or symbols present.7
natural_image
Diagram of a mechanical assembly with two circular components inserted into a housing (no text or symbols)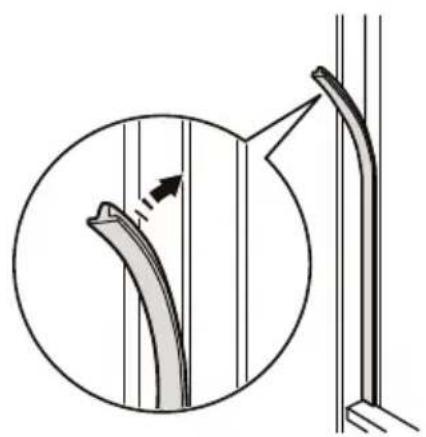
natural_image
Diagram showing a curved pipe or duct with an arrow indicating direction, alongside a magnified inset (no text or symbols)8
UW APPARAAT VERPLAATSEN
natural_image
Illustration of a milk carton, cheese bowl, and milk carton (no text or symbols)natural_image
Simple line drawing of a biological or geological cross-section (no text or symbols)natural_image
Simple line drawing of a roasted chicken with legs and decorative base (no text or symbols)natural_image
Line drawing of a fish with scales and decorative elements (no text or symbols)natural_image
Illustration of fresh vegetables including carrots, mushrooms, and a pomegranate (no text or symbols)natural_image
Technical line drawing of a structural component with an inset showing a hand holding a circular component (no text or symbols present)Vriesvak ontdooien
https://eprel.ec.europa.eu/screen/product/refrigeratingappliances2019/334089

SERVICE VOOR REPARATIES EN RESERVEONDERDELEN
natural_image
Warning symbol with exclamation mark and circular dot (no text or numbers)text_image
Diagram showing a refrigerator with an open door and a close-up of the door, labeled with number ①.VERIFICATIE VAN DE TEMPERATUUR IN DE KOUDSTE ZONE
EU Declaration of Conformity
Product Description:
natural_image
White refrigerator with two doors, no visible text or symbolsMarque -
Brand /Merk /Marca:
THOMSON
The object of the declaration described above is in conformity with the relevant Union harmonisation legislation:
Low Voltage Directive (LVD)
Eco design requirements for energy-related products (ErP)
RoHS
EMC:
EN 55014-1:2017
EN 55014-2:2015
EN 61000-3-2:2014
EN IEC 61000-3-2:2019
EN 61000-3-3:2013+A1:2019
LVD :
EN 60335-1:2012+A11:2014+A13:2017+A14:2019+A1:2019+A2:2019
EN 60335-2-24:2010+A1:2019+A2:2019
EN 62233:2008
ErP :
(EU) 2019/2016
(EU) 2019/2019
(EU) 2021/340
(EU)2021/341
EN 62552-1:2020
EN 62552-2:2020
EN 62552-3:2020
EN 60704-1:2010+A11:2012
EN 60704-2-14:2013+A11:2015+A1:2019
(EU)2019/2015
(EU)2019/2020
This declaration of conformity is drawn up under the sole responsibility of the manufacturer.
The person responsible for this declaration is:
Place, Date / Lieu :
Ivry-sur-Seine, mars 25, 2022


text_image
C€