
RA097600 - Fridge GAGGENAU - Free user manual and instructions
Find the device manual for free RA097600 GAGGENAU in PDF.
| Product type | Built-in refrigerator |
| Brand | Gaggenau |
| Model | RA097600 |
| Height (approx.) | 177 cm |
| Width (approx.) | 91 cm |
| Depth (approx.) | 71 cm |
| Weight (approx.) | 80 kg |
| Power supply | 230 V / 50 Hz |
| Door reversibility | Yes (left/right) |
| Side-by-side installation | Yes with included connection kit |
| Height adjustment | Adjustable feet with adjustment key |
| Included accessories | Adjustment key, fixing screws (4x14, 4x30), connection brackets |
| Main functions | Ventilated cooling, LED lighting, electronic control |
| Maintenance and cleaning | Clean with a soft cloth and mild detergent |
| Safety | Child lock, open door alarm |
| Spare parts and repairability | Door gasket, shelves, door bins available |
| Energy class (estimated) | A+ |
| Net capacity (approx.) | 300 litres |
| Noise level (estimated) | 38 dB |
Frequently Asked Questions - RA097600 GAGGENAU
User questions about RA097600 GAGGENAU
0 question about this device. Answer the ones you know or ask your own.
Ask a new question about this device
Download the instructions for your Fridge in PDF format for free! Find your manual RA097600 - GAGGENAU and take your electronic device back in hand. On this page are published all the documents necessary for the use of your device. RA097600 by GAGGENAU.
USER MANUAL RA097600 GAGGENAU
natural_image
Diagram showing two identical rectangular devices with front and side views, one with an arrow indicating rotation or assembly (no text or symbols present)- Letakkan perkakas berdampingan di depan ceruk pemasangan.
natural_image
Technical line drawing of a dual-panel computer unit with front and back panels, no text or symbols presentnatural_image
Isometric line drawing of a 3D rectangular frame with internal structural connections and downward arrows indicating force or movement (no text or symbols)natural_image
Diagram showing two mechanical components with threaded ends and curved arms, no text or symbols presentnatural_image
Diagram of an open server rack cabinet showing two internal compartments with ventilation grilles and drive bays (no text or labels)- Masukkan braket penghubung atas.
natural_image
Diagram of an open server rack with multiple drive bays and ventilation grilles, showing internal structure and mounting points (no text or labels)natural_image
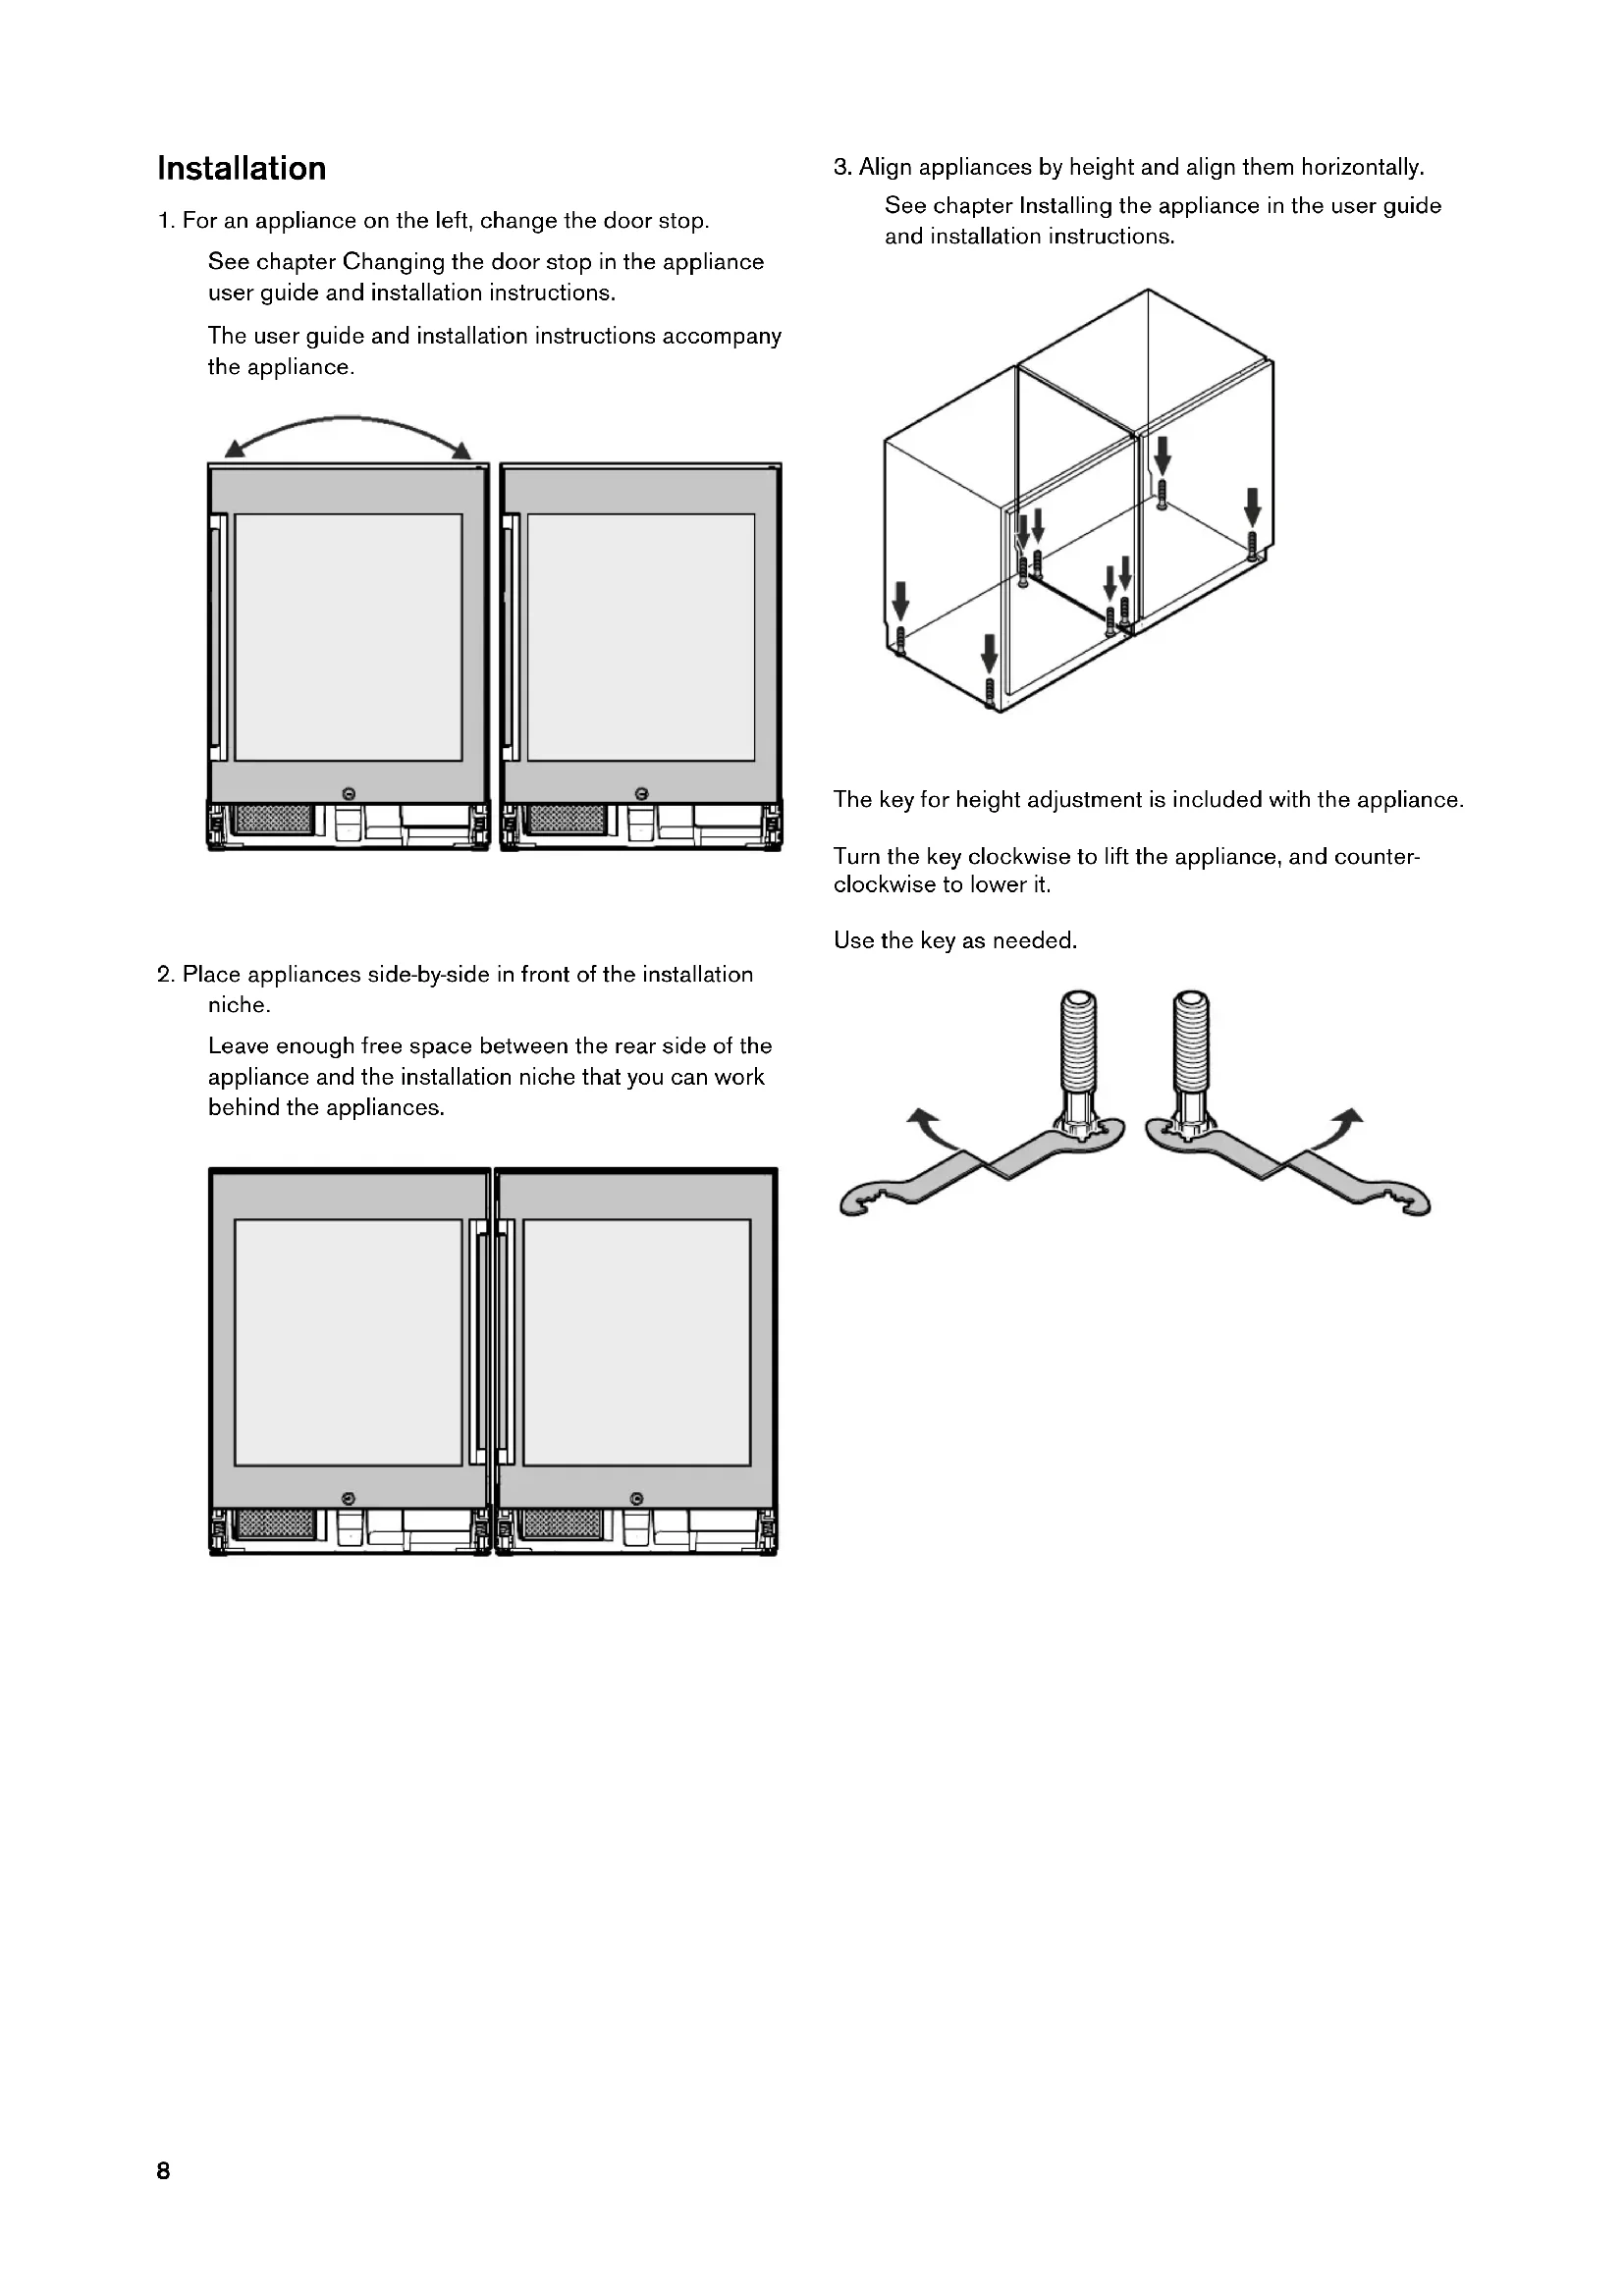
Diagram of a double-door refrigerator with two doors, showing airflow direction arrows (no text or symbols)- For an appliance on the left, change the door stop.
See chapter Changing the door stop in the appliance user guide and installation instructions.
The user guide and installation instructions accompany the appliance.
natural_image
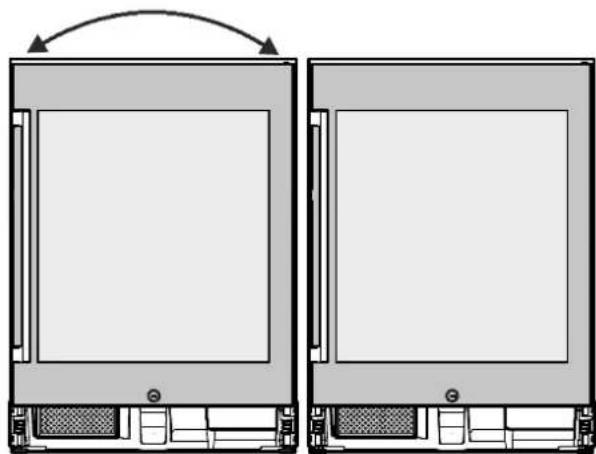
Diagram showing two identical rectangular electronic devices with front and back panels, one with an arrow indicating rotation (no text or symbols)- Place appliances side-by-side in front of the installation niche.
Leave enough free space between the rear side of the appliance and the installation niche that you can work behind the appliances.
natural_image
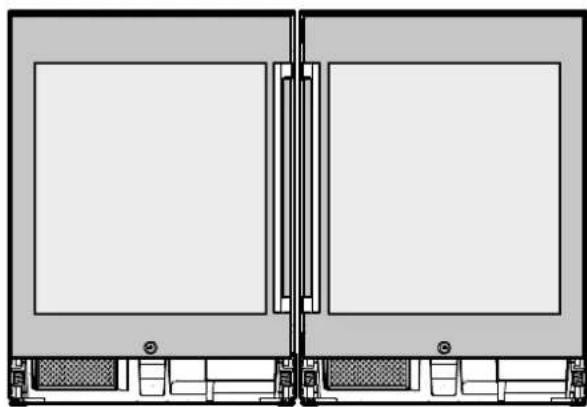
Technical line drawing of a dual-panel computer unit with front and back panels, no text or symbols present- Align appliances by height and align them horizontally.
See chapter Installing the appliance in the user guide and installation instructions.
natural_image
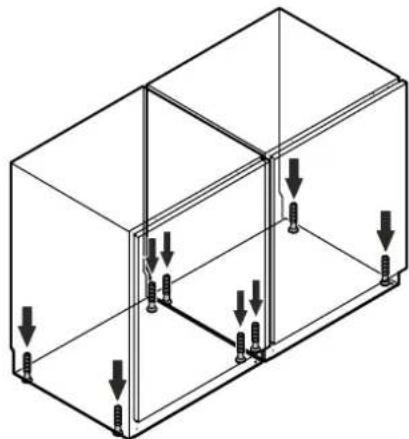
Isometric line drawing of a 3D rectangular frame with internal structural connections and downward arrows indicating force or movement (no text or symbols)The key for height adjustment is included with the appliance.
Turn the key clockwise to lift the appliance, and counterclockwise to lower it.
Use the key as needed.
natural_image
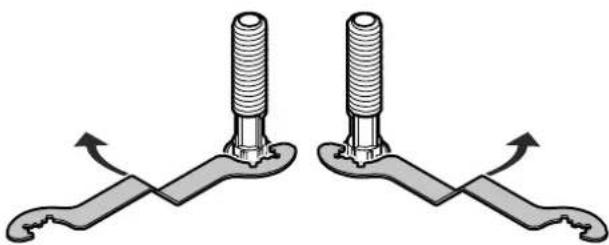
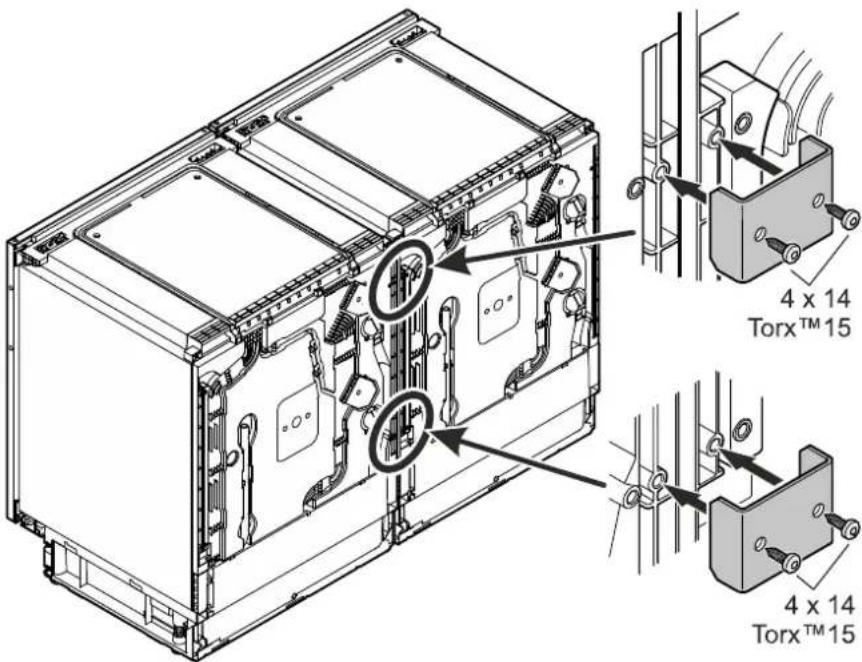
Diagram showing two mechanical components with threaded ends and curved arms, no text or symbols present- Screw the angle connectors to the rear of the appliances.
Use two 4 x 14 screws apiece.
text_image
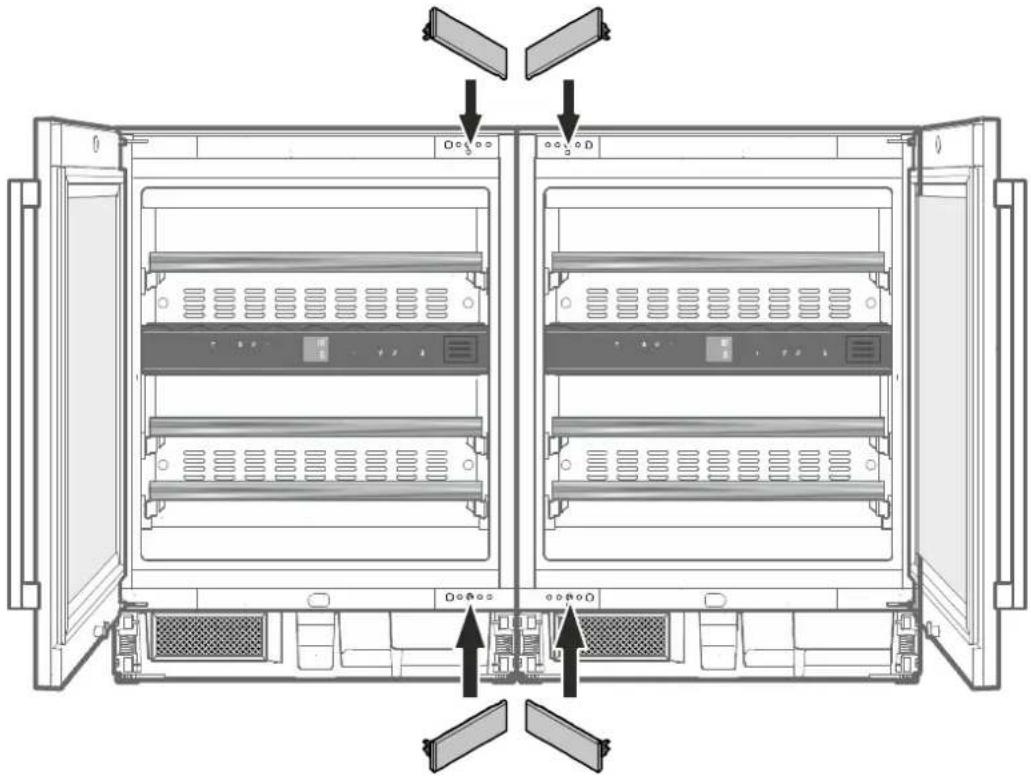
4 x 14 Torx™ 15 4 x 14 Torx™ 15- Remove covers.
natural_image
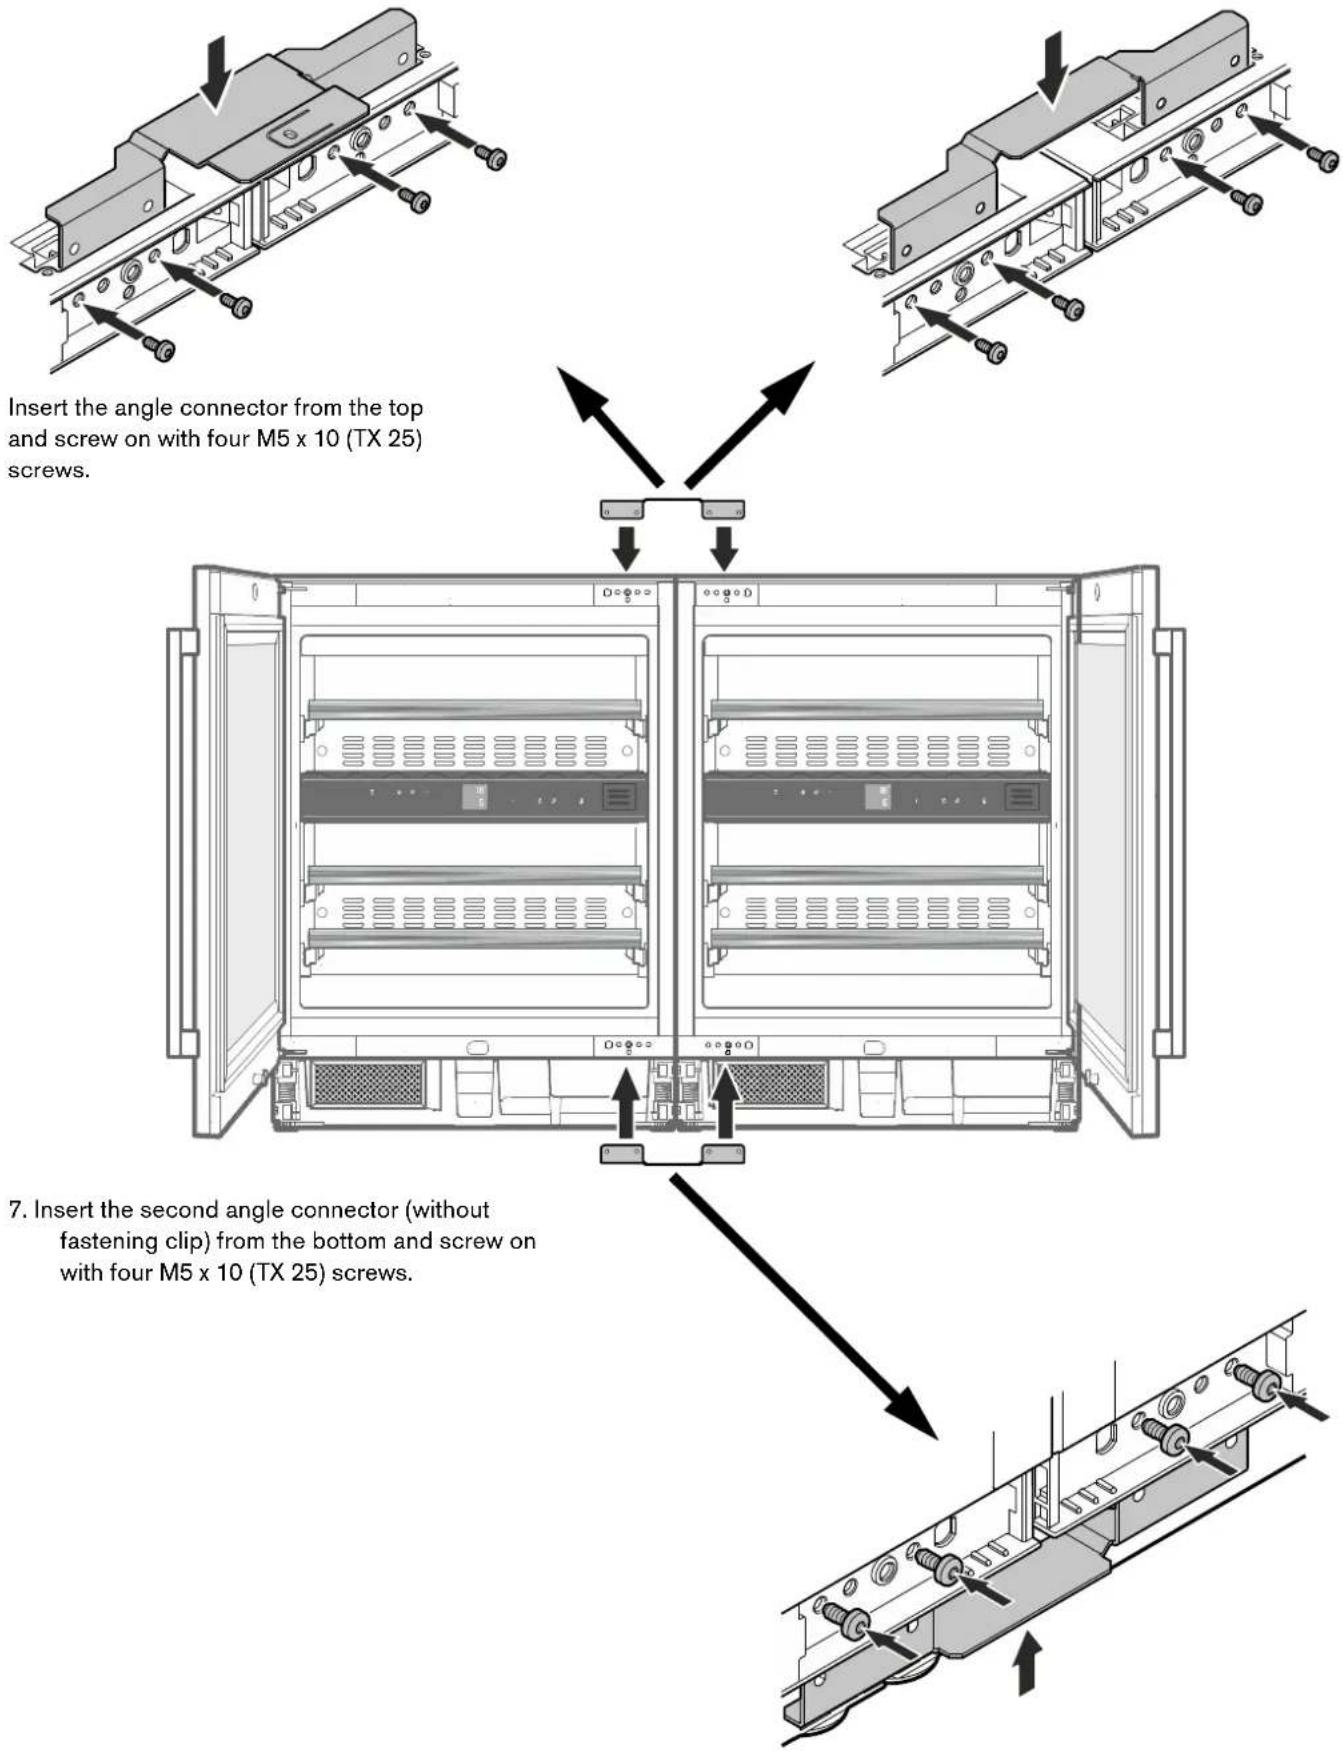
Diagram of an open server rack cabinet showing two internal compartments with ventilation grilles and drive bays (no text or labels)- Insert the angle connectors on top.
For wood counter tops
Use the angle connectors with fastening clip.
For counter tops of non-screw-capable material (e.g. stone)
Use the angle connectors without fastening clip.
text_image
Insert the angle connector from the top and screw on with four M5 x 10 (TX 25) screws. 7. Insert the second angle connector (without fastening clip) from the bottom and screw on with four M5 x 10 (TX 25) screws.- Replace covers.
natural_image
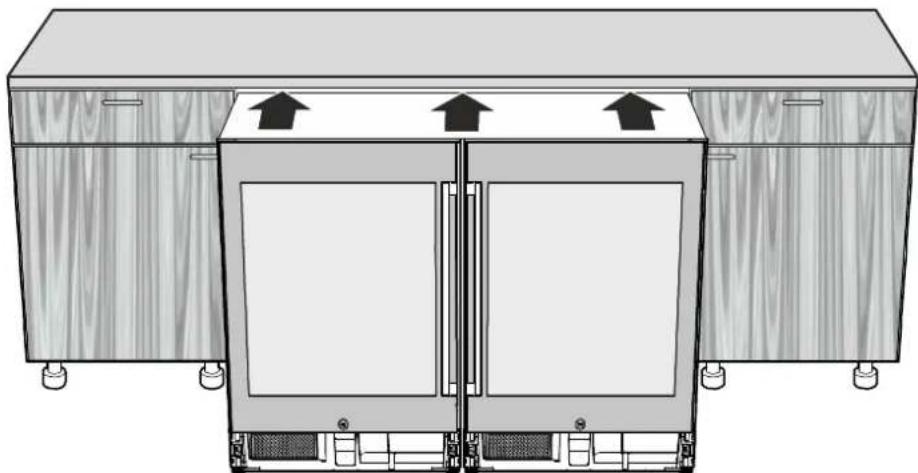
Diagram of an open server rack with multiple drive bays and ventilation grilles, showing internal structure and mounting points (no text or labels)- Push the appliance combination into the niche until the front face of the appliance doors is flush with the cabinet fronts.
When pushing in, make sure that the network cables are not damaged!
natural_image
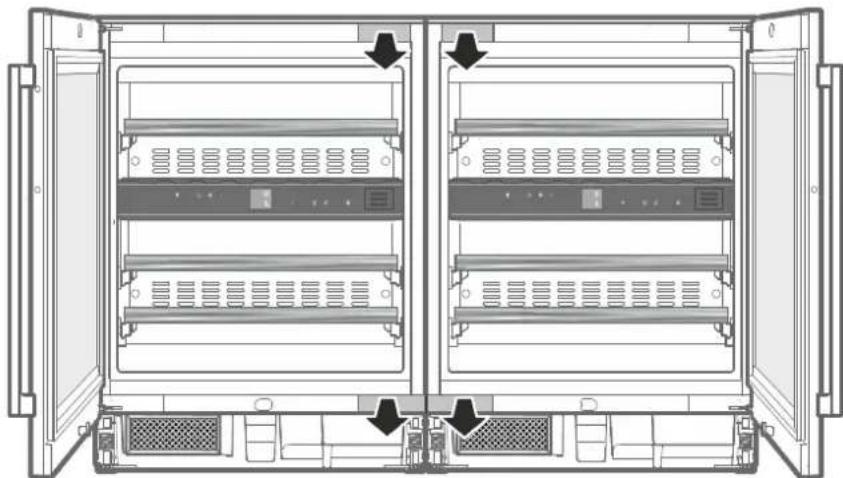
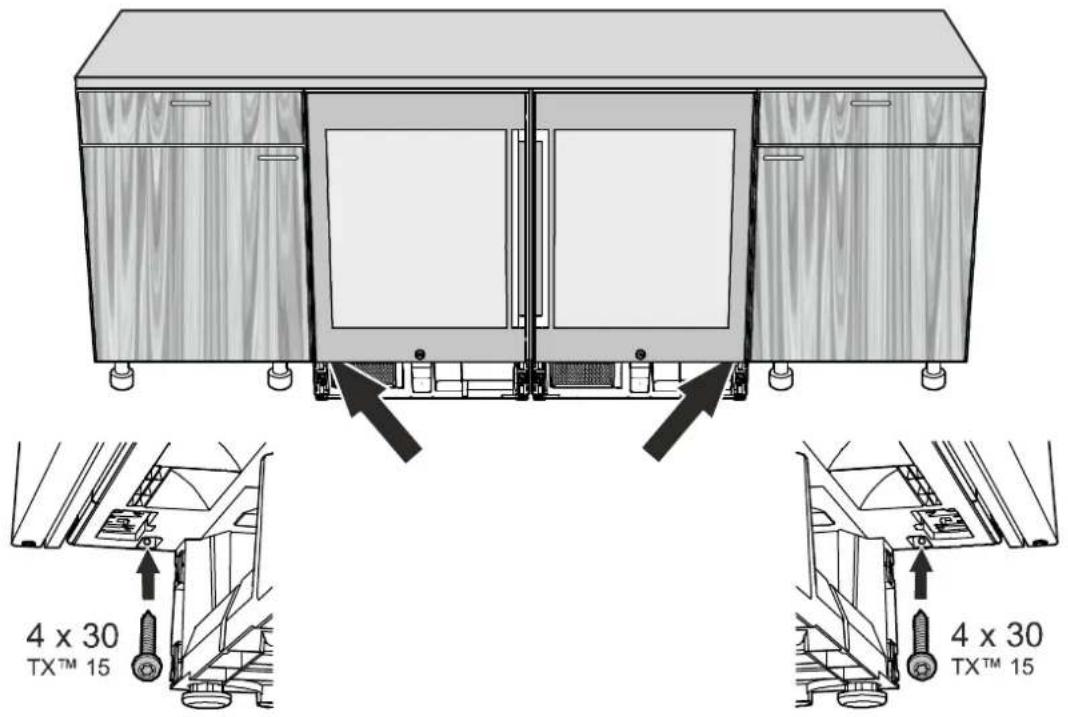
Diagram of a double-door refrigerator with two doors and upward arrows indicating airflow or ventilation (no text or symbols)- Fasten the appliance combination in the niche on the right and left.
The screws (4 x 30) are included in the package with the appliance.
text_image
4 x 30 TX™ 15 4 x 30 TX™ 15- For wood counter tops, fasten the appliance combination in the niche on the top.
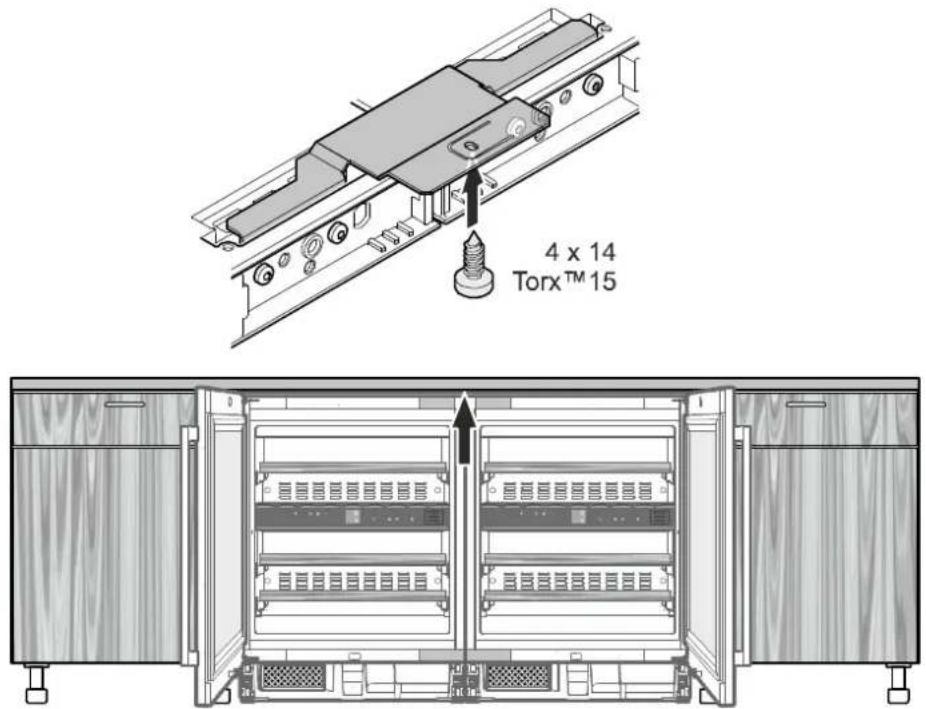
text_image
4 x 14 Torx™ 15Perform the installation as described in the appliance user guide and installation instructions.