
Robored G2 - Vacuum Cleaner Redline - Free user manual and instructions
Find the device manual for free Robored G2 Redline in PDF.
| Product type | Robot vacuum and mop |
| Brand | Redline |
| Model | Robored G2 |
| Dimensions (diameter x height) | 325 mm x 96 mm |
| Weight | 2.7 kg |
| Battery type | Lithium-ion 5200 mAh, 14.4 V |
| Battery life (Auto mode) | 140 minutes |
| Battery life (Max mode) | 100 minutes |
| Battery life (Eco mode) | 160 minutes |
| Charging time | 290 to 320 minutes |
| Dustbin capacity | 475 ml |
| 2-in-1 water tank capacity | Water: 220 ml / Dust: 230 ml |
| Navigation | Laser LDS |
| Cleaning modes | Automatic, Max, Quiet, Zone, No-go zone |
| Connectivity | Wi-Fi, mobile app |
| Scheduling | Yes, via app |
| Mopping function | Yes, with 2-in-1 water tank and mop cloth |
| Sensors | Anti-drop, bumper, wall follow, laser |
| Noise level | Variable depending on mode (quiet available) |
| Maintenance | Regular cleaning of brushes, filters, sensors, and tank |
| Included accessories | Charging station, adapter, 2-in-1 water tank, side brushes (x4), mop cloth (x2), HEPA filter, cleaning brush, remote control, manual |
| Warranty | Contact retailer |
Frequently Asked Questions - Robored G2 Redline
User questions about Robored G2 Redline
0 question about this device. Answer the ones you know or ask your own.
Ask a new question about this device
Download the instructions for your Vacuum Cleaner in PDF format for free! Find your manual Robored G2 - Redline and take your electronic device back in hand. On this page are published all the documents necessary for the use of your device. Robored G2 by Redline.
USER MANUAL Robored G2 Redline
Robot Vacuum Cleaner
Instruction Manual
natural_image
Black robotic vacuum cleaner with 'robored' branding and 'G2' model, shown against a blue geometric background (no text beyond branding)REDLINE
robored
G2
Laser Navigation
All control in one app
Smart electronic water tank
G2
Robot Vacuum Cleaner Instruction Manual
natural_image
Simple line drawing of a circular device with an exclamation mark and two side handles (no text or symbols)Safety Instructions
Before using this product, please read the safety instructions and follow all regular safety precautions.
- Only authorized technicians can disassemble the product. Users are not allowed to disassemble or repair the product.
- Only use the original battery and power adapter (Model: QG24-240125-AG) of the product for charging. Using an unmatched adapter may cause electric shock, fire or product damage.
- Do not touch the power cord, plug or adapter with wet hands.
- Do not use this product in wet or moist environment (any environment with liquid), e.g. bathroom or laundry. If there is too much water on the floor, please wipe off the water by manual firstly before running machine.
- Do not have curtain, any kind of wrapping material, clothes or part of user's body caught in the wheels.
- Before use, clean floor environment (remove all fragile objects and cords, clothing, paper, loose cables, as well as make sure to lift curtains and drapes off the floor to avoid any possible accidents.)
- Make sure this product is not close to cigarette butts, lighters matches or any flammables.
- Never use the product to clean combustible or highly volatile liquids, such as gasoline.
- Only use the product indoors, do not use it outdoors.
-
If the product needs cleaning, clean it after power is switched off.
-
Do not over-bend or pressure the flexible cord with heavy or sharp objects.
- Do not sit or attach an item on the top of this product. Beware of children or pets while the product is in operation.
- Do not place this product where ifs easy to drop off (table, chairs, etc.)
- Turn off the power switch during product transportation or for long term storage.
- Before charging, check whether adapter and outlet are properly connected.
- To avoid tripping, all the people in the house should be noticed when this product is on.
- Check dustbin is empty prior to use.
- Use this product in temperature from 0^ C to 40^ C.
- Do not use this product in high-temperature environment or under intense sunlight for a long time.
- This appliance contains batteries that are only replaceable by skilled persons. The battery must be removed from the product before it is scrapped. The battery should be disposed of properly for safety sake.
- For the purposes of recharging the battery, only use the detachable supply unit provided with this appliance.
22 This appliance contains batteries that are only replaceable by skilled persons. - Do not press or lift the lidar housing by hand in case of damage to the lidar module.
WARNING :
* This appliance can to be used by children aged from 8 years and above and persons with reduced physical, sensory or mental capabilities or lack of experience and knowledge, if they have been given supervision or instruction concerning use of the appliance in a safe way ahe understand the hazards involved. Children should not play with the appliance. Cleaning and user maintenance should not be made by children withoutsupervision.
* For the purposes of recharging the battery, only use the detachable supply unit provided with this appliance.
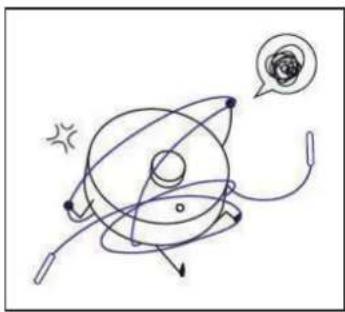
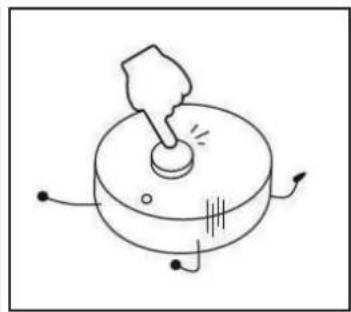
Please avoid below operation.
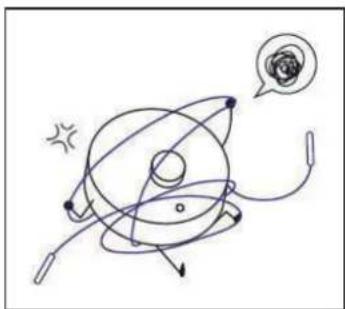
natural_image
Hand-drawn diagram of a planetary system with orbiting electrons and a spiral, no text or symbols presentPlease Clean the ground to avoid robot locked or binded.
natural_image
Simple line drawing of a mechanical device with a lever and base, no text or symbols presentDo not press or pull radar cover to avoid radar damage.
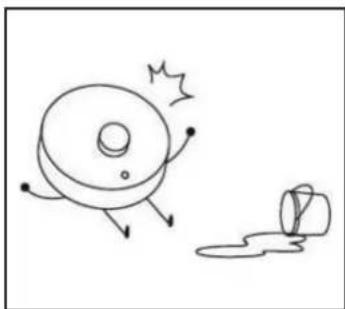
natural_image
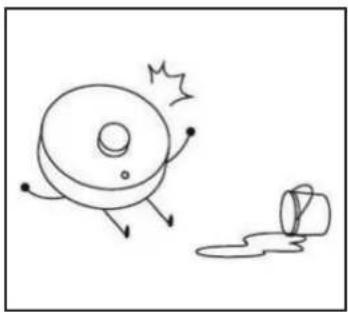
Simple line drawing of a spinning wheel with motion arrows and a small drop, no text or symbols presentDo not use your robot to clean the liquid.
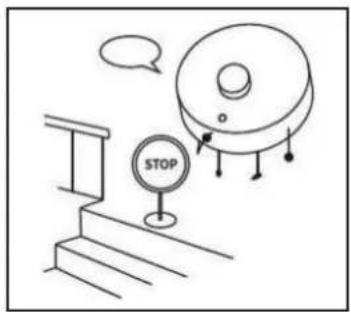
Please set up a guardrail to prevent falling when cleaning a duplex staircase.
CONTENTS
Product Components 3
Main Body and Accessories 3
Main Body Diagram 4
Dust Bin&Rolling Brush&Charging Dock 5
Product Operation 6
APP Connect 6
Robot Standby 6
Start Cleaning 6
Stop Cleaning 7
Auto-charging 7
Schedule setting operation 8
LED Indication 8
Battery Charging 9
Cleaning Modes 10
Component install 11
Product Maintenance 12
Cleaning Side Brushes 12
Cleaning Dust Bin and Filters 12
Cleaning Sensors&Charging Poles&Rolling Brush 13
How to assemble 2-in-one Water Tank 14
How to clean the Dust Bin in 2-in-one Water Tank 15
Trouble shooting 16
Product Specifications 17
Warnings About Battery 18
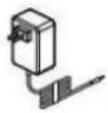
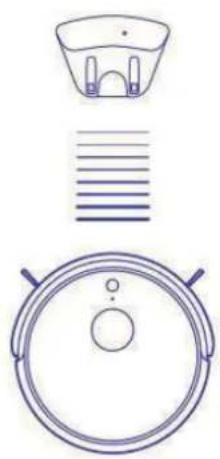
Product Components
Main Body and Accessories
Item Description Quantity
1 Main Body 1
2 Charging Docking 1
3 Power Adapter 1
4 2 in 1 Electronic Water Tank 1
5 Side Brush 4
6 Mopping Cloth 2
7 HEPA 1
8 Clean Brush 1
9 Manual 1
10 Remote controller 1
 |  |  |
 |  |  |
 |  |  |
 |
Product Components
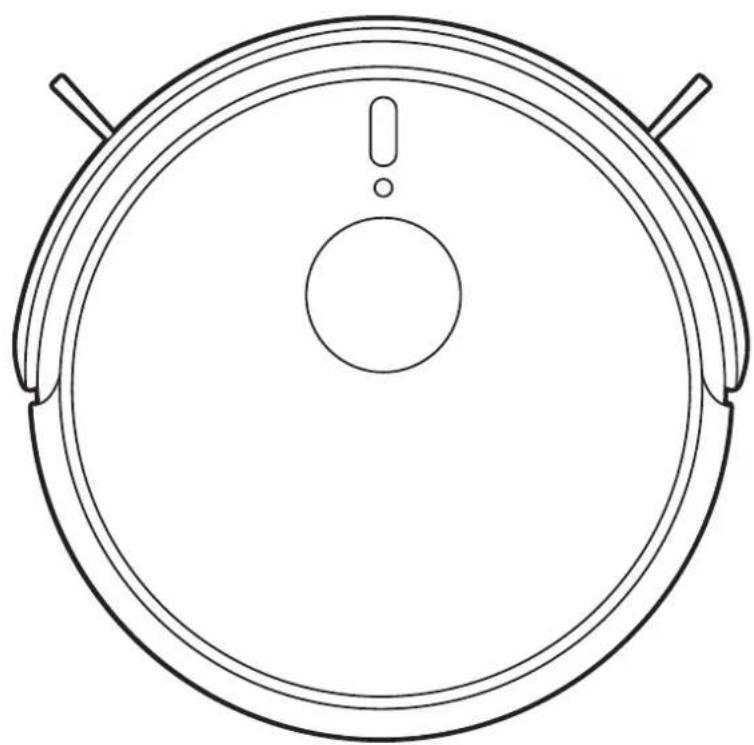
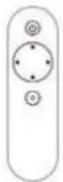
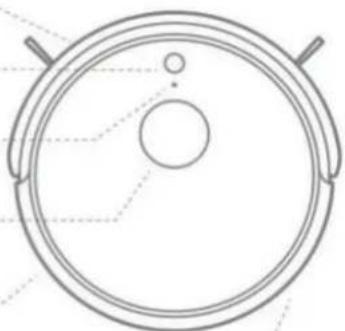
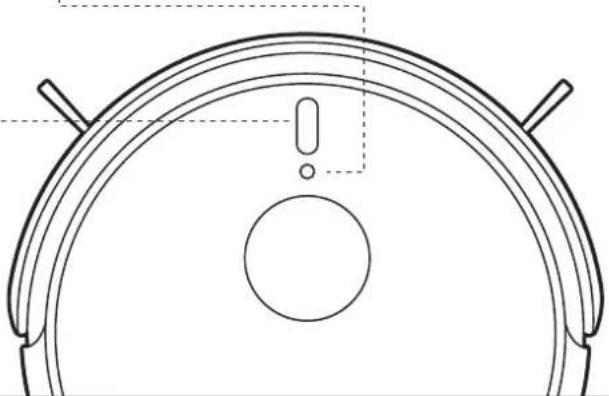
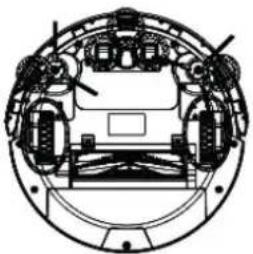
Main Body Diagram
Bumper
On/Off Button
Wi-Fi Button
LDS
Wall Following Sensor
Power Switch
natural_image
Top-down schematic of a circular mechanical component with internal features (no text or symbols)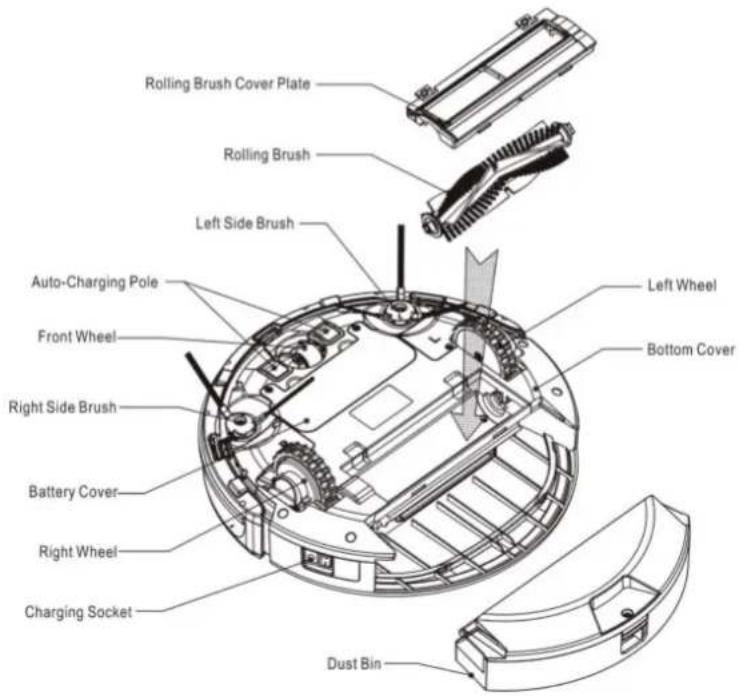
Product Components
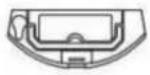
Dust Bin&Rolling Brush&Charging Dock
Charging Docking
Product Operation
1. APP Connect
Step 1: Download the APP
Step 2: Connect the robot with wifi per the instruction interface on the APP
Step 3: Then you can control the robot, set up schedule or select cleaning mode via the APP
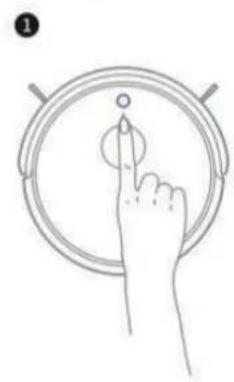
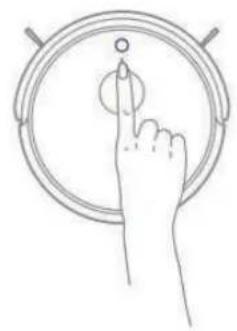
2. Robot Standby
Press the ON/OFF button till the circle LED light on the button is on, or Press the "Pause" button on the APP to let robot enter standby mode.
natural_image
Line drawing of a hand pressing a circular button on a circular device (no text or symbols)3. Start Cleaning
Press the ON/OFF button on the robot, or press the START button on the APP, then the robot will start cleaning.
natural_image
Line drawing of a hand pressing a button on a circular device (no text or symbols)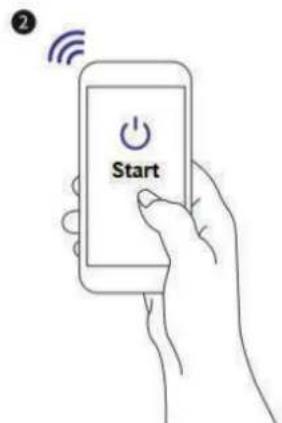
Product Operation
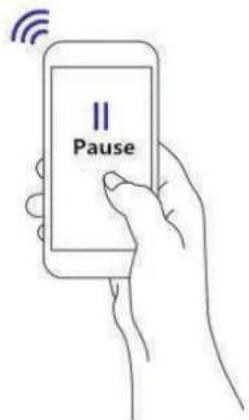
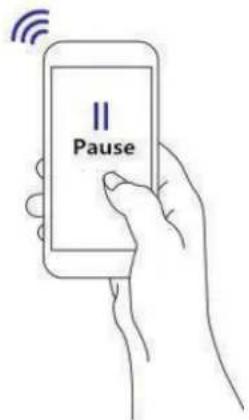
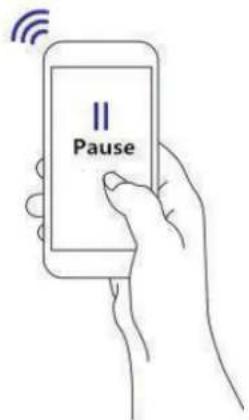
4. Stop Cleaning
"Pause" button on the APP, then the robot will stop cleaning.
1
natural_image
Line drawing of a hand pressing a circular button on a ring (no text or symbols)2
5. Auto-charging
a. When the robot runs out of power, it will looks for the charging station automatically. After automatically charging, robot will continue to cleaning the remaining area if cleaning not completed before the charging.
b. When robot is in other mode, press "Re-charge" button on the APP and the robot will start looking for its charging station.
c. Press the "◎" button twice in a short time, robot will go back to charging station for charging.
natural_image
Three technical line drawings of a circular device with handles and a top panel, no text or symbols present.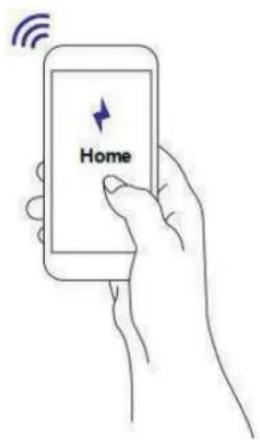
Product Operation
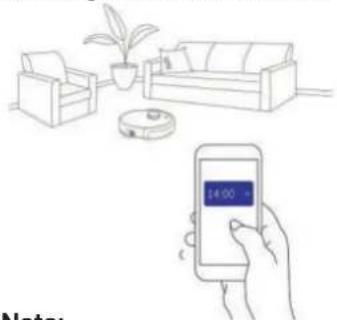
6. Schedule Setting Operation
In standby or charging status, press "Schedule" button on the APP to set up schedule, and robot will start cleaning on scheduled time.
natural_image
Line drawing of a smart home with a hand holding a smartphone displaying 14:00, featuring a sofa, armchair, and robotic vacuum cleaner (no text or symbols)Note:
a. When robot connect with the APP, robot system time will synchronize with your mobile phone's time automatically.
b. Once the cleaning time schedule setting is confirmed, robot will start cleaning automatically every day at the scheduled time.
c. If the robot is powered off, its schedule would be canceled. So if you need the robot's schedule keep working, you have to make the robot keep in standby on charging station, or you have to schedule setting again.
7. LED Indication
ON/OFF LED Indicator
White Slow Flash: Starting Up/Charging
White Light Stay On: Standby/Charging Completed
Red Slow Flash: Low Power
Red Quick Flash: Error
Wi-Fi Indicator
Blue Quick Flash: Wi-Fi Setting Completed
Blue Slow Flash: Wi-Fi connecting
Blue Light Stay On: Wi-Fi connected
Red Light SLow Flash: Connection Failure
natural_image
Top-down technical drawing of a curved mechanical component with a circular center and two protruding rods (no text or symbols)Product Operation
Battery Charging
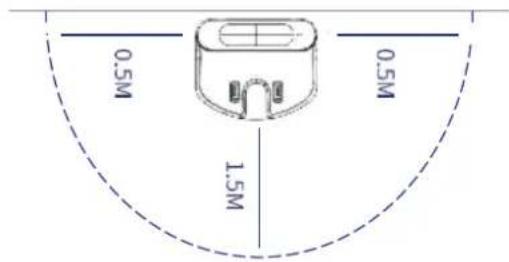
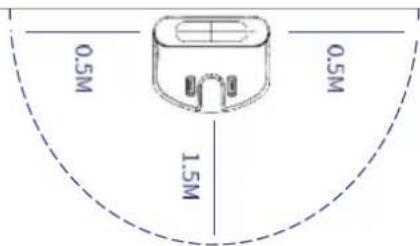
- Charging Station Placement Place charging station against the wall, and remove obstacles about 1 meter at two sides and 2 meters in front of the station as show in the right figure.
Note: if robot is powered off, then switch on the robot firstly before charging.
- Charge the robot in either way as shown below:
a. plug one end of the adapter into the robot and the other end into the power socket.
looking for the charging station automatically.
c. Press the K®H button twice in a short time, robot will go back to charging station for charging.
Note:
A. In standby or working status, the robot will looks for charging docking automatically when battery capacity is low.
B. During the process of looking for charging station, if robot run out of power before arriving the charging station, it will broadcast voice "Battery low, robot is shutting down" and shut down within twenty minutes.
C. When battery in working status, you should "Pause" it
In Order to Extend Battery Life
A. Please charge the robot up to 12 hours in first charging.
B. Charge the robot as soon as possible when battery capacity is low.
C. The robot will return to the charging station automatically when accomplish cleaning or battery capacity is low.
D. When you will not use the robot for some time, please fully charge the battery firstly, then switch off the robot and keep it in a cool but dry place.
E. If the robot has been put aside over 3 months, please charge the robot for 12 hours firstly before use it for cleaning.
Product Operation
Cleaning Modes
There are below cleaning modes to meet different cleaning requirements of you.
natural_image
Pure electrical circuit lines without any symbols1. Automatic Cleaning Mode
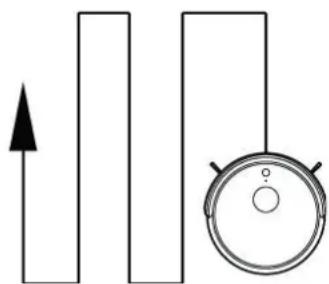
In standby status, pressM on robot body or press ON/OFF on APP, robot will enter automatic cleaning mode. Robot will start along the wall and plan the cleaning of a 4 m2 area with Zig-zag mode, and then after that moves to next 4 m2 area.
2. MAX Cleaning Mode
Press "MAX" on APP to enter powerful cleaning mode,
Robot will slow down its speed and increase its vacuum power, and speed up the main brush rotation for deep cleaning.
Product Operation
natural_image
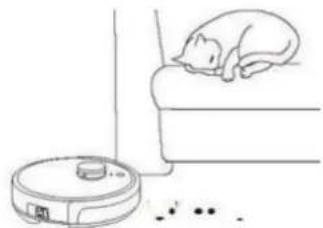
Line drawing of a rabbit sleeping on a bed next to a robotic vacuum cleaner (no text or symbols)3. Mute Cleaning Mode
Press "Mute" on APP to enter low noise cleaning mode, Robot will slow down its moving speed and mainbrush rotating speed, and decrease its vacuum power to minimize the noise level.

natural_image
Line drawing of a minimalist room layout with a sofa, counter, and rug (no text or symbols)4. Area Cleaning
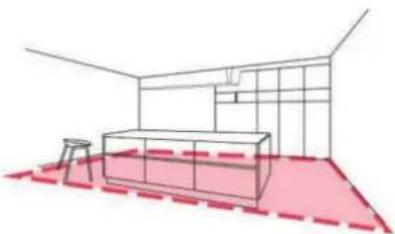
Based on the existing complete map of house, press "Area" on the mapping page of APP, chose the size and location of a target area, and confirm it and start cleaning. Robot will go straight for cleaning the target area.
natural_image
Architectural sketch of a modern office space with a bench, chair, and wall (no text or symbols)5. Forbidden Area Setting
Based on the existing complete map of house, press "Forbidden area" on the mapping page of APP, chose the size and location of the forbidden area, and confirm it and start cleaning. Robot will the remaining area of the house except for the forbidden area.
Product Operation
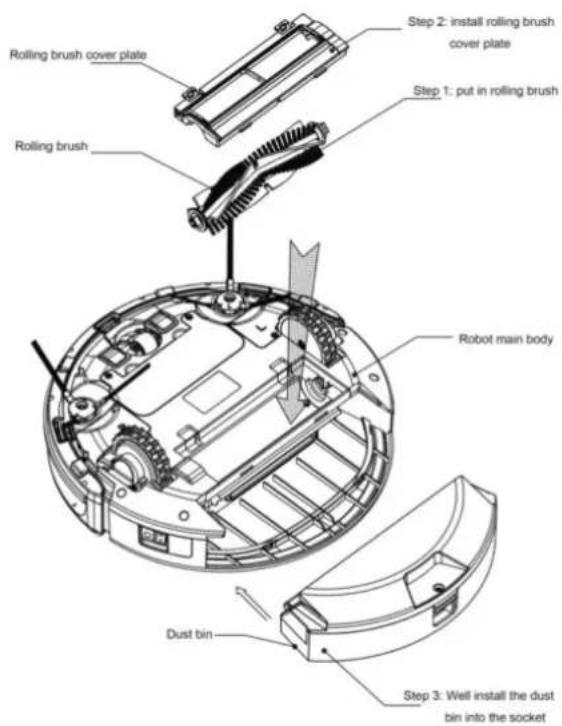
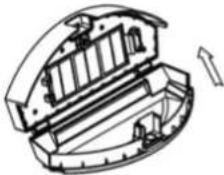
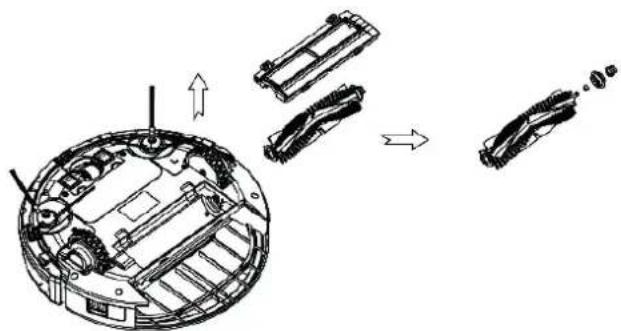
Component Install
Rolling baish kit, dust bin kit should be well installed in the corresponding position (refer to below diagram)
Product Maintenance
Cleaning Side Brush
- check if side brush is broken or something stacked
- use mops to clean the side brush
- if side brush is curly or deform, put them in hot water for 5 seconds
- if side brush cannot be used any more, please change it in time.
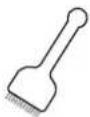
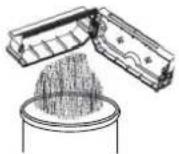
Cleaning Dust Bin and Filters
Empty and clean dust bin every time when you use it, cleaning steps as below:
A. simply wash dust bin in running water after use to avoid dust blowing in the air which will cause second pollution.
B. wash primary filter every 15-30 days to maximize its use life. Do not wash HEPA filter.
C. before install the filters make sure they are dry.
D. primary filter and HEPA filter are changeable accessories. Maximum life span for HEPA is 24 months.
E. Do not bake the filters under intense sunlight.
 |  B. Take out of dust tbin B. Take out of dust tbin | ||
 C. Open the dust bin C. Open the dust bin | 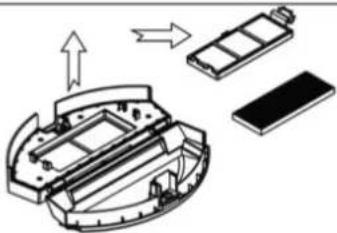 D. Pull out of dust bin inside clapboard, take out primary filter D. Pull out of dust bin inside clapboard, take out primary filter | 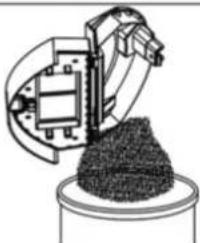 E. Drain the crash in dust bin E. Drain the crash in dust bin | |
 F. Flush the dust bin and primary filter, use cleaning brush to clean HEPA filter F. Flush the dust bin and primary filter, use cleaning brush to clean HEPA filter | 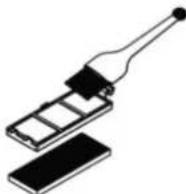 | 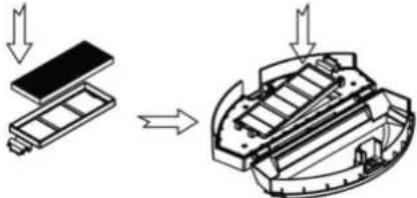 G. Install the primary filter and HEPA filter back into dust bin G. Install the primary filter and HEPA filter back into dust bin | |
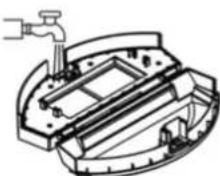
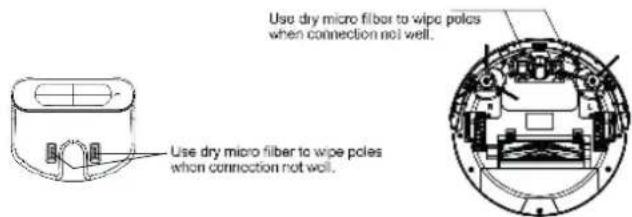
Product Maintenance
Cleaning Sensors&Charging Poles&Rolling Brush
Use cleaning tools or soft micro fiber to wipe the sensors and wheels as below:
natural_image
Technical line drawing of a circular mechanical assembly with internal components (no text or symbols)Cleaning Charging Poles
Use cleaning tools or soft micro fibers to wipe charging poles of charging docking and robot as below:
Cleaning Rolling Brush Kit
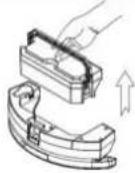
Remove the rolling brush kit from robot, take out of the rolling bmsh stick, cleaning the brush rolling brush stick or cover clapboard with cleaning tools or soft micro fibers, (rolling brush stick is washable)
natural_image
Technical illustration of a mechanical assembly with exploded view and exploded view (no text or symbols)Product Maintenance
How to assemble 2-in-one Water Tank
Step 1: Take off the dust bin, unplug the rnbber plug of water tank and inject water until filling it up, then plug its lid.
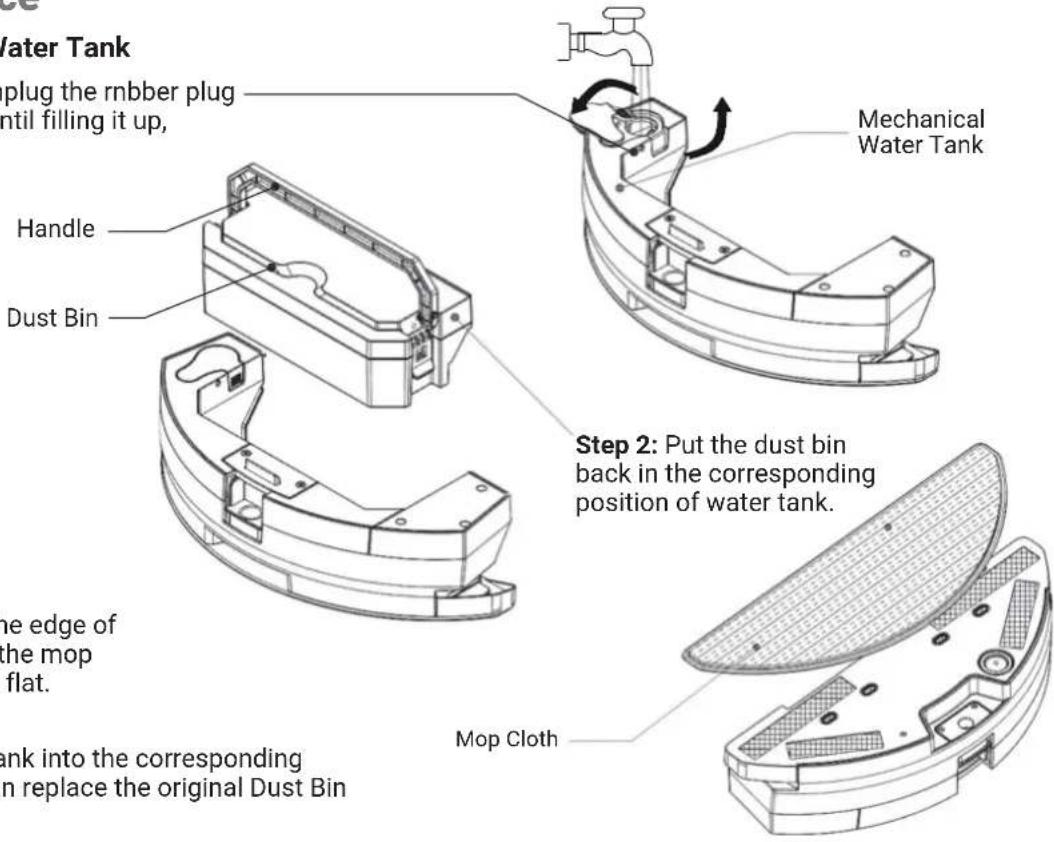
Step 3: Align the mop cloth to the edge of water tank's bottom, then stick the mop cloth on water tank and press it flat.
Step 4: Put the 2-in-one water tank into the corresponding position of the machine. You can replace the original Dust Bin for your needs.
Product Maintenance
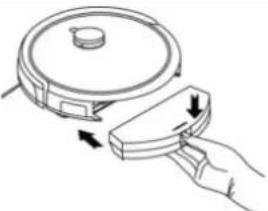
How to clean the Dust Bin in 2-in-one Water Tank
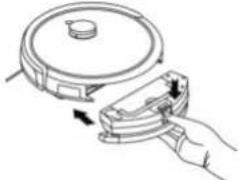 A. Hold the bottom of 2-in-one water tank, and thum press down the button to take it out. A. Hold the bottom of 2-in-one water tank, and thum press down the button to take it out. | 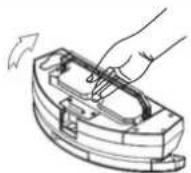 B.Lift the handle of dust bin. B.Lift the handle of dust bin. | |
 C.Remove the dust bin from 2-in-one water tank C.Remove the dust bin from 2-in-one water tank | 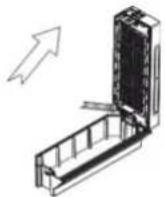 D.Open the dust bin D.Open the dust bin |  E.Pull out of dust bin inside clapboard, take out primary filter. E.Pull out of dust bin inside clapboard, take out primary filter. |
 F.Drain the crash in dust F.Drain the crash in dust |  G. Flush the dust bin and primary filter,use cleaning brush to clean HEPA filter. G. Flush the dust bin and primary filter,use cleaning brush to clean HEPA filter. | 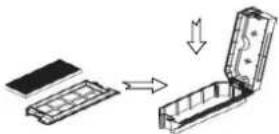 H.Install the primary filter and HEPA filter back into dust bin. H.Install the primary filter and HEPA filter back into dust bin. |
Trouble Shooting
If eorr occurs, LED indicator on the button will be red flash and there will be voice prompt for the instructions as follows.
- Switch off the robot and restart it.
| Item | Fault Prompt Cause Solution | ||
| 1 | Main brush fault, please clean the main brush. | Main brush locked or binded | Please dismantle and clean main brush. Pis remove all fragile objects and cords, clothing, paper, loose cables, make sure No scattered items on the ground. |
| 2 | Side brush fault, please clean the side brush. | Side brush locked or binded | Please dismantle and clean side brush. Pis remove all fragile objects and cords, clothing, paper, loose cables, make sure No scattered items on the ground. |
| 3 | Wheel overload, please clean the wheel assembly. | Wheel locked or binded | Please check and clean the wheel. Pis remove all fragile objects and cords, clothing, paper, loose cables, make sure No scattered items on the ground. |
| 4 | Front bumper fault, please tap the bumper | Front bumper locked | Please tap the bumper times to clean it |
| 5 | Please clean the front bumper lens. | Something stick or shaded on the front bumper lens | Please clean the front bumper lens |
| 6 | Please clean the anti-drop sensors | Something stick or shaded on the anti-drop sensors | Please clean the anti-drop sensors |
| 7 | Please put the machine in a safe place. | Machine doesn't in a safe place | Please move the machine and restart it |
| 8 | Please turn on the power switch. | Power switch turn off during charging | Please turn on the power switch |
| 9 | Please poke the surface of the laser sensor. | The laser sensor locked or shaded by something | Please clean the laser sensor |
| 10 | Please clean the laser sensor lens on top. | Something stick or shaded on the laser sensor | Please clean the laser sensor and start-up robot in a safe place |
| 11 | Please click the start button again. | Button locked | Please click the start button again |
| 12 | Dust fan fault. Please | Robot Fault | Please Turn off the power switch and restart try again. Please contact the after-service if no still no working. |
| 13 | Front wheel fault, pis restart | Robot Fault | Please Turn off the power switch and restart try again. Please contact the after-service if no still no working. |
| 14 | Communication error, please restart or contact after-sale service | Robot Fault | Please Turn off the power switch and restart try again. Please contact the after-service if no still no working. |
| 15 | Battery temperature abnormal | Please restart try again after the battery temperature recover. Please contact the after-service if no still no working. | |
| 16 | The robot is trapped. Please move to a new place | The robot trapped by something | Please move robot to a new place and restart it. |
| 17 | Please put the robot on the charging station | Battery too low to find the charge station | Please place robot on the charge station for charging. |
- If restarting robot doesn't work, pis send the robot to after-sales service center.
Product Specifications
| Mechanical Specifications | Diameter | 325mm |
| Height | 96mm | |
| Weight | 2.7KG | |
| Electrical Specifications | Battery | Li-ion 5200 mAh |
| Voltage | 14.4V | |
| Big Dust Bin Capacity | 475 ml | |
| Two-in-One Water Tank&Dustbin Capacity | Su Tankı 220ml / Toz Haznesi 230 ml | |
| Recharge System | Manuel / Otomatik Şarj | |
| Function Specifications | Cleaning Type | Oto / Max / Mode / Program |
| Charging Time | 290 - 320 dakika | |
| Cleaning Time (Auto) 140 dakika | ||
| Cleaning Time (Max) 100 dakika | ||
| Cleaning Time (Eco) 160 dakika |
Note : the specification could be modified with the objective continual improvement.
Warnings about Battery
You must not remove (or attempt to remove) the battery incorporated in this product on your own. To replace the battery, you must contact your service provider or an independent qualified professional. These instructions have been prepared for the exclusive use of your service.
FOR YOUR OWN SAFETY, DO NOT ATTEMPT TO REMOVE THE BATTERY ON YOUR OWN OR DISPOSE OF IT IN FIRE. DO NOT DISASSEMBLE, CRUSH OR PUNCTURE THE BATTERY.
Battery Removal
- Remove the screws on battery cover with a screw driver.
- Remove the battery cover.
- Grasp the insulating tape at two sides of the battery and lift the battery.
- Unplug the wire connector that links the battery and robot.

Correct disposal of batteries in this product
(Applicable in countries with separate battery return system.)
The marking on the battery, manual or packaging indicates that the battery in this product should not be disposed of with other household waste. Where marked, the chemical symbols Hg, Cd or Pb indicate that the battery contains mercury, cadmium or lead above the reference levels in EC Directive 2006/66.
The battery incorporated in this product is not user replaceable. For information on this replacement, please contact your service provider. Do not attempt to remove the battery or dispose it in a fire. Do not disassemble, crush, or puncture the battery. If you intend to discard the product, the waste collection site will take the appropriate measures for the recycling and treatment of the product, including the battery.
REDLINE
robored
G2
natural_image
Simple line drawing of a circular device with a central hole and two side handles, no text or symbols present.Güvenlik Talimatı
Please avoid below operation.
natural_image
Hand-drawn diagram of a planetary orbit with orbital paths and a thought bubble (no text or symbols)Please Clean the ground to avoid robot locked or binded.

natural_image
Simple line drawing of a mechanical component with a handle and base, no text or symbols presentDo not press or pull radar cover to avoid radar damage.
natural_image
Simple line drawing of a sun and a droplet with motion arrows (no text or symbols)Do not use your robot to clean the liquid.
Please set up a guardrail to prevent falling when cleaning a duplex staircase.
iÇİNDEKİLER
natural_image
Top-down schematic of a circular mechanical component with internal features (no text or symbols)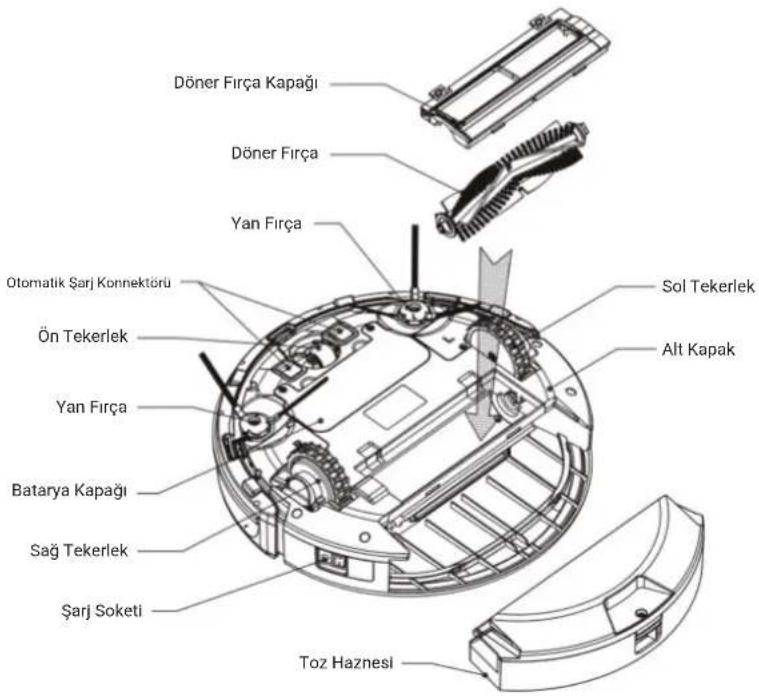
natural_image
Line drawing of a hand pressing a circular button on a circular device (no text or symbols)- Temizliği Başlatma
natural_image
Line drawing of a hand pressing a button on a circular device (no text or symbols)
Ürünün Kullanımı
natural_image
Line drawing of a hand pressing a circular button on a ring (no text or symbols)2
5. Otomatik Şarj
natural_image
Three technical line drawings of a circular device with internal components, no text or symbols present.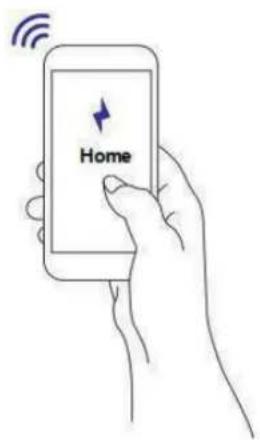
Ürünün Kullanımı
natural_image
Line drawing of a smart home with a smartphone displaying 14:00, a refrigerator, and a robot (no text or symbols on main elements)Not:
natural_image
Top-down technical line drawing of a curved mechanical component with a circular center and two protruding rods (no text or symbols)Ürünün Kullanımı
Pili Şarj Etme
natural_image
Pure electrical circuit lines without any symbolsnatural_image
Line drawing of a rabbit sleeping on a bed next to a robotic vacuum cleaner (no text or symbols)natural_image
Line drawing of a minimalist room interior with a bench, chair, and floor mat (no text or symbols)4. Alan Temizliği
natural_image
Architectural sketch of a modern office space with a bench, chair, and wall (no text or symbols)5. Yasak Alan Ayarı
natural_image
Technical line drawing of a circular mechanical assembly with internal components (no text or symbols)natural_image
Technical illustration of a mechanical assembly with exploded view and exploded views (no text or symbols)Ürün Bakımı
- Switch off the robot and restart it.
- If restarting robot doesn't work, pis send the robot to after-sales service center.
Teknik Özellikleri
natural_image
Simple line drawing of a circular device with a central hole and two side handles, no text or symbols present.natural_image
Hand-drawn diagram of a planetary orbit with orbital paths and a thought bubble (no text or symbols)natural_image
Simple line drawing of a mechanical device with a handle and base, no text or symbols presentnatural_image
Simple line drawing of a sun-draped CD or CD with a small droplet and starburst, no text or symbols present.Corps principal et accessoires 51
How to assemble 2-in-one Water Tank 62
Corps principal et accessoires
natural_image
Line drawing of a hand pressing a circular button on a circular device (no text or symbols)3. Commencer le nettoyage
natural_image
Line drawing of a hand pressing a button on a circular device (no text or symbols)
natural_image
Line drawing of a hand pressing a circular button on a ring (no text or symbols)2
5. Auto-chargement
natural_image
Three technical line drawings of a circular device with internal components, no text or symbols present.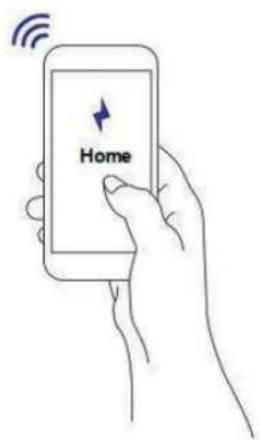
natural_image
Line drawing of a hand holding a smartphone displaying 14:00, with a sofa, armchair, and coffee pot nearby (no text or symbols on main elements)Note:
natural_image
Technical line drawing of a circular mechanical component with a central hole and two side protrusions (no text or symbols)- Placement de la station de recharge
natural_image
Pure electrical circuit lines without any symbolsnatural_image
Technical line drawing of a mechanical assembly with no visible text or symbolsnatural_image
Technical illustration of a mechanical assembly with exploded view and exploded views (no text or symbols)natural_image
Simple line drawing of a circular device with a central hole and two side handles, no text or symbols present.تعليمات السلامة
natural_image
Hand-drawn diagram of a planetary system with orbiting electrons and a thought bubble (no text or labels)natural_image
Simple line drawing of a mechanical device with a lever and base, no text or symbols presentnatural_image
Simple line drawing of a drum and a cup with motion arrows (no text or symbols)natural_image
Top-down schematic of a circular mechanical component with internal dashed lines indicating hidden edges (no text or symbols)مستشعر تتبع الجدار
عملية المنتج
APP ربط
توقف عن التنظيف
natural_image
Hand pressing a button on a circular mechanical component (no text or symbols visible)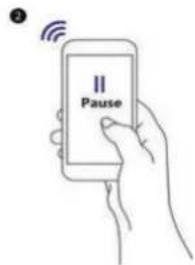
ال二十五
natural_image
Line drawing of a smart home with a hand holding a smartphone displaying 14:00, featuring a sofa, armchair, and robotic vacuum cleaner (no text or symbols on main elements)ت歇يق:
natural_image
Simple line diagram showing a directional arrow and a circular dial (no text or symbols)MAX-O请问 التنظيف
natural_image
Line drawing of a minimalist interior layout with furniture and a blue rug (no text or symbols)إطار المنطقة ممنوع
natural_image
Simple line drawing of a minimalist interior space with a sofa, bench, and wall (no text or symbols)عملية المنتج
تركيب المكونات
natural_image
Line drawing of a hand holding a circular device with directional arrows indicating motion (no text or symbols)natural_image
Simple line drawing of a circular device with a central hole and two side handles, no text or symbols present.natural_image
Hand-drawn diagram of a planetary orbit with orbital paths and a thought bubble (no text or symbols)
natural_image
Simple line drawing of a mechanical device with a handle and base, no text or symbols presentnatural_image
Simple line drawing of a sun-draped CD or CD with a small droplet nearby (no text or symbols)natural_image
Line drawing of a hand pressing a circular button on a circular device (no text or symbols)natural_image
Line drawing of a hand pressing a button on a circular device (no text or symbols)
natural_image
Line drawing of a hand pressing a circular button on a ring (no text or symbols)2

natural_image
Three technical line drawings of a kitchen appliance: a bowl, a striped pattern, and a circular fan (no text or symbols)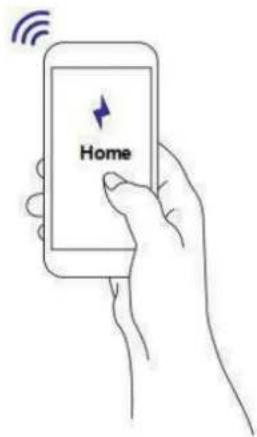
natural_image
Line drawing of a smart home with a smartphone displaying 14:00, armchair, sofa, and robotic room (no text or symbols on main elements)Niet:
natural_image
Technical line drawing of a mechanical component with a circular center and two protruding rods (no text or symbols)natural_image
Pure electrical circuit lines without any symbolsnatural_image
Technical line drawing of a mechanical assembly with no visible text or symbolsnatural_image
Technical illustration of a mechanical assembly with exploded view and assembled views (no text or symbols)Redline Electronics Technology Limited
- Room 508, Building D, Zhi Hui Chuangxin Center,
Hang Cheng Industrial Park, Xixiang, Bao'An,
Shenzhen, CHINA
Phone: +86-755-26993430
Fax : +86-755-26993431
E-mail: info@redline.com.tr

/redline.com.tr

/redline.com.tr

/redlinecomtr

redline.com.tr