
GLS 3000 VST - Blower Güde - Free user manual and instructions
Find the device manual for free GLS 3000 VST Güde in PDF.
| Product Type | Leaf Blower / Vacuum |
| Brand | Güde |
| Model | GLS 3000 VST |
| Power Supply | 230 V ~ 50 Hz |
| Motor Power | 3000 W |
| Variable Air Speed | 5000 – 14000 min⁻¹ (6 positions) |
| Suction / Blowing Volume | 6.5 – 15 m³/h |
| Composting Ratio | 10:1 |
| Collection Bag Capacity | 45 L |
| Dimensions (assembled) | 380 x 190 x 810 / 1130 mm |
| Weight (without/with bag) | 4.0 / 4.5 kg |
| Protection Class | II |
| Protection Type | IP 23 |
| Functions | Suction and Blowing |
| Harness Included | Yes |
| Guide Wheels | Yes |
| Consumer Warranty | 24 months |
| Customer Service | www.guede.com / support@ts.guede.com |
| Spare Parts | Available via Güde service |
Frequently Asked Questions - GLS 3000 VST Güde
User questions about GLS 3000 VST Güde
0 question about this device. Answer the ones you know or ask your own.
Ask a new question about this device
Download the instructions for your Blower in PDF format for free! Find your manual GLS 3000 VST - Güde and take your electronic device back in hand. On this page are published all the documents necessary for the use of your device. GLS 3000 VST by Güde.
USER MANUAL GLS 3000 VST Güde
GB Translation of the original instructions
natural_image
Black and white photo of a vacuum cleaner with a bag, no visible text or symbols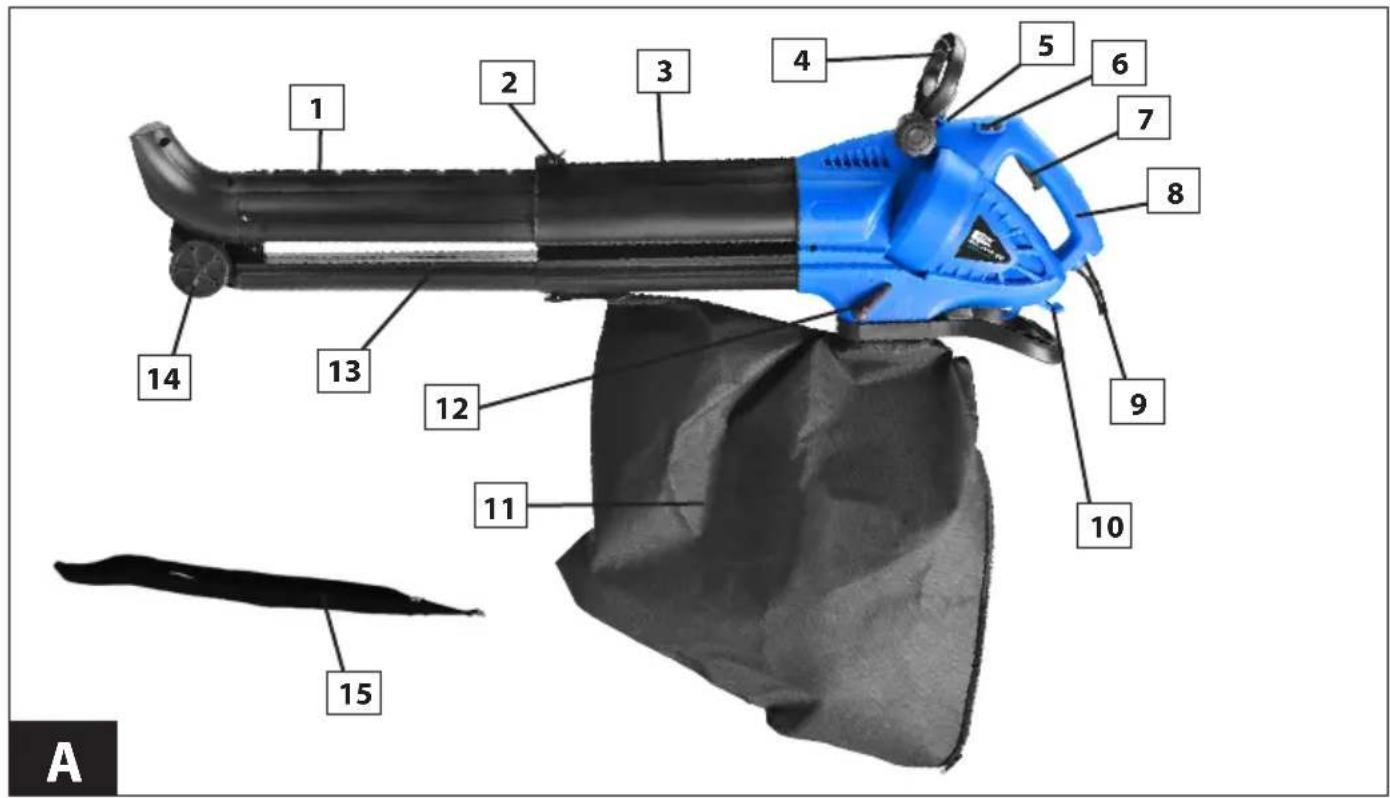
natural_image
Two views of a black athletic jacket with attached straps, shown from top and side (no text or symbols)
natural_image
Close-up of a hand using a handheld device to press down fabric, with a red arrow pointing to the fabric (no visible text or symbols)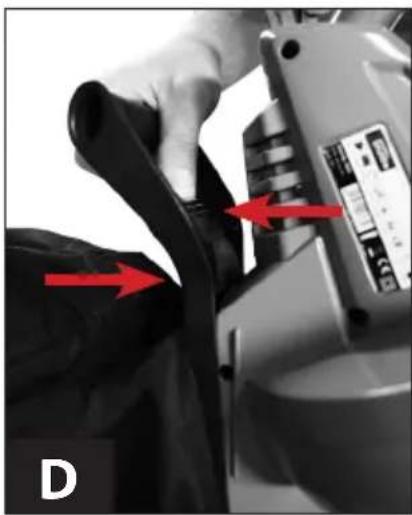
natural_image
Close-up of a hand adjusting a mechanical component with red arrows indicating motion (no visible text or symbols)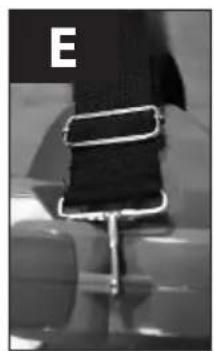
natural_image
Close-up of a black mechanical buckle with metal frame, no visible text or symbols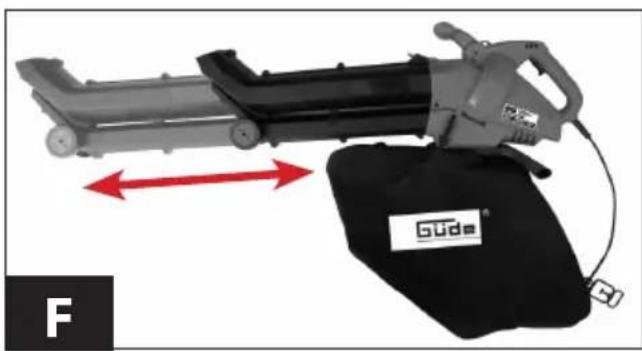
natural_image
Exterior view of a Gudi-branded electric shock absorber with red directional arrows indicating motion (no text or symbols on device)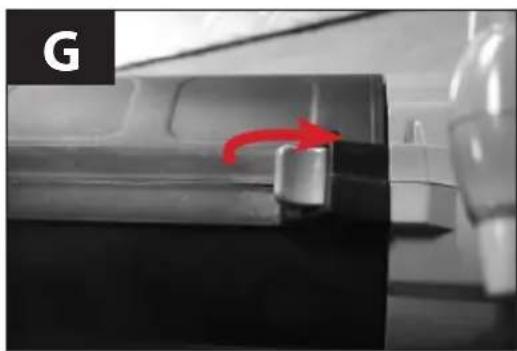
natural_image
Close-up of a mechanical component with a red arrow indicating rotation, no visible text or symbols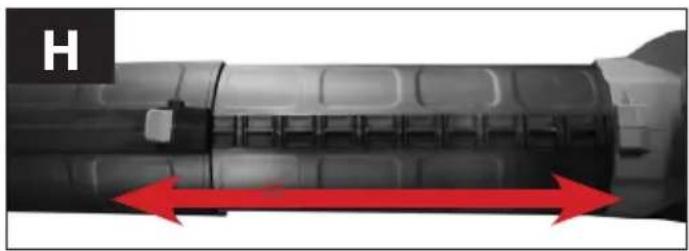
natural_image
Cross-sectional view of a cylindrical mechanical component with red directional arrows indicating width (no text or symbols)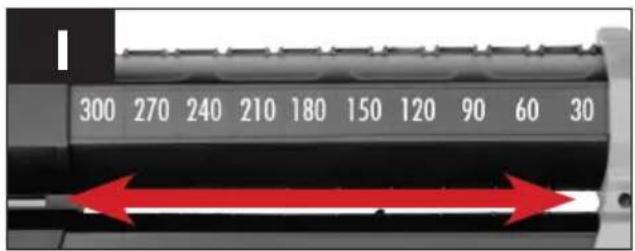
natural_image
Blue electric power tool with black handle and cloth, no visible text or symbols on the device itself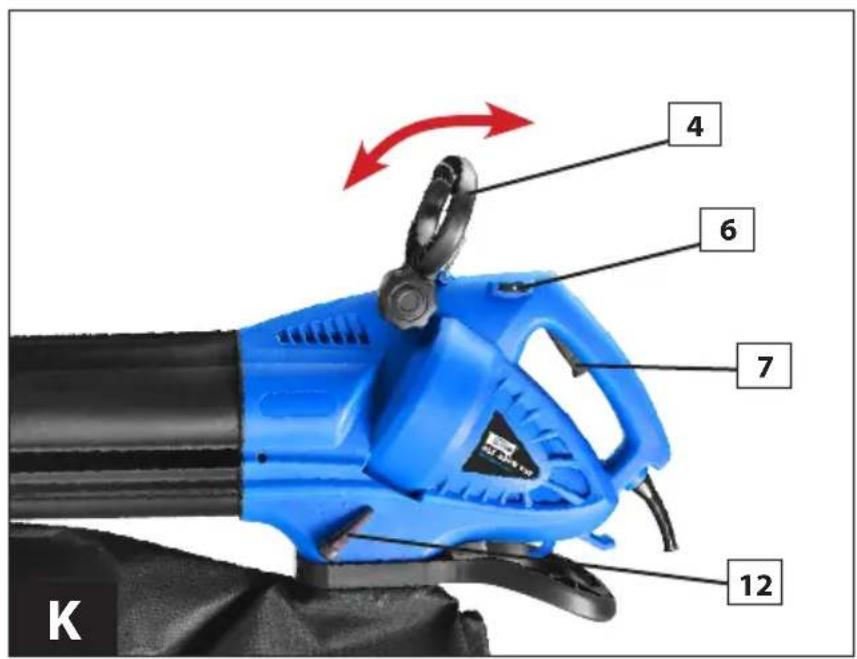
natural_image
Close-up of a blue industrial machine component with red arrows indicating motion, and an inset showing a cartoon character emitting smoke (no text or symbols)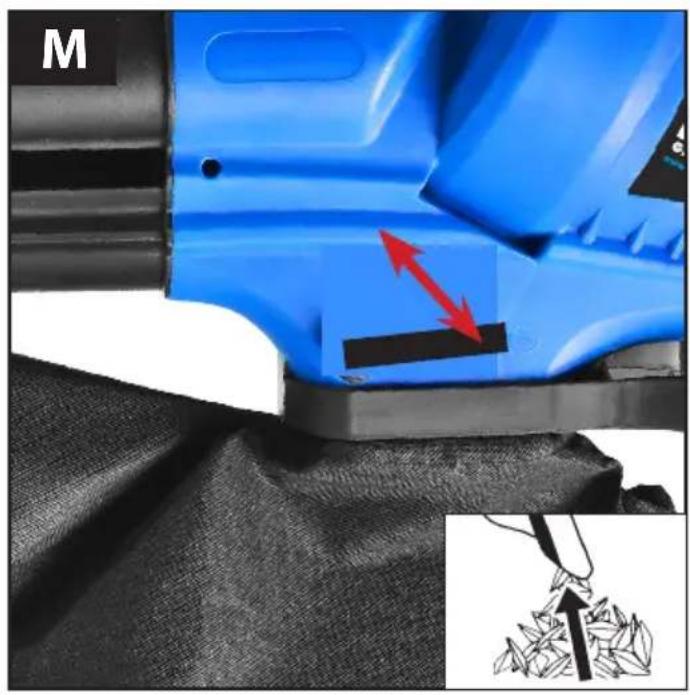
natural_image
Close-up of a blue industrial machine component with red arrows indicating movement or force, alongside a close-up of fabric texture (no text or symbols)Einleitung
Please read thoroughly this operation manual and attached safety instructions to enjoy your machine. We further recommend to retain the operation manual for future references. We reserve right to make technical changes for the purpose of improvement in the course of continuous product development.
Translation of original operating instructions.
Supply includes
Take the appliance out of the transport container and check whether there are the following parts:
- Leaf vacuum
- Leaf collection bag
- Shoulder strap
If any parts are missing or are damaged, please contact your dealer.
Use as designated
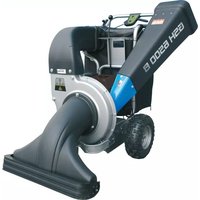
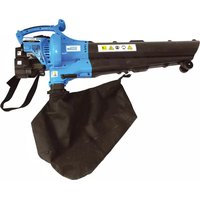
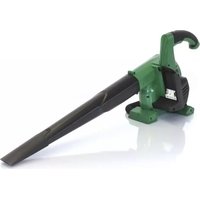
Leaf vacuum including the suction and blowing feature may only be used for leaves and garden waste such as grass and small branches.
The appliance cannot be used for works other than those for which it has been designed and that are specified in the Operating Instructions.
Any other use will be considered a use in conflict with the designation. The manufacturer will not be liable for any consequential damage and injuries. Please be sure to know that our appliances have not been designed for industrial use.
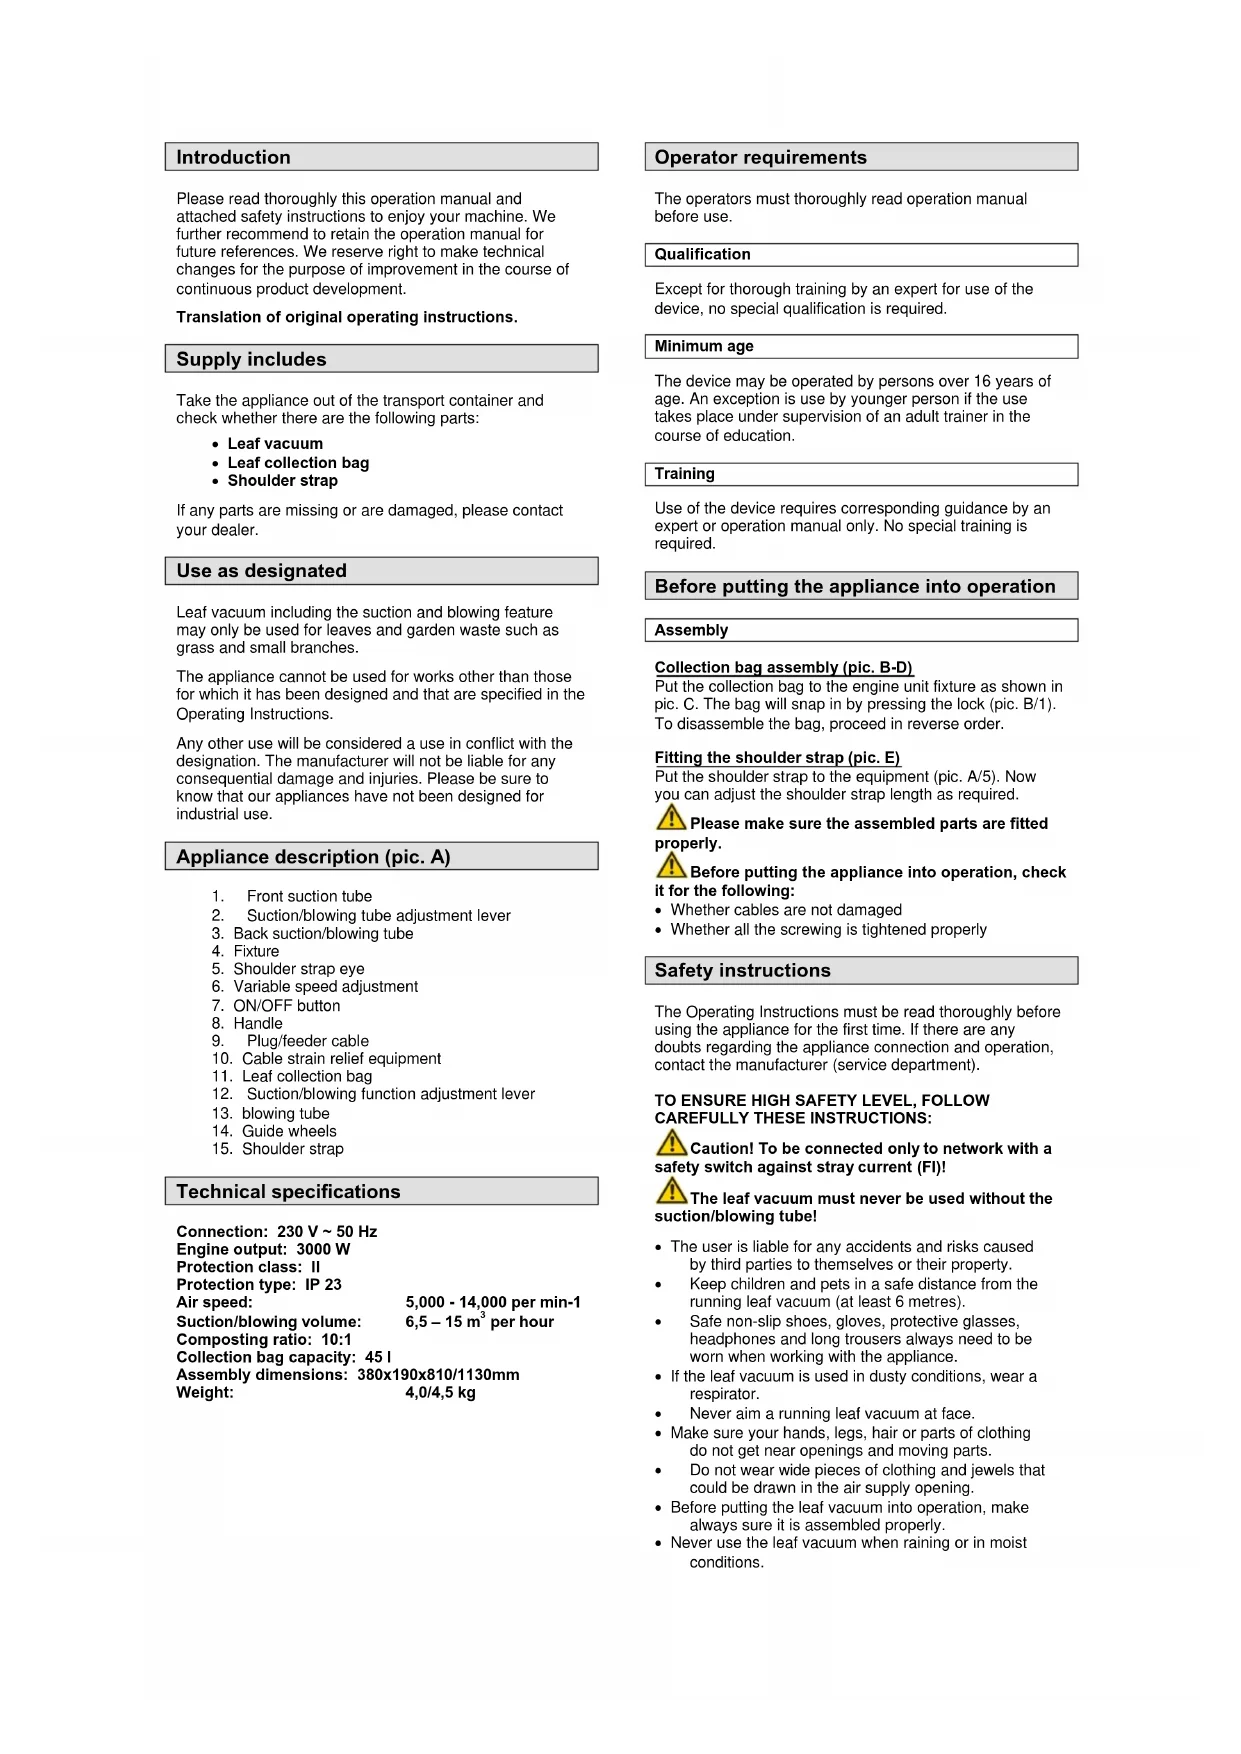
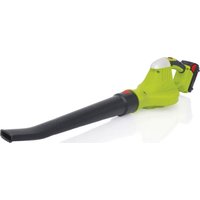
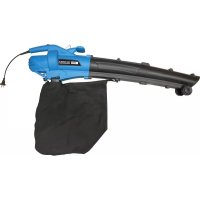
Appliance description (pic. A)
- Front suction tube
- Suction/blowing tube adjustment lever
- Back suction/blowing tube
- Fixture
- Shoulder strap eye
- Variable speed adjustment
- ON/OFF button
- Handle
- Plug/feeder cable
- Cable strain relief equipment
- Leaf collection bag
- Suction/blowing function adjustment lever
- blowing tube
- Guide wheels
- Shoulder strap
Technical specifications
Connection: 230 V \~ 50 Hz
Engine output: 3000 W
Protection class: II
Protection type: IP 23
Air speed: 5,000 - 14,000 per min-1
Suction/blowing volume: 6,5 – 15 m ^3 per hour
Composting ratio: 10:1
Collection bag capacity: 45 l
Assembly dimensions: 380x190x810/1130mm
Weight: 4,0/4,5 kg
Operator requirements
The operators must thoroughly read operation manual before use.
Qualification
Except for thorough training by an expert for use of the device, no special qualification is required.
Minimum age
The device may be operated by persons over 16 years of age. An exception is use by younger person if the use takes place under supervision of an adult trainer in the course of education.
Training
Use of the device requires corresponding guidance by an expert or operation manual only. No special training is required.
Before putting the appliance into operation
Assembly
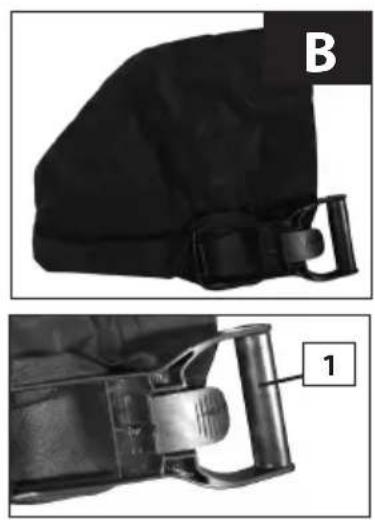
Collection bag assembly (pic. B-D)
Put the collection bag to the engine unit fixture as shown in pic. C. The bag will snap in by pressing the lock (pic. B/1). To disassemble the bag, proceed in reverse order.
Fitting the shoulder strap (pic. E)
Put the shoulder strap to the equipment (pic. A/5). Now you can adjust the shoulder strap length as required.
⚠️ Please make sure the assembled parts are fitted properly.
Before putting the appliance into operation, check it for the following:
• Whether cables are not damaged
- Whether all the screwing is tightened properly
Safety instructions
The Operating Instructions must be read thoroughly before using the appliance for the first time. If there are any doubts regarding the appliance connection and operation, contact the manufacturer (service department).
TO ENSURE HIGH SAFETY LEVEL, FOLLOW CAREFULLY THESE INSTRUCTIONS:
Caution! To be connected only to network with a safety switch against stray current (FI)!
The leaf vacuum must never be used without the suction/blowing tube!
- The user is liable for any accidents and risks caused by third parties to themselves or their property.
- Keep children and pets in a safe distance from the running leaf vacuum (at least 6 metres).
- Safe non-slip shoes, gloves, protective glasses, headphones and long trousers always need to be worn when working with the appliance.
- If the leaf vacuum is used in dusty conditions, wear a respirator.
• Never aim a running leaf vacuum at face. - Make sure your hands, legs, hair or parts of clothing do not get near openings and moving parts.
- Do not wear wide pieces of clothing and jewels that could be drawn in the air supply opening.
- Before putting the leaf vacuum into operation, make always sure it is assembled properly.
-
Never use the leaf vacuum when raining or in moist conditions.
-
Check regularly the main line and have any defective lines replaced in an authorised service centre or by a qualified mechanic.
- Keep all handles and holders dry and clean.
- Before switching the leaf vacuum on, make sure all outer nuts, pins and bolts are tightened properly and safe.
Marking
Product safety:
| CE | |
| Product corresponds to appropriate EU standards | Protective insulation |
Prohibitions:
| Protect against rain and moisture! Do not cut wet grass! |
Warning:
 |  | ||
| Risk of injury by thrown-away items | Please read carefully the Operating Instructions. | ||
 |  | ||
| Warning against risk of drawing-in | Before carrying out any work on the machine, disconnect the plug from the socket. | ||
Commands:
 |  | ||
| Please read carefully the Operating Instructions. Familiarise with the way the appliance works before using it. | Use headphones | ||
 | |||
| Use protective glasses | |||
Environment protection:
 |  | ||
| Dispose waste professionally so as not to harm the environment. | Packing cardboard material may be delivered to collecting centres for recycling. | ||
 | |||
| Any faulty and/or disposed electric or electronic devices must be delivered to appropriate collection centres. | |||
Package:
| Protect against moistureCaution - fragileThis side up | Interseroh-Recycling |
Technical specifications:
 |  | |
| Connection Engine output | ||
 | ||
| Engine speed Air speed | ||
  |  | |
| Suction/blowing capacity | Composting ratio | |
| [0C6K] | ||
| Collection bag capacity | Weight | |
Other instructions:
| LWAdB (A) | |
| Noise |
Appliance-specific safety instructions

Appliance plug or extension cable to be connected only when the appliance is switched off.
- Before you start working, check the appliance, feeder and extension cables for any damage.
- Put the appliance drop cable in the backward direction from the appliance at all times.
- Do not carry the appliance by its cable.
- Unplug the appliance at all times – when the appliance is not used, when being transported, left unattended and when checking the appliance for any damage, cleaning or releasing it.
- Never let the leaf vacuum run when being on side. It has been designed to be operated in an upright position only.
- Do not vacuum flammable materials, e.g. charcoal grill, ash, etc.
- Do not vacuum flammable, toxic or explosive materials.
- Do not use the suction/blowing function if the collection bag is not in place.
- Do not run over gravel ways or roads when the leaf vacuum is running.
• Do not put anything with your hand to the inlet.
- Appliance to be only used in adequate broad daylight or under adequate artificial lighting.
- Do not use the appliance in wet grass. Do not vacuum wet leaves, etc.
- Provide good stability especially on slopes.
- Keep the ventilation slots clean at all times.
- Before you start working, use a rake and broom to remove any undesirable items that could damage the appliance or cause injuries and damage by throwing something away or blowing.
- The surface must be moistened a bit in dusty conditions.
When working
Wear protective glasses, headphones and gloves when working with the leaf vacuum. At all times, work with non-slip shoes, never when barefooted or in sandals.
The device works only with mounted leaf catcher bag.
Appliance to be used only with the shoulder strap (included in the supply) that should be held by both hands. Provide good stability.
⚠ Stones and other items that could cause severe injuries may be thrown/blown away when working with the appliance.
Emergency procedures
Administer first aid according to injury and call for qualified medical assistance. Protect injured person against other injuries and keep him/her in rest. For reasons of potential injury, a first aid box according to DIN 13164 must be available on workplace. Replenish immediately material used from the first aid box. If you require medical assistance, give the following information:
- Place of accident
- Type of accident
- Number of injured persons
- Type of injury
Operation
Please follow the statutory provisions issued in respect of noise protection that may differ depending on the location.
Put the appliance into operation only after complete assembly is provided. The device works only with mounted leaf catcher bag. Before putting the appliance into operation, check the appliance drop cable for any damage – the appliance may only be used when in a perfect condition.
Shoulder strap length adjustment
Adjust the shoulder strap (pic. A/15) length in a way the suction tube can be guided just above the ground. Moreover, the fitted guide wheels are used to guide the suction tube on the ground easier.
Connecting and starting the appliance
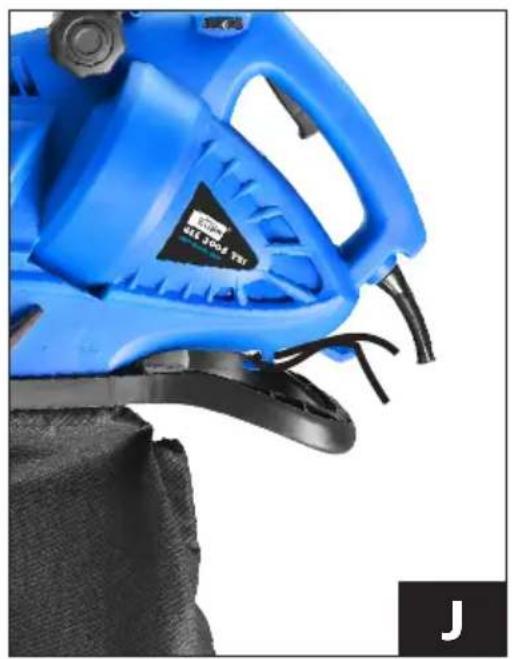
Put the plug (pic. A+K/9) to the extension cable and hang the extension cable in the cable strain relief equipment (pic. A/10) so that the cable is secured. Also, see pic. J. To switch the appliance on or off, press the operating switch (pic. A+K/7). Release the switch to stop the appliance.
Selecting the operating mode
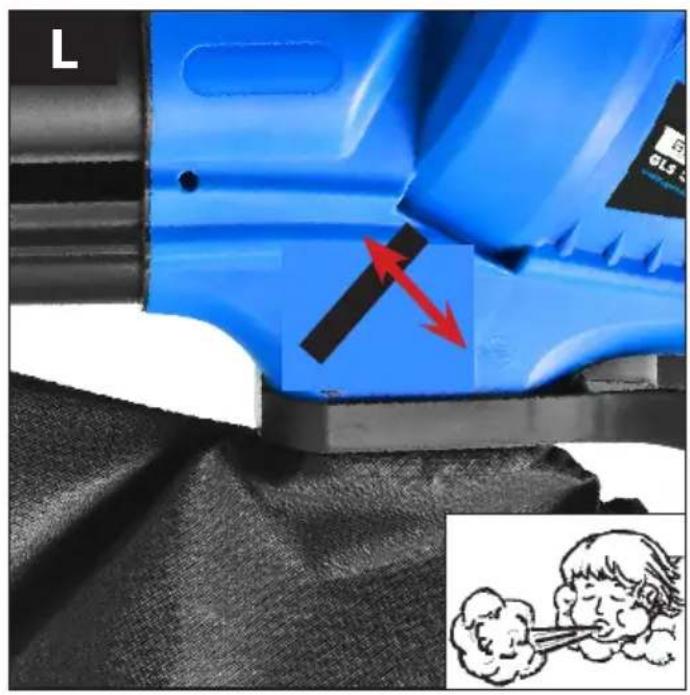
Suction (pic. L)
Put the adjustment lever (pic. L) fully up to the Suction function. This setting can be used both when the appliance is on and off.
The device works only with mounted leaf catcher bag.
Blowing (pic. M)
Put the adjustment lever (pic. M) fully down to the Blowing function. This setting can be used both when the appliance is on and off.
Empty the collection bag before working in the Blowing mode. Otherwise, the vacuumed material could get out.
Emptying the collection bag
Do not empty the collection bag (pic. A/11) too late. If filled too much, the suction output drops significantly. Compost any organic waste.
– Switch the appliance off and unplug it
- Open the collection bag zip (pic. A/11) and empty the vacuumed material.
- The close the zip again, plug the appliance and switch it on.
Speed control (pic. L)
Speed may be set on the speed controller (pic. A/5) using the knob. 1-6 levels correspond to 5,000–14,000 per min ^-1 .
Training
Please read carefully the Operating Instructions and the servicing instructions. Familiarise thoroughly with the controls and proper using of the appliance. You must know how the appliance works and how controls can quickly be switched off.
Never let children work with the appliance. Never let an adult person work with the appliance without proper training.
Do not let any persons, especially small children and pets, to the place of your work.
Be careful to prevent slipping or falling.
Warranty
A warranty period of 12 months applies to commercial use and 24 months apply to private use and commences on the day of purchase of the device.
Warranty applies exclusively to failures due to defective material or workmanship. An original sale slip with indication of date of sale must be presented in case of claiming for the warranty rights.
Warranty does not cover unprofessional use such as device overload, violent use, damage caused by third party or foreign materials, failure to comply with operations and assembly manual, and normal wear and tear.
Disposal
Disposal instructions are illustrated in the form of pictograms on the device or packaging. Description of the pictograms is given in "Identification" chapter.
Disposal of transport packaging
Packaging protects the device against damage during transport. Packaging materials are usually selected according to their effect on environment and disposal methods and can therefore be recycled. Returning of the packaging back to circulation saves resources and costs for packaging disposal. Parts of the packaging (e.g. foil, styropor) may be dangerous for children. Risk of suffocation! Keep these parts of the packaging out of reach of children and dispose as soon as possible.
Service
Any technical questions? Complaint? Do you need spare parts or operation manual?
Go to our website www.guede.com and the section Service will help you quickly and without bureaucracy. Please, help us to help you. In order to identify your device in case of complaint, please indicate serial number, order number and year of manufacture. All information is available on the product label. To have all information always at hand, put them down.
Serial number:
Order number:
Year of manufacture:
Phone: +49 (0) 79 04 / 700-360
Fax: +49 (0) 79 04 / 700-51999
E-Mail: support@ts.guede.com
Servicing

Switch the appliance off before any servicing and cleaning and wait until it fully stops. Unplug the appliance.
Servicing works not explicitly specified in this manual must be performed by specialised staff as there might be dangerous situations the operator is unable to handle. Spare parts may only be replaced by specialised staff.

Proceed as follows when the appliance is
blocked:
The suction/blowing tube may only be disassembled for cleaning purposes. It must be properly refitted after finishing the cleaning!
Cleaning
- The appliance must not be cleaned by high-pressure cleaners or under running water.
- Do not use any aggressive, caustic cleaning agents.
- After finishing your work, remove the collection bag and turn it inside out. Clean the bag properly; otherwise, mould and unpleasant smell could be produced.
- A severely dirty collection bag can be cleaned by water and soap.
- Keep the appliance and ventilation slots clean and free at all times.
- Any dirt on the appliance can be removed by a wet cloth. Clean the suction tube with a wet cloth or brush.
Troubleshooting
The table shows potential failures, their possible cause and removal options. However, if you are unable to remove the problem, contact a professional to assist you.
Switch off and unplug the appliance before any servicing and cleaning.
| Symptoms | Possible cause | Remedy |
| Appliance not starting | No system voltage | Check the plugging and protection |
| Cable is defective | To be checked or replaced in the customer service centre. | |
| Collection bag is not mounted | Collection bag mount so that the limit switch is actuated. | |
| Couplings on the engine are not tightened properly | To be checked or replaced in the customer service centre. | |
| Appliance not sucking | Collection bag is full | Empty the collection bag |
| Suction tube is blocked | Clean the suction tube | |
| Switch to “Blowing” | Switch to “Suction” | |
| Appliance not blowing | Switch to “Suction” | Switch to “Blowing” |
Introduction
Translation of the EC-Declaration of Conformity
We, hereby declare the conception and construction of the below mentioned appliances correspond - at the type of construction being launched - to appropriate basic safety and hygienic requirements of EC Directives.
In case of any change to the appliance not discussed with us the Declaration expires.
2006/95/EC 2004/108/
2009/105/EC 1907/2006/EC
2011/65/EC ROHS 2009/142/EC
☐ 89/686/EEC (PPE) 1935/2004/EC
2006/42/EC
Annex IV
Notified Body
No:
Name:
Adress:
Type Ex. Cert.-No.:
□97/68/EC_
Emission No.:
2000/14/EC_2005/88/EC
- Einleitung
- Supply includes
- Use as designated
- Appliance description (pic. A)
- Technical specifications
- Operator requirements
- Qualification
- Minimum age
- Training
- Before putting the appliance into operation
- Assembly
- Collection bag assembly (pic. B-D)
- Fitting the shoulder strap (pic. E)
- Safety instructions
- TO ENSURE HIGH SAFETY LEVEL, FOLLOW CAREFULLY THESE INSTRUCTIONS:
- Marking
- Appliance-specific safety instructions
- When working
- Emergency procedures
- Operation
- Shoulder strap length adjustment
- Connecting and starting the appliance
- Selecting the operating mode
- Suction (pic. L)
- Blowing (pic. M)
- Emptying the collection bag
- Speed control (pic. L)
- Warranty
- Disposal
- Disposal of transport packaging
- Service
- Any technical questions? Complaint? Do you need spare parts or operation manual?
- Servicing
- blocked:
- Cleaning
- Troubleshooting
- Introduction
- Translation of the EC-Declaration of Conformity
Brand : Güde
Model : GLS 3000 VST
Category : Blower