
E2N - Camera NIKON - Free user manual and instructions
Find the device manual for free E2N NIKON in PDF.
| Product type | Digital SLR camera |
| Brand | Nikon |
| Model | E2N |
| Power supply | Rechargeable battery EN-1; quick charger EH-1/EH-2; DC adapter ES-1 |
| Storage media | Nikon EC-15 image memory card |
| Sensor | CCD (not specified in the manual) |
| Number of pixels | Not stated |
| ISO sensitivity | 800 (STD) or 3200 (HIGH) – switchable |
| Shooting mode | Single frame (S), continuous (C) approx. 1 frame/s, preview |
| White balance | Automatic + 6 manual modes (including flash at 5700K) |
| Flash sync | External flash sync (standby mode 2 min) |
| Video output | V-out connector (EG-10 cable) |
| Compatible lenses | See table pages 73-74: AF Nikkor, Nikkor, etc. (list provided) |
| Included accessories | EN-1 battery, EH-1/EH-2 charger, ES-1 DC adapter, EC-15 card, EG-10 video cable, EX-10 sync cable |
| Safety | Compliant with EN60950, EN55022 Class B, EEC directives (89/336/EEC) and low voltage (73/23/EEC) |
| Maintenance | Clean with a soft dry cloth; avoid moisture and shocks |
| Repairability | Spare parts available from the manufacturer |
Frequently Asked Questions - E2N NIKON
User questions about E2N NIKON
0 question about this device. Answer the ones you know or ask your own.
Ask a new question about this device
Download the instructions for your Camera in PDF format for free! Find your manual E2N - NIKON and take your electronic device back in hand. On this page are published all the documents necessary for the use of your device. E2N by NIKON.
USER MANUAL E2N NIKON
Digital Still Camera
(supplement to Digital Still Camera E2/E2s Manual)
Bedienungsanleitung
Thank you for purchasing the Nikon Digital Camera E2N. The E2N is an improved version of the E2/E2s Digital camera. In this instruction manual, only the new or modified features and instructions are described. For details on other operations, please consult the Instruction Manual of the E2/E2s included with this package.
Vorwort
EC DECLARATION OF CONFORMITY
We
Name:
Nikon UK Limited
Address:
Nikon House, 380 Richmond Road, Kingston, Surrey KT2 5PR, UK
declare that the product
Product Name:
Nikon Digital Still Camera E2/E2s/E2N
Manufacturer's Name:
Nikon Corporation
Manufacturer's Address:
Fuji Bldg., 2-3, Marunouchi 3-chome, Chiyoda-ku, Tokyo 100, Japan
is in conformity with the following Standards
Safety: EN60950
EMC: EN55022: 1987 Class B
EN50082-1
IEC801-2: 1991 4kVCD, 8kVAD
IEC801-3:1984 3V/m
IEC801-4: 1988 1kV AC, 0.5kV I/O
following the provisions of the EMC Directive (89/336/EEC) and the Low Voltage Directive (73/23/EEC).
DECLARATION DE CONFORMITE DE LA CEE
Nous
Nom:
Nikon UK Limited
Adresse:
Nikon House, 380 Richmond Road, Kingston, Surrey KT2 5PR, UK

Fuji Bldg., 2-3, Marunouchi 3-chome,
Chiyoda-ku,Tokyo 100,Japan
Name: Nikon UK Limited
Anschrift: Nikon House, 380 Richmond Road, Kingston,
Surrey KT2 5PR, UK
Signature/Managing Director
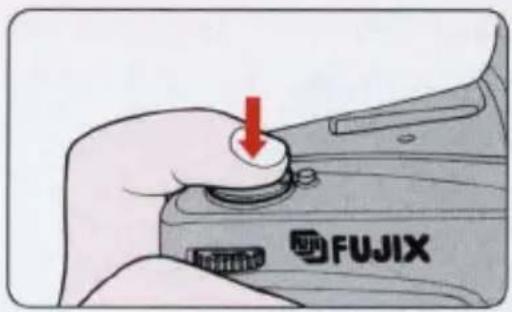
Use the Nikon Image Memory Card EC-15 and be sure to initialize the card before using it for the first time.

Use the Nikon Image Memory Card EC-15 and be sure to initialize the card before using it for the first time.
When card initializing is complete, subdirectory area "IMFIDX10" is automatically created on the card for storing image data.
—This directory is very important for managing files. Do not delete directory or files, and do not alter file names from the computer. This may cause the camera to malfunction during shooting and playback operations.
CAUTION
Any data in the memory card will be deleted during initialization.
• This data will not be recoverable.
• Take special care when initializing a memory card other than for the first time.

CAUTION
Any data in the memory card will be deleted during initialization.
- This data will not be recoverable. Save and backup valuable data before initializing the card.
• Take special care when initializing a memory card other than for the first time.
Setting the frame advance mode (Page 34)
C: Continuous shooting mode
Shooting operation continues as long as the shutter release button is depressed.

C: Continuous shooting or preview mode
In continuous shooting mode: Shooting operation continues as long as the shutter release button is depressed.
In preview mode: The video signal from camera to monitor is renewed each time you press the shutter release button. However, no image data can be downloaded to the Image Memory Card. (See page 8 on this manual.)
Adjusting white balance (Page 38)
In order to ensure proper white balance, an Auto white balance mode and five manual white balance modes are provided with this camera. For most scenes, select the auto white balance mode. Choose the manual modes for particular lighting situations. We recommend that you experiment with the various settings until you are fully familiar with them.
—When using a speedlight in external synchro-flash shooting mode, the white balance is adjusted between subject brightness and the light from the flash.

In order to ensure proper white balance, an Auto white balance mode and six manual white balance modes are provided with this camera. For most scenes, select the auto white balance mode. Choose the manual modes for particular lighting situations. We recommend that you experiment with the various settings until you are fully familiar with them.
—When using a speedlight, or in external synchro-flash shooting mode, white balance is adjusted between subject brightness and the light from the flash. The above applies to all white balance modes, with the exception of Flash mode. In Flash mode, white balance is fixed at preset color temperature.
While pressing the W.Bal button, rotate the command dial to change the mode.
—The ■ mark in the LCD panel settles above one of the following symbols.

While pressing the W.Bal button, rotate the command dial to change the mode.
—The ■ mark in the LCD panel settles above one of the following symbols.

—In Flash mode, both ⚙ and ♣ marks light up simultaneously.

Adjusting white balance (Page 39)

: Flash mode
Best suited for taking pictures in locations where high-power flash units are used such as in studios or other facilities. White balance is fixed at color temperature 5700° K.
Setting the sensitivity level (Page 41)
Two shooting sensitivity levels equivalent to film speeds of ISO 800 (STD) and ISO 1600 (HIGH) can be selected. Set the sensitivity to "STD" when taking pictures outside in bright weather, and "HIGH" for dark interiors.

Two shooting sensitivity levels equivalent to film speeds of ISO 800 (STD) and ISO 3200 (HIGH) can be selected. Set the sensitivity to "STD" when taking pictures outside in bright weather, and "HIGH" for dark interiors.
NOTE
Sensitivity and film speed
This camera's shooting sensitivity is equivalent to ISO film speeds of 800 and 1600. Equivalent shutter speed/f-stop combinations can be calculated based on this ISO rating. For example, to compare traditional film to digital, at 1/250 second for the same scene brightness, the E2 might use f/6.7 at ISO 800 which would be equivalent to f/2.8 at ISO 150 on a regular Nikon SLR.

NOTE
Sensitivity and film speed
This camera's shooting sensitivity is equivalent to ISO film speeds of 800 and 3200. Equivalent shutter speed/f-stop combinations can be calculated based on this ISO rating. For example, to compare traditional film to digital, at 1/250 second for the same scene brightness, the E2N might use f/6.7 at ISO 800 which would be equivalent to f/2.8 at ISO 150 on a regular Nikon SLR.

Setting the six basic modes simultaneously (Page 45)
—Command lock is cancelled. (See page 46.)

—Command lock (see page 46) and preview mode (see page 8 on this manual) are canceled.
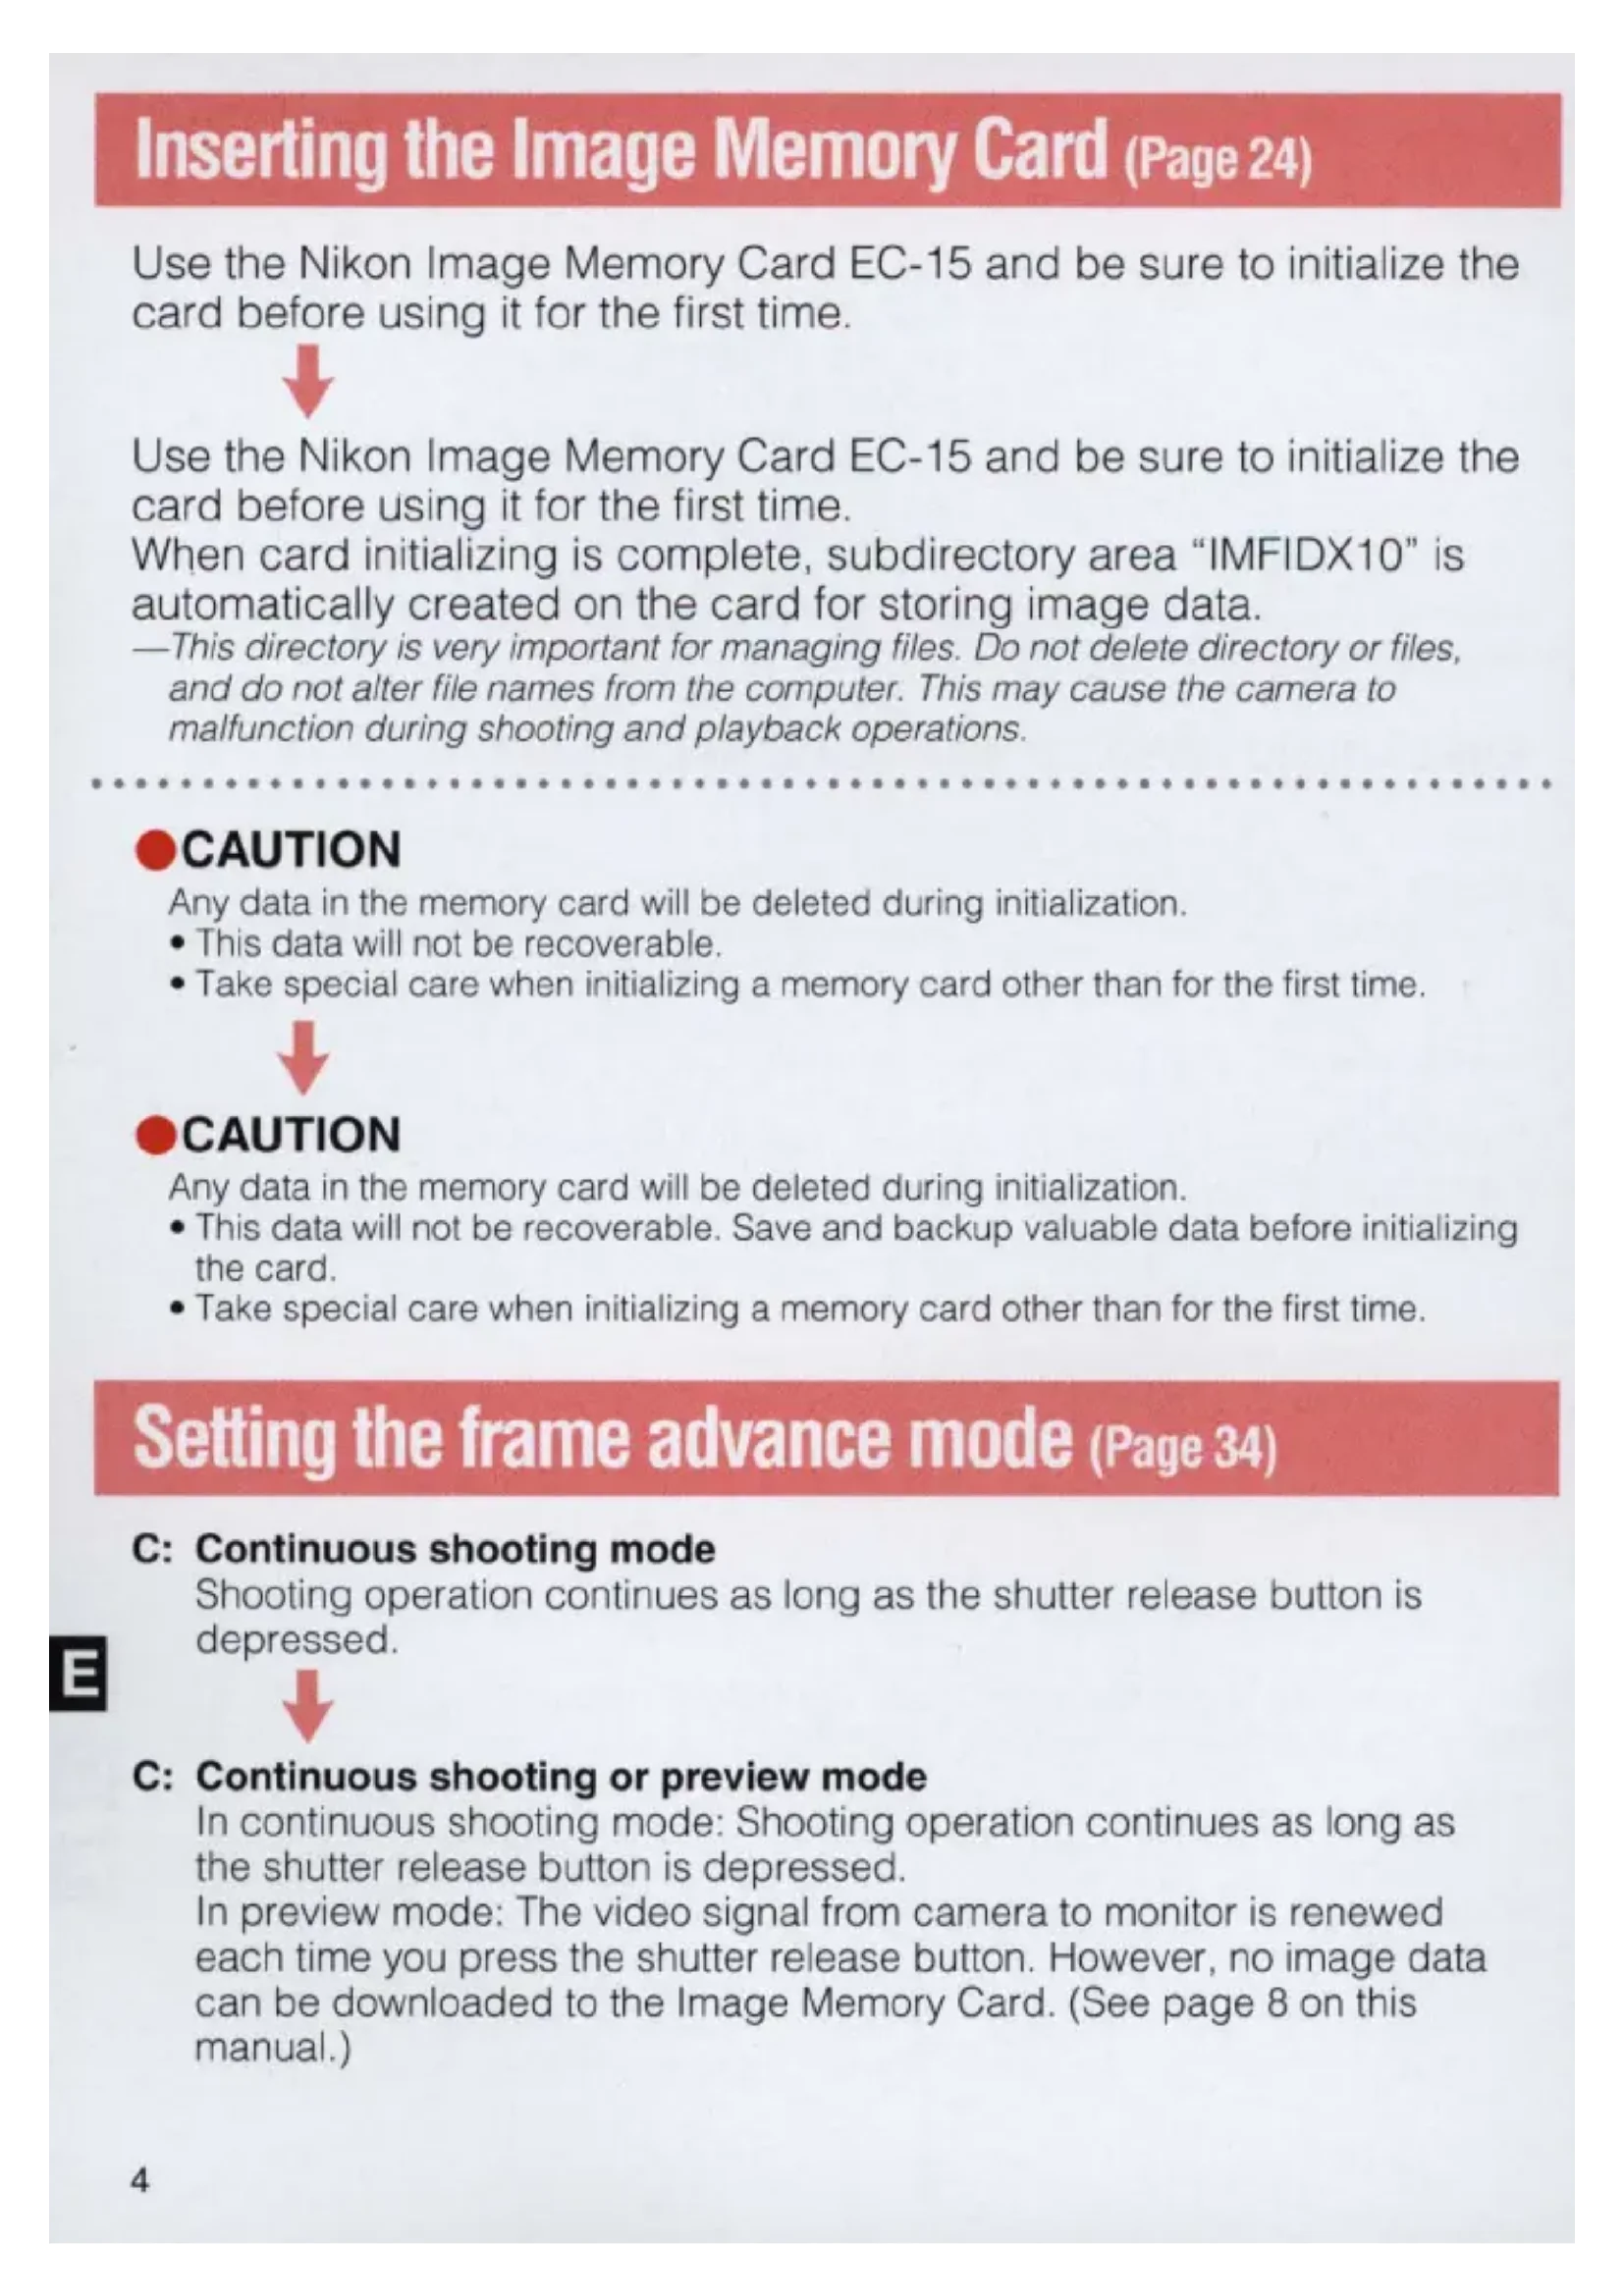
External synchro-flash shooting (Page 62)
Depress the shutter release button.
The "Sy" mark blinks in the LCD panel to indicate that the camera is in standby mode; pictures are taken in sync with the firing of the remote speedlight
—The standby mode will be canceled approx. 10 seconds after depressing the shutter release button if the firing of the remote speedlight is not detected by the camera.
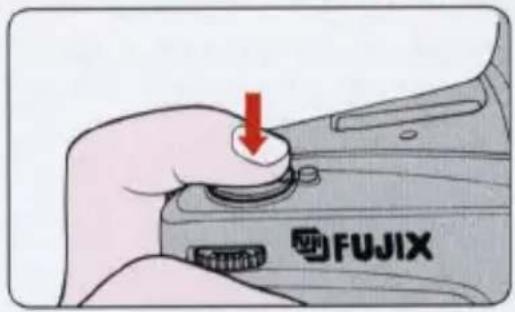

Depress the shutter release button.
The "Sy" mark blinks in the LCD panel to indicate that the camera is in standby mode; pictures are taken in sync with the firing of the remote speedlight.
—The standby mode will be canceled approx. 2 minutes after depressing the shutter release button if the firing of the remote speedlight is not detected by the camera.
—To cancel the standby mode, rotate the Main dial to L and turn the power OFF. Note that the mirror remains in the up position throughout. Set the Main dial to L and turn the power ON again to bring the mirror back down.

Using preview mode
In this mode, the video signal from camera to monitor is renewed each time you press the shutter release button. You can prepare shooting while checking compositions and exposures before shooting.
—No image data can be downloaded to the Image Memory Card. When you want to download image data to the Image Memory Card, cancel the preview mode or set the frame advance mode to S (single-frame shooting). (See page 34 of the E2/E2s manual.)
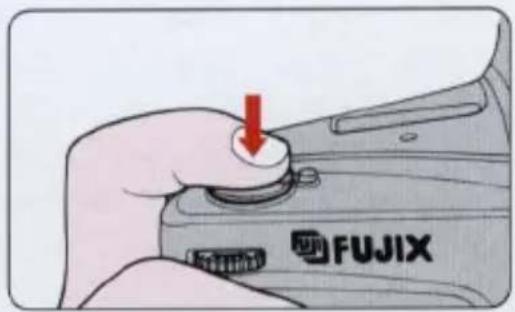
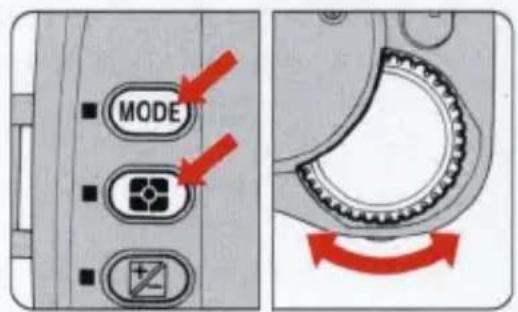
1 Set the frame advance mode to C.
While pressing the Main dial lock-release button, rotate the Main dial to C.
2 To set Preview mode, rotate the command dial while simultaneously pressing the MODE and Metering system buttons.
—Rotate the command dial to toggle between the C (continuous shooting) mode and the preview mode.
—Check if the frames-shot counter in the LCD panel and the frame counter in the viewfinder are blinking.

C — Preview

Release the shutter.
Image data is output from the V-Out (video output) terminal.
—Continuous shooting operation cannot be performed even when the shutter release button is held down.
—If no Image Memory Card is inserted, the shutter can be released but no image data is output.
—If the Image Memory Card cannot store data (because of insufficient memory, write-protection, etc.), the shutter cannot be released.
4 Release the shutter again to renew the video output.
—Whenever the shutter is released, video output is renewed.
—In preview mode, video output operation stops automatically after approx. 3 minutes when the camera is not in use. The power will turn OFF after a further 16 seconds when the camera is not in use. Press the shutter release button halfway or set the Main dial to any position other than C to stop video output operation.
—You cannot use the command dial and aperture dila to change modes and values during video output. Cancel preview mode to change shooting conditions once.
NOTE
The following accessories for the E2/E2s camera can also be used with the E2N.
• Rechargeable Battery Pack EN-1
- Quick Charger EH-1 (EH-2)
- DC Adapter ES-1
• Image Memory Card EC-15
• Video Cable EG-10
• External Sync Adapter EX-10


Updated lens lineup.
◎: Fully usable
○: Usable
Pictures may be slightly dim around the edges of the frame in close-up shots or with infinity-distance subject.
△: Usable subject to conditions Pictures may be colored or dim around the edges of the frame depending on the aperture value selected.
| AF Nikkor 16mm f/2.8D | × |
| AF Nikkor 18mm f/2.8D | × |
| AF Nikkor 20mm f/2.8D | × |
| AF Nikkor 24mm f/2.8D | × |
| AF Nikkor 24mm f/2.8S | × |
| AF Nikkor 28mm f/1.4D | ◎ |
| AF Nikkor 28mm f/2.8D | × |
| AF Nikkor 28mm f/2.8S | × |
| AF Nikkor 35mm f/2D | △ |
| AF Nikkor 35mm f/2S | △ |
| AF Nikkor 50mm f/1.4D | ◎ |
| AF Nikkor 50mm f/1.4S | ◎ |
| AF Nikkor 50mm f/1.8S | × |
| AF Nikkor 85mm f/1.4D | ◎ |
| AF Nikkor 85mm f/1.8D | ◎ |
| AF Nikkor 85mm f/1.8S | ◎ |
| AF Nikkor DC105mm f/2D | ◎ |
▲: Usable subject to conditions Pictures are colored or dim around the edges of the frame.
x: Not usable
A shadow appears around the edges of the frame.
| Frame advance mode | C: Continuous shootingApprox. 1 frame/sec. (in BASIC mode) (when using EC-15)Preview: For monitoring shooting image (No image data can be downloaded to the Image Memory Card.) |
| Viewfinder information | By LED—Focus indicators (in-focus, front-focus, rear-focus), Exposure compensation mark, Flash-ready light (lights up when charging is completed, and blinks to alert the subject is out of the flash shooting range when used with SB-27, SB-26 or SB-25) |
| Sensitivity | ISO equivalent 800 (STD) and 3200 (HIGH) switchable |
No reproduction in any form of this manual, in whole or in part (except for brief quotation in critical articles or reviews), may be made without written authorization from NIKON CORPORATION.

- Digital Still Camera
- Bedienungsanleitung
- Vorwort
- EC DECLARATION OF CONFORMITY
- DECLARATION DE CONFORMITE DE LA CEE
- CAUTION
- Setting the frame advance mode (Page 34)
- C: Continuous shooting mode
- C: Continuous shooting or preview mode
- Adjusting white balance (Page 38)
- Adjusting white balance (Page 39)
- : Flash mode
- Setting the sensitivity level (Page 41)
- NOTE
- Sensitivity and film speed
- Setting the six basic modes simultaneously (Page 45)
- External synchro-flash shooting (Page 62)
- Depress the shutter release button.
- Using preview mode
- Set the frame advance mode to C.
- To set Preview mode, rotate the command dial while simultaneously pressing the MODE and Metering system buttons.
- C — Preview
- Release the shutter.
- Release the shutter again to renew the video output.
- Updated lens lineup.
Brand : NIKON
Model : E2N
Category : Camera