GH124 - Deep fryer BUFFALO - Free user manual and instructions
Find the device manual for free GH124 BUFFALO in PDF.

User questions about GH124 BUFFALO
0 question about this device. Answer the ones you know or ask your own.
Ask a new question about this device
Download the instructions for your Deep fryer in PDF format for free! Find your manual GH124 - BUFFALO and take your electronic device back in hand. On this page are published all the documents necessary for the use of your device. GH124 by BUFFALO.
USER MANUAL GH124 BUFFALO
natural_image
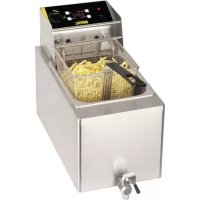
Exterior view of a stainless steel kitchen<|im_start|> Puerto Rico electric oven with French food in the foreground (no visible text or symbols)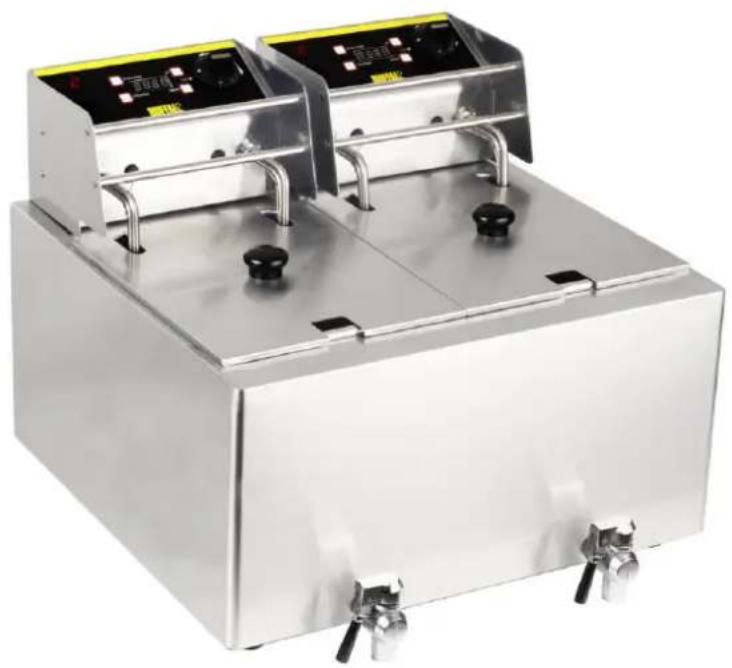
natural_image
Two stainless steel kitchen cabinets with control knobs and side outlets, no visible text or symbolsModel . Modèle . Modell . Modello . Modelo . Malli
GH124 / GH125 / GH126 / GH127
Safety Tips
- Position on a flat, stable surface.
- A service agent/qualified technician should carry out installation and any repairs if required. Do not remove any components on this product.
- Consult Local and National Standards to comply with the following:
- Health and Safety at Work Legislation
- BS EN Codes of Practice
- Fire Precautions
○ IEE Wiring Regulations
○ Building Regulations
- DO NOT immerse the electrical control box assembly in water, or use jet/pressure washers to clean the appliance
- Do not use the appliance for anything other than its intended use.
• Always switch off and disconnect the power supply to the appliance when not in use.
- Not suitable for outdoor use.
- Keep all packaging away from children. Dispose of the packaging in accordance to the regulations of local authorities.
- If the power cord is damaged, it must be replaced by a BUFFALO agent or a recommended qualified technician in order to avoid a hazard.
- This appliance is not intended for use by persons (including children) with reduced physical, sensory or mental capabilities, or lack of experience and knowledge, unless they have been given supervision or instruction concerning the use of the appliance by a person responsible for their safety.
- Ensure oil levels are maintained above the minimum indicated level. Failing to maintain the required level may result in element failure.
- The manufacturers of Buffalo products take every care to ensure that all products are safe. Steel cutting procedures used to manufacture these items results in sharp edges. These sharp edges are removed to the best of our ability; however we still insist the operator takes care when in contact with this piece of equipment.
- Switch off power to the Fryer, and remove the plug from the power socket whilst cleaning, draining oil, or filling with oil.
- Change the oil regularly. Used oil breaks down after use, it can catch fire as its flash point is reduced, and it is more prone to surge boiling.
- The oil pan should not be covered during frying – Lid should not be fitted when unit in use.
Introduction
Thank you for purchasing the Buffalo Electric Fryer. Before operating this product, you should read through the instructions and hints in this manual, this will help you enjoy effective, trouble free results from using the product. Keep the instructions in a safe place for future reference.
These appliances are intended to be used for commercial applications, for example in kitchens of restaurants, canteens, hospitals and in commercial enterprises such as bakeries, butcheries, etc., but not for continuous mass production of food
Buffalo will not accept liability for product failures in the event that:
- The instructions in this manual have not been followed correctly.
- Unqualified or unauthorized personnel have adjusted the Fryer.
• Non-original spare parts are used. - The Fryer has not been handled and cleaned correctly.
- The Fryer has been used for a purpose for which it was not intended.
Packaging
All Buffalo products are inspected and tested prior to packing.
This product consists of the following parts:
- Fryer
- Basket – one or two according to the model purchased
- Instruction Leaflet
If any of these parts are found to be missing or damaged after transit, you must contact your supplier immediately.
Installation
Remove the Fryer from the packaging, ensuring that all protective packaging, plastic and residues are thoroughly cleaned from its surfaces.
Place the Fryer on a firm level surface (Or Fryer stand if purchased).
Before installing and operating the Fryer, it is the user's responsibility to ensure that all Health & Safety regulations concerning safe positioning, spacing, ventilation, electrical installation, and fire risk, are complied with.
UK
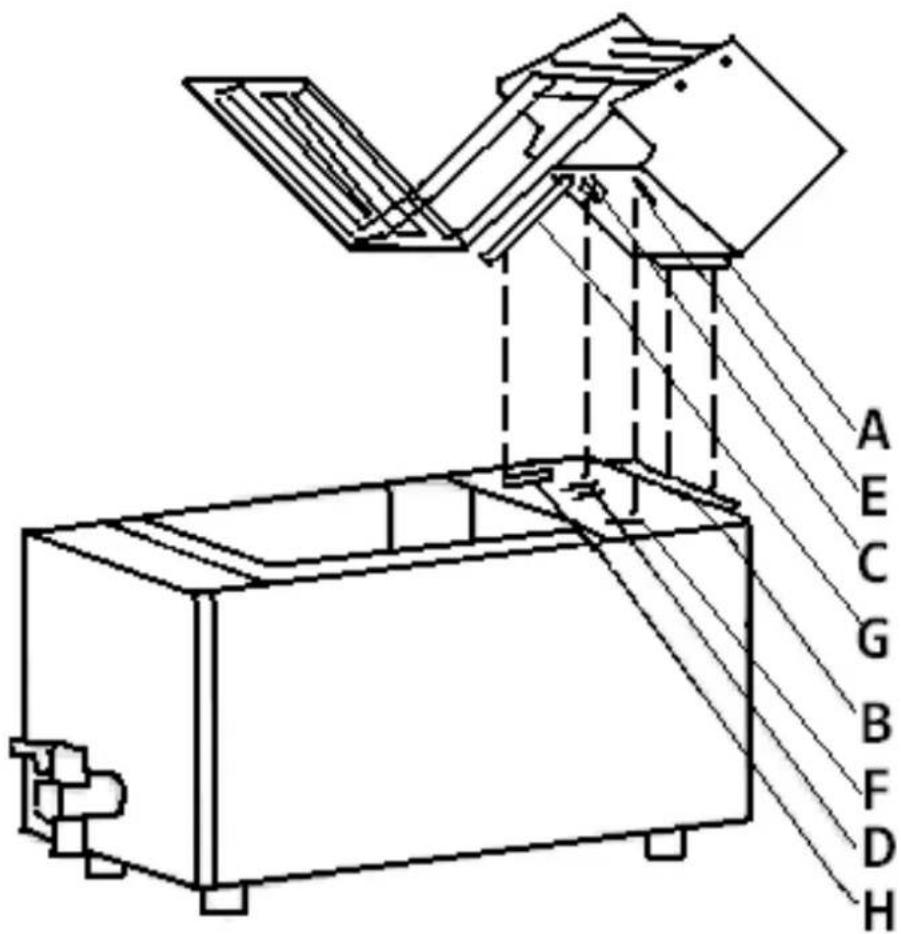
Fitting the Element and Control box to the Fryer body.
Position the Element/Control Box into the body of the fryer, locating it into the lugs at the rear of the Fryer body, using the bracket on rear of the Control Box. Once the rear of the control unit (A) is clipped into the lugs on the main body (B), ensure that the safety switch (C), and the location plate (E) on the base of the control unit, is correctly aligned with the slots (D) and (F) in the main body, before the element is lowered into its operating position in the pan. Locate Electrical box support (G) in main body (H). Place the guard over the element at the bottom of the pan.
text_image
A E C G B F D HThe fryer can now be filled with the appropriate cooking oil. Connect the Fryer to the correct power supply and it is ready to operate.
Operation
- Please ensure Oil level is between Min and Max lines.
- Turn the thermostat dial towards the "ON" position, adjust the dial to the required temperature setting.
- Allow time for the oil temperature to reach the required setting. While the oil is heating, the red light will be on, when the oil has reached the required temperature; the red light will switch off.
- As the oil temperature fluctuates, the thermostat will operate to maintain the set temperature, the indicator light will be lit when the Fryer is heating the oil.
- A temperature setting of between 170 and 180 degrees centigrade will be sufficient for most cooking. However this may vary for particular food types or according to individual requirements.
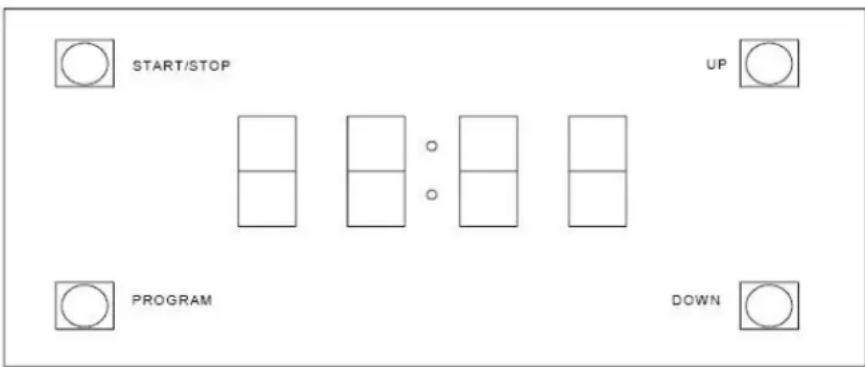
Using the Timer
The digital timer with audible alarm can be set from 1 second to 15 minutes
text_image
START/STOP UP PROGRAM DOWNThe timer provides an audible alarm only; after the set time expires unit will continue to operate at set temperature.
START/STOP: Press START/STOP to start timer, press again to stop. The timer will provide an audible alarm after the set time. The alarm will beep 10 times and the display will continue to flash until timer is reset (press the START/STOP button)
UP: Press UP to add extra time
DOWN: Press DOWN to reduce time
PROGRAM: There are a total of 6 programmable timer settings. The default factory program settings are given below
| Program | 1 | 2 | 3 | 4 | 5 | 6 |
| Factory Preset Time | 00:30 | 01:00 | 01:30 | 02:00 | 02:30 | 03:00 |
To change the length of a program select the program you want to change by scrolling using the PROGRAM button. Adjust the program time by using the UP and DOWN buttons. Press START/STOP to commence the count-down. The new program time will be automatically stored.
If the unit is left without power for more than 24hrs the timer settings will revert to the factory defaults.
Cleaning, Care and Maintenance
The Fryer should be cleaned after each day's operation; however it may require cleaning more often, depending on the volume of frying carried out.
- Switch off the power and disconnect from the power supply by removing the plug from the socket.
- The Fryer must be left until the oil has cooled to room temperature before cleaning.
- Empty oil by opening the drain tap at the front of the unit
Note: If the oil is to be reused, it should be filtered
- Once the oil has been emptied from the fryer, the control box can be tilted back enabling the pan to be cleaned using warm soapy water.
Warm soapy water is recommended for cleaning. Cleaning agents after prolonged use can cause damage to stainless steel.
The main body can also be cleaned with warm soapy water. Remove the control box and element before cleaning takes place.
The control box cannot be immersed in water, but can be wiped down with a damp cloth.
After cleaning as above, please use a dry cloth to clean the appliance to ensure there is no water on the heating element and in the water oil pan.
Trouble Shooting
| Problem | Cause | Remedy |
| Oil is not heating and indicator light is off. | Main power supplyElement/ control unit not correctly locatedPlug and lead are damagedInternal wiring fault | Check main power supplyFollow the steps on page 2 to correctly locateCall service agent or qualified technicianCall service agent or qualified technician |
| Oil is heating & indicator light is on. But heating up slowly | Thermostat or heating element has failed | Call service agent or qualified technician |
| Indicator light is not on but appliance is operating normally | Faulty pilot lightOil has reached the set temperature | Call service agent or qualified technicianUse FRYER normally |
If your Buffalo FRYER does not operate, please check the following before placing a service call.
It is connected to the correct power supply.
The machine is plugged in correctly and power is switched on.
The thermostat dial has been set to the required temperature.
Specifications
| MODEL | VOLTAGE | POWER | MAX BATCH LOAD (KG) | OIL VOLUME (Litres) | DIMENSIONS(MM) | WEIGHT (KG) | ||
| HEIGHT | WIDTH | DEPTH | ||||||
| GH124 | 2900W | 1 | 8L | 452 | 283 | 595 | 9.9 | |
| GH125 | 230V ~ 50HZ | 2×2900W | 2x1 | 2 x8L | 452 | 550 | 595 | 20.8 |
| GH126 | 6000W | 1 | 8L | 452 | 283 | 595 | 10.9 | |
| GH127 | 2×6000W | 2x1 | 2x8L | 452 | 550 | 595 | 21.8 | |
Electrical Wiring – GH124, GH125
GH124 and GH125 are supplied with a 3 pin, moulded, BS1363 plug and lead, with a 13 amp fuse as standard.
The plug is to be connected to a suitable mains socket.
This appliance is wired as follows:
• Live wire (coloured brown) to terminal marked L
• Neutral wire (coloured blue) to terminal marked N
- Earth wire (coloured green/yellow) to terminal marked E
This appliance must be earthed, using a dedicated earthing circuit.
If in doubt consult a qualified electrician.
Electrical isolation points must be kept clear of any obstructions. In the event of any emergency disconnection being required they must be readily accessible.
Electrical Wiring – GH126, GH127
GH126 and GH127 are supplied unplugged and require hardwiring to a suitable electrical power supply capable of supporting 6KW at 230V/50hz.
This appliance is wired as follows:
• Live wire (coloured brown) to terminal marked L
• Neutral wire (coloured blue) to terminal marked N
- Earth wire (coloured green/yellow) to terminal marked E
This appliance must be earthed, using a dedicated earthing circuit.
Electrical isolation points must be kept clear of any obstructions. In the event of any emergency disconnection being required they must be readily accessible.
Connection to a suitable power supply should only be carried out by a qualified and competent electrical engineer.
Compliance
The WEEE logo on this product or its documentation indicates that the product must not be disposed of as household waste. To help prevent possible harm to human health and/or the environment, the product must be disposed of in an approved and environmentally safe recycling process. For further information on how to dispose of this product correctly, contact the product supplier, or the local authority responsible for waste disposal in your area.
BUFFALO parts have undergone strict product testing in order to comply with regulatory standards and specifications set by international, independent, and federal authorities.
BUFFALO products have been approved to carry the following symbol:

text_image
CEPlease keep this manual in a safe place for future use!
All rights reserved. No part of these instructions may be produced or transmitted in any form or by any means, electronic, mechanical, photocopying, recording or otherwise, without the prior written permission of BUFFALO.
Every effort is made to ensure all details are correct at the time of going to press, however, BUFFALO reserve the right to change specifications without notice
Veiligheidstips
text_image
A E C G B F D Htext_image
A E C G B F D Htext_image
A E C G B F D Htext_image
A E C G B F D Htext_image
A E C G B F D Htext_image
A E C G B F D HApplication of Council Directives(s)
Toepassing van Europese Richtlijn(en) • Application de la/des directive(s) du Conseil • Anwendbare EU-Richtlinie(n) •
I, the undersigned, hereby declare that the equipment specified above conforms to the above Directive(s) and Standard(s).