XWave - Remote control toy Overmax - Free user manual and instructions
Find the device manual for free XWave Overmax in PDF.

| Brand | Overmax |
| Model | XWave |
| Product type | Radio-controlled toy |
| Vehicle power supply | Li-ion battery 7.4V 1500mAh |
| Remote control power supply | 3 AA 1.5V batteries (not included) |
| Charging time | Approximately 150 minutes |
| Water resistance | IP57 |
| Recommended age | From 5 years old |
| Package contents | Body, chassis, controller, Li-ion battery, USB cable, wrench, screwdriver |
| Main functions | Forward, reverse, brake, left/right steering, speed adjustment |
| Safety | Not suitable for children under 3 years (small parts, choking hazard). Use under adult supervision. |
| Maintenance and cleaning | Clean with a damp cloth, oil moving parts, avoid sand and dust. |
| Repairability | Do not repair yourself; contact an authorized service center. |
| Compliance | Complies with European Union directives. Subject to separate collection (WEEE). |
| Manual languages | FR, DE, EN, ES, IT, LT, NL, PL, UK |
| Included accessories | Wrench, screwdriver |
| Recommended adapter voltage | 5V / 1A (not included) |
| Remote control battery type | Alkaline AA batteries |
Frequently Asked Questions - XWave Overmax
User questions about XWave Overmax
0 question about this device. Answer the ones you know or ask your own.
Ask a new question about this device
Download the instructions for your Remote control toy in PDF format for free! Find your manual XWave - Overmax and take your electronic device back in hand. On this page are published all the documents necessary for the use of your device. XWave by Overmax.
USER MANUAL XWave Overmax
natural_image
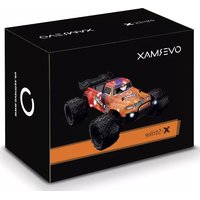
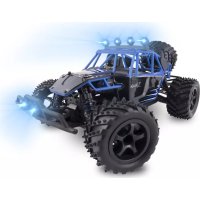
Exterior view of a blue and orange X-WAVE toy car with large tires and exposed suspension (no text or symbols visible)OVERMAX
You • unlimited
CE
EN: The product complies with requirements of EU directives.
Pursuant to the Directive 2012/19/EU, this product is subject to selective collection. The product must not be disposed of along with domestic waste as it may pose a threat to the environment and human health. The worn-out product must be handed over to the electrics and electronics recycling center.
2
natural_image
Diagram of a vehicle's internal components with directional arrows indicating motion or flow (no text or symbols)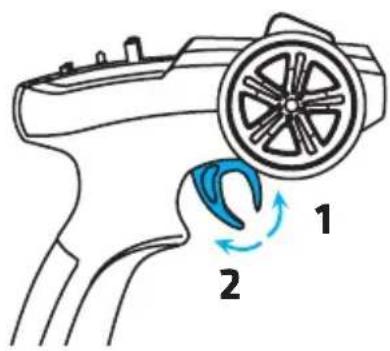
natural_image
Diagram of a vehicle chassis with two large tires and directional arrows indicating motion (no text or symbols)Wprowadzenie
Drogi Kliencie!
Thank you for placing trust in us and choosing Overxmax.
Thanks to the use of high-quality materials and modern solutions, we provide you with a product perfect for everyday use. We are convinced that the product will satisfy your requirements as it has been manufactured with utmost care.
Before you use the product, please read this manual carefully.
Should you have any remarks or questions concerning the product, please do not hesitate to contact us:
Please read this manual before you start using the product to see all its functions and use them in accordance with intended use.
- Do not repair or modify the device. Only an authorized service technician is allowed to perform these operations.
- Do not switch the device on if you have noticed any damage.
- Do not use the device when it acts up, has been dropped or immersed in water, overheats extensively, is discolored or deformed, and when other atypical circumstances occur. Contact the manufacturer's authorized service center.
- Never leave the charging battery unattended.
- The device is intended for persons aged above 5. Do not let younger children play with it.
- Use the device away from sources of heat, high temperatures, hot surfaces, direct sunlight, source of ignition, naked flame, oils and sharp edges.
- Do not use the device in inflammable, explosive or toxic atmosphere.
- Do not use chemicals to clean the device.
-
After every use, switch the device off and disconnect the battery.
-
Before you start cleaning or moving the device, switch it off.
- Do not use the device for other purposes than designed.
- Keep the device away from sharp items.
- Do not place other items on the device when you use it.
- Use the device on flat and hard surfaces only. Avoid going on sand, grass or other surfaces which may lead to damage.
- To charge a battery, use a supplied charging cable only.
- After every charging, disconnect the charging cable from USB port.
- Pay attention to battery polarization in the device and controller.
- In the device use the supplied battery only, in the controller three batteries AA 1,5V are used (they are not supplied). In the controller do not use storage batteries.
- After the use, do not touch a car engine because it may be extremely hot.
- Transformer, power supply, or battery charger used with the electric toy shall be regularly examined for damage to the supply cord, plug, enclosure or other parts, and in the event of such damage, it shall not be used until the damage has been repaired.
- The toy must not be connected to more power sources than recommended.
- Recharge the batteries only under adult supervision.
- Batteries must be removed from the toy before charging.
- Do not use different types of batteries or new and used batteries.
- Remove exhausted batteries from the toy.
- Power terminals should not be short-circuited.
- Non-rechargeable batteries should not be recharged.
- The batteries must be inserted with the correct polarity.
- Waterproof: IP57.
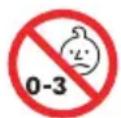
Warning. Not suitable for children under 3 years. Small parts. Choking hazard.
1. Description of box content (see fig. 1):
- Bodywork
- Controller
- Chassis
-
Battery Li-ion 1500 mAh, 7.4V
-
Power cord
- Lug wrench
- Screwdriver
EN
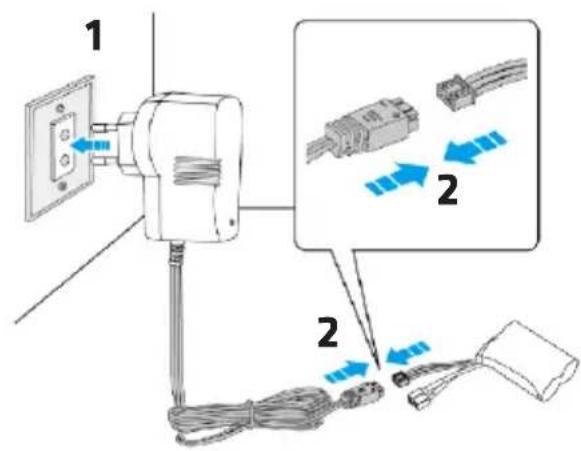
The power adapter is not supplied. Use the power supply of the following parameters: 5V = A
2. Plug connection diagram (see fig. 2):
- LED's plug
- Controller's plug
- Motor's plug
- Battery's plug
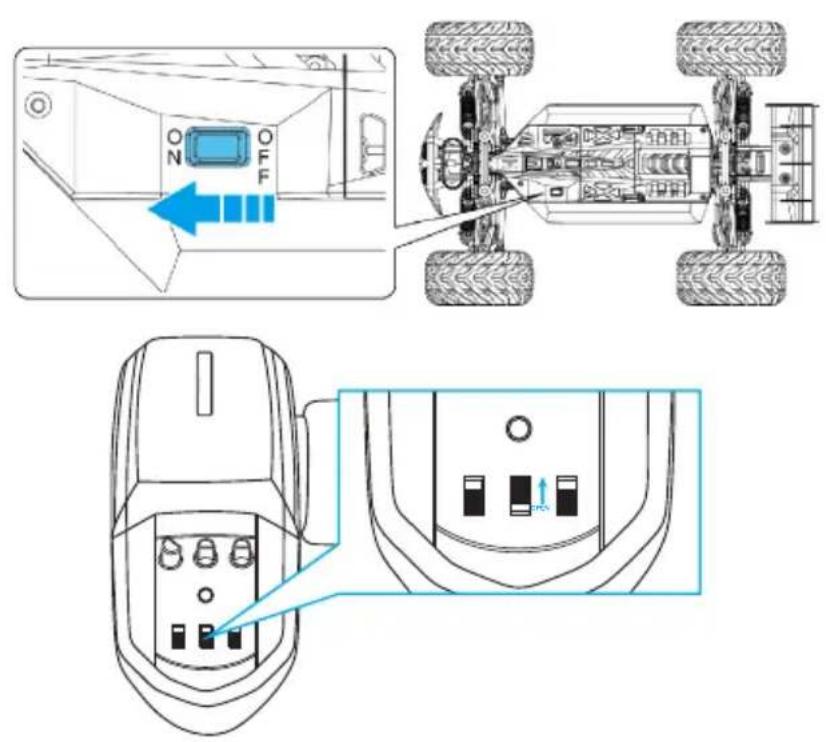
- On/off switch and power indicator
3. How to pair controller with car (see fig. 3):
- Slide the switch on the car into „ON” to activate the vehicle.
- Slide the controller's switch into „ON”. Power LED will go on.
- If the LED fails to go on, check the controller's batteries for suitable condition and proper assembly.
- Wait for about 15 seconds until the controller has connected to the car.
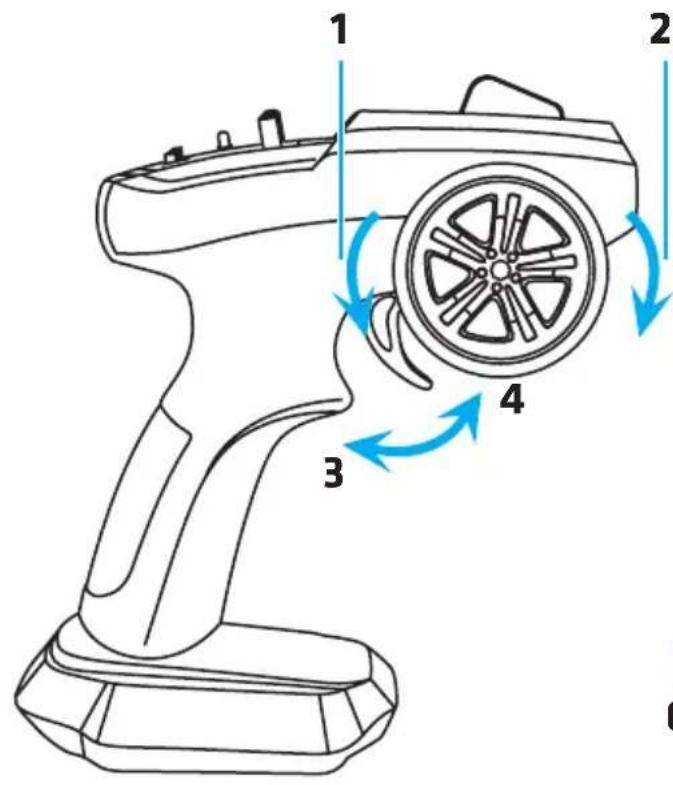
4. Description of controller (see fig. 4):
- Turn left
- Turn right
- Forward
- Brake/Reverse
- Acceleration adjustment
- Reversed direction of throttling valve operation
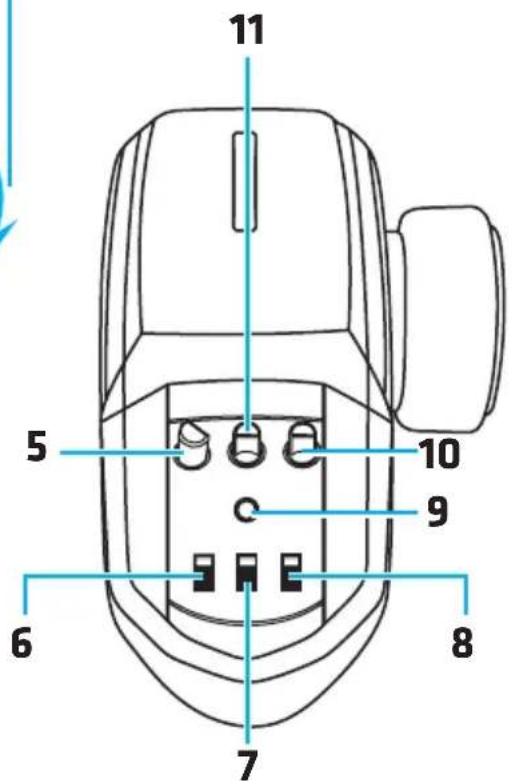
- On/Off switch
- Reversed direction of control knob operation
-
Power/connection LED
-
Toe-in adjustment
- Wheel turn adjustment
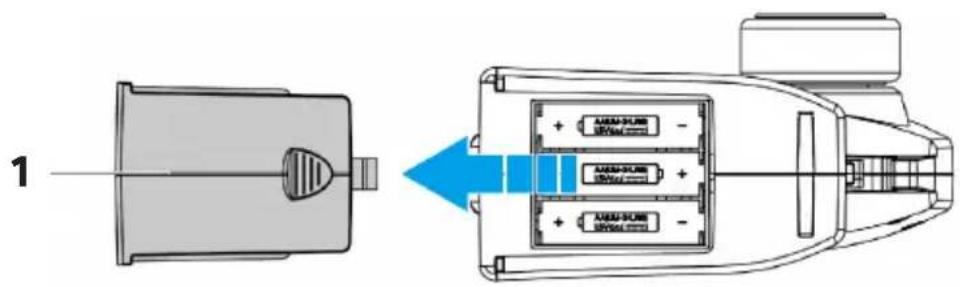
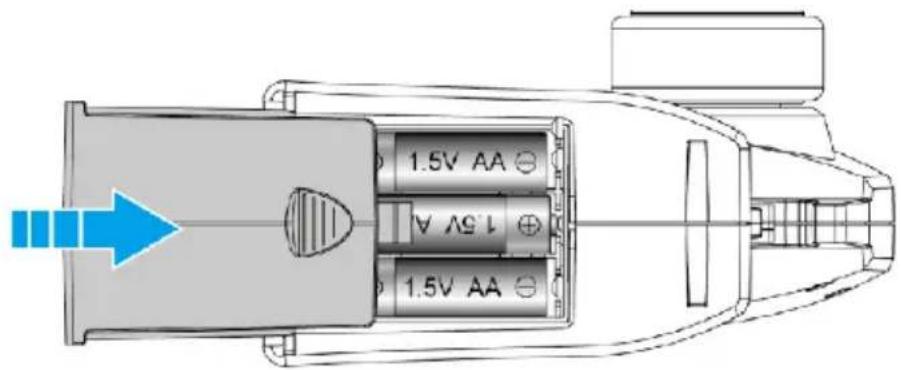
5. How to assemble batteries in controller (see fig. 5):
- Remove battery cover (1).
- Insert 3 AA alkaline batteries. Pay special attention to battery polarity.
- Put the cover back on (1).
6. How to charge batteries (see fig. 6):
Charge the battery before use.
- Disconnect the battery from the car before charging.
- Connect the battery plug to USB cable. Connect the USB cable to the power adapter.
- After about 150 minutes charging will be completed.
- Disconnect the battery and put it in the car.
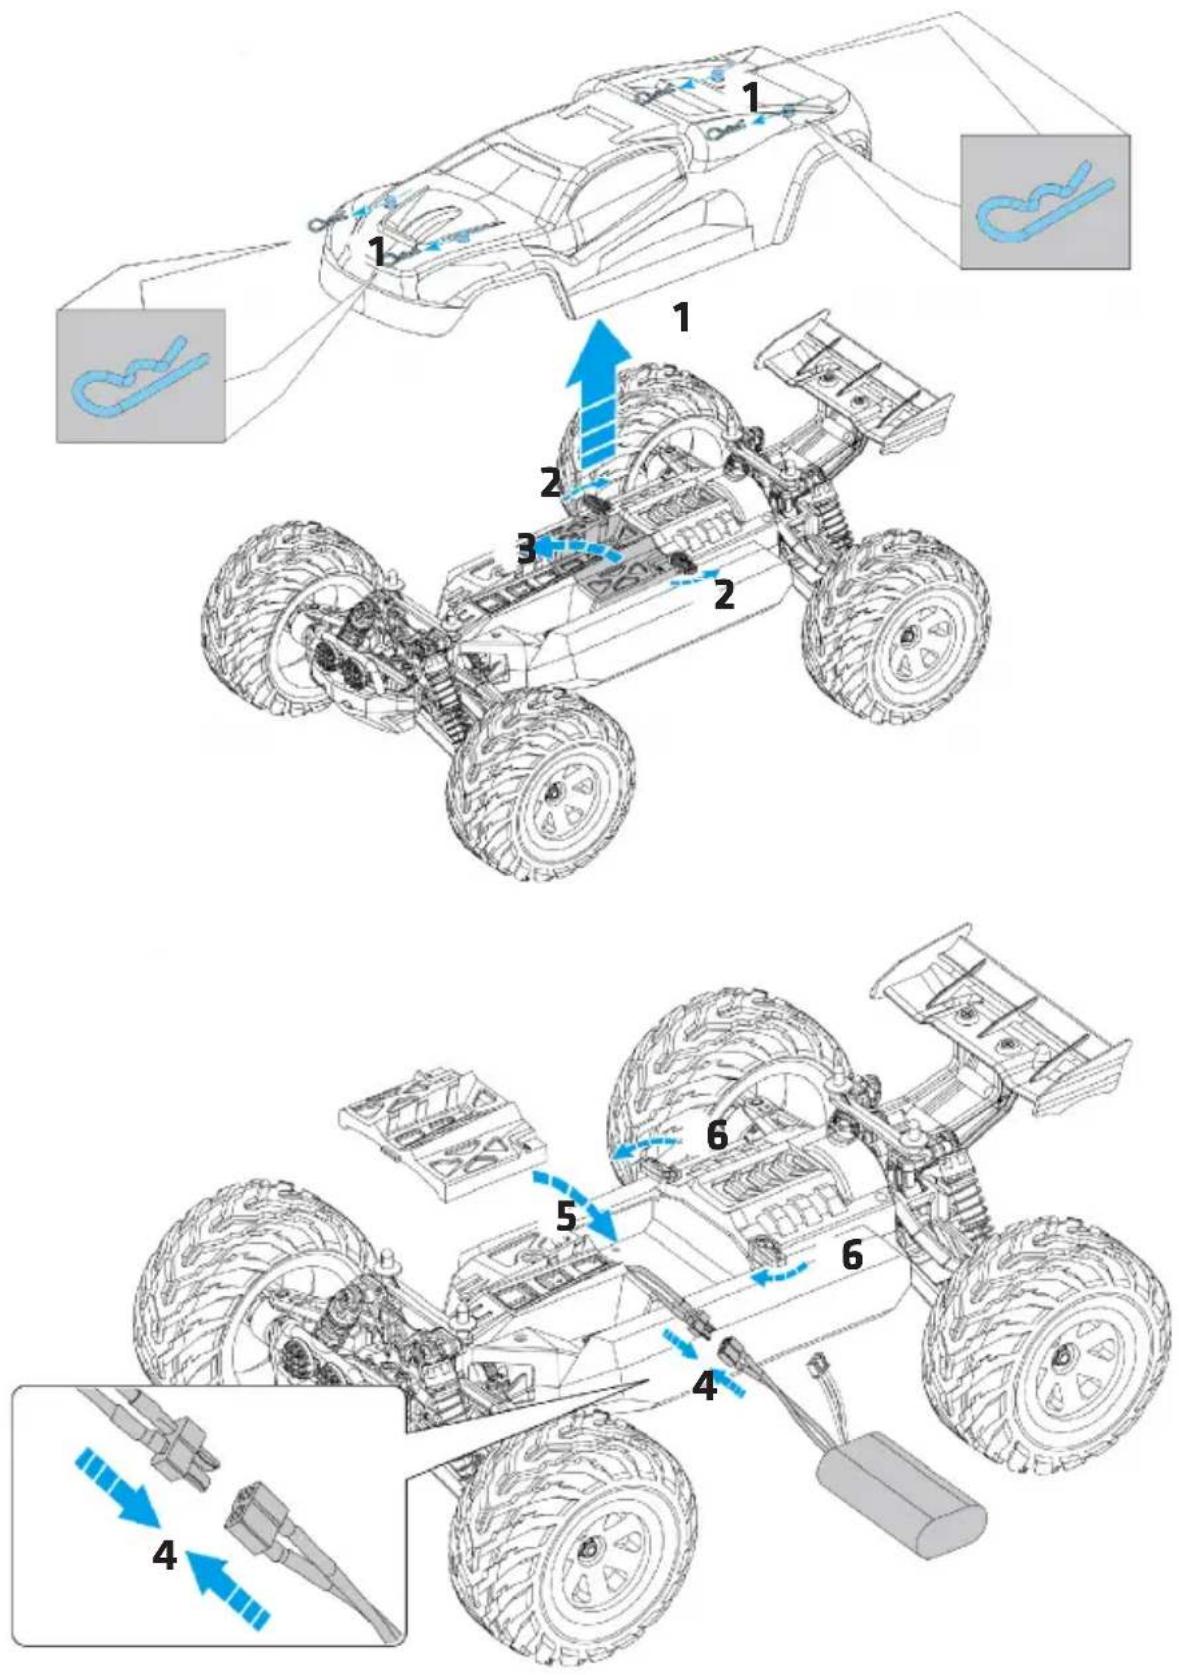
7. How to install battery in car (see fig. 7):
- Remove the bodywork.
- Turn the hooks outside.
- Open the battery cover.
- Remove the cover and connect the battery plug to car plug.
- Insert the connected battery, put and secure the battery cover with hooks. To deinstall the battery, take these steps in a reversed order.
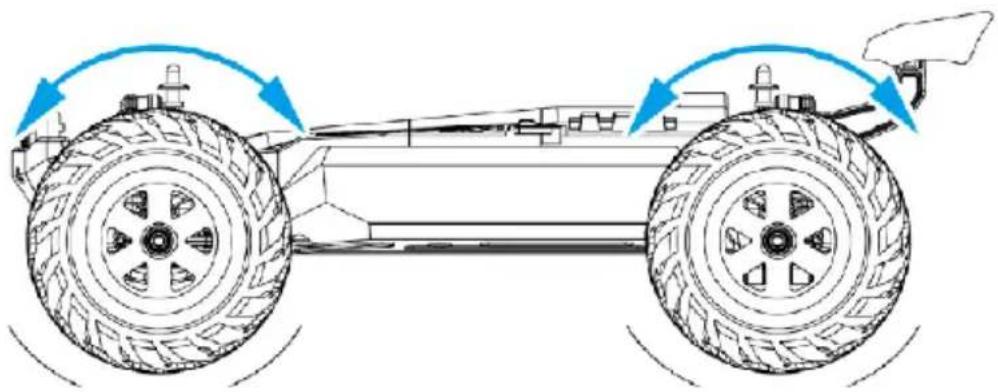
8. How to control (see fig. 8):
- Turn the knob left or right to move front wheels.
- Press the controller throttling valve to drive forward. The farther you move the throttling valve, the faster the car drives. Slide the throttling value forward to brake, and then to reverse.
EN
9. Description of controller functions (see fig. 4):
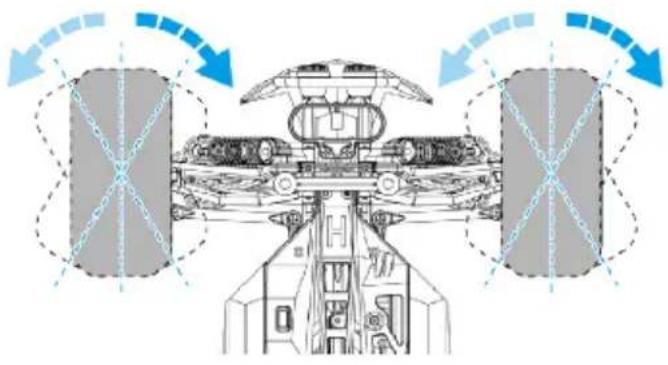
- If you can see the car deviates to the left or right instead of going straight, you can adjust the turn with toe-in adjustment on the controller (5). Keep the front of the car in the air when using the adjustment.
- To change the wheel turning angle, turn the wheels turning adjustment knob (11) to the right to increase the angle, or to the left to reduce the angle. If you set the knob in „0” position, the car will not turn.
- To adjust the speed, turn the throttling valve adjustment (10) to the right and the maximum speed will be increased. Turn it left to reduce the maximum speed.
10. How to clean and maintain
• Before you start cleaning, switch the device off and disconnect the battery.
- Apply oil on all moving parts.
- Clean the car and controller with a wet cloth.
- Do not use chemicals to clean the device.
- After every use, remove dust and sand from the car. Dry if the device had a contact with water.
The pictures are for reference only. The real design of products may differ from the pictures presented.