
Serial 1 - Electric bike Serial1 - Free user manual and instructions
Find the device manual for free Serial 1 Serial1 in PDF.

| Product Type | Electric Bike |
| Brand | Serial1 |
| Model | Serial 1 (MOSH/CTY and RUSH/CTY range) |
| Category | Electric Bike |
| Weight (depending on model and size) | 21.9 kg to 27.6 kg |
| Available frame sizes | S, M, L, XL (depending on model) |
| Motor type | Mid-drive torque sensor motor |
| Transmission | Reinforced carbon fiber belt; electronic CVT (RUSH/CTY models) |
| Brakes | Hydraulic disc brakes, 203 mm rotor |
| Battery | Rechargeable lithium-ion (specific charger included) |
| Riding modes | 4 modes: Eco, Tour, Sport, Boost; walk assist; off mode |
| Display | 1.5-inch TFT screen (RUSH/CTY) or LED indicator (MOSH/CTY) |
| Lighting | Integrated front headlight, rear light with brake light and SOS signal in case of tip-over |
| USB-C port | Yes (2022 models), max 10W for charging mobile devices |
| Tires | 27.5 x 2.8 (MOSH/CTY) or 27.5 x 2.4 (RUSH/CTY); Presta valves |
| Recommended tire pressure | 30 PSI (MOSH/CTY) or 55 PSI (RUSH/CTY) |
| Maximum load capacity | 280 lb (128 kg) total; front/rear rack 10 kg each |
| Regular maintenance | Check tire pressure, brakes, lighting before each ride; belt tension every 1500 km |
| Cleaning | Damp cloth; do not use high-pressure cleaner |
| Safety | Helmet mandatory; reflectors front, rear, and on spokes; obey traffic laws |
| Spare parts | Use only genuine Serial1 parts for safety components |
| Warranty | See terms at www.Serial1.com |
| Compliance | EN 15194:2017, EN ISO 4210-2, CFR 1512 |
Frequently Asked Questions - Serial 1 Serial1
User questions about Serial 1 Serial1
0 question about this device. Answer the ones you know or ask your own.
Ask a new question about this device
Download the instructions for your Electric bike in PDF format for free! Find your manual Serial 1 - Serial1 and take your electronic device back in hand. On this page are published all the documents necessary for the use of your device. Serial 1 by Serial1.
USER MANUAL Serial 1 Serial1
Lithium-ion batteries and/or products that contain lithium-ion batteries can expose you to chemicals including cobalt lithium nickel oxide, and nickel, which are known to the State of California to cause cancer and birth defects or other reproductive harm. For more information, go to www.P65Warnings.ca.gov.
CAUTION

To provide you the features described in this document and at our website (www.Serial1.com), this bike includes a built-in connected IoT device that uses cellular communications to receive and transmit data to Serial 1 and its service providers, including information about the bike, its location, and use of the bike. Go to https://serial1.com/privacy-notice/ for more privacy information.

TABLE OF CONTENTS
II
YOUR OWNER'S MANUAL .... 1
SAFETY DEFINITIONS....1
SAFE OPERATION....2
IN THE BOX....5
SPECIFICATIONS 6
UNBOXING 7
ASSEMBLY 8
FIT 14
CHARGING THE BATTERY 16
USB POWER 17
DRIVETRAIN....18
DISPLAY....18
RIDE MODES....19
LIGHTING....20
BRAKE OPERATION 20
STORAGE 21
CARGO RACK 21
MAINTENANCE & SERVICE 21
PRIVACY POLICY 26
WARRANTY & RETURNS 26
DECLARATION OF CONFORMITY 26
SERIAL 1 TRADEMARK INFORMATION ...... 26
PATENTS....26
COPYRIGHT 26
DOCUMENT NUMBER 26
YOUR OWNER'S MANUAL
Enjoy The Ride
From the whole Serial 1 Cycle Company crew, we thank you for embarking on your next riding journey with us! When enjoying your Serial 1 eBicycle, be sure to ride safely, respectfully, and within the limits of the law. Always wear a helmet, proper eyewear, and protective clothing. Never ride while under the influence of alcohol or drugs. Know your Serial 1 eBicycle and read and understand your owner's manual from cover to cover.
This manual has been prepared to acquaint you with the operation, care, and maintenance of your eBicycle and to provide you with important safety information. Follow these instructions carefully for your personal cycling safety and pleasure. Your owner's manual contains instructions for operation and minor maintenance. We recommend that any maintenance or major repairs, which may require special skills and tools, should
be performed by a competent professional. Please contact Serial 1 for more information on obtaining service.
NOTE
Read this manual in its entirety before your first ride. Make sure you understand all sections and issues. Not all eBicycles have all the features described in this manual. Contact Serial 1 if you have questions about the features of your eBicycle.
SAFETY DEFINITIONS
Take special notice of sections with the following headings:
WARNING
Indicates a potentially hazardous situation which, if not avoided, could result in death or serious injury.
CAUTION
Indicates a potentially hazardous situation which, if not avoided, may result in minor or moderate injury.
NOTE
Refers to additional important information about the given subject.
Safety Symbols
The following graphic symbols indicate potential safety hazards and avoidance actions to prevent a hazardous situation. The graphical symbols may be present in manuals, instructions, on the eBicycle, and/or parts & accessory product labels.
Hazard Symbols
A triangle represents a hazard symbol, alerting to a safety hazard.
| General hazard warning. | |
| Electric shock hazard. | |
| Flammable material hazard. | |
| Explosive material hazard. | |
| Hot surface hazard. |
Prohibition Symbols
A circle with a line represents a prohibition symbol, indicating a situation to avoid which otherwise may lead to a hazard, personal injury, and/or property damage.
| General prohibition sign to signify a prohibited action. | |
| Keep away from open flame.Avoid smoking, flames, or sparks. |
Action Symbols
A circle represents an action to take in order to avoid a potential hazard.
| Refer to appropriate manual or instructions. |
SAFE OPERATION
Local Safety Regulations
Your Serial 1 eBicycle conforms to all safety standards and regulations effective on the date of manufacture.
Know and respect the rules of the road. It is your responsibility to comply with the laws and regulations of the areas where you ride. Read the safety information that is provided by your national, regional, or local traffic authority. Make sure all equipment required by law is installed and/or utilized and in good operating condition.
In most countries, regulations for the use of an eBicycle are the same as those for a standard bicycle. However, there may be local differences such as where you can ride, minimum rider age, or required equipment and registration. It is the rider's responsibility to know and obey local eBicycle regulations.
General Safety
WARNING

eBicycles are different than bicycles. They operate and handle differently. Unskilled or improper use could result in loss of control, death, or serious injury.
Always wear a helmet, appropriate to the type of riding you will be doing, when riding your eBicycle.
Keep body parts and other objects away from the moving belt or chain, turning pedals and cranks, and spinning wheels of your eBicycle. It is possible that entrapment may occur during normal use or maintenance.
Never tow a person or item (including a trailer) or allow the eBicycle to be towed.
Safe Operation
Before operating your new eBicycle, it is your responsibility to read and follow the operating and maintenance instructions in this manual and follow these rules for your personal safety.
WARNING

Striking an object, such as a curb or pothole, can cause internal tire and/or rim damage. If an object is struck, have the tire and rim inspected immediately by a trained professional. A damaged wheel can fail while riding and adversely affect stability and handling, which could result in death or serious injury.
WARNING
Always pay strict attention to road surfaces and wind conditions and keep both hands on the handlebar grips when riding. Any two wheeled vehicle
may be subject to upsetting forces such as wind blasts from passing vehicles, holes in the pavement, rough road surfaces, rider control error, etc. These forces may influence the handling characteristics of your eBicycle. If this happens, reduce speed and guide the eBicycle with a relaxed grip to a controlled condition. Do not brake abruptly or force the handlebar. This may aggravate an unstable condition.
Brake Safety
WARNING

Apply front and rear brakes evenly. Favoring one brake accelerates wear and reduces braking efficiency. Operation with excessively worn brakes can lead to brake failure, which could result in death or serious injury.
Battery Safety
WARNING

This vehicle contains a rechargeable battery. An improperly handled or damaged battery can cause electrical shock and/or fire, which could result in death or serious injury.
Do not disassemble, short-circuit, or use battery in any way other than its intended purpose.
Do not connect to charger if battery is cracked or damaged due to impacts, falls, and other compromises to the integrity of the case or its contents.
Do not immerse battery in fluids such as water or acid.
Keep away from fire. Improper charging, impact, or exposure to fire can damage the battery.
Use only the lithium-ion battery and charger specified by the manufacturer. Charge the battery within operating temperature range of 32^ to 113^ F [ 0^ to 45^ C]. Charge the battery before use if unused for more than one month.
WARNING

A damaged battery can leak electrolyte. Contact with electrolyte can cause serious chemical burns or blindness. If electrolyte comes in contact with eyes, skin, or clothing rinse affected area with clean water and seek medical attention immediately.
Wet Weather Riding
WARNING

When riding on wet roads, brake efficiency and traction are greatly
reduced, resulting in increased braking distances. Failure to use care when braking, accelerating, or turning on wet roads can cause loss of control, which could result in death or serious injury.
Rider Visibility
Riding an eBicycle at night or in other poor visibility conditions is more dangerous than riding during the day. A bicyclist can be difficult for motorists and pedestrians to see. If you are going to ride in those conditions, consult a qualified service provider about equipment that improves your ability to see and be seen by others. Find qualified service providers at www.Serial1.com.
WARNING

The Consumer Product Safety Commission requires eBicycles to be equipped with front, rear, pedal, and side reflectors. Be sure reflectors are
properly mounted. Poor visibility of rider to motorists can result in death or serious injury.
eBicycle reflectors are designed to reflect vehicle lights and streetlights to help be seen and recognized as a moving bicyclist.
Check reflectors and mounting brackets regularly to make sure that they are clean, straight, unbroken, and securely mounted. Replace damaged reflectors and straighten or tighten any that are bent or loose.
When riding under conditions of poor visibility, check and be sure you comply with all local laws about night riding, and take these additional precautions:
- Wear light colored, reflective clothing and accessories, such as a reflective vest, reflective arm and leg bands, reflective stripes on your helmet, or flashing lights attached to your body and/or your eBicycle.
- Verify clothing or anything you may be carrying on the eBicycle does not obstruct a reflector or lamp.
Use Conditions
Your eBicycle has a frame sticker that indicates its use condition. Ride only in the use condition specified for your bicycle type.
/CTY eBicycles are designed for Use Condition 1: suitable for road riding only. /CTY eBicycles are designed for riding on a paved surface where the tires do not lose ground contact.
WARNING

Serial 1 eBicycles are designed to perform under specific use conditions. Operating the eBicycle under conditions outside of or beyond the specified use conditions can result in a crash which could cause death or serious injury.
Do not use this eBicycle for off road riding. It is not designed for this type of riding.
Do not use this eBicycle for extreme, stunt, or competition riding. It is not designed for this type of riding.
Parts & Accessories
If there is a conflict between the information in this manual and information provided by a component manufacturer, always follow the component manufacturer's instruction.
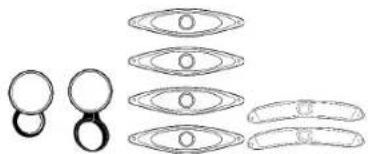
IN THE BOX
Your eBicycle box is provided with the following contents:
- Serial 1 owner's manual
- eBicycle frame (assembled)
- Battery
- Fork
- Handlebars
- Rear wheel
- Rear fender/rack (RUSH/CTY models only)
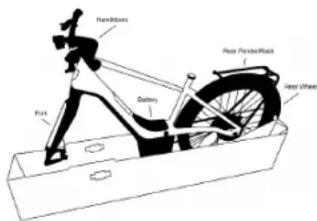
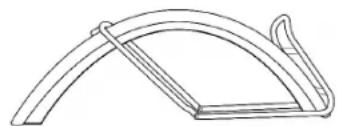
- Front fender and rack hardware (RUSH/CTY models only)
natural_image
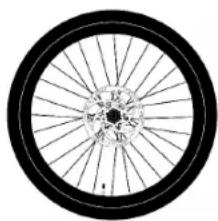
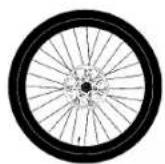
Simple line drawing of a curved mechanical component or bracket (no text or symbols)- Front wheel
natural_image
Close-up of a bicycle wheel rim with spokes and hub (no text or symbols visible)- Saddle/Seatpost

Small Parts Box
- Torque tool
- Multi-tool
- Keys

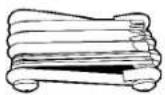
- Bell
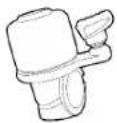
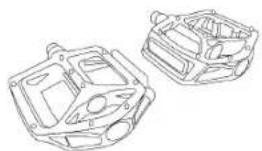
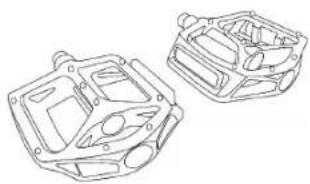
- Pedals
natural_image
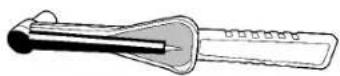
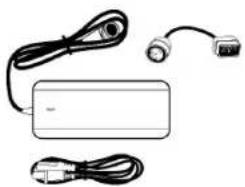
Technical line drawing of two mechanical components (no text or symbols)- Battery charger and adapter
natural_image
Simple line drawing of a device with cables, a switch, and a plug (no text or symbols)- Reflectors (front/rear, EU spoke, and US spoke shown)
natural_image
Diagram showing multiple oval shapes with internal circles, possibly illustrating a geometric or mechanical assembly (no text or symbols present)- Sidestand

- Associated fasteners
NOTE
The preceding images are representational illustrations only. The actual components provided may differ slightly.
SPECIFICATIONS
NOTE
Specifications in this publication may not match those of official certification in some markets due to timing of publication
printing, variance in testing methods, and/or eBicycle differences. Customers seeking officially recognized regulatory specifications for their eBicycle should refer to certification documents posted at www.Serial1.com.
Serial 1 reserves the right to change specifications, equipment, or designs at any time without notice and without incurring obligation.
NOTE
The A-weighted emission sound pressure level at the driver ears is less than 70 dB(A).
Table 1: Specified Tires
| Model Size | Rec. Tire Pressure | Max Pressure | |
| MOSH/CTY | 27.5 x 2.8 | 30 PSI [2.1 Bar] | 45 PSI [3.1 Bar] |
| RUSH/CTY | 27.5 x 2.4 | 55 PSI [3.8 Bar] | |
/CTY tires are equipped with Presta valves.
Table 2: eBicycle Weights
| Model | S | M | L | XL |
| MOSH/CTY | 46.7 lb[21.2 kg] | 47.5 lb[21.5 kg] | 48.3 lb[21.9 kg] | 49.0 lb[22.2 kg] |
| RUSH/CTY | 58.0 lb[26.3 kg] | 58.5 lb[26.5 kg] | 59.0 lb[26.7 kg] | 59.4 lb[26.9 kg] |
| RUSH/CTYStep-Thru | 59.0 lb[26.7 kg] | 59.5 lb[27.0 kg] | 60.0 lb[27.2 kg] | |
| RUSH/CTYSpeed | 58.0 lb[26.3 kg] | 58.5 lb[26.5 kg] | 59.0 lb[26.7 kg] | 59.4 lb[26.9 kg] |
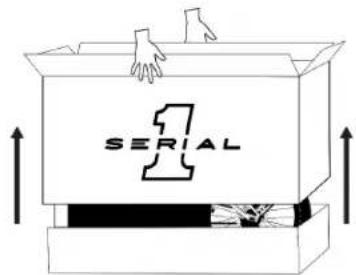
UNBOXING
Preparation
You will need adequate room to move around the box. We recommend at least 8 x 4 ft [2 x 1 m] of space.
Do not cut through the box. We recommend that you save your box for at least 14 days in case of the need to return.
Do not remove any of the protective paper from the eBicycle frame until you are done with the assembly.
NOTE
You can follow along with our unboxing and assembly videos at www.Serial1.com.
Unboxing Steps
- Cut and discard straps
- Lift the outer box and set aside
-
Remove the owner's manual and read through it fully
-
Check for all main components according to the IN THE BOX section of this manual
- Remove foam, saddle, and seatpost and set aside, and cut and discard any zip-ties
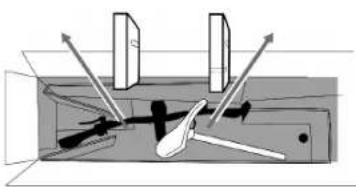
natural_image
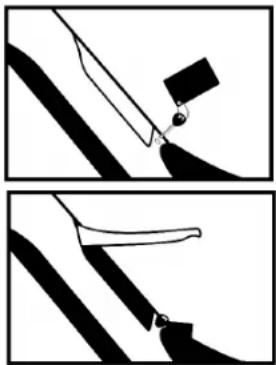
Pure mechanical diagram showing a lever mechanism inside a housing (no text or symbols)- Remove top tray, front wheel box, small parts box, and front box (if applicable) and set aside
natural_image
Mechanical assembly diagram showing a cutting tool interacting with a baseplate and clamped parts (no text or labels)- Check the contents of the small parts box according to the IN THE BOX section of this manual
ASSEMBLY
NOTE
We have designed your eBicycle to be assembled safely and with high quality by an individual at home. However, if you decide you would instead like some help with the assembly process, please contact a qualified service provider or contact us at www.Serial1.com.
Assembly Steps
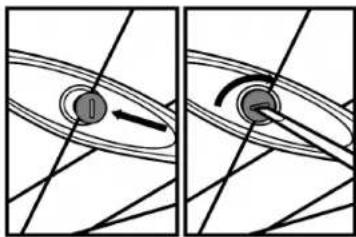
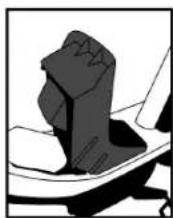
- Remove the battery

natural_image
Abstract line drawing of a figure with interlocking rings and curved lines (no text or symbols)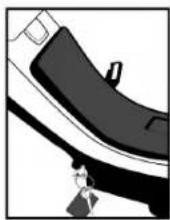
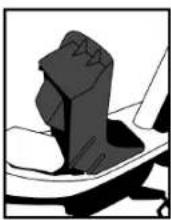
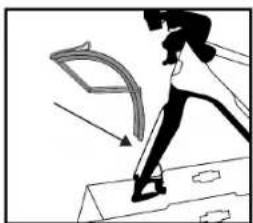
- Lift front of bike to remove tray from under front axle
natural_image
Line drawing of a bicycle stationary frame with wheels and suspension components (no text or symbols)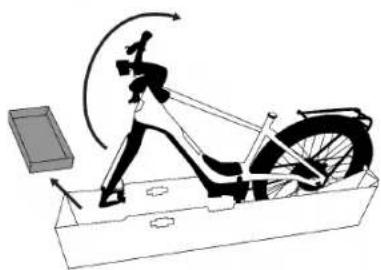
natural_image
Diagram of a person using a stationary bike with motion arrows indicating cycle (no text or symbols)- Pull the two perforated edges of the tray down
- The front edge will remove completely, while the rear will remain attached
- Install tray in center notches of lower box and rest the bike, elevated, on the tray
- The black stamped arrow on the tray points toward the front wheel when installed correctly
natural_image
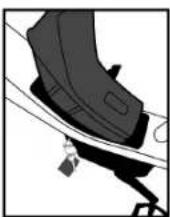
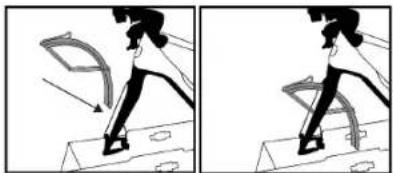
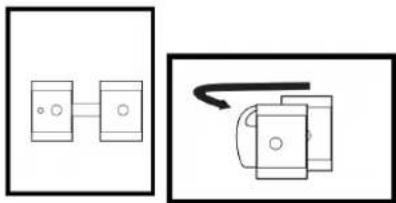
Mechanical diagram of a stationary exercise setup with a person using a leotard and wheel (no text or labels)- Install front fender (RUSH/CTY models only)
natural_image
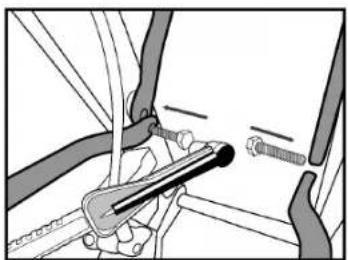
Two-panel illustration showing a person walking with motion arrows, no text or symbols present- Attach to fork in center hole and tighten to 6.5 Nm using torque tool. The small rubber washer should be between fender and fork. The shortest of the three screws is for the top fender hole, while the two longer screws are for the side forks
natural_image
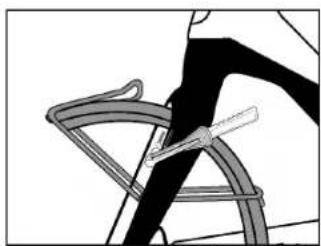
Illustration of a bicycle wheel with a fork, showing no text or symbols○ Attach both rack supports to forks, making sure the rack support arm is routed between the fork and the brake line and tighten to 6.5 Nm using torque tool
natural_image
Mechanical assembly diagram showing a clamp and screw assembly (no text or labels)- Install front wheel
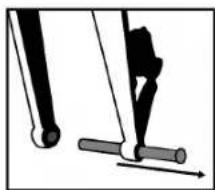
- Remove front axle
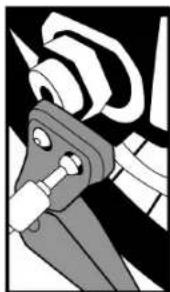
natural_image
Diagram of a mechanical device with lever and rod, showing motion direction (no text or symbols)- Remove plastic spacer from brake caliper. Avoid applying brakes without a wheel installed

natural_image
Diagram of a mechanical or electrical component with no visible text or symbols- Fold down front end of lower box tray
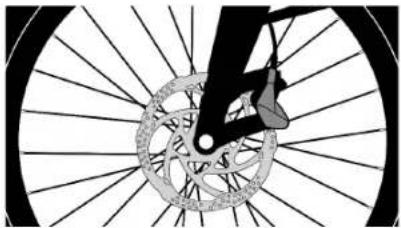
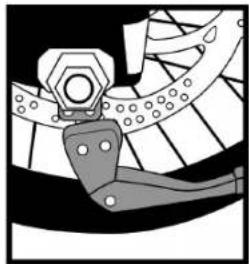
- Fit brake rotor into caliper
natural_image
Diagram of a bicycle wheel with spokes and gear mechanism (no text or symbols)○ Align and insert axle through fork and wheel
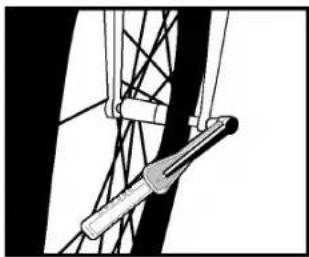
- Tighten to 11 Nm using torque tool
natural_image
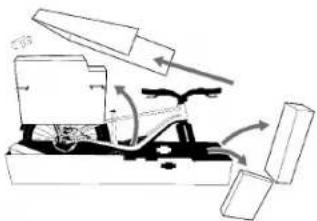
Pure mechanical diagram showing a lever and connecting rod (no text or symbols)-
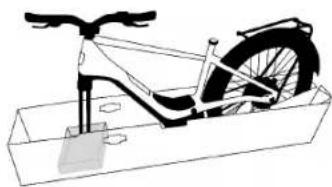
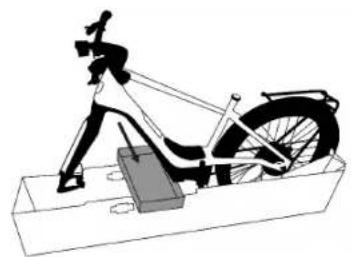
Remove any remaining ties between eBicycle and packaging
-
Lift bike, remove tray, and roll bike out of box
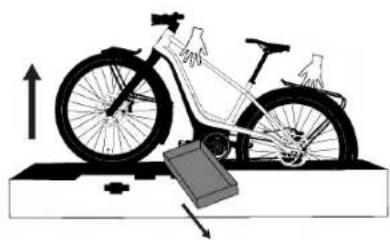
natural_image
Diagram of a bicycle on a platform with an upward arrow and a battery, no text or symbols present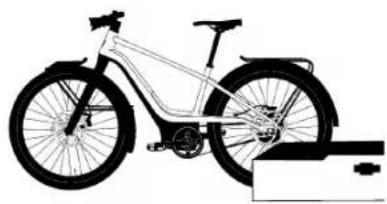
natural_image
Side profile illustration of a bicycle with wheels and suspension components (no text or symbols)- Install sidestand
natural_image
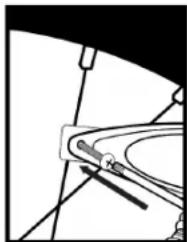
Mechanical assembly diagram showing a gear and linkage mechanism (no text or labels)- Tighten to 9 Nm using torque tool
natural_image
Mechanical component diagram showing a clamp or bracket assembly (no text or symbols visible)- Install pedals
☐ The end of each pedal is marked with either an "L" or "R", indicating the side of the bike as seen by the rider when seated on the bike.
- The Left pedal has 3 lines on the pedal spindle. The Right pedal spindle is smooth.
- The Left pedal is reverse threaded, or left-hand threaded.
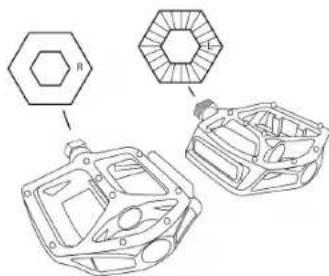
chemical
Chemical structure diagram showing benzene ring attached to a car body with cyclohexane ring and internal hexagonal ring- Tighten using multi-tool. Finalize tightening with a pedal wrench (not supplied) to 35Nm

natural_image
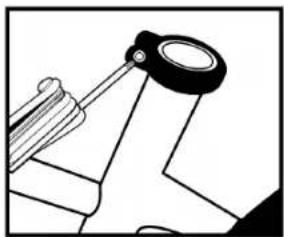
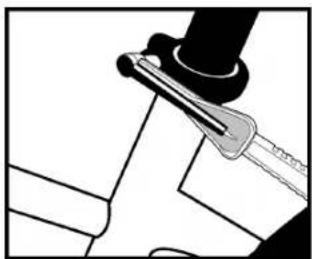
Line drawing of a mechanical clamp or lever mechanism (no text or symbols)- Install seatpost
○ Loosen clamp screw using multi-tool
natural_image
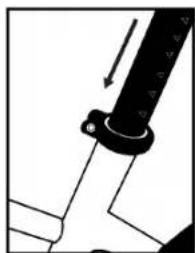
Pure mechanical diagram showing a lever and pivot (no text or symbols)Insert seatpost to desired height (see FIT section for additional direction)
natural_image
Pure mechanical diagram showing a lever and pivot point without any text or symbols- Tighten to 6 Nm using torque tool
natural_image
Mechanical assembly diagram showing a lever and pin (no text or symbols)- Install bell
- Disassemble using multi-tool
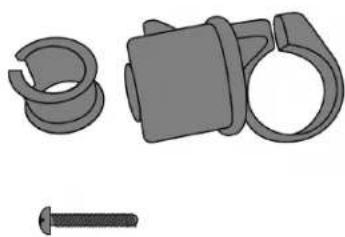
natural_image
Illustration of mechanical components including a spring, clamp, and screw (no text or symbols)- Wrap inner sleeve around handlebar to the right of the right brake handle

natural_image
Line drawing of a hand holding a cable with a handle and lever (no text or symbols)- Wrap bell around inner sleeve, tighten screw using multi-tool

natural_image
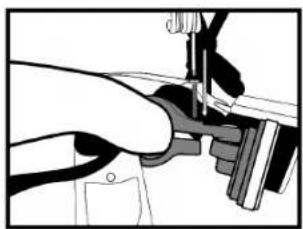
Simple line drawing of a mechanical component with no text or symbols- Install post reflectors
- Wrap the front post reflector (white) around the handlebar to the right of the headlamp. Tighten screw using multi-tool.
natural_image
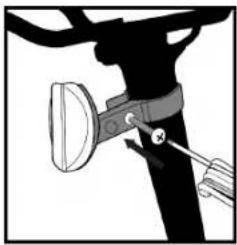
Close-up of a hand using a sewing machine to adjust or install a mechanical component (no visible text or symbols)- Wrap the rear post reflector (red) around the seatpost below the saddle. Tighten screw using multi-tool.
natural_image
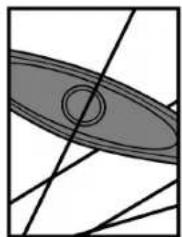
Diagram of a bicycle's seatbelt mechanism with a belt and handle (no text or symbols)- Install spoke reflectors (Method 1)
- Fit the circular center of the reflector around a spoke
natural_image
Abstract geometric diagram with intersecting lines and shaded oval shape (no text or symbols)- Screw a circular locking nut into the slot, tightening using multi-tool
natural_image
Two diagrams showing a rotating object with an arrow, no text or symbols present- Install spoke reflectors (Method 2)
- Wrap a plastic clamp around a spoke
natural_image
Two simple line drawings of electronic components: one with a connector and the other with a curved arrow (no text or symbols)- Fit clamp to the end of a reflector
- Screw the pieces together, tightening using multi-tool
natural_image
Pure mechanical diagram showing a lever and pivot point without any text, numbers, or symbolsTorque Specifications
Always tighten fasteners to the correct torque to ensure the integrity of the eBicycle. In case of a conflict between this manual and information provided by a component manufacturer, consult with Serial 1 or the component's customer service representatives for clarification.
Table 3: Torque Values
| Part | Tool Size | Torque | Notes |
| Handlebar | 4mm | 6 Nm | Tighten bottom two, then top two screws |
| Handlebar stem | 4mm | 6 Nm | If necessary, for service |
| Saddle rail clamp | 5mm | 9 Nm | If necessary, for service |
| Seatpost clamp | 4mm | 6 Nm | Set the height, then torque |
| Axles (wheels) | 6mm | 11 Nm | Align brake disc rotor between brake pads before inserting axle |
FIT
Verify your eBicycle is the correct size. Correct fit is essential for a safe and pleasant ride.
Standover Height
Standover height is the basic element of eBicycle fit. It is the distance from the ground to the middle of the top tube.
Step-Over Frame
When straddling the top tube of a Step-Over style bike, you should have 1 – 2 in [2.5 – 5 cm] of clearance between yourself and the bike.
Step-Thru Frame
Standover height does not apply to eBicycles with step-thru frames. Instead, the limiting dimension is determined by saddle height range.
Saddle Position
To get the most performance and comfort from your eBicycle, correct saddle adjustment is important. If the saddle position is not comfortable for you, adjust the saddle or seatpost or see a qualified service provider.
The saddle can be adjusted in three directions:
- Up and down
- Front and back
- Saddle angle
Adjust your saddle position without exceeding the limits set by the height of the top of the seat tube and the "minimum insertion" or "maximum extension" mark on the seatpost.
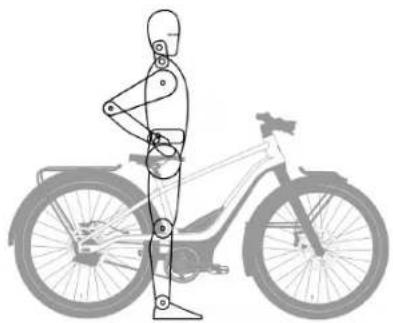
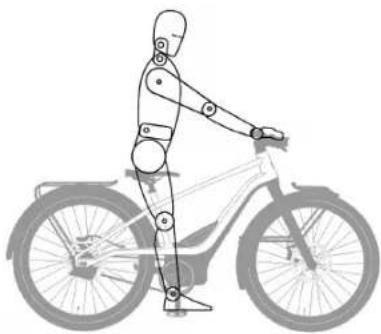
- While standing next to your eBicycle, loosen the seat clamp with the multi-tool and raise your saddle to the height of your hip bone. Re-tighten the seat clamp with the torque tool to 6 Nm.
natural_image
Human figure standing beside a bicycle, showing mechanical components and foot alignment (no text or symbols)- Sit on your bike and bring the pedals / crank arms perpendicular to the ground. Your leg should be locked straight and your knee fully locked. If it is not, get off the bike and slowly increase the height of the saddle, repeating as necessary until the correct position is attained.
natural_image
Line drawing of a human figure riding a bicycle (no text or symbols)Handlebar Height
The eBicycle is equipped with a "threadless" stem and is not height adjustable.
CHARGING THE BATTERY
WARNING

Only use the provided charger to charge the battery. The charger is specifically designed to work with this battery and terminals. The use of any other charger can cause damage to the battery and/or injury to the user.
Your eBicycle will be delivered to you with the battery installed, with a State of Charge (SOC) less than 30%. It is recommended that you charge your new eBicycle battery fully after initial assembly and before every future ride.
The battery may be charged in or out of the eBicycle. Battery status indicator lights will indicate battery level while charging. Disconnect charger when status lights indicate battery is fully charged.
Always unplug a battery after it has completed its charging cycle.
Installed in eBicycle
- Locate the charging port on the lower left-hand side of the motor cover.
- Open the cover on the charging port. Be careful not to tear or pull off the cover.
natural_image
Illustration of a hand inserting a plug into an electrical socket (no text or symbols)- Plug the charger into a wall outlet.
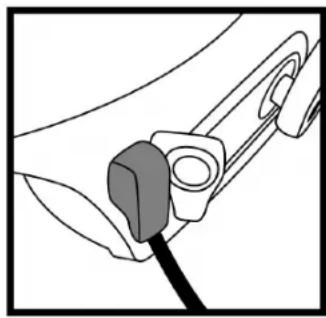
- Check that the charger plug and the port are free from dirt and debris. Insert the charger plug into the charging port.
natural_image
Diagram of a mechanical component with a cable inserted, showing no text or symbols- The LED indicator on the battery charger will turn solid green when the battery is fully charged. Once fully charged, disconnect the charger from the battery and the outlet.
- Ensure that you securely close the charge port cover.
NOTE
The handlebar display cannot be turned on while the battery is charging.
Removed from eBicycle
- Remove the battery from the eBicycle.

natural_image
Illustration of a shoe being adjusted with a tag (no text or symbols)-
Place the battery in a dry, well-ventilated area near the battery charger.
-
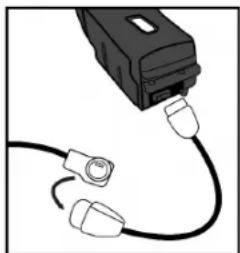
Connect the battery adapter cord to the main charger cord.
natural_image
Close-up of a black USB cable with three connectors, no text or symbols visible-
Plug the charger into a wall outlet.
-
Insert the adapter cord into the charging port on the battery.
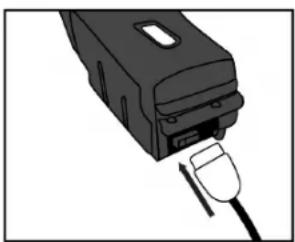
natural_image
Illustration of a black electronic device with a plug inserted into it (no text or symbols visible)- The LED indicator on the battery charger will turn solid green when the battery is fully charged. Once fully charged, disconnect the charger from the battery and the outlet.
USB POWER
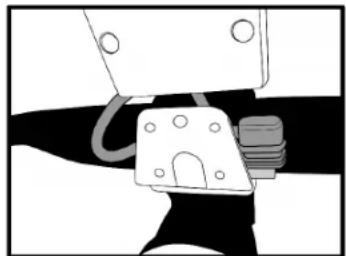
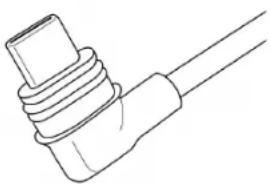
Model Year 2022 eBicycles come with a USB-C plug adapter secured directly below the headlamp.
natural_image
Mechanical assembly diagram showing a clamp and lever mechanism (no text or symbols)The USB plug can provide power to a mobile device such as a cellphone. The maximum power level of 10W is supplied by the internal eBicycle battery. If the
battery is not installed or is depleted the USB plug will not provide power.
natural_image
Line drawing of a coiled cable or connector with no text or symbolsDRIVETRAIN
Drive Motor
The drive motor is mid-mounted with placement near the pedal crank assembly. An electronic torque sensor automatically recognizes the pressure the rider applies to the pedals and instantly provides a proportionate amount of electric drive assistance.
Belt Drive
The drive motor is connected to the rear wheel assembly with a carbon fiber-reinforced drive belt (similar to motorcycle drive belts). The drive belt provides smooth, quiet, and low-maintenance operation.
Continuously Variable Transmission
Your eBicycle may come equipped with an electronically controlled CVT (Continuously Variable Transmission) on the rear hub that delivers seamless gear changes and transmission of power at any speed. There is no shifting required; the transmission automatically adjusts the gear ratio as terrain or speed changes. The transmission is fully enclosed without any exposed components and requires no maintenance.
DISPLAY
Every eBicycle includes a display attached to the left handlebar. The display directly controls the eBicycle when utilizing the battery powered components. It will not function without battery power but is not needed to use the eBicycle as a traditional bicycle under pedal power only.
Ergonomically arranged thumb-and-forefinger controls on all models allow the rider to operate the displays without lifting a hand off of the handlebar.
The Power button is located on the back side of the display. To turn the bike on or off, press and hold the Power button for at least 1 second before releasing.
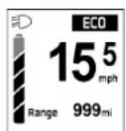
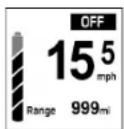
"Allround" Display
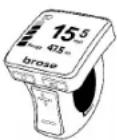
RUSH/CTY models utilize a Brose "Allround" display with a 1.5 in [37 mm] TFT screen. The screen can show at least the selected ride mode, current speed, odometer/trip meter, battery charge level, and headlamp on/off status.
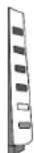
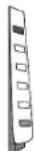
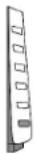
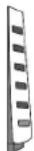
"Remote" Display
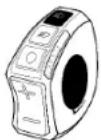
MOSH/CTY models utilize a Brose "Remote" display with an LED indicator. The LED indicator can show the selected ride mode, battery charge level, and headlamp on/off status.
RIDE MODES
Serial 1 eBicycles by default have 4 selectable Ride Modes, a Walk Assist, and an Off Mode. The current selectable ride mode will be indicated on the display (either screen or LED indicator).
Eco Mode
Best used in flat-and-favorable conditions when you want just a gentle amount of assistance without unnecessarily depleting the battery.
Tour Mode
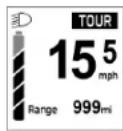
Best used when you desire a consistent-but-still-transparent level of electric assistance, for the optimal blend of assistance and battery economy under mixed riding conditions.
Sport Mode

Best used when you want pronounced assistance away from corners or over rolling hills, or to ride further or faster than you would under your own power alone.
Boost Mode
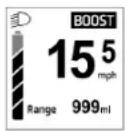
Best used when confronting a steep hill, a strong headwind, or any other condition where you might require a sustained boost of substantial assistance.
Walk Assist

A push-button "walk-assist" function which provides a low level of forward motion to help easily maneuver the eBicycle at walking speeds, especially when there is a need to push the eBicycle up a hill.
Off
Ride Modes can be turned to an Off position, which will provide no additional pedal assist. However, lighting and the display will still be active if the battery has charge.
LIGHTING
Your eBicycle features integrated lighting for safety and convenience.
- The LED front headtube badge lighting ("Signature Light") and the rear taillamp are illuminated any time the eBicycle is turned on.
-
A button on the display illuminates the LED headlamp.
-
The rear brake lamp automatically illuminates upon deceleration.
- If the eBicycle is laid on its side (either purposefully or accidentally) while powered on, the rear lights will flash an SOS to alert passerby.
BRAKE OPERATION
The front brake lever controls the front wheel brake and is located on the left handlebar. Operate the lever with the fingers of the left hand. The rear brake lever controls the rear wheel brake and is located on the right handlebar. Operate the brake lever with the fingers of the right hand.
NOTE
The direction of brake operation may be reversed if your country requires a different configuration (for example, the United Kingdom).
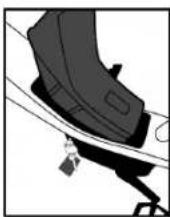
STORAGE
natural_image
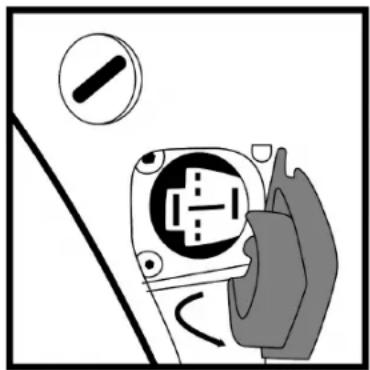
Two-panel diagram showing a tool interacting with a surface, no text or symbols presentA storage compartment in the RUSH/CTY model downtube provides a place to stow small items. Insert key and turn clockwise to open.
CARGO RACK
Cargo racks on RUSH/CTY models provide a convenient way to carry small loads.
CAUTION

Do not carry passengers, including children in child carriers, or use rack(s) as a seat.
Do not exceed maximum weight limits.
Use an elastic cord or another suitable retaining device to secure cargo to rack.
Table 4: Maximum Weight Limits
| Front Rack | Rear Rack | Rider and Luggage Max Weight | Total Max Weight |
| 22 lb[10 kg] | 22 lb[10 kg] | 220 lb[100 kg] | 280 lb[128 kg] |
MAINTENANCE & SERVICE
For all service concerns or questions, please visit our Help Center at www.Serial1.com for additional support or to contact our Support team directly.
WARNING

Always remove the battery prior to performing any maintenance or service.
Services should be performed by a certified bike technician, unless you have the proper tools, service data, and are mechanically qualified. Find qualified service providers at www.Serial1.com.
CAUTION

Replace safety-critical components with genuine replacement parts. Using parts or accessories not approved by Serial 1 can adversely affect performance, stability, or handling, which could result in death or serious injury.
NOTE
The use of parts and service procedures other than Serial 1 approved parts and service procedures or performing any work that may be deemed as “tampering” may void the limited warranty.
Tampering is defined as “purposefully removing or replacing the internals or externals of your eBicycle or components in a way that may alter the original design or function.”
Battery Maintenance
The battery is designed only to work with a Serial 1 eBicycle. Use of the battery for any other purpose will void the warranty and can cause harm to property and people. There is no special maintenance required for a Serial 1 eBicycle battery.
CAUTION

Handle the battery with care. Do not drop or impact the battery. Mishandling the battery could lead to severe damage or over-heating. In rare cases, a mishandled or severely impacted battery could potentially catch fire. If you suspect damage to your battery, contact Serial 1 immediately.
Batteries are water-resistant for normal storage and riding conditions but are not to be fully submerged.
Store the battery in less than 80% relative humidity and within a temperature range of 14^ F to 113^ F [- 10^ C to 45^ C]. If a battery will sit idle for longer than 3 months, it should be fully charged prior to storage and again after every subsequent 3 months in storage.
Discontinue use of a battery that has damage due to impacts, falls, or other compromises to the integrity of the case or its contents.
Drivetrain Maintenance
The carbon drive belt on the Serial 1 eBicycle only requires occasional tensioning, as outlined in the Regular Service Intervals.
Table 5: Drive Belt Tension
| Model | Smooth | Rough |
| MOSH/CTY | 45 to 60 Hz[35 to 45 lbs] | 60 to 75 Hz[45 to 53 lbs] |
| RUSH/CTY | 35 to 50 Hz[28 to 40 lbs] | |
Lubrication
Use a general lubricant on the following items:
- Sidestand
NOTE
Avoid getting any lubricant on the brake rotors.
Brake Maintenance
Your Serial 1 eBicycle is equipped with hydraulic disc brakes. Hydraulic brakes are self-adjusting and provide ease of use and control.
WARNING

Brakes are a critical safety component. Improperly serviced brakes can adversely affect brake performance, which could result in death or serious injury.
If your hydraulic disc brakes require service (line bleeding, caliper adjustment, or pad replacement) we recommend contacting a qualified service provider. Find qualified service providers at www.Serial1.com.
Table 6: Brake Sizing
| Model | Piston-Calipers | Rotor Thickness | Rotor Diameter |
| MOSH/CTY | 2 1.8 | mm | 203 mm |
| RUSH/CTY | 4 2.3 | mm | 203 mm |
Transportation
Remove the battery from the eBicycle and store elsewhere in the vehicle while transporting the eBicycle.
Always respect local laws about transportation of an eBicycle.
Because Li-lon batteries of this size and power are considered "dangerous goods, class 9" when transporting, regulations may restrict the transport of separate Li-lon batteries in some places. The restrictions
apply to most airlines and some trucking companies. If you intend to ship or travel with your eBicycle (with battery installed), check with local regulations and the airline or carrier beforehand.
CAUTION

An eBicycle is heavier than a normal bicycle. If transporting on a vehicle, be aware of the maximum load capacity of the vehicle's roof, towing hook, and/or the eBicycle carrier. Refer to the vehicle manufacturer's manuals for details.
Cleaning
Wipe the external surfaces of your eBicycle with a damp cloth.
CAUTION

Do not use a pressure washer to clean your eBicycle. Using a pressure washer can result in equipment damage.
Lamp Service
All lamps are sealed units, without access to individual light bulbs. Service on a lamp requires the entire lamp unit to be replaced.
Regular Service Intervals
Service must be performed at specified intervals to keep your eBicycle operating at peak performance.
NOTE
- Perform maintenance more frequently in severe riding conditions such as extreme temperatures, dusty environments, rough roads, long storage conditions, short runs, or heavy stop & go traffic.
- Perform spoke tension check at every 10 hours or after a hard ride over rough roads.
- Regular maintenance needs to continue for the entire time the eBicycle is owned.
CAUTION

As with all mechanical components subjected to wear and stresses, fatigue will occur. If the design life of a component has been exceeded, it may suddenly fail, possibly causing injury or damage. Regular servicing can help identify potential issues. The following table is a minimum recommendation.
Table 7: Minimum Service Intervals
| Rec. Service (repeated at every interval) | Each ride | 1 mo. | 6 mo. | 12 mo. |
| 0 mi [0 km] | 250 mi [400 km] | 1500 mi [2400 km] | 3000 mi [4800 km] | |
| Check tire pressure and tread, wheel rims for damage | X X | X X | ||
| Charge battery fully | X X | X X | ||
| Check brake functionality | X X | X X | ||
| Check lamp and reflector functionality | X X | X X | ||
| Check bell functionality | X X | X X | ||
| Verify handlebars and fork/front wheel turn | X X | X X |
| Rec. Service (repeated at every interval) | Each ride | 1 mo. | 6 mo. | 12 mo. |
| 0 mi [0 km] | 250 mi [400 km] | 1500 mi [2400 km] | 3000 mi [4800 km] | |
| Inspect brake pads and discs for wear and alignment | X | X X | ||
| Check wheel spoke tightness | X | X X | ||
| Check handlebar clamp fastener screw torque | X | X X | ||
| Check axle nut torque | X | X X | ||
| Inspect and lubricate kick stand and pedals | X | X X |
| Rec. Service (repeated at every interval) | Each ride | 1 mo. | 6 mo. | 12 mo. |
| 0 mi [0 km] | 250 mi [400 km] | 1500 mi [2400 km] | 3000 mi [4800 km] | |
| Inspect frame for cracks, breaks, nicks, failed welds | X | X X | ||
| Road test to verify system functions | X | X X | ||
| Check sprocket alignment and belt tension | X | X | ||
| Inspect brakes for leaks or damage | X | |||
| True wheels | X | |||
| Check and adjust all bike bolt torque values | X |
PRIVACY POLICY
CAUTION

This bike should be used only by riders who have been provided all bike documentation and instructions, including descriptions of its built-in connectivity and cellular communication functions, and the features of the Serial 1 Mobile App as described at www.Serial1.com.
WARRANTY & RETURNS
Our most up-to-date Warranty and Returns policies are posted on our website at www.Serial1.com. We encourage every customer to register their warranty at that site.
DECLARATION OF CONFORMITY
Our Serial 1 eBicycles and all language translations of our owner's manual comply with and meet the requirements laid out in the following standards. This is not an all-encompassing list:
- EN 15194:2017
- EN ISO 4210-2
- Machinery Directive 2006/42/EC
- CFR 1512
Our most up-to-date Declarations of Conformity are posted on our website at www.Serial1.com.
SERIAL 1 TRADEMARK INFORMATION
MOSH/CTY, RUSH/CTY, and Serial 1 are among the trademarks of Serial 1 Cycle Company.
PATENTS
Serial 1 products are covered by one or more United States and international patents or pending patent applications.
COPYRIGHT
ALL RIGHTS RESERVED.
©2022 Serial 1 Cycle Company
3451 N Triumph Blvd
Suite 100
Lehi, UT 84043
United States of America
DOCUMENT NUMBER
94000888 Revision E
The English version of this printed owner's manual is the "Original Instruction" version and was last revised on April 1, 2022 (2022-04-01).
ADVERTENCIA

natural_image
Line drawing of a shoulder joint (no text or symbols)natural_image
Simple line drawing of a black tag with two keys attached (no text or symbols)- Campana

- Pedales
natural_image
Technical line drawing of two mechanical housing components (no text or symbols)natural_image
Simple line drawing of a device with cables and a connector (no text or symbols)natural_image
Illustration of ring and oval shapes with no text or symbols- Soporte lateral

natural_image
Pure mechanical diagram showing a lever mechanism with arrows indicating motion (no text or symbols)natural_image
Technical diagram of a mechanical device with arrows indicating motion or force direction (no text or symbols)natural_image
Abstract line drawing of a stylized figure with looped elements, no text or symbols present

natural_image
Line drawing of a bicycle resting on a rectangular platform (no text or symbols)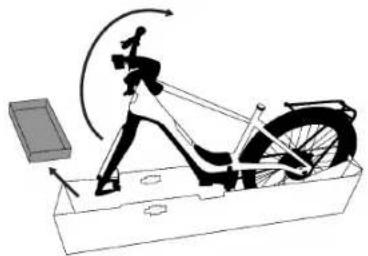
natural_image
Diagram of a person using an exercise bike in a boat, showing motion trajectory and support system (no text or labels)natural_image
Illustration of a person using a stationary exercise bike on a platform (no text or symbols)- Instale el guardabarros delantero (solo modelos RUSH/CTY).
natural_image
Illustration of a person running on a slope with motion arrows indicating movement (no text or symbols)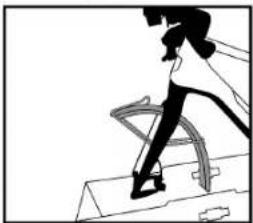
natural_image
Silhouette of a person running on stairs (no text or symbols visible)natural_image
Diagram of a bicycle's wheel and seat assembly (no text or labels)natural_image
Mechanical assembly diagram showing a lever mechanism with no visible text or symbols- Instale la rueda delantera.
natural_image
Diagram showing two mechanical components with arrows indicating motion (no text or symbols)natural_image
Diagram of a mechanical or electrical component with no visible text, numbers, or symbolsnatural_image
Close-up of a bicycle wheel with spokes and a bicycle wheel, showing no text or symbols.natural_image
Diagram of a bicycle on a platform with directional arrows indicating motion (no text or symbols)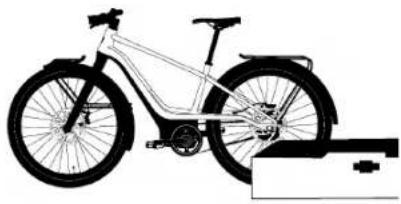
natural_image
Side profile illustration of a bicycle with front wheel and side seat, mounted on a platform (no text or symbols)natural_image
Abstract mechanical diagram with layered components and no visible text or symbolsnatural_image
Close-up of a mechanical tool interacting with a bracket (no visible text or symbols)chemical
Chemical structure diagram showing a benzene ring connected to a macrocycle and a car body with internal componentsnatural_image
Mechanical linkage diagram showing a lever and connecting rod (no text or symbols)natural_image
Pure mechanical component diagram without any text, numbers, or symbolsnatural_image
Pure mechanical component diagram without any text, numbers, or symbols
natural_image
Mechanical assembly diagram showing a lever interacting with a piece of material (no text or symbols visible)- Instale la campana.
natural_image
Illustration of mechanical components including a clamp, ring, and screw (no text or symbols)natural_image
Line drawing of a hand holding a cable with a handle, no text or symbols presentnatural_image
Simple line drawing of a mechanical device with a handle and base (no text or symbols)- Instale los reflectores.
natural_image
Close-up of a hand using a tool to adjust or install a mechanical component (no visible text or symbols)natural_image
Two-panel diagram showing a circular object with an arrow pointing to it, surrounded by curved lines and intersecting diagonal lines (no text or symbols)natural_image
Two schematic diagrams showing connected devices and a mechanical component with an arrow indicating motion (no text or symbols)natural_image
Human figure standing beside a bicycle silhouette (no text or symbols)natural_image
Line drawing of a humanoid robot riding a bicycle (no text or symbols)Altura del manubrio
natural_image
Illustration of a hand holding an electrical outlet with a switch symbol (no text or labels)natural_image
Simple line drawing of a tool interacting with a surface (no text or symbols)natural_image
Illustration of a black athletic shoe with a small weight attached, shown in motion (no text or symbols)natural_image
Illustration of a black USB cable with two connectors (no text or symbols)natural_image
Mechanical assembly diagram showing a clamp and lever mechanism (no text or symbols)natural_image
Two-panel diagram showing a tool interacting with a black object, no text or symbols present©2022 Serial 1 Cycle Company
3451 N Triumph Blvd
Suite 100
Lehi, UT 84043
United States of America
DÉCLARATION DE CONFORMITÉ ......27
INFORMATIONS SUR LA MARQUE SERIAL 1....27
BREVETS....27
DROIT D'AUTEUR 27
NUMÉRO DE DOCUMENT 27
MODE D'EMPLOI
natural_image
Pure line drawing of a curved mechanical component without any text, numbers, or symbols- Roue avant
natural_image
Simple line drawing of a device with cables, connectors, and a rectangular component (no text or symbols)natural_image
Pure diagram of ring-like objects with circular ends and layered shapes, no text or symbols present- Béquille

natural_image
Pure mechanical diagram showing a lever mechanism inside a housing (no text or symbols)natural_image
Technical diagram of an electronic device with internal components and directional arrows indicating motion (no text or symbols)natural_image
Simple line drawing of a person holding a ring, no text or symbols present

natural_image
Line drawing of a bicycle on a rectangular platform (no text or symbols)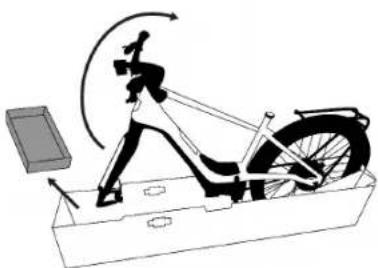
natural_image
Illustration of a person using a stationary exercise bike with motion arrows indicating motion (no text or symbols)natural_image
Mechanical diagram of a stationary platform with a levers and wheel (no text or symbols)natural_image
Diagram of a bicycle's wheel and seat assembly (no text or labels)natural_image
Mechanical diagram showing a hand holding a tool with a screw, connected to a bracket (no text or symbols visible)natural_image
Diagram showing mechanical components with arrows indicating motion (no text or symbols)natural_image
Diagram of a mechanical or anatomical structure with no visible text, numbers, or symbolsnatural_image
Diagram of a bicycle wheel with spokes and a gear mechanism, no text or symbols presentnatural_image
Diagram of a bicycle on a platform with an upward arrow and mechanical components (no text or symbols)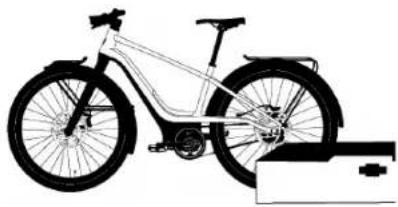
natural_image
Side profile illustration of a bicycle with front wheel and rear wheels, mounted on a support frame (no text or symbols)natural_image
Mechanical assembly diagram showing a gear and shaft assembly (no text or labels)natural_image
Close-up of a mechanical clamp or bracket component being adjusted by hand (no visible text or symbols)chemical
Chemical structure diagram showing benzene ring attached to a cyclohexane ring and a car body with internal componentsnatural_image
Line drawing of a mechanical clamp or bracket with no visible text or symbolsnatural_image
Pure mechanical component diagram without any text, numbers, or symbolsnatural_image
Pure mechanical diagram showing a lever and pivot point without any text or symbolsnatural_image
Pure mechanical assembly diagram showing a clamp and lever mechanism without any text or symbolsnatural_image
Illustration of mechanical components including a clamp, ring, and screw (no text or symbols)natural_image
Line drawing of a hand holding a cable with a handle, no text or symbols presentnatural_image
Simple line drawing of a mechanical component with no text or symbolsnatural_image
Close-up of hands using a sewing machine to adjust or install a mechanical component (no visible text or symbols)natural_image
Diagram of a bicycle's seatbelt mechanism with a belt and handle (no text or symbols)natural_image
Diagram showing two mechanical or fluid dynamics scenarios with rotating components and directional arrows (no text or symbols)natural_image
Human figure standing beside a bicycle, showing mechanical components and body positioning (no text or symbols)natural_image
Line drawing of a humanoid robot riding a bicycle (no text or symbols)Hauteur du guidon
natural_image
Illustration of a hand inserting a plug into an electrical socket (no text or symbols)natural_image
Diagram of a mechanical component with a tool inserted, showing no text or symbolsnatural_image
Illustration of a black shoe with a small object attached, against a white background (no text or symbols)natural_image
Close-up of a black USB cable with multiple connectors (no text or symbols visible)natural_image
Illustration of a black rectangular device with a cutout and a separate plug inserted (no text or symbols)natural_image
Mechanical assembly diagram showing a clamp holding a component (no text or symbols visible)natural_image
Line drawing of a coiled connector or cable (no text or symbols)
ENTRAÎNEMENT
natural_image
Two-panel diagram showing a tool interacting with a surface, no text or symbols presentDÉCLARATION DE CONFORMITÉ
©2022 Serial 1 Cycle Company
3451 N Triumph Blvd
Suite 100
Lehi, UT 84043