SBSD227FWW - Tumble drier GE - Free user manual and instructions
Find the device manual for free SBSD227FWW GE in PDF.
User questions about SBSD227FWW GE
0 question about this device. Answer the ones you know or ask your own.
Ask a new question about this device
Download the instructions for your Tumble drier in PDF format for free! Find your manual SBSD227FWW - GE and take your electronic device back in hand. On this page are published all the documents necessary for the use of your device. SBSD227FWW by GE.
USER MANUAL SBSD227FWW GE
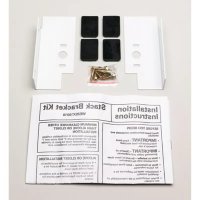
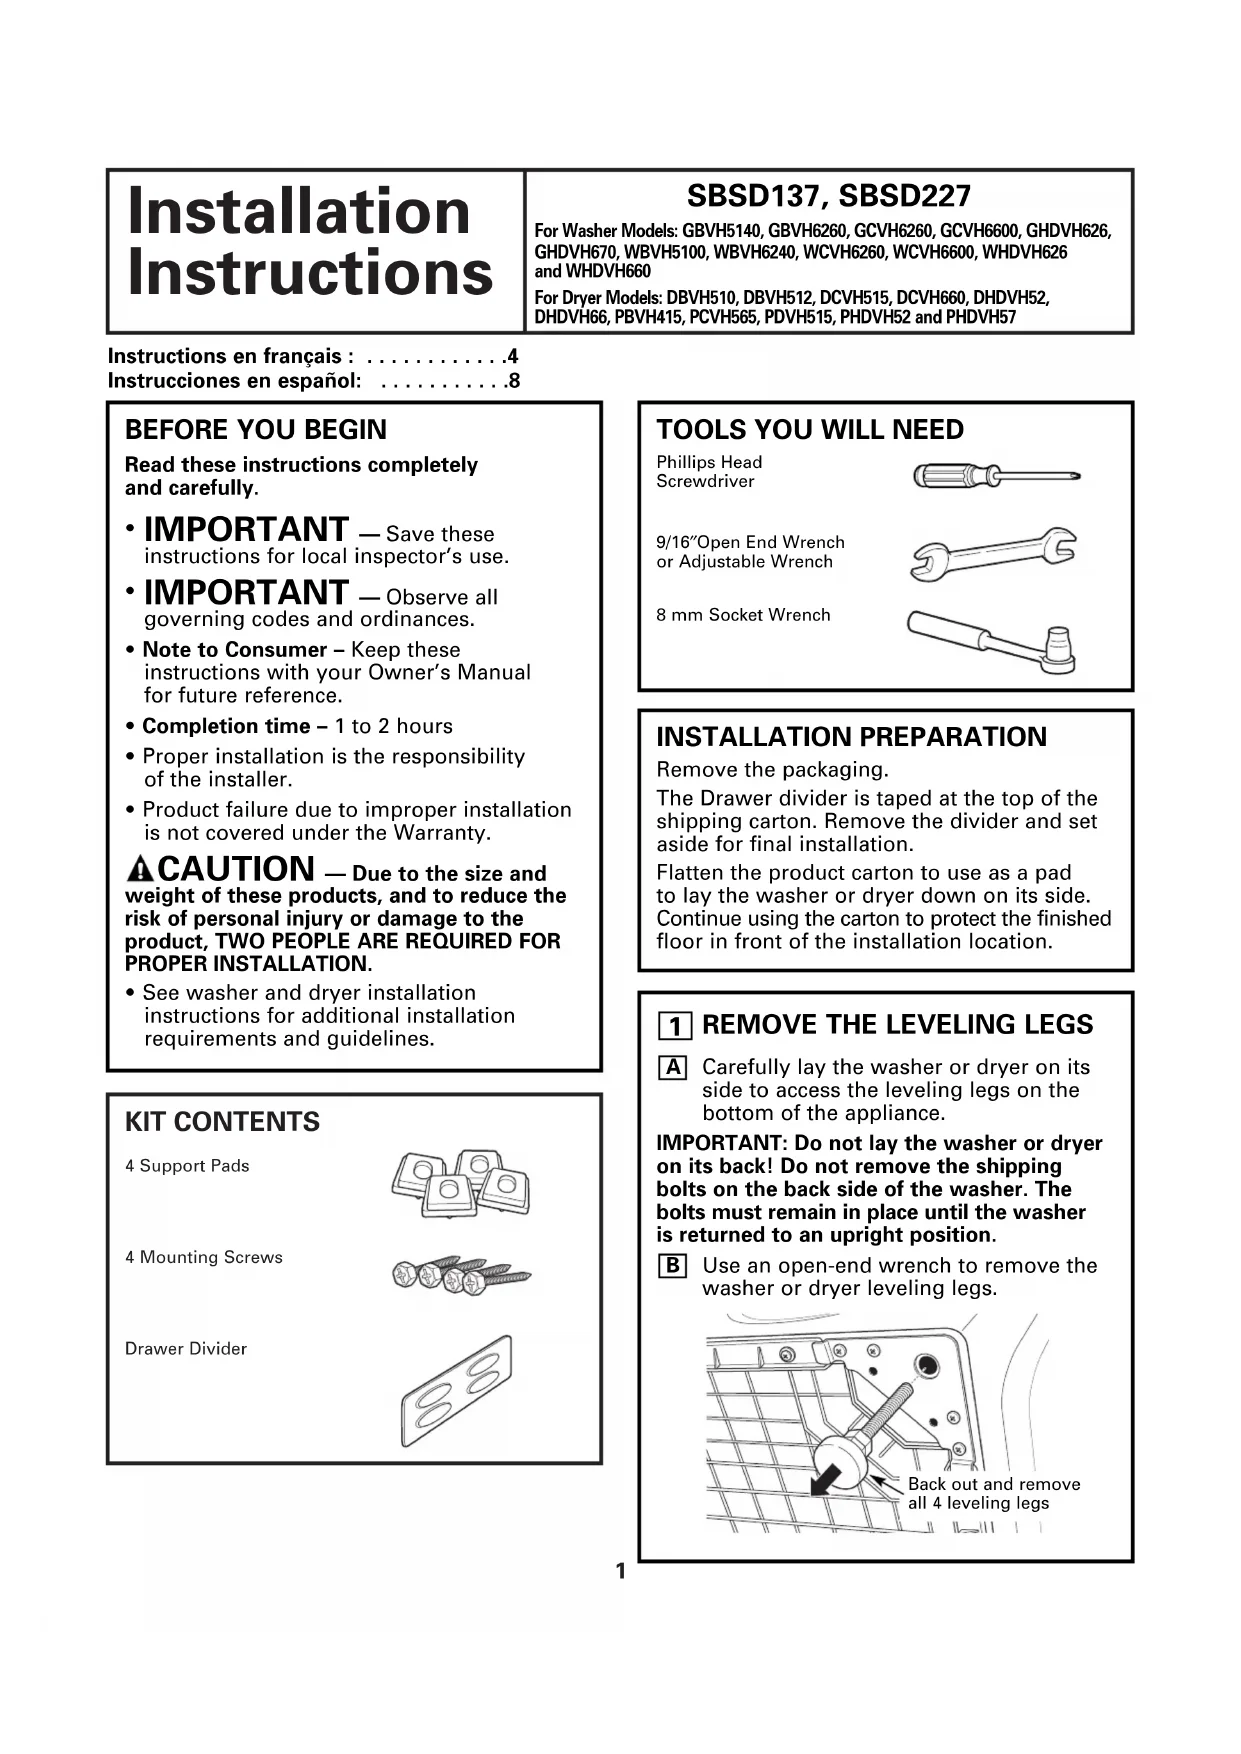
Installation Instructions KIT CONTENTS 4 Support Pads4 Mounting ScrewsDrawer Divider
Phillips Head Screwdriver9/16″ Open End Wrench or Adjustable Wrench8 mm Socket Wrench
REMOVE THE LEVELING LEGS
Carefully lay the washer or dryer on itsside to access the leveling legs on thebottom of the appliance.IMPORTANT: Do not lay the washer or dryeron its back! Do not remove the shippingbolts on the back side of the washer. Thebolts must remain in place until the washeris returned to an upright position.Use an open-end wrench to remove thewasher or dryer leveling legs.
INSTALLATION PREPARATION Remove the packaging.The Drawer divider is taped at the top of theshipping carton. Remove the divider and setaside for final installation.Flatten the product carton to use as a pad to lay the washer or dryer down on its side.Continue using the carton to protect the finishedfloor in front of the installation location.Back out and remove all 4 leveling legsInstructions en français : . . . . . . . . . . . .4Instrucciones en español: . . . . . . . . . . .8For Washer Models: GBVH5140, GBVH6260, GCVH6260, GCVH6600, GHDVH626,GHDVH670, WBVH5100, WBVH6240, WCVH6260, WCVH6600, WHDVH626 and WHDVH660For Dryer Models: DBVH510, DBVH512, DCVH515, DCVH660, DHDVH52,DHDVH66, PBVH415, PCVH565, PDVH515, PHDVH52 and PHDVH57
Read these instructions completely and carefully.
IMPORTANT — Save these instructions for local inspector’s use.
IMPORTANT — Observe all governing codes and ordinances.• Note to Consumer – Keep theseinstructions with your Owner’s Manual for future reference.• Completion time – 1 to 2 hours• Proper installation is the responsibility of the installer. • Product failure due to improper installationis not covered under the Warranty. CAUTION — Due to the size and weight of these products, and to reduce therisk of personal injury or damage to theproduct, TWO PEOPLE ARE REQUIRED FORPROPER INSTALLATION.• See washer and dryer installationinstructions for additional installationrequirements and guidelines.2 Installation Instructions
Place the pedestal against the bottom of the unit. Check to be sure the drawer front is at the front of the unit. Align the holes in the pedestal with the holes in the bottom of the unit. Use a Phillips screwdriver to install the 4 screws through the pedestal and into the unit—do not tighten. Slide the pedestal toward the unit, until it is aligned front to back. Use an 8 mm socket wrench to securely tighten the screws.
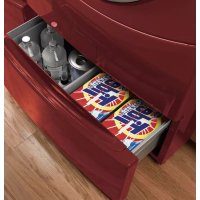
Pull the drawer out as far as it will go. Remove screws from drawer slides. Slide drawer out of the base and set aside. FOR DRYERS ONLY: Locate the 4 support pads from the parts package. Each pad has 2 protrusions that fit into the holes on top of the pedestal. Press the rubber pads into each set of corner holes on the top of the pedestal as shown. NOTE: The support pads should be installed on the dryer only. DO NOT INSTALL THESE PADS ON THE WASHER PEDESTAL.
Installation Instructions
LEVEL THE WASHER OR DRYER
Locate the 4 legs from the parts package and install. Stand the washer or dryer upright. Move it close to its final location. Make sure that the washer or dryer is level by placing a spirit level on top. Check side to side and front to back. Use an open ended wrench to adjust the legs in and out. Tighten the lock nut against the bottom of the pedestal. NOTE: To minimize vibration, the locking nuts must be tight.
Remove the 4 shipping screws on the back side of the unit.
Check to be sure the slides are closed. Slide the drawer into the opening. Align the drawer supports to the slides on each side. Reinstall the original screws into each drawer slide. Tighten both screws. Open the drawer fully. Slide drawer divider into slots in the center of the drawer. The drawer should slide smoothly when you push it closed.
Refer to the washer or dryer Installation Instructions to complete the installation.