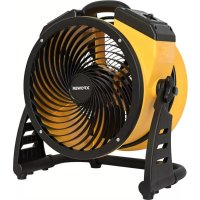
FC100 - Fan XPower - Free user manual and instructions
Find the device manual for free FC100 XPower in PDF.


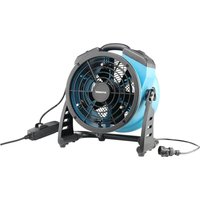
| Brand | XPower |
| Model | FC100 |
| Product Type | Air Circulator / Fan |
| Power Supply | 115 V~60 Hz, 0.6 A |
| Motor Power | Not specified (see specifications) |
| Nominal Airflow | 1100 CFM (cubic feet per minute) |
| Speed Control | 4 speeds (1 to 4) |
| Timer | 3 hours (auto shut-off) |
| Extra Electrical Outlet | No |
| Cord Length | 6 feet / 1.8 m |
| Dimensions (L × W × H) | 41.0 × 22.5 × 36.0 cm (16.1 × 8.9 × 14.2 in) |
| Weight | 4.4 kg (9.7 lb) |
| Housing Material | PP (polypropylene) |
| Tilt Angle | 360° (swivel base) |
| Certification | ETL / C-ETL |
| Warranty | 1 year limited |
| Maximum Stacking | Do not stack more than 6 units (for FC-100 up to 5 according to manual page 15) |
| Maintenance | Unplug before cleaning; wipe with a damp cloth; do not clean with direct water |
| Safety | Use a GFCI outlet; do not cover the cord; do not immerse; do not insert objects |
| Replacement Parts | Front grille, motor, housing, capacitor, handle, speed selector, stand, fan blade, rear cover, rear grille, power cord |
Frequently Asked Questions - FC100 XPower
User questions about FC100 XPower
0 question about this device. Answer the ones you know or ask your own.
Ask a new question about this device
Download the instructions for your Fan in PDF format for free! Find your manual FC100 - XPower and take your electronic device back in hand. On this page are published all the documents necessary for the use of your device. FC100 by XPower.
USER MANUAL FC100 XPower
natural_image
Line drawing of a multi-free fan with visible blades and mounting base (no text or symbols)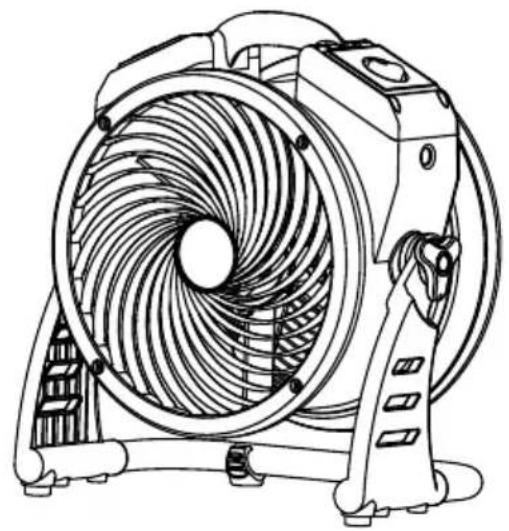
natural_image
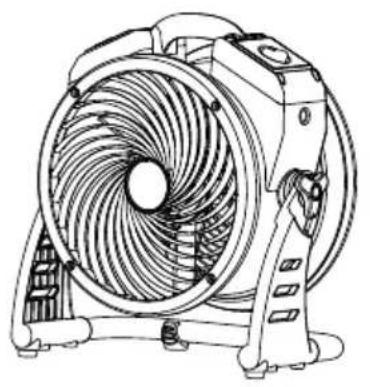
Line drawing of a fan with visible blades and mounting base (no text or symbols)Air Circulator Owner's Manual
Read and save these instructions
WARNING - READ AND SAVE THIS INSTRUCTIONS BEFORE USING THIS PRODUCT.
The user of electrical products may create hazards that include, but are not limited to injury, fire, electrical shock. Failure to follow these instructions may damage and/or impair its operation and void the warranty.
- Before operating, remove all packaging material and check for any damage that may have occurred during shipping or any missing items.
- Check household power supply to ensure it matches the appliance's specification.
- DO NOT operate any fan with a damaged cord or plug. Discard fan or return it to an authorized service facility for examination and/or repair.
- Use only on GFCI protected receptacles. Please contact a qualified electrician for verification and / or installation of a GFCI receptacle if necessary.
- DO NOT run cord under carpeting. DO NOT cover cord with throw rugs, runners, or similar coverings. DO NOT route cord under furniture or appliances. Arrange cord away from traffic area and where it will not be tripped over.
- To reduce the risk of fire or electric shock, DO NOT use this fan with any solid-state speed control device.
- DO NOT touch this appliance or the plug with wet hands or while standing in water.
- DO NOT operate the appliance in any pooled water.
- DO NOT use the product in areas where gasoline, paint or other flammable goods and objects are used or stored.
- DO NOT insert or allow objects to enter any ventilation or exhaust opening as this may damage the appliance and void the warranty.
- DO NOT cover the air inlet or outlet on the appliance.
- DO NOT direct the air flow at human faces or bodies.
- DO NOT allow children to play with this appliance.
- AUTOMATICALLY OPERATED DEVICE – To reduce the risk of injury, disconnect from power supply before servicing.
- Remove the power cord from the electrical receptacle by grasping and pulling on the power cord plug-end only, DO NOT pull the cord directly.
- DO NOT attempt to repair or adjust any electrical or mechanical functions of this appliance, as this may cause danger and void the warranty.
- If the appliance is damaged or it malfunctions, DO NOT continue to use it. Unplug the product from the electrical outlet. Refer to troubleshooting guide or contact XPOWER.
- Store in a dry area, away from exposure to sunlight, extreme temperature and humidity, or other extreme environments, when not in use.
- For model FC-100 / FC-200 Series, DO NOT stack more than six units of this appliance. For model FC-300 / FC-420, DO NOT stack more than five units of this appliance.
- An electronic instruction manual can be obtained through manufacturer's website www.xpower.com.
Items Included
natural_image
Line drawing of a multi-free fan with blades and mounting base (no text or symbols)○
- Rubber Washer x 2**
natural_image
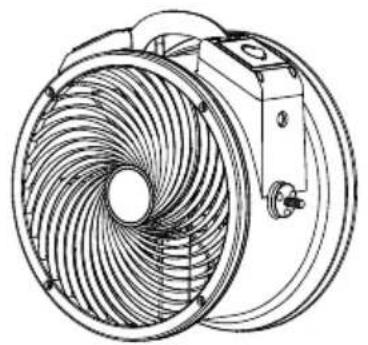
Technical line drawing of a circular fan or impeller with internal blades and mounting bracket (no text or symbols)- Air Circulator Body x 1** • Air Circulator x 1*

- Rack Handle x 2**
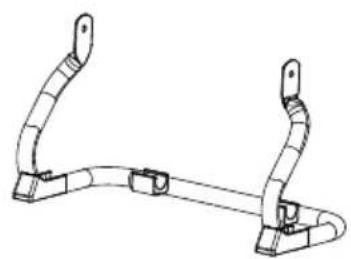
natural_image
Technical line drawing of a mechanical clamp or bracket (no text or symbols)- Rack x 1**
- Owner's Manual x 1
* For model FC-100/FC-200 Series/FC-420 only.
The exact appearance of the products might be slightly different from the diagram.
** For model FC-300 only.
Parts Description
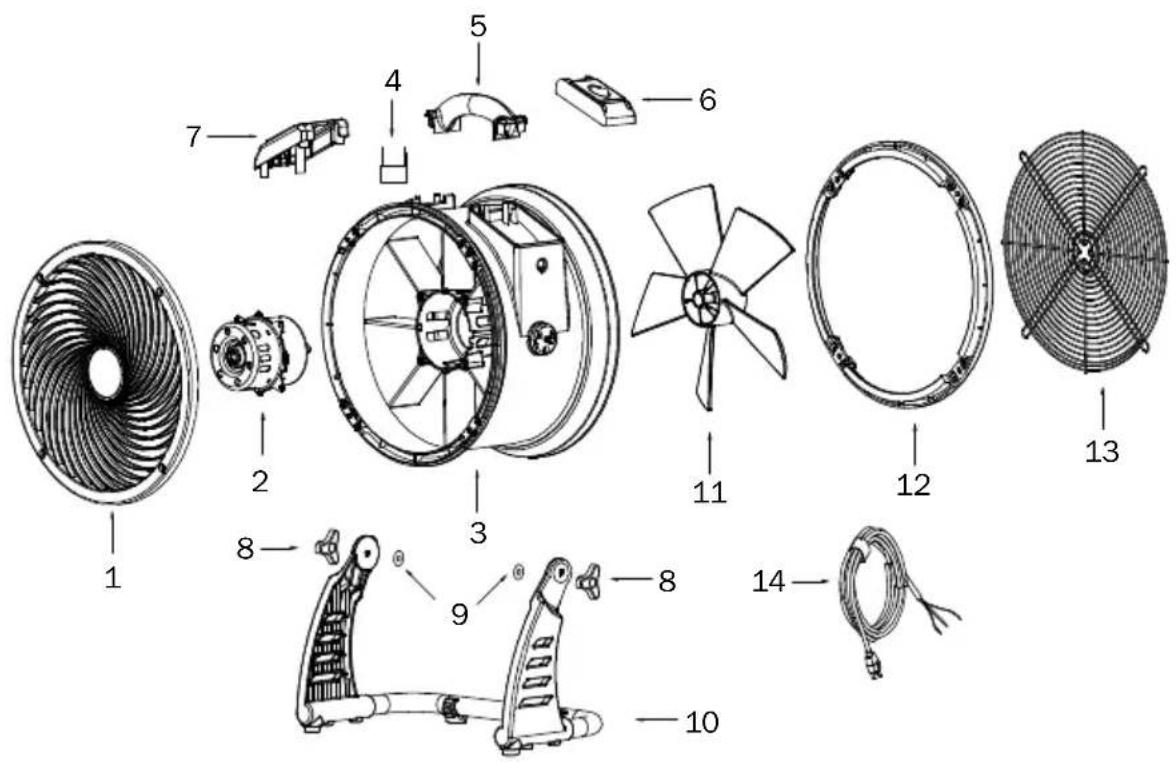
Parts Description (Continued)
(1) Front Grille Cover
and Timer Plate**
(10) Rack
(2) Motor
(7) Additional Electrical
(11) Fan
(3) Housing
Receptacle *** / Timer
(12) Rear End Cover
(4) Capacitor
Plate ****
(13) Rear Grille Cover
(5) Housing Handle
(8) Rack Handle
(14) Power Cord
(6) Switch Plate*/Switch
(9) Rubber Washer
* / ** / *** / **** These functions do not apply all models mentioned in this manual. (See Page 11: Technical Specification)
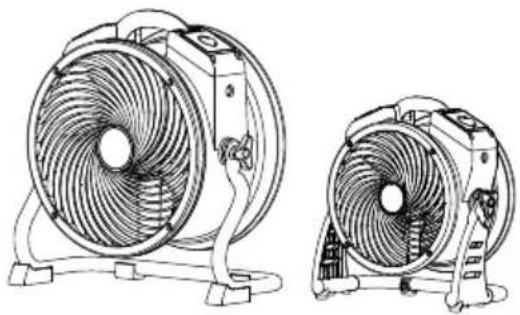
Air Circulator Introduction
- XPOWER Air Circulators are designed to offer efficient air circulation and ventilation with its high and long-distance focused airflow.
- It's perfect for air circulation and ventilation in janitorial/sanitation jobs, air condition control and more.
natural_image
Technical line drawing of two different fan-shaped electric fans with blades and mounting base (no text or symbols)Installation and Operation Guide
Installing the Rack\*
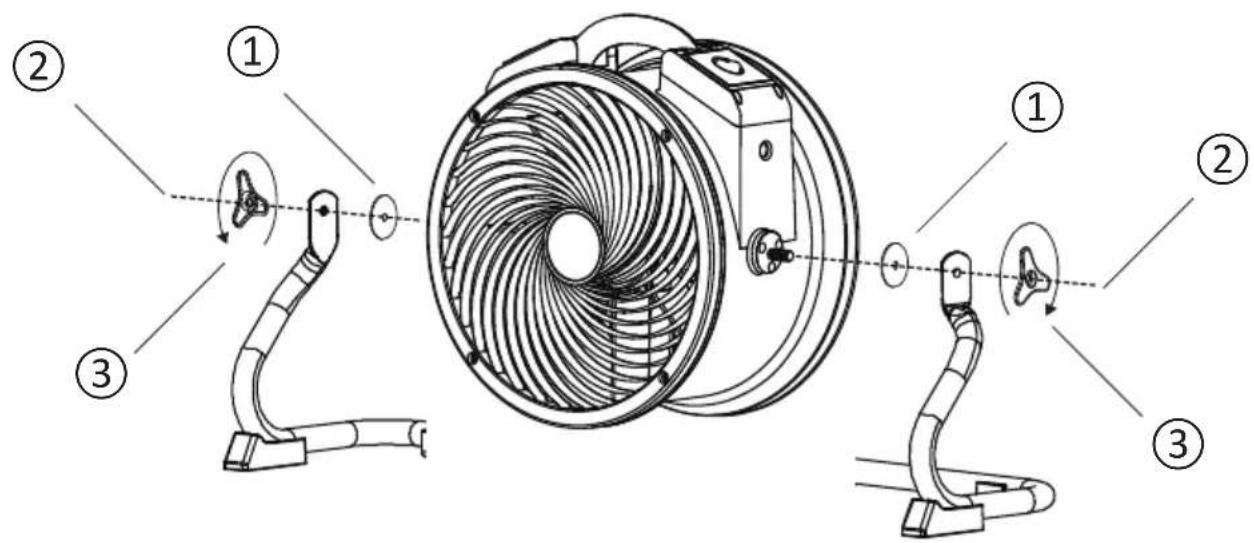
① Fit both rubber washers onto bolts on both sides of unit.
② Align the rack onto the air circulator.
③ Fasten the connection with the rack handle.
* For model FC-300 only.
Switch Plate
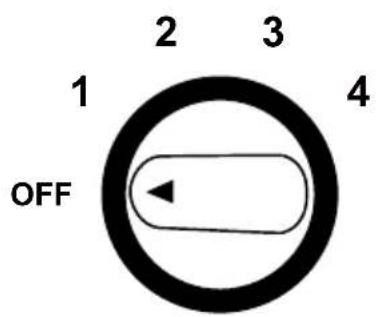
Four Speed Control
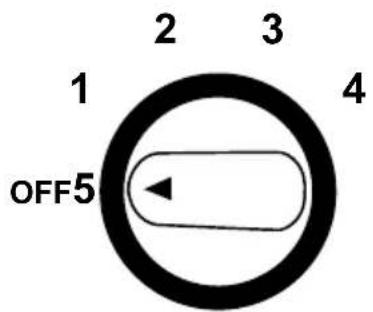
Five Speed Control
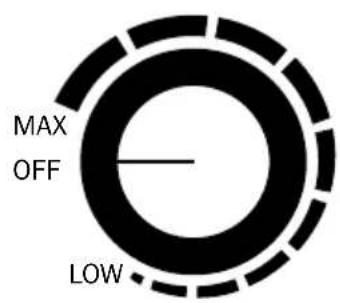
Variable Speed Control
Four Speed Switch ( For model FC-100/FC-200/FC-300 only)
- Turn to "OFF" position to switch the machine OFF. Turn to any speed position to switch the machine ON.
- Turn clockwise to set the desired speed. There are 4 speeds from: 4, 3, 2, 1. “4” is the highest speed and “1” is the lowest speed.
Installation and Operation Guide (Continued)
Switch Plate (Continued)
Five Speed Switch (For model FC-420 only)
- Turn to "OFF" position to switch the machine OFF. Turn to any speed position to switch the machine ON.
- Turn clockwise to set the desired speed. There are 5 speeds from: 5, 4, 3, 2, 1. “5” is the highest speed and “1” is the lowest speed.
Variable Speed Switch (For model FC-250D/FC-250AD only)
- Turn to “OFF” position to switch the machine OFF. Turn clock-wisely to any position between “MAX” and “LOW” to switch the machine ON.
- You can adjust to any desired speed variably. "MAX" is the highest speed and "LOW" is the lowest speed.
Additional Electrical Receptacle (Daisy Chain)\*
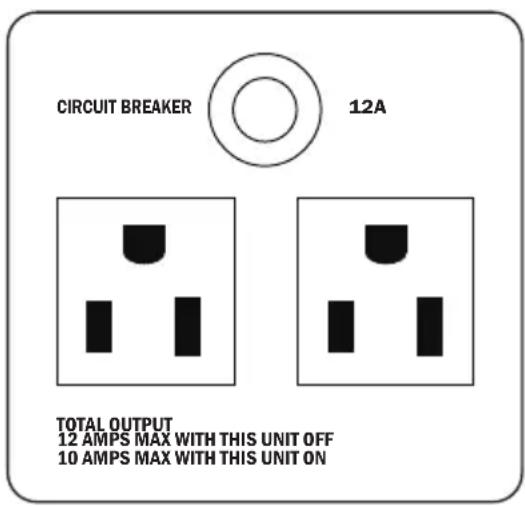
- Other appliances can be plugged in the additional electrical receptacles and work whether the machine is on or off. However, the total amperage must be lower than the amperage instructed. Different models may have varying instructions.
- If the machine or the plugged in appliance stops working, press the RESET BUTTON to reset the circuit.
Installation and Operation Guide (Continued)
Timer Switch\*
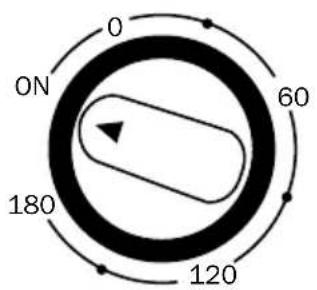
- Turn clockwise to set timer for minutes count down to an automatic stop.
- The timer can be set for up to 180 minutes (3 hours).
- When the timer reaches "0" position, the unit stops working. On "ON" position, it will work constantly.
* For model FC-100/FC-200/FC-250D/FC-300/FC-420 only.
Adjust Operation Position
natural_image
Line drawing of a multi-free fan with visible blades and mounting base, showing rotational motion arrows (no text or symbols)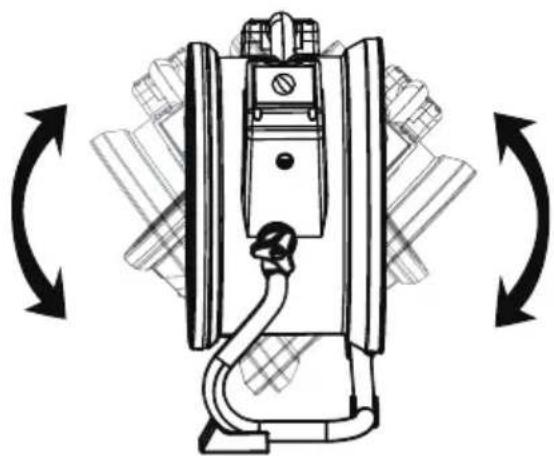
natural_image
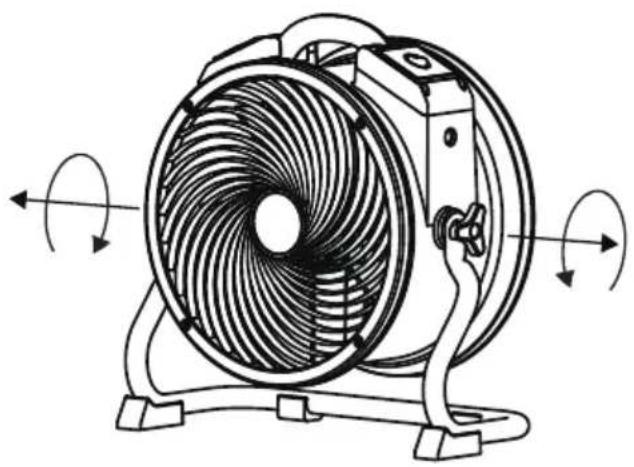
Technical line drawing of a mechanical device with bidirectional arrows indicating rotation or assembly (no text or symbols)- The Air Circulator features 360^ Rotation. Tilt Air Circulator to desired angle and screw on rack handles to secure the position.
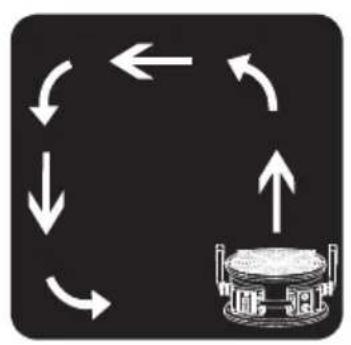
flowchart
graph TD
    A["Start"] --> B{Loop Back}
    B -->|Up| C["Device Icon"]
    B -->|Down| D["Loop Back"]
    D --> E["End"]

natural_image
Abstract diagram of a cylindrical object with radial arrows pointing outward, no text or symbols present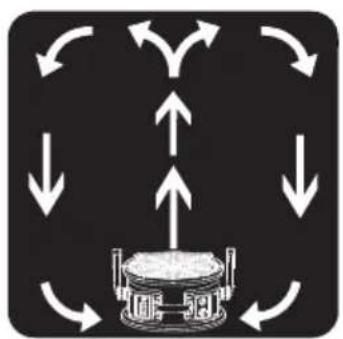
flowchart
graph TD
    A["Central Device"] --> B["Node 1"]
    A --> C["Node 2"]
    A --> D["Node 3"]
    A --> E["Node 4"]
    A --> F["Node 5"]
    A --> G["Node 6"]
    A --> H["Node 7"]
    A --> I["Node 8"]
    A --> J["Node 9"]
    A --> K["Node 10"]
    A --> L["Node 11"]
    A --> M["Node 12"]
    A --> N["Node 13"]
    A --> O["Node 14"]
    A --> P["Node 15"]
    A --> Q["Node 16"]
    A --> R["Node 17"]
    A --> S["Node 18"]
    A --> T["Node 19"]
    A --> U["Node 20"]
    A --> V["Node 21"]
    A --> W["Node 22"]
    A --> X["Node 23"]
    A --> Y["Node 24"]
    A --> Z["Node 25"]
Installation and Operation Guide (Continued)
Adjust Operation Position (Continued)
natural_image
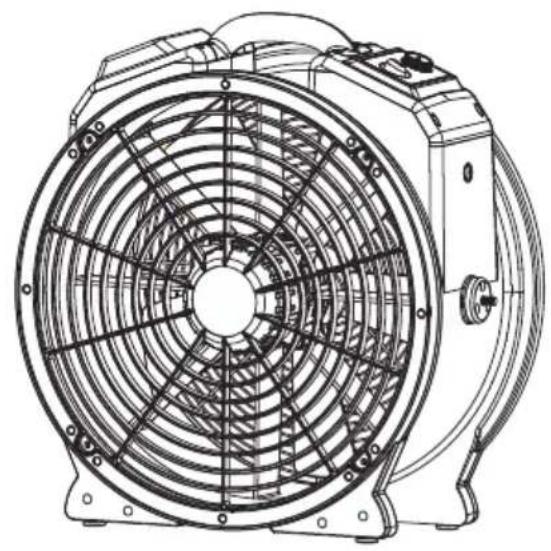
Technical line drawing of a mechanical fan assembly (no text or symbols)Use without Rack\*
- Uninstall the rack and place the Air Circulator on a level surface.
* For model FC-420 only.
Transportation
natural_image
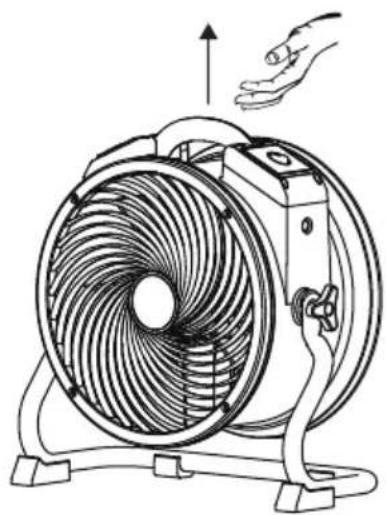
Line drawing of a hand operating the fan with a head-mounted handle (no text or symbols)Lift with Handle
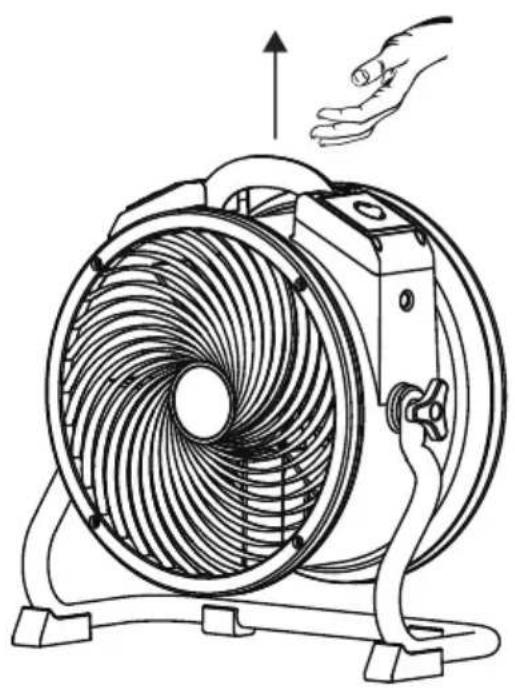
- Lift the Air Circulator with the handle on the top.
User Maintenance Instructions
Frequent maintenance is recommended on this appliance. Failure to follow the maintenance instructions may cause failure of the appliance and void the warranty.
- When not in use, unplug and store the appliance in a dry and cool indoor place. Make sure it's out of reach of children.
- Before performing any maintenance or cleaning, always disconnect the Air Circulator from its power source.
- Use a damp cloth to wipe the surface of the housing. Do not clean the unit with water directly.
- Check if the grille covers are clean. Remove dirt or any other objects that could block the air inlet and air outlet.
natural_image
Line drawing of a multi-free fan with visible blades and rotating buttons (no text or symbols)Fasten the Rack Handles
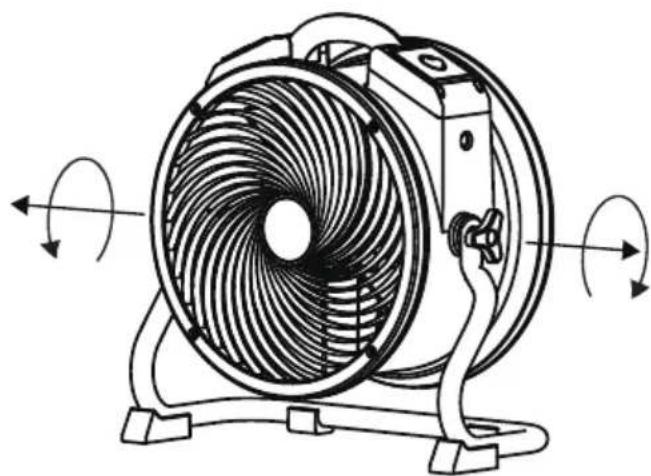
• To prevent possible injury, when you finish using this appliance, please position the Air Circulator UPRIGHT.
- Fasten the rack handle to lock the position of the Air Circulator.
natural_image
Line drawing of a multi-passed fan with visible blades and mounting base (no text or symbols)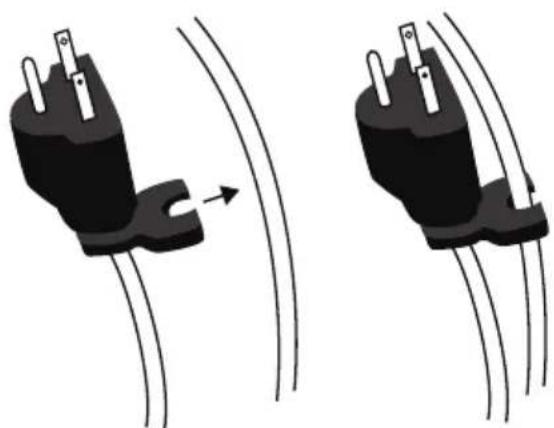
natural_image
Two identical diagrams showing a black plug with three pins and a curved arrow indicating flow or movement (no text or symbols)Organize the Power Cord
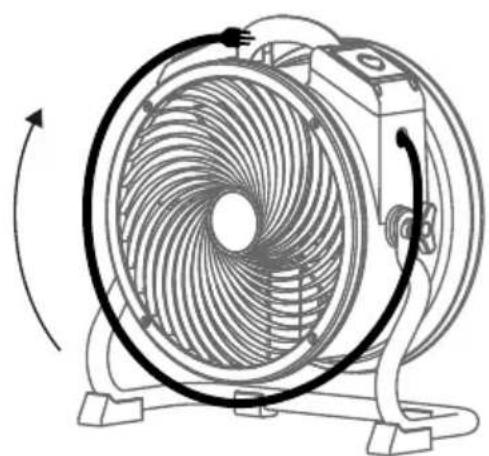
- Wrap the power cord around the housing.
- Clip the cord to the cord clip on the plug shown above.
User Maintenance Instructions (Continued)
natural_image
Technical line drawing of a mechanical assembly with multiple views (no text or symbols)Stack Multiple Units
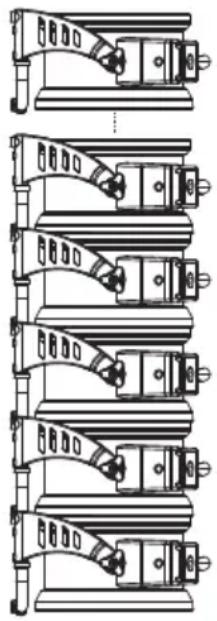
- Stack the Air Circulators on the sides. Align the air inlets of both Air Circulators.
WARNING
- For model FC-100 / FC-200 Series, DO NOT stack more than six units of this appliance.
- For model FC-300 / FC-420, DO NOT stack more than five units of this appliance.
- Stacking function is not secure during transportation.
Troubleshooting Guide
PROBLEM POSSIBLE CAUSE SOLUTION
| Air Circulator does not start | No electricity. Check for power supply. | |
| The power cord is not properly plugged in. | Remove and reconnect the power cord. | |
| The circuit breaker on the additional electrical receptacle (Daisy chain) jumps.* | Remove all appliance on the additional electrical receptacle and press “Reset”. | |
| The timer switch is set to “0” position.* | Set the timer switch to “ON” position. | |
| Unit runs but the speed is abnormal | Air inlet or air outlet is blocked. Remove blockage. | |
* These functions do not apply to all models mentioned in this manual.
If troubleshooting does not resolve your problem, please contact XPOWER or other parties authorized by XPOWER for further instructions.
Technical Specification
| MODEL NUMBER | FC-100 FC-200 FC-250D FC-250AD FC-300 FC-420 | |||||
| Voltage/Frequency | 115 V~60 Hz | |||||
| Amperage 0.6 | A 1.0 A 0.9 | A 1.5 A 2.8 A | ||||
| Motor Power - | - 1/4 HP 1/3 HP | |||||
| Rated Airflow | 1100 CFM | 1300 CFM | 1560 CFM | 2100 CFM | 3600 CFM | |
| Speed Control | 4 Speeds | Variable Speeds | 4 Speeds | 5 Speeds | ||
| Timer 3 Hours | (OFF) N/A | 3 Hours (OFF) | ||||
| Additional Electrical Receptacle | N/A | Yes | N/A | |||
| Cord Length | 6 ft. / 1.8 m | 10 ft. / 3.0 m | 15 ft. / 4.5 m | |||
| Housing | PP | ABS | ||||
| Unit Dimension (L) x (W) x (H) | 16.1 x 8.9 x 14.2 in. / 41.0 x 22.5 x 36.0 cm | 17.3 x 8.9 x 15.4 in. / 44.0 x 22.5 x 39.0 cm | 18.6 x 9.4 x 19.2 in. / 47.2 x 23.9 x 48.8 cm | 21.9 x 9.8 x 22.5 in. / 55.6 x 24.9 x 57.1 cm | ||
| Unit Weight | 9.7 lbs. / 4.4 kg | 10.1 lbs. / 4.6 kg | 10.8 lbs. / 4.9 kg | 13.0 lbs. / 5.9 kg | 23.4 lbs. / 10.6 kg | |
| Safety Certification | ETL / C-ETL | |||||
If your product(s) is not listed above, please visit www.xpower.com for more information.
XPOWER Limited Warranty (USA)
1 YEAR LIMITED WARRANTY
XPOWER-branded products purchased in the U.S. from authorized distributors include a 1-year limited warranty. Contact XPOWER to confirm warranty information about your product(s).
This limited warranty covers defects in materials and workmanship in your XPOWER-branded products, purchased in the U.S. ONLY. Local warranty policy (if any) in your country will cover products purchased outside the U.S.

IMPORTANT:
(1) Please finish the online warranty registration before usage. Visit www.xpower.com/service-support/warranty-registration.
(2) This Limited Warranty applies with its own timeliness. Contact XPOWER or visit www.xpower.com for more information.
Items mentioned but not limited to below are not covered by warranty:
(1) Power cord, filters or any other components considered as a “consumable parts” by XPOWER.
(2) Normal wear and tear.
(3) Problems that result, directly or indirectly, at XPOWER's sole discretion, from:
(3.1) External causes such as accident, abuse, misuse or problems with electrical power supply.
(3.2) Disassembling, servicing or modification not authorized by XPOWER.
(3.3) Usage that is not accordant with product instructions stated in Owner's Manual.
(3.4) Failure to follow the product instructions or lack of necessary maintenance stated in Owner's Manual.
Before contacting XPOWER, please try one or more of the following:
(1) Consult this Owner's Manual and follow the instructions of troubleshooting guide.
(2) Access www.xpower.com for more advice and information that could be helpful to address your problems.
If you need additional assistance from XPOWER, please:
(1) Email info@xpower.com.
(2) Call XPOWER U.S. Customer Service Department at 855-855-8868 or other numbers provided on www.xpower.com.
(3) Visit XPOWER U.S. Head Office at 668 S. 6th Ave., City of Industry, CA 91746 or the most current address provided on www.xpower.com.
Please also have your original proof of purchase and the serial number(s) of your product(s) ready when you contact XPOWER.
XPOWER Limited Warranty (USA)
If you are instructed to return the unit for service or replacement, please:
(1) Request a RMA (Return-Merchandise-Authorization) number.
(2) Use the original or an equivalent packaging, prepay shipping charges at your own expense to the address provided by XPOWER, with the RMA number on the shipping label or the packaging.
(3) Include all the original parts and components.
XPOWER will inspect, assess and advise the repairs needed and applicable cost, if any. For products under warranty, we will pay to ship the repaired or replaced product(s) to you if you use an address within the Contiguous United States. Otherwise, we will ship the product(s) to you at your own expense.

ATTENTION - LISEZ ET CONSERVEZ CE MANUEL D'UTILISATION AVANT D'UTILISER CE PRODUIT
natural_image
Line drawing of a multi-free fan with visible blades and mounting base (no text or symbols)natural_image
Line drawing of a fan with visible blades and rotating buttons (no text or symbols)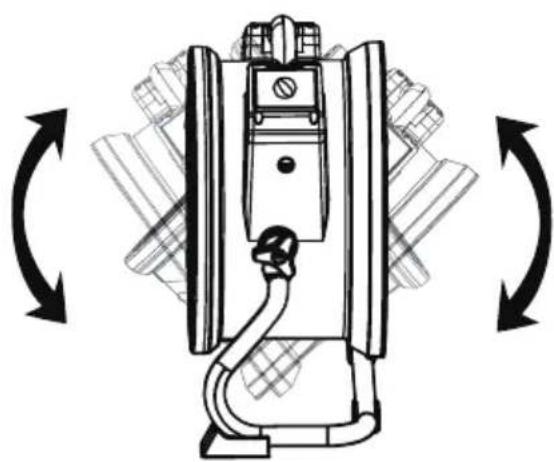
natural_image
Technical line drawing of a mechanical device with bidirectional arrows indicating rotation or assembly (no text or symbols)natural_image
Diagram of a mechanical component with multiple directional arrows radiating outward (no text or symbols)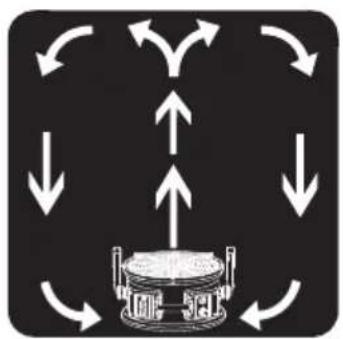
flowchart
graph TD
    A["Central Device"] --> B["Node 1"]
    A --> C["Node 2"]
    A --> D["Node 3"]
    A --> E["Node 4"]
    A --> F["Node 5"]
    A --> G["Node 6"]
    A --> H["Node 7"]
    A --> I["Node 8"]
    A --> J["Node 9"]
    A --> K["Node 10"]
    A --> L["Node 11"]
    A --> M["Node 12"]
    A --> N["Node 13"]
    A --> O["Node 14"]
    A --> P["Node 15"]
    A --> Q["Node 16"]
    A --> R["Node 17"]
    A --> S["Node 18"]
    A --> T["Node 19"]
    A --> U["Node 20"]
    A --> V["Node 21"]
    A --> W["Node 22"]
    A --> X["Node 23"]
    A --> Y["Node 24"]
    A --> Z["Node 25"]
Adjust Operation Position (Continued)
natural_image
Technical line drawing of a mechanical fan assembly (no text or symbols)Use without Rack\*
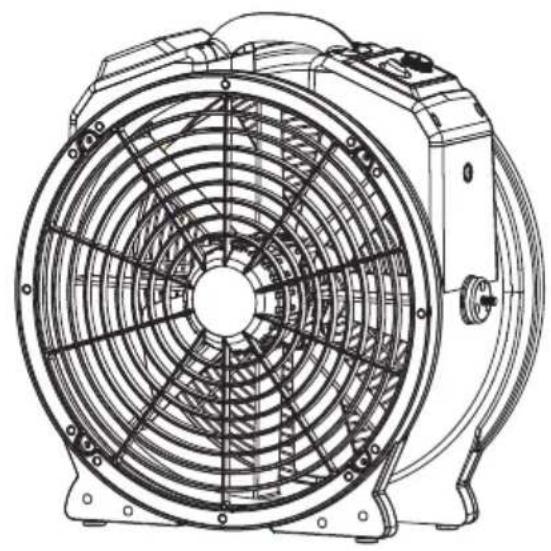
- Uninstall the rack and place the Air Circulator on a level surface.
* For model FC-420 only.
Transport
natural_image
Line drawing of a fan with internal blades and a hand holding the top handle (no text or symbols)natural_image
Line drawing of a multi-passed fan with visible blades and mounting base, showing rotational motion arrows (no text or symbols)natural_image
Line drawing of a fan with visible blades and rotating motion arrows (no text or symbols)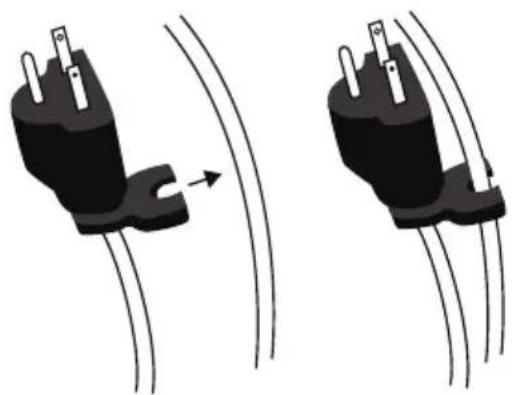
natural_image
Two black electrical plug connectors with wires, shown from different angles (no text or symbols)Organiser le cordon
natural_image
Technical line drawing of a multi-tiered mechanical assembly (no text or symbols)PROBLÈME CAUSE POSSIBLE SOLUTION
XPOWER Manufacture, INC.
668 S. 6th Ave.,
City of Industry, CA 91746 USA
www.xpower.com | 1-(855)-855-8868 | info@xpower.com
Read and save these instructions
- Air Circulator Owner's Manual
- WARNING - READ AND SAVE THIS INSTRUCTIONS BEFORE USING THIS PRODUCT.
- Items Included
- Parts Description
- Parts Description (Continued)
- Air Circulator Introduction
- Installation and Operation Guide
- Installing the Rack\*
- Switch Plate
- Four Speed Switch ( For model FC-100/FC-200/FC-300 only)
- Installation and Operation Guide (Continued)
- Switch Plate (Continued)
- Five Speed Switch (For model FC-420 only)
- Variable Speed Switch (For model FC-250D/FC-250AD only)
- Additional Electrical Receptacle (Daisy Chain)\*
- Timer Switch\*
- Adjust Operation Position
- Adjust Operation Position (Continued)
- Use without Rack\*
- Transportation
- Lift with Handle
- User Maintenance Instructions
- Fasten the Rack Handles
- Organize the Power Cord
- User Maintenance Instructions (Continued)
- Stack Multiple Units
- WARNING
- Troubleshooting Guide
- Technical Specification
- XPOWER Limited Warranty (USA)
- YEAR LIMITED WARRANTY
- IMPORTANT:
- Items mentioned but not limited to below are not covered by warranty:
- Before contacting XPOWER, please try one or more of the following:
- If you need additional assistance from XPOWER, please:
- If you are instructed to return the unit for service or replacement, please:
- ATTENTION - LISEZ ET CONSERVEZ CE MANUEL D'UTILISATION AVANT D'UTILISER CE PRODUIT
- Transport
- Organiser le cordon
Brand : XPower
Model : FC100
Category : Fan