
221044 - Juicer Hendi - Free user manual and instructions
Find the device manual for free 221044 Hendi in PDF.
| Product type | Slow juicer |
| Brand | Hendi |
| Model | 221044 |
| Dimensions (W x D x H) | 260 x 175 x 545 mm |
| Net weight | 7.2 kg |
| Power | 250 W |
| Voltage / Frequency | 220-240 V / 50 Hz |
| Rotation speed | 45 rpm |
| Protection class | Class I (mandatory grounding) |
| Bowl and strainer material | Plastic and stainless steel |
| Feeding capacity | Pieces up to 7 cm |
| Functions | On (ON), Off (O), Reverse (R) |
| Continuous operation time | Maximum 10 minutes |
| Safety | Bowl lock device, secure lid |
| Maintenance and cleaning | Manual cleaning of removable parts with hot water and mild detergent; quick cleaning by pouring water while operating |
| Spare parts and repairability | Pusher, auger, strainer, rotating basket, bowl, silicone seal; repair by qualified personnel |
| Warranty | 12 months |
| Included accessories | Pusher, juice container, pulp container, cleaning brush |
Frequently Asked Questions - 221044 Hendi
User questions about 221044 Hendi
0 question about this device. Answer the ones you know or ask your own.
Ask a new question about this device
Download the instructions for your Juicer in PDF format for free! Find your manual 221044 - Hendi and take your electronic device back in hand. On this page are published all the documents necessary for the use of your device. 221044 by Hendi.
USER MANUAL 221044 Hendi
natural_image
Modern black and white kitchen grimmer with a glass interior (no visible text or symbols)Item: 221044
You should read this user manual carefully before using the appliance
Keep this manual with the appliance.
natural_image
Simple line drawing of a house with an arrow indicating direction, labeled 'INDOOR' below (no other text or symbols)For indoor use only.
natural_image
Symbol of a trash bin crossed with no text or numbers, enclosed in a rounded square (no readable text or symbols)

CONTENTS
-
THE SLOW JUICING DIFFERENCE .... 3
-
SAFETY REGULATIONS 3
-
TECHNICAL DATA....6
-
SLOW JUICER COMPONENTS 6
-
OPERATION ....7
-
USING THE SLOW JUICER....9
-
SLOW JUICING TIPS 10
-
CLEANING 10
-
TROUBLE SHOOTING 11
-
WARRANTY....12
-
DISCARDING & ENVIRONMENT 12
Dear Customer,
Thank you for purchasing this Hendi appliance. Please read this manual carefully before connecting the appliance in order to prevent damage due to incorrect use. Read the safety regulations in particular very carefully.
1. THE SLOW JUICING DIFFERENCE
Slow Juicing allows you to consume more fruits and vegetables in one glass than you could eat at one time. There is no oxidation or separation in slow juicing, so it preserves more of the organic nutrients from the food and keeps it closer to its natural state. Fresh juice from a slow juicer is absorbed directly into the body, allowing the intake of important vitamins and nutrients from your food - your body receives everything it needs for optimum health. In addition, you can create a wide variety of juice recipes to enjoy from fruits and vegetables you may not normally enjoy eating whole.
The Slow Juicer uses a 2-step process in which the juice is extracted from the fruit or vegetable twice before it enters your glass. The auger, the main component of the unit, precisely squeezes the food without shredding or grinding it, helping you to get more juice in your glass.
The Slow Juicer produces fresh and healthy juice that's packed with more vitamins and nutrients needed for everyday living. In addition, the Slow Juicer uses less energy, saving you money and helping to lower your carbon footprint. One glass and you'll experience first-hand the difference between store-bought juice and fresh, healthy goodness.
2. SAFETY REGULATIONS
EN
- The appliance must only be used for the purpose for which it was intended and designed. The manufacturer is not liable for any damage caused by incorrect operation and improper use.
- Keep the appliance and electrical plug away from water and any other liquids. In the event that the appliance should fall into water, immediately remove plug from the socket and do not use until the appliance has been checked by a certified technician. Failure to follow these instructions could cause a risk to lives.
- Never attempt to open the casing of the appliance yourself.
- Do not insert any objects in the casing of the appliance.
- Do not touch the plug with wet or damp hands.
- Danger of electric shock! Do not attempt to repair the appliance yourself. In case of malfunctions, repairs are to be conducted by qualified personnel only.
- Never use a damaged appliance! Disconnect the appliance from the electrical outlet and contact the retailer if it is damaged.
- Warning! Do not immerse the electrical parts of the appliance in water or other
liquids. Never hold the appliance under running water.
- Regularly check the power plug and cord for any damage. If the power plug or power cord is damaged, it must be replaced by a service agent or similarly qualified persons in order to avoid danger or injury.
- Make sure the cord does not come in contact with sharp or hot objects and keep it away from open fire. To pull the plug out of the socket, always pull on the plug and not on the cord.
- Ensure that the cord (or extension cord) is positioned so that it will not cause a trip hazard.
• Always keep an eye on the appliance when in use.
- Warning! As long as the plug is in the socket the appliance is connected to the power source.
- Turn off the appliance before pulling the plug out of the socket.
- Never carry the appliance by the cord.
- Do not use any extra devices that are not supplied along with the appliance.
- Only connect the appliance to an electrical outlet with the voltage and frequency mentioned on the appliance label.
- Connect the power plug to an easily accessible electrical outlet so that in case of emergency the appliance can be unplugged immediately. To completely switch off the appliance pull the power plug out of the electrical outlet.
• Always turn the appliance off before disconnecting the plug.
- Never use accessories other than those recommended by the manufacturer. Failure to do so could pose a safety risk to the user and could damage the appliance. Only use original parts and accessories.
- This appliance is not intended for use by persons (including children) with reduced physical, sensory or mental capabilities, or lack of experience and knowledge.
- This appliance must not be used by children under any circumstances.
- Keep the appliance and its cord out of reach of children.
- Always disconnect the appliance from the mains if it is left unattended or is not in use, and before assembly, disassembly or cleaning.
- Never leave the appliance unattended during use.
- Do not use the appliance to process excessively hard or fibrous foods (e. g. rhubarb).
- Danger of burns! Do not use the appliance during the cooking process, with boiling liquids or hot fat.
- Danger of injury! Care shall be taken when handling the sharp cutting blades, emptying the cutting tools and during cleaning.
- Switch off the appliance and disconnect from the supply before changing accessories/parts or approaching parts that move in use.
- Do not continuously operate the appliance for too long to avoid overheating the motor. The continuous operation time should not exceed 10 minutes. Let the appliance cool down if the appliance housing becomes too hot. Only operate the appliance again, after it has cooled.
- Keep fingers, hair, clothing and utensils away from all moving parts.
- Dry the appliance and all accessories/parts before connecting to the power supply and prior to attaching the accessories.
- Never use your fingers or an object (e.g. spatula) to push ingredients down the feed tube while the appliance is running. Only use the pusher for this purpose.
- Never use a spoon, a spatula or similar to remove ingredients during operation. In case, you have to remove something out of the feed tube, always switch off the appliance and unplug it before you do so.
Grounding Installation
This is a class I appliance. This appliance must be grounded. In the event of an electrical short circuit, grounding reduces the risk of electric shock by providing an escape wire for the electric current. This appliance is equipped with a cord having a grounding wire with a grounding plug. The plug must be plugged into an outlet that is properly installed and grounded.
3. TECHNICAL DATA
Model 221044
Dimensions 260x175x(H)545 mm
Speed 45 RPM
Rated Power 250 W
Rated Frequency 50 Hz
Rated Voltage 220-240 V
Weight 7,2 kg
Protection class Class I
The manufacturer and dealer is not liable for any inaccuracies due to printing errors or transcription, in this manual. In line with our policy of continuous improvement products, we reserve the
right to make modification of the product, packaging and specifications contained in the Documentation without prior notice.
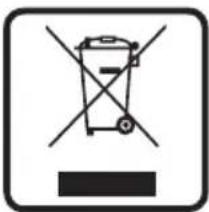
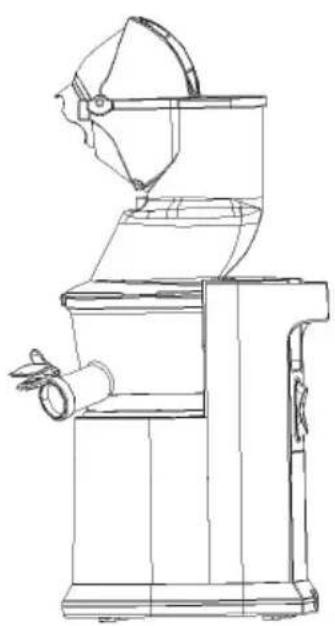
4. SLOW JUICER COMPONENTS
5. OPERATION
The Slow Juicer is virtually assembled straight out of the box. We suggest taking it apart and washing the removable parts in warm water with non-abrasive liquid detergent before the first use. Rinse thoroughly with warm water and allow to air dry. This will eliminate any traces of dust or residue from manufacturing or shipping. Never submerge the Slow Juicer motor base in water or any other liquid.
5.1 ASSEMBLY
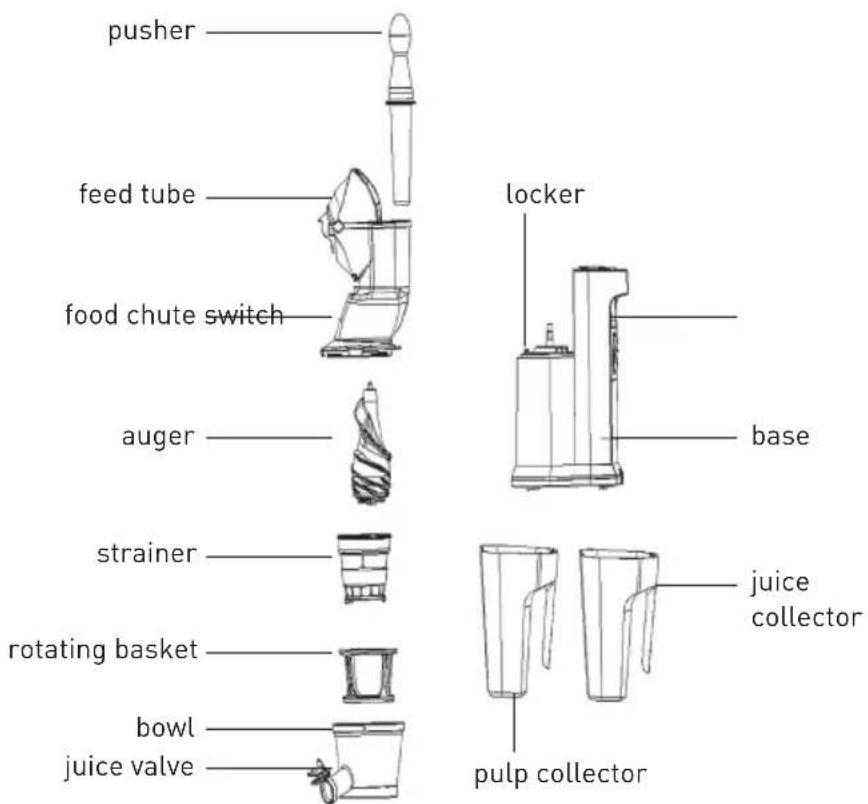
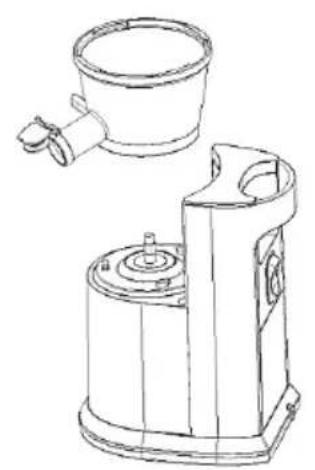
1. Assemble the bowl to the base. (Figure 1)
a. Make sure the bowl fits all the way into the shell of the base.
b. Align the arrow on the bowl with the arrow on the base, twist clockwise slightly to lock. (Note: If the bowl is not completely locked onto the base, the machine will not start.)
natural_image
Line drawing of a hand pump and two different types of industrial machines (no text or symbols)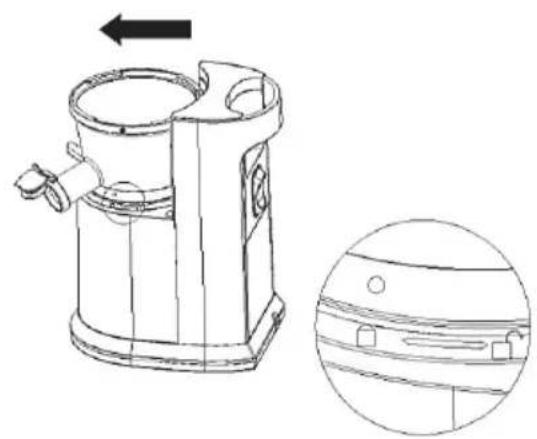
natural_image
Technical line drawing of a mechanical device with an arrow indicating direction and a close-up inset showing internal components (no text or symbols)Fig. 1
2. Assemble the Strainer and Rotating Basket to the bowl. (Figure 2)
a. Make sure the deep pit on the strainer basket lines up with the red dot on the bowl.
natural_image
Line drawing of a hand mixer with a downward arrow indicating compression (no text or symbols)
natural_image
Line drawing of a mechanical device with no visible text or symbols
natural_image
Simple line drawing of a planet with rings and a small circle, no text or symbols present.Fig. 2
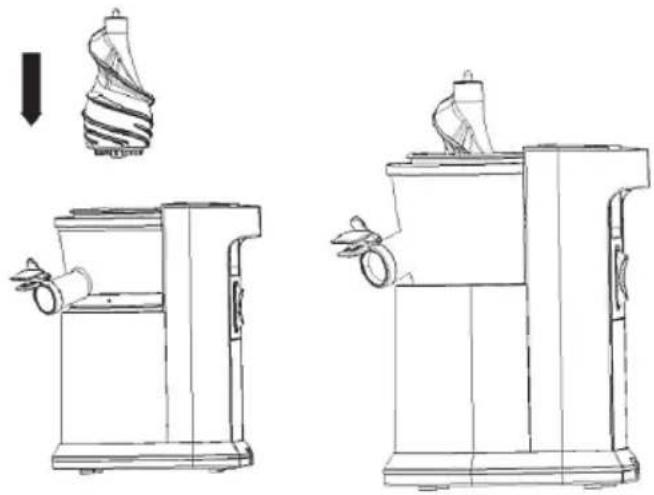
3. Place the Auger in the center of the bowl. (Figure 3)
a. Twist the Auger clockwise until it drops into place.
natural_image
Technical line drawings of a mechanical device with two views: top shows a spiral component, bottom shows a base with handles (no text or symbols)Fig. 3
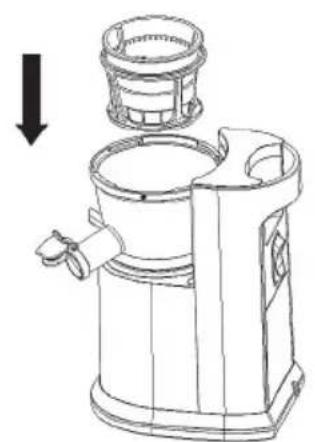
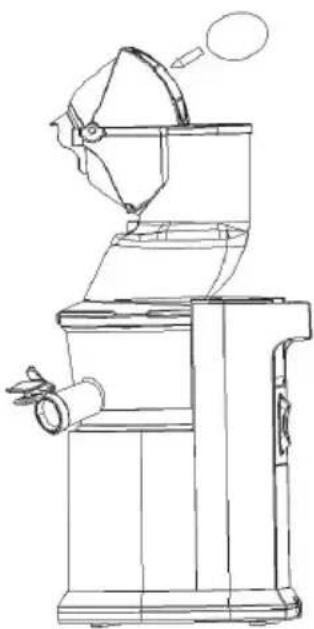
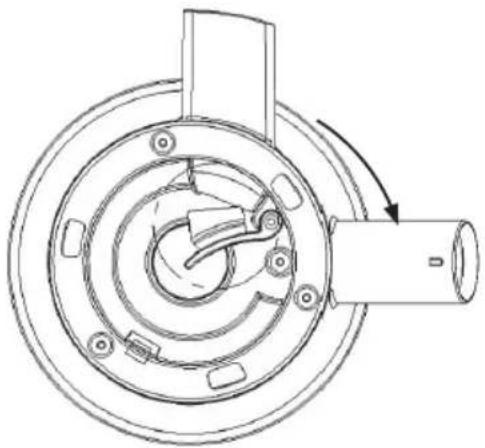
4. Place the Food Chute onto the bowl.
a. Make sure the tilt-out triangle of the Food Chute is aligned with the unlocked sign on the bowl. (Figure 4)
b. Turn the Food Chute clockwise until the lid clicks into the locked position.
(The arrow on the Food Chute will line up with word CLOSED on the motor base. (Figure 5)

natural_image
Technical line drawings of two types of industrial equipment, one with a dome-shaped component and the other with a handle (no text or symbols)Fig. 4 Fig. 5

natural_image
Line drawing of a vintage kitchen grater with handle and spout (no text or symbols)6. USING THE SLOW JUICER
- Once all parts are securely in place, connect the power cord to an approved power source.
-
Place one of the collectors under the pulp ejector, and either a glass or the other collector under the juice spout.
-
The Slow Juicer has 3 settings (Figure 6)
a. ON - this starts the motor for juicing.
b. O - this stops operation.
c. R - this moves the Auger in the opposite direction.
natural_image
Line drawing of a vintage kitchen grater with handle and spout (no text or symbols)
Fig. 6
- Before placing food in the Slow Juicer, make sure all foods have been thoroughly washed, if food has to be peeled, there is no need to wash. Also make sure to cut all foods to an appropriate size so it easily fits into the Food Chute, we recommend no more than 3-inch pieces.
*Please make sure to remove any hard seeds or pits, such as cherry or plum pits, as it will not process in the juicer and can damage the Auger. - When placing any food in the Slow Juicer, the Auger will automatically pull in the food, and begin juicing immediately. DO NOT push, force, or overstuff the unit. The Pusher provided with the Slow Juicer is only to use when food obstructs the inside of the Food Chute.
-
It is best to insert all food at a slow pace, allowing all pulp to be extracted from the fruit or vegetable completely.
-
Reminder: turn off the Slow Juicer when juicing is complete. Do not run the Slow Juicer without any food inside the unit as this could overheat the motor.
- The Slow Juicer has a unique cleaning process when switching between different types of juices. To clean, simply place one of the collectors under the juice spout and pour water though the Food Chute while the unit is on. This will rinse out most of the remaining residue from your last juicing. When the water from the slow juicer begins to run clear, that is an indication the unit is clean and ready to make a new juice recipe.
NOTE: This process is not an alternative to a complete cleaning of each disassembled part.
7. SLOW JUICING TIPS
Please read the instruction manual carefully and follow the below juicing suggestion for best results, as a slow juicer has different operating instructions than that of a traditional juicer.
- Carefully drop food into the Food Chute. The Slow Juicer Pusher provided is only for use if any food obstructs the inside of the Food Chute. Do not overstuff, shove or force the food down.
- Cut food into pieces that are no larger than 3-inches for best juicing results.
- For best results, insert foods slowly to allow pulp to be extracted, do not over stuff or rush the juicing process.
- Do not put any frozen fruit, vegetables or ice into
the unit.
- Combine leafy greens with a variety of fruit for the best results.
NOTE
At the bottom of the bowl, there is a silicone pad (Figure 7) that prevents juice from exiting through the pulp ejector. When using the Slow Juicer, make sure the silicone pad is closed in place. When cleaning the bowl, make sure to slide the pad out and run water through the pulp ejector to remove excess food debris.
natural_image
Technical line drawing of a mechanical component with concentric rings and mounting holes (no text or symbols)Fig. 7
8. CLEANING
- Switch the machine off, and disconnect from power source.
- Turn the Food Chute counterclockwise to unlock.
- Twist the bowl counterclockwise to the unlock position and lift out the entire section.
- Disassemble the upper unit in the following order:
a. Food Chute
b. Auger
c. Strainer
d. Rotating Basket
e. Bowl
- Using the included Slow Juicer Cleaning Brush, thoroughly clean each of the disassembled parts using warm soapy water. Remember to move the silicone pad under the bowl to clean the remaining debris in the pulp ejector.
Please Note:
a. Don't use an abrasive cloth or abrasive liquids.
b. Do not rinse the Slow Juicer base or submerge the base in water.
c. Dry all Slow Juicer attachments before reusing.
- Hand washing is recommended for all components of the upper unit. Please do not place any of the Slow Juicer parts in the dishwasher.
8.1 FOR TOUGH STAINS
Because there are many powerful staining properties of the carotenoids that are found in many vegetables, especially carrots, we suggest using ONE of the following cleaning procedures:
- Soak in mild soapy water.
- Equal parts warm water to cider vinegar.
- Soak in baking soda, 1/2 box, and warm water.
- 12 cup bleach in a sink full of warm water.
8.2 OTHER CLEANING TIPS
- Never use strong household cleaners, ammonia or abrasives while cleaning the Slow Juicer.
- Cleaning the Slow Juicer immediately after each use will also help to reduce stains on the bowl or upper parts.
9. TROUBLE SHOOTING
PROBLEM SOLUTION
| Machine does not operate • Check power cord and power source.• Check that all parts have been assembled correctly. | |
| Machine jams/ clogs or stops operating | • Check food chute is clear and is not blocked.• Check that hard seeds have been removed before juicing and are not stuck in the machine.• Turn machine off, and switch to reverse for 3 seconds.• Disassemble upper section and clear remaining pulp. |
| Squeaking noise when juicing | • Squeaking sound is perfectly normal. Please note to not run the juicer without any food. |
| Leaking from underneath the bowl | • Be sure the silicone pad is tightly in place after cleaning. |
| Strainer Damage | • Refer to operation instruction for proper usage and juicing tips.Remember not to over stuff food or force food in the slow juicer. |
| Too much pulp coming out | • Cut food into smaller pieces, especially fibrous foods to avoid fibers scrapping around the Auger. Insert food at a slower pace and allow all food pulp to eject the unit before adding more. |
| Bowl is stuck and will not detach from the base | • This is commonly caused by excess food in the bowl.Press reverse button 3-5 seconds. Repeat process 2-3 times.Then, push bowl upward while turning. |
| Food Chute/Lid is stuck | • Press reverse button 3-5 seconds. Repeat process 2-3 times,you can then press down on top of lid while turning. |
10. WARRANTY
Any defect affecting the functionality of the appliance which becomes apparent within one year after purchase will be repaired by free repair or replacement provided the appliance has been used and maintained in accordance with the instructions and has not been abused or misused in any way. Your statutory rights are not affected. If the appliance is claimed under warranty, state where and when it was purchased and include proof of purchase (e.g. receipt).
In line with our policy of continuous product development we reserve the right to change the product, packaging and documentation specifications without notice.
11. DISCARDING & ENVIRONMENT
At the end of the life of the appliance, please dispose of the appliance according to the regulations and guidelines applicable at the time. Throw packing materials like plastic and boxes in the appropriate containers.
EN
INHALTSVERZEICHNIS
natural_image
Technical line drawing of a mechanical device with a cylindrical top and base housing (no text or symbols)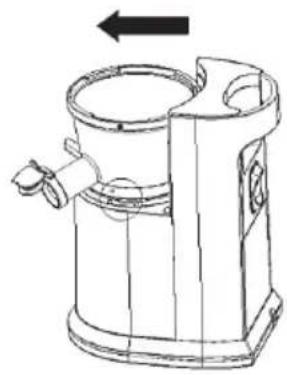
natural_image
Technical line drawing of a mechanical device with an arrow indicating direction (no text or symbols)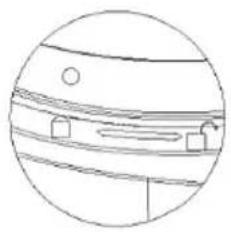
natural_image
Simple line drawing of a circular frame with horizontal bands and small rectangular objects inside (no text or symbols)Abb. 1
natural_image
Line drawing of a hand-painted manual shaver with a downward arrow indicating compression (no text or symbols)
natural_image
Line drawing of a mechanical device with handle and base (no text or symbols)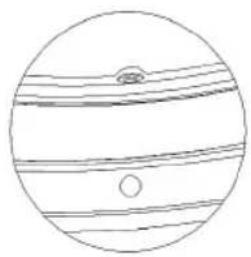
natural_image
Simple line drawing of a celestial body with horizontal lines and two marked points (no text or symbols)Abb. 2
natural_image
Technical line drawings of a mechanical device with two views: top shows a spiral-shaped component, bottom shows a base with handles and a handle (no text or symbols)Abb. 3
natural_image
Line drawing of a vintage kitchen grater with handle and spout (no text or symbols)6. BEDIENUNG DER FRUCHTSAFTPRESSE MIT NIEDRIGER DREHZAHL
natural_image
Line drawing of a vintage kitchen grater with handle and spout (no text or symbols)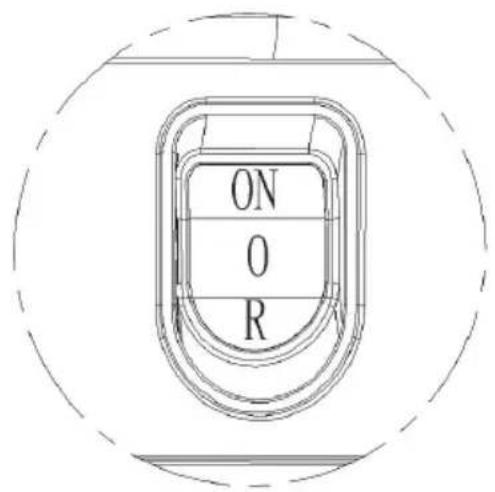
Abb. 6
natural_image
Technical line drawing of a mechanical component with rotational arrow indicating motion (no text or symbols)Abb. 7
8. REINIGUNG
natural_image
Technical line drawing of a mechanical device with a cylindrical top and side housing (no text or symbols)
natural_image
Technical line drawing of a mechanical device with an arrow indicating direction and a close-up inset showing internal components (no text or symbols)Fig. 1
natural_image
Line drawing of a hand mixer device with a downward arrow indicating compression (no text or symbols)
natural_image
Line drawing of a mechanical device with no visible text or symbols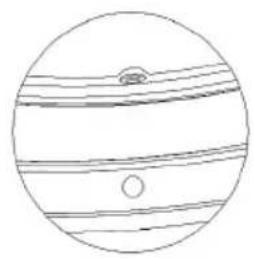
natural_image
Simple line drawing of a planet with rings and a small circle, no text or symbols present.Fig. 2
natural_image
Technical line drawings of a mechanical device with two views: top shows a spiral tool, bottom shows a base device (no text or symbols)Fig. 3
natural_image
Line drawing of a vintage kitchen grater with handle and spout (no text or symbols)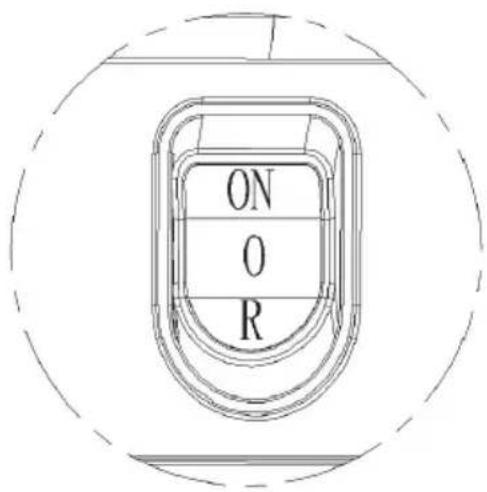
Fig. 6
natural_image
Technical line drawing of a mechanical component with concentric rings and a shaft (no text or symbols)Fig. 7
8. REINIGING
natural_image
Line drawing of a mechanical device with a cylindrical top and base, showing internal components (no text or symbols)
natural_image
Technical line drawing of a mechanical device with an arrow indicating direction and a close-up inset showing internal components (no text or symbols)Rys. 1
natural_image
Line drawing of a hand-painted manual shaver machine with a downward arrow indicating compression (no text or symbols present)
natural_image
Line drawing of a mechanical device with no visible text or symbols
natural_image
Simple line drawing of a planet with rings and a small circle, no text or symbols present.Rys. 2
natural_image
Technical line drawings of a mechanical device with two views: top shows a spiral tool, bottom shows a base device (no text or symbols)Rys. 3
natural_image
Line drawing of a vintage kitchen grater with handle and spout (no text or symbols)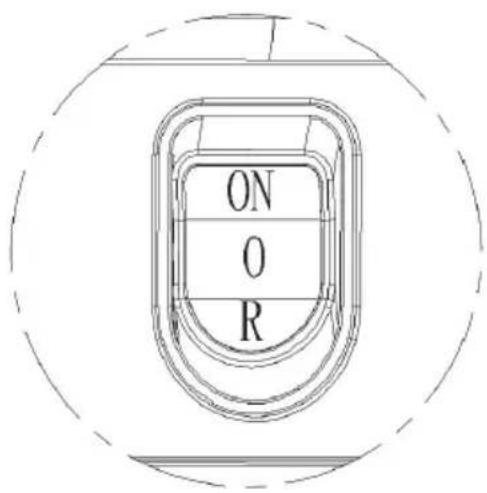
Rys. 6
natural_image
Technical line drawing of a mechanical component with rotational arrow indicating motion (no text or symbols)Rys. 7
8. CZYSZCZENIE
natural_image
Technical line drawing of a mechanical device with a cylindrical top and side housing (no text or symbols)
natural_image
Technical line drawing of a mechanical device with an arrow indicating direction and a close-up inset showing internal components (no text or symbols)Fig. 1
natural_image
Line drawing of a hand mixer with a downward arrow indicating compression (no text or symbols)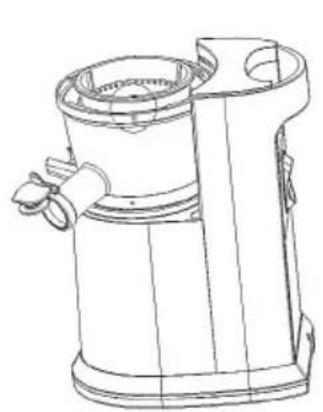
natural_image
Line drawing of a mechanical device with handle and central hub (no text or symbols)
natural_image
Simple line drawing of a planet with rings and a small circle, no text or symbols present.Fig. 2
natural_image
Technical line drawings of a manual kitchen tool, showing front and side views with no text or symbolsFig. 3
natural_image
Line drawing of a vintage kitchen grater with handle and spout (no text or symbols)
Fig. 6
natural_image
Technical line drawing of a mechanical component with concentric rings and a shaft (no text or symbols)Fig. 7
8. NETTOYAGE
natural_image
Technical line drawing of a mechanical device with a cylindrical top and side housing (no text or symbols)
natural_image
Technical line drawing of a mechanical device with an arrow indicating direction and a close-up inset showing internal components (no text or symbols)Fig. 1
natural_image
Line drawing of a hand mixer with a downward arrow indicating compression (no text or symbols)
natural_image
Line drawing of a mechanical device with handle and central hub (no text or symbols)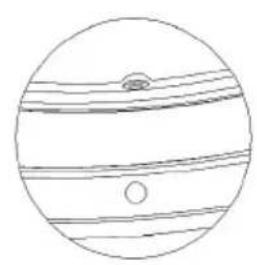
natural_image
Simple line drawing of a planet with rings and a small circle, no text or symbols present.Fig. 2
natural_image
Technical line drawings of a mechanical device with two views: top shows a spiral tool, bottom shows a base device (no text or symbols)Fig. 3
natural_image
Line drawing of a vintage kitchen grater with handle and spout (no text or symbols)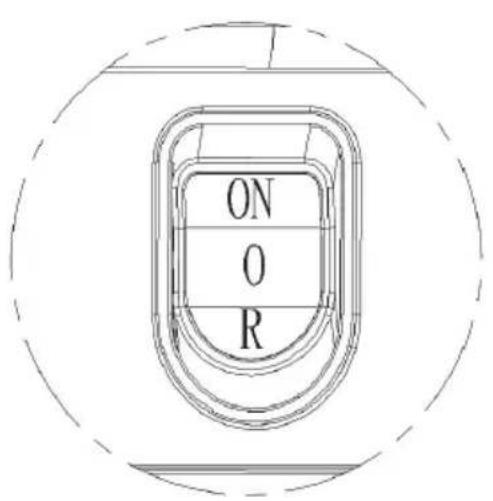
Fig. 6
natural_image
Technical line drawing of a mechanical component with rotational arrow indicating motion (no text or symbols)Fig. 7
8. PULIZIA
natural_image
Technical line drawing of a mechanical device with a cylindrical top and side housing (no text or symbols)
natural_image
Technical line drawing of a mechanical device with an arrow indicating direction and a close-up inset showing internal components (no text or symbols)Fig. 1
natural_image
Line drawing of a hand mixer device with a downward arrow indicating compression (no text or symbols)
natural_image
Technical line drawing of a mechanical device with no visible text or symbols
natural_image
Simple line drawing of a planet with rings and a small circle, no text or symbols present.Fig. 2
natural_image
Technical line drawings of a mechanical device with two views: top shows a spiral tool, bottom shows a base device (no text or symbols)Fig. 3
4. Aşezati jgheabul pe bol.
natural_image
Line drawing of a vintage kitchen grater with handle and spout (no text or symbols)
Fig. 6
natural_image
Technical line drawing of a mechanical component with concentric rings and mounting holes (no text or symbols)Fig. 7
8. CURĂȚARE
natural_image
Technical line drawing of a mechanical device with cylindrical and rectangular components (no text or symbols)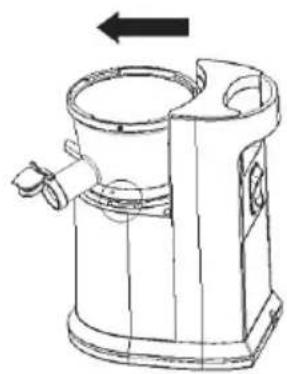
natural_image
Technical line drawing of a mechanical device with an arrow indicating direction (no text or symbols)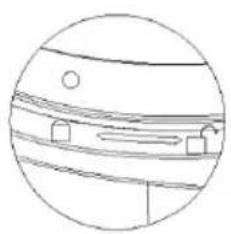
natural_image
Simple line drawing of a circular object with horizontal bands and small circular elements (no text or symbols)Рис. 1
natural_image
Line drawing of a hand mixer with a downward arrow indicating compression (no text or symbols)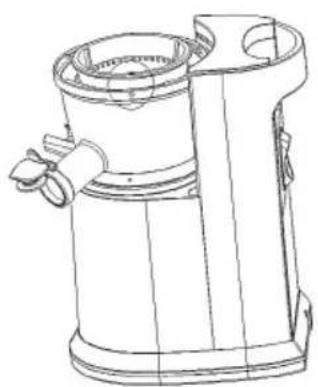
natural_image
Line drawing of a mechanical device with no visible text or symbols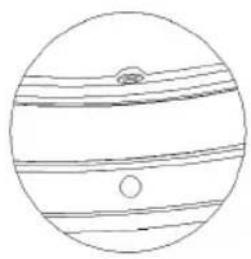
natural_image
Simple line drawing of a celestial body with two marked points (no text or symbols)Рис. 2
natural_image
Technical line drawings of two mechanical devices with no visible text or symbolsРис. 3
natural_image
Technical line drawings of two types of industrial filterers or pumps (no text or symbols present)Рис. 4 Рис. 5
natural_image
Line drawing of a vintage kitchen grater with handle and spout (no text or symbols)natural_image
Line drawing of a vintage manual bread maker with handle and spout (no text or symbols)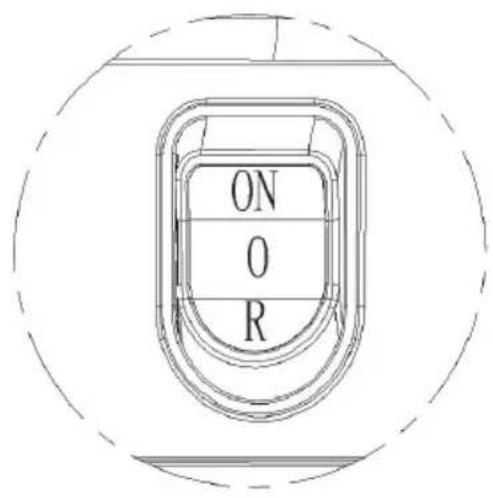
Рис. 6
natural_image
Technical line drawing of a mechanical component with concentric rings and a shaft (no text or symbols)Рис. 7
RU
8. ЧИСТКА
62-023 Gądki, Poland
Tel: +48 61 6587000
Fax: +48 61 6587001
Email: info@hendi.pl
Hendi Food Service Equipment GmbH
Hendi Food Service Equipment Romania S.R.L.
1208, 12/F Exchange Tower
33 Wang Chiu Road, Kowloon Bay, Hong Kong
Tel: +852 2154 2618
Email: info-hk@hendi.eu
Find Hendi on internet:
www.hendi.eu
www.facebook.com/HendiFoodServiceEquipment
www.linkedin.com/company/hendi-food-service-equipment-b.v.
www.youtube.com/HendiEquipment
- Changes, printing and typesetting errors reserved.
- Änderungen und Druckfehler vorbehalten.
- Wijzigingen en drukfouten voorbehouden.
-
Producent zastrzega sobie prawo do zmian oraz błędów drukarskich w instrukcji.
-
Variations et fautes d'impression réservés.
- Errori di cambiamenti, di stampa e di impaginazione riservati.
- Drepturi rezervate cu privire la modificări și greșeli de imprimare.
- Изменения, печати и верстки ошибки защищены.


- CONTENTS
- THE SLOW JUICING DIFFERENCE
- SAFETY REGULATIONS
- Grounding Installation
- TECHNICAL DATA
- SLOW JUICER COMPONENTS
- OPERATION
- ASSEMBLY
- Assemble the bowl to the base. (Figure 1)
- Assemble the Strainer and Rotating Basket to the bowl. (Figure 2)
- Place the Auger in the center of the bowl. (Figure 3)
- Place the Food Chute onto the bowl.
- USING THE SLOW JUICER
- SLOW JUICING TIPS
- NOTE
- CLEANING
- Please Note:
- FOR TOUGH STAINS
- OTHER CLEANING TIPS
- TROUBLE SHOOTING
- WARRANTY
- DISCARDING & ENVIRONMENT
- INHALTSVERZEICHNIS
- BEDIENUNG DER FRUCHTSAFTPRESSE MIT NIEDRIGER DREHZAHL
- REINIGUNG
- REINIGING
- CZYSZCZENIE
- NETTOYAGE
- PULIZIA
- Aşezati jgheabul pe bol.
- CURĂȚARE
- ЧИСТКА
- Hendi Food Service Equipment GmbH
- Hendi Food Service Equipment Romania S.R.L.
- Find Hendi on internet:
Brand : Hendi
Model : 221044
Category : Juicer