Drum Block 420 - Karaoke system N-Gear - Free user manual and instructions
Find the device manual for free Drum Block 420 N-Gear in PDF.
| Product type | Karaoke system |
| Brand | N-Gear |
| Model | Drum Block 420 |
| Dimensions | 183 x 183 x 205 mm |
| Net weight | 1400 g |
| Power supply | Li-ion battery 1500 mAh, recharge via MicroUSB 5V 1A |
| Peak power (PMPO) | 30 W |
| RMS power | 3 W |
| Frequency response | 60 Hz - 18 kHz |
| Signal-to-noise ratio | ≥ 72 dB |
| Bluetooth version | 5.1 |
| Main functions | Bluetooth, AUX, drum pads, wired microphone, USB MP3, MicroSD MP3 (up to 64 GB) |
| Charging time | Approximately 3 hours |
| Battery life | Up to 6 hours (low volume), 3 hours (50% volume), 2 hours (max volume) |
| Maintenance and cleaning | Clean with a dry cloth. Do not use water or chemicals. |
| Safety | Do not open the device. Avoid water and heat sources. Unplug during thunderstorms. |
| Spare parts and repairability | Included accessories (microphone, cables). No user-serviceable parts. Contact customer service. |
| General information | Made in China. Distributed by N-Gear. Compliant with directive 2014/53/EU. |
Frequently Asked Questions - Drum Block 420 N-Gear
User questions about Drum Block 420 N-Gear
0 question about this device. Answer the ones you know or ask your own.
Ask a new question about this device
Download the instructions for your Karaoke system in PDF format for free! Find your manual Drum Block 420 - N-Gear and take your electronic device back in hand. On this page are published all the documents necessary for the use of your device. Drum Block 420 by N-Gear.
USER MANUAL Drum Block 420 N-Gear
natural_image
Abstract black and white geometric logo with a lightning bolt inside a circle (no text or symbols)N-GEAR®
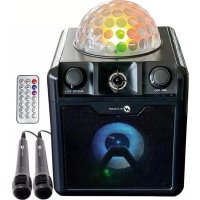
N-Gear Drum Block 420
natural_image
Black N-GEAR audio amplifier with blue speaker and wooden chopsticks nearby (no text or symbols visible on main body)User Manual - Manuel d'utilisation - Handleiding
Benutzerhandbuch - Manual de usuario -Manuale utente
English
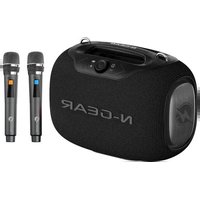
What's in the box
1 x N-Gear Drumblock 420
2 x N-Gear Drumsticks
1 x Wired Microphone
1 x AUX Cable
1 x USB Cable
This product meets the essential requirements of Directive 2014/53/EU.
https:www.n-gear.eu/doc
PLEASE READ THIS USER MANUAL COMPLETELY BEFORE OPERATING THIS UNIT AND RETAIN BOOKLET FOR FUTURE REFERENCE.
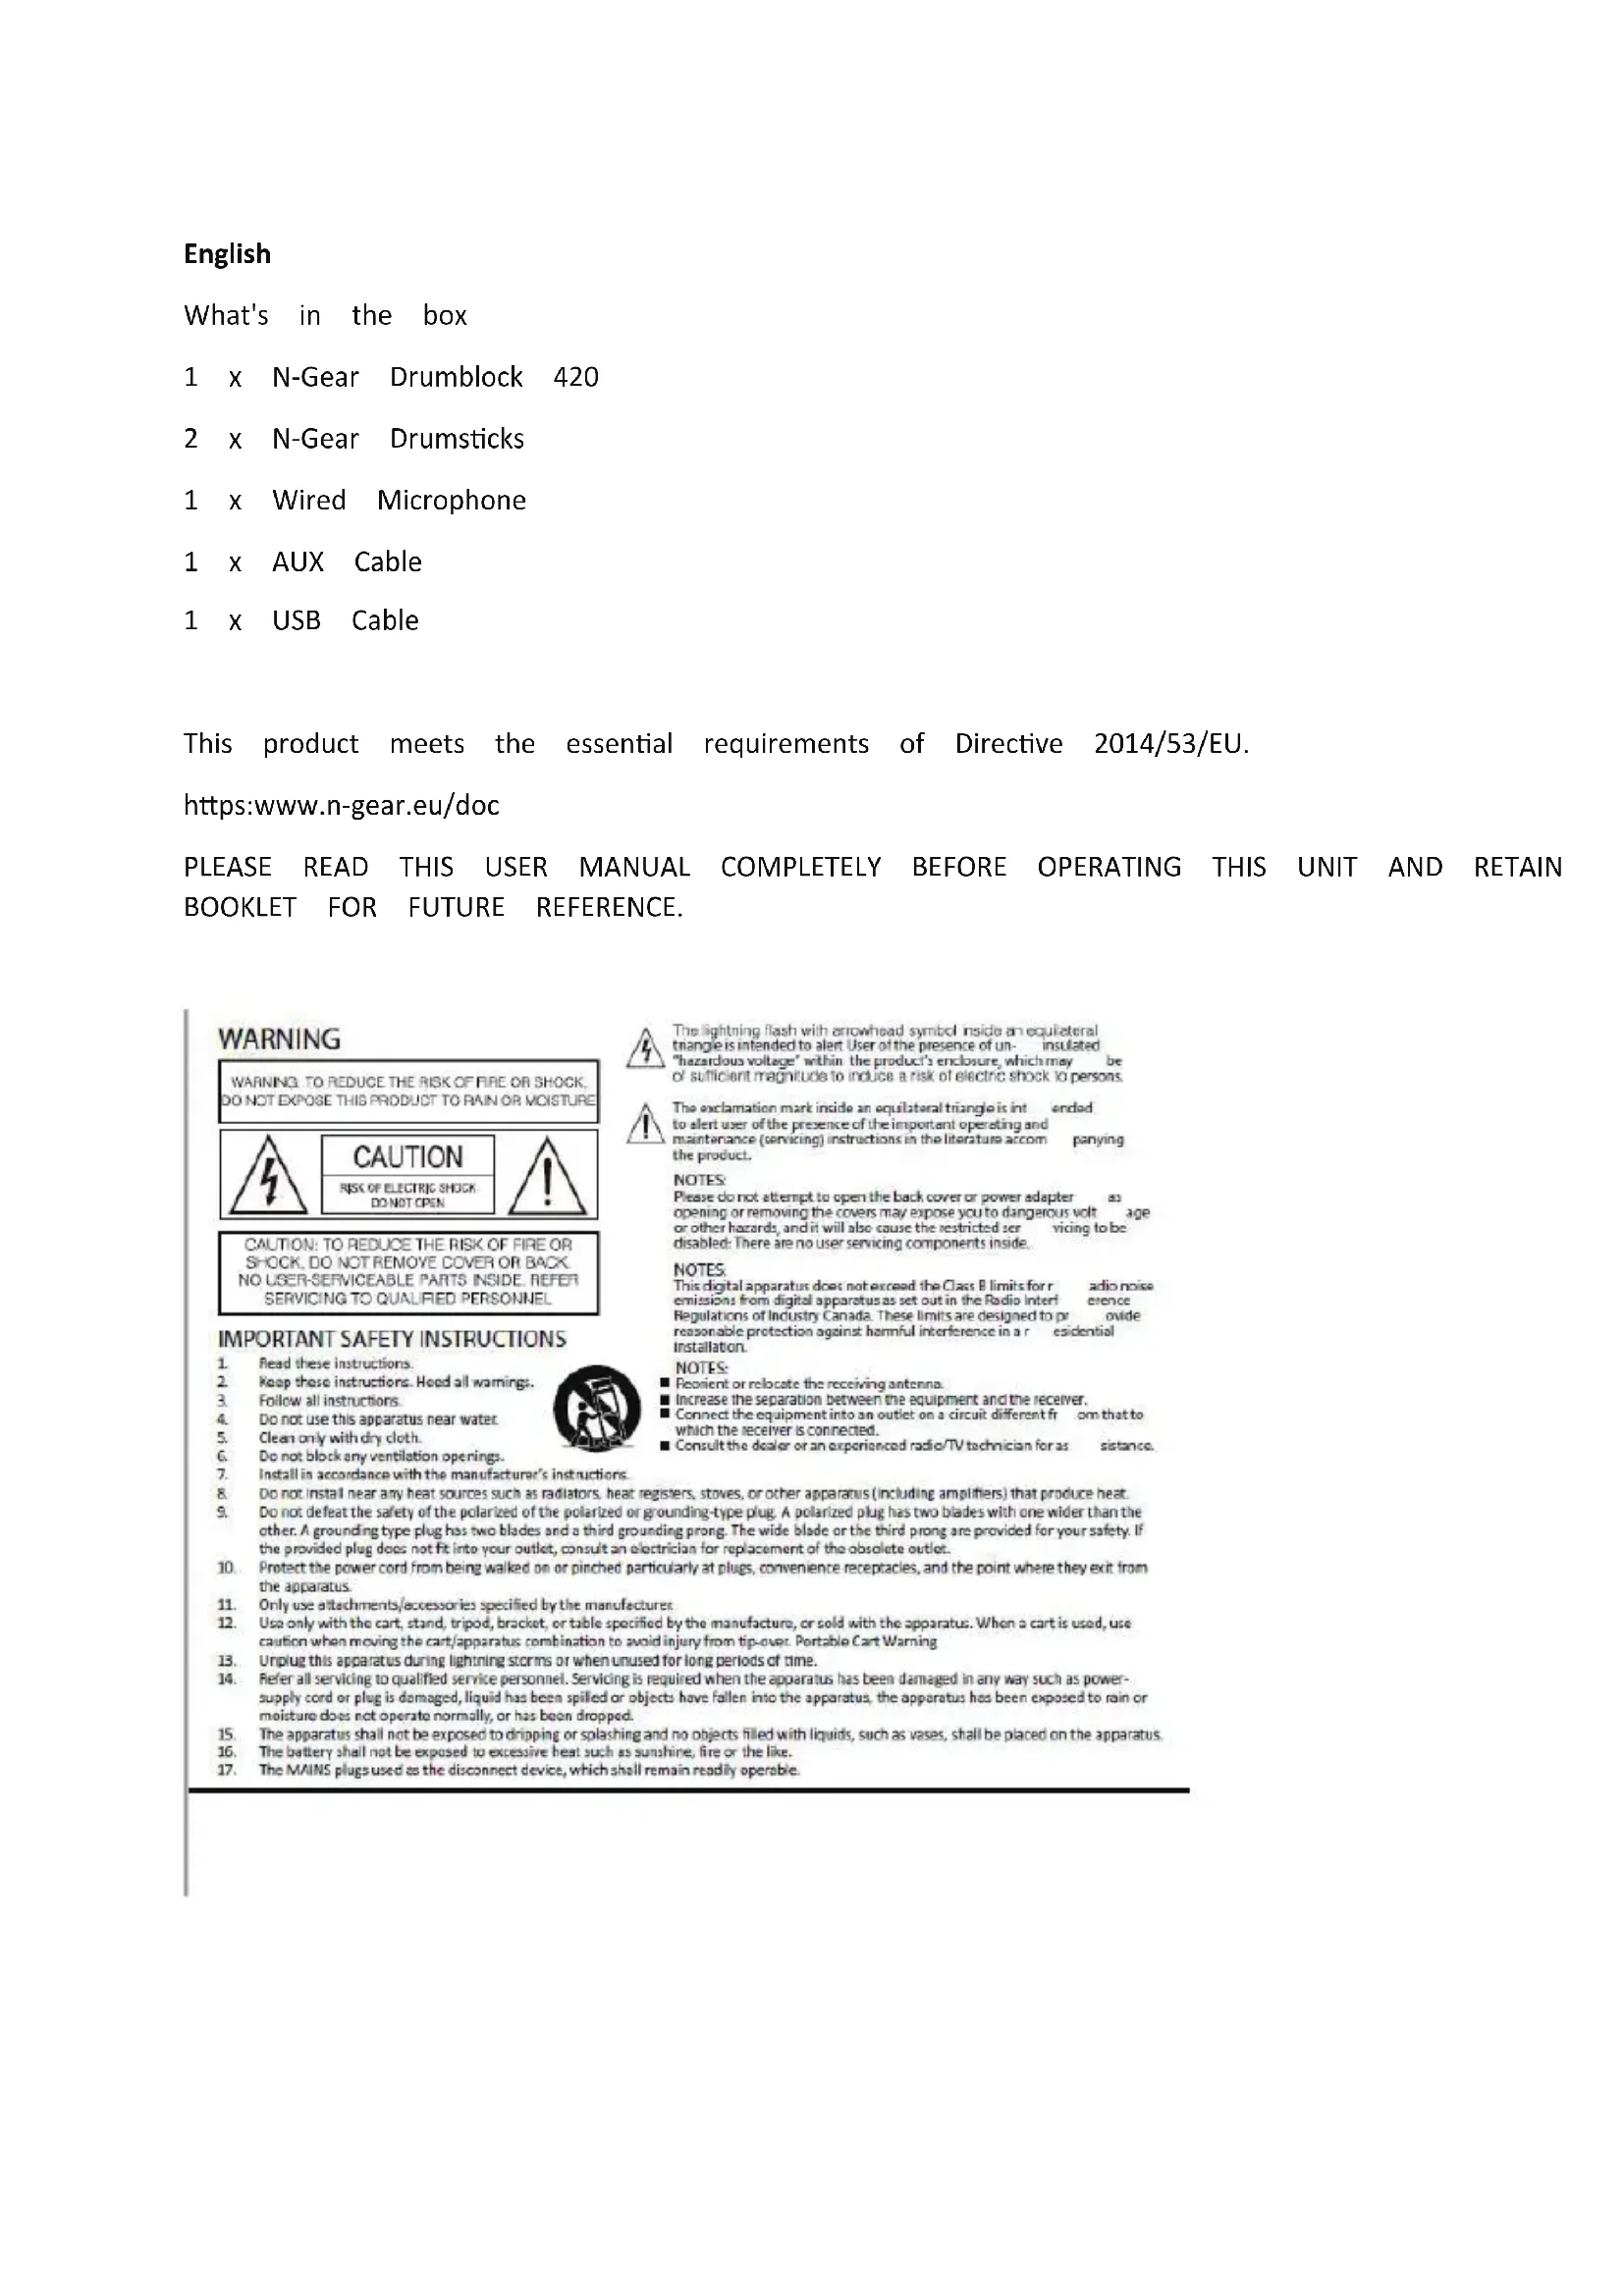
WARNING
WARNING TO REDUCE THE RISK OF FIRE OR SHOCK, DO NOT EXPOSE THIS PRODUCT TO RAIN OR MOISTURE

CAUTION
RISK OF ELECTRIC SHOCK DO NOT OPEN

CAUTION: TO REDUCE THE RISK OF FIRE OR SHOCK, DO NOT REMOVE COVER OR BACK. NO USER-SERVICEABLE PARTS INSIDE. REFER SERVICING TO QUALIFIED PERSONNEL
IMPORTANT SAFETY INSTRUCTIONS
-
Read these instructions.
-
Keep these instructions. Heed all warnings.
-
Follow all instructions.
-
Do not use this apparatus near water.
-
Clean only with dry cloth.
-
Do not block any ventilation openings.
-
Install in accordance with the manufacturer's instructions.
-
Do not install near any heat sources such as radiators, heat registers, stoves, or other apparatus (including amplifiers) that produce heat.
-
Do not defeat the safety of the polarized of the polarized or grounding-type plug. A polarized plug has two blades with one wider than the other. A grounding type plug has two blades and a third grounding prong. The wide blade or the third prong are provided for your safety. If the provided plug does not fit into your outlet, consult an electrician for replacement of the obsolete outlet.
-
Protect the power cord from being walked on or pinched particularly at plugs, convenience receptacles, and the point where they exit from the apparatus.
-
Only use attachments/accessories specified by the manufactures
-
Use only with the cart, stand, tripod, bracket, or table specified by the manufacture, or sold with the apparatus. When a cart is used, use caution when moving the cart/apparatus combination to avoid injury from tip-over. Portable Cart Warning
-
Unplug this apparatus during lightning storms or when unused for long periods of time.
-
Refer all servicing to qualified service personnel. Servicing is required when the apparatus has been damaged in any way such as power-supply cord or plug is damaged, liquid has been spilled or objects have fallen into the apparatus, the apparatus has been exposed to rain or moisture does not operate normally, or has been dropped.
-
The apparatus shall not be exposed to dripping or splashing and no objects filled with liquids, such as vases, shall be placed on the apparatus.
-
The battery shall not be exposed to excessive heat such as sunshine, fire or the like.
-
The MAINS plugs used as the disconnect device, which shall remain readily operable.

The lightning flash with arrowhead symbol inside an equilateral triangle is intended to alert User of the presence of un- insulated "hazardous voltage" within the product's enclosure, which may be of sufficient magnitude to induce a risk of electric shock to persons.

The exclamation mark inside an equilateral triangle is intended to alert user of the presence of the important operating and maintenance (servicing) instructions in the literature accom panying the product.
NOTES:
Please do not attempt to open the back cover or power adapter as opening or removing the covers may expose you to dangerous voltage or other hazards, and it will also cause the restricted servicing to be disabled: There are no user servicing components inside.
NOTES
This digital apparatus does not exceed the Class B limits for r radio noise emissions from digital apparatus as set out in the Radio interference Regulations of Industry Canada. These limits are designed to provide reasonable protection against harmful interference in a residential installation.
NOTES:
Reorient or relocate the receiving antenna.
Increase the separation between the equipment and the receiver.
Connect the equipment into an outlet on a circuit different from that to which the receiver is connected.
Consult the dealer or an experienced radio/TV technician for as sistance.

- Drum Machine Speaker Main Unit
- Speaker
- LED Lights
- Power On/Off Switch
- LED Light Button
- Drums On/OFF Switch
- Master Volume Control Dial
- Mic. Volume Control Dial
- LED Indicator Light
-
Aux. Input Part
-
S V I A DC Charging Port
- Mic. Input Port
- USB Charging Cable
- USB Connector
- Micro USB Connector
- Line-in Aux. Cable
- Drum Pads
A. Hihot
B. Cymbal 1
C. Cymbal 2
D. High Tom
E. Mid Tom
F. Floor Tom
G. Share
H. Kick
Getting Started
Remove the unit from the box. Remove any packaging from the unit, Place the package box and either store or dispose of safely.
Charging the Battery
The speaker is fitted with a 1500 mAh battery. It is recommended that the battery is before first use; this will take approx. 4 hours.
Connect the micro USB end of the USB charging cable into the 5 V 1 A DC charging of the speaker and the other end to a compatible USB port. Whilst charging, the LED will illuminate red. Once fully charged, the LED indicator light will switch off. Carefully, both ends of the USB charging cable and store it safely for future use.
Using the Drum Machine Speaker
Basic Functionality: Turn on the speaker using 'ON/OFF POWER'; the LED lights will illum the LED lights on by pressing 'LIGHT'; press it again fo turn the LED lights off.
Adjust the volume of the speaker using the master volume control dial. Rotate it in a direction to increase the volume; decrease the volume by rotating it in an anticlockwise
Use 'ON/OFF POWER' to turn the speaker off.
Using a Microphone (Included)
STEP 1: Insert a microphone connector into the mic. input port.
STEP 2: Adjust the volume of the microphone using the mic. volume control dial. Rota clockwise direction to increase the volume; decrease the volume by rotating it in an a direction.
Warning: When using the microphone, give the speaker a 1 meter exclusion radius; bei may cause loud feedback and could damage the speaker.
Using the Drums Pads
The speaker must be turned on before using the drum pads. To turn the drum pads DRUMS' to the 'On' position. To turn the drum pads off, slide 'ON/OFF DRUMS' to t
Modes
The speaker must be turned on before using any of the following modes.
Bluetooth Mode
STEP 1: Once the speaker has been turned on, the LED indicator light will flash blue sound to signal that the speaker is ready to be paired.
STEP 2: Search for the speaker using a Bluetooth compatible device. Select 'FE3967' to pair. Once a connection has been made, the LED indicator light will remain blue to : device is paired with a Bluetooth compatible device.
STEP 3: To unpair or remove a Bluetooth compatible device from the speaker, turn of function on the compatible device. The speaker can now be paired with a new compa
Note: Once connected, sound can be controlled using the master volume control dial of controlson the Bluetooth compatible device.
Aux. Mode
Connect one end of the line-in Aux. cable to the Aux. input port on the speaker at an MP3 player or other compatible audio source.
The speaker will automatically switch to Aux. mode once the line-in Aux. cable has be
Note: Once connected, sound can be controlled using the master volume control dial of controls on the compatible audio device. The speaker cannot be used to skip tracks d
Troubleshooting
The speaker has no power.
The speaker has run out of charge. Charge the speaker following the instructions in tl
entitled 'Charging the Battery'.
The speaker has no sound.
The volume level is set too low. The volume level is set too low. Check that the volume an audible level and adjust accordingly.
The speaker is not paired with a Bluetooth compatible device. Follow the instructions in entitled ‘Bluetooth Mode’.
The speaker is not connected to a compatible audio source. Follow the instructions in the entitled ‘Aux. Mode’.
Unable to pair a Bluetooth device with the speaker. The Bluetooth device is not compatible speaker. Check that the Bluetooth device is compatible with the speaker and that the Bluetooth function is switched on.
The charge of the speaker depletes quickly.
The volume level is set too high. Excessive use of the speaker at high volumes will drag quickly. Charge the speaker following the instructions in the section entitled 'Charging the and listen at a lower volume for better results.
The microphone is not working.
The microphone is not securely connected to the speaker. Connect the microphone to the following the instructions in the section entitled ‘Using a Microphone’.
Check that the microphone is switched on.
Specifications
Peak Power 30W
Power input MicroUSB USB 5V,1A
Peak Power PMPO 30W
RMS Power 3W
Frequency Response 60Hz-18KHz
Woofer size +impedance 4inch, 4Ω
S/N Ratio ≥72dB
Battery type Li-ion
Battery capacity 1500 mAh
Battery Playing Time (Max vol.) 2 hours
Battery Playing Time (50% vol.) 3 hours
Battery Playing Time (Low vol.) 6 hours
Battery Charging Time 3 hours
Battery weight 35gr
Bluetooth Version 5.1
Bluetooth frequency 2400-2483.5MHz
USB MP3 64GB
MicroSD/TF MP3 64GB
Dimensions: 183 x 183 x 205 mm
Net Weight 1400gr
The undersigned, Neeskens International declares that the radio equipment of the Block Di 410 type complies with the 2014/53/EU directive. The complete text is available at www.

When this crossed-out wheeled bin symbol is attached to a product it means that the covered by the European Directive 2012/19/EU. Please inform yourself about the local separation collection system for electrical and electronic products. Please act according to your local do not dispose of your old products with your normal household waste. Correct disposal of product helps to prevent potential negative consequences for the environment and human
This product complies with the requirements of the Europe
Made in China
Manufactured for N-Gear
N-Gear Office
Salland 9
1948RE Beverwijk
The Netherlands
www.n-gear.eu
FRANÇAIS
https:www.n-gear.eu/doc
VEUILLEZ LIRE ATTENTIVEMENT CE MANUEL AVANT D'UTILISER CETTE UNITÉ ET CONSERVEZ LIVRET POUR RÉFÉRENCE ULTÉRIEURE.
AVERTISSEMENT
AVERTISSEMENT: POUR RÉDUIRE LE FISQUE D'INCENDIE OU DE CHOC ÉLECTRIQUE, N'EXPOSEZ PAS CE PRODUIT À LA PLUIE OU À L'HUMIDITE

MISEEN GARDE
REVOC DE CHOC ELECTRIQUE NE PAS OUMBER

ATTENTION: POUR RÉDUIRE LE RISQUE D'INCENDIE OU D'ÉLECTROCUTION, NE RETIREZ PAS LE COUVERCLE OU L'ARRÈRE, AUCLINE PÉCE RÉPARABLE PAR L'UTILISATEUR CONTACTER UN SERVICE AU PERSONNEL QUALIFIE
INSTRUCTIONS IMPORTANTE DE SECURITE

1. Drum Machine Speaker Main Unit
2. Speaker
3. LED Lights
4. Power On/OFF Switch
5. LED Light Button
6. Drums On/Off Switch
7. Master Volume Control Dial
8. Mic. Volume Control Dial
9. LED Indicator Light
10. Aux. Input Part
11. S V I A DC Charging Port
12. Mic Input Port
13. USB Charging Cable
14. USB Connector
15. Micro USB Connector
16. Line-in Aux. Cable
17. Drum Pads
A. Hi-hot
B. Cymbal 1
C. Cymbal 2
D. High Tom
E. Mid Tom
F. Floor Tom
G. Snare
H. Kick
Commencer
https:www.n-gear.eu/doc
LEES DEZE GEBRUIKERSHANDLEIDING VOLLEDIG VOORDAT U DEZE GEBRUIKT EN HOUD DEZE HANDLEIDING VOOR TOEKOOMSTIGE NASLAG OP.
WAARSCHUWING

text_image
WIARSCHUWING:OM HET RISICO OP BRAND OF SCHOK TE VERMINDEREN, DIT PRODUCT NET BLOOTSTELLEN AAN RE GEN OF VOCH VOORZICHTI GHEID RISICO VAN ELECTRONICSCHOK NET OPEN DOWN VOORZICHTIG:ON HET RISICO OP BRAND OF SCHOKEN TE VERMINDEREN, VERWILDER DE DEKIN G OF DE ACHTERKANT NET. G INNEER DOOR GEBRUKERS ONDERHOUEN ONDERBELN, RAADLERE G SERVICE AAN GEWALIFICEERD PERSONNEL
-
Drum Machine Speaker Main Unit
-
Speaker
-
LED Lights
-
Power On/Off Switch
-
LED Light Button
-
Drums On/Off Switch
-
Master Volume Control Dial
-
Mic. Volume Control Dial
-
LED Indicator Light
-
Aux. Input Port
-
5 V I A DC Charging Part
-
Mic. Input Port
-
USB Charging Cable
-
USB Connecto
-
Micro USB Connector
-
Line-in Aux. Cable
-
Drum Pods
A. Hi-hat
B. Cymbal 1
C. Cuvinal 2
D. High Tom
E. Miel Toos
C. AND DEF
F. Floor lot
G. Share
H. Kick
Beginnen
https://www.n-gear.eu/doc
- Drum Machine Speaker Main Unit
- Speaker
- LED Lights
- Power On/Off Switch
- LED Light Button
- Drums On/OFF Switch
- Master Volume Control Dial
- Mic. Volume Control Dial
- LED Indicator Light
-
Aux. Input Port
-
S V I A DC Charging Port
- Mic Input Port
- USB Charging Cable
- USB Connector
- Micro USB Connector
- Line-in Aux. Cable
- Drum Pods
A. Hi-hat
B. Cymbal 1
C. Cymoal 2
D. High Tom
E. Mid Tom
F. Floor Tom
G. Snare
H. Kick
Loslegen
https:www.n-gear.eu/doc
POR FAVOR, LEA ESTAS INSTRUCCIONES ANTES DE UTILIZAR ESTE USO,Y CONSERVE ESTE N PARA EL FUTURO.
ADVERTENCIA
ADVERTENCIA: PARA REDUCIR EL RIESGO DE INCENDIO O DESCARGAS ELECTRICAS, NO EXPONGA ESTE PRODUCTO A LA LUMA NI A LA HUMEDAD

PRECAUCIÓN

1. Drum Machine Speaker Main Unit
2. Speaker
3. LED Lights
4. Power On/Off Switch
5. LED Light Button
6. Drums On/Off Switch
7. Master Volume Control Dial
8. Mic. Volume Control Dial
9. LED Indicator Light
10. Aux. Input Port
11. 5 V I A DC Charging Part
12. Mic. Input Port
13. USB Charging Cable
14. USB Connecto
15. Micro USB Connector
16. Line-in Aux. Cable
17. Drum Pods
A. Hi-hat
B. Cymbal 1
C. Cymbol 2
D. High Top
E. Miciel Tom
E. Floor Town
G. Slough
H. Kick
Empezando
https:www.n-gear.eu/doc
- Drum Machine Speaker Main Unit
- Speaker
- IED lights
- Power On/Off Switch
S. LED Light Button - Drums On/Off Switch
- Master Volume Control Dial
- Mic. Volume Control Dial
- LED Indicator Light
-
Aux. Input Port
-
S V I A DC Charging Port
- Mic. Input Port
- USB Charging Cable
- USB Connector
1.5. Micro USB Connector - Line-in Aux. Cable
- Drum Pods
A. Hi-hat
B. Cymbal 1
C. Cymbal 2
D. High Tom
E. Mid Tom
F. Floor Town
G. Silicone
H. Kick