
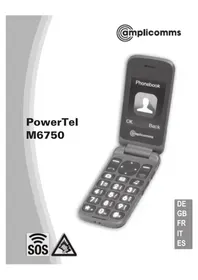
PowerTel M6350 - Mobile Phone Amplicom - Free user manual and instructions
Find the device manual for free PowerTel M6350 Amplicom in PDF.

| Product type | Mobile phone |
| Brand | Amplicom |
| Model | PowerTel M6350 |
| Network | Quad-Band 850/900/1800/1900 MHz |
| Battery | Lithium, 3.7 V, 900 mAh (type BL-4D) |
| Talk time | Approximately 5 to 6 hours |
| Standby time | Approximately 15 to 20 days |
| Dimensions | 113.2 x 54 x 13.2 mm |
| Weight | 50 g (without battery) |
| Power supply | Power adapter: input 100-240 V AC, output 5 V DC / 600 mA |
| Connector | Micro USB for charging and data transfer |
| SAR (head) | 0.581 W/kg |
| SAR (body) | 1.27 W/kg |
| Emergency function | SOS button with SMS sending and audible alarm |
| Flashlight | Dedicated button on the side |
| FM radio | Integrated, with automatic search |
| Bluetooth | Yes, enable/disable in the Extras menu |
| Media player | Image viewer, file manager |
| Expandable memory | MicroSD card (not included) |
| Warranty | 24 months (excluding battery) |
| Care and cleaning | Wipe with a dry cloth; do not use chemical products |
| Security | Automatic key lock, PIN code lock, menu lock function |
| Spare parts and repairability | Battery is removable; repairs by qualified personnel only |
Frequently Asked Questions - PowerTel M6350 Amplicom
User questions about PowerTel M6350 Amplicom
0 question about this device. Answer the ones you know or ask your own.
Ask a new question about this device
Download the instructions for your Mobile Phone in PDF format for free! Find your manual PowerTel M6350 - Amplicom and take your electronic device back in hand. On this page are published all the documents necessary for the use of your device. PowerTel M6350 by Amplicom.
USER MANUAL PowerTel M6350 Amplicom
2 USB port (Charging/data transfer)
3 M1 - short press in standby mode: Menu - Quick dial (longpress)
M2 - short press in standby mode: Open phonebook - Quick dial (longpress)
4 Up/down arrow keys
5 Call button
6 End call button / On/Off button (longpress)
7 *-key
- in standby mode: lock/unlock keyboard (longpress)
- when writing SMS: enter symbol
- when navigating: to the left
8 #-key
- in standby mode: change silent mode/normal mode (longpress)
- when writing SMS: change input method
- when navigating: to the right
9 Snap joint to open the battery cover
10 0-key - longpress to enter + or P / W (may be necessary for call-through numbers or remote accessing an answering machine)
11 Torch switch
12 SOS button
Scope of delivery
1 mobile phone
1 rechargeable battery
1 USB cable
1 desktop charger
1 user guide
Installation
Installing SIM card, memory card and battery
1 Remove the battery cover.
2 Slide the micro SD card holder to the right to unlock it and open it. Insert the micro SD card (not supplied) in a form-fitting manner (contacts downwards), fold down the card holder and slide it to the left for locking.
3 Slide the SIM card with the contacts downwards under the holder. Note the bevelled corner!
4 Insert the battery (contacts down on the right).
5 Replace the battery cover and press it all the way round.
Making a call/taking a call
Making a call
1 In standby mode, input phone number including the area code
2 Press .
3 Press to end the call.
Taking a call
1 Press .
Phonebook
Add new contact
1 In standby: press Menu (M1), select Phonebook and press OK.
2 Select Add new contact and press OK.
3 Select the location (phone or SIM) and press OK.
4 Enter name and telephone number.
5 Press Options, select Save and press Select.
6 Press to return to standby.
Note: Always add + (longpress digit key "0") in front of the country code for making international calls.

Calling from the phonebook
1 In standby: press Names (M2).
2 Use the Up/Down arrow keys to select an entry.
3
Pre

Messages
Writing and sending SMS
1 In standby: press Menu (M1), select Messaging and press OK.
2 Select Write message and press OK.
3 Enter the text.
Press the *-key to display symbols, use the Up/Down arrow keys or the *- and #-keys to select a symbol and press OK.
Press the #-key to change the input method.
4 Press Options, select Send to, enter the telephone number or select an entry from the phonebook or the calls list and press OK.
5 Press Options, select Send and press Select.
Viewing a SMS
1 In standby: press Menu (M1), select Messaging and press OK.
2 Select Inbox and press OK.
3 Select an entry and press Options -> View -> Select.
Further options:
- Reply: enter your message and send to the sender.
- Call sender: to call the sender.
- Forward: to forward message to other recipients.
- Delete: delete the message.
- Delete same number: delete all messages from this telephone number.
- Delete all: delete all messages.
- Save to phonebook: save the sender's telephone number to the phonebook.
Call history
1 In standby: press Menu (M1), select Call history and press OK.
2 Select the desired list and press OK to check the calls (missed, dialled, received, all) or
Select Delete call logs to delete all entries.
Organizer
1 In standby: press Menu (M1), select Organizer and press OK.
2 To choose from:
- Alarm: you can enter up to 5 different alarm times.
- Calculator: enter the first number (decimal point with the # key), select the calculation operation with the arrow keys and enter the next number. To display the result, press OK.
- Calendar: today is marked. Use the arrow keys and * and # keys to select a day (or use "Jump to Date") and enter an event to which you want to be reminded.
- Bluetooth: switch on or off the Bluetooth function and use the search function for pairing other Bluetooth devices.
- File manager: manage files in the phone / memory card.
- SIM toolkit: scope and offer depending on the SIM card used (provider / network operator).
Multimedia
1 In standby: press Menu (M1), select Multimedia and press OK.
2 To choose from:
- FM radio: press Options and start a channel search or enter the frequency manually etc. Adjust the volume with the *- and the #-key.
- Image viewer: view pictures stored on the phone.
Settings
1 In standby: press Menu (M1), select Settings and press OK.
2 To choose from:
- SOS Setting: settings for the emergency call function (On/Off / enter emergency numbers / settings for emergency SMS / setting for warning tone).
- Call settings: settings for Caller ID, call waiting, call divert, call barring, blacklist, auto redial, call time display, call time reminder (signal), answer mode.
- Phone settings: settings for time and date, language, preferred input method, display.
- Profiles: settings for call signaling (General / Silent / Meeting / Outdoor).
- Speed dial: assignment of keys M1 / M2 and digit keys 2 ... 9 with entries from the telephone book. Key 1 is pre-assigned with the speed dialing to the voice mailbox. To dial with speed dialing, press and hold the respective button in idle status.
- Block Function: you can hide individual menus to simplify operation.
- Key Shortcuts: you can use the up/down arrow keys to quickly access specific menus (in delivery state: Up key = Messaging / Down key = photo contacts).
- Network settings: network selection automatically or manually.
- Security settings: settings for SIM security (PIN lock / PIN change), phone security (phone lock / lock code available on request from your network operator), screen auto lock.
- Restore settings: reset the device to factory settings (lock code 1122).
Safety Information
- Prevent exposure to smoke, dust, vibration, chemicals, moisture, heat and direct sunlight. The phone is not waterproof; therefore, keep it dry.
- Only use original accessories and batteries. Never attempt to connect other products.
- If you want to connect the phone to another device, read the manual supplied with that device with regard to any detailed safety information.
- Never attempt to connect incompatible products.
- Repairs to this device may only be completed by qualified service personnel.
- All mobile communication equipment is subject to interference which may impair its performance.
- Keep the phone and accessories out of the reach of children.
- The SIM card can be removed. Caution! Small children can swallow them.
- The ringing tone is issued via the loudspeaker. Take an incoming call first and then hold the phone to your ear. This prevents any possible hearing damage.
- Only use the phone while driving or riding a transport vehicle in road traffic when using the approved handsfree equipment and appropriately positioned holders. Ensure that no safety-related functions are interfered with when operating the phone. It is essential
to observe the applicable national laws and regulations.
- Always maintain a distance of at least 15 cm to implanted heart pacemakers to prevent any possible interference. If you have had a pacemaker implanted, do not carry the phone in a breast pocket when switched on. Always hold the phone to the ear furthest away from the pacemaker during calls. Switch the phone off immediately if you notice or suspect any adverse effects.
- Do not rely on the mobile phone as a safeguard for emergencies. For a variety of technical reasons, it is not possible to guarantee a reliable connection under all circumstances.
- Ensure access to the power adapter plug is not obstructed by furniture or such.
Intended use
This mobile phone is designed for use when connected to a mobile phone network. Any other use is considered unintended use. Unauthorised modification or reconstruction is not permitted. Under no circumstances open the device or complete any repair work yourself.
Areas of use
- Do not use the phone in prohibited areas.
- Switch the phone off in the vicinity of medical equipment (e.g. in hospitals).
- Do not use the phone in petrol stations or near fuels and chemicals.
- Check with the airline whether mobile phones may be used on board.
Tips on the battery
- Only use batteries, cables and charging unit approved by the manufacturer, otherwise the battery could be damaged.
- Never throw batteries into the fire or water.
- Do not short circuit the battery
• Always leave the battery in the phone to avoid accidentally short circuiting the battery contacts. - Keep the battery contacts clean and free of dirt.
- The battery can be charged/discharged hundreds of times but its service life is limited.
- Replace the battery when the battery power has decreased noticeably.
Disposal
In order to dispose of your device, take it to a collection point provided by your local public waste authorities (e.g. recycling centre).
According to laws on the disposal of electronic and electrical devices, owners are obliged to dispose of old electronic and electrical devices in a separate waste container. The symbol indicates that the device must not be disposed of in normal domestic waste!
Batteries represent a hazard to health and the environment!

Never open, damage or swallow batteries or allow them to pollute the environment. They may contain toxic, ecologically hazardous heavy metals. You are legally obliged to dispose of power packs and batteries at the point of sale or in the corresponding containers provided at collection points by local public waste authorities. Disposal is free of charge. The symbols indicate that the batteries must not be disposed of in normal domestic waste and that they must be brought to collection points provided by local public waste authorities.
Packaging materials must be disposed of according to local regulations.
Declaration of Conformity
C€
This device fulfils the requirements stipulated in the EU directive: 2014/53/EU. Conformity with the above mentioned directive is confirmed by the CE mark on the device. To view the complete Declaration of Conformity, please refer to the free download available on our web site www.amplicomms.com
Technical data
Quad-Band 850/900/1800/1900 MHz Additional functions emergency call function Battery Li-Ion, BL-4D, 3.7 V, 900 mAh Talk time up to 5 - 6 hours Standby time up to 15 - 20 days
Dimensions 113.2 x 54 x 13.2 mm
Weight 50 g (without battery)
USB connection Micro USB, EU Standard
SAR values Head 0.581 W/kg
Body 1.27 W/kg
Guarantee
AMPLICOMMS equipment is produced and tested according to the latest production methods. The implementation of carefully chosen materials and highly developed technologies ensure trouble-free functioning and a long service life. The terms of guarantee do not apply when a device malfunction was caused by the mobile telecommunications network operator/provider. The terms of guarantee do not apply to the batteries or power packs used in the products. The period of guarantee is 24 months from the date of purchase. All deficiencies related to material or manufacturing errors within the period of guarantee will be redressed free of charge. Rights to claims under the terms of guarantee are annulled following tampering by the purchaser or third parties.
Damage caused as a result of improper handling or operation, normal wear and tear, incorrect positioning or
storage, improper connection or installation or Acts of Gods and other external influences are excluded from the terms of guarantee. In the case of complaints, we reserve the right to repair defective parts, replace them or replace the entire device.
Replaced parts or devices become our property. Rights to compensation in the case of damage are excluded where there is no evidence of intent or gross negligence by the manufacturer.
If your device shows signs of defect during the period of guarantee, please return it to the sales outlet in which you purchased the AMPLICOMMS device together with the purchase receipt. All claims under the terms of guarantee in accordance with this agreement can only be asserted at the sales outlet.
No claims under the terms of guarantee can be asserted after a period of two years from the date of purchase and hand-over of the product.
Service hotline
In the event of technical problems, please contact our service hotline under tel. 0844 800 6503 (Using a UK landline, at the time of going to print: calls cost 6p for connection charge and then 5p a minute. Mobile costs may vary.) In the case of claims under the terms of guarantee, contact your sales outlet. There is a 2 year period of guarantee.
Notice succincte
1 LED lampe de poche
6 Touche raccrocher / Touche ON/OFF (appui long)
7 Touche *
Adapter APS DIGITECH HOLDINGS LTD
Ingang: 100...240 VAC / 50/60 Hz /
150 mA
- Scope of delivery
- Installation
- Installing SIM card, memory card and battery
- Making a call/taking a call
- Making a call
- Taking a call
- Phonebook
- Add new contact
- Calling from the phonebook
- Messages
- Writing and sending SMS
- Viewing a SMS
- Call history
- Organizer
- Multimedia
- Settings
- Safety Information
- Intended use
- Areas of use
- Tips on the battery
- Disposal
- Batteries represent a hazard to health and the environment!
- Declaration of Conformity
- Technical data
- Guarantee
- Service hotline
- Notice succincte
Brand : Amplicom
Model : PowerTel M6350
Category : Mobile Phone