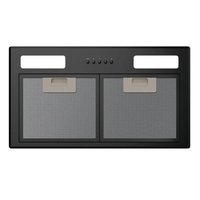
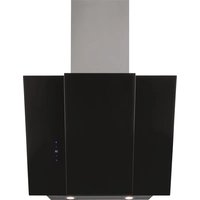
USER MANUAL HATS6CBS6BVOC HAIER
EN - Warnings and installation
The product is designed for the extraction of cooking fumes and steam and it is for domestic use only.
Strictly observe the instructions in this manual. No liability shall be accepted for any inconvenience, damage or fire caused to the product as a result of not following the instructions given in this manual.
The device may have different aesthetic features with respect to the illustrations in this handbook, however the operating, maintenance and installation instructions remain the same.
- It is important to keep all the manuals accompanying the product so that they can be consulted at all times. If sold, transferred or moved, make sure it remains with the product. • Read the instructions carefully: they contain important information on installation, operation and safety. • Check the integrity of the product prior to its installation. Otherwise, contact the dealer and do not continue with the installation.
GENERAL SAFETY
- Do not make electrical or mechanical changes on the product or on the exhaust pipes. •Before doing any cleaning or maintenance work, disconnect the product from the mains power supply by removing the plug or turning off the mains switch. •For all installation and maintenance operations, always wear work gloves. •The product can be used by children over the age of 8 and by people with reduced physical, sensory or mental capabilities or without experience or the necessary knowledge, as long as they are properly supervised or have been instructed on how to safely use the device and understand the inherent dangers. •Children must be supervised to make sure that they do not play with the product.
•Cleaning and maintenance must never be performed by children unless they are properly supervised. •The room must have sufficient ventilation when the product is used at the same time as other appliances burning gas or other fuels. •The product must be cleaned frequently both inside and out (AT LEAST ONCE A MONTH); always follow the instructions given in the maintenance manual. •Failure to comply with the rules indicated for cleaning the product and replacing/cleaning the filters may result in the risk of fire. •It is strictly forbidden to cook food on the flame under the product.• WARNING: •When the hob is on, the accessible parts of the product may become hot. •Do not connect the product to the electrical power supply until the installation is complete. •The regulations laid down by local authorities must be strictly followed with regard to the technical and safety measures to adopt for fume extraction. •The extracted air must not be conveyed through the same ducts used to extract the fumes generated by gas combustion or other types of combustion products. •Do not use or leave the product without appropriately installed lamps, as this may result in the risk of electric shock. •The product must NEVER be used without the grille correctly fitted. •The product must NEVER be used as a support surface unless expressly indicated.
- Range hoods and other cooking fume extractors may adversely affect the safe operation of appliances burning gas or other fuels (including those in other rooms) due to back flow of combustion gases. These gases can potentially result in carbon monoxide poisoning. After installation of a range hood or other cooking fume extractor, the operation of flued gas appliances should be tested by a competent person to ensure that back flow of combustion gases does not occur.
• To replace the lamp, only use the lamp indicated in the maintenance/lighting system section of this manual. • Using a naked flame may damage the filters and cause a fire hazard, and must therefore be avoided under all circumstances. • Extra care must be taken when frying to prevent the oil from overheating and catching fire. • In case of doubt, contact the authorised service centre or similar qualified personnel.
INSTALLATION SAFETY
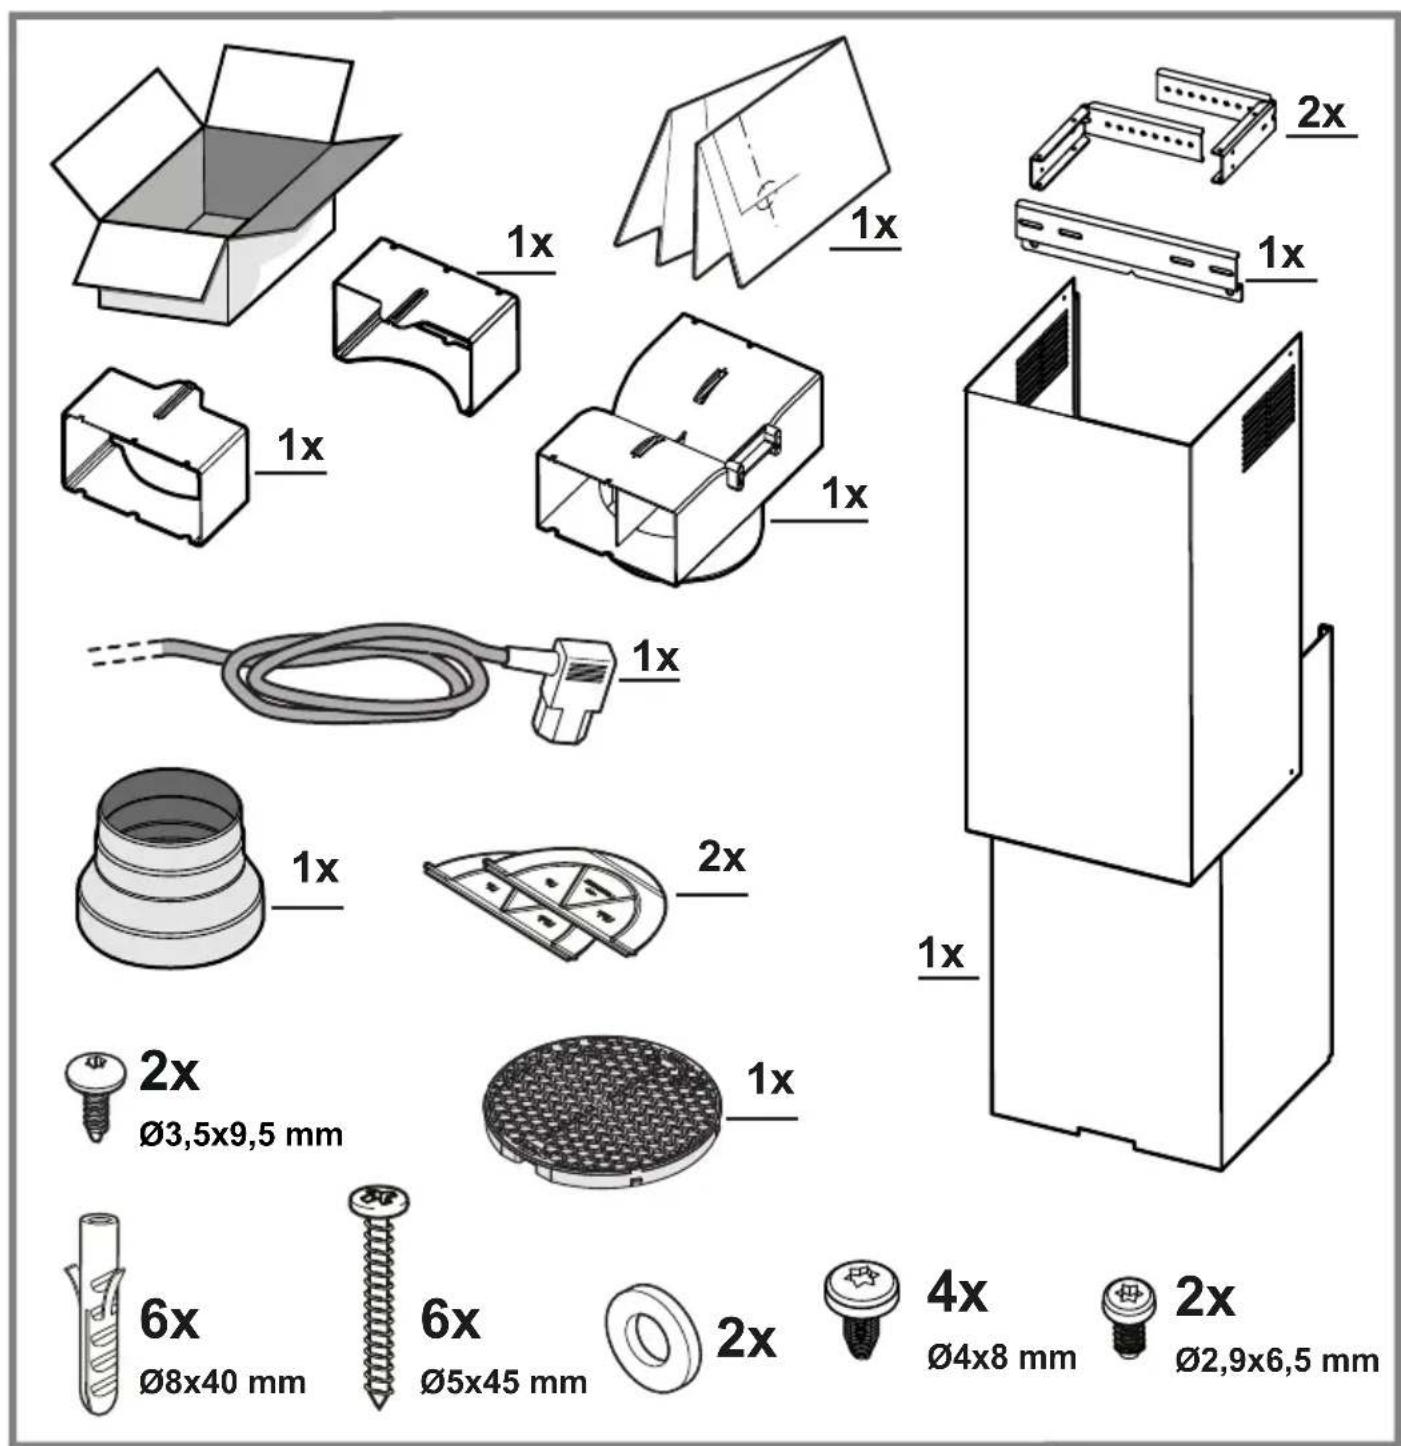
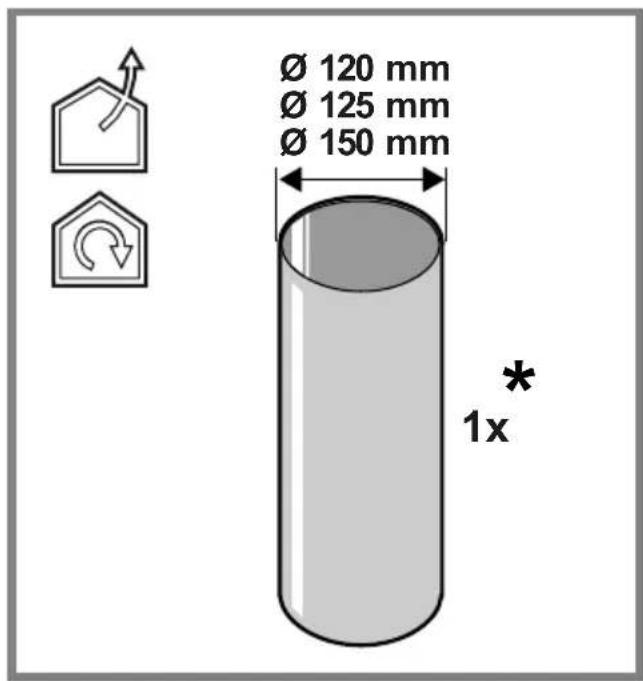
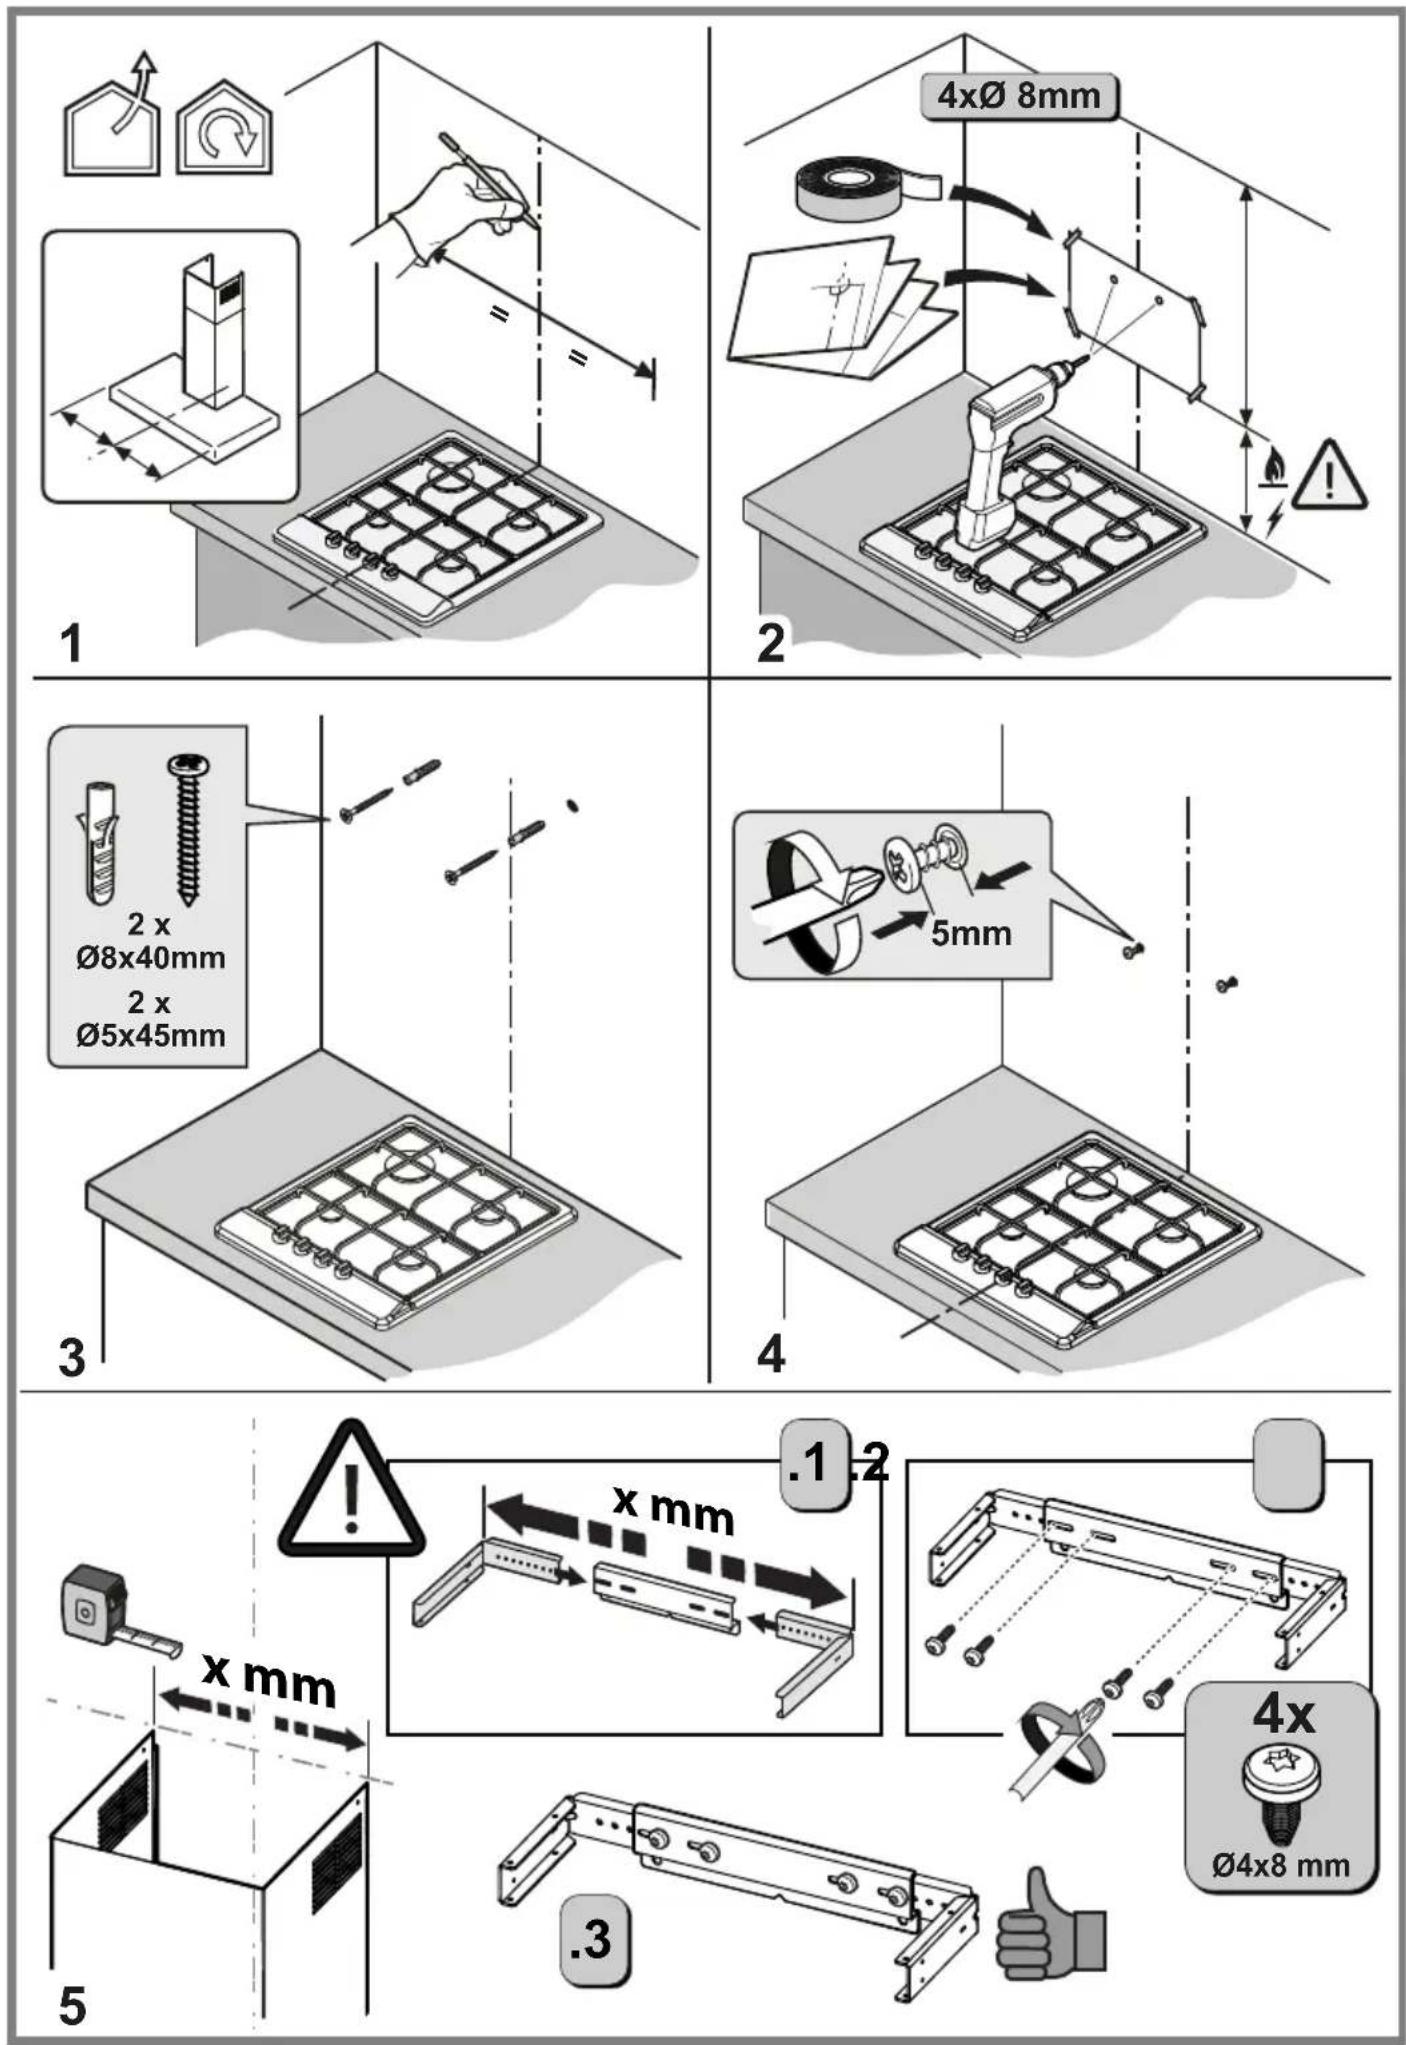
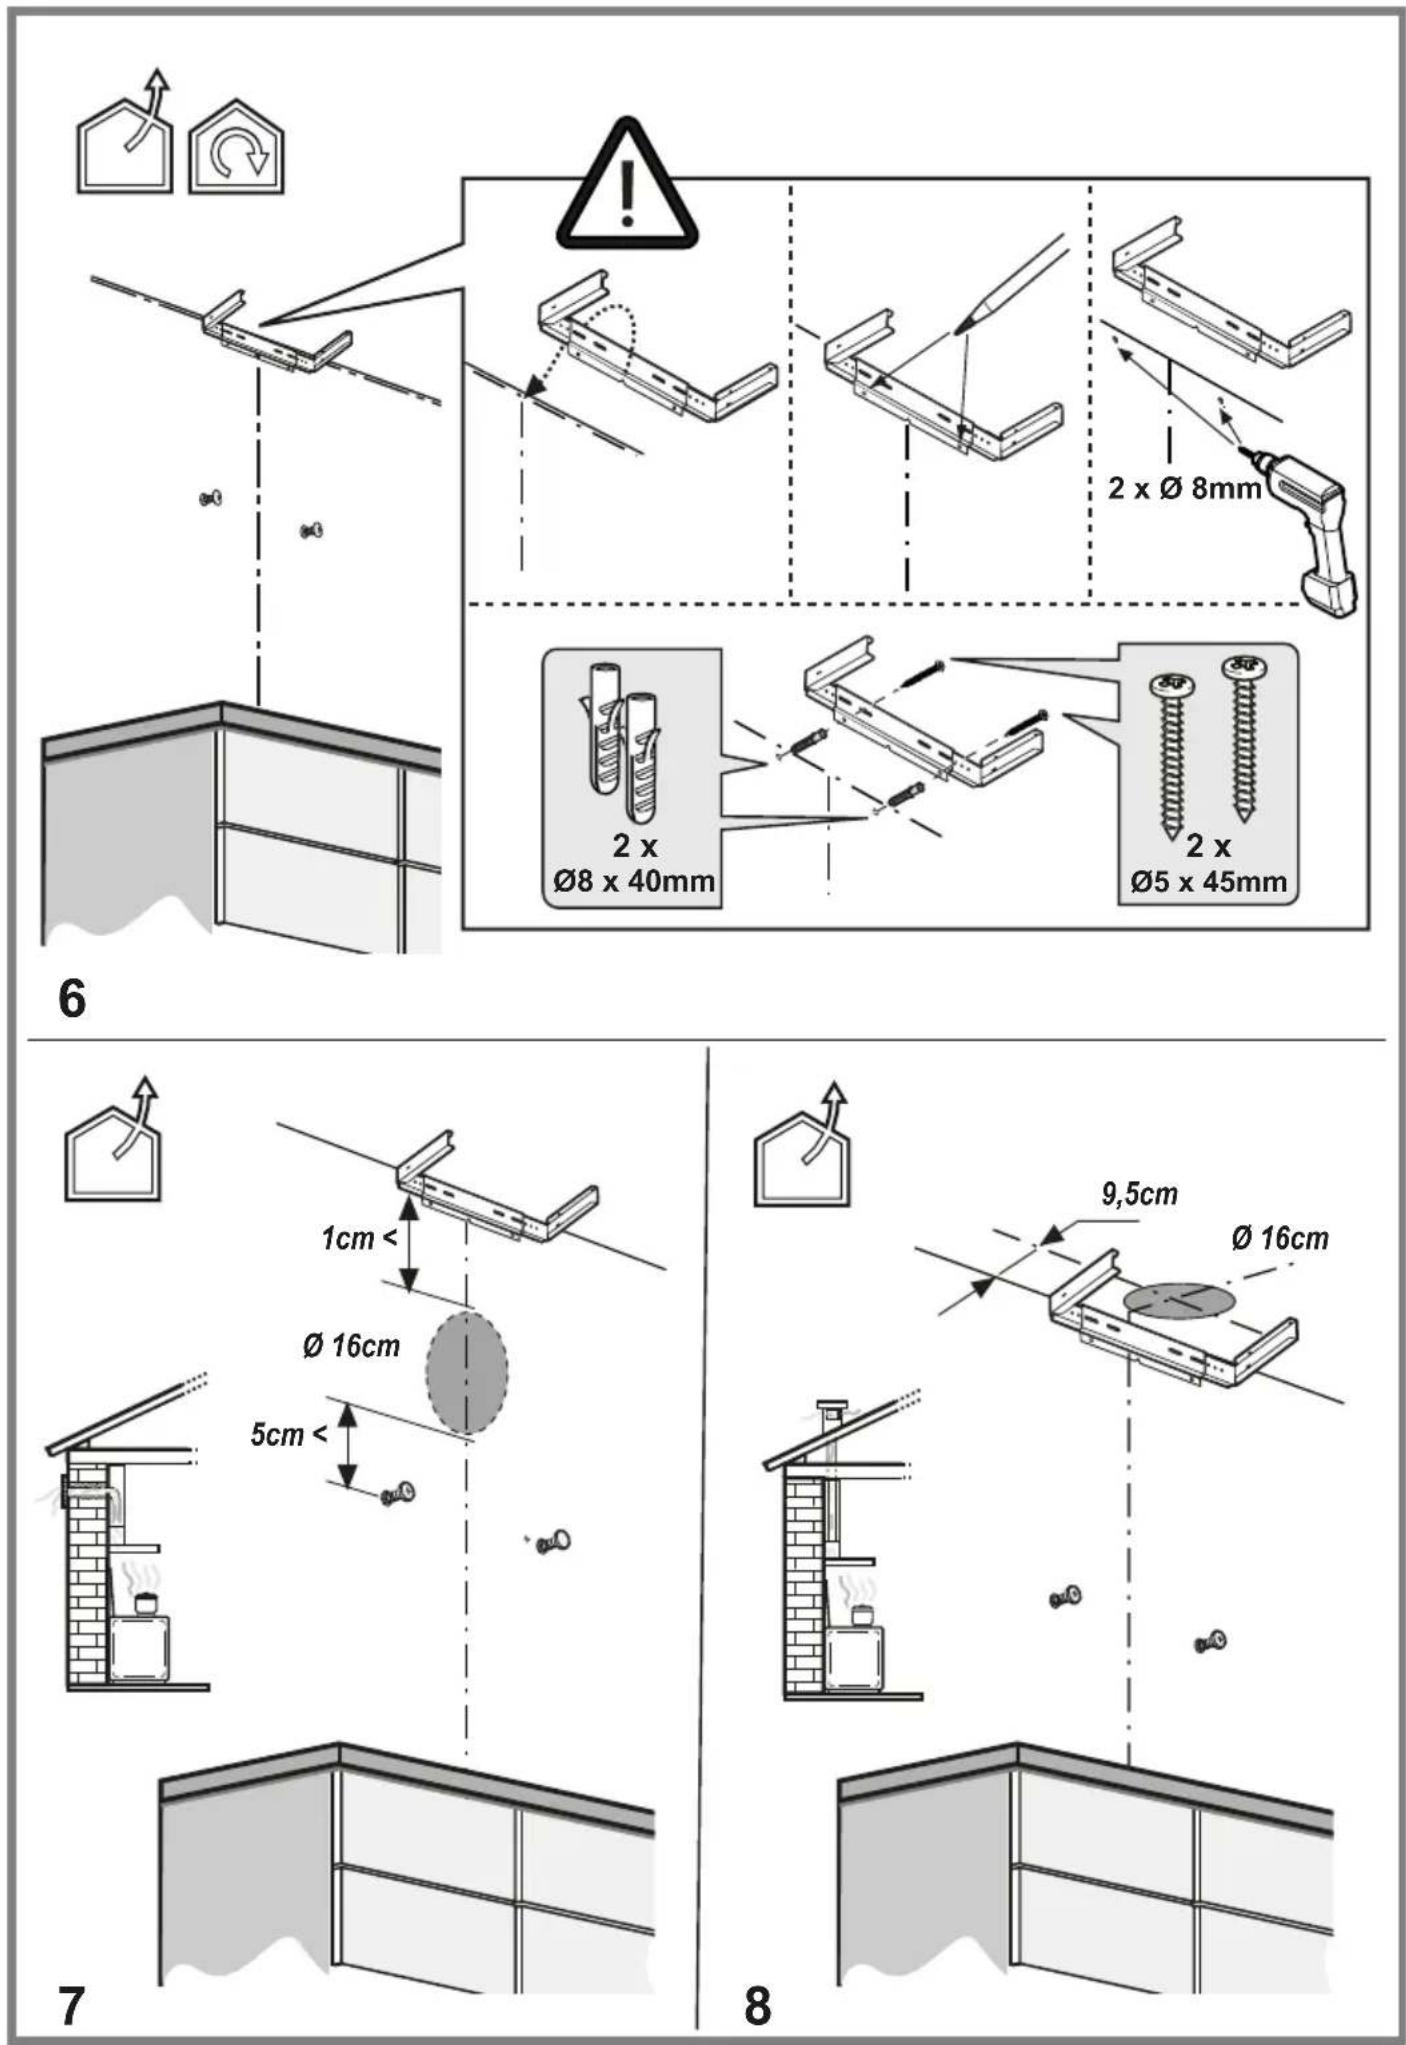
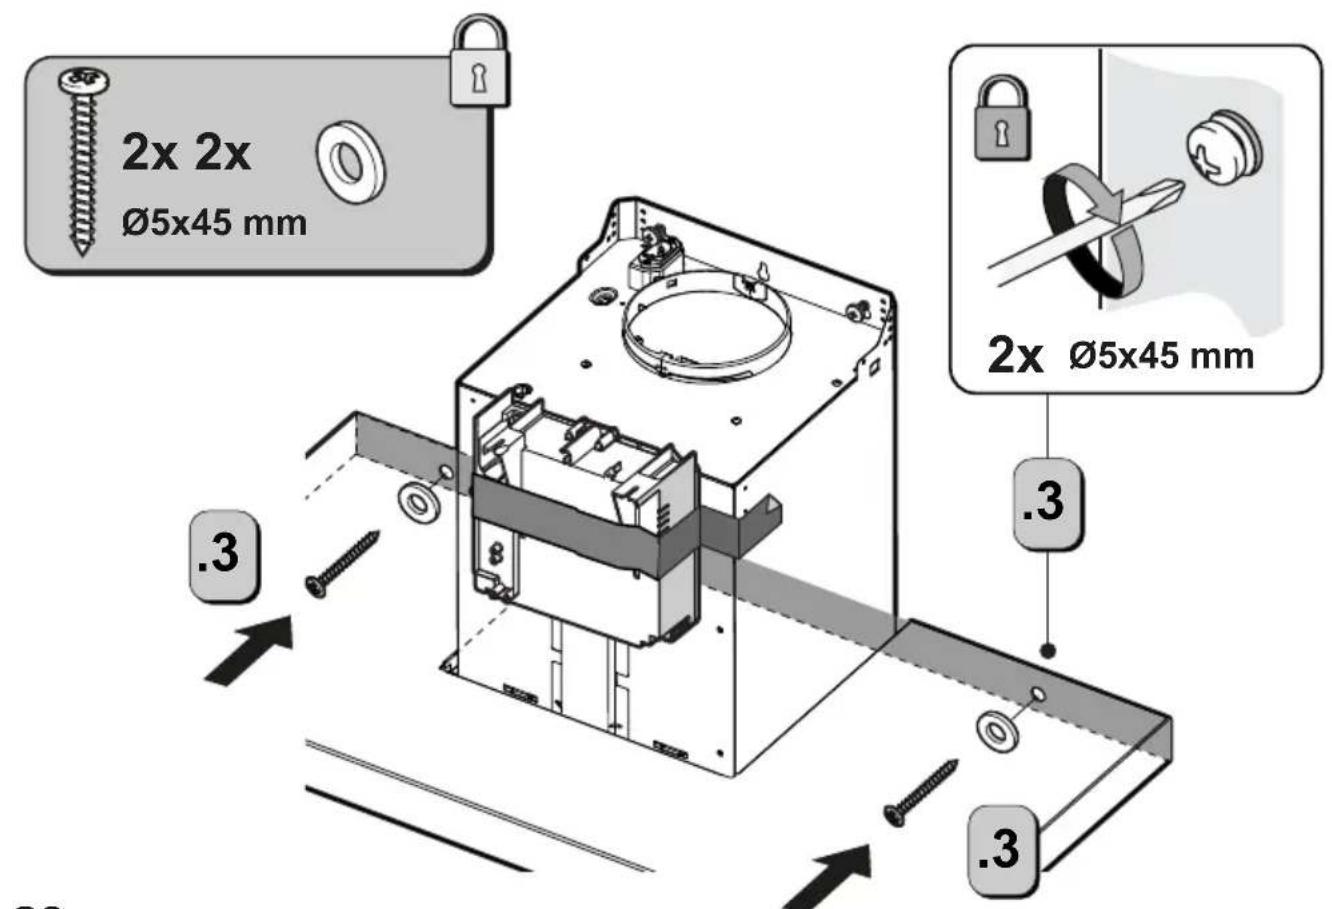
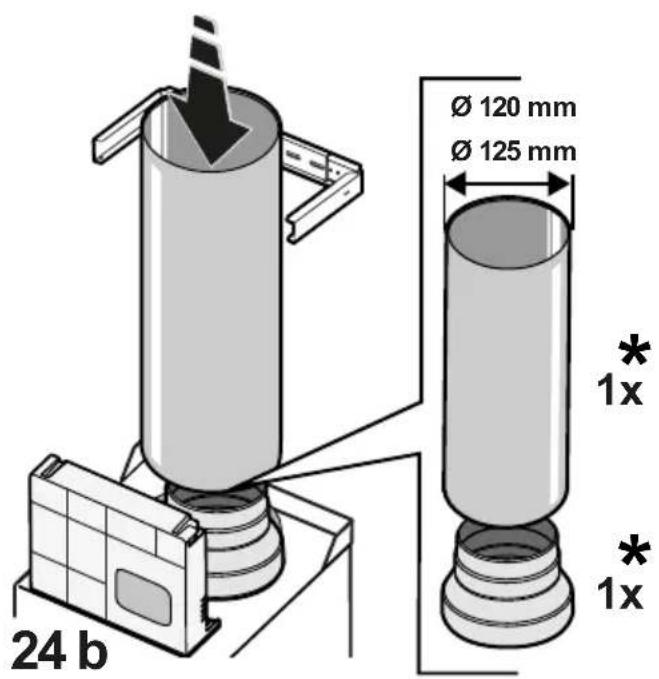
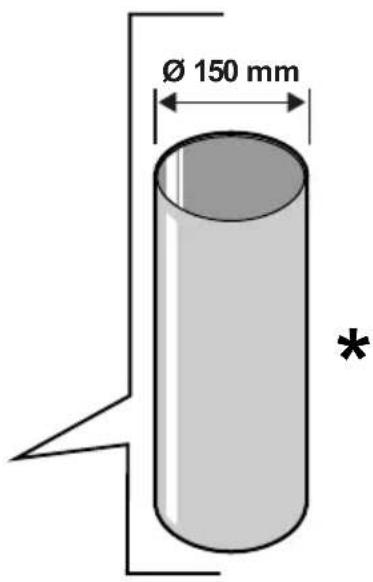
- Use the fixing screws supplied with the product only if suitable for the surface; otherwise purchase the correct type of screws. •Check for accessories (e.g. bags containing screws, warranty certificates, etc.) inside the product (placed there for transport reasons). If there are any, remove them and keep them safe. •WARNING: Failure to install screws and fasteners in accordance with these instructions may result in electrical hazards. •The exhaust pipe is not supplied and must be purchased. •The diameter of the exhaust pipe must be equivalent to the diameter of the connecting ring. •For installation of the product on the hob, respect the height indicated in the drawings •The minimum distance between the surface of the container supports on the cooker and the lowest part of the range hood must not be less than 50 cm (not less than 65 cm only for Australia and New Zealand) for electric cookers and 65 cm for gas or mixed cookers. •If the installation instructions of the gas cooker specify a greater distance, take it into account.
ELECTRICAL CONNECTION SAFETY
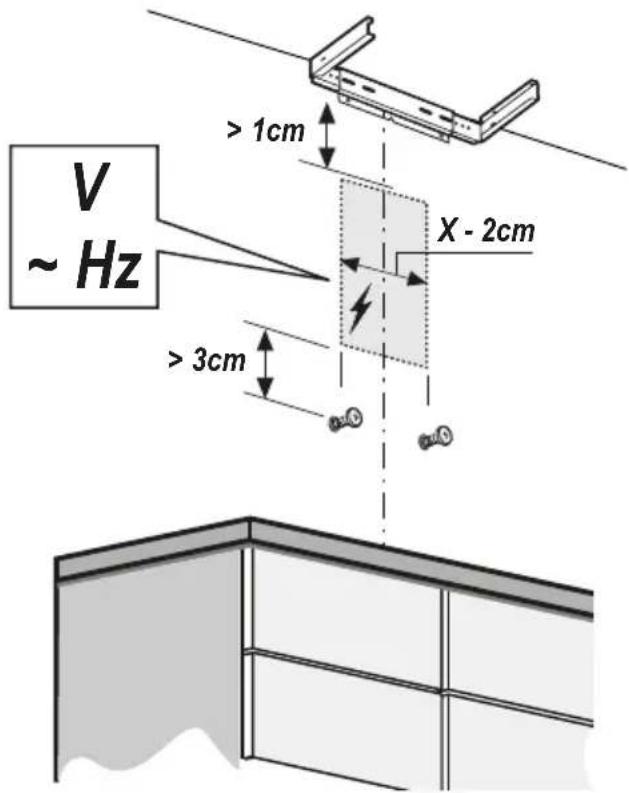
- The mains voltage must correspond to the voltage indicated on the label found inside the product. •If it features a plug, connect the product to a socket that complies with current standards, located in an area accessible even after installation.
- If it does not feature a plug (direct connection to the mains) or the plug is not located in an accessible area, even after
installation, apply a standard double pole switch that ensures complete disconnection from the mains in category III overvoltage conditions, in accordance with the installation rules. •The product features a special power cable; if the cable is damaged, contact the Service Centre for a replacement.
- Please note! Before reconnecting the circuit to the mains power supply, make sure that it is working correctly, always check that the power cable is correctly installed.
Please note! Do not use with a programmer, timer, separate remote control or any other device that activates automatically.
RECOMMENDATIONS FOR USE
Recommendations for correct use in order to reduce the impact on the environment: When cooking begins, the device should be turned on at minimum speed, and left on for a few minutes even after cooking is complete. Increase the speed only if there is a large quantity of fumes and steam, using the Booster function only in extreme cases. To keep the odour reduction system running efficiently, replace the carbon filter/s when necessary. To ensure the high performance of the grease filter, clean it when necessary. To improve efficiency and minimise noise, use the maximum duct diameter indicated in this manual.
USE
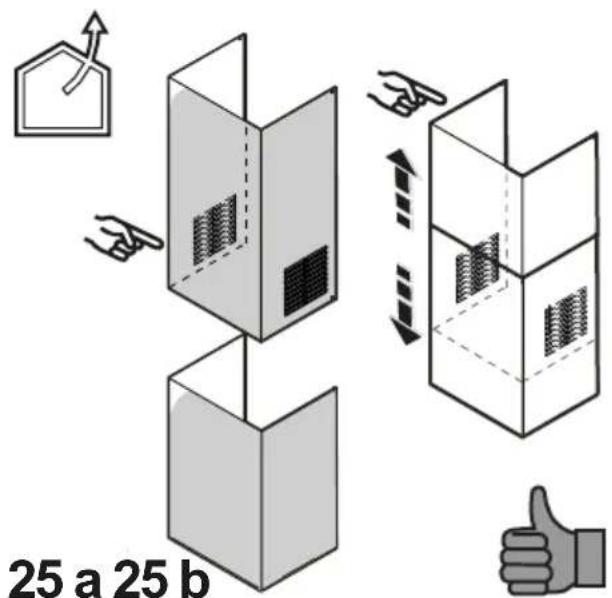
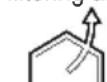
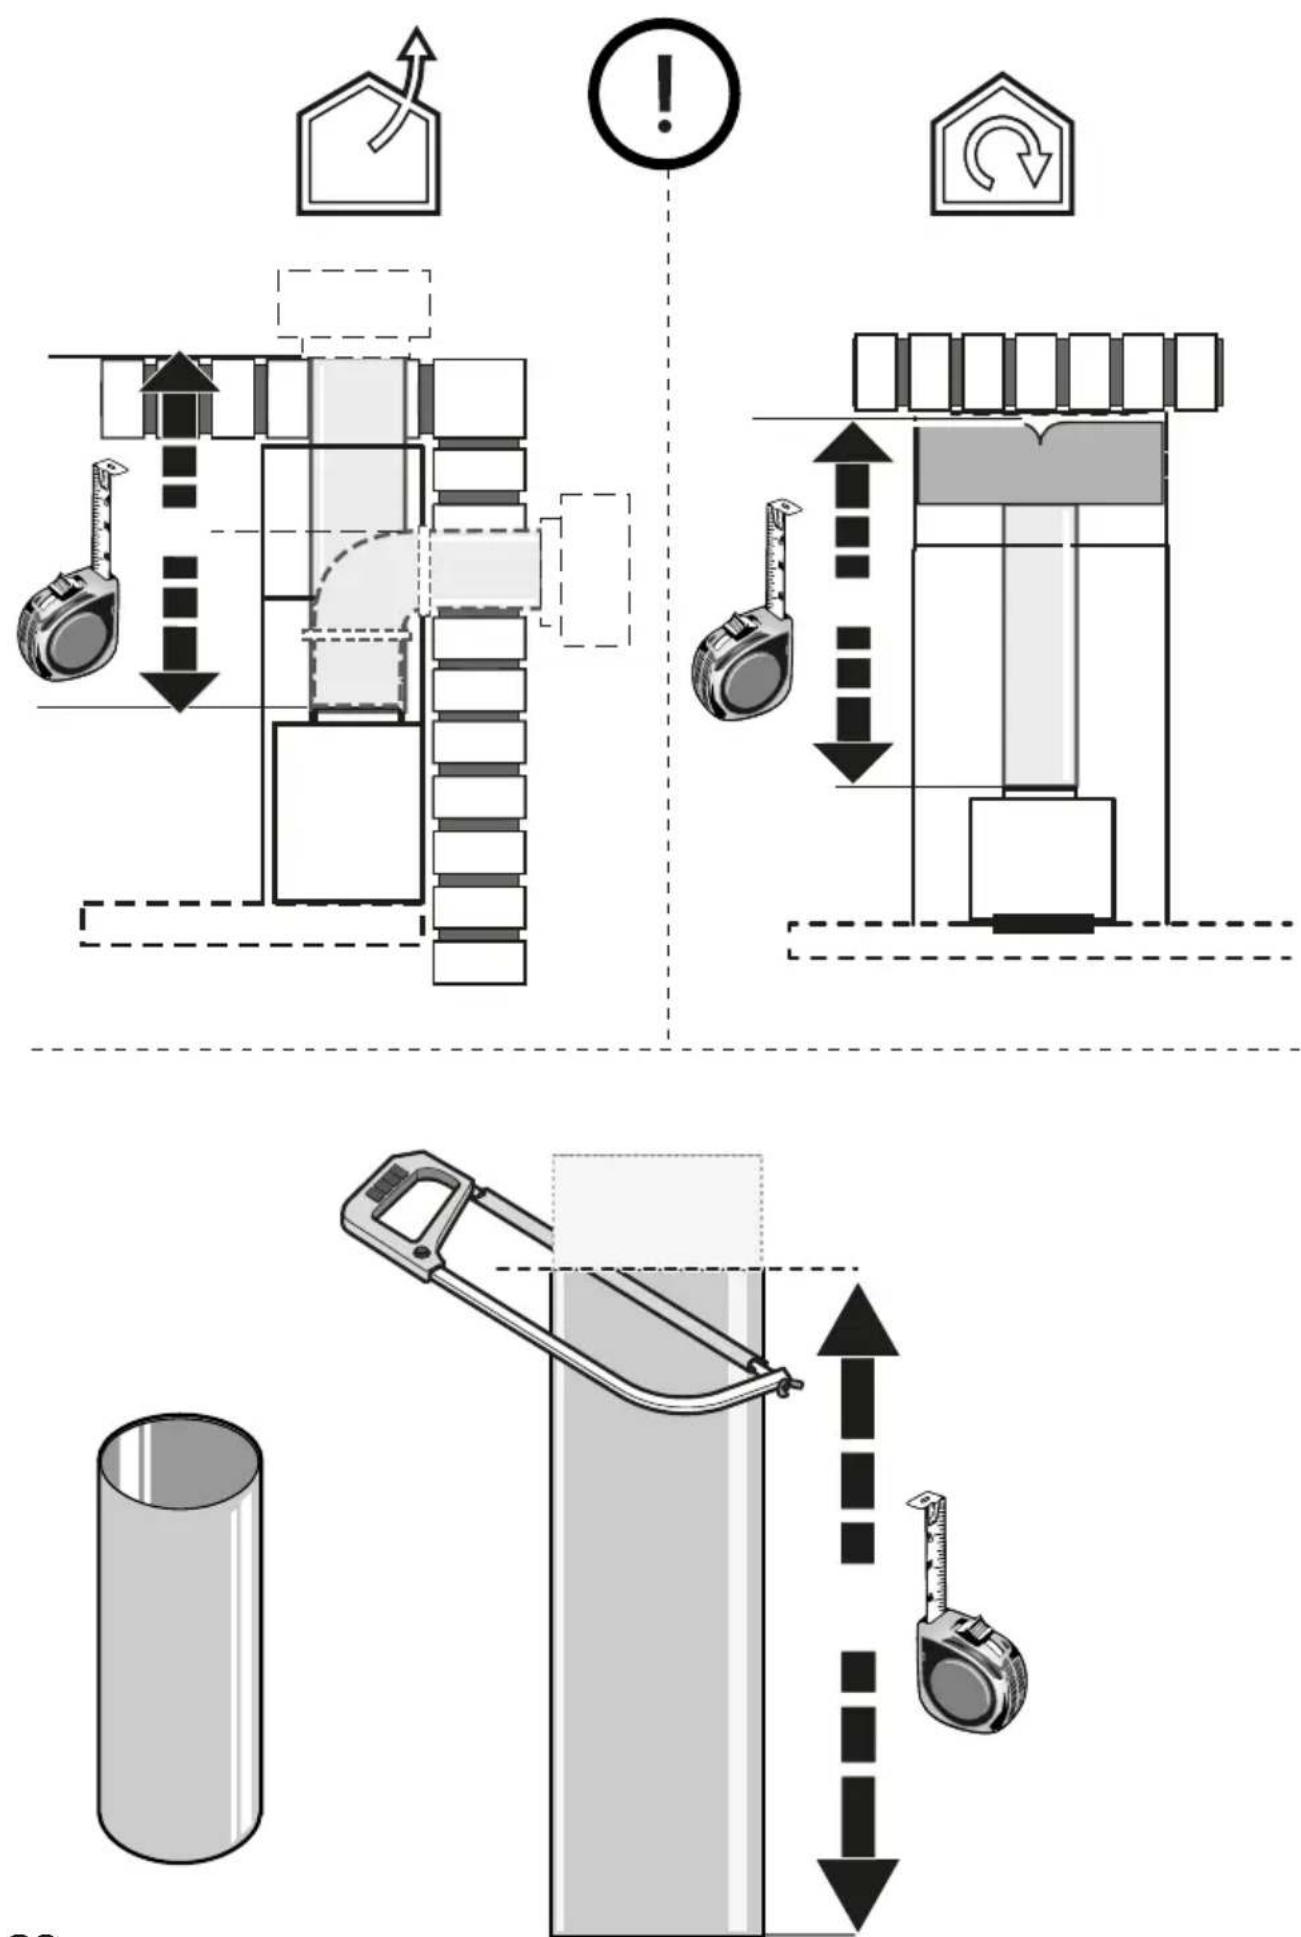
The extraction system can be used in the duct-out version with external evacuation, or in the recirculating version with filtering and internal recirculation.
- Duct-Out Version:
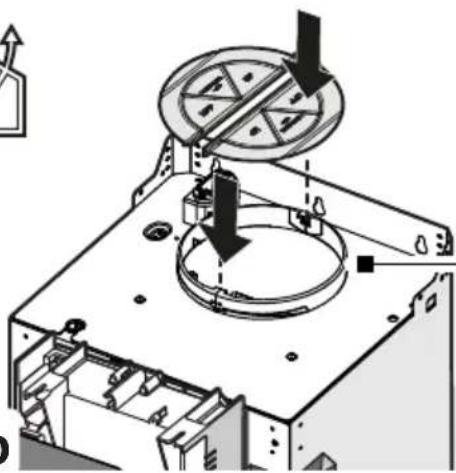
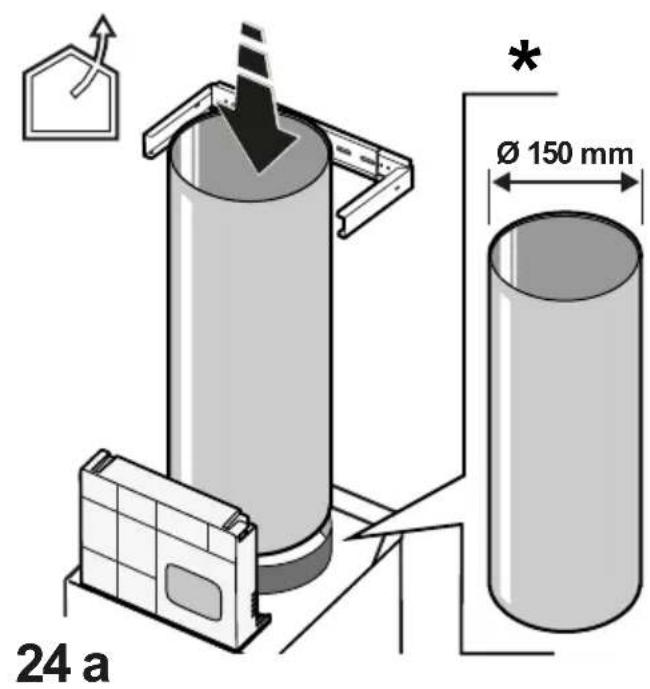
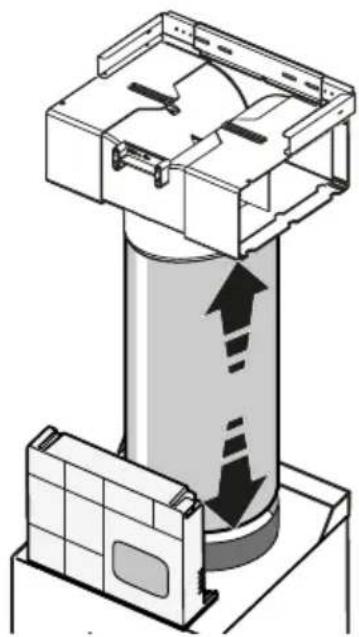
Vapours are evacuated outside through an exhaust pipe attached to the connecting flange.
CAUTION! If the product features one or more carbon filters, they must be removed.
Connect the product to wall-mounted exhaust pipes and holes with a diameter equivalent to the air outlet (connecting flange).
The use of pipes and outlet holes in the wall with a smaller diameter will reduce the extraction performance and drastically increase the noise level.
All responsibility in this regard is therefore denied.
- Use a ducting pipe with the shortest length necessary.
- Use a ducting pipe with the least number of bends possible (maximum bend angle: 90° ).
- Avoid drastic changes in the ducting pipe diameter.

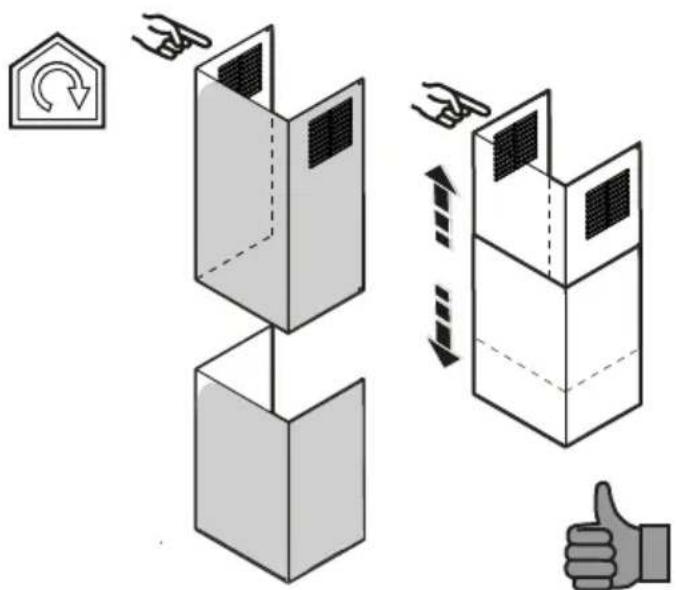
• Recirculating Version:
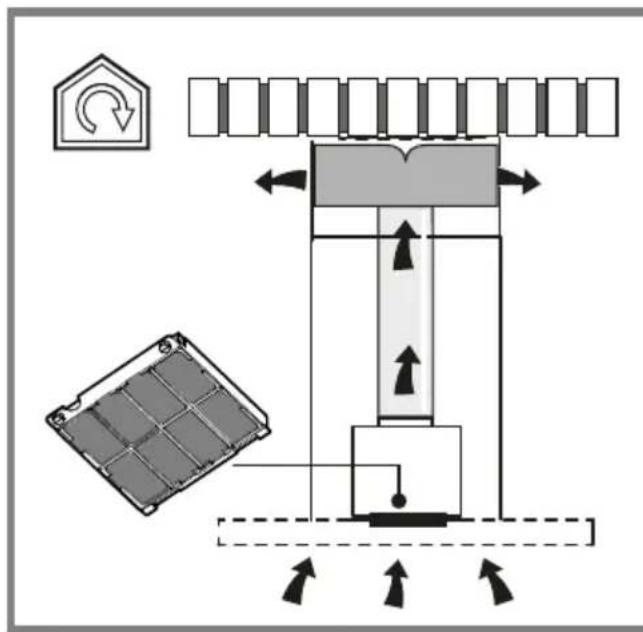
The suctioned air will be degreased and deodorised before it is sent back into the room. To use the product in this version, it is necessary to install an additional activated carbon filter system.
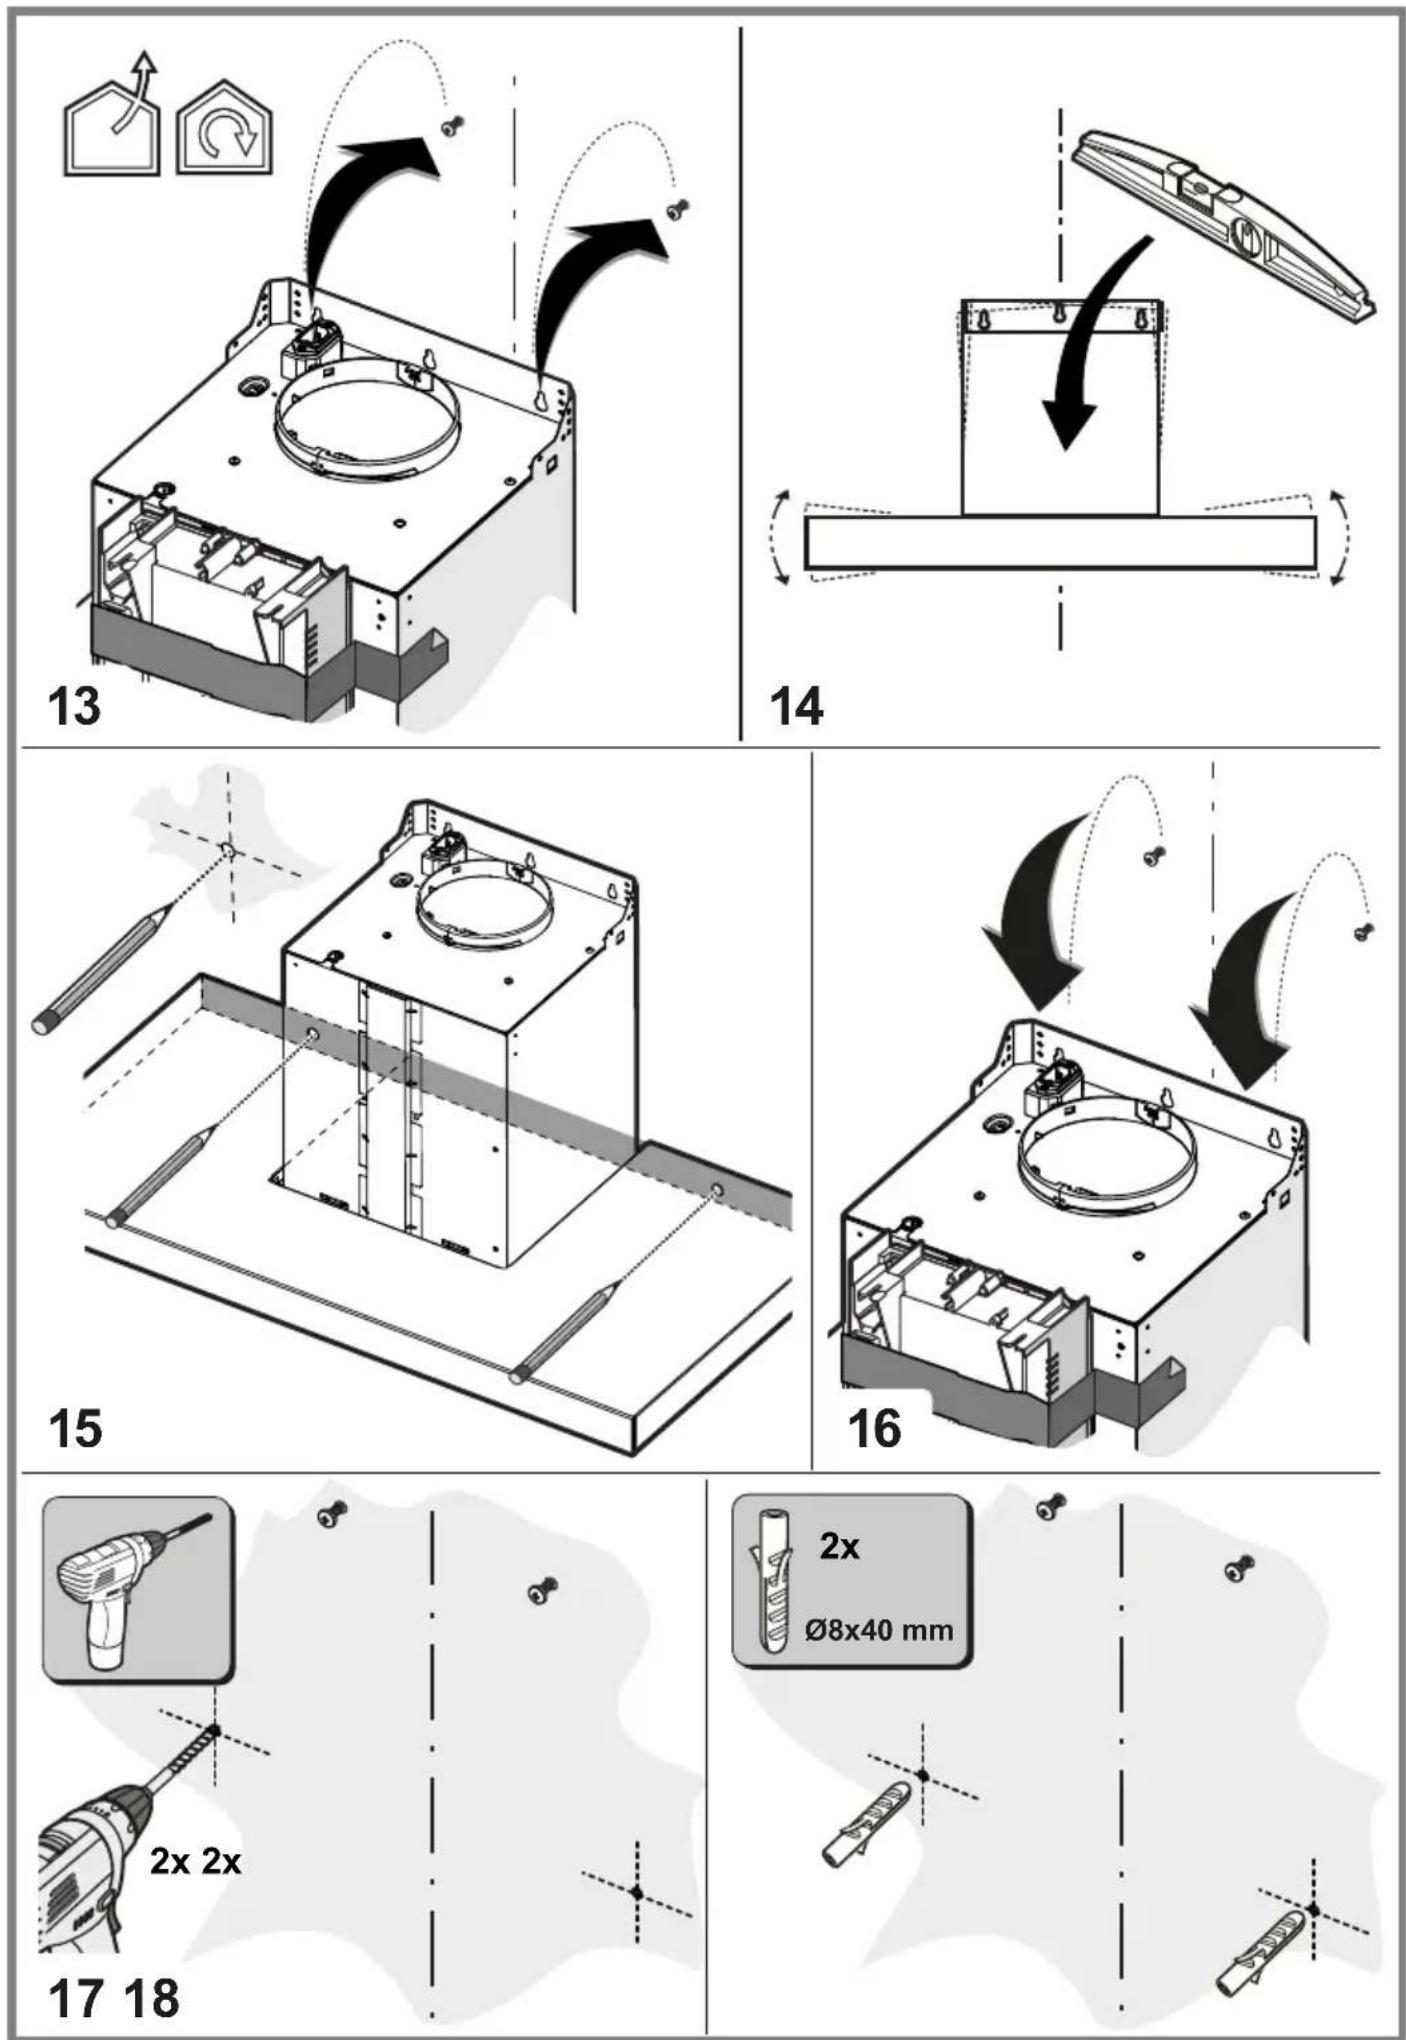
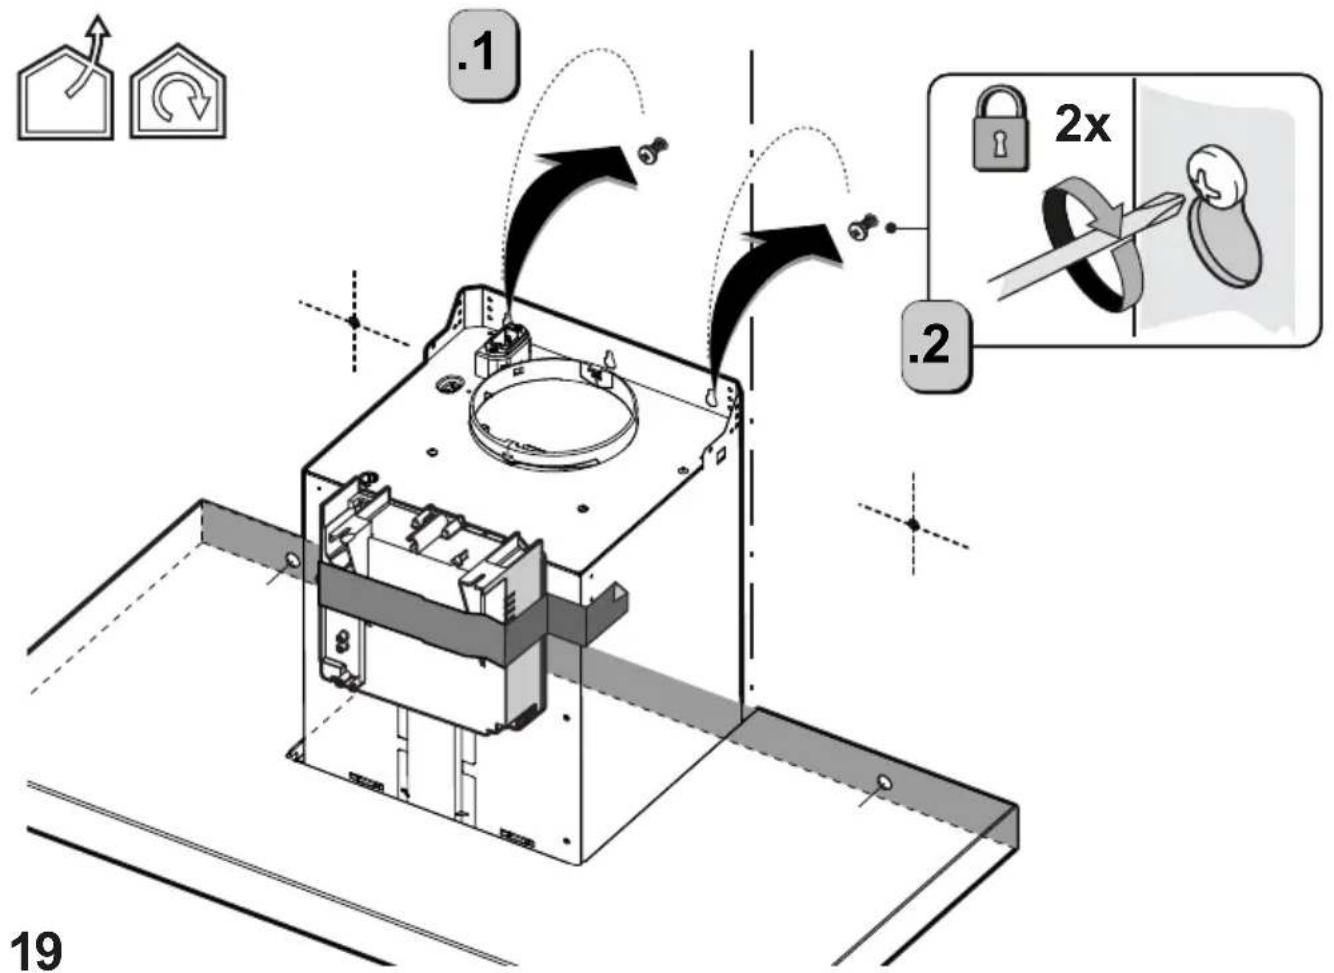
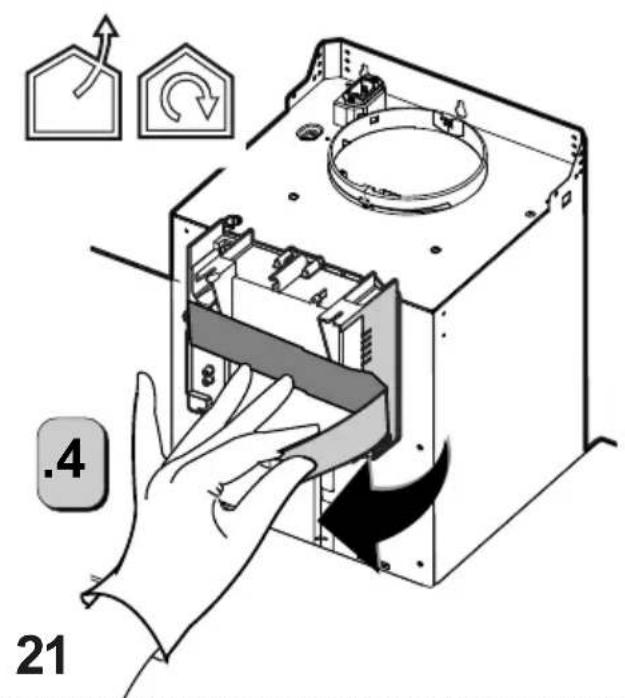
ASSEMBLY BEFORE INSTALLATION
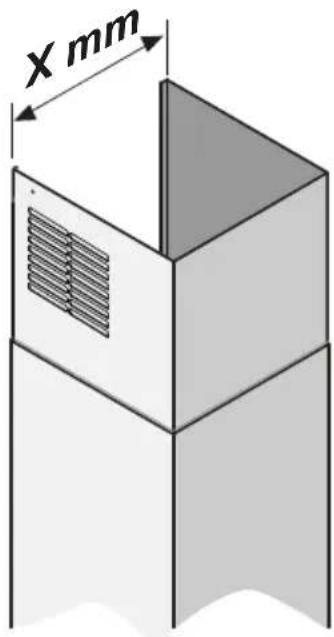
- Check that the product is the right size for the installation area.
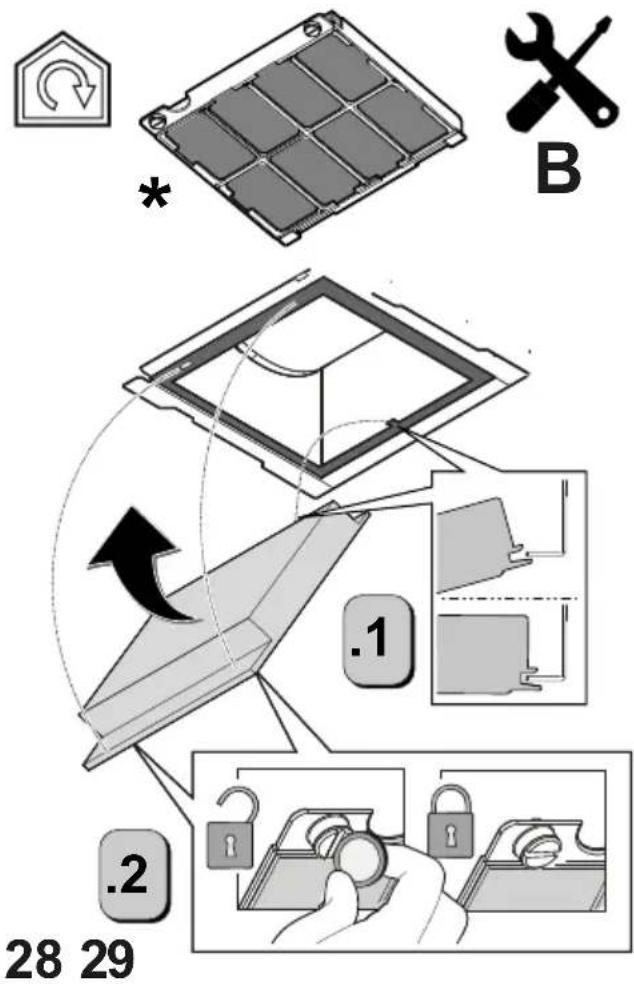
- Remove the activated carbon filter(s) if supplied (see also relevant paragraph).
- It(they) must be reinstalled if the product is used in the filter version.
- If there are panels and/or walls and/or wall units on the sides, make sure that there is enough space to install the product and that it is always possible to access the control panel easily.
- The product is equipped with fixing plugs suitable for most walls/ceilings. However, it is necessary to consult a qualified technician to make sure that the materials are suitable for the type of wall/ceiling. The wall/ceiling must be strong enough to support the weight of the hood.
Heavy product, two or more people are required for handling and installation operations.
OPERATION
This hood has an automatic operation system (see paragraph "Automatic operation (sensor)").
Calibration occurs automatically each time the hood is reconnected to the electrical network (e.g.: the first time it is installed after a blackout). It can also be done manually (see paragraph "Adjusting the parameters for automatic operation-Manual adjustment").
During calibration, which lasts for 5 minutes, the controls will flash and only the lights button can be used.
Control panel
To select the hood functions, simply touch the controls.
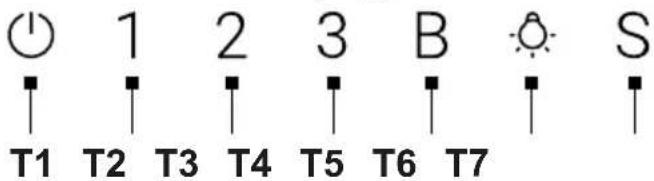
T1 = Motor OFF key (stand by)
T2 = Speed selection key (extraction power) low. The key flashes if delayed hood switch-off is activated (only for models with remote control).
T3 = Speed selection key (extraction power) medium. The key flashes if delayed hood switch-off is activated (only for models with remote control).
T4 = Speed selection key (extraction power) high. The key flashes if delayed hood switch-off is activated (only for models with remote control).
T5 = Speed selection key (suction power) intensive - it lasts 5 minutes after which it switches back to medium speed (extraction power) or it switches off if delayed hood switch-off is activated (only for models with remote control). The key flashes in both cases to indicate the speed timer.
T6 = Light ON/OFF key. Short press to switch illumination of the cooking hob on or off.
T7 = Automatic operation (sensor).
Filter saturation indicators (T5)
At regular intervals, the hood signals the need to perform maintenance on the filters.
Key (T5) on with steady light: the grease filter requires maintenance.
Key (T5) on with flashing light: the activated carbon filter requires maintenance.
Note: The filter saturation indicator is visible within on first minute after switching off the hood; the saturation indicators must be reset within this time.
Resetting the filter saturation indicators (T5)
Press and hold key (T5).
Activating the activated carbon filter saturation indicator (T5).
Note: this operation must be performed with the hood off.
This indicator is normally deactivated; press and hold key (T5) to activate the function: the key will light up steadily.
To deactivate the function, press and hold key (T5): the key will start flashing.
Automatic operation (sensor) (T7)
Press key (T7) (the central LED (T7) lights up white). The hood will switch on at the most suitable speed based on the fumes detected by the sensor the hood is equipped with.
Adjusting the parameters for automatic operation
Note: All of the calibration, selection, adjustment and logical connection operations described below are possible with the hood switched off (OFF).
The parameters are adjusted automatically each time the hood is reconnected to the mains (e.g. first installation or after a power failure) or manually.
Manual adjustment
To be performed when automatic operation is unsatisfactory and when normal environmental conditions persist in the kitchen.
Manual adjustment includes:
- Hood calibration.
• Hob selection (gas - induction or electric).
Hood calibration (T7).
Press and hold key (T7), all of the LEDs of the key will flash "darker" to indicate that calibration has started; the calibration process will take about 5 minutes.
Hob selection (gas - induction or electric).
Simultaneously press and hold keys (T2 - T3); keys (T2 - T3 - T4) will start flashing for 5 seconds.
Within this time, press:
key (T2) in the case of a gas hob
key (T3) in the case of an electric hob
key (T4) in the case of an induction hob.
The selected key will remain lit to indicate that a selection has been made; after 10 seconds, the key will flash briefly to indicate that the selection made has been recorded.

MAINTENANCE WARNINGS
- Cleaning: For cleaning, simply use a cloth moistened with neutral liquid detergents. Do not use cleaning tools or instruments.
- Avoid the use of abrasive products. DO NOT USE ALCOHOL!

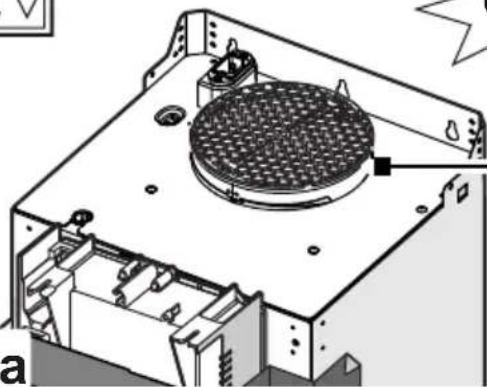
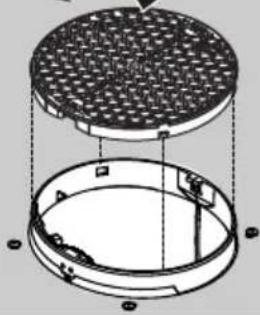
For product maintenance, see the images at the end of the installation marked by this symbol.

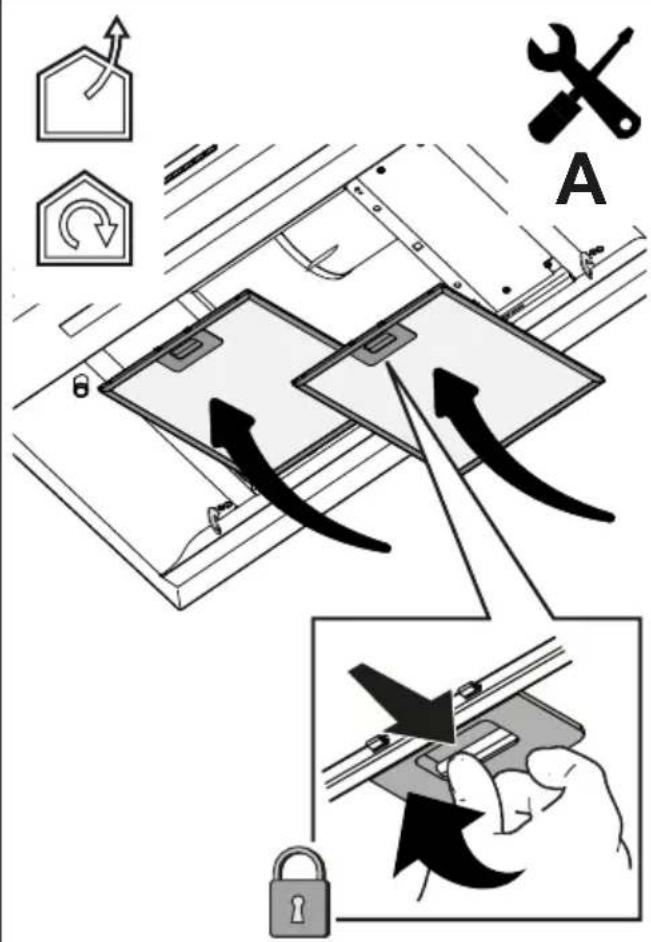
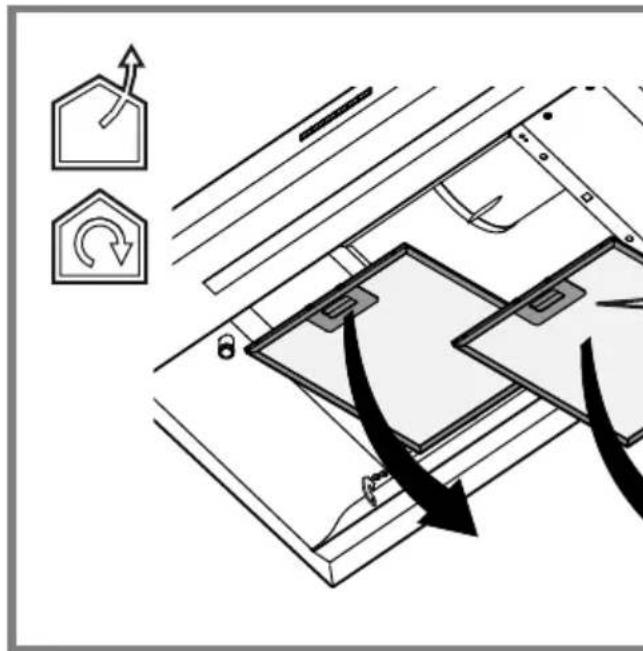
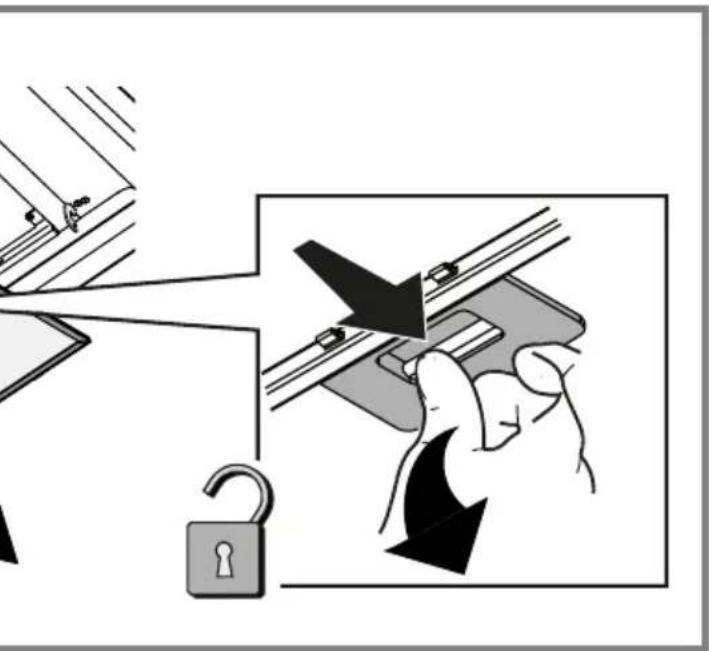
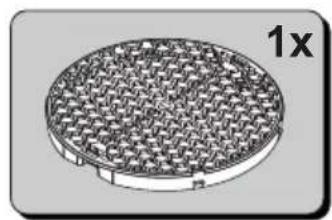
Anti-Grease Filter: The metallic anti-grease filter must be cleaned once a month with non-aggressive detergenually or in a dishwasher on a short wash at low temperatures. To remove the anti-grease filter, pull the spring reandle.
- The Anti-Grease Filter traps the grease particles produced during cooking. When cleaned in the dishwasher, the metal grease filter may discolour, but its filtering characteristics remain unchanged.

Activated carbon filter NOT washable: the saturation of the carbon filter can occur after somewhat prolonged pending on the type of cooking and how regularly the grease filter is cleaned. In any case, the cartridge must be d at least every four months. It CANNOT be washed or regenerated.
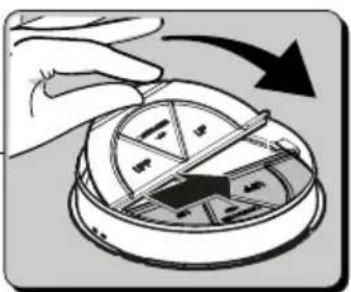
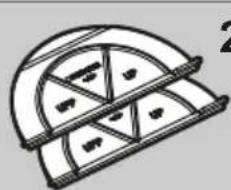
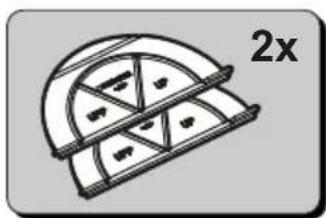
Assembly: first attach the activated carbon filter at the back on the metal tab of the hood, then at the front with the two knobs.
Disassembly: remove the activated carbon filter by turning the knobs attaching it to the hood by 90°.
- Lighting system : The lighting system cannot be replaced by the user, contact Customer Service in case of malfunction.
- The lighting system is based on LED technology. LEDs provide optimal illumination, last up to 10 times longer than conventional lamps and save 90% of electricity.
END-OF-LIFE DISPOSAL

This appliance is labelled in accordance with the European Directive 2012/19/EU on Waste Electrical and Electronic Equipment (WEEE).
WEEE contains both pollutants (which can have a negative effect on the environment) and basic elements (which can be reused).
It is important that WEEE is subject to specific treatment to remove and properly dispose of pollutants and to recover all the materials. Individual citizens can play an important role in ensuring that WEEE does not become an environmental problem; it is essential to follow some basic rules:
- WEEE must not be treated as household waste;
- WEEE must be taken to collection centres managed by the municipality or by a registered company.
In many countries, household collection may be available for large WEEE. When a new appliance is purchased, the old one can be given to the seller who must accept it, free of charge, as a single piece, provided that the appliance is of an equivalent type and has the same functions as the one purchased.
REGULATIONS
Equipment designed, tested and manufactured in compliance with safety regulations: EN/IEC 60335-1; EN/IEC 60335-2-31, EN/IEC 62233. Performance: EN/IEC 61591; ISO 5167-1; ISO 5167-3; ISO 5168; EN/IEC 60704-1; EN/IEC 60704-2-13; EN/IEC 60704-3; ISO 3741; EN 50564; IEC 62301. EMC: EN 55014-1; CISPR 14-1; EN 55014-2; CISPR 14-2; EN/IEC 61000-3-2; EN/IEC 61000-3-3.
NOTES

: the items marked with this symbol are optional accessories supplied only with some models or items that cannot be complied but can be purchased.
MONTÁŽ PRVNÍ INSTALACE
T1 = Toets OFF motor (stand-by)
T1 = Taste Motor OFF (Stand-by)
![graph TD A["Building Section 1"] --> B["Stairway"] B --> C["Floor"] C --> D["Deck"] D --> E["Entry"] style A fill:#f9f,stroke:#333 style B fill:#ccf,stroke:#333 style C fill:#cfc,stroke:#333 style D fill:#fcc,stroke:#333 style E fill:#ffc,stroke:#333](/content/2026/04/615684/images/f5539f71359544f7ecdcf0e07ea43c1b23277f88fbbedafc9e36e1135013f63c.jpg)
![graph TD A["Solar Collector"] --> B["Reactor Unit"] B --> C["Grid Substrate"] C --> D["Output"] style A fill:#f9f,stroke:#333 style B fill:#ccf,stroke:#333 style C fill:#cfc,stroke:#333 style D fill:#fcc,stroke:#333](/content/2026/04/615684/images/6ebedd370768e34b6b57c8b21ed11728c4318c9b3378f024ac1aa31c920cf499.jpg)



V-Hz
9

10

11

12a
CLAK!


12b

24 c