Access Steam Care DT9120 - Steam cleaner TEFAL - Free user manual and instructions
Find the device manual for free Access Steam Care DT9120 TEFAL in PDF.
| Brand | Tefal |
| Model | Access Steam Care DT9120 |
| Product type | Steam cleaner |
| Power supply | 220-240 V ~ |
| Steam levels | 3 adjustable levels |
| Continuous steam lock | Yes, lock button |
| Auto shut-off | Standby mode after 8 minutes of inactivity |
| Heat-up time | Approximately 40 seconds |
| Water tank capacity | Removable tank (capacity not specified) |
| Soleplate | Heated soleplate |
| Included accessories | Fabric brush, steam cover, crease accessory, door hook, travel pouch, garment board |
| Recommended water type | Untreated tap water; very hard water: mix 50% tap water + 50% demineralized water |
| Descaling | Mix 50% water + 50% white vinegar or citric acid |
| Cleaning | Soft sponge and water; do not use detergent |
| Safety | Automatic standby shut-off, burn protection |
| Repairability | Authorized service center recommended |
| Warranty | Standard Tefal (not specified) |
Frequently Asked Questions - Access Steam Care DT9120 TEFAL
User questions about Access Steam Care DT9120 TEFAL
0 question about this device. Answer the ones you know or ask your own.
Ask a new question about this device
Download the instructions for your Steam cleaner in PDF format for free! Find your manual Access Steam Care DT9120 - TEFAL and take your electronic device back in hand. On this page are published all the documents necessary for the use of your device. Access Steam Care DT9120 by TEFAL.
USER MANUAL Access Steam Care DT9120 TEFAL
natural_image
Illustration of a modern electric shaver device with handle and control buttons (no text or symbols)DT91XX
text_image
Diagram of a hair dryer with labeled parts including front, side, and interior views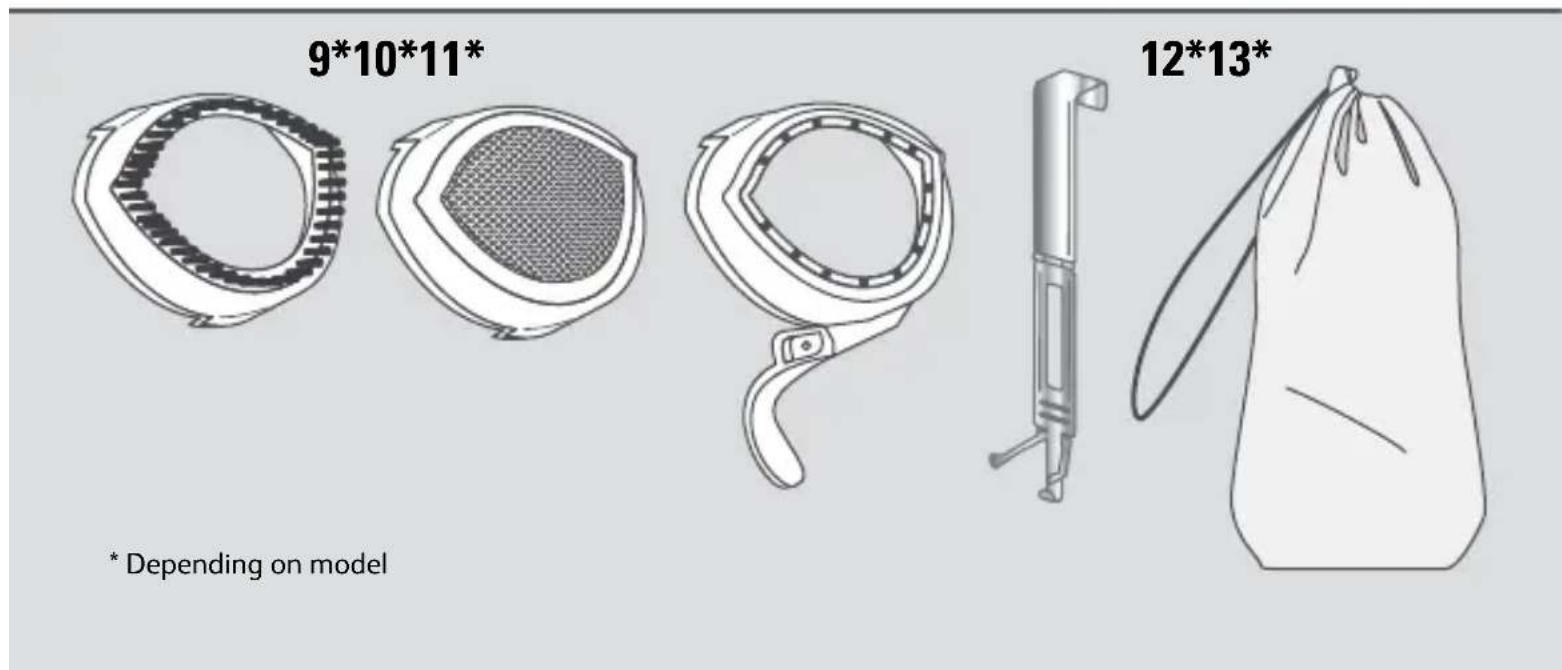
text_image
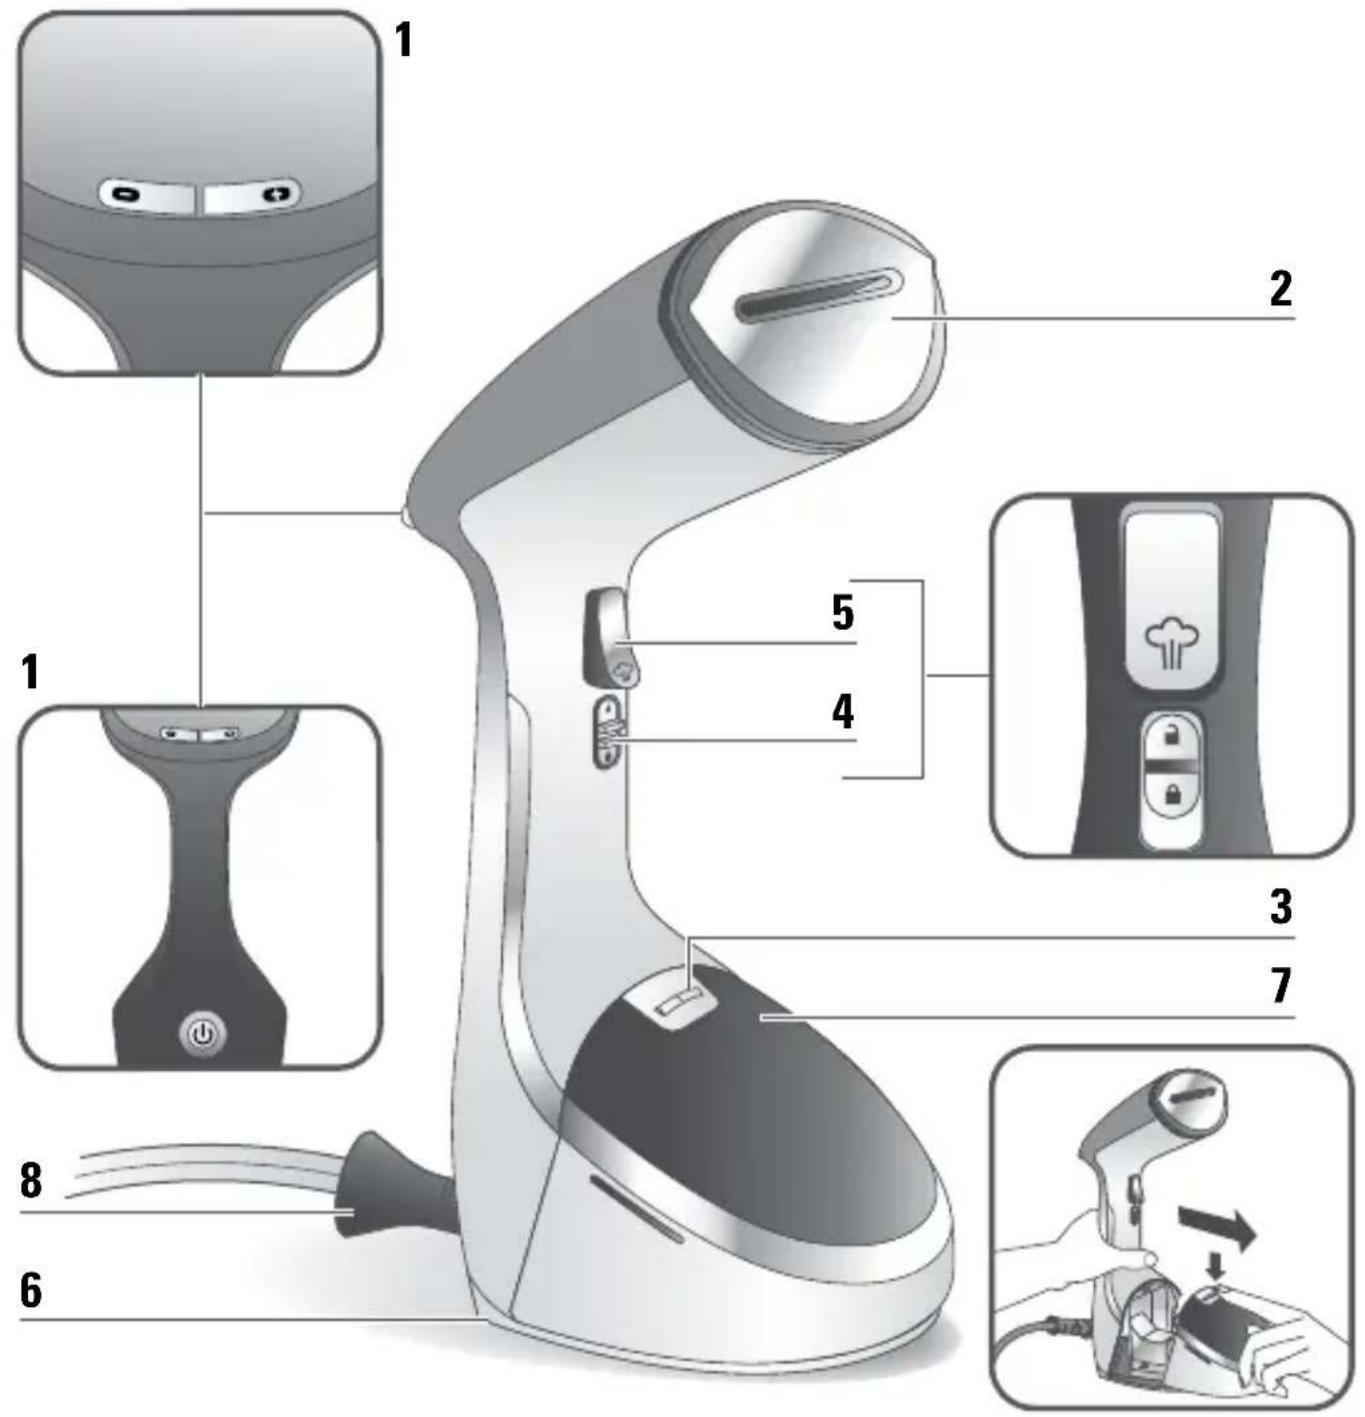
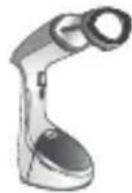
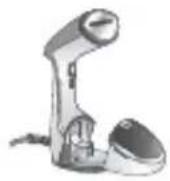
9*10*11* 12*13* * Depending on modelPRODUCT DESCRIPTION
- Control panel: On/Off and steam level buttons
- Heated soleplate
- Water tank locker
- Locker switch for continuous steam
- Steam trigger
- Standing base
-
Removable water tank
-
Cord exit
9*. Fabric brush
10*. Steam cover
11*. Crease attachment
12*. Door hook
13*. Travel Pouch
EN
Important safety instructions
- Please read these instructions carefully before first use.
- This product has been designed for indoor, domestic use only. Any commercial use, inappropriate use or failure to comply with the instructions, the manufacturer accepts no responsibility and the guarantee will not apply.
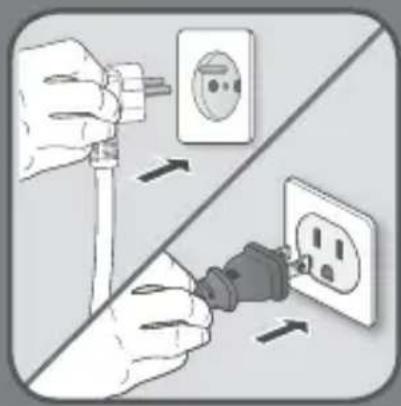
• Always plug your appliance:
- into a mains socket with voltage between 220 V and 240 V. - into an earthed electrical socket.
Connecting to the wrong voltage may cause irreparable damage to the appliance and will invalidate your guarantee.
Do not use an extension lead. If you accept liability for doing so, only use an extension lead which is in good condition, has a plug with an earth connection and is suited to the power rating of the appliance.
- Completely unwind the power cord before plugging into an earthed socket.
- Use appliance for its intended use only.
- To reduce the risk of contact with hot water emitting from steam vents, check appliance before each use by holding it away from body and operating steam button.
- This appliance can be used by children aged from 8 years and above and persons with reduced physical, sensory or mental capabilities or lack of experience and knowledge if they have been given supervision or instruction concerning use of the appliance in a safe way and understand the hazards involved. Children shall not play with the appliance. Cleaning and user maintenance shall not be made by children without supervision.
- Never pull on the cord to disconnect the appliance from electrical outlet; instead, grasp plug and pull to disconnect on the plug to disconnect the appliance.
- Do not allow cord to touch hot surfaces or come into contact with rough or sharp edges. Let the appliance cool completely down before putting away. Loop cord loosely around appliance when storing.
- Always disconnect appliance from the electrical supply when filling with water or emptying when cleaning, when removing or refitting accessories and when not in use.
- Care should be taken when using the appliance due to the emission of steam.
- Do not operate appliance with a damaged cord or if appliance has been dropped or damaged. To avoid the risk of electric shock, do not disassemble or attempt to repair the appliance. Take it to the nearest approved service centre for examination and repair. Incorrect reassembly or repair could cause a risk of fire, electrical shock or injury to persons when the appliance is used.
- Close supervision is necessary for any appliance being used by or near children.
- Do not leave the appliance unattended while plugged in or while it is still hot.
- Burns could occur from touching hot metal or plastic parts, hot water or steam. Use care when you empty a steam appliance. There may be hot water in the reservoir.
- If an extension cord is absolutely necessary, a cord with a 16A ampere rating shall be used. A cord rated for less amperage can result in a risk of fire or electric shock due to overheating. Care shall be taken to arrange the cord so that it cannot be pulled or be tripped over.
- To protect against a risk of electric shock, do not immerse the appliance in water or other liquids.
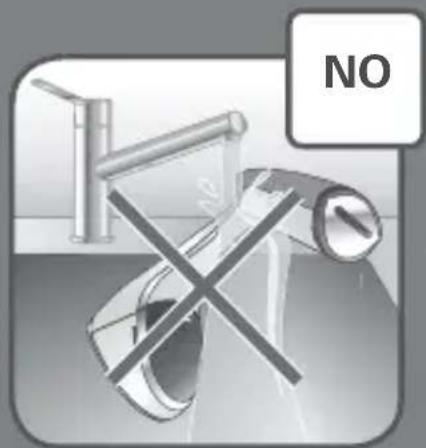
- Do not direct steam at people, animals or clothes while they are being worn.
- This appliance is not intended for use by persons (including children) with reduced physical, sensory or mental capabilities, or lack of experience and knowledge, unless they have been given supervision or instruction concerning use of the appliance by a person responsible for their safety. Children should be supervised to ensure that they do not play with the appliance.
- The use of accessory attachments other than those provided by the manufacturer is not recommended and may result in fire, electric shock or personal injury.
- The appliance must be rested on a stable surface. When placing the appliance on its base, ensure that the surface on which the base is placed is stable.
- The appliance must not be used if it has been dropped, if there are visible signs of damage or if it is leaking.
- Check the electrical power cord for sign and wear or damage prior to use. If the electrical power cord is damaged, it must be replaced at an approved service centre to avoid any danger.
- Do not use other descaling products than the one cited in the IFU.
Before first use
- When you first use the appliance, some smoke or a harmless odour may be produced or there may be a small discharge of particles. This will not affect the use of the appliance and will disappear quickly.
What water to use?
- Your appliance has been designed to use untreated tap water.
If your water is very hard, mix 50% tap water and 50% bottled demineralised water.
Do not use pure demineralised or pure distilled water, water from clothes dryers, scented or softened water, rain water, filtered, bottled or boiled water, water from refrigerators, batteries or air conditioners as these may damage the appliance. These types of water contain organic waste, mineral elements that become concentrated when heated and cause spitting, brown staining, leaking or premature wear on your appliance. If your water is very hard, mix 50% untreated tap water with 50% distilled water (available in hardware stores). This water contains organic waste materials or minerals that concentrate under the effect of heat and cause spitting, brown colouring or premature ageing of your appliance.
SAVE THESE INSTRUCTIONS
Environment protection first !
i Your appliance contains valuable materials which can be recovered or recycled.
Leave it at a local civic waste collection point.
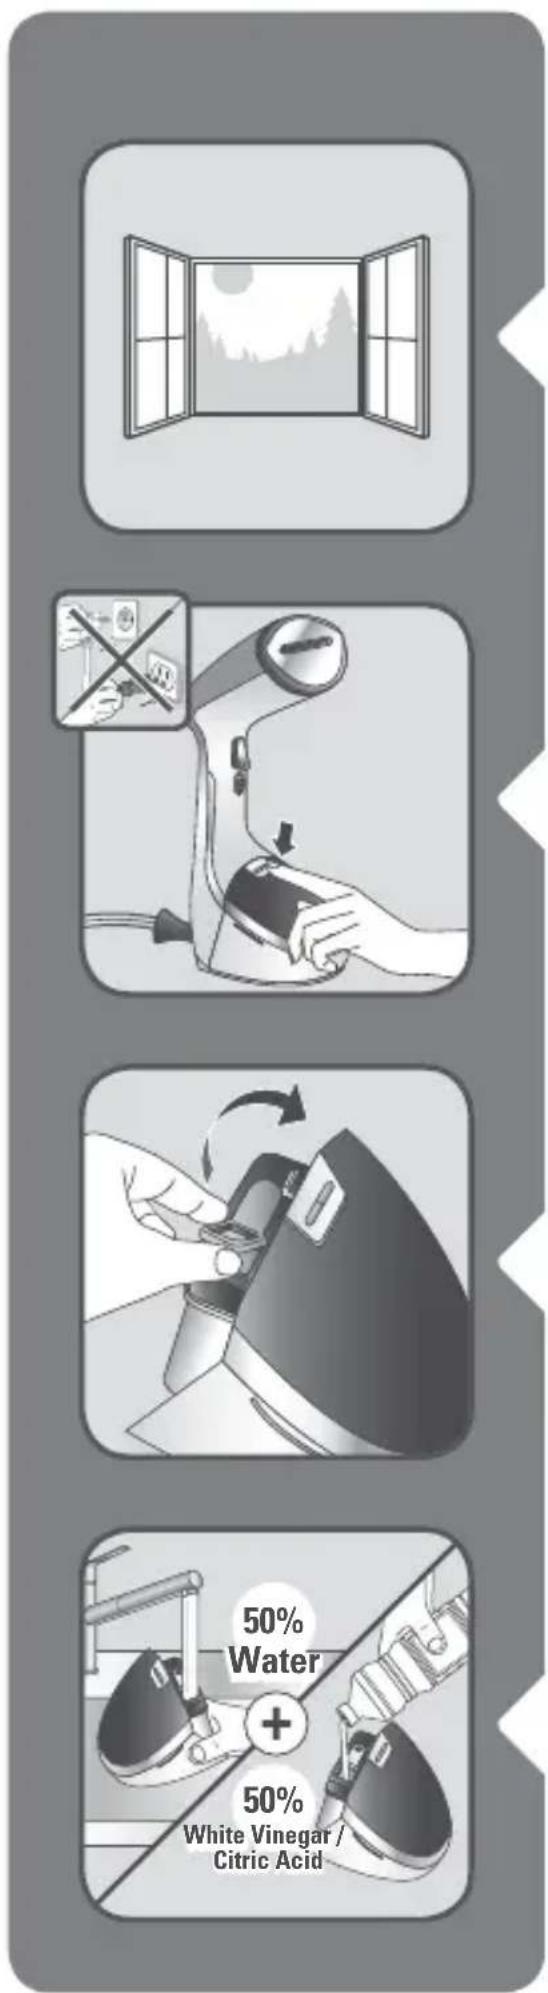
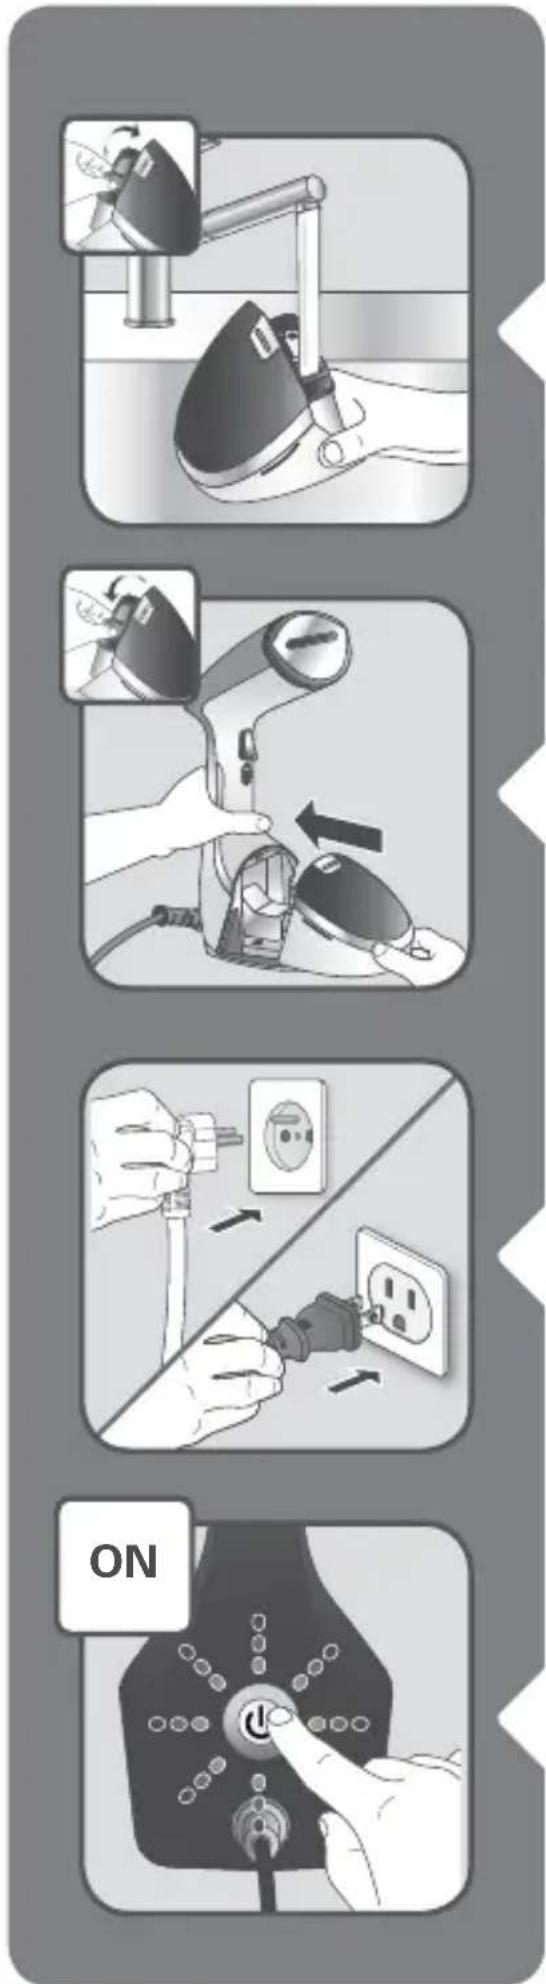
1 BEFORE USE


text_image
Diagram showing a hand using a device to press or install a device, with an inset image indicating no readable text or symbols.Unlock and remove the water tank.
natural_image
Close-up of a hand using a tool to adjust or install a device, showing a curved arrow indicating rotation (no text or symbols present)Remove the water inlet stopper.
natural_image
Illustration of a hand washing a showerhead with a metal faucet (no text or symbols)Fill the water tank with untreated tap water.

natural_image
Close-up of a hand using a tool to adjust or install a device, showing a curved arrow indicating rotation (no text or symbols present)Close the water inlet stopper.
natural_image
Illustration of a hand using a handheld device to interact with a device, showing mechanical components and an arrow indicating motion (no text or symbols present)Return the water tank to its place on the appliance. Make sure that the water tank is fully set in place and locked.
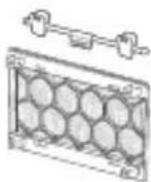
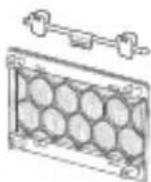
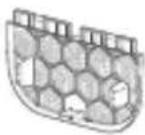
2 ASSEMBLY BOARD GUIDE
natural_image
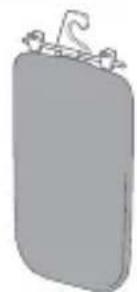
Simple gray illustration of a rectangular object with a curled top and small protrusions on the side (no text or symbols)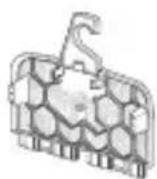


natural_image
Simple 3D illustration of a rectangular panel with rounded edges and mounting holes (no text or symbols)View of the finished product and exploded view.
text_image
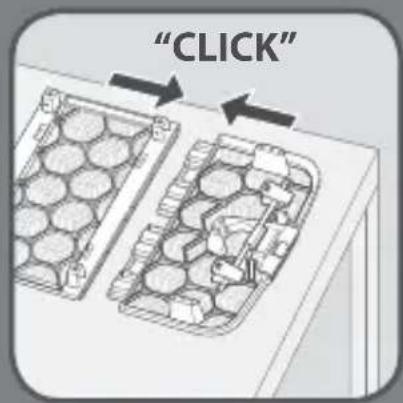
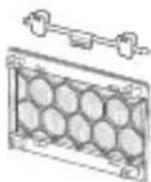
"CLICK"Lay down the three parts on a table and clip them together.
natural_image
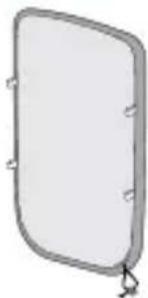
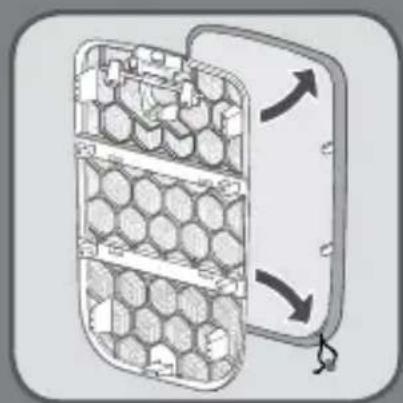
Diagram of a hexagonal grid device with directional arrows indicating movement or flow (no text or symbols)Insert the cover over the board.
natural_image
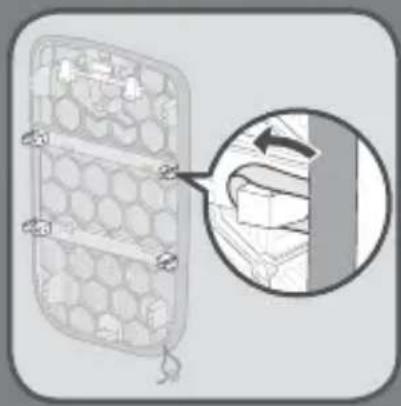
Diagram of a mechanical component with hexagonal grid pattern and a magnified inset showing a hand interacting with a vertical bar (no text or symbols)Position the four bands around the four hooks.
natural_image
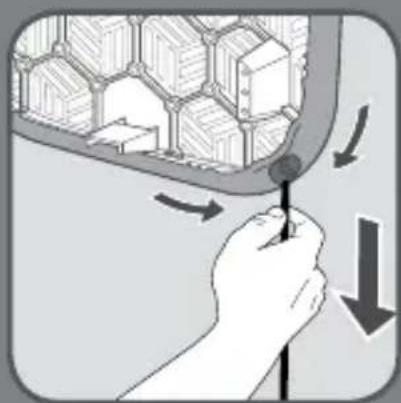
Illustration of a hand holding a tool near a hexagonal grid structure with directional arrows (no text or symbols)Band the cord and slip the stop element.
natural_image
Illustration of a hand inserting a cable into a hexagonal grid structure (no text or symbols)Tuck away the cord in the back of the cover.
natural_image
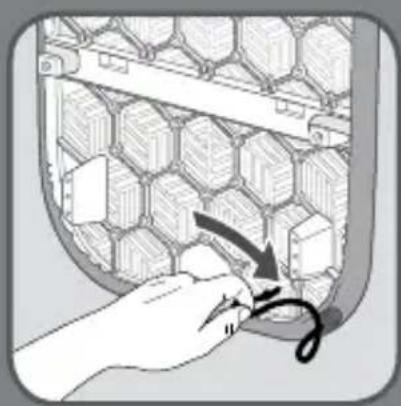
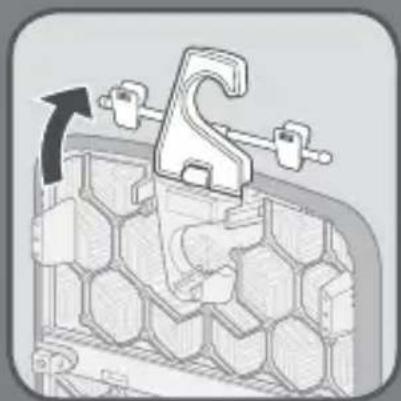
Cross-sectional diagram of a mechanical assembly with a hook and clamping mechanism (no text or labels)Deploy the hook.
natural_image
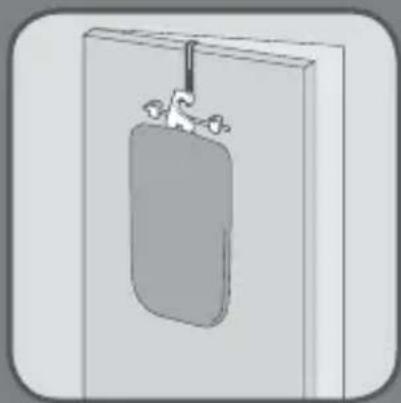
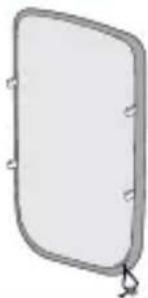
Simple line drawing of a door with a hanging clip and two small protrusions (no text or symbols)Hang the board on the door hook.

text_image
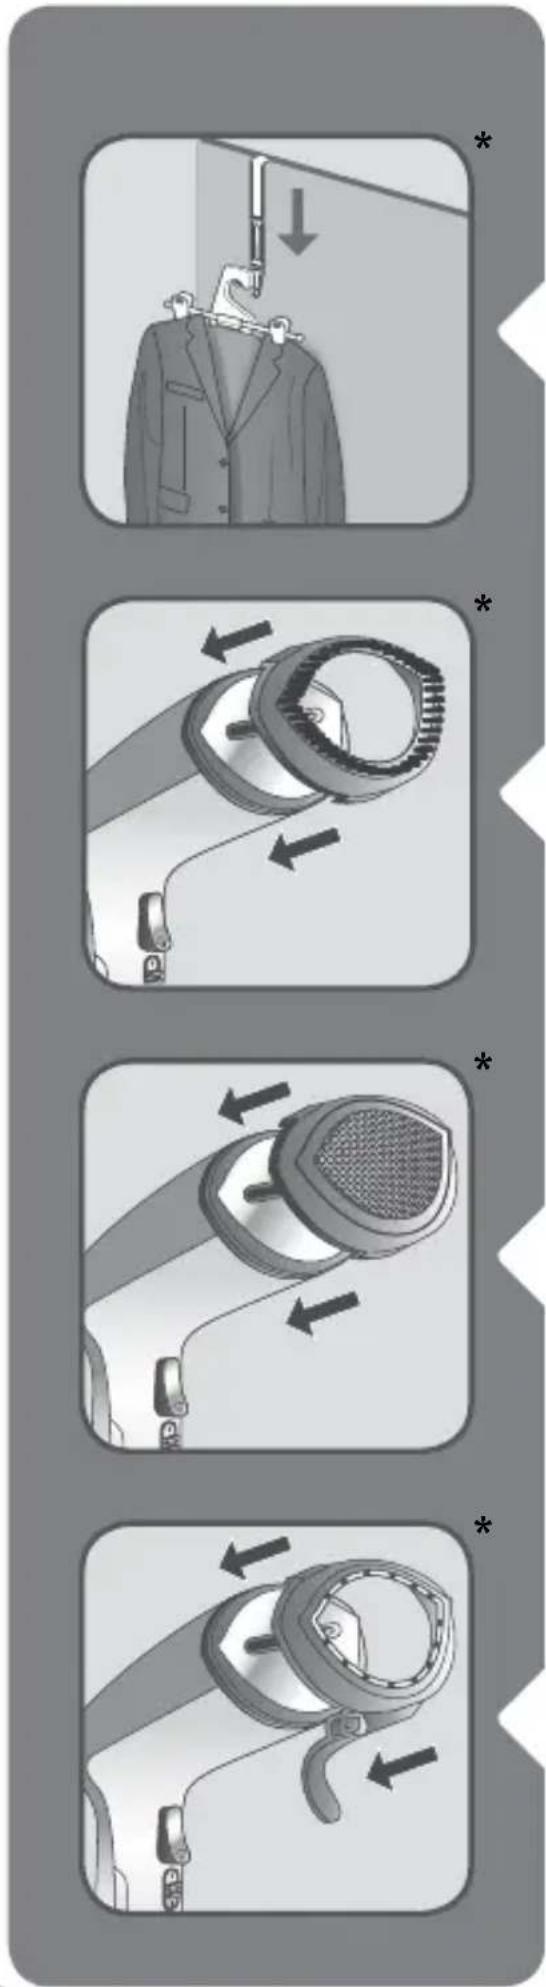
Warning symbol with exclamation mark over a person in suit, indicating caution or errorWarning: never use the board and the product on a flat position.
flowchart
graph TD
    A["Handbag with chain"] --> B["Sharling with ring"]
    B --> C["Meshing with mesh"]
    C --> D["Handbag disassembly with handbags"]
3 ACCESSORIES /
The door hook allows to hang your garment for steaming. Do not use the door hook on wooden on painted doors to avoid damaging the door.
The fabric brush opens the weaves of the fabrics for better steam penetration.
Before removing or attaching the steam brush, unplug your appliance and allow it to cool down, for one hour.
The steam cover filters water impurities and protects fabrics from water drips.
This accessory must be used for delicate fabrics which do not support ironing.
Before removing or attaching the steam cover, unplug your appliance and allow it to cool down for one hour.
The crease attachment is used to make pant creases easily or to remove stubborn creases. Put your fabric in the space between the two accessory parts. Move the crease attachment in a downwards motion starting from the top.
Before removing or attaching the accessory, unplug your appliance and allow it to cool down for one hour.

natural_image
Simple line drawing of a bag with a handle and spout, no text or symbols presentThe travel pouch is used for transportation. Before storing your appliance in the travel pouch, unplug your appliance then empty the water tank and allow the appliance for approximately 1 hour until completely cool.
The lint pad is a separate accessory and cannot be attached to the steam head. You can use the lint pad independently from the steamer.
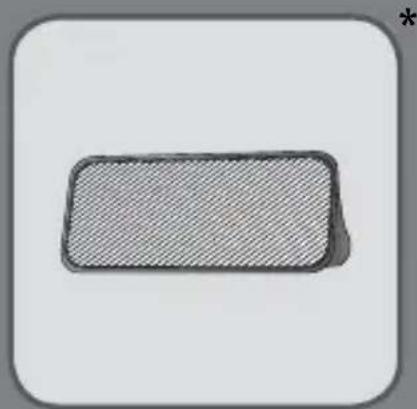
natural_image
Simple 3D rectangular block with hatched fill, no text or symbols visibleThe lint pad removes hair, lint and animal fur for a professional finish.
• To use the lint pad, slowly brush the clothing with the grain or nap of the fabric.
- The pad can be cleaned by brushing it in the opposite direction. We recommend cleaning the pad on an old cloth that can be discarded.
text_image
ON 40s OK
USE

natural_image
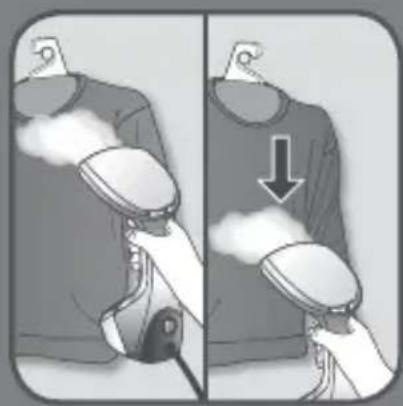
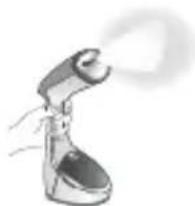
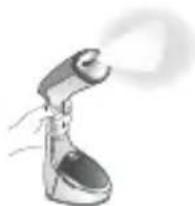
Illustration of a hand holding a small object with a smoke or vapor trail (no text or symbols)Warning : Never steam a garment while it is being worn.
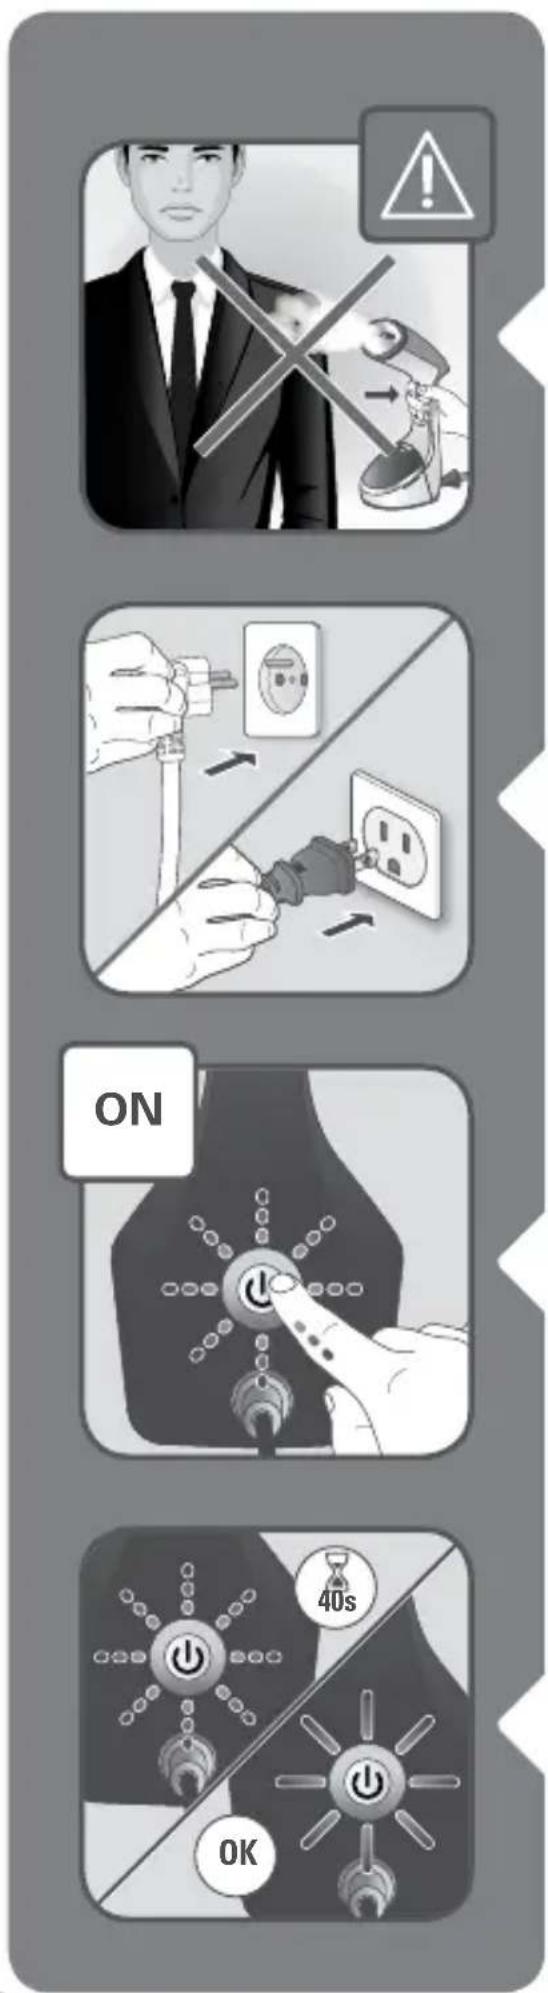
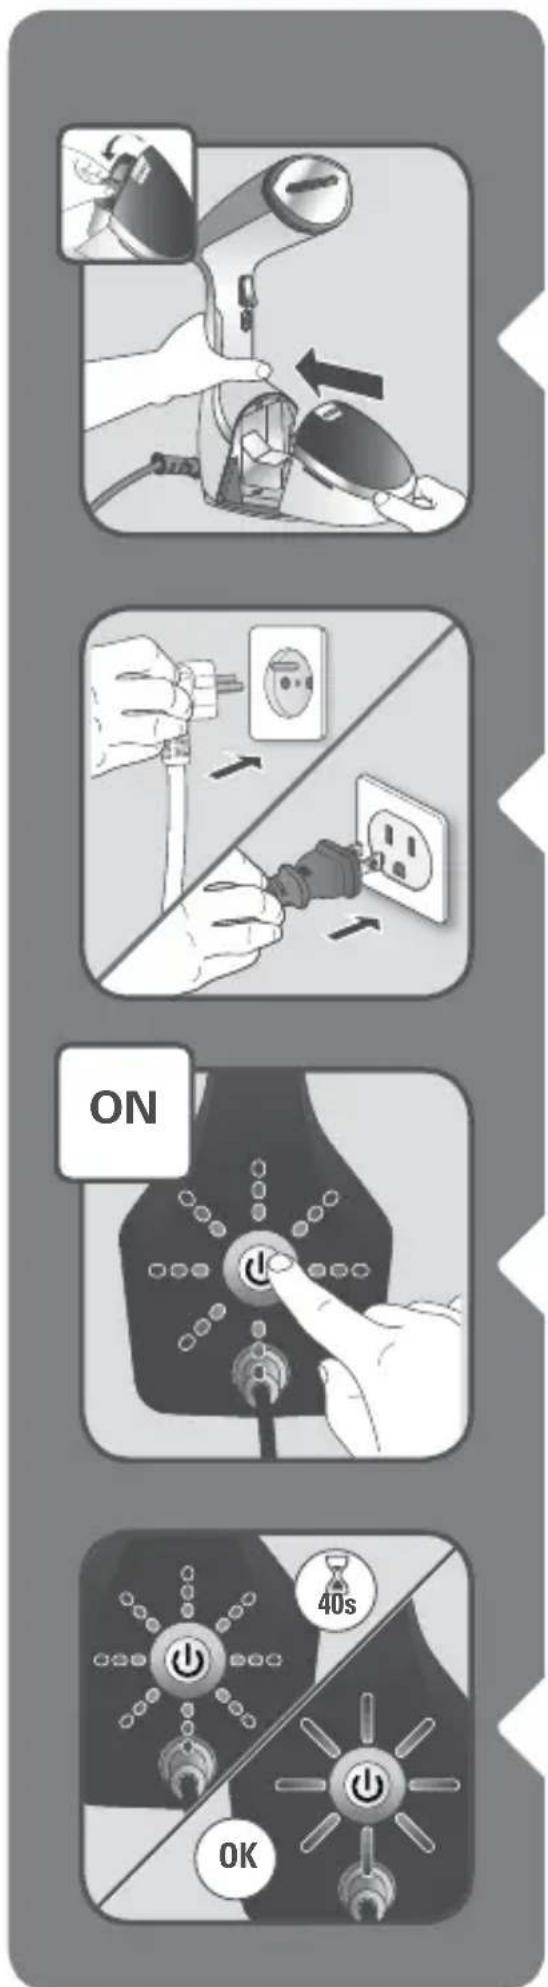
Plug-in the appliance.
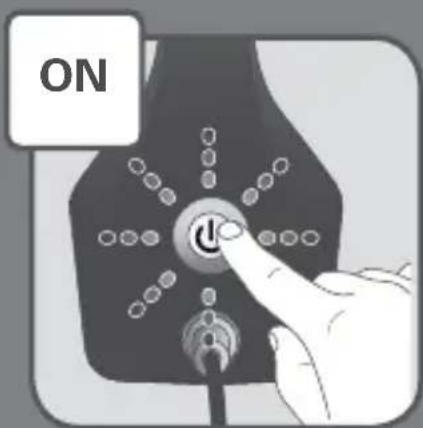
Switch on the appliance.
Wait until the light stops flashing (approximately 40 seconds). When the light is steady the appliance is ready to use.
natural_image
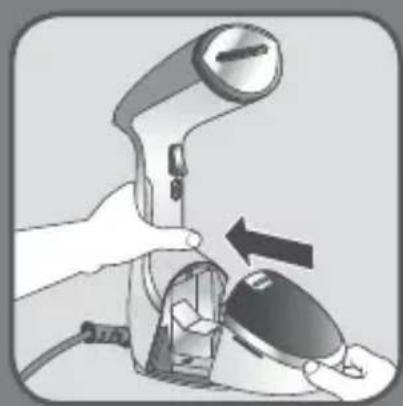
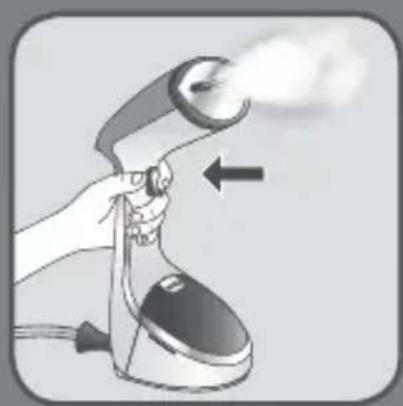
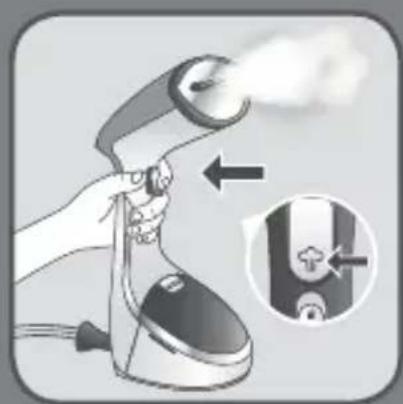
Illustration of a hand using a hairdryer to lift a device with a smoke trail (no text or symbols)Press the steam button with the steam brush facing away from you holding it in a vertical position.
natural_image
Illustration of two hands holding a shirt with steam rising, showing the process (no text or symbols)For optimal use, move the garment steamer over your garment from top to bottom.
natural_image
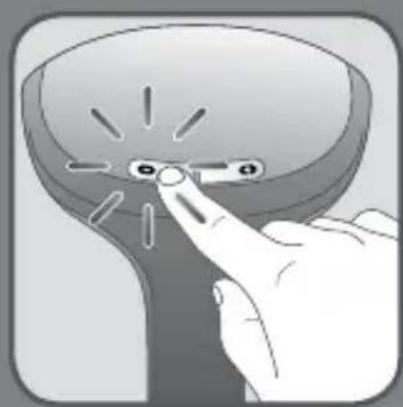
Illustration of a hand pointing at a button labeled 'θ' (no text or symbols beyond the label)3 levels of steam: adapt the steam output to your garment.
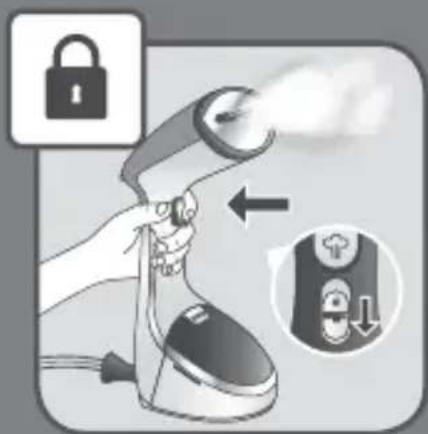
text_image
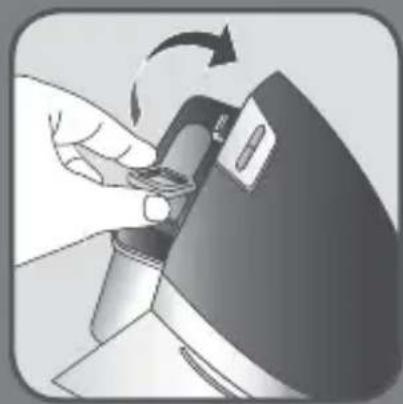
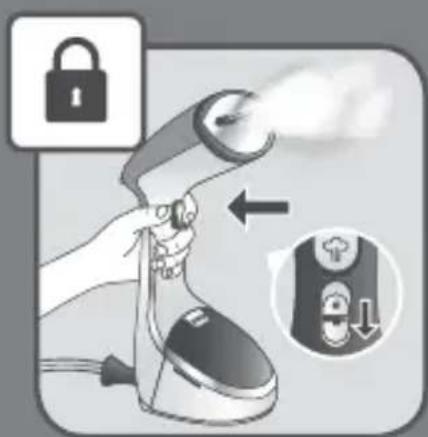
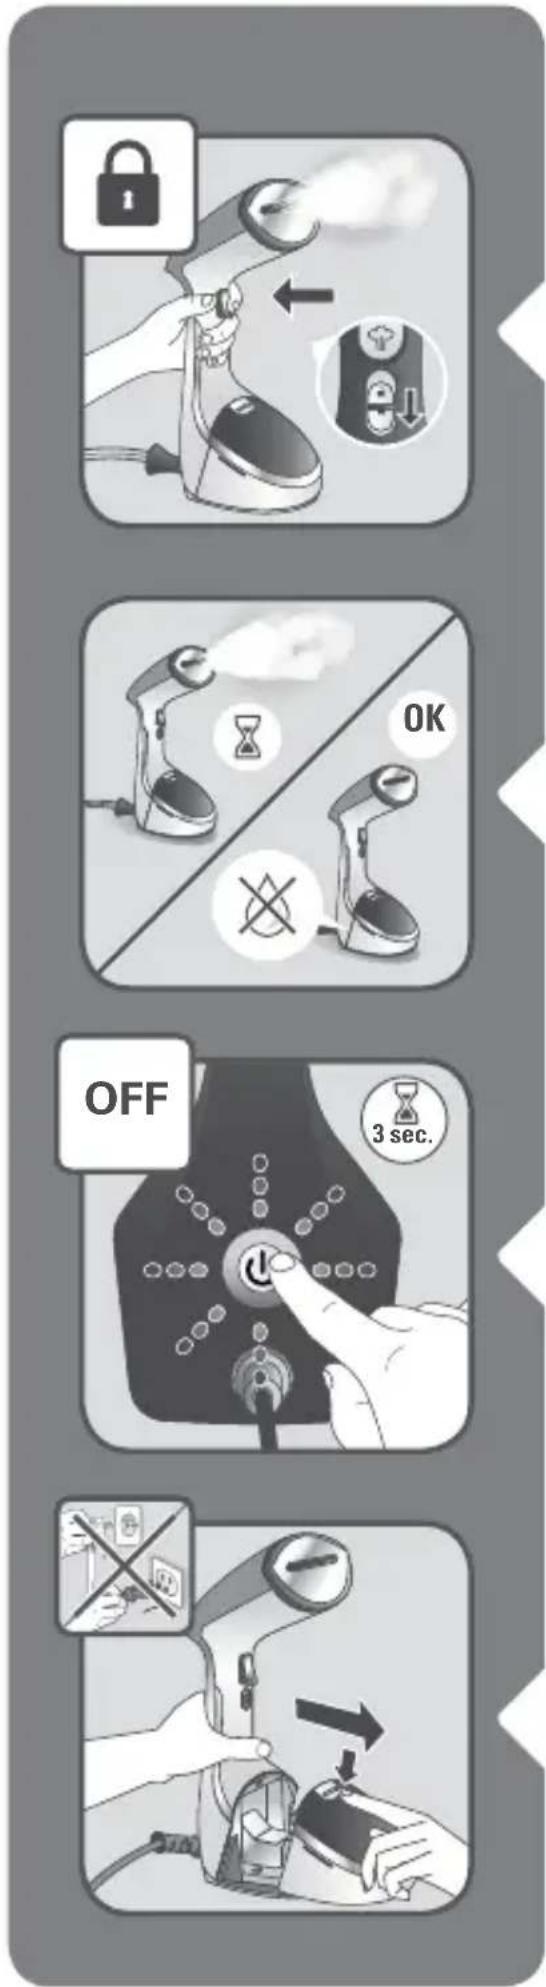
Illustration showing a hand using an electric shaver to press down a lock, with a close-up of the lock mechanism.For continuous steam, lock the steam trigger by pushing the locker switch down. To release it, push it up.
text_image
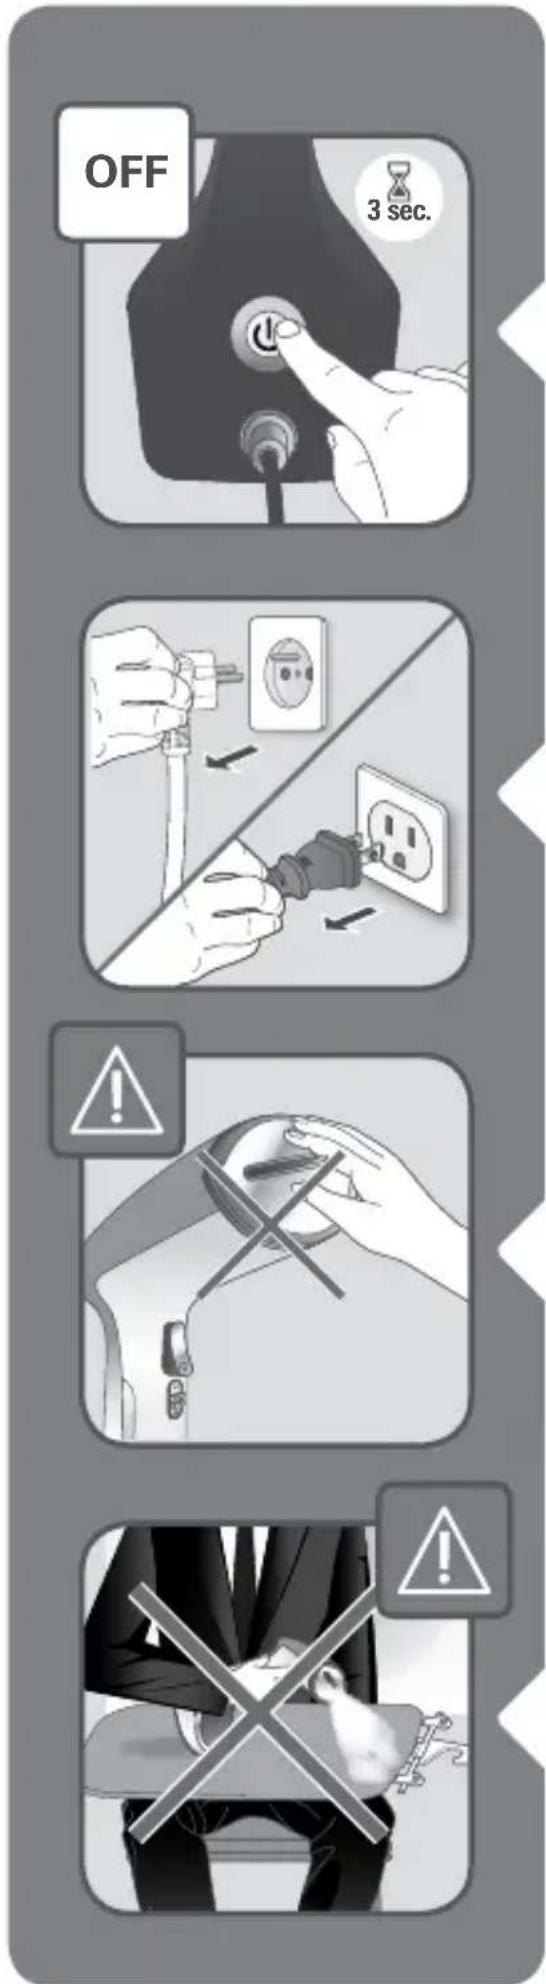
OFF 3 sec.Press and hold the On/Off button for 3 seconds to switch the appliance off.
Unplug the appliance.
Warning: Never touch the soleplate of the appliance.
Warning: Never steam a garment with the board on your legs.

natural_image
Hand pressing a button on a device with a power symbol (no text or labels visible)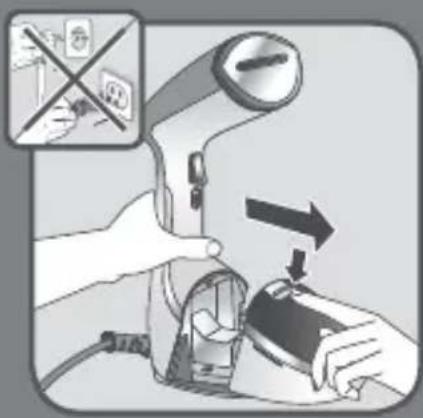
text_image
Diagram showing a hand using a device to press or install a device, with an inset image showing a warning sign and a magnified view of the device.5 STANDBY MODE

1) For your safety, the appliance is fitted with a standby monitoring system, which is activated automatically after approximately 8 minutes without use.
2) Only the 'On-Off' button flashes slowly to indicate that the appliance is on standby
3) To reactivate the steambrush :
a. Press the 'On-Off' button and wait until the button light stops flashing
b. You can start steaming again.
6 AFTER USE

Unlock and remove the water tank.

text_image
Diagram illustrating three-step safety procedure for using a device, showing step-by-step installation and time stamp.Empty the water tank completely.
Return the water tank to its place on the appliance.
Wait for approximately 1 hour for your appliance to cool completely before storing or using the travel pouch.
text_image
50% Water + 50% White Vinegar / Citric Acid7 DESCALING
Do this operation in a well ventilated room.
Unlock and remove the water tank.
Remove the water inlet stopper.
Fill the water tank with 50% untreated tap water and 50% white vinegar or citric acid.
Do not use other descaling products.
text_image
Diagram illustrating five different electrical switch state changes: one with a plug, one with an outlet, one with a power button, one with a 40-second indicator, and one without.Return the water tank to its place on the appliance. Make sure the water tank is fully set in place and locked.
Plug-in the appliance.
Switch on the appliance.
Wait until the light stops flashing (approximately 40 seconds). When the light is steady the appliance is ready to use.
text_image
OFF 3 sec.Put the steam trigger in the locked position using the locker.
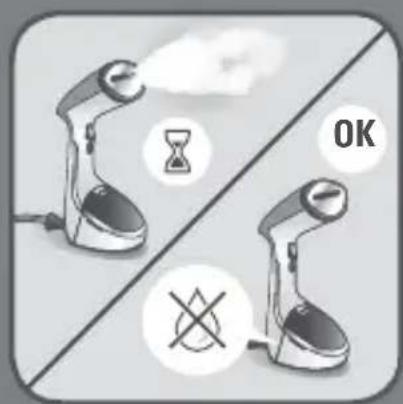
Place the product on a flat, stable, horizontal and heat resistant surface.
Allow the appliance to run until the water tank has completely emptied.
Press and hold the On/Off button for 3 seconds to switch the appliance off.
Unplug the appliance and pull the water tank out.
text_image
Diagram illustrating the step-by-step installation of a power outlet, showing hand positioning and electrical switch controls.Remove the water inlet stopper and fill the water tank with untreated tap water.
Return the water tank to its place on the appliance. Make sure the water tank is fully set in place.
Plug in the appliance.
Switch on the appliance.

text_image
40s OKWait until the light stops flashing (approximately 40 seconds). When the light is steady the appliance is ready.
natural_image
Illustration of a hand using an electric steam gun to press down a doorbell (no text or symbols present)Put the steam trigger in the locked position. place the product on a flat, stable, horizontal and heat resistant surface.

text_image
OKAllow the appliance to run until the water tank has completely emptied.

text_image
1H NO8 CLEANING
Wait for approximately 1 hour for the appliance to completely cool.
Only use a soft sponge with water to clean. Do not use any detergent product.
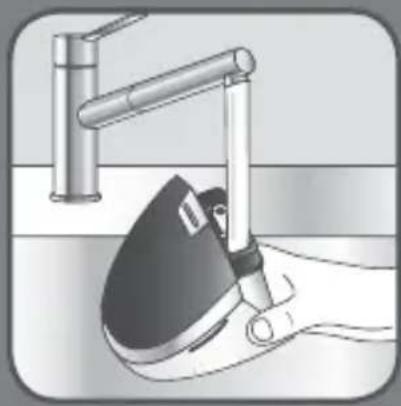
Never wash or rinse appliance directly over a sink.
Troubleshooting Guide
| PROBLEM POSSIBLE CAUSES SOLUTIONS | ||
| There is no steam. The appliance is not plugged in, or not switched on. | Check that your appliance is correctly plugged in and switched on. | |
| The water level is too low. Unplug your appliance and refill it. | ||
| The steam pump has not been primed. Press the steam trigger continuously for a few seconds to begin steaming. | ||
| You are using the appliance for the first time. | ||
| The water tank is not fully in place. Ensure that stopper is closed and that the water tank clicks when put into place. | ||
| The appliance is on standby mode. PLEASE REFER TO THE ‘STANDBY’ section. | ||
| The appliance does not heat. | It is not plugged in, or not switched on. Plug in your appliance and switch on. | |
| The appliance is on standby mode. PLEASE REFER TO THE ‘STANDBY’ section. | ||
| Water leaks. The water tank is not fully in place or the stopper is not closed properly. | Ensure that stopper is closed and that the water tank clicks when put into place. | |
| Steam rate decreases. Calc is building up. Refer to ‘ANTI CALC section in instructions for use. | ||
| The steam leaves stains on the fabric or the appliance spits | You are using water with additives. Never add any additive in the water tank. | |
| The appliance has not been cleaned enough after the descaling operation. | Read carefully the ‘ANTI CALC’ section in instructions for use. | |
| You are using liquids other than white vinegar or citric acid to descale the product. | Use only white vinegar or citric acid during ‘ANTI CALC’ procedure. | |
| Appliance steams continuously. | The steam trigger is on the lock position. | Unlock the steam trigger. |
text_image
Illustration showing a step-by-step procedure for using a hairdryer, with instructional arrows and safety symbols.1 ΠΡΙΝ ΑΠΟ ΤΗ ΧΡΗΣΗ
natural_image
Illustration of a hand using a handheld device to interact with a device, showing mechanical components and an arrow indicating motion (no text or symbols present)natural_image
Simple illustration of a gray rectangular object with a curled handle and small protrusions on top (no text or symbols)


natural_image
Simple 3D illustration of a rectangular panel with rounded edges and mounting holes (no text or symbols)natural_image
Diagram of a hexagonal grid device with directional arrows indicating movement or flow (no text or symbols)natural_image
Diagram of a mechanical component with hexagonal grid pattern and a magnified inset showing a hand interacting with a vertical structure (no text or symbols)natural_image
Illustration of a hand holding a tool interacting with a hexagonal grid structure, with arrows indicating direction (no text or symbols)natural_image
Illustration of a hand inserting a cable into a hexagonal grid structure (no text or symbols)natural_image
Cross-sectional diagram of a mechanical assembly with a hook and clamping mechanism (no text or labels)natural_image
Simple line drawing of a door with a hanging clip and two small protrusions (no text or symbols)text_image
Warning symbol with exclamation mark over a person in suit, indicating legal or regulatory hazardnatural_image
Illustration of a man in a suit hanging from a hanging hanger with a downward arrow, no text or symbols present.
natural_image
Mechanical component diagram showing a ring and shaft assembly with directional arrows (no text or symbols)
natural_image
Diagram of a device with a mesh head and cable, showing directional arrows (no text or symbols)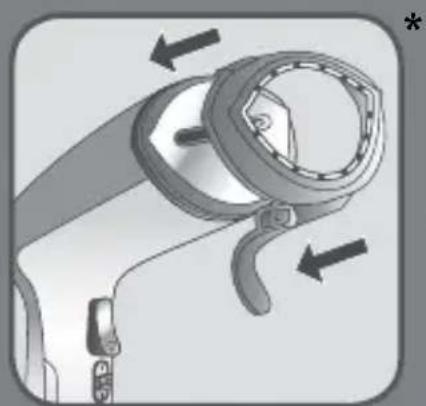
natural_image
Diagram of a mechanical device with directional arrows indicating motion or force (no text or symbols)natural_image
Simple line drawing of a bag with a handle and a small leaf, no text or symbols present.natural_image
Simple 3D-rendered rectangular object with hatched fill, no text or symbols visibletext_image
ON 40s OK4 ΧΡΗΣΗ
natural_image
Illustration of a hand holding a small object emitting smoke or vapor (no text or symbols)natural_image
Illustration of a hand using a hairdryer to lift a device with a smoke trail (no text or symbols)natural_image
Illustration of two hands holding a shirt with steam rising, showing the process (no text or symbols)natural_image
Illustration of a hand pointing at a device with labeled ports (no text or symbols present)text_image
Illustration showing a hand using an electric iron with lock and down arrow, indicating lock status change.text_image
OFF 3 sec.text_image
Diagram illustrating a device control interface with labeled buttons and warning signs for disassembly or repair.text_image
Diagram illustrating three-step cleaning or assembly process for a device, showing tool insertion, magnification, and time stamp.text_image
Diagram illustrating four steps of appliance control: lighting, power installation, switch press, and 40-second power switch.text_image
OFF 3 sec.natural_image
Illustration of a hand operating a machine with a close-up inset showing the motion (no text or symbols)natural_image
Illustration of a hand using a device to adjust or install a device, showing a close-up view of the device (no text or symbols present)από τη βρύση.
natural_image
Illustration of hands connecting electrical socket to power outlet, showing installation and disassembly (no text or symbols)natural_image
Illustration of a hand using an electric steam gun to press down a doorbell (no text or symbols present)text_image
Illustration showing a step-by-step procedure for using a hairdryer, with instructional arrows and safety symbols.natural_image
Illustration of a hand using a handheld device to interact with a device, showing mechanical components and an arrow indicating motion (no text or symbols present)natural_image
Simple gray illustration of a rectangular object with a curled top and small protrusions on the side (no text or symbols)

natural_image
Simple 3D illustration of a rectangular panel with rounded edges and mounting holes (no text or symbols)natural_image
Diagram of a hexagonal grid device with directional arrows indicating movement or flow (no text or symbols)natural_image
Diagram of a mechanical component with hexagonal grid pattern and a magnified inset showing a hand interacting with a vertical bar (no text or symbols)natural_image
Illustration of a hand holding a tool near a hexagonal grid structure with directional arrows (no text or symbols)natural_image
Illustration of a hand inserting a cable into a hexagonal grid structure (no text or symbols)natural_image
Cross-sectional diagram of a mechanical assembly with a hook and clamping mechanism (no text or labels)natural_image
Simple line drawing of a door with a hanging clip and two small protrusions (no text or symbols)text_image
Warning symbol with exclamation mark over a person in suit, indicating caution or errornatural_image
Illustration of a man in a suit hanging from a hanger with a downward arrow, no text or symbols present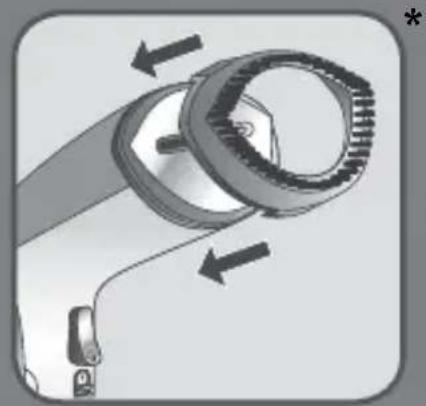
natural_image
Mechanical component diagram showing a ring and shaft assembly with directional arrows (no text or symbols)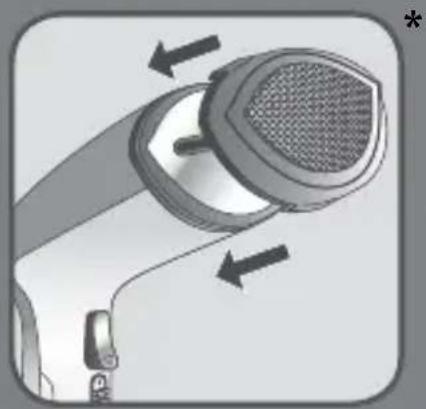
natural_image
Diagram of a device with a mesh grille and directional arrows indicating movement or force (no text or symbols)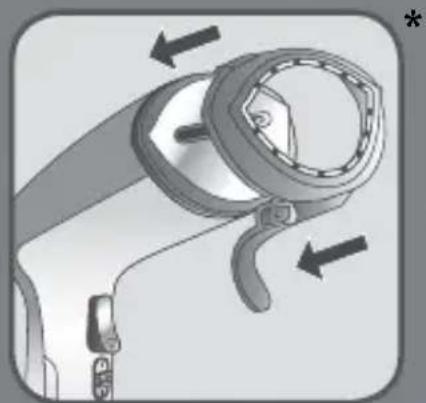
natural_image
Diagram of a handheld device with directional arrows indicating motion or movement (no text or symbols present)natural_image
Simple line drawing of a bag with a handle and a small leaf, no text or symbols present.natural_image
Simple 3D-rendered rectangular object with a hatched fill, no text or symbols present.text_image
ON 40s OK
UTILISATION

natural_image
Illustration of a hand holding a small object with a smoke or vapor trail (no text or symbols)natural_image
Illustration of a hand using a hairdryer to lift a device with a smoke trail (no text or symbols)natural_image
Illustration of two hands using a hairdryer to clean or wear a garment, showing a downward arrow (no text or symbols)natural_image
Illustration of a hand pressing a button on a curved object with arrows indicating motion (no text or symbols)vêtement.
text_image
Illustration showing a hand using an electric iron with lock and down valve, indicating lock status change.text_image
OFF 3 sec.natural_image
Hand pressing a button on a device with a power symbol (no text or labels visible)
text_image
Diagram showing a hand using a device to press or install a device, with an inset image showing a warning sign and a magnified view of the device.5
MODE VEILLE

text_image
Diagram illustrating three-step safety procedure for using a device, showing step-by-step installation and time stamp.text_image
Diagram illustrating five different electrical switch state changes: one with a plug, one with an outlet, one with a power button, one with a 40-second indicator, and one without.text_image
OFF 3 sec.text_image
Diagram illustrating the step-by-step installation of a power outlet, showing hand positioning and electrical switch controls.natural_image
Illustration of a hand using an electric steam gun to press down a doorbell (no text or symbols present)Allumez l'appareil.
text_image
OKtext_image
Diagram showing a hand using a device to press or install a device, with an inset image indicating no readable text or symbols.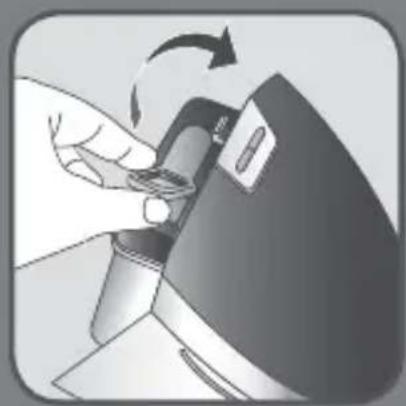
natural_image
Illustration of a hand using a tool to press or adjust a device, showing a curved arrow indicating rotation (no text or symbols present)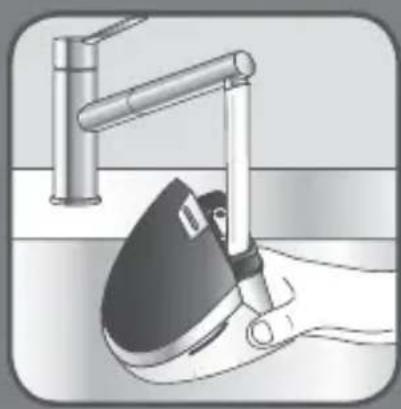
natural_image
Illustration of a hand using a hairdryer to clean water, no text or symbols present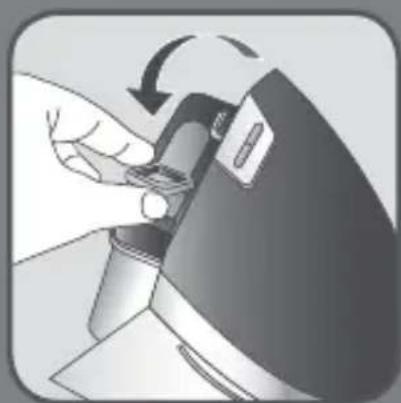
natural_image
Close-up of a hand using a tool to adjust or install a mechanical component, no visible text or symbolsقبل الاستخدام

natural_image
Illustration of a vintage desktop phone with a speaker and ear (no text or symbols visible)natural_image
Illustration of a hand using a handheld device to interact with a device, showing mechanical components and an arrow indicating motion (no text or symbols present)natural_image
Simple illustration of a gray rectangular object with a curled paperclip on top (no text or symbols)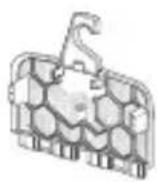

natural_image
Simple 3D illustration of a rectangular panel with rounded edges and mounting holes (no text or symbols)natural_image
Diagram of a hexagonal grid device with directional arrows indicating movement or flow (no text or symbols)
natural_image
Diagram showing a device with hexagonal grid pattern and a magnified inset of a hand holding a tool (no text or symbols)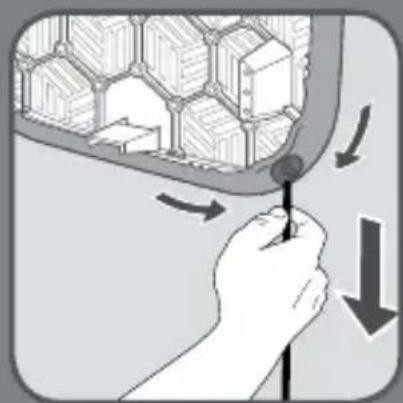
natural_image
Illustration of a hand holding a tool near a window frame with house symbols, showing directional arrows (no text or labels)-
- عم اهم mergا و قلواطلا ی لع تقلانلا عاز جلًا عض
natural_image
Illustration of a hand inserting a cable into a hexagonal grid structure (no text or symbols)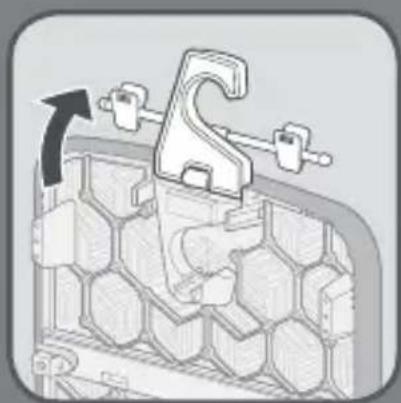
natural_image
Diagram of a mechanical clamp securing a hexagonal component, with an arrow indicating force direction (no text or symbols present)
natural_image
Simple line drawing of a door with a hanging clip and two small protrusions (no text or symbols)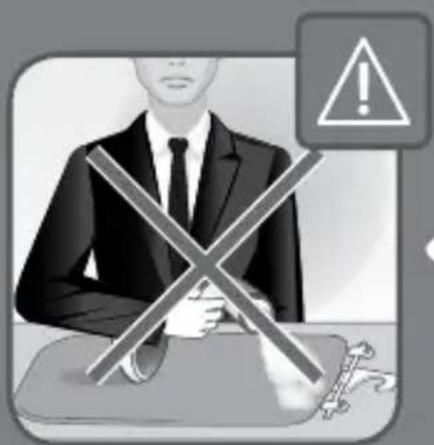
natural_image
Illustration of a person in a suit crossed with a cross symbol, with an exclamation mark and warning triangle (no text or symbols on the figure itself)natural_image
Illustration of a jacket hanging from a hanger with a downward arrow indicating hanging weight (no text or symbols)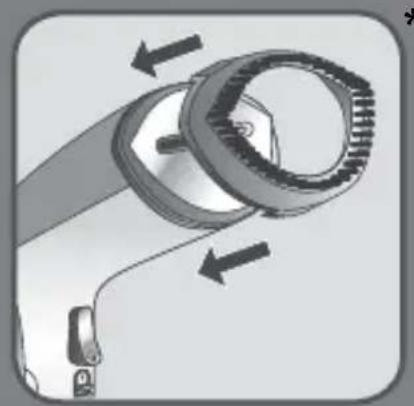
natural_image
Mechanical component diagram showing a lever mechanism with arrows indicating motion direction (no text or symbols)
natural_image
Diagram of a device with a mesh cover and directional arrows indicating movement or force (no text or symbols)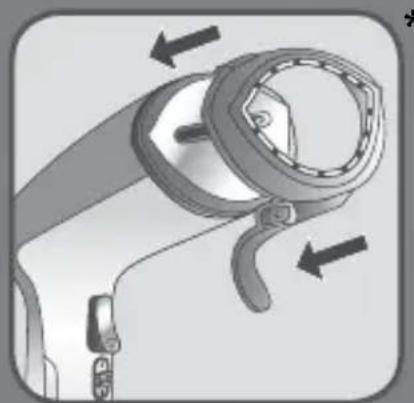
natural_image
Diagram of a mechanical device with directional arrows indicating motion or force (no text or symbols present)natural_image
Simple line drawing of a bag with a handle and tail, no text or symbols presentnatural_image
Simple 3D-rendered rectangular block with hatched fill, no text or symbols presenttext_image
Warning symbol with a man in suit crossed over a phone, indicating incorrect use of electronic devices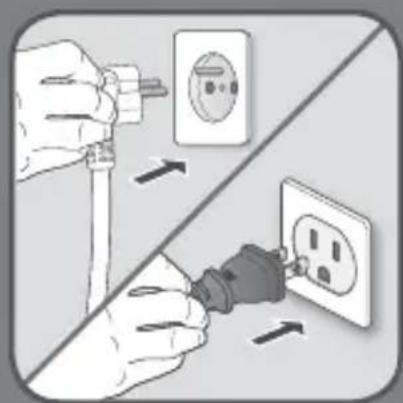
natural_image
Illustration of hands connecting electrical outlets to a plug, showing power and circuit connections (no text or symbols)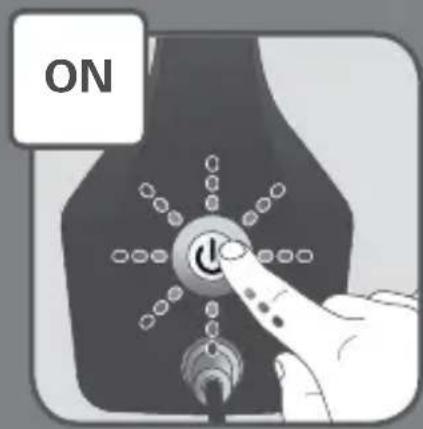
text_image
ON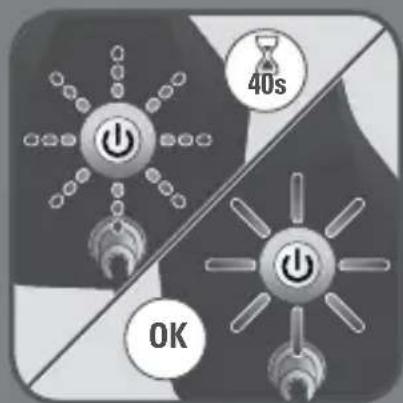
text_image
40s OKالاستخدام 4
natural_image
Illustration of a hand holding a small object emitting smoke or vapor (no text or symbols). اهنادترا عانثً راخبلاب بایللا يکبا دباً مقت لا: ری Zones
natural_image
Illustration of a hand using a hairdryer to lift a device with a smoke trail (no text or symbols)natural_image
Illustration of a person using a hairdryer to clean or exhaust clothing, showing the process with no text or symbols.natural_image
Illustration of a hand pointing at a small object with labeled points (no text or symbols present)text_image
Illustration showing a hand using an electric iron with lock and down valve, indicating lock status change.text_image
OFF 3 sec.text_image
Diagram showing installation of an electrical outlet with plug and socket, including a close-up of the socket and plug.text_image
Warning symbol with exclamation mark and car handle, indicating safety hazardnatural_image
Illustration of a person sitting with a large 'X' symbol crossed out, no text or symbols presentnatural_image
Hand pressing a button with a power symbol (no text or labels visible)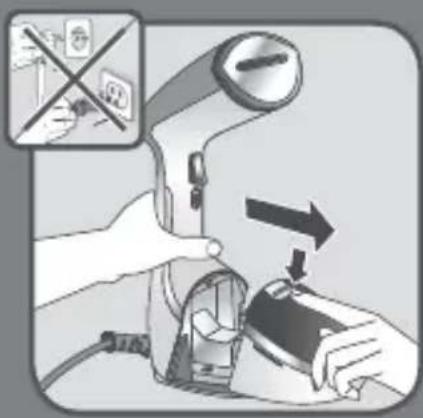
text_image
Diagram showing a hand using a device to adjust or install a device, with an inset image showing a warning sign and a crossed-out arrow.وضع الاستعداد
5

natural_image
Illustration of a hand holding a cleaning tool with a pipe, showing fluid flow (no text or symbols)natural_image
Illustration of a hand using a computer to adjust a device, showing a magnified view of the device (no text or symbols present)natural_image
Illustration of a hand using a computer to adjust a device, showing a close-up of the screen and mouse (no text or symbols present)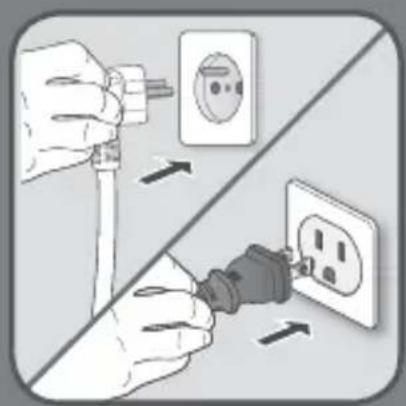
natural_image
Illustration of hands connecting a plug to an electrical outlet, showing installation and disassembly (no text or symbols)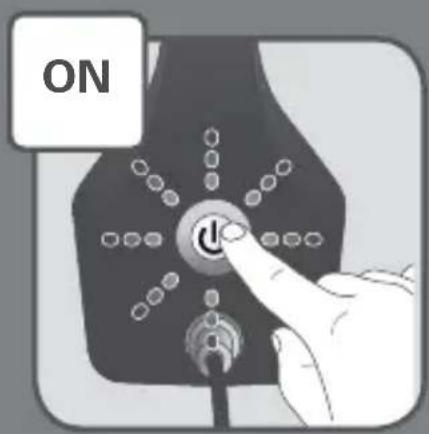
text_image
ON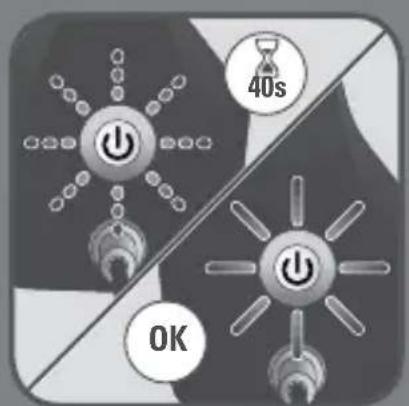
text_image
40s OKtext_image
Illustration showing a hand using an electric iron to press down a lock, with an inset highlighting the lock mechanism.text_image
OFF 3 sec.text_image
Diagram showing a hand using a device to switch a valve, with an inset image indicating no readable symbols or text.natural_image
Illustration of a hand using a manual power tool to lift a device, showing mechanical components and motion (no text or symbols)natural_image
Illustration of a hand holding a device with an arrow indicating motion (no text or symbols present)natural_image
Illustration of hands connecting electrical socket to power outlet, showing installation and disassembly (no text or symbols)زاهجلا لیصوتد مق
text_image
ONزاهجلا لیغشتب مق

text_image
40s OKحبصيو. (قِنَاتْ 40 ىلَوْح) رشُّملا ضِيمو فَقُوتِي ى تَح رَظُتنَا اً تبَاثْ عوضلا حبصِي امندع مَادخْتِسِالَ ازْهَاج زَاهِجُلا

natural_image
Illustration of a hand using an electric steam gun to press down a doorbell (no text or symbols present)natural_image
Illustration of a hand holding a small object with a magnified inset showing a food item (no text or symbols present)