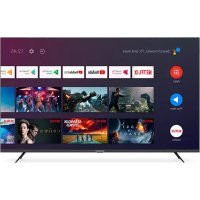
SCLED32SC400ATV - TV SCHNEIDER - Free user manual and instructions
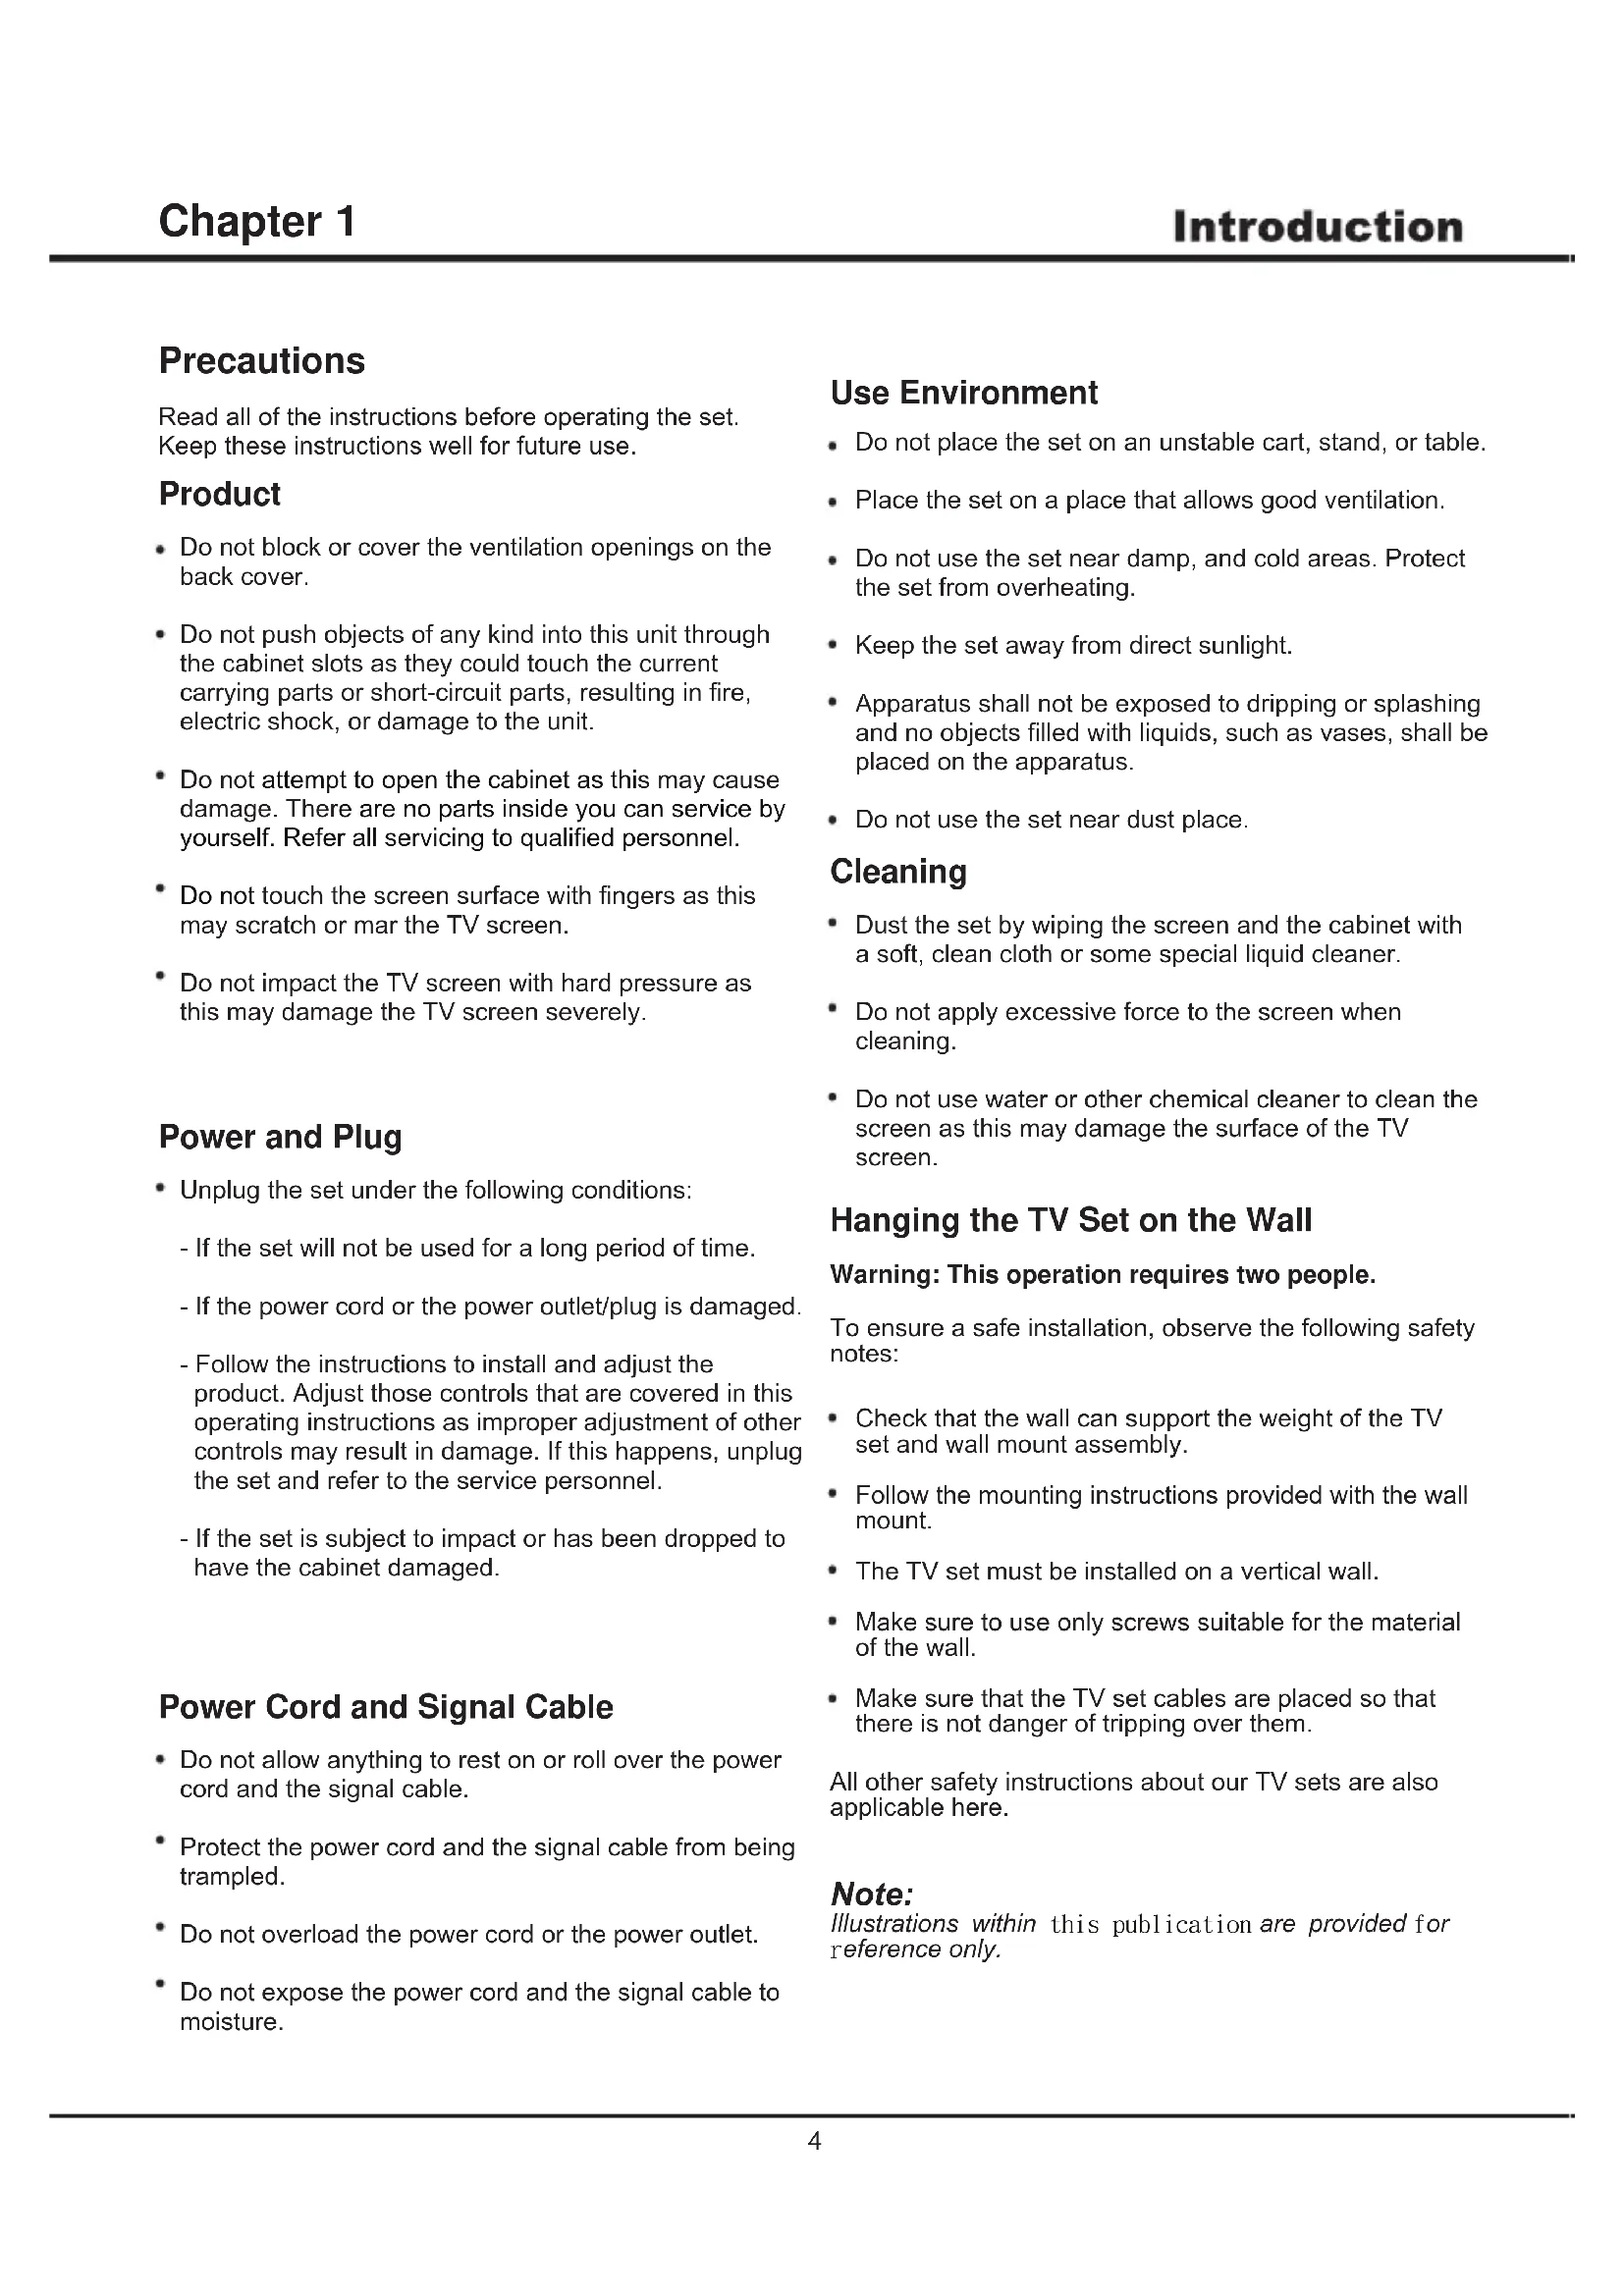
Find the device manual for free SCLED32SC400ATV SCHNEIDER in PDF.


| Product Type | LED LCD TV |
| Brand | Schneider |
| Model | SCLED32SC400ATV |
| Screen Diagonal | 80 cm (32 inches) |
| Screen Resolution | 1366 x 768 pixels |
| Net Weight | 3.9 kg |
| Power Consumption (SDR mode) | 31 W |
| Power Consumption (HDR mode) | 40 W |
| Power Consumption Standby | 0.5 W |
| SDR Energy Efficiency Class | F |
| HDR Energy Efficiency Class | G |
| Display Technology | LED LCD |
| Main Connectors | HDMI, USB, VGA, SCART, Antenna/Cable, Satellite, Optical Audio Output, Headphone |
| Power Supply | Built-in, AC 100-240 V (internal) |
| Operating Temperature | 0 to 40 °C |
| Main Features | HD DVB-T2/S2, USB Multimedia, Built-in Wi-Fi, Smart TV, Netflix, YouTube |
| Recommended Cleaning | Soft dry cloth; no chemicals, alcohol or solvents |
| Safety | Double insulation (Class II), automatic shutdown in case of overheating, protection against electric shocks |
Frequently Asked Questions - SCLED32SC400ATV SCHNEIDER
User questions about SCLED32SC400ATV SCHNEIDER
0 question about this device. Answer the ones you know or ask your own.
Ask a new question about this device
Download the instructions for your TV in PDF format for free! Find your manual SCLED32SC400ATV - SCHNEIDER and take your electronic device back in hand. On this page are published all the documents necessary for the use of your device. SCLED32SC400ATV by SCHNEIDER.
USER MANUAL SCLED32SC400ATV SCHNEIDER
EARPHONE/HEADPHONE →
DIGITAL AUDIO OUTPUT (COAXIAL)/SPDIF
SORTIE AUDIO NUMÉRIQUE (COAXIAL)/SPDIF
CONFIGURATION/PARAMÈTRES/OPTION
natural_image
Technical line drawing of a rectangular electronic device with internal components and mounting points (no text or symbols)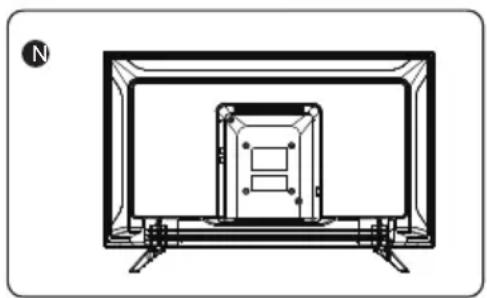
natural_image
Line drawing of a flat-screen TV unit with a central display and mounting base (no text or symbols)Fiche technique
IMPORTANT SAFETY INSTRUCTIONS
This lightning flash with arrowhead symbol within an equilateral triangle is intended to alert the user to the presence of non-insulated “dangerous voltage” within the product's enclosure that may be of sufficient magnitude to constitute a risk of electric shock.
WARNING
- To reduce the risk of electric shock, do not remove cover (or back) as there are no user-serviceable parts inside. Refer servicing to qualified personnel.
- The exclamation point within an equilateral triangle is intended to alert the user to the presence of important operating and maintenance instructions in the literature accompanying the appliance.
- Do not install this equipment in a confined or building-in space such as a book case or similar unit, and remain a well ventilation conditions at open site. The ventilation should not be impeded by covering the ventilation openings with items such as newspaper, table-cloths, curtains etc.
- Please refer the information on exterior bottom enclosure for electrical and safety information before installing or operating the apparatus.
- The mains plug/appliance couple is used as disconnect device, the disconnect device shall remain readily operable.
- To reduce the risk of fire or electric shock, do not expose this apparatus to rain or moisture. The apparatus shall not be exposed to dripping or splashing and that objects filled with liquids, such as vases, shall not be placed on apparatus.
- The battery (battery or batteries or battery pack) shall not be exposed to excessive heat such as sunshine, fire or the like.
- Never place a television set in an unstable location. A television set may fall, causing serious personal injury or death. Many injuries, particularly to children, can be avoided by taking simple precautions such as:
- Using cabinets or stands recommended by manufacturer of the television set.
- Only using furniture that can safely support the television set.
- Not placing the television set on tall furniture (for example, cupboards or bookcases) without anchoring both the furniture and television set to a suitable support.
- Not placing the television set on cloth or other materials that may be located between the television set and supporting furniture.
- Educating children about the dangers of climbing on furniture to reach the television set or its controls. If your existing television set is being retained and located, the same considerations are above should be applied.
- No naked flame sources, such as lighted candles, should be placed on the apparatus.
- Keep a minimum distance of 5 cm around all edges of the display for sufficient ventilation.
Notes for battery disposal
The batteries used with this product contain chemicals that are harmful to the environment. To preserve our environment, dispose of used batteries according to your local laws or regulations. Do not dispose of batteries with normal household waste. For more information, please contact the local authority or your retailer where you purchased the product. All trademarks are the property of their respective owners and all rights are acknowledged.

This equipment is a Class II or double insulated electrical appliance. It has been designed in such a way that it does not require a safety connection to electrical earth.

To prevent the spread of fire, keep candles or other open flames away from this product at all times.
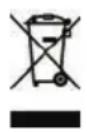
Correct Disposal of this product. This marking indicates that this product should not be disposed with other household wastes throughout the EU. To prevent possible harm to the environment or human health from uncontrolled waste disposal, recycle it responsibly to promote the sustainable reuse of material resources. To return your used device, please use the return and collection systems or contact the retailer where the product was purchased. They can take this product for environmental safe recycling.
Cleaning Instruction

- Before cleaning this product, press STANDBY button to turn it to the standby mode and wait for a few minutes to disconnect the power plug.
- Wipe this product with a dry, soft cloth. Do not spray water directly onto the TV, but apply a small amount of water on the corner of the cloth and wipe as gently as possible. Never use cleaning fluids, wax, or chemicals.
- Never use alcohol, benzene, thinner, cleaning fluid or other chemicals. And do not use compressed air to remove dust.
- If the surface is extremely dirty, wipe it with a cloth which has been dipped in a weak soap-water solution and wrung out thoroughly, and then wipe again with a dry cloth.
- Before you plug in the TV back, let the screen dry completely.

*Do not touch or be close to the ANT/CABLE IN, HDMI, USB, SPDIF terminals, and prevent electrostatic discharge to disturb these terminals while in USB, WIFI and LAN operation mode, or it will cause the TV to stop working or abnormal status.
Terms and options may change depending on the models.
Chapter 1: Introduction
Precautions 4
Product 4
Power and Plug 4
Power Cord and Signal Cable 4
Use Environment 4
Cleaning 4
Hanging the TV Set on the Wall 4
Buttons on the TV 5
Sockets 6
Remote Control Functions 8
Chapter 2: General Operation
Switching on 9
Switching off 9
Network connection 10
Menu Function 1
USB Function 1
Features of product 1
Chapter 3: Advanced Functions
Attention and Frequently Asked Questions 12
Chapter 4: Other Information
Troubleshooting 13
Base Installation 13
Precautions
Read all of the instructions before operating the set. Keep these instructions well for future use.
Product
- Do not block or cover the ventilation openings on the back cover.
- Do not push objects of any kind into this unit through the cabinet slots as they could touch the current carrying parts or short-circuit parts, resulting in fire, electric shock, or damage to the unit.
- Do not attempt to open the cabinet as this may cause damage. There are no parts inside you can service by yourself. Refer all servicing to qualified personnel.
- Do not touch the screen surface with fingers as this may scratch or mar the TV screen.
- Do not impact the TV screen with hard pressure as this may damage the TV screen severely.
Power and Plug
- Unplug the set under the following conditions:
- If the set will not be used for a long period of time.
- If the power cord or the power outlet/plug is damaged.
- Follow the instructions to install and adjust the product. Adjust those controls that are covered in this operating instructions as improper adjustment of other controls may result in damage. If this happens, unplug the set and refer to the service personnel.
- If the set is subject to impact or has been dropped to have the cabinet damaged.
Power Cord and Signal Cable
- Do not allow anything to rest on or roll over the power cord and the signal cable.
- Protect the power cord and the signal cable from being trampled.
• Do not overload the power cord or the power outlet. - Do not expose the power cord and the signal cable to moisture.
Use Environment
- Do not place the set on an unstable cart, stand, or table.
- Place the set on a place that allows good ventilation.
- Do not use the set near damp, and cold areas. Protect the set from overheating.
- Keep the set away from direct sunlight.
- Apparatus shall not be exposed to dripping or splashing and no objects filled with liquids, such as vases, shall be placed on the apparatus.
- Do not use the set near dust place.
Cleaning
- Dust the set by wiping the screen and the cabinet with a soft, clean cloth or some special liquid cleaner.
- Do not apply excessive force to the screen when cleaning.
- Do not use water or other chemical cleaner to clean the screen as this may damage the surface of the TV screen.
Hanging the TV Set on the Wall
Warning: This operation requires two people.
To ensure a safe installation, observe the following safety notes:
- Check that the wall can support the weight of the TV set and wall mount assembly.
- Follow the mounting instructions provided with the wall mount.
- The TV set must be installed on a vertical wall.
- Make sure to use only screws suitable for the material of the wall.
- Make sure that the TV set cables are placed so that there is not danger of tripping over them.
All other safety instructions about our TV sets are also applicable here.
Note:
Illustrations within this publication are provided for reference only.
Buttons on the TV
Note: The location and names of the function buttons and power button on the TV may vary according to TV model. And some buttons may not be available for some models.
Type 1:
1. PROGRAM/CHANNEL UP/DOWN button
Scans up/down through the channel list. In the menu system, they act like the up/down direction buttons on the remote and adjust menu controls.
2. VOLUME UP/DOWN button
Increases/decreases the volume. In the menu system, they act like the right/left direction buttons on the remote and adjust menu controls. (Note: In some menus, VOLUME DOWN also acts like the OK button on the remote.)
3. MENU button
Brings up the main menu or press to return to the previous menu.
4. SOURCE button
Press to select signal source.
5. POWER(⏻) button
Turns the TV on or standby. (Note: for some models, the ⏻ button turns the TV on or off.)
Type 2:
/ MENU button1.
Turns the TV on or standby. The TV is on, press it, brings up the main menu or press to return to the previous menu. Before enter menu, long press it for three seconds to display the Source Select. Long press it, TV will be off.
Note: In some models, when the power is on, press and hold the TV Controller more than 2 seconds and then release, the NAV menu will display on the screen; When NAV menu is visible, you can highlight the shortcuts by moving the Controller up/down direction, and press the Controller to enter, then operate according to the on-screen display. The shortcuts are including Source, Menu, Home, Back and Standby. And the shortcuts may vary depending on models.
To exit the NAV menu, press the Controller up/down direction till 🔍 is highlighted, then press the controller again to confirm.
2. VOLUME UP/DOWN button
Increases/decreases the volume. In the menu system, they act like the right/left direction buttons on the remote and adjust menu controls. (Note: In some menus, VOLUME UP also acts like the OK button on the remote.)
3. PROGRAM/CHANNEL UP/DOWN button
Scans up/down through the channel list. In the menu system, they act like the up/down direction buttons on the remote and adjust menu controls.
Type 3:
1. PROGRAM/CHANNEL UP/DOWN button
Scans up/down through the channel list. In the menu system, they act like the up/down direction buttons on the remote and adjust menu controls.
2. VOLUME UP/DOWN button
Increases/decreases the volume. In the menu system, they act like the right/left direction buttons on the remote and adjust menu controls. (Note: In some menus, VOLUME DOWN also acts like the OK button on the remote.)
3. HOME( △) button
Return to Home menu or enter certain source from Home menu.
4. OK button
In the menu system, confirms your selection or changes settings.
5. POWER(⏻) button
Turns the TV on or standby. (Note: for some models, the ⏻ button turns the TV on or off.)
Sockets
Note: The location and names of the sockets on the TV may vary according to TV model, and some sockets may not available for some models.
USB
USB sockets (input)
These sockets can be used to connect an USB device.
Note: The number of USB sockets on the TV may vary according to TV model.
![AV OUT [VIDEO- L- AUDIO R- ]](/content/2026/04/615453/images/26a955411c914e99e78502a11847166b5c3c9788860be4616cd2e61eed8ec95d.jpg)
AV audio + video mini sockets (output)
These AV out socket can be used to connect a VCR to record programs. You must leave the TV on the same channel you are recording. The VIDEO OUT socket provides composite video connection.
HDMI
HDMI socket (input)
The HDMI (High-Definition Multimedia Interface) socket can be used to connect a PC with a compatible video card installed, certain DVD players or a high-definition compatible digital satellite decoder. This socket provides an uncompressed digital connection that carries both video and audio data by way of an integrated mini-plug cable.
- ARC (Audio Return Channel) function is only supported on certain HDMI (ARC) port for some models.
- Number of HDMI ports may vary.
Note: Only HDMI sockets with the MHL identification will support the MHL function, MHL stands for Mobile High-definition Link, and allows you to link an MHL-capable mobile device to the television.
Cl ^-
CI socket
This CI socket can be used to put the CI card in to accept the locked programs.
EARPHONE/HEADPHONE →
EARPHONE/HEADPHONE socket (output)
Allow you to connect earphones to listen to the sound coming from the TV. Note: Excessive sound pressure from earphones can cause hearing loss.
VGA/PC AUDIO IN -
VGA/PC AUDIO IN socket
Provides audio connection when using VGA/PC.
DIGITAL AUDIO OUTPUT (COAXIAL)/SPDIF
DIGITAL AUDIO OUTPUT(COAXIAL)/SPDIF
Use a digital cable to connect your TV to a compatible audio receiver.
ANTENNA/CABLE IN
ANTENNA/CABLE IN socket (input)
Lets you connect a coaxial cable to receive the signal from your antenna, cable, or cable box.
SCART -
SCART adapter
Connects to an external device, such as a VCR, set-top box, or a DVD player using the included SCART adapter cable.
VGA/PC-
VGA/PC socket (input)
This socket can be used to connect a computer.
SATELLITE
SATELLITE socket (input)
This socket can be used to connect the satellite receiver pot.
AUDIO L/R OUT
Use an audio cable to connect your TV to a compatible audio receiver.
$$ \text { AV IN } \left[ \begin{array}{c} \text { VIDEO } \ \Gamma R \ \text { AUDIO } \ L L \end{array} \right] - $$
The AV IN sockets can be used to connect a range of equipment, including video recorders, camcorders, decoders, satellite receivers, DVD players, or games consoles. The VIDEO IN socket provides composite video connection.
LAN/RJ45
LAN/RJ45
RJ45 plug for connecting to external modem or network access equipment.
Component/AV IN
$$ \left[ \begin{array}{c} Y \ P b \ P r \ V i d e o \ L \ A u d i o \ R \end{array} \right] - $$
YPbPr component sockets (input)
The component sockets can recognize if the device you're connecting to is Y Pb Pr compatible. The component sockets provide excellent picture quality because the video is separated into three separate parts.
Video + AV RCA audio sockets (input)
The AV IN sockets can be used to connect a range of equipment, including video recorders, camcorders, decoders, satellite receivers, DVD players, or games consoles.
Note: Component IN and AV IN share the same L/R Audio input jacks.
AC IN \~ -
AC In socket (input)
This socket can be used to connect a AC supply.
DC IN
DC In socket (input)
This socket can be used to connect a DC supply.
SD CARD -
SD CARD (input)
The socket can be used to connect an SD card.
S-VIDEO
S-VIDIO socket (input)
Allows you to connect an S-VIDEO cable from another component.
OPTICAL OUT
OPTICAL OUT socket
This output can be used to connect a compatible digital audio receiver.
LINE OUT
LINE OUT sockets
Use a 3.5mm stereo to RCA audio cable to connect your TV to a compatible audio receiver.
Remote Control Functions
Most of your television's functions are available on the menu that appear on the screen. The remote control supplied with your set can be used to navigate through the menus and to configure all the general settings. Note: The location and names of the buttons on the remote control may vary according to TV model, and not all buttons available on all models.

Turns the TV on or off.
MUTE To mute and un-mute the sound.
0-9 buttons To enter channel numbers.
FAV To bring up the favorite channel list menu.
LIST To display the channel list.
+/- To control the volume.
P+/- To adjust channels.
TV Accesses the TV mode.
SMART To enter SMART function interface.
HOME To enter Homepage.
MENU ≡ Enter into Quick Access Menu.
OK Confirms your selection.
(up, down, left and right direction buttons) Highlights different items in the menu system and adjusts the menu controls.
BACK ← To go back to the previous menu or interface; to exit a running app.
SOURCE ➕ To enter source selection interface.
EXIT To go back to the previous menu or interface; to exit a running app.
ZOOM To select the picture format.
Enter into Using TV System menu.
INFO To display program information, if available.
EPG To toggle the Electronic Program Guide on or off under DTV source.
① Lang/AD To select a sound type available for selected analogue TV program; to select an audio language available for selected digital TV program.
USB To enter the USB mode.
SUBT. To select a subtitle language available for selected digital TV program.
TEXT To toggle Teletext on or off.
Colored buttons To select tasks or Teletext pages.
◀◀ ▶▶ To start fast reverse or fast forward.
▶ To start playback.
II To pause playback.
To select the previous or the next photo, music or video.
■ To stop playback.
- REC Not available.
NETFLIX Goes to the NETFLIX homepage.
YouTube Goes to the YouTube homepage.
Switching on
Follow the instructions on this page on how to switch on your TV set and the remote control before going on to following pages describing how to use the channel set-up procedure.
- Insert two batteries in the remote control.
Precautions on using batteries:
- Only use the battery types specified.
- Make sure you use the correct polarity.
- Do not mix new and used batteries.
- Do not use rechargeable batteries.
- Do not expose batteries to excessive heat such as sunshine, fire or the like, throw them in a fire, recharge them or try to open them, as this could cause them to leak or explode.
- Remove the batteries from the remote control if you are not using it for a long period of time.
- Connect the power cable FIRST to the television, THEN to a mains socket. (Note: If the power cable is connected to the television, please only connect the power cable to the mains socket.)
- If your TV is connected to an AC supply Your TV set should only be connected to an AC supply. It must not be connected to a DC supply. If the plug is detached from the cable, do not, under any circumstances, connect it to a mains socket, as there is a risk of electric shock.
- If your TV is connected to a DC supply Your TV set should only be connected to a DC supply. It must not be connected to a AC supply. If the plug is detached from the cable, do not, under any circumstances, connect it to a mains socket, as there is a risk of electric shock.
-
Connect an outside aerial to the ANTENNA IN socket at the back of the TV set.
-
When powered on, the TV will be turned on directly or be in standby. Note: For some models, switch the TV on by pressing the power button.
If the power indicator lights up, the TV set is in standby mode. Press the button on the remote control or on the TV set to turn on the TV.
Switching off
- To put the TV set into standby mode, press the ⏻ button on the remote control or on the TV, the TV set remains powered up, but with low energy consumption.
- To switch off the TV set, unplug the mains socket from the mains outlet. Note: For some models, press the power button to switch off the TV set.
Network Connection
To access the internet, you must subscribe high speed broadband internet service from your internet service provider.
Your TV can be connected to your home network in two ways:
- Wired, using the RJ45 (LAN) connector on the back panel.
- Wireless, using the internal wireless or external wireless USB adapter and your home wireless network.
Note: This function is not available for certain models. Instructions below are just the usual ways to connect your TV to the wired or wireless network. The connection method may be different depending on your actual network configuration. If you have any questions about your home network, please refer to your ISP (Internet Service Provider).
Connecting to a wired network
To connect to a wired network:
- Ensure you have:
• An ethernet cable long enough to reach your TV
• A router or modem with an available Ethernet port
• A high-speed internet connection
• An Ethernet (LAN) port on the back of the TV
- Connect your ethernet cable to the router and to the Ethernet port on the back of the TV.
- Use the Network Settings to configure the TV.
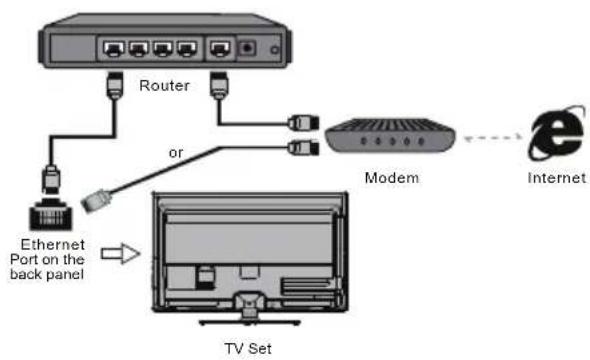
flowchart
graph TD
    A["TV Set"] --> B["Ethernet Port on the back panel"]
    B --> C["Router"]
    C --> D["Modem"]
    D --> E["Internet"]
    style A fill:#f9f,stroke:#333
    style B fill:#ccf,stroke:#333
    style C fill:#cfc,stroke:#333
    style D fill:#fcc,stroke:#333
    style E fill:#cff,stroke:#333
Connecting to a wireless network
To connect to a wireless network
- Ensure you have:
• A router broadcasting a high-speed wireless signal
• A high-speed internet connection
- A wireless USB Adapter (not need for a built-in wireless connection).
- The TV set with Wi-Fi Module.
- Use the Network menu to configure the TV.
Note: Some models may have internal wireless module, then the wireless USB adapter is unnecessary. Some external wireless adapters cannot be compatible with the TV.
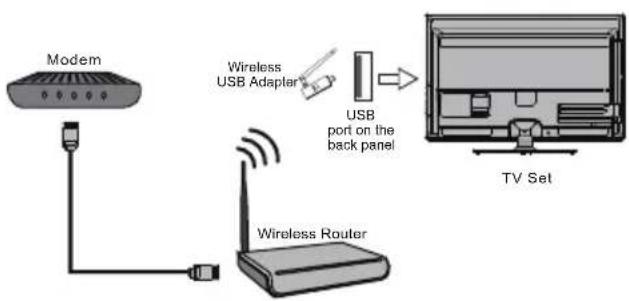
flowchart
graph TD
    A["Modem"] --> B["Wireless Router"]
    B --> C["USB port on the back panel"]
    C --> D["TV Set"]
    style A fill:#f9f,stroke:#333
    style B fill:#ccf,stroke:#333
    style C fill:#cfc,stroke:#333
    style D fill:#fcc,stroke:#333
Menu Function
The following instructions will introduce the main menu of the TV simply. These functions are the basic functions for TV, please note that some functions might be unavailable in certain input source. And for some models, certain options are not available.
Note: The names of the functions on the TV may vary according to TV model, and not all functions are available on all models.
CHANNEL
The CHANNEL menu allows you to select all the settings required to be able to search for and store all the channels you can receive. You also may edit those channels.
Note: This function is only available in TV mode.
PICTURE
The menus for adjusting the picture are used to obtain the best picture setting according to your preference, the type of programme you are watching and the ambient lighting.
SOUND
The SOUND menu allows you to adjust each option for your listening pleasure.
TIME/TIMER
The TIME/TIMER menu allows you to set the sleep time, turn on time, turn off time, etc..
LOCK
The LOCK menu allows you to effectively stop the desired one without the correct password from watching TV.
SETUP/SETTING/OPTION
The SETUP/SETTING/OPTION menu allows you to set the OSD language, Audio language, etc..
SCREEN/PC
The SCREEN/PC menu allows you to adjust the picture's position, phase clock, etc..
Note: Only available in VGA/PC mode.
USB Function
Connect a USB device to a USB socket and display the main menu.
You can play movie, photo, music or text on TV.
Note: Some options may unavailable in some models. In USB state, if no USB device connected, the USB interface will be displayed.
Features of product
• High definition picture
- Ultra slim
- USB support movie
- Energy saving
• High contrast ratio
- High resolution
• User-Friendly function & interface
- Eye protection
Attention and Frequently Asked Questions
Attention:
Some non-standard mobile storage device may not be recognized. Please change to use the standard device.
Note: For coding files, there are many kinds non-standard coding method, so this system can not be guaranteed to support the file formats using any coding method.
Frequently Asked Questions:
- Under the following conditions, this system cannot decode the file and the file cannot be play normally:
-The parameters of file, such as the pixel of picture, code rate of audio and video file, sampling rate of audio file, exceed the limit of the system;
-The format of file is not matched or the file is harmed. - Hot plug: Do not disconnection when the system is reading or transmitting data, avoid damaging the system or the device.
- Pay attention to the power supply of the device when you are using a mobile hard disk or a digital camera. If the power supply is not sufficient or not stable, you may encounter problems during operating or can not operate at all. In this case, please restart the device, or unplug the device and plug it again, and ensure that its power supply is normal.
- The system supports standard USB1.1 and USB2.0 devices, such as standard U-disks, MP3 players, mobile hard disks, etc..
- For obtaining better audio and video quality, suggests to use the external device which accords with USB2.0 standard.
- When playing the video with high compression ratio, these phenomenons, such as picture standstill and menu long time response, are normal.
- For some USB device with power supply, such as large size hard disk, MP4, etc., suggests using it with power to avoid electric power shortage.
Troubleshooting
Most problems you encounter with your TV can be corrected by consulting the following troubleshooting list.
No picture, no sound
- Check if the fuse or circuit breaker is working.
- Plug another electrical device into the outlet to make sure it is working or turned on.
- Power plug is in a bad contact with the outlet.
- Check the signal source.
No color
- Change the color system.
- Adjust the saturation.
- Try another channel. Black-white program may be received.
Remote control does not work
- Change the batteries.
- Batteries are not installed correctly.
- Main power is not connected.
No picture, normal sound
- Adjust the brightness and contrast.
- Broadcasting failure may happen.
Normal picture, no sound
- Press the Vol+ button to increase volume.
- Volume is set to mute, press the mute button to restore sound.
- Change the sound system.
- Broadcasting failure may happen.
Unorderly ripples on the picture
It is usually caused by local interference, such as cars, daylight lamps and hair driers. Adjust the antenna to minimize the interference.
Blank screen in VGA mode
Perhaps the TV can not recognize the resolution set by the PC. Suggest to change to the best resolution or other standard resolutions of the Windows system.
Snowy dots and interference
If the antenna is located in the fringe area of a television signal where the signal is weak, the picture may be marred by dots. When the signal is extremely weak, it may be necessary to install a special antenna to improve the reception.
- Adjust the position and orientation of the indoor/outdoor antenna.
- Check the connection of antenna.
- Fine tune the channel.
- Try another channel. Broadcasting failure may happen.
Ignition
Black spots or horizontal streaks appear, or the picture flutters or drifts. This is usually caused by interference from car ignition system, neon lamps, electric drills, or other electrical appliance.
Ghost
Ghosts are caused by the television signal following two paths. One is the direct path, the other is reflected from tall buildings, hills, or other objects. Changing the direction or position of the antenna may improve the reception.
Radio frequency interference
This interference produces moving ripples or diagonal streaks, and in some case, loss of contrast in the picture. Find out and remove the radio interference source.
If the TV is crashed
- Press the Power button to turn off TV, then press the Power button again to reset TV.
- Unplug the power cord, then press the Power button to reset TV.
Note: If these 2 methods can not be resolved, please contact the after-sales to solve.
Base Installation
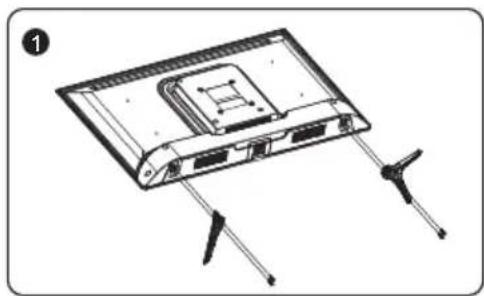
To fix the double support base on the unit by screws, the installation is completed.
Note: Illustrations below are provided for reference only and may differ from actual product appearance.
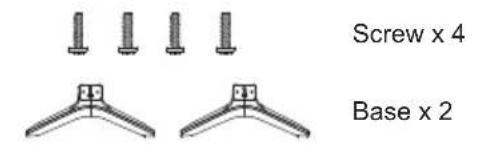
natural_image
Diagram of a computer monitor with ports and connectors, no text or symbols present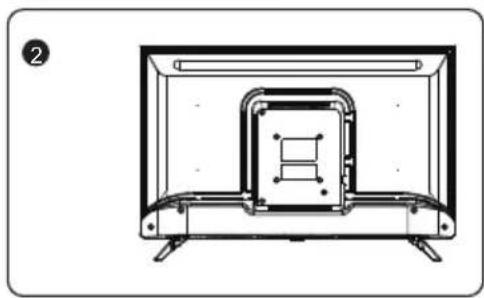
natural_image
Technical line drawing of a mechanical component or enclosure with no visible text or symbolsTechnical data sheet
Information for Electronic Displays for Commission Regulation 2019/2013/EU
| Value | Unit | |
| Model identification | SC-LED32SC400ATV | |
| Manufacturer's name or trade mark | SCHNEIDER | |
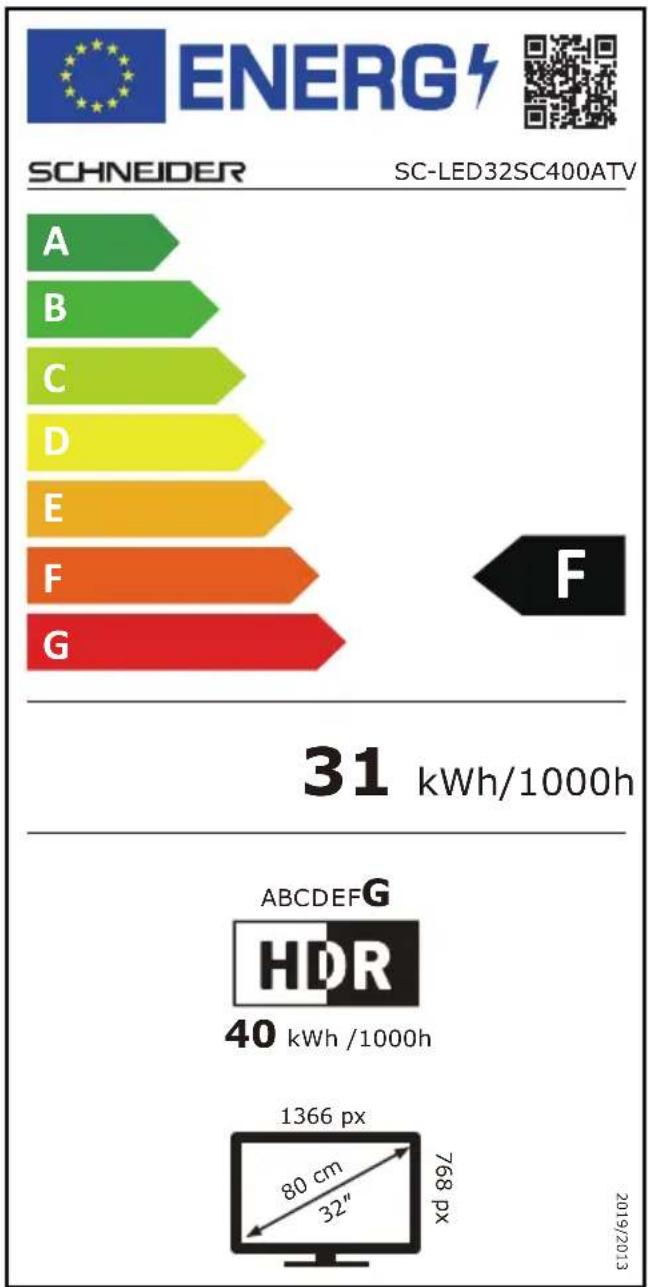
| Energy efficiency class for standard Dynamic Range (SDR) | F | A-G |
| On mode power demand for Standard Dynamic Range (SDR) | 31 | W |
| Energy efficiency class (HDR) | G | A-G |
| On mode power demand in High Dynamic Range (HDR) mode | 40 | W |
| Off mode, power demand | 0 | W |
| Standby mode power demand | 0.5 | W |
| Networked standby mode power demand | 2.0 | W |
| Electronic display category | television | television/monitor /signage/other |
| Size ratio | 16: 9 | Integer |
| Screen resolution (pixels) | 1366X768 | Pixels |
| Screen diagonal | 80.0 | cm |
| Screen diagonal | 32 | Inches |
| Visible screen area | 2736.7 | cm2 |
| Panel technology used | LED LCD | E.g. LCD/LED LCD/QLED LCD/OLED/MicroLED/QD LED/SED/FED/EPD, etc. |
| Automatic Brightness Control (ABC) available | No | Yes/No |
| Voice recognition sensor available | No | Yes/No |
| Room presence sensor available | No | Yes/No |
| Image refresh frequency rate | 60 | Hz |
| Power supply type: | Internal | Internal/External/Standardised external |
Note:
- Energy efficiency class: A (most efficient) to G (lease efficient)
- Annual energy consumption in kWh per 1000 hr, based on the power consumption of the television operating 1000 hours. The actual energy consumption will depend on how the television is used.
The above value has been measured in accordance with standards under specified operating conditions.
Result may vary according to operation time, contrast, brightness, operating mode....etc.
Product Information sheet according to EU Regulation No. 2019/2013 Energy labelling for Electronic Display & Television can be found below URL or QR code indicated on Energy label URL: https://eprel.ec.europa.eu/qr/333595
HDMI®
HIGH-DEFINITION MULTIMEDIA INTERFACE
The terms HDMI, HDMI High-Definition Multimedia Interface, and the HDMI Logo are trademarks or registered trademarks of HDMI Licensing Administrator, Inc.
Technical Specification:
Name: Television Product
Net Weight: 3.9kg
Operation Temperature: 0—40°C
TV Reception System: DVB-S2/S/T2/T/C
Sheet of household television according EU directive 1062/2010
| Trade Mark Schneider | |
| Reference | SC-LED32SC400ATV |
| Model 32D2011 | |
| Viewing angle | Typical: +89/-89 (H),+89/-89 (V) |
| Resolution 1366 x 768 | |
| Display Colour 16.7M | |
| Contrast 3000:1 (typical) | |
| Ratio 16:9 | |
| Tuner 2 | |
| TV power supply 180-240V~50/60HZ | |
| Consumption | 50W |
| Dimensions | 725.9(W)×180.4(D)×482.5(H) |
| Weight Net weight: 3.9Kg | |
| Socle 2 pcs, removable | |
| Operating temperature | 0°C et 40°C |
| Remotecontrol power supply | AAA*2pcs |
| USBportpower supply | 5V,500mA |
| Hotel /factory mode | Yes |
| Loud speaker 2*8W | |
| Input | USB*2 / RF*2 / HD |
| Output Earphone out, Optical out | |
| Wirelessconnectivity | Yes |
| Reading formats Vidéo : H.265/H.264/MPEG1/MPEG2/MPEG4/VC1/WMV | |
| Musique : MP3/AAC | |
| Multimedia via USB | Photos : JPG/JPEG/PNG/BMP |
| Processor: | CA53*4 64bi t |
| RAM: 1.5G | |
| Operating system(for smart TV only): | Andr o i d |
| Internal memory | 8GB |
bar
| Category | Value | | -------- | --------- | | A | 31 kWh/1000h | | B | 31 kWh/1000h | | C | 31 kWh/1000h | | D | 31 kWh/1000h | | E | 31 kWh/1000h | | F | 31 kWh/1000h | | G | 31 kWh/1000h |Position: Quality Assurance Engineer
Signature:
Date: 4 Mar 2021
SCHNEIDER


(1)
FR - Manuel d'utilisation / Veuillez lire attentivement ce manuel avant de l'utiliser et conservez-le pour toute référence ultérieure.
IT - Manuale d'uso / Si prega di leggere attentamente questo manuale prima dell'uso e di conservarlo per riferimento futuro.
ES - Manual del usuario / Por favor, lea este manual cuidadosamente antes de usarlo y guárdelo para futuras referencias.
PT - Manual do usuário / Por favor, leia este manual cuidadosamente antes de usar, e guarde-o para referência futura.
AL - Benutzerhandbuch / Bitte lesen Sie dieses Handbuch vor dem Gebrauch sorgfältig durch und bewahren Sie es zum späteren Nachschlagen auf.
NL - Gebruiksaanwijzing / Lees deze handleiding zorgvuldig door voordat u hem gebruikt en bewaar hem voor toekomstig gebruik.
GR - Εγχειρίδιο χρήσης / Διαβάστε προσεκτικά το παρόν εγχειρίδιο πριν από τη χρήση και φυλάξτε το για μελλοντική αναφορά.
RO - Cititi cu atentie manualul de utilizare si pastrati-I pentru consultari ulterioare

- SORTIE AUDIO NUMÉRIQUE (COAXIAL)/SPDIF
- CONFIGURATION/PARAMÈTRES/OPTION
- Fiche technique
- IMPORTANT SAFETY INSTRUCTIONS
- WARNING
- Notes for battery disposal
- Cleaning Instruction
- Chapter 1: Introduction
- Chapter 2: General Operation
- Chapter 3: Advanced Functions
- Chapter 4: Other Information
- Precautions
- Product
- Power and Plug
- Power Cord and Signal Cable
- Use Environment
- Cleaning
- Hanging the TV Set on the Wall
- Note:
- Buttons on the TV
- Type 1:
- PROGRAM/CHANNEL UP/DOWN button
- VOLUME UP/DOWN button
- MENU button
- SOURCE button
- POWER(⏻) button
- Type 2:
- / MENU button1.
- PROGRAM/CHANNEL UP/DOWN button
- Type 3:
- HOME( △) button
- OK button
- Sockets
- USB sockets (input)
- AV audio + video mini sockets (output)
- HDMI socket (input)
- CI socket
- EARPHONE/HEADPHONE socket (output)
- VGA/PC AUDIO IN socket
- DIGITAL AUDIO OUTPUT(COAXIAL)/SPDIF
- ANTENNA/CABLE IN socket (input)
- SCART adapter
- VGA/PC socket (input)
- SATELLITE socket (input)
- LAN/RJ45
- YPbPr component sockets (input)
- Video + AV RCA audio sockets (input)
- AC In socket (input)
- DC In socket (input)
- SD CARD (input)
- S-VIDIO socket (input)
- OPTICAL OUT socket
- LINE OUT sockets
- Remote Control Functions
- Switching on
- Switching off
- Network Connection
- Connecting to a wired network
- Connecting to a wireless network
- Menu Function
- CHANNEL
- PICTURE
- SOUND
- TIME/TIMER
- LOCK
- SETUP/SETTING/OPTION
- SCREEN/PC
- USB Function
- Features of product
- Attention and Frequently Asked Questions
- Frequently Asked Questions:
- Troubleshooting
- No picture, no sound
- No color
- Remote control does not work
- No picture, normal sound
- Normal picture, no sound
- Unorderly ripples on the picture
- Blank screen in VGA mode
- Snowy dots and interference
- Ignition
- Ghost
- Radio frequency interference
- If the TV is crashed
- Base Installation
- Technical data sheet
- HDMI®
- SCHNEIDER
Brand : SCHNEIDER
Model : SCLED32SC400ATV
Category : TV