SCLED50SC500QA - TV SCHNEIDER - Free user manual and instructions
Find the device manual for free SCLED50SC500QA SCHNEIDER in PDF.
| Product type | 4K LED TV |
| Brand | Schneider |
| Model | SCLED50SC500QA |
| Screen diagonal | 50 inches (127 cm) |
| Resolution | 3840 x 2160 pixels (4K Ultra HD) |
| Aspect ratio | 16:9 |
| TV system | PAL/SECAM, DVB-T/T2/C |
| Power supply | AC 100-240V, 50/60Hz |
| Power consumption (max) | 138 W |
| Standby power consumption | < 0.5 W |
| Energy class | A |
| Sound output | 2 x 10 W |
| Connectivity | 4x HDMI, 3x USB, 1x AV IN, 1x RJ45, 1x optical output, 1x headphone, 1x CI, 1x antenna |
| Smart TV | Android TV |
| Voice assistant | Google Assistant built-in (remote control) |
| Chromecast built-in | Yes |
| Remote control | Bluetooth with voice command |
| Safety standards | Double insulation, child protection |
| Cleaning | Soft dry cloth, do not spray water |
| Viewing angle | Wide (not specified) |
Frequently Asked Questions - SCLED50SC500QA SCHNEIDER
User questions about SCLED50SC500QA SCHNEIDER
0 question about this device. Answer the ones you know or ask your own.
Ask a new question about this device
Download the instructions for your TV in PDF format for free! Find your manual SCLED50SC500QA - SCHNEIDER and take your electronic device back in hand. On this page are published all the documents necessary for the use of your device. SCLED50SC500QA by SCHNEIDER.
USER MANUAL SCLED50SC500QA SCHNEIDER
natural_image
Black triangular warning symbol with a lightning bolt and downward arrow (no text)ATTENTION
RISQUE D'ÉLECTROCUTION NE PAS OUVRIR !

natural_image
Black triangular warning symbol with exclamation mark (no text or numbers)ATTENTION POUR RÉDUIRE LE RISQUE D'ÉLECTROCUTION, NE RETIREZ PAS LE CAPOT (OU LA PARTIE ARRIÈRE DU BOÎTIER). LE TÉLÉVISEUR NE CONTIENT AUCUNE PIÈCE REMPLACABLE. CONFIEZ LES RÉPARATIONS AU PERSONNEL QUALIFIÉ.

natural_image
Illustration of a computer monitor with warning symbols and a crossed-out cable, no text or labels present.Avertissement

natural_image
Simple line drawing of a monitor with a cross symbol and a hanging curtain (no text or symbols)Avertissement

natural_image
Simple line drawing of a computer monitor with a crossed X symbol and stars (no text or labels)Avertissement

natural_image
Simple line drawing of a computer monitor with a curved frame and a base, emitting steam (no text or symbols)Attention

natural_image
Simple line drawing of a flat-screen monitor with a black X mark on the stand (no text or symbols)Attention

natural_image
Cartoon illustration of a person running away from a computer monitor with a crossed-out X symbol (no text or symbols present)Attention

natural_image
Simple line drawing of a geometric shape with intersecting lines and a vertical line, no text or symbols present.Attention

natural_image
Illustration of a person running away from a computer monitor next to a broken circular object with a label (no text or symbols present)Attention

natural_image
Technical line drawing of a device rear panel with internal components and directional arrows (no text or symbols)natural_image
Technical line drawing of a device rear panel with mounting holes and internal components (no text or symbols)M4X14MM M4X14MM
INSTRUCTIONS D'INSTALLATION MURALE
natural_image
Back view of a black rectangular TV with red directional arrows indicating orientation or movement (no text or symbols)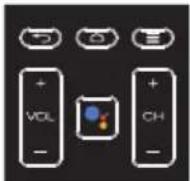
CHAÎNES
1.


Safety and warnings ......2
Warnings and cautions....10
Introduction....11
Installation....12
Remote control....17
Operation....18
Trouble shooting....28
Cleaning instruction....29
Technical data sheet....30
SAFETY AND WARNINGS
IMPORTANT SAFETY INSTRUCTION
1) Read these instructions.
2) Keep these instructions.
3) Heed all warnings.
4) Follow all instructions.
5) Do not use this apparatus near water.
6) Clean only with dry cloth.
7) Do not block any ventilation openings, install in accordance with the instructions.
8) Do not install near any heat sources such as radiations, heat registers, stoves, or other apparatus (including amplifiers) that produce heat.
9) Do not defeat the safety purpose of
the polarized plug. If the provided plug does not fit into your outlet, consult an electrician for replacement of the obsolete outlet.
10) Protected the power cord from being walked on or pinched particularly at plugs, convenience receptacles, and the point where they exit from the apparatus.
11) Only use attachments/accessories specified by the manufacturer.
12) Unplug this apparatus during lighting storms or when unused for long periods of time.
13) Refer all servicing to qualified service personnel. Servicing is required when the apparatus has been damaged in any way, such as power-supply cord or plug is damaged, liquid has been spilled
or objects have fallen into the apparatus, the apparatus has been exposed to rain or moisture, does not operate normally, or has been dropped.
14) Mains plug is used as the disconnect device, the disconnect device shall remain readily operable.
15) The ventilation should not be impeded by covering the ventilation openings with items, such as newspapers, table-cloth, curtains, etc.
16) No naked flame sources, such as lighted candles, should be placed on the apparatus.
17) Attention should be drawn to the environmental aspects of battery disposal.
18) The use of apparatus in moderate climate.
19) The apparatus shall not be exposed to dripping or splashing and that no objects filled with liquids, such as vases, shall be placed on the apparatus.
WARNING
Never place a television set in an unstable location. A television set may fall, causing serious personal injury or death. Many injuries, particularly to children, can be avoided by taking simple precautions such as :
- Using cabinets or stands recommended by the manufacturer of the television set.
-
Only using furniture that can safely support the television set.
-
Ensuring the television set is not overhanging the edge of the supporting furniture.
- Not placing the television set on tall furniture (for example, cupboards or bookcases) without anchoring both the furniture and the television set to a suitable support.
- Not placing the television set on cloth or other materials that may be located between the television set and supporting furniture.
- Educating children about the dangers of climbing on furniture to reach the television set or its controls.
- In case this television set is to be relocated to a different location, please keep in mind and apply the above safety instructions.

natural_image
Black triangular warning symbol with a lightning bolt and downward arrow (no text)CAUTION
RISK OF ELECTRIC SHOCK DO NOT OPEN!

natural_image
Black triangular warning symbol with exclamation mark (no text or numbers)CAUTION
TO REDUCE THE RISK OF ELECTRIC SHOCK, DO NOT REMOVE COVER (OR BACK).NO USER SERVICEABLE PARTS INSIDE. REFER SERVICING TO QUALIFIED SERVICE PERSONNEL.

The symbol indicates that dangerous voltages constituting a risk of electric shock are present within this unit.

The symbol indicates that there are important operating and
maintenance instructions in the literature accompanying this unit.
WARNING :
To reduce the risk of fire or electric shock, do not expose this apparatus to rain or moisture.
WARNING :
The batteries shall not be exposed to excessive heat such as sunshine, fire ro the like.
This symbol indicates that this product incorporates double insulation between hazardous mains voltage and user accessible parts. When servicing use only identical replacement parts.

This marking indicates that this product should not be disposed with other household wastes
throughout the EU. To prevent possible harm to the environment or human health from uncontrolled waste disposal, recycle it re sponsibly to promote the sustainable reuse of material resources. To return your used device, please use the return and collection systems or contact the retailer where the product was purchased. They can take this product for environmental safe recycling.

HIGH-DEFINITION MULTIMEDIA INTERFACE
The terms HDMI and HDMI High-Definition Multimedia Interface, and the HDMI Logo are trademarks or registered trademarks of HDMI Licensing Administrator, Inc. in the United States and other countries.
natural_image
Illustration of a computer monitor with a warning symbol and a crossed-out line, no text or symbols present.Warning

High voltages are used in the operation of this television receiver. Do not remove the cabinet back from your set. Refer servicing to qualified service personnel.
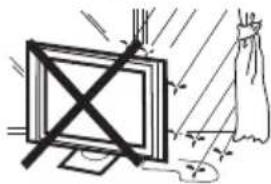
natural_image
Simple line drawing of a monitor with a cross mark and a hanging curtain (no text or symbols)Warning

To prevent fire or electrical shock hazard, do not expose the television receiver to rain or moisture.

natural_image
Simple line drawing of a computer monitor with a crossed X symbol and stars (no text or symbols)Warning

Do not drop or push objects into the television cabinet slots or openings. Never spill any kind of liquid on the television receiver.
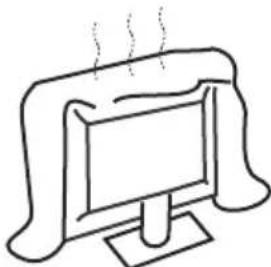
natural_image
Simple line drawing of a computer monitor with a stand and curved frame (no text or symbols)Caution

Do not block the ventilation holes in the back cover. Adequate ventilation is essential to prevent failure of electrical components.
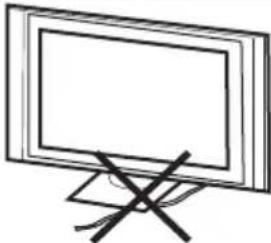
natural_image
Simple line drawing of a flat-screen monitor with a black X mark on top (no text or symbols)Caution

Do not trap the power supply cord under the television receiver.
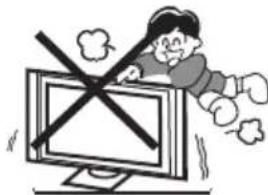
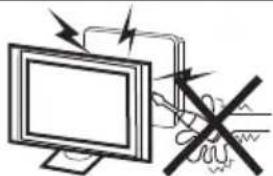
natural_image
Cartoon illustration of a person lying on a computer monitor with a crossed-out X symbol (no text or symbols present)Caution

Never stand on, lean on, or suddenly push the television or its stand. You should pay special attention to children. Serious injury may result if it should fall.

Caution

Do not place your television on an unstable cart, stand, shelf or table. Serious injury to an individual, and damage to the television, may result if it should fall.
natural_image
Illustration of a person reacting to a computer screen with a CD, no text or symbols presentCaution

When the television receiver is not used for an extended period of time, it is advisable to disconnect the AC power cord from the AC outlet.
Minimum distances
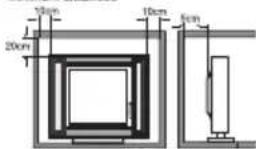
Caution

If the television is to be built into a compartment or similar enclosure, the minimum distances must be maintained. Heat build-up can reduce the service life of your television, and can also be dangerous.
Thank you very much for purchasing this TV. To enjoy your product from the very beginning, read this manual carefully and keep it handy for easy reference.
CAUTION
Never tamper with any components inside the TV, or any other adjustment controls not mentioned in this manual. All LED-TVs are high voltage instruments. When you clean up dust or water drops on the LED PANEL or CABINET, the power cord should be pulled out from the receptacle, then wipe the TV with a dry soft cloth. During thunder and lighting, unplug the power cord and antenna cord to prevent damage to your TV. All repairs to this TV should only be performed by qualified TV service personnel.
INSTALLATION
*Locate the TV in the room where light does not strike the screen directly.
*Total darkness or a reflection on the picture screen can cause eyestrain. Soft and indirect lighting is recommended for comfortable viewing.
*Allow enough space between the TV and the wall to permit ventilation.
*Avoid excessively warm locations to prevent possible damage to the cabinet or premature component failure.
*Do not cover the ventilation openings when using the TV.
Main features
① Used as Television, display terminal, PC display;
② High luminance, wide viewing Angle;
③ NICAM;
| Viewing Picture Size (Diagonal) | 50" |
| Resolution | 3840 x 2160 |
| Aspect Ratio | 16:9 |
| TV System | PAL-B/G, I, D/KSECAM-B/G, D/K, LDVB-T, DVB-C,DVB-T2 |
| Input Power Voltage | AC 100-240V 50/60Hz |
| Power consumption | 138W |
| Audio Output Power (THD≤10%) | 2x10W |
| Signal Input | High-Definition Multimedia Interfac (HDMI) x 4AV IN x 1RJ45 x 1USB x 3ANT x 1CI x 1 |
| Signal Output | Headphone x 1Optical x 1 |
| Horizontal definition (TV line) | CompositeVideoinput >=350 |
Base Stand Assembly Instruction

Prepare to place the TV with the display side down on a flat surface. Ensure the table or desk you use provides a flat, totally clean surface, and use a soft cloth between the face of the TV and the table to protect the TV's screen.
- Put the TV on the platform with the screen facing down, insert stands in the grooves, then adjust the screw holes to match each other.
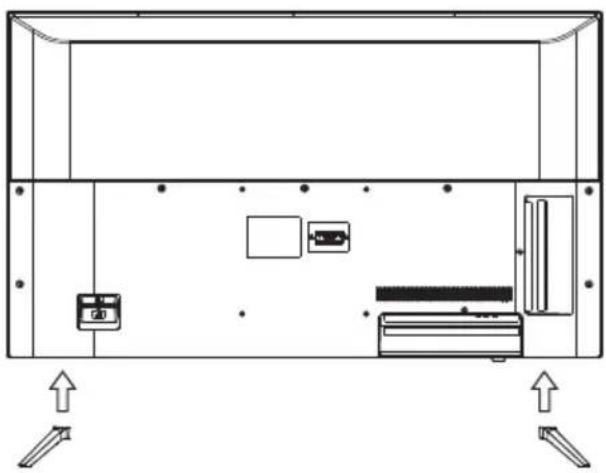
natural_image
Technical line drawing of a device rear panel with internal components and directional arrows indicating movement (no text or symbols)- Fix the stands with 4 screws.
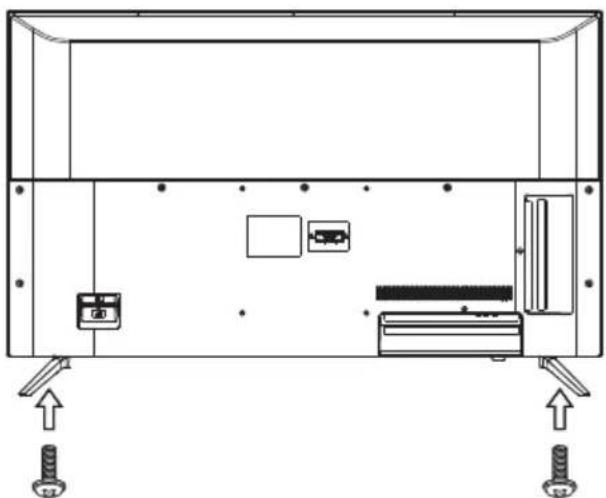
natural_image
Technical line drawing of a mechanical or electrical enclosure with mounting feet and internal components (no text or symbols)M4X14MM M4X14MM
WALL MOUNT INSTALLATION
Step One: Use the expansion bolts(4*36PWA) to fix the wall mount brackets into the wall.
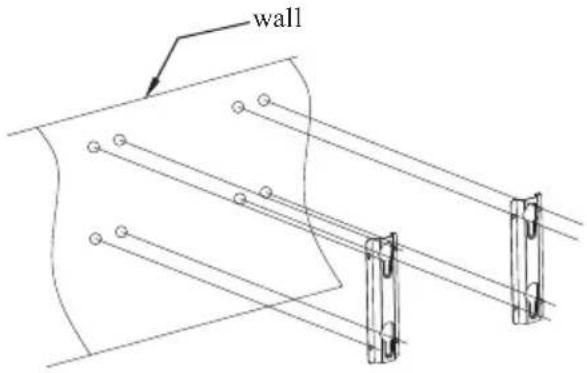
Step Two: Fix the wall mount screws (M6x12mm/4pcs) into the rear side of the LCD TV.
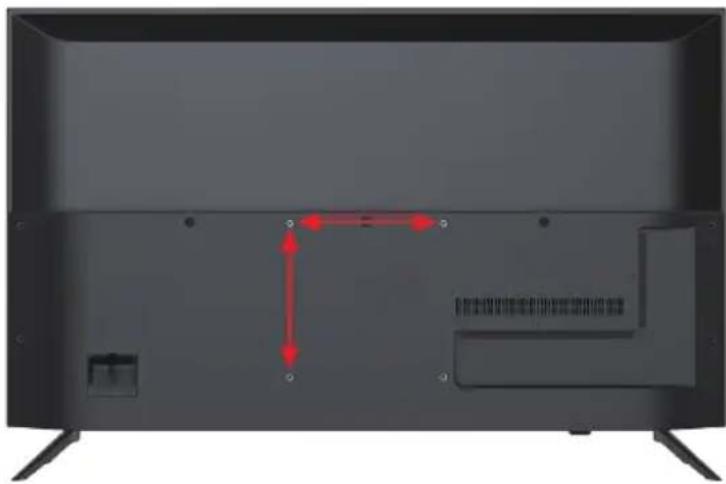
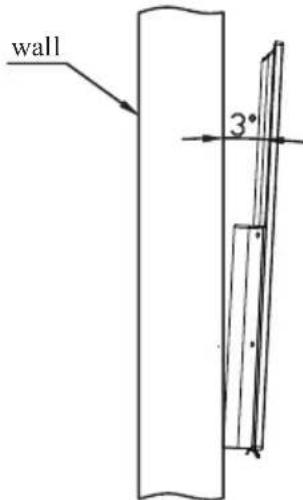
natural_image
Back view of a modern flat-screen TV with visible rear and front panels, showing internal layout and red directional arrows (no text or symbols)Step Three: Put the LCD TV with wall mount screws onto the wall mount brackets. Warning: the angle between the TV and wall must not be bigger than 3°.
Front panel
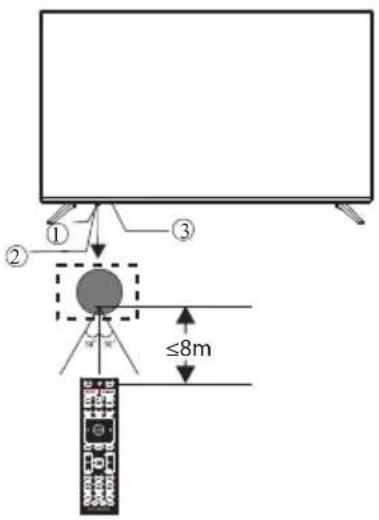
1: Remote control sensor.
2: Indicator LED: RED ● STANDBY.
3: Key board
KEYBOARD
The keyboard is located at the bottom left near the right side of signal indicator. Rocker
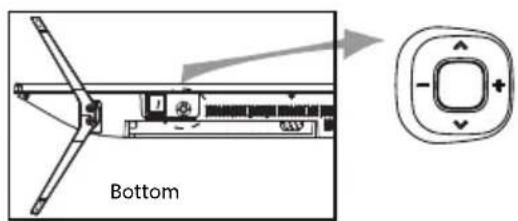
- Middle Button: Short press to compirm or enter menu. Long press to power off.
- Up/Down: CH+/- and move up/down.
- Left/Righ: VOL-/+ and move left/right
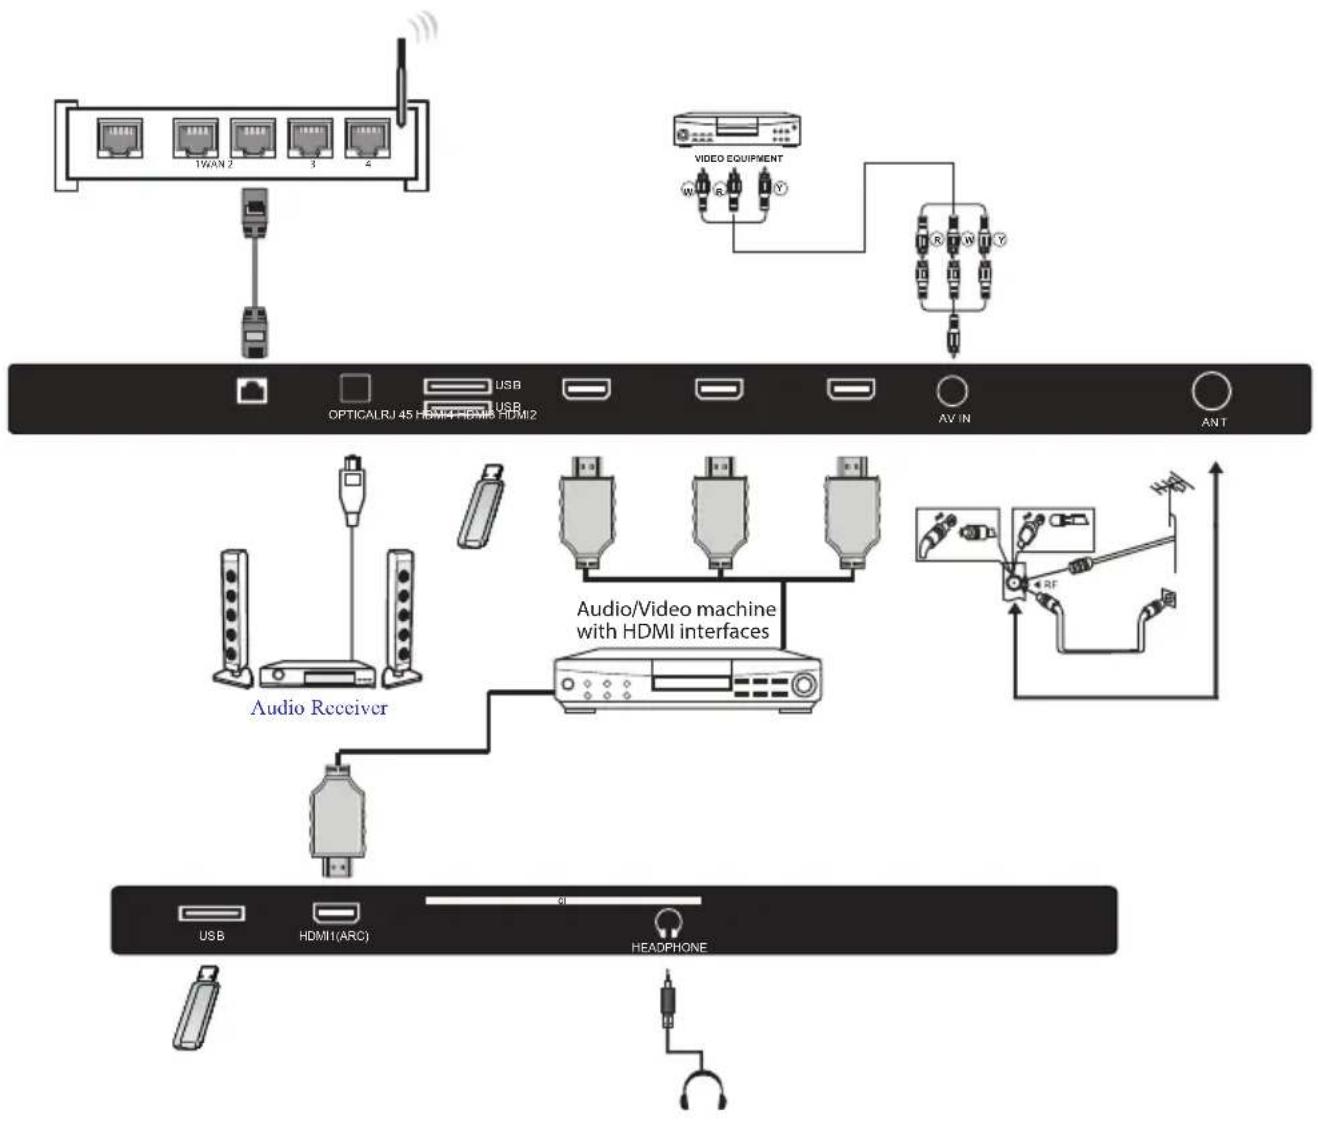
REAR AV Connections

RJ45, OPTICAL output, USB, HDMI4, HDMI3, HDMI2, AV IN, ANT.
REAR AV Connections(SIDE)

All the terminals are(from left to right): USB, HDMI1(ARC), CI, HEADPHONE.
ANTENNA
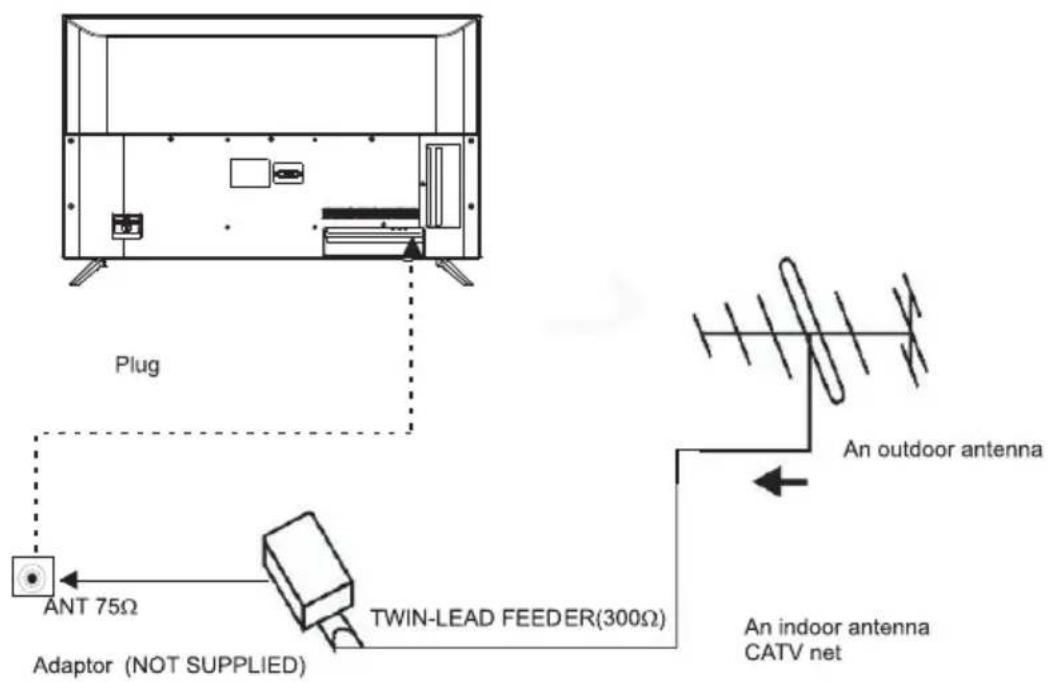
Note:
Aerial connections: IEC(female).
Input impendance:75 unbalanced.
PRESET MODE (HDMI)
| RESOLUTION | V.Freq.(Hz) | |
| 1 | 640*480 | 50/60 |
| 2 | 800*600 | 50/60 |
| 3 | 1024*768 | 50/60 |
| 4 | 1360*768 | 50/60 |
| 5 | 1280*768 | 50/60 |
| 6 | 1920*1080 | 50/60 |
| 7 | 3840*2160 | 24/25/30/60 |
AV EQUIPMENT
You can use the input terminals on TV set rear as follows.
flowchart
graph TD
    A["1WAN 2"] --> B["USB"]
    C["3"] --> D["USB"]
    E["4"] --> F["USB"]
    G["VIDEO EQUIPMENT"] --> H["AV IN"]
    I["OPTICAL RJ 45 HDMI HDMI HDMI2"] --> J["USB"]
    K["Audio Receiver"] --> L["USB"]
    M["Audio/Video machine with HDMI interfaces"] --> N["USB"]
    O["RF"] --> P["Headphone"]
    Q["USB"] --> R["HDMI(ARC)"]
    S["6"] --> T["Headphone"]
It can be connected to the following appliances: VCR, multi disc player, DVD, camcorder, video game or stereo system, etc...
REMOTE CONTROL
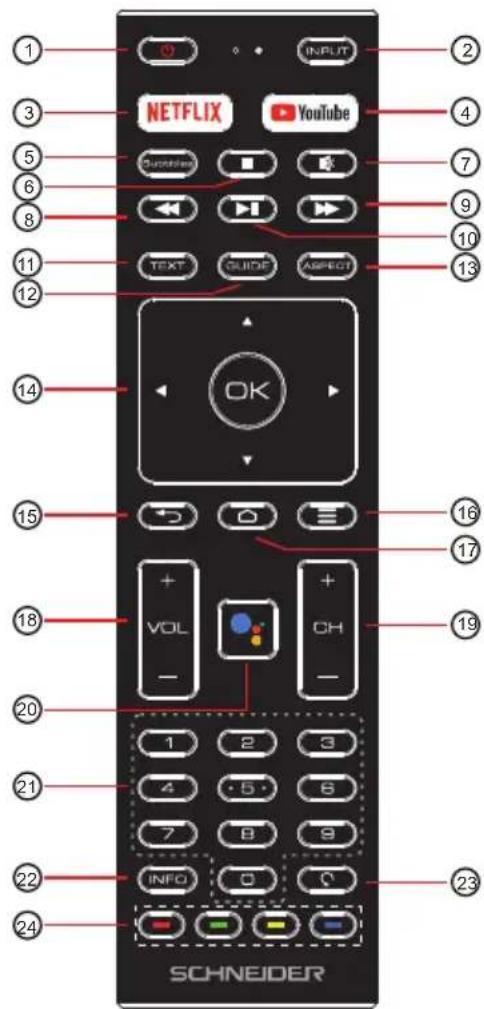
1: POWER: To set the TV to Standby or Power On modes.
2: INPUT: Select among the different input signal sources.
3: NETFLIX: Press to open NETFLIX.
4 : YouTube : Press to open the YouTube.
5: Subtitles: To turn on subtitles in DTV mode.
6: ■ (Stop): Press to stop multimedia playback
7: MUTE: To disable or enable the speaker sound output.
8:◀(Reverse) : Reverse playback rapidly.
9 :▶▶ (Forward): Advance playback rapidly.
10:▶(Play/Pause) : Start playback. Pause playback.
11 : TEXT: Press to select the teletext mode.
12: GUIDE: Press to display electronic programme guide in TV mode.
13: ASPECT Adjust Aspect ratio of the TV.
14 : ▲▼◀▶ : Press to navigate the on-screen menu. OK: Confirms selection.
15 : ←: Return to the previous menu.
16: ≡ : Press to open or close the on-screen menu.
17 : Press to open the Home Page.
18:VOL+/-: To adjust sound level.
19:CH+/CH-: To access the next or previous channels.
20 Start to voice search or speak to Google Assistant.
21: NUMERIC KEY: For direct access to channels.
22: INFO :Press to display the channel information.
23: Jumps to last channel viewed.
24: Coloured buttons: Implement the relevant operations according to the prompt at the bottom of the menu in the text.
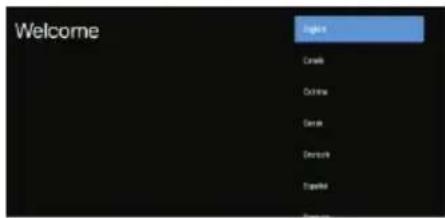
INITIAL SETUP
The first you turn your TV, the setup wizard will guide you through setting up basic settings.
Please according to the text tip to first time setup.
This function is used for the remote control pair code. After the code is successful, you can use the Bluetooth remote control to operate the TV. If you don't need to use the Bluetooth remote control, you can press the BACK button to skip this step.
The setting below is about bluetooth synchronization of the remote control
Please note that this product is not compatible with this feature.
Please use the Back button to continue installing the product


Press▼▲ to select the system language and press OK to confirm the language.
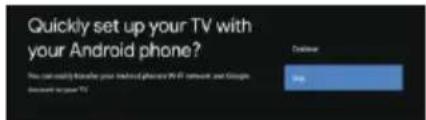
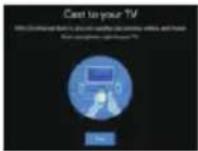
Connect your Android phone to your TV, select "Continue to continue the connection, and choose "Skip to skip this step.
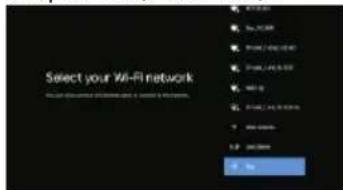
Press▼▲ to select the the Wifi to connect, press OK and enter the password to confirm the connection is successful. You can also try use Ethernet and skip select network.
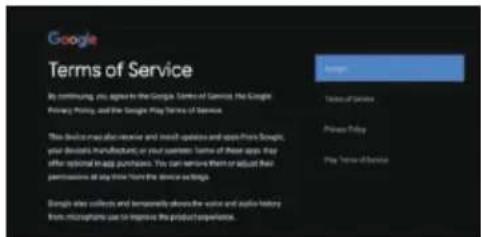
By accepting the Google Terms of Service to improve the product experience, select "Accept to accept this condition.
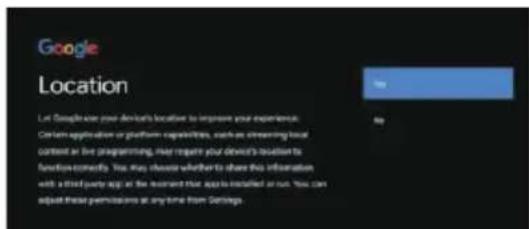
Agree to Google to get the location information of your device to get more features, choose YES to accept."
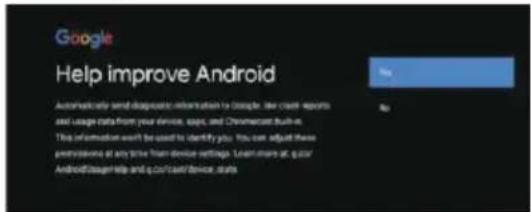
By agreeing to automatically send diagnostic information to Google to improve discriminative power, choose YES to accept.
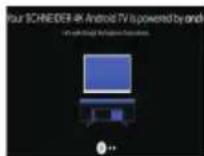
- Your device is powered by Android TV and press the button to select the browsing feature.
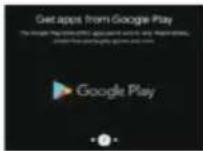
- You can get more apps from Google Play and press the ▶ button to go to the next screen.
- Transfer photos and other content to the TV via the built-in chromecast, press OK to complete the browsing.
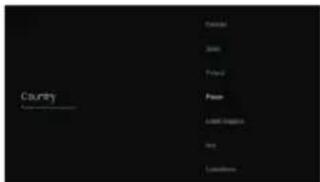
Press▼▲ to select the country of your device and press OK to confirm.

Used to set your device's password to ensure security and privacy.

Press OK to pop up the soft keyboard, and use the remote control to enter the 4-digit password automatically jump to the next interface.

Confirm the password again and keep it consistent. Use the remote control to enter the password and complete the password confirmation.
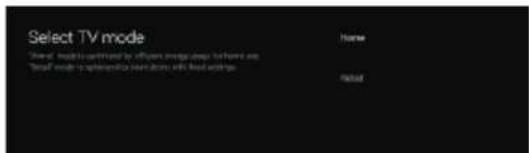
For selecting the mode, press▼▲key to select Home mode and press OK to confirm.

Confirm the selected mode again, select "Ye's to confirm the selected mode, and select "No" to return to the previous step.

Let this device be detected as a Google Cast device and allow Google Assistant and other services to wake this device up to respond to Cast commands, even when on standby and the screen is off.
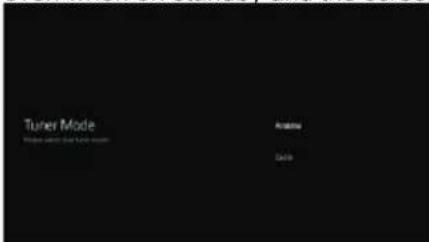
To select the Tuner mode for searching, press
▼▲to select and press OK to confirm.

Press ▼▲to select whether to search, select can to search, select "Skip Scan to skip the search.
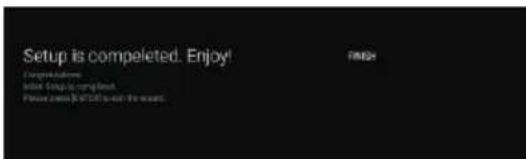
PreOK to complete the setup.
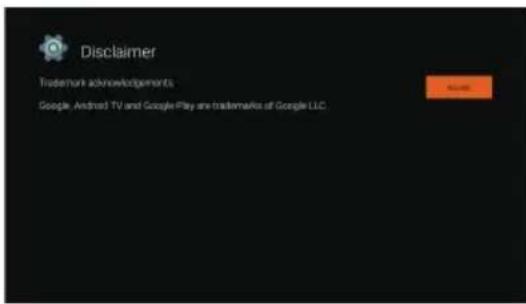
Press the OK button to agree to (Disclaimer). After setting is complete, You can watch TV.
HOME SCREEN
Press the HOME button to go to the home page
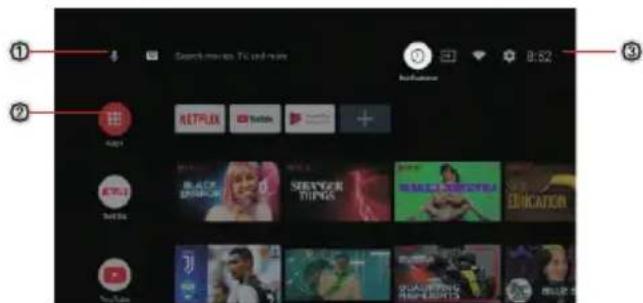
① open the google assistant start a voice search or use keyboard search
② Among the applications installed on the TV, the icons for the favourite applications are shown inside here.(Favourite applications can be added/deleted/ changed its order by users.)
Apps: Click to jump to Apps screen where all the installed applications are listed.
③ ② Notification: Display the notifications.
Inputs:Icon to select an input source.
Network&Internet:Icon to Setup Network, Such as wifi.
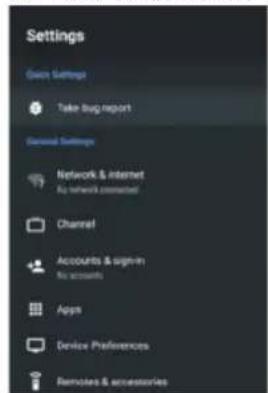
Settings: Various settings can be configured here. For details on the settings, see the next explanation.
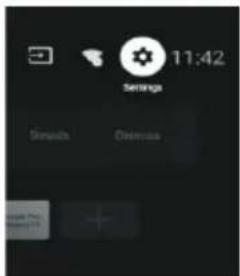
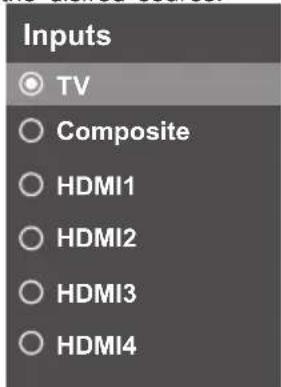
INPUT SOURCE
- In the HOME interface, press ▼▲◀▶ to select the "Inputs" icon, press OK to open the input source list, then press up to highlight an input and press OK to switch.

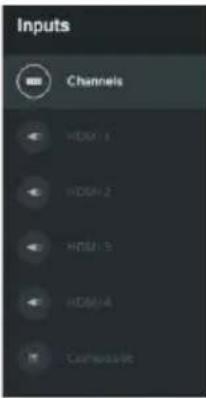
2.Under Live TV, press the SOURCE button to display the list of input sources. You can select the desired source.
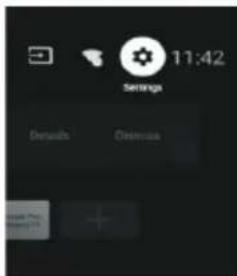
- There are two ways to enter. First, in Live TV, press the menu button to display TV options, press ▼▲
◀▶ select the settings menu and press OK to confirm. Second, in the HOME interface, press the ▶key to select the icon of the circular settings menu, press OK to confirm.
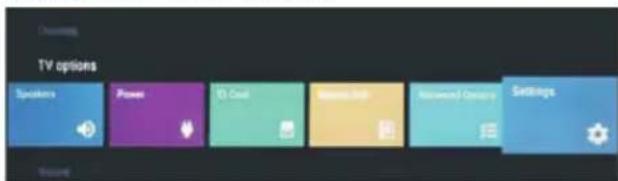
-
Press ▼▲button to select what you want set.
-
Press OK to enter setting.
Press BACK to return to the previous menu. If the main menu is displayed, pressing BACK will close the onscreen menu.
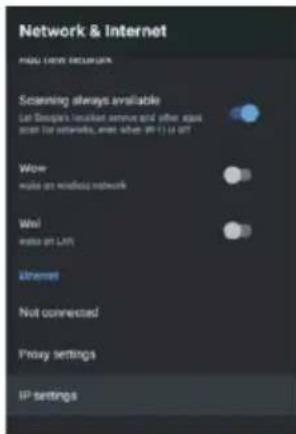
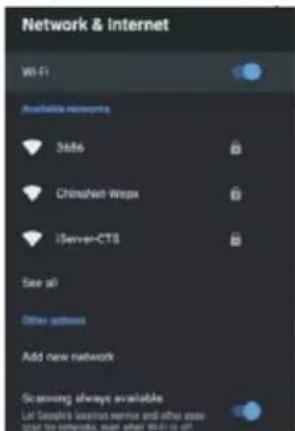
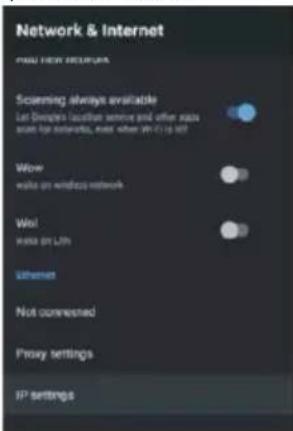
Network & Internet
- Press ▼▲ button to select what you want set.
- Press OK button to adjust.
- After finishing your adjustment, press OK button to save and return to the previous menu.
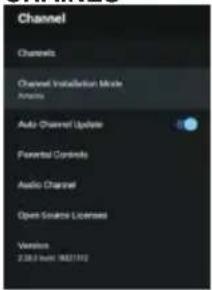
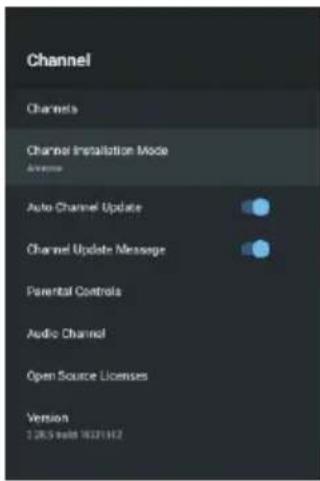
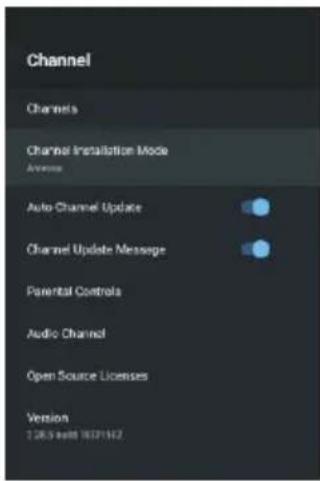
CHANNEL
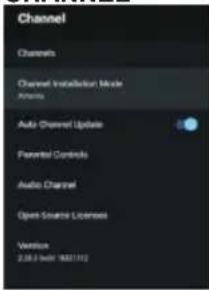
Channels: Display the scan sub-menu based on different Channel installation modes.
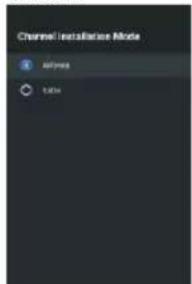
Channel installation mode: Select on-screen display channel sources. You can select the signal type.
- Antenna: Set the signal type to antenna. When set to Antenna, the TV can receive analog and digital (DVB-T/DVB-T2) broadcasting signals.
•Cable: Set the signal type to cable. When set to Cable, the TV can receive analog and QAM broadcasting signals.
Auto Channel Update
Parental controls: Press▼▲button to select the option then press OK button to enter the sub-menu. Audio Channel: Press▼▲button to select the option then press OK button to enter the sub-menu. Open source licenses: Press▼▲button to select the option then press OK button to enter the sub-menu.
Antenna
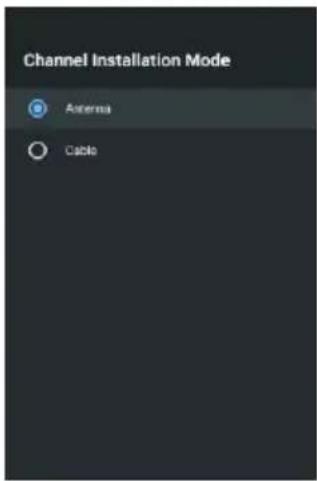
- Menu->Settings->Channel->Channel Installation Mode enter, choose Antenna or Cable.
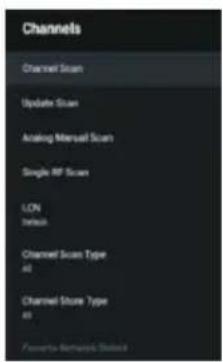
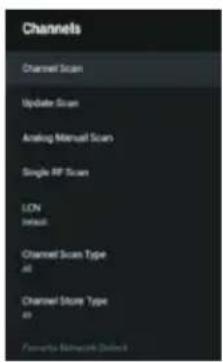
- Enter Menu->Settings->Channel->Channels.
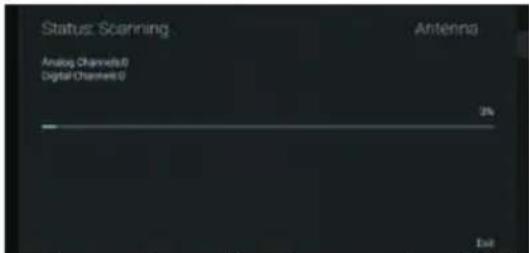
- Channel Scan directly enters the ATV+DTV automatic search platform interface of Antenna. Update Scan: Re-automatically search for frequency points outside the station.
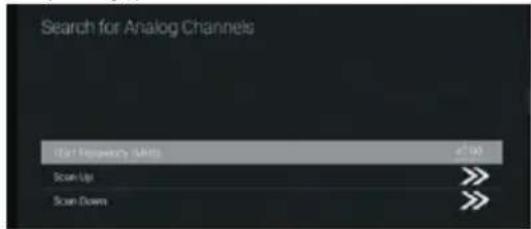
Analog Manual Scan: Manual ATV search station. After input the frequency point, you can select up or down search station.
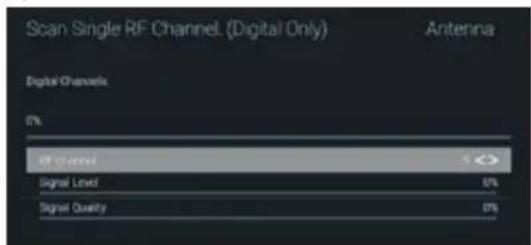
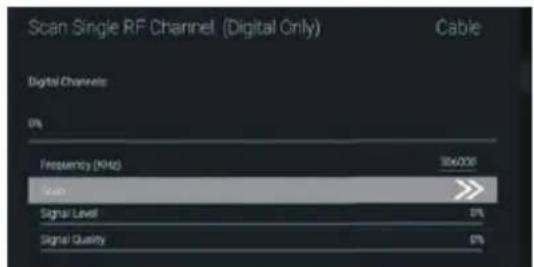
Single RF Scan: DTV manual search, left and right after selecting RF Channel, directly OK search.
Cable

- Menu->Settings->Channel->Channel Installation Mode, select Cable.
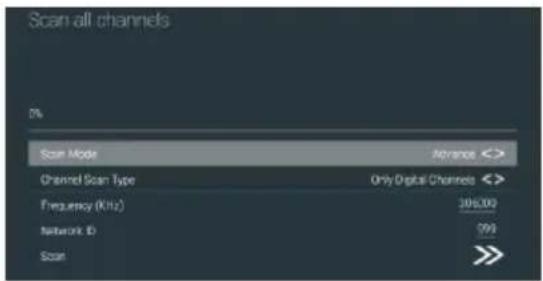
- Enter Menu->Settings->Channel->Channels.
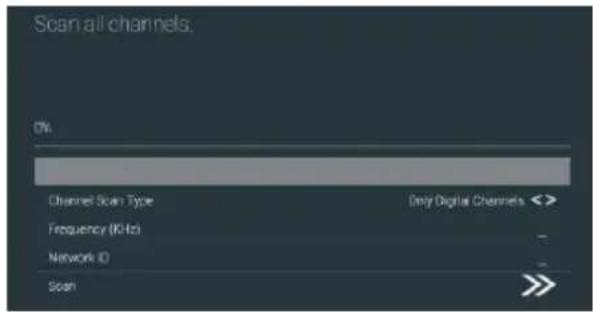
- Enter Channel Scan, where Numericable are the local operators, and the default Scan Mode is Advance; Others have Advance, Quick and Full Scan modes.
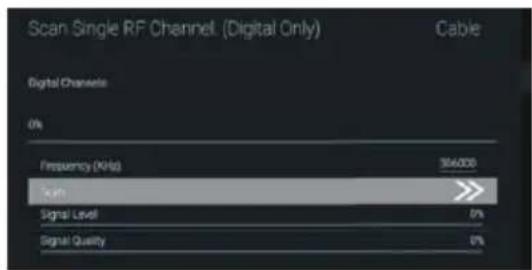
Single RF Scan: manual search station.
ACCOUNTS&SIGN IN
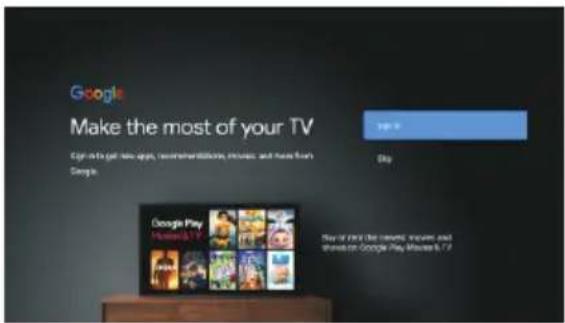
Press UP/DOWN button to select Sign in or Skip.
APPS
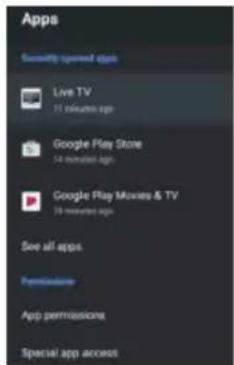
In this menu, you can set the APP permissions, and read the app lists.
-
Press button to select what you want set.
-
Press OK button to adjust.
-
After finishing your adjustment, Press BACK button to return to the previous menu.
DEVICE PREFERENCES
ABOUT
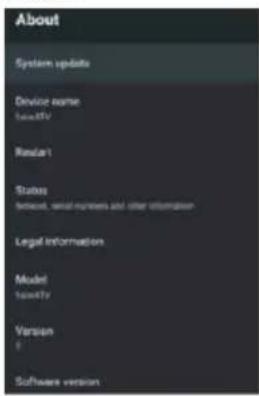
In this menu, you can read the information and settings of TV.
-
Press ▼▲button to select what you want set.
-
Press OK button to adjust.
-
After finishing your adjustment, Press BACK button to return to the previous menu.
DATE&TIME
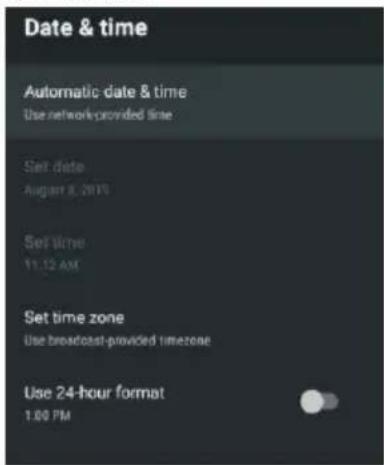
Automatic date&time-Press▲button to select the option then press OK button to enter the sub-menu. (Optional: Use network-provided time, Off)
Set date:Press▼▲button to select the option then press OK button to enter the sub-menu.
Set time:Press▼▲button to select the option then press OK button to enter the sub-menu.
Set time zone: Press ▼▲button to select the option then press OK button to enter the sub-menu.
Use 24-hour format: Press ▼▲button to select the option then press OK button to choose ON/OFF.
TIMER:
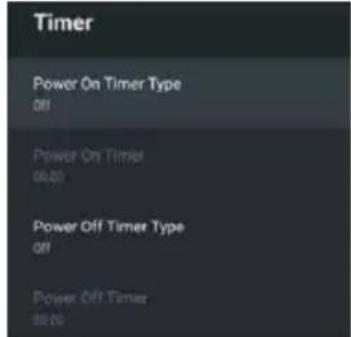
Power On Timer Type: Press ▼▲button to select the option then press OK button to choose ON/OFF/ONCE.
Power On Timer : Press ▼▲button to select the option then press OK button to enter the sub-menu.
Power Off Timer Type: Press ▼▲button to select the option then press OK button to choose ON/OFF/ONCE.
Power Off Timer :Press▼▲button to select the option then press OK button to enter the sub-menu.
LANGUAGE:

Language :Press button to select the option then press OK button to enter the select language.
KEYBOARD
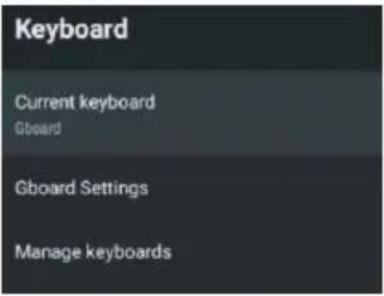
Current keyboard: Press ▼▲ button to select the option then press OK button to enter the sub-menu.
Gboard Settings: Press ▼▲ button to select the option then press OK button to enter the sub-menu. Manage keyboards: Press ▼▲ button to select the option then press OK button to enter the sub-menu.
INPUTS

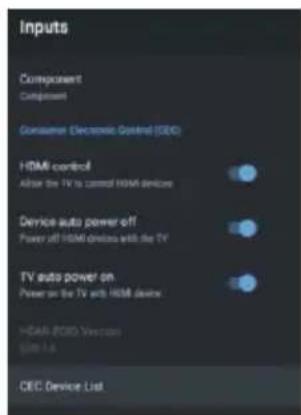
Inputs:Press ▼▲button to select the option then press OK button to enter the sub-menu.
HDMI control: Press ▼▲button to select the option then press OK button to choose ON/OFF.
Device auto power off: Press ▼▲button to select the option then press OK button to choose ON/OFF.
TV auto power on: Press ▼▲button to select the option then press OK button to choose ON/OFF. HDMI EDID Version: show EDID version.
CEC Device List: Press ▼▲ button to select the option then press OK button to enter the sub-menu.
POWER
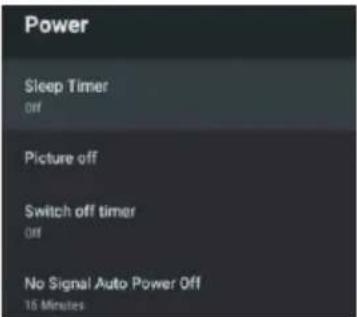
Sleep Timer:Press ▼▲button to select the option then press OK button to enter the sub-menu.(Optional: off, 10 minutes, 20 minutes, 30 minutes, 40 minutes, 50 minutes, 60 minutes, 90 minutes, 120 minutes).
Picture off: Press ▼▲button to select the option then press OK button to turn off the TV.
Switch off timer: Press ▼▲button to select the option then press OK button to enter sub-menu.(Optional: off, 30 minutes, 60 minutes, 90 minutes, 120 minutes, 150 minutes, 180 minutes, 210 minutes, 240 minutes).
No signal Auto Power Off: Press ▼▲button to select the option then press OK button to enter sub-menu. (Optional: off, 5 minutes, 10 minutes, 15 minutes, 30 minutes, 60 minutes).
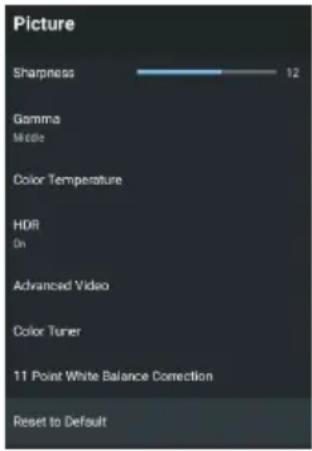
PICTURE
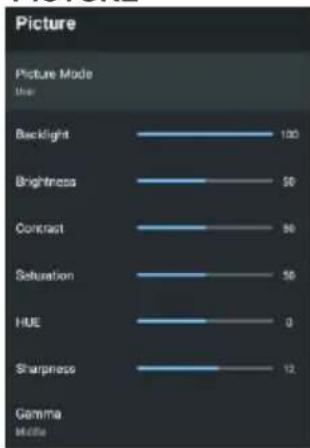
bar
Picture | Picture Mode | Value | |---|---| | Backlight | 120 | | Brightness | 50 | | Contrast | 30 | | Saturation | 50 | | HUE | 0 | | Sharpness | 12 | | Gamma mode | |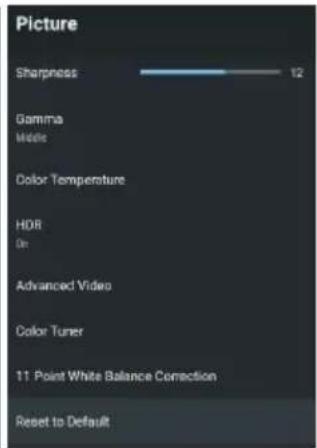
Picture Mode: Press ▼▲button to select the option then press OK button to enter sub-menu.(Optional: user, Standard, Vivid, Sport, Movie, Game, Energy saving).
Backlight/Brightness/Contrast/Saturation/HUE/Sharpness:Press▼▲button to select the option. Press◀to decrease the parameter. Press▶to increase the parameter.
Gamma:Press ▼▲button to select the option then press OK button to enter sub-menu.(Optional: Dark, middle, Bright).
Color Temperature: Press ▼▲button to select the option then press OK button to enter sub-menu.
HDR:Press ▼▲button to select the option then press OK button to enter the sub-menu. (Optional:on, off)
Advanced Videocer ▼▲button to select the option then press OK button to enter the sub-menu.
Reset to Default: Reset all settings to the factory defaults.
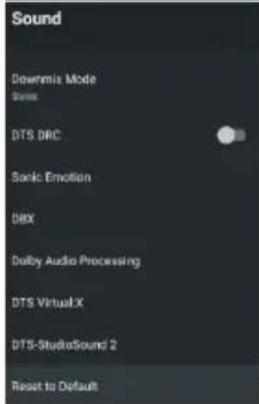
SOUND
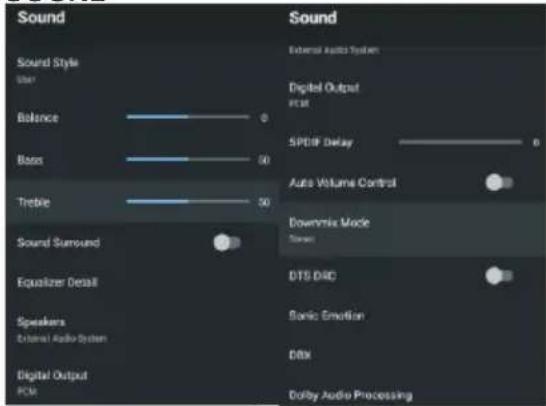
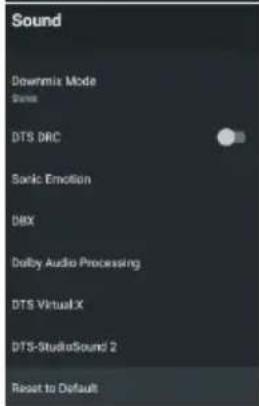
Sound style: Press ▼▲button to select the option then press OK button to enter the sub-menu. (Optional:user, Standard, Vivid, Sports, Movie, Music, News)
Balance/Bass/Treble: Press ▼▲button to select the option. press ◀to decrease the parameter. Press ▶to increase the parameter.
Sound Surround: Press ▼▲button to select the option then press OK button to choose ON/OFF.
Equalizer Detail: Press ▼▲button to select the option then press OK button to enter the sub-menu.
Speakers: Press ▼▲button to select the option then press OK button to enter the sub-menu. (Optional: TV Speaker, External Audio System)
Digital Output Press▼▲button to select the option then press OK button to enter the sub-menu. (Optional: Auto, Bypass, PCM, Dolby Digital Plus, Dolby Digital)
SPDIF Delay: Press ▼▲buRoaste to select the option. ◀to decrease the parameter. Press ▶ to increase the parameter.
Auto Volume Control: Press ▼▲button to select the option then press OK button to choose ON/OFF.
Downmix Mode: Press ▼▲button to select the option then press OK button to enter the sub-menu. (Optional: Stereo, Surround)
Reset to Default: Reset all settings to the factory defaults.
STORAGE
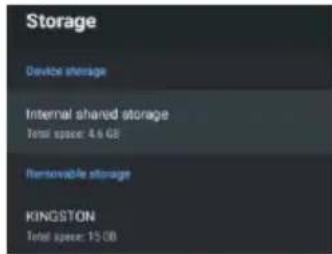
Internal shared storage: Press ▼▲button to select the option then press OK button to enter the sub-menu.
Removeable Storage: Press ▼▲button to select the option then press OK button to enter the sub-menu. (Note: Show external devices if available)
HOME SCREEN
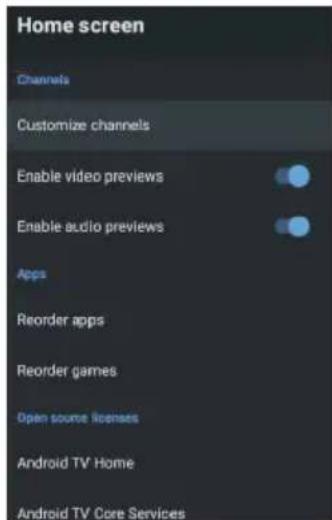
In this menu, you can set channels, apps, open source licenses.
- Press▼▲button to select what you want set.
- Press OK button to adjust.
- After finishing your adjustment, Press BACK button return to the previous menu.
RETAIL MODE

Retail mode: Press ▼▲button to select the option then press OK button to choose ON/OFF.
GOOGLE
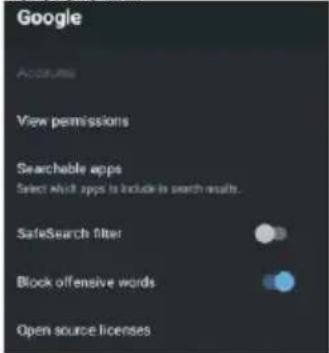
In this menu, you can set searchable apps, safe search filter, block offensive words, open source licenses.
- Press ▲ button to select what you want set
- Press ok button to adjust
- After finishing your adjustment, Press BACK button return to the previous menu.
CHROMECAST BUILT-IN
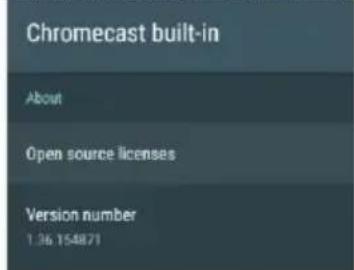
In this menu, you can read the information and settings of Chromecast.
- Press ▲ button to select what you want set.
- Press ok button to adjust.
- After finishing your adjustment, Press BACK button return to the previous menu.
SCREEN SAVER
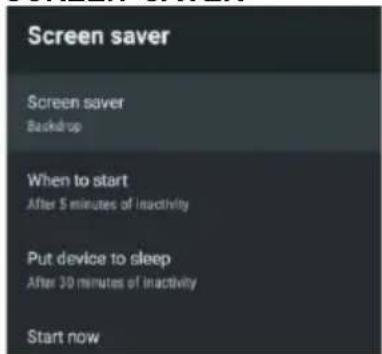
Screen saver: Press ▼▲button to select the option then press OK button to enter the sub-menu.(Optional: Tum screen off, Backdrop, Colors).
When to Start: Press ▼▲button to select the option then press OK button to enter the sub-menu.(Optional: 5 minutes, 15 minutes, 30 minutes, 1 hour, 2 hours).
Put device to sleep: Press ▼▲button to select the option then press OK button to enter the sub-menu. (Optional: 30 minutes, 1 hour, 3 hours, 6 hours, 12 hours, Never).
Start now: Press ▼▲button to select the option then press OK button to enter screen saver. LOCATION
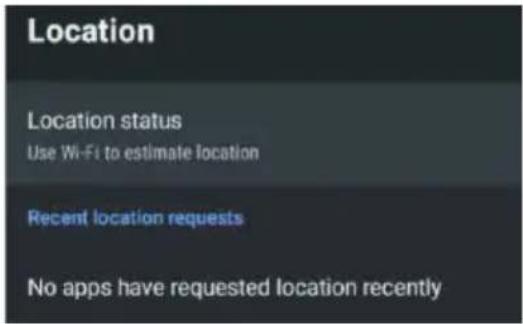
Location status: Press ▼▲button to select the option then press OK button to enter the sub-menu. (Optional: Use Wi-Fi to estimate location, Off).
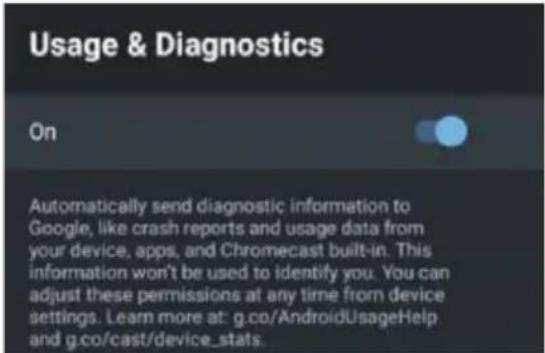
Usage & diagnostics Press ▼▲button to select the option then press OK button to choose ON/OFF. ACCESSIBILITY
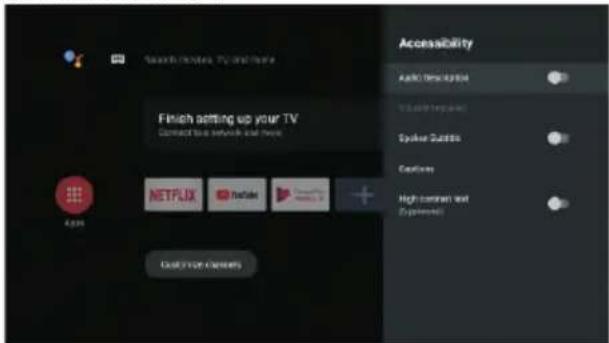
Audio Description: Press ▼▲button to select the option then press OK button to choose ON/OFF.
Visually Impaired: Press ▼▲button to select the option then press OK button to enter the sub-menu.
Spoken Subtitle: Press ▼▲button to select the option then press OK button to choose ON/OFF.
Captions: Press ▼▲button to select the option then press OK button to enter the sub-menu.
High contrast text: Press ▼▲button to select the option then press OK button to choose ON/OFF.
RESET
Press OK button to enter the sub-menu. Reset-Erase everything.
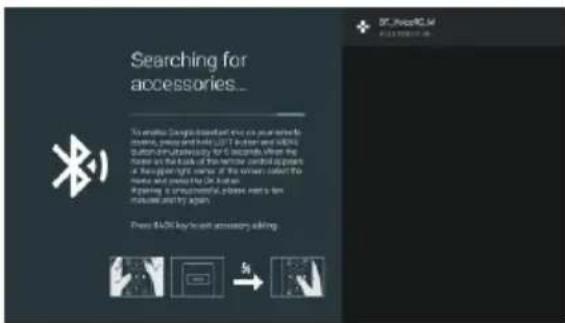
REMOTE & ACCESSORIES


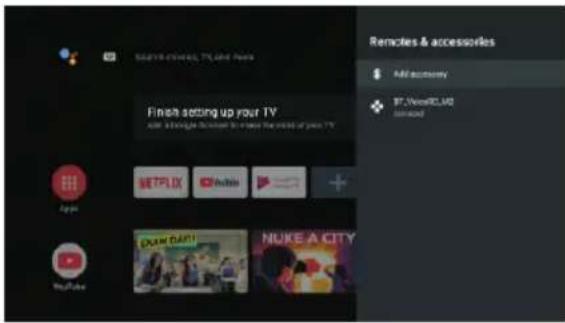
In this menu, you can pair Bluetooth devices.
- Press the "MENU" and "LEFT" buttons at the bottom of the remote control for 5 seconds.
- When the LED starts to flash, release it. The remote controller will send the pairing signal to the TV and display the information of the remote control on the right side of the screen.
- Press the OK button to display the pairing. If the paired is displayed, the connection is successful.
- If the couldn't pair appears, the connection fails. Wait 30 seconds and then press the "MENU" and "LEFT" buttons at the bottom of the remote control for 5 seconds to repeat the previous steps.
- Press BACK button return to the previous menu.
MULTIMEDIA PLAYER
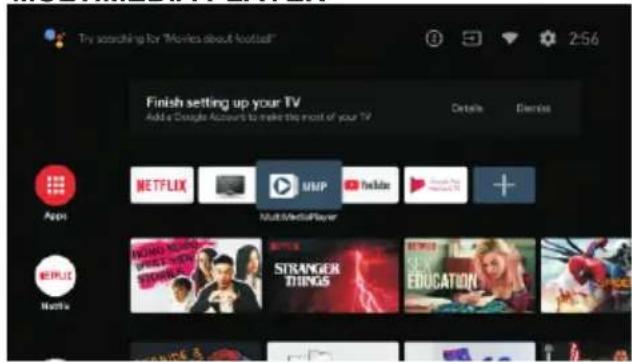
In the HOME interface, select the MMP APP to display Video, Photo, Audio, Text. After inserting the USB flash drive, you can view the corresponding files in the USB flash drive.

NOTE:
The menu may be different depending on when you purchased the TV.
| Trouble phenomenon Symptom | Inspection Check | ||
| Picture Audio | |||
 | Snow Noise |  | antenna position, direction or connection |
 | Ghost |  Normal audio Normal audio | antenna position, direction or connection |
 | Interference |  Noise Noise | electronic equipment, car/ motorcycle, fluorescent light |
 | Normal Picture |  Mute Mute | Volume(check if mute is activated or if the audio system connections are not correct) |
 | No picture Mute |  | Power cord is not inserted Power switch is not opened Contrast and brightness/volume setup Press standby key on the remote control for inspecting |
 | No colour Normal a |  control control | |
 | Picture breaking up |  Normal audio or weak Normal audio or weak | retune channel |
 | No colour |  Noise Noise | TVsystem |
 | There is black bar on top and bottom |  Normal audio Normal audio | Change aspect to zoom |

- Before cleaning this product, press STANDBY button to turn it to the standby mode and wait for a few minutes to disconnect the power plug.
- Wipe this product with a dry, soft cloth. Do not spray water directly onto the TV, but apply a small amount of water on the corner of the cloth and wipe as gently as possible. Never use cleaning fluids, wax, or chemicals.
- Never use alcohol, benzene, thinner, cleaning fluid or other chemicals. And do not use compressed air to remove dust.
- If the surface is extremely dirty, wipe it with a cloth which has been dipped in a weak soap-water solution and wrung out thoroughly, and then wipe again with a dry cloth.
- Before you plug in the TV back, let the screen dry completely.
Technical data sheet
Sheet of household television according to EU directive 1062/2010
| Trade mark SCHNEIDER | |
| Model no. SC-LED50SC500QA | |
| Energy efficiency class A | |
| Visible screen diagonal 127cm | / 50 inches |
| On mode power consumption 91W | |
| Annual energy consumption 133kWh | |
| Power consumption in off mode 0 W | |
| Standby power consumption <0.5W | |
| Screen resolution (pixel) | 3840(H) x 2160 (V) |
| Wireless Technology & Frequency Band | Maximum Wireless Transmit Power Power (dBm) |
| IEEE 802.11 b/g/n (WLAN)2400-2483.5 MHz | 20dB M |
Note:
- Energy efficiency class: A+++ (most efficient) to D (lease efficient).
- Annual energy consumption in kWh per year, based on the power consumption of the television operating 4 hours per day for 365 days.
The actual energy consumption will depend on how the television is used.
The above value has been measured in accordance with standards under specified operating conditions. Result may vary according to operation time, contrast, brightness, operating mode....etc.
Product Information sheet according to EU Regulation No. 2019/2013
Energy labelling for Electronic Display & Television can be found be below
URL or QR code indicated on Energy label
URL: https://eprel.ec.europa.eu/qr/362649

Product Information sheet according to EU Regulation No. 2019/2013
Energy labelling for Electronic Display & Television can be found be below
URL or QR code indicated on Energy label
URL: https://eprel.ec.europa.eu/qr/362649

Position: Quality Assurance Engineer
Signature: